|
|
|
Porsche, and the Porsche crest are registered trademarks of Dr. Ing. h.c. F. Porsche AG.
This site is not affiliated with Porsche in any way. Its only purpose is to provide an online forum for car enthusiasts. All other trademarks are property of their respective owners. |
|
|

  |

| got914? |
 Mar 7 2015, 12:54 PM Mar 7 2015, 12:54 PM
Post
#1
|
|
Member  Group: Members Posts: 133 Joined: 8-October 14 From: Niagara Member No.: 17,993 Region Association: None |
ok i got the phillips screw at the top out but it doesnt seem to want to let go.
Hows the clip or attachment to the bottom edge ? I dont want to break it. |
   |

 
|
| cn2800 |
Mar 7 2015, 01:32 PM
Post
#2
|
|
Member Group: Members Posts: 119 Joined: 11-August 14 From: Amarillo, Texas Member No.: 17,766 Region Association: None |
I had the same question. Turns out it's an 8mm nut on the upper inside of the rear fender. It is likely hidden beneath a few layers of undercoating and muck. I don't know if you can get to it at all without removing the rear wheel. These photos show what you're dealing with:
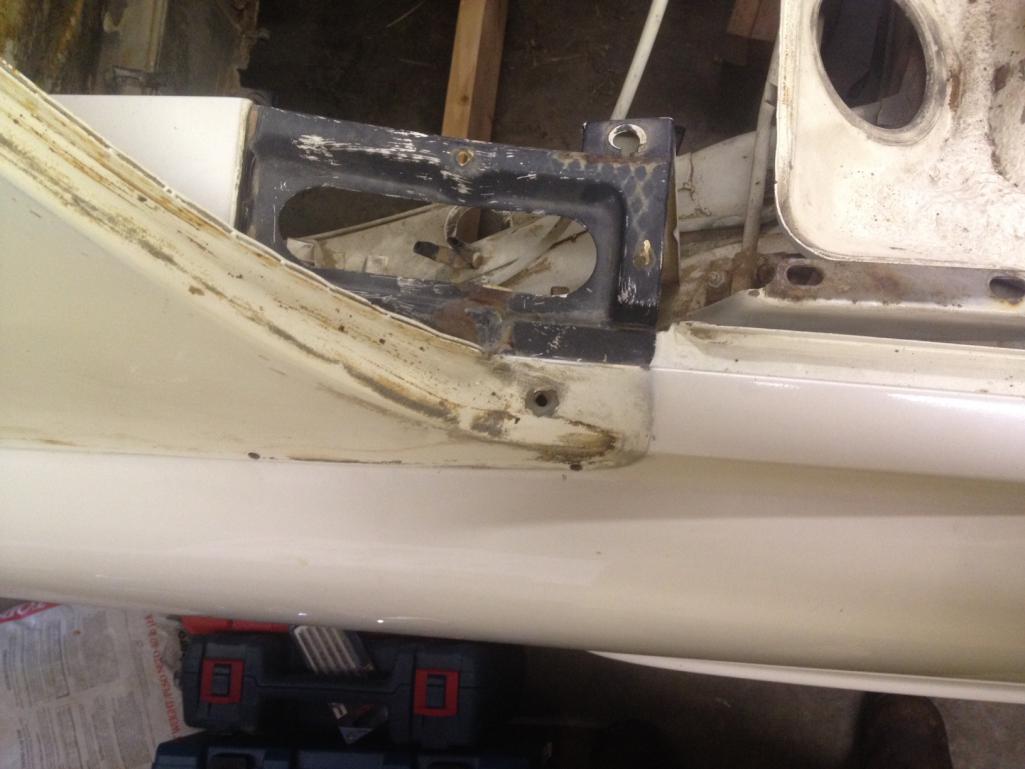 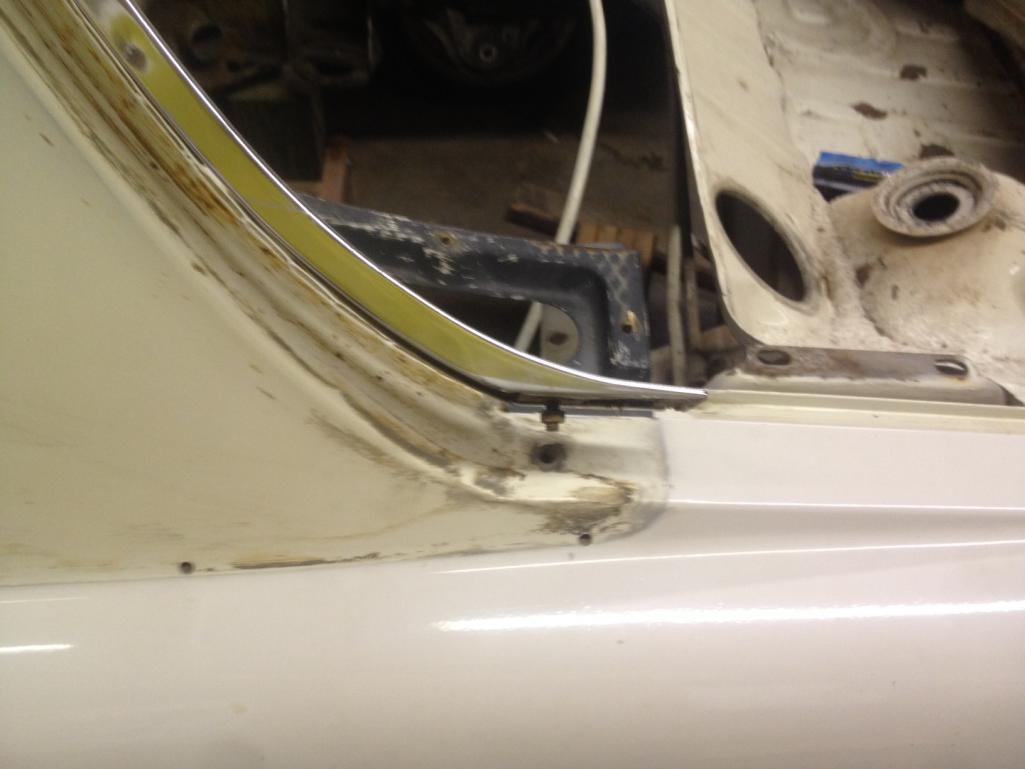 Don't forget that at the top (the phillips screw) there's a plastic barrel spacer between the trim and the body. It's there to prevent over-tightening the screw and bending the trim. Don't loose it when you finally remove the trim. Or if you loose it, don't forget to make/buy another one before you reinstall the trim. |
|
|
|
| got914? |
Mar 7 2015, 01:40 PM
Post
#3
|
|
Member Group: Members Posts: 133 Joined: 8-October 14 From: Niagara Member No.: 17,993 Region Association: None |
Thanks.
Exactly what I was looking for. |
|
|
|
| stugray |
Mar 7 2015, 02:02 PM
Post
#4
|
|
Advanced Member Group: Members Posts: 3,824 Joined: 17-September 09 From: Longmont, CO Member No.: 10,819 Region Association: None |
I just did this the other day too.
I needed a 8mm 1/4"-drive deep socket. I also had to get the wheels off, get up in there with a wire brush and some WD-40 to clear all the undercoating and rust first. BTW - if you are in the mood for a turretts laden moment (or two hours), just try to get the little plastic clip/disks off of the engine cover end pieces shown missing in the pictures above while having a bad back.... |
|
|
|
|
1 User(s) are reading this topic (1 Guests and 0 Anonymous Users)
0 Members:

|
Lo-Fi Version | Time is now: 1st June 2024 - 01:09 PM |
Invision Power Board
v9.1.4 © 2024 IPS, Inc.