|
|
|
Porsche, and the Porsche crest are registered trademarks of Dr. Ing. h.c. F. Porsche AG.
This site is not affiliated with Porsche in any way. Its only purpose is to provide an online forum for car enthusiasts. All other trademarks are property of their respective owners. |
|
|

  |

| theleschyouknow |
 Aug 3 2016, 07:35 PM Aug 3 2016, 07:35 PM
Post
#1
|
|
Senior Member  Group: Members Posts: 524 Joined: 4-June 13 From: Texas Member No.: 15,967 Region Association: None |
I've had my car for about two years first year -what I call the year of living dangerously
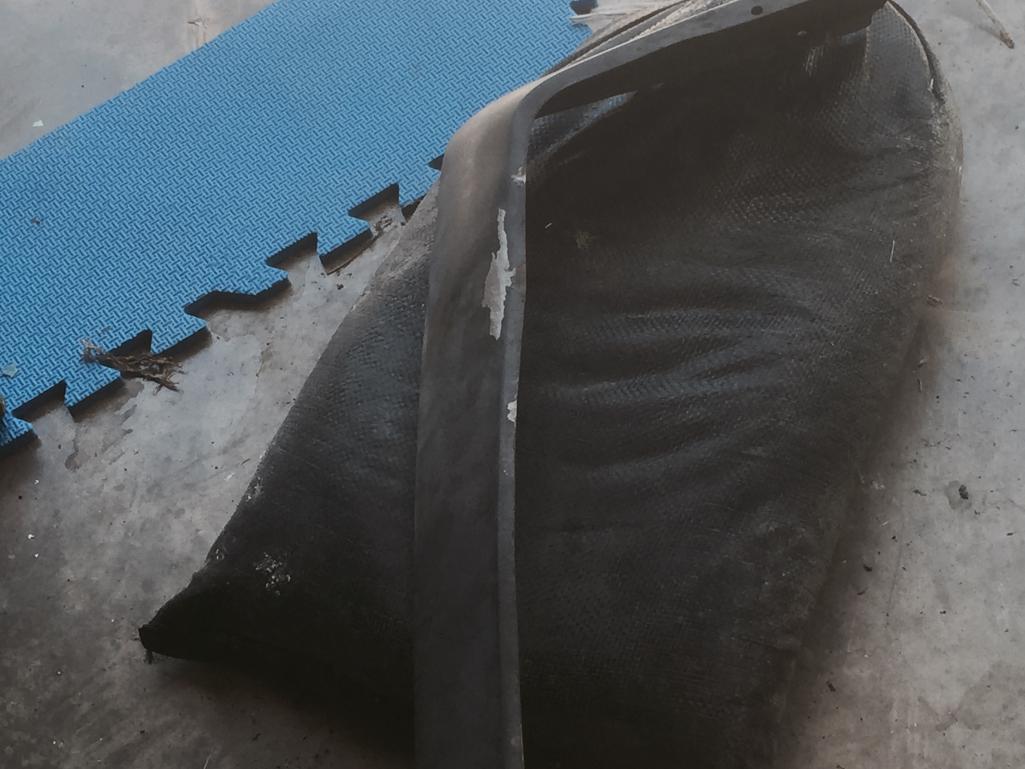
I drove it whenever the weather allowed including a 914 weekend in the talimena hills after a brokenclutch cable clevis it's been wheels in the air for close to a year I've been cleaning the engine and trans and suspension arms and cv's/axles and shocks & springs and engine tin I can reach of 40+ years of grease and dirt -a bunch of it likely from the leaking cv's which I'm sure I'll ask about soon in another thread so here's my question for this thread: my rear valence has one 'big' dent in it and couple small wrinkles in the bottom 1/4" or so 'return' flange that defines the bottom edge pics following having never done any kind of body work before this seems fairly straight forward to repair what are the minimal tools required? what kind of results could reasonably be expected? could I (easily)screw it up beyond repair? thanks for any comments or suggestions 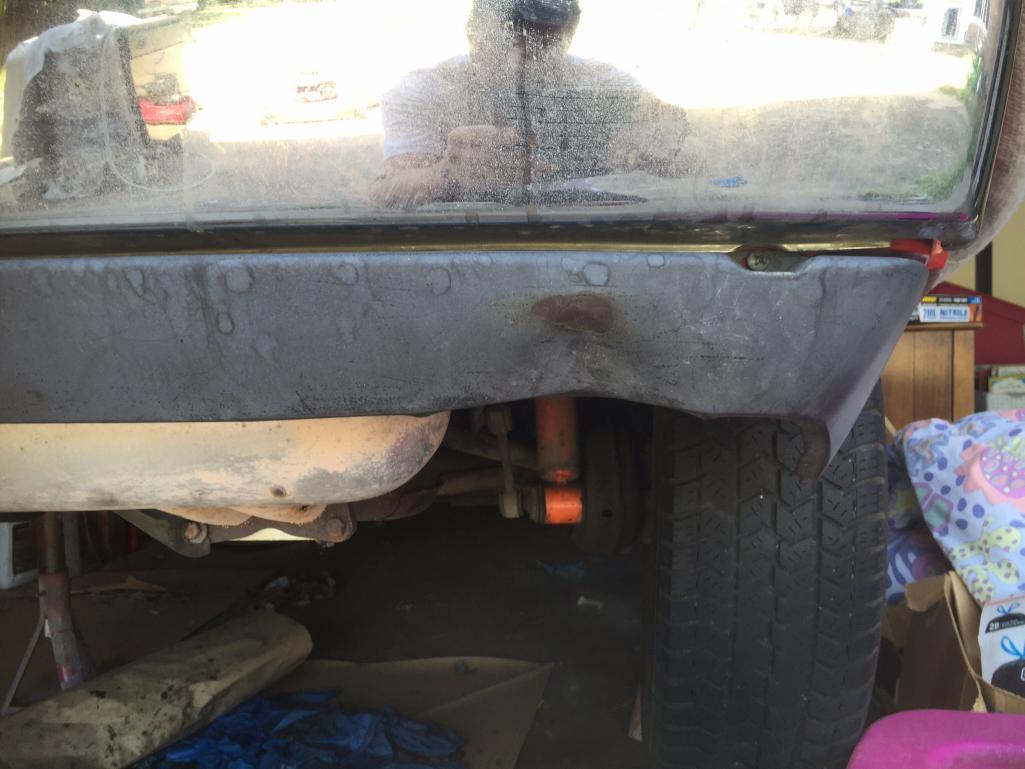 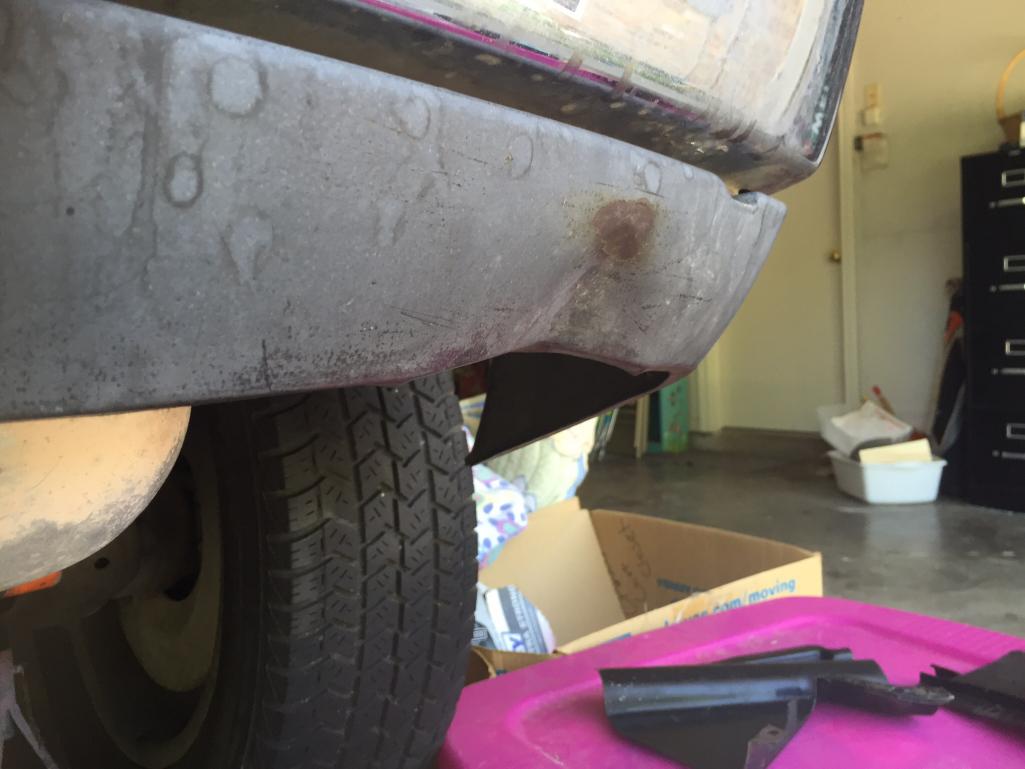  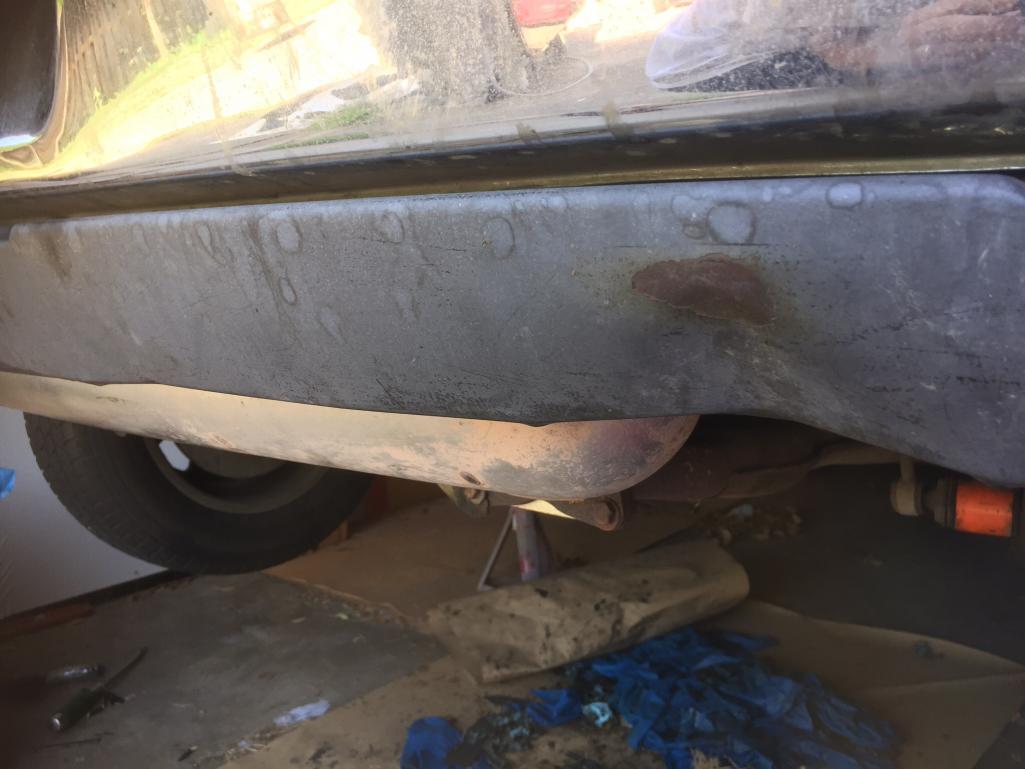 (IMG:style_emoticons/default/beerchug.gif) cjl |
   |

 
|
| barefoot |
Aug 3 2016, 07:48 PM
Post
#2
|
|
Senior Member Group: Members Posts: 1,407 Joined: 19-March 13 From: Charleston SC Member No.: 15,673 Region Association: South East States |
Take it off, put it in your kids sandbox and shape the end of a chunk of 2x4 a little rounded and pound it out.
you should get it pretty close this way, then a little body filler |
|
|
|
| steuspeed |
Aug 3 2016, 08:16 PM
Post
#3
|
|
Senior Member Group: Members Posts: 1,010 Joined: 12-July 11 From: Portland, Oregon Member No.: 13,308 Region Association: Pacific Northwest |
I'm no expert, but I was able to pound out some dents in my chrome bumper with surprising results. I used a rag and a board so I did not damage the chrome. Watch some youtube videos for tips. The sandbox idea is a good one.
|
|
|
|
| Mikey914 |
Aug 3 2016, 11:45 PM
Post
#4
|
|
The rubber man Group: Members Posts: 12,772 Joined: 27-December 04 From: Hillsboro, OR Member No.: 3,348 Region Association: None |
You can do it.
|
|
|
|
| porschetub |
Aug 4 2016, 12:44 AM
Post
#5
|
|
Advanced Member Group: Members Posts: 4,869 Joined: 25-July 15 From: New Zealand Member No.: 18,995 Region Association: None |
Find a block of hardwood shape it as you need and work on it,softwood what ever you use is a waste of time,you will get there, (IMG:style_emoticons/default/beer.gif)
|
|
|
|
| jacksun |
Aug 4 2016, 04:46 AM
Post
#6
|
|
Member Group: Members Posts: 236 Joined: 8-August 13 From: mi Member No.: 16,224 Region Association: Upper MidWest |
how about using two 2x6's
place wood clamps at points A and B and place the the whole thing in your bench vise at point C tighten until you get the bottom line straight. buy the body work hammers from harbor freight, relatively cheap. and use them for the final work... U tube for tips on hammering. the part in the middle will most likely be stretched? so you might have to do some metal shrinking. 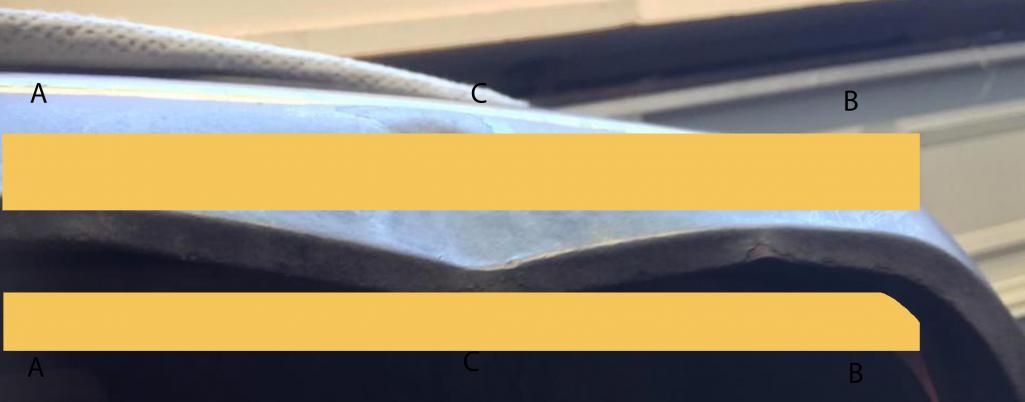 |
|
|
|
| theleschyouknow |
Aug 4 2016, 11:16 AM
Post
#7
|
|
Senior Member Group: Members Posts: 524 Joined: 4-June 13 From: Texas Member No.: 15,967 Region Association: None |
thanks for the encouragement and suggestions
I will give it a shot this weekend probably using a variety of the methods mentioned here will report back with any progress (or disasters!) (IMG:style_emoticons/default/beerchug.gif) cjl |
|
|
|
| Jeffs9146 |
Aug 4 2016, 12:01 PM
Post
#8
|
|
Ski Bum Group: Members Posts: 4,062 Joined: 10-January 03 From: Discovery Bay, Ca Member No.: 128 |
Attached thumbnail(s) 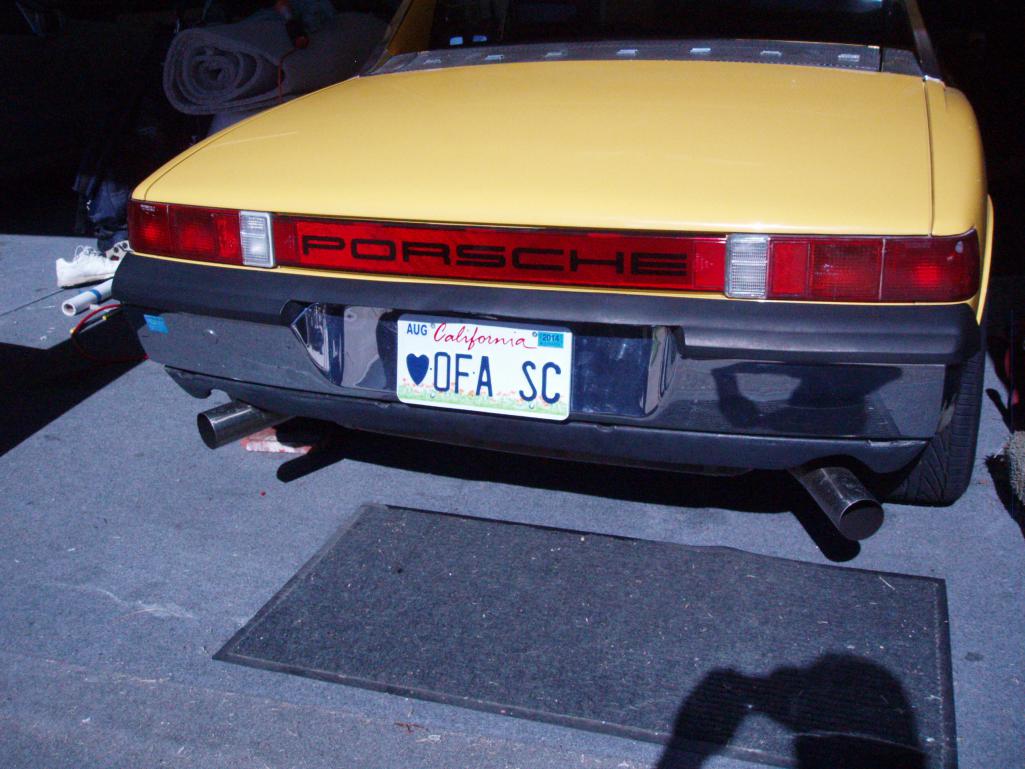
|
|
|
|
| malcolm2 |
Aug 4 2016, 12:18 PM
Post
#9
|
|
Advanced Member Group: Members Posts: 2,747 Joined: 31-May 11 From: Nashville Member No.: 13,139 Region Association: South East States |
$26 PROfessional tools from Harbor Freight might help.... (IMG:style_emoticons/default/piratenanner.gif)
 |
|
|
|
| theleschyouknow |
Aug 4 2016, 01:02 PM
Post
#10
|
|
Senior Member Group: Members Posts: 524 Joined: 4-June 13 From: Texas Member No.: 15,967 Region Association: None |
QUOTE(Jeffs9146 @ Aug 4 2016, 01:01 PM)  ha! trust me I thought about that, glad I'm not the only one it's really close to be almost perfectly symmetrical with the existing exhaust cut out as far as location goes but I think I'll just try to return it to stock for now (IMG:style_emoticons/default/beerchug.gif) cjl |
|
|
|
| worn |
Aug 4 2016, 01:12 PM
Post
#11
|
|
Winner of the Utah Twisted Joint Award Group: Members Posts: 3,488 Joined: 3-June 11 From: Madison, WI Member No.: 13,152 Region Association: Upper MidWest |
having never done any kind of body work before this seems fairly straight forward to repair what are the minimal tools required? -hammer, not claw, and something to hit against what kind of results could reasonably be expected? -perfect if you skim a light film of bond over the end result. probably 1/16 in or so thick with no experience. could I (easily)screw it up beyond repair? - I doubt it. As you pound out the dent avoid squeezing it tight against the anvil. If you here a distinct click as the hammer hits it is striking the anvil through the metal. That stretches. So hit to move the dent and bend the metal back into shape. As long as you aren't pinching the metal you are probably shrinking or at least not ruining it. Read. Your's looks like mine did a couple months ago. Close to perfect now. |
|
|
|
| theleschyouknow |
Aug 7 2016, 10:57 AM
Post
#12
|
|
Senior Member Group: Members Posts: 524 Joined: 4-June 13 From: Texas Member No.: 15,967 Region Association: None |
well a cheap set of harbor freight tools, a sand bag and several hours of pissing my neighbors off later I am here:
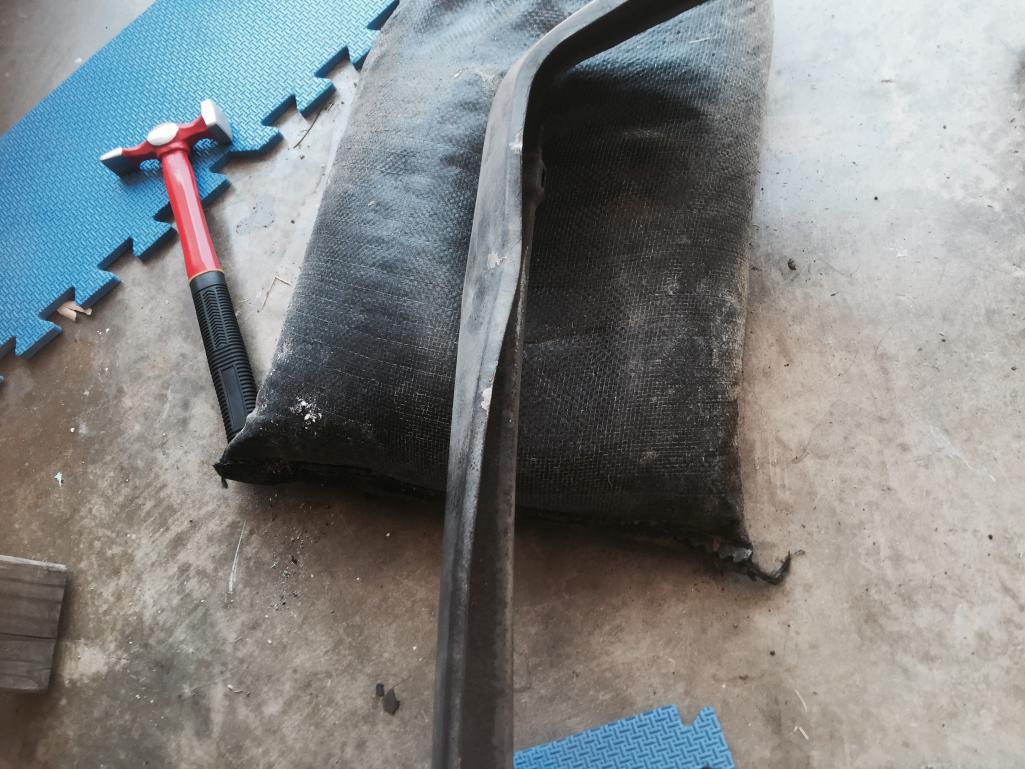
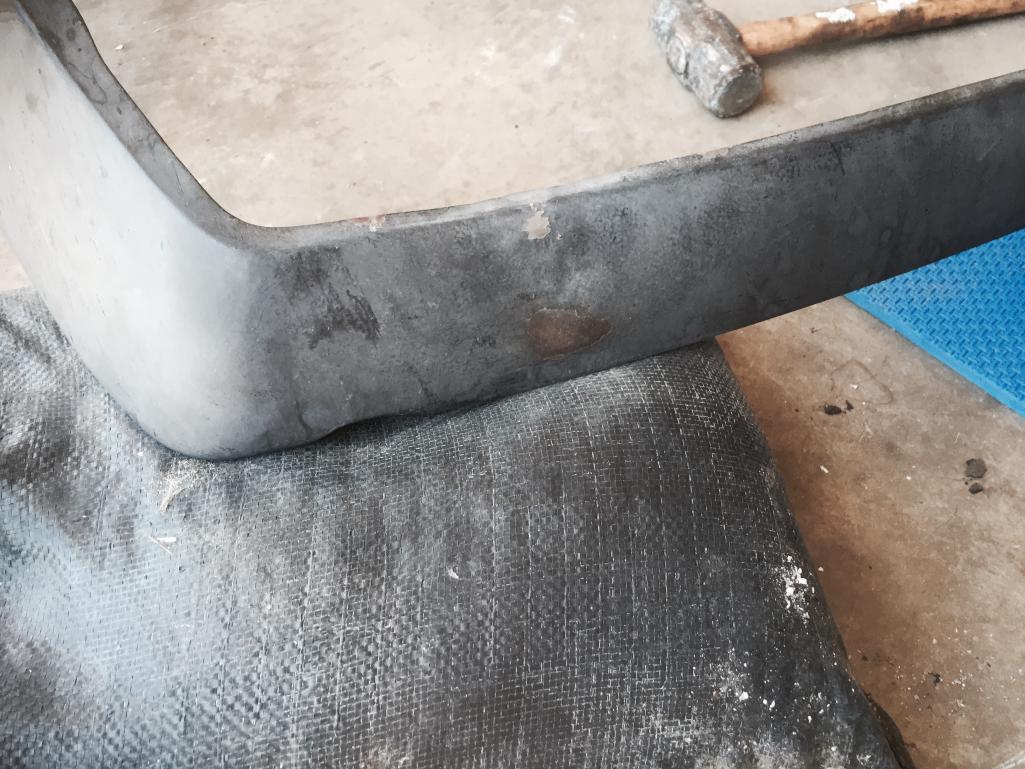
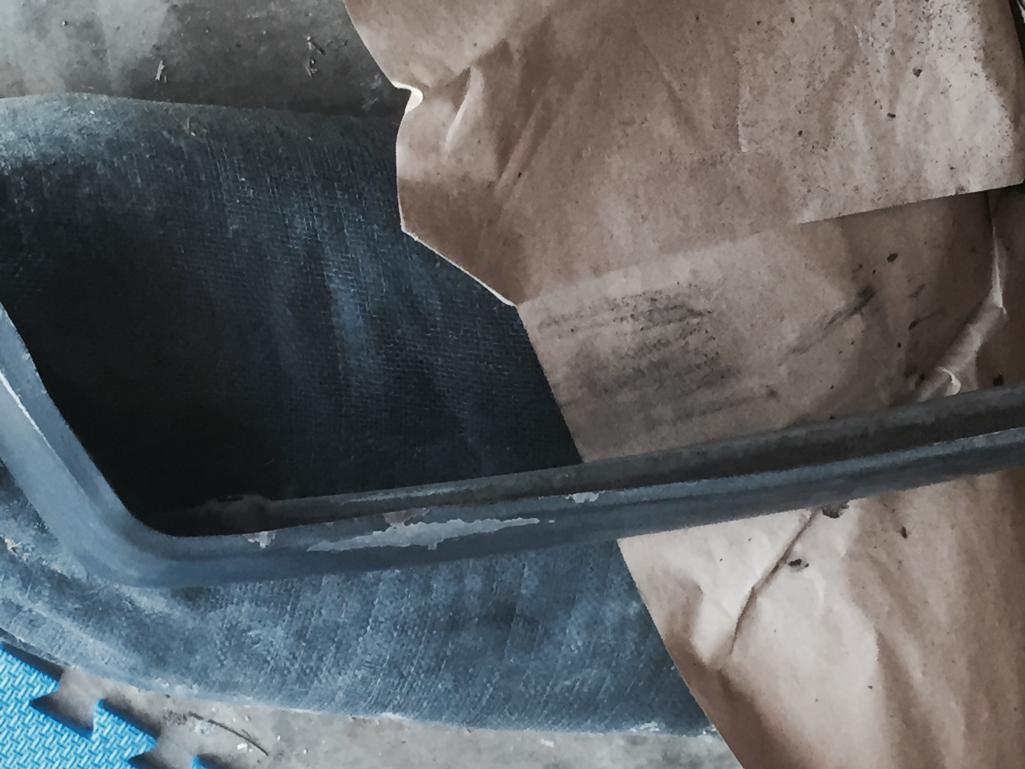
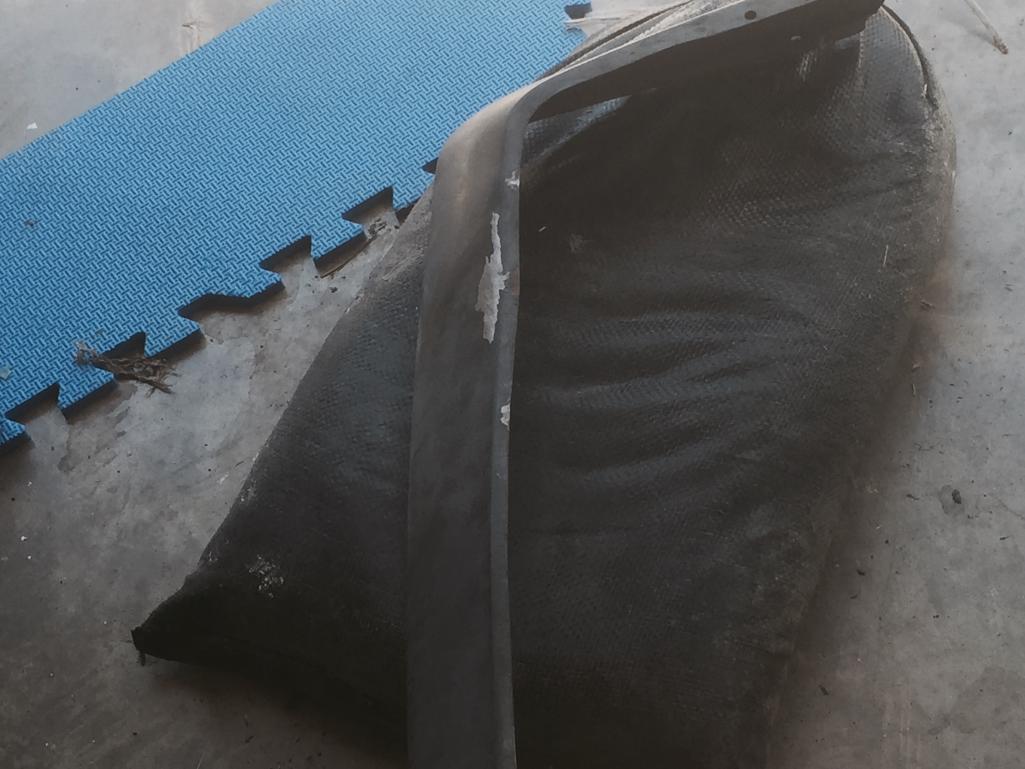
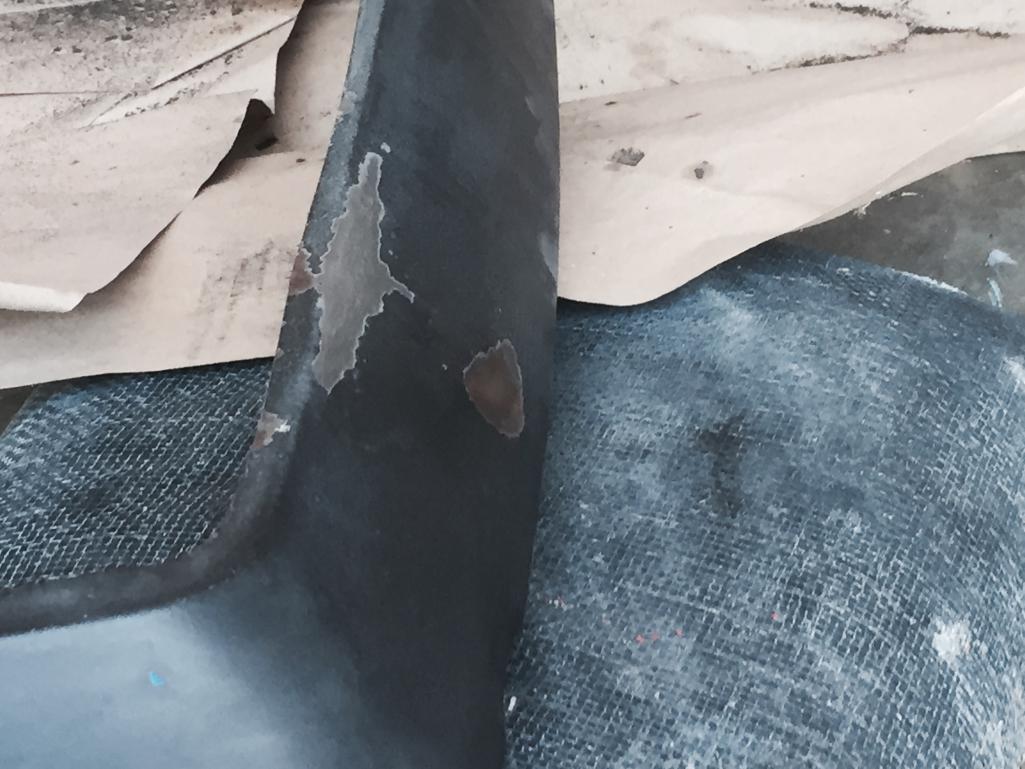 I'm pretty happy with the results so far but still have a ways to go here's a question though, I have gotten the big deep dent fairly well pounded out but you can kinda see in the pic below there's a long sweeping "dent" or pushed in area as a result of the main dent  I'm having a hard time getting it back into shape. I'm not sure how to attack such a large area to get it to line up better any suggestions are welcome and here's some progress pics -pretty boring but I know y'all like pictures I'm at my space limit so progress pics to follow |
|
|
|
| theleschyouknow |
Aug 7 2016, 11:00 AM
Post
#13
|
|
Senior Member Group: Members Posts: 524 Joined: 4-June 13 From: Texas Member No.: 15,967 Region Association: None |
 |
|
|
|
| theleschyouknow |
Aug 7 2016, 11:01 AM
Post
#14
|
|
Senior Member Group: Members Posts: 524 Joined: 4-June 13 From: Texas Member No.: 15,967 Region Association: None |
 |
|
|
|
| theleschyouknow |
Aug 7 2016, 11:06 AM
Post
#15
|
|
Senior Member Group: Members Posts: 524 Joined: 4-June 13 From: Texas Member No.: 15,967 Region Association: None |
|
|
|
|
| zambezi |
Aug 8 2016, 11:01 AM
Post
#16
|
|
Senior Member Group: Members Posts: 711 Joined: 14-April 08 From: Lafayette, LA Member No.: 8,920 Region Association: South East States |
Are you using a hammer and dolley or just the hammer and sand bag? For dents like these I don't use sand bags, but strictly hammer and dolley and have good results.
|
|
|
|
| theleschyouknow |
Aug 8 2016, 11:48 AM
Post
#17
|
|
Senior Member Group: Members Posts: 524 Joined: 4-June 13 From: Texas Member No.: 15,967 Region Association: None |
QUOTE(zambezi @ Aug 8 2016, 12:01 PM) Are you using a hammer and dolley or just the hammer and sand bag? For dents like these I don't use sand bags, but strictly hammer and dolley and have good results. I've been using both so far I started using hammer & dolly on the small wrinkles in the bottom flange based on the first in last out principle I figured those wrinkles were incident to the major dent and that went pretty well then I moved on to the big main dent but wasn't having much luck really moving any metal with dolly and body hammer so I moved on to sand bag a BFH to get the main dent pushed back out and then worked it a little with body hammer and bag and dollies I will quit with the sandbag I've watched a handful of u tube vids and think I get the general idea and off dolly hammering in concept but I guess not in practice so I need to push out on the low side from behind with the dolly and hammer on the outside or just the opposite put the dolly on the outside and hammer it from behind thanks for the advice (IMG:style_emoticons/default/beerchug.gif) cjl |
|
|
|
| Darren C |
Aug 8 2016, 12:36 PM
Post
#18
|
|
Member Group: Members Posts: 392 Joined: 26-December 14 From: Chichester UK Member No.: 18,255 Region Association: England |
Your doing real well cjl,
Very good work! To answer your question, you need to work the metal from both sides with a good planishing hammer (not a lump or ball peen) and dolly. As said before, forget the sandbag. It looks a simple damage repair and I'd guess you'll not need a shrinking hammer, just the basic tools. The trick is to do it nice and slow and progressively. Better to hit numerous times with a light blow than a few with a heavy blow. Knock and work a dent from the convex side, then flip to the other side only to finely adjust. A good beginners trick is to use a large woodworkers G clamp with some small wood blocks to ease out dents before the hammer, or with metal blocks to flatten creases on edge returns or flanges. Be careful with any corners on wooden and metal blocks, as well as your dolly as you can hammer in a new crease easily if you catch the sides. Also it's a skill to hold the hammer face flat to the panel as you can create "half crowns" (When I was a very young lad learning coppersmithing and panel beating my teacher used to beat us for every half crown we put in a job) A half crown was an old UK coin just about the size of a quarter, and it was the nick-name for the imprint of the hammer head in the material if we'd not hit the job squarely. Once you get it back to shape you can move to a nylon mallet and light multiple hits with the dolly to finish smooth. Check out day 93 here on my build for inspiration from my valance dent removal. http://www.914world.com/bbs2/index.php?sho...47250&st=40 Good luck, you're doing great so far! |
|
|
|
| theleschyouknow |
Aug 8 2016, 05:18 PM
Post
#19
|
|
Senior Member Group: Members Posts: 524 Joined: 4-June 13 From: Texas Member No.: 15,967 Region Association: None |
thanks Darren
I was kinda hoping you would chime in here. I have read your entire build thread (speaking of very good work) and that was one of the things that motivated me to try my hand at it that and staring at it every time I got under my car but I will revisit day 93 thanks for the advice I will try some of those techniques and although I am much more well versed in woodworking (I can build any thing you want with wood and a saw & make that mother scratcher look good) I am a bit hesitant to try clamping for some of the reasons you mentioned. the majority of my hammering I have done with a body hammer that has about a 3 cm square slightly domed head on one side and a long flat rounded over blade that's about 3cm by ~.5 cm on the other I don't think I've crowned anything too badly yet it's still over 100* (36* C)at 6:30 here and sun's beaming right into my garage so if it cools down enough before it gets too late I will smack on it some more tonite if not it may have to wait til the weekend (IMG:style_emoticons/default/beerchug.gif) cjl |
|
|
|
| Darren C |
Aug 9 2016, 12:50 AM
Post
#20
|
|
Member Group: Members Posts: 392 Joined: 26-December 14 From: Chichester UK Member No.: 18,255 Region Association: England |
I could use some of your weather.
Its 8am here, when I woke and went down to the garage a couple of hours ago it was 3C / 37F now its made it to 9C / 48F and just because its our Summer time its expected to make a dizzy 20C / 68F in the high heat of mid afternoon! (thats if it doesn't rain of course) Don't play down your skills, you look like you have the abilities and aptitude to do great things, have confidence in them. |
|
|
|
|
1 User(s) are reading this topic (1 Guests and 0 Anonymous Users)
0 Members:

|
Lo-Fi Version | Time is now: 1st July 2025 - 03:00 AM |
Invision Power Board
v9.1.4 © 2025 IPS, Inc.