|
|
|
Porsche, and the Porsche crest are registered trademarks of Dr. Ing. h.c. F. Porsche AG.
This site is not affiliated with Porsche in any way. Its only purpose is to provide an online forum for car enthusiasts. All other trademarks are property of their respective owners. |
|
|

  |

| Trevor Gates |
 Apr 22 2019, 02:41 PM Apr 22 2019, 02:41 PM
Post
#1
|
|
Newbie  Group: Members Posts: 12 Joined: 8-April 19 From: San Clemente, CA Member No.: 23,021 Region Association: Southern California |
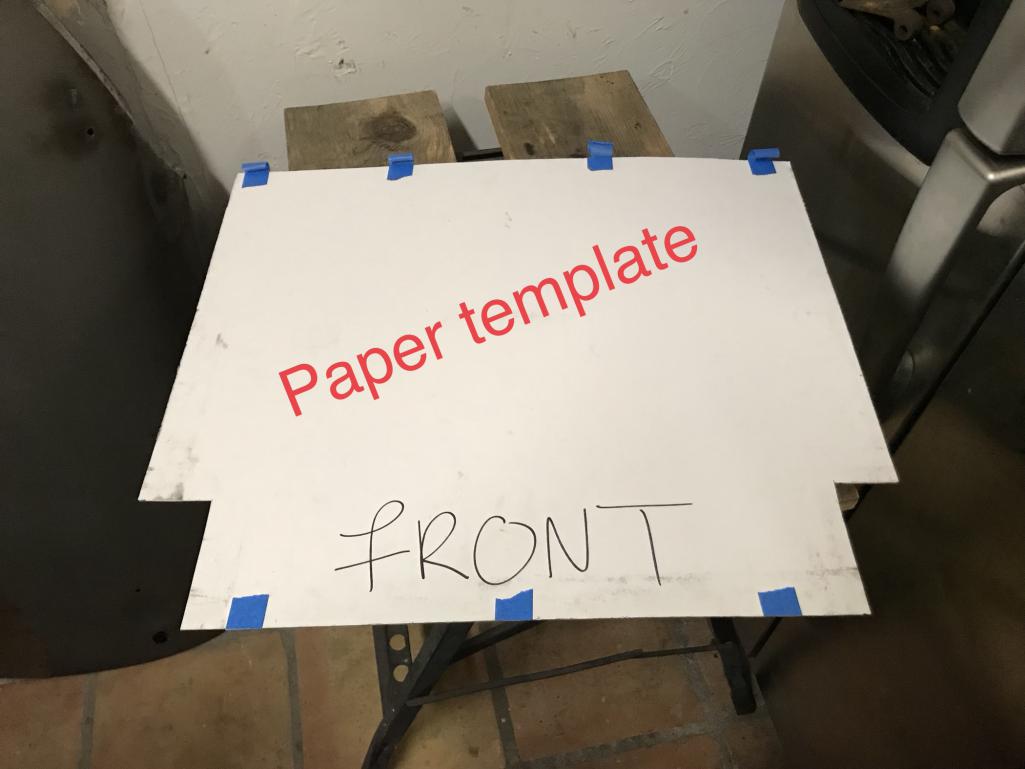
I’ve been meaning to share these pics as a small how to on installing this panel from Patrick Motorsports. https://patrickmotorsports.com/collections/...9146l-vrpan-pmp
A friend and neighbor has a 914 and I installed one in his car and he told a friend about it, except his friend wanted to add more lovers, so sure, let’s do it. 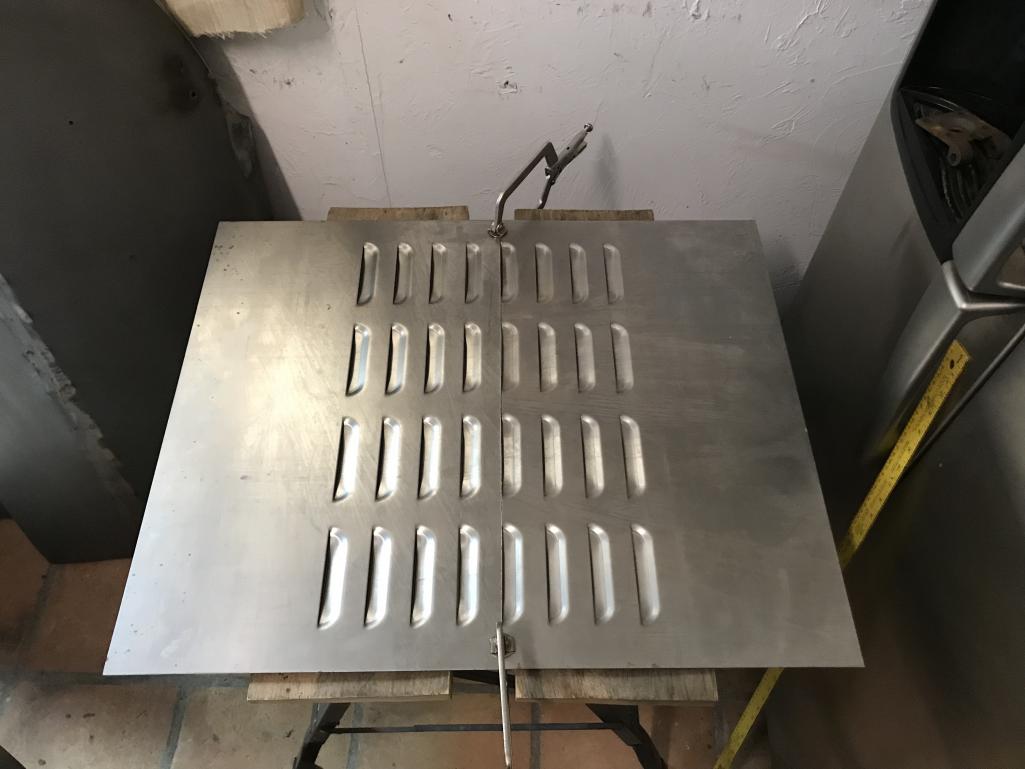 |
   |

 
|
| Trevor Gates |
Apr 22 2019, 02:43 PM
Post
#2
|
|
Newbie Group: Members Posts: 12 Joined: 8-April 19 From: San Clemente, CA Member No.: 23,021 Region Association: Southern California |
  |
|
|
|
| Trevor Gates |
Apr 22 2019, 02:47 PM
Post
#3
|
|
Newbie Group: Members Posts: 12 Joined: 8-April 19 From: San Clemente, CA Member No.: 23,021 Region Association: Southern California |
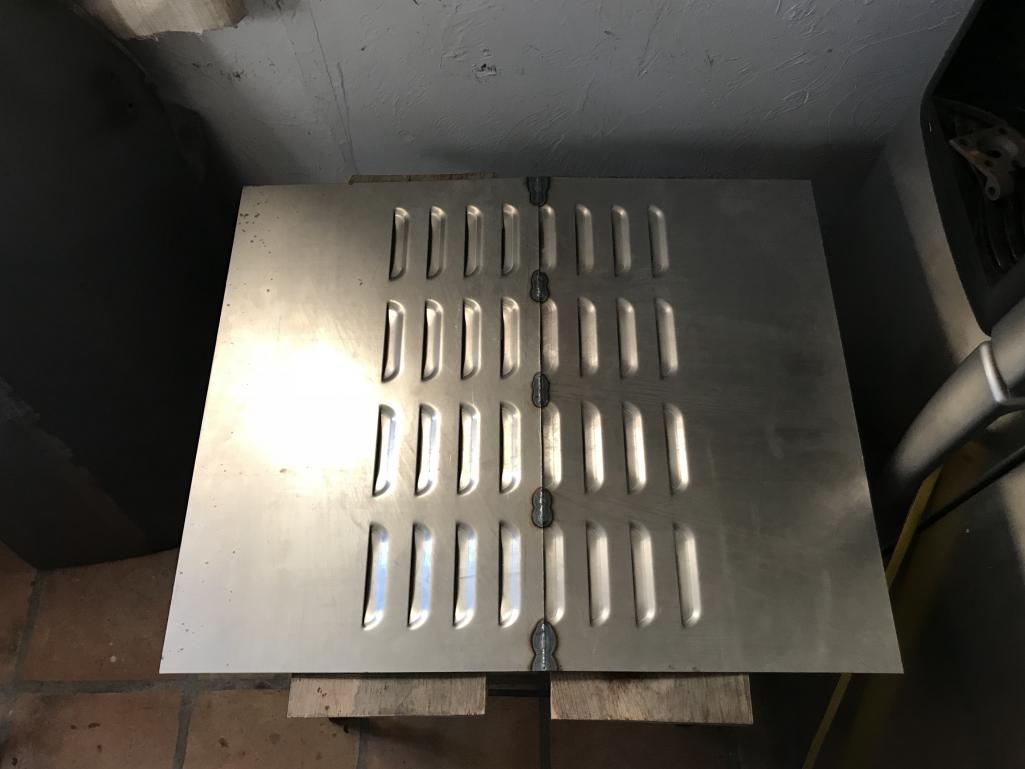
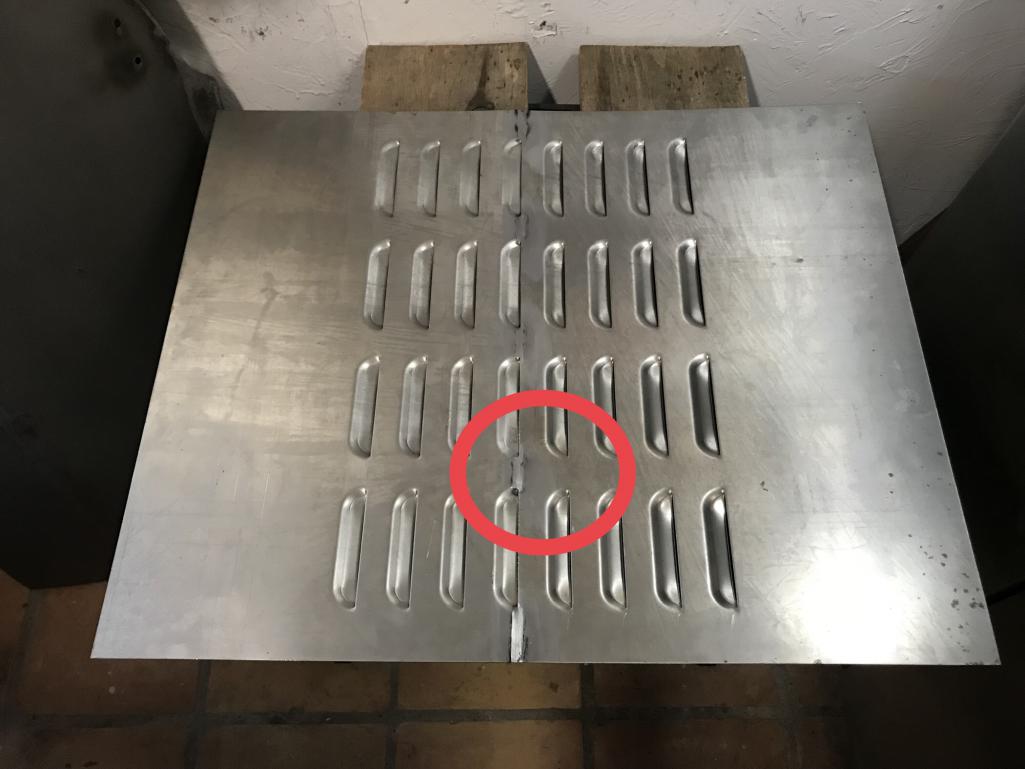
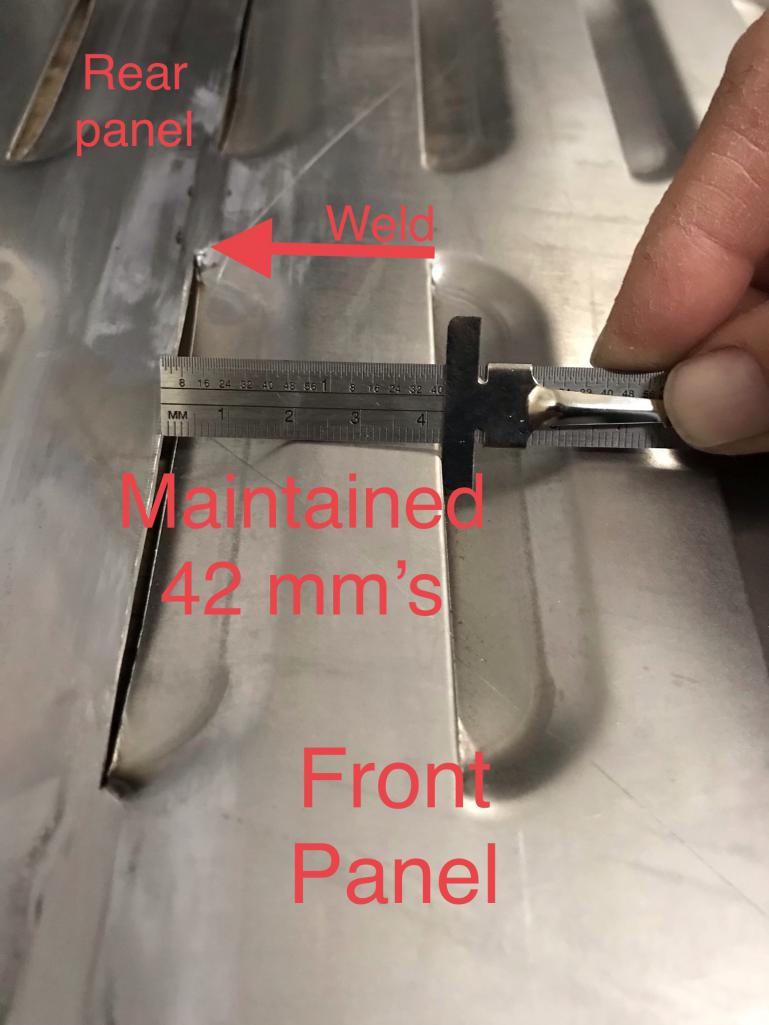
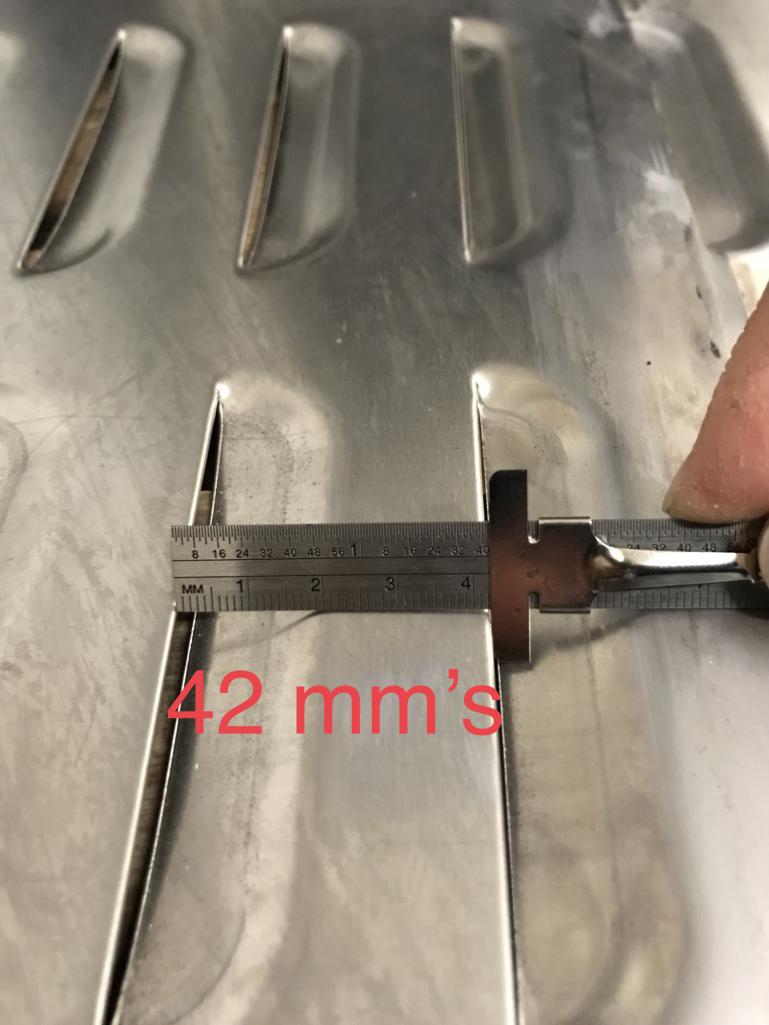
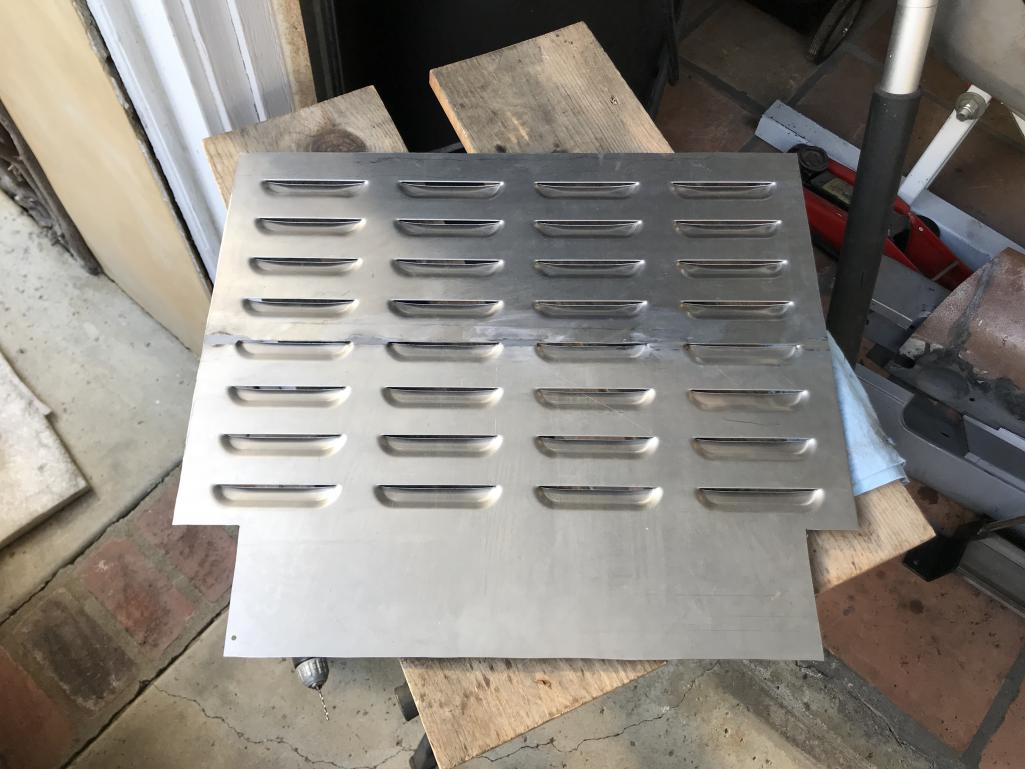
The spacing of the louvers is 42mm’s. I cut the front and back panel to weld them together to maintain the 42mm spacing so it would look like one panel. I also joined them this way to reduce the amount of TIG welding required.
  |
|
|
|
| Trevor Gates |
Apr 22 2019, 02:50 PM
Post
#4
|
|
Newbie Group: Members Posts: 12 Joined: 8-April 19 From: San Clemente, CA Member No.: 23,021 Region Association: Southern California |
  |
|
|
|
| Trevor Gates |
Apr 22 2019, 02:55 PM
Post
#5
|
|
Newbie Group: Members Posts: 12 Joined: 8-April 19 From: San Clemente, CA Member No.: 23,021 Region Association: Southern California |
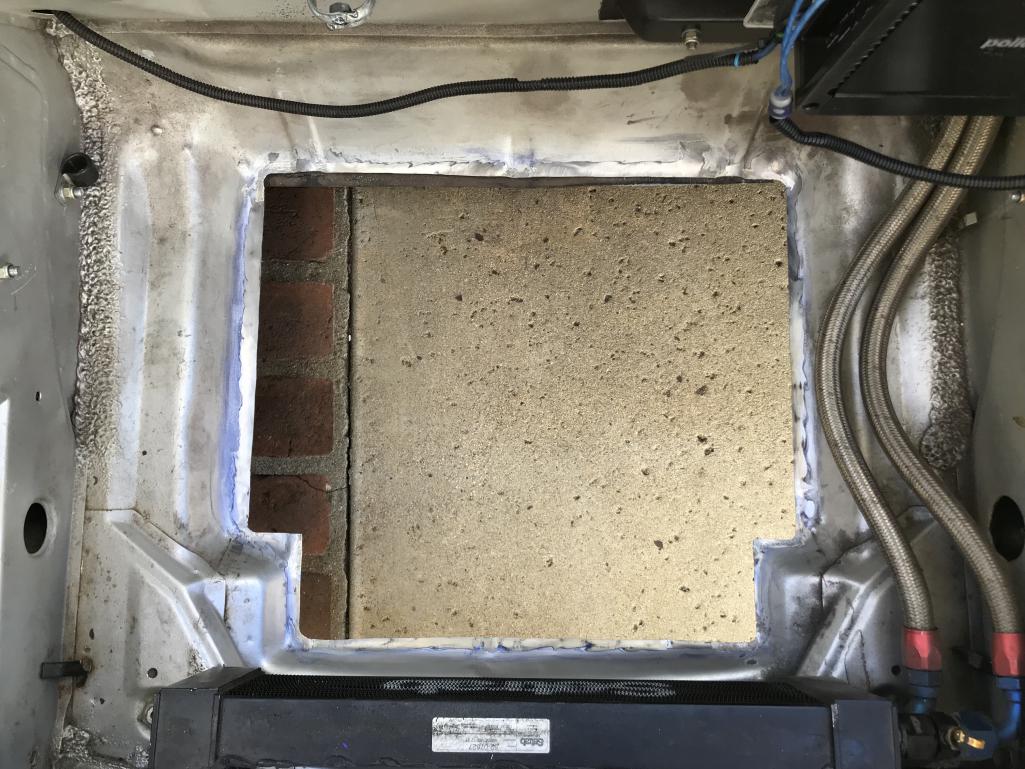
Previous hole was already in the floor, blue dykem layout fluid used so I could scribe my line to cut the hole.
 |
|
|
|
| Trevor Gates |
Apr 22 2019, 02:57 PM
Post
#6
|
|
Newbie Group: Members Posts: 12 Joined: 8-April 19 From: San Clemente, CA Member No.: 23,021 Region Association: Southern California |
 |
|
|
|
| Trevor Gates |
Apr 22 2019, 03:01 PM
Post
#7
|
|
Newbie Group: Members Posts: 12 Joined: 8-April 19 From: San Clemente, CA Member No.: 23,021 Region Association: Southern California |
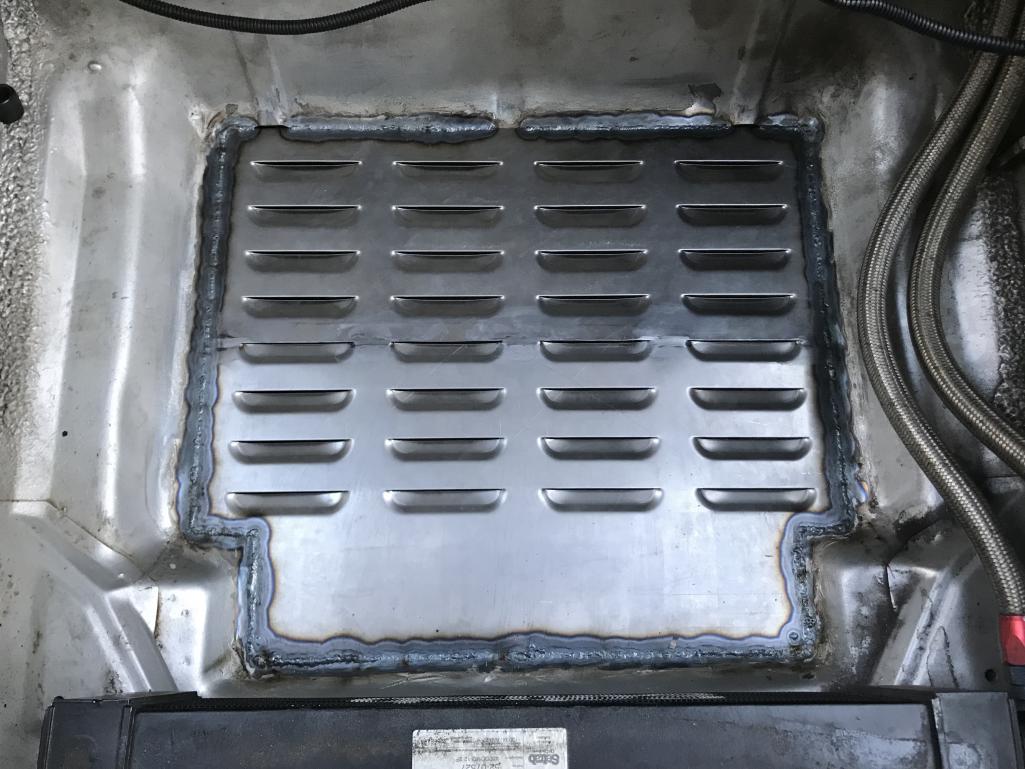
TIG welded in. At this point you can either sand down the weld bead with some 80 grit or leave as is and undercoat. If anyone has any questions please ask. I’m all about using forums to share information!
 |
|
|
|
| Steve |
Apr 22 2019, 06:48 PM
Post
#8
|
|
914 Guru Group: Members Posts: 5,982 Joined: 14-June 03 From: Laguna Niguel, CA Member No.: 822 Region Association: Southern California |
Thanks Trevor!! Awesome work and thanks for sharing. That was my 914. I wanted the extra louvers for an AC condenser.
 I just got the car back from the body shop for a color change!! |
|
|
|
| maf914 |
Apr 23 2019, 10:28 AM
Post
#9
|
|
Not a Guru! Group: Members Posts: 3,049 Joined: 30-April 03 From: Central Florida Member No.: 632 Region Association: None |
Steve,
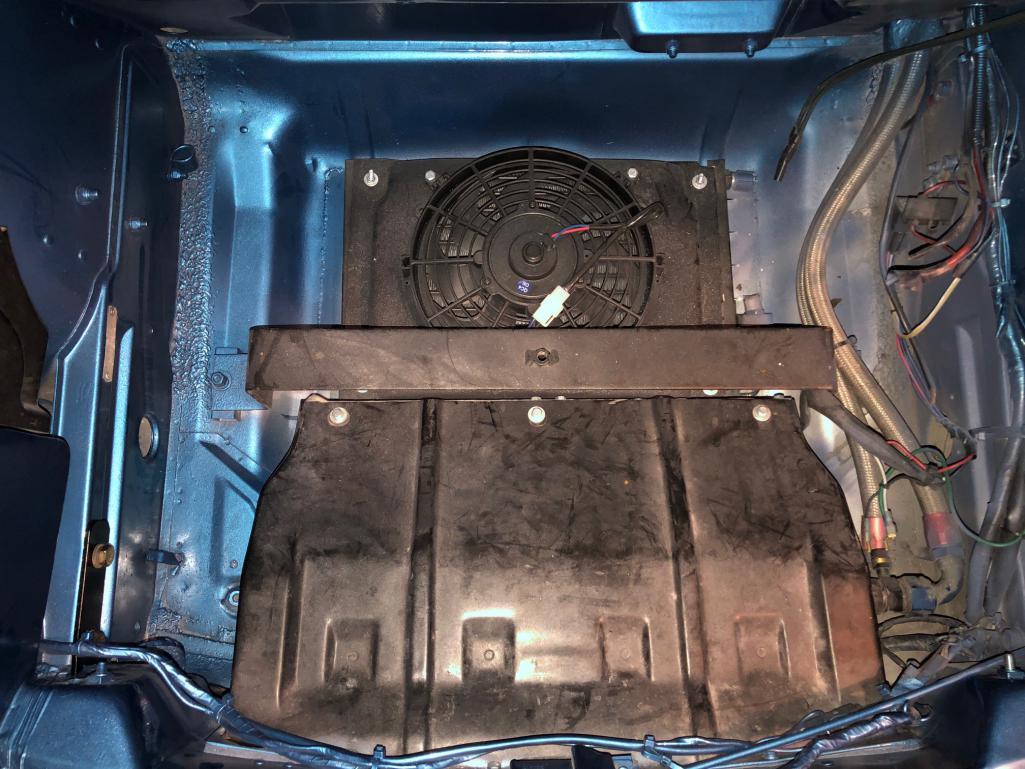
Do you have a front mounted oil cooler under that duct? I was wondering where the cooling air for the AC condenser comes from. Is there additional ducting that is not obvious in the photo? |
|
|
|
| Trevor Gates |
Apr 23 2019, 10:40 AM
Post
#10
|
|
Newbie Group: Members Posts: 12 Joined: 8-April 19 From: San Clemente, CA Member No.: 23,021 Region Association: Southern California |
Hey Steve! Thanks! Congrats on the paint job.
|
|
|
|
| Steve |
Apr 23 2019, 01:42 PM
Post
#11
|
|
914 Guru Group: Members Posts: 5,982 Joined: 14-June 03 From: Laguna Niguel, CA Member No.: 822 Region Association: Southern California |
QUOTE(maf914 @ Apr 23 2019, 09:28 AM)  Steve, Do you have a front mounted oil cooler under that duct? I was wondering where the cooling air for the AC condenser comes from. Is there additional ducting that is not obvious in the photo? Yes there is a PMS oil cooler under the shroud. I shortened the shroud so the air exits underneath in front of the condenser. For the condenser, the air enters through the front holes on each side of the shroud. I use the tire board on top of the shroud to force the air through the condenser. The oil cooler has fans and a thermostat. The condenser also has its own fan. I have not plumbed the AC yet, so we will see how well it works... I have a Benling DC Compressor and small evaporator for the console. |
|
|
|
| Steve |
Apr 23 2019, 01:43 PM
Post
#12
|
|
914 Guru Group: Members Posts: 5,982 Joined: 14-June 03 From: Laguna Niguel, CA Member No.: 822 Region Association: Southern California |
QUOTE(Trevor Gates @ Apr 23 2019, 09:40 AM) Hey Steve! Thanks! Congrats on the paint job. Thanks Trevor!! Taking the car to bare metal, I couldn't resist changing the color. |
|
|
|
|
1 User(s) are reading this topic (1 Guests and 0 Anonymous Users)
0 Members:

|
Lo-Fi Version | Time is now: 7th December 2025 - 11:34 PM |
Invision Power Board
v9.1.4 © 2025 IPS, Inc.