|
|
|
Porsche, and the Porsche crest are registered trademarks of Dr. Ing. h.c. F. Porsche AG.
This site is not affiliated with Porsche in any way. Its only purpose is to provide an online forum for car enthusiasts. All other trademarks are property of their respective owners. |
|
|

  |

| Dr Evil |
 Sep 3 2007, 01:43 PM Sep 3 2007, 01:43 PM
Post
#1
|
|
Send me your transmission!  Group: Members Posts: 23,002 Joined: 21-November 03 From: Loveland, OH 45140 Member No.: 1,372 Region Association: MidAtlantic Region |
Since I have CIS on my engine it takes up a bit of room. This created a need to remove the engine bay latch and all of its related hardware, but this left the hood flopping if I ever hit bumps. I wanted to put pins in, but didnt know how....until I was inspired last night!
List of materials: - the rubber stoppers that you already have that your lid rests on 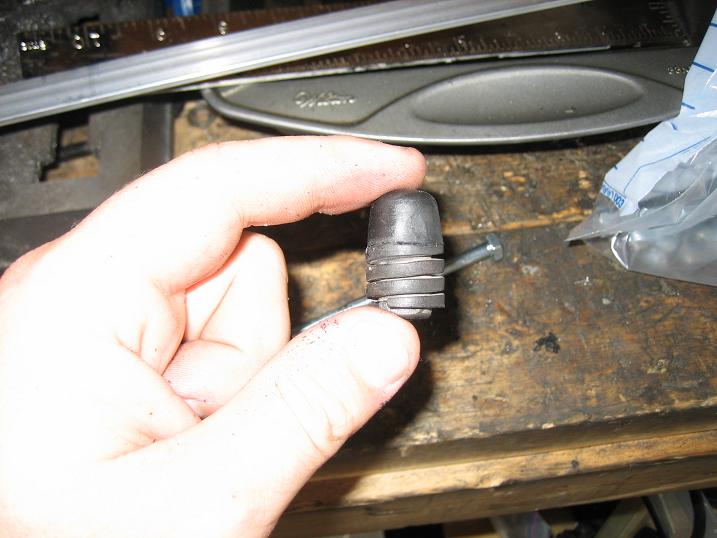 - 2x 1/4" x 3" (its good to go longer so you can cut off the excess) stainless/zinc bolts ~ $.18ea 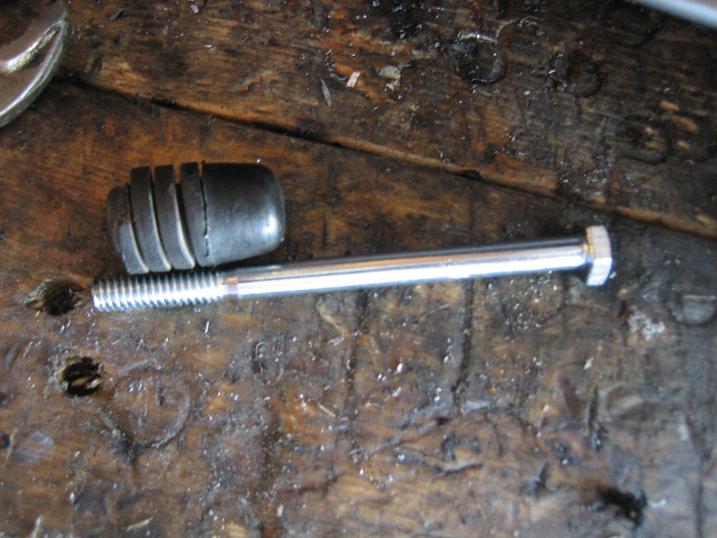 - 2x flat 1/4" washers, Stainless/zinc ~ $.10ea - 2x 1/16" pins, ~$1.20 - Drill bits, drill, cut off wheel 1) Take the rubber nubs off. They are threaded and unscrew. 2) Drill a hole that is smaller than 1/4 inch buy 2 sizes down the center of the nubs (I forget what I used, I just grabbed the bit two sizes down) 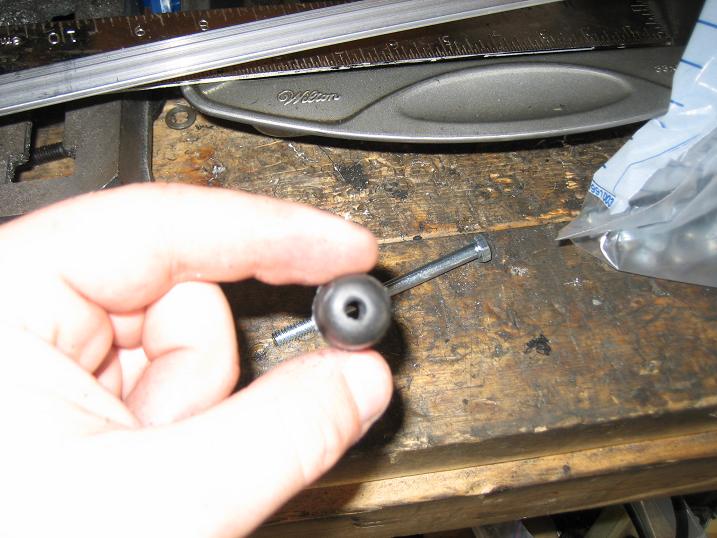 3) Cut heads off of bolts and place the bolt shaft into the holes you drilled.  |
   |

 
|
| Dr Evil |
Sep 3 2007, 01:46 PM
Post
#2
|
|
Send me your transmission! Group: Members Posts: 23,002 Joined: 21-November 03 From: Loveland, OH 45140 Member No.: 1,372 Region Association: MidAtlantic Region |
4) Put nubs back on and check where the holes need to be drilled through the lid.
* Use a hammer to beat the nubs until they hit a spot on the lid where it is flat and make the sides match* 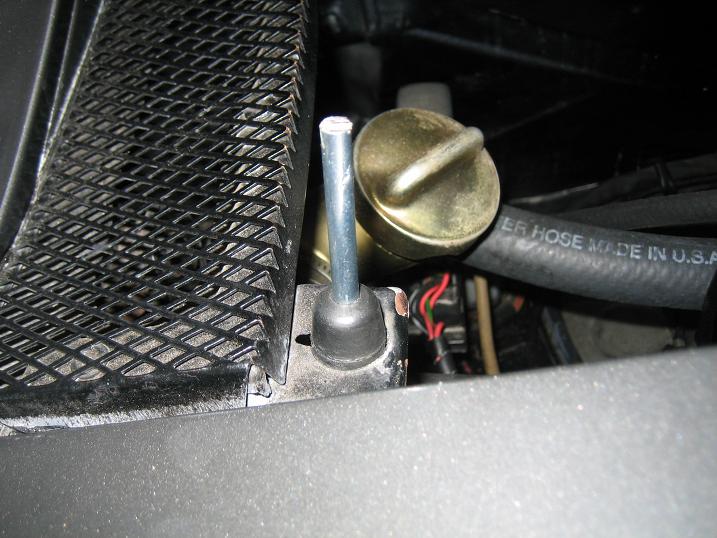 5) Notch the nubs on the outboard side so the lid will seat correctly (this process takes the nubs a little more outboard than usual)  6) Drill the lid 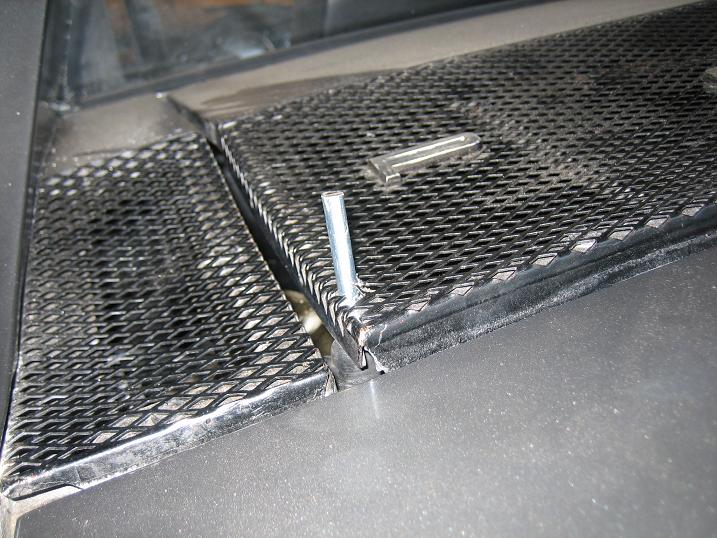 7) Lower the lid, put washer on, and mark with a sharpie where you want the hole for the pin to be and where you want to cut the excess shaft material off, then remove and do such. 8) place the nub/pin set up back on and smile! (IMG:style_emoticons/default/biggrin.gif) 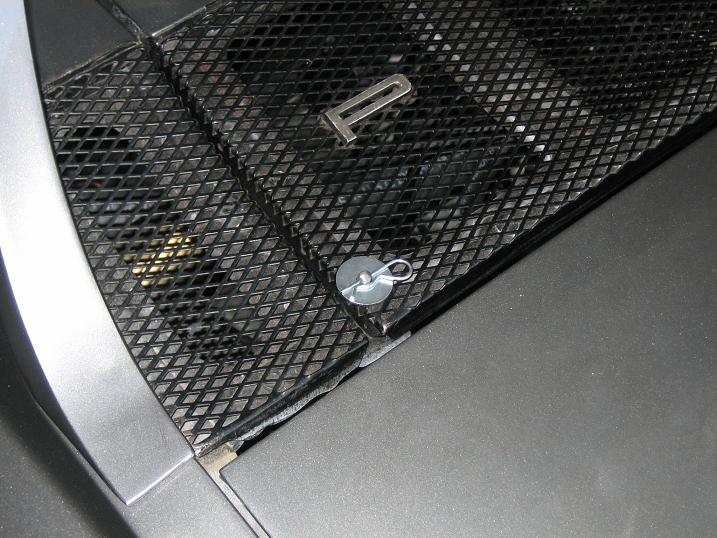 |
|
|
|
| Dr Evil |
Sep 3 2007, 01:49 PM
Post
#3
|
|
Send me your transmission! Group: Members Posts: 23,002 Joined: 21-November 03 From: Loveland, OH 45140 Member No.: 1,372 Region Association: MidAtlantic Region |
Symmetry (IMG:style_emoticons/default/biggrin.gif)
Attached image(s) 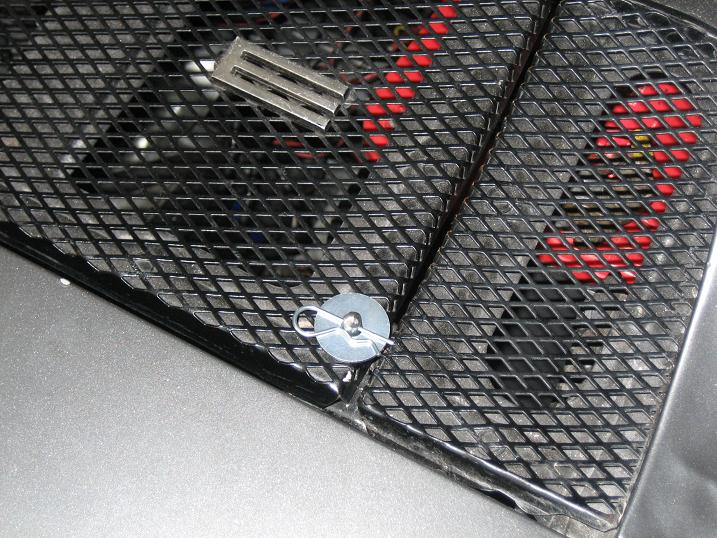
|
|
|
|
| firstknight13 |
Sep 3 2007, 01:49 PM
Post
#4
|
|
Senior Member Group: Members Posts: 652 Joined: 25-March 05 From: manchester,ct. Member No.: 3,817 |
(IMG:style_emoticons/default/biggrin.gif) show off......you really should be studying!!!!!! (IMG:style_emoticons/default/happy11.gif)
|
|
|
|
| drewvw |
Sep 3 2007, 02:36 PM
Post
#5
|
|
new england car guy Group: Members Posts: 1,631 Joined: 24-February 06 From: Boston, MA Member No.: 5,630 Region Association: North East States |
Good stuff evil. Love the why pay when you can fabricate methodology.... |
|
|
|
| Rand |
Sep 3 2007, 03:07 PM
Post
#6
|
|
Cross Member Group: Members Posts: 7,409 Joined: 8-February 05 From: OR Member No.: 3,573 Region Association: None |
Nice job Mike!
How do you lift the lid? Get your fingertips in the gap and work it up, or are you going to put some kind of a loop/handle on the lid to lift by? |
|
|
|
| Dr Evil |
Sep 3 2007, 04:10 PM
Post
#7
|
|
Send me your transmission! Group: Members Posts: 23,002 Joined: 21-November 03 From: Loveland, OH 45140 Member No.: 1,372 Region Association: MidAtlantic Region |
The lid has the lip removed in the center to clear the CIS air boot so it is easy to open. I may attach the pins with fishing leaders and JB weld the washers in place. We will see, I want stand for tacky.
|
|
|
|
| SLITS |
Sep 3 2007, 05:07 PM
Post
#8
|
|
"This Utah shit is HARSH!" Group: Benefactors Posts: 13,602 Joined: 22-February 04 From: SoCal Mountains ... Member No.: 1,696 Region Association: None |
I used 1/4 X 20 Standoffs , but drilled another hole in the rubber support, left rubber in same positon. Found some "cone" shaped Ricer license plate screws that were 1/4 X 20.
Left torsion bars on engine lid until I changed it to a GT style lid (will eventually put torsions bars in GT lid). |
|
|
|
| okieflyr |
Sep 3 2007, 06:16 PM
Post
#9
|
|
9fauxteen Group: Members Posts: 816 Joined: 9-January 05 From: Phila PA Member No.: 3,426 Region Association: North East States |
Nice work Mike! This gets me thinkin! ( I dont' do that often)....
|
|
|
|
| JPB |
Sep 3 2007, 06:17 PM
Post
#10
|
|
The Crimson Rocket smiles in your general direction. Group: Members Posts: 2,927 Joined: 12-November 05 From: Tapmahamock, Va. Member No.: 5,107 |
Nice combo idea. Might save a few pounds and get rid of some useless and antiquated technology on that wornout trunk system (IMG:style_emoticons/default/beer.gif)
|
|
|
|
| lotus_65 |
Sep 3 2007, 06:19 PM
Post
#11
|
|
Senior Member Group: Members Posts: 1,608 Joined: 21-March 05 From: minneapolis, mn Member No.: 3,795 Region Association: Northstar Region |
clever.
thanks! |
|
|
|
| scotty |
Sep 3 2007, 08:56 PM
Post
#12
|
|
The Fun Never Stops Group: Members Posts: 773 Joined: 20-May 03 From: Portland. Oregon (SW) Member No.: 718 Region Association: None |
Sweet! (IMG:style_emoticons/default/pray.gif)
|
|
|
|
|
1 User(s) are reading this topic (1 Guests and 0 Anonymous Users)
0 Members:

|
Lo-Fi Version | Time is now: 31st May 2024 - 10:44 PM |
Invision Power Board
v9.1.4 © 2024 IPS, Inc.