|
|
|
Porsche, and the Porsche crest are registered trademarks of Dr. Ing. h.c. F. Porsche AG.
This site is not affiliated with Porsche in any way. Its only purpose is to provide an online forum for car enthusiasts. All other trademarks are property of their respective owners. |
|
|


| TargaToy |
 Feb 12 2011, 01:14 PM Feb 12 2011, 01:14 PM
Post
#1
|
|
-NONSOLIS RADIOS SEDIOUIS FULMINA MITTO-  Group: Members Posts: 713 Joined: 26-March 10 From: DelMarVa Peninsula Member No.: 11,509 Region Association: MidAtlantic Region |
For the driver's side, is the general practice to remove the P-brake handle resting post or relieve the Engman panel and leave the post in place?
Also, I've read a couple opinions about how much "spread" to introduce to the door way to allow for shrinkage after the tub cools down--and to compensate for sag in the body once it's back on its wheels. What's my best strategy? |
   |

 
|
  |
Replies(1 - 4)
| SirAndy |
Feb 12 2011, 01:34 PM
Post
#2
|
|
Resident German Group: Admin Posts: 42,257 Joined: 21-January 03 From: Oakland, Kalifornia Member No.: 179 Region Association: Northern California |
QUOTE(TargaToy @ Feb 12 2011, 11:14 AM)  What's my best strategy? Brace the chassis (and double check the gaps!) before you start welding and you should be fine. Move around when welding so you don't introduce too much heat in one spot. As for the handbrake post, i would modify the kit if needed to allow for the post to remain. (IMG:style_emoticons/default/shades.gif) |
|
|
|
| Elliot Cannon |
Feb 12 2011, 05:54 PM
Post
#3
|
|
914 Guru Group: Retired Members Posts: 8,487 Joined: 29-December 06 From: Paso Robles Ca. (Central coast) Member No.: 7,407 Region Association: None |
I took both doors off (damn things weigh a ton), made braces for the doors out of 1 inch square tubing and welded brackets to the tubing to bolt in the doorway so the body didn't flex. I also drilled all the holes out to 5/8 inch to make stronger welds. I think it's a great idea to do this. It is a very good kit, takes a little massaging to get it fit up right but you will be pleased with the results.
Cheers, Elliot Attached thumbnail(s) 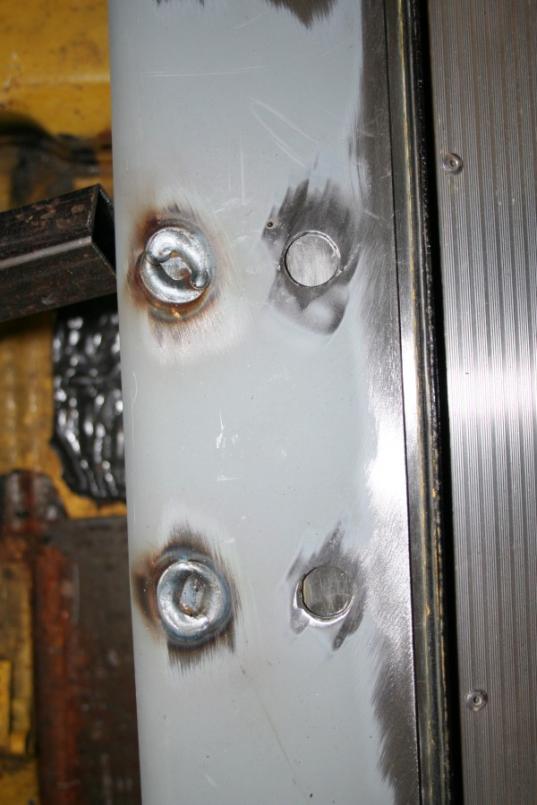
|
|
|
|
| TargaToy |
Feb 12 2011, 08:28 PM
Post
#4
|
|
-NONSOLIS RADIOS SEDIOUIS FULMINA MITTO- Group: Members Posts: 713 Joined: 26-March 10 From: DelMarVa Peninsula Member No.: 11,509 Region Association: MidAtlantic Region |
Thanks, guys.
What I have is braces I made from 1" square tubing with integral turnbuckles. They fasten at the upper shoulder belt mount and are tacked on top of the longs as far forward as i could get them. The reason for this was so I could adjust them with the doors in place. I kept the roof clipped in place and then removed the door so I could cut out the inner longs, jack post area, and wheelhouse. All that grunt work is done now with new steel in place and I finally made the plunge on getting the Engman kit. Trouble is, my braces are on top of the longs--interfering with where the stiffening kit will go. My plan (which I started today) is to grind the welds and pull out one brace at a time. I will then clamp the Engman side piece in place and weld it just in the area which would be under the foot of my chassis brace so I could re-tack the brace. Then, put the door back on to check gaps again, adjust the brace as necessary, remove door, and finish welding in the kit. I just wasn't sure if it was as easy as that or if I needed to actually put expansion tension on my braces as I have read in the past. And then the P-brake post also raised the question. I had never seen anyone else addressing it being in the way of fitment. I will say I was blown away by the design, quality, and finish of the kit's parts. Nice stuff to say the least. 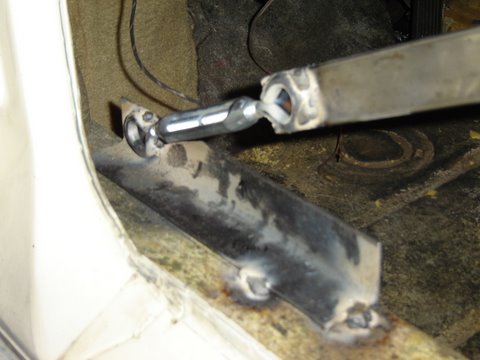 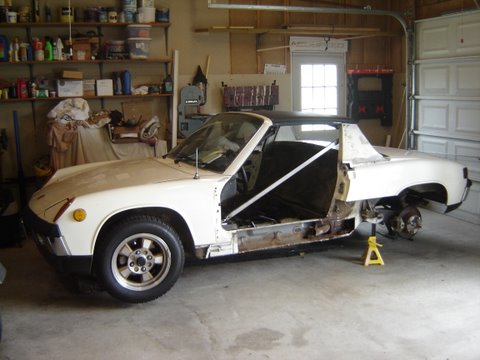 |
|
|
|
| McMark |
Feb 12 2011, 08:44 PM
Post
#5
|
|
914 Freak! Group: Retired Admin Posts: 20,180 Joined: 13-March 03 From: Grand Rapids, MI Member No.: 419 Region Association: None |
Cut the Engman piece to fit.
I have never braced a chassis while welding in the kit and I've never had a problem with shrinkage. ( (IMG:style_emoticons/default/naughty.gif) ) I usually set up a floor jack in the middle of the long and raise that side wheels off the ground slightly. Then just weld slowly. Oh and most importantly, measure the gap between the window hoop and the roll bar and keep measuring as you go. |
|
|
|
|
1 User(s) are reading this topic (1 Guests and 0 Anonymous Users)
0 Members:

|
Lo-Fi Version | Time is now: 11th July 2025 - 05:17 AM |
Invision Power Board
v9.1.4 © 2025 IPS, Inc.