|
|
|
Porsche, and the Porsche crest are registered trademarks of Dr. Ing. h.c. F. Porsche AG.
This site is not affiliated with Porsche in any way. Its only purpose is to provide an online forum for car enthusiasts. All other trademarks are property of their respective owners. |
|
|


| DNHunt |
 Jun 29 2004, 11:18 PM Jun 29 2004, 11:18 PM
Post
#1
|
|
914 Wizard? No way. I got too much to learn.  Group: Members Posts: 4,099 Joined: 21-April 03 From: Gig Harbor, WA Member No.: 598 |
Gerry and I took on the connecting rods tonight. Lotsa fun, kind of a big model. We measured the bearing to journal clearance and all were .0015" and rod side clearance was .012 to .014 on the 4 rods.
Here's Gerry torquing down the rod bolts on #2 Attached image(s) 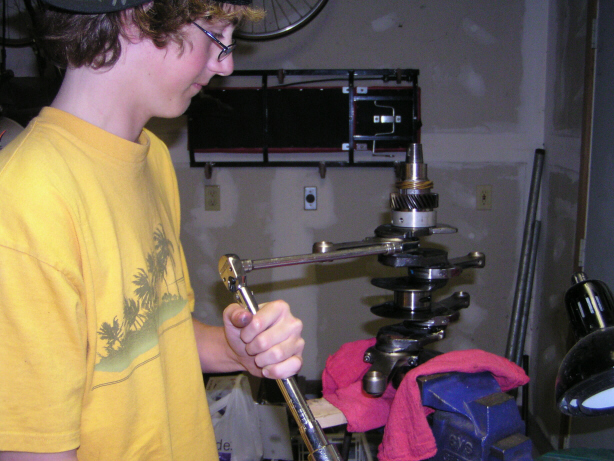
|
   |

 
|
  |
Replies(1 - 19)
| DNHunt |
Jun 29 2004, 11:26 PM
Post
#2
|
|
914 Wizard? No way. I got too much to learn. Group: Members Posts: 4,099 Joined: 21-April 03 From: Gig Harbor, WA Member No.: 598 |
Here's Plastigauge on the journal. Very fun. It's a thin thread of wax that spreads out when it gets compressed. You get the thickness of the space for oil between the parts by measuring the width of the thread after the parts were torqued.
Attached image(s) 
|
|
|
|
| Jake Raby |
Jun 30 2004, 01:01 AM
Post
#3
|
|
Engine Surgeon Group: Members Posts: 9,398 Joined: 31-August 03 From: Lost Member No.: 1,095 Region Association: South East States |
Looks like you are doing it right....
The plastigage and other tolerances were already measured for you though.... (IMG:style_emoticons/default/boldblue.gif) |
|
|
|
| ablose58 |
Jun 30 2004, 01:06 AM
Post
#4
|
|
rust never sleeps Group: Members Posts: 584 Joined: 6-December 03 From: port orchard,wa. Member No.: 1,422 |
NICE , Dave (IMG:style_emoticons/default/smilie_pokal.gif) Can't wait to see it all together (IMG:style_emoticons/default/cool_shades.gif)
|
|
|
|
| Rusty |
Jun 30 2004, 01:45 AM
Post
#5
|
|
914 Guru Group: Admin Posts: 7,974 Joined: 24-December 02 From: North Alabama Member No.: 6 Region Association: South East States |
Very meticulous... clean and check everything, even if the parts are fresh from the machine shop or right out of the pacakge.
You're going to have a great motor. (IMG:style_emoticons/default/smilie_pokal.gif) -Rusty (IMG:style_emoticons/default/smoke.gif) |
|
|
|
| DNHunt |
Jun 30 2004, 06:34 AM
Post
#6
|
|
914 Wizard? No way. I got too much to learn. Group: Members Posts: 4,099 Joined: 21-April 03 From: Gig Harbor, WA Member No.: 598 |
Jake
I was pretty sure you did all that but checking things is in my nature. One of the sayings we heard in dental school was "We can teach a monkey to do this is six months. You ought to learn as fast as a monkey so what are we going to do with the rest of the time? We'd say "Teach us to think like a dentist" That meant check everything including stuff that was just done. Our advisor was an old Marine. Anyway, Gerry got to do it and maybe he'll remember how careful we were. Dave |
|
|
|
| newdeal2 |
Jun 30 2004, 06:59 AM
Post
#7
|
|
Unregistered |
I see an extension on the tourque wrench...is that OK?
|
|
|
|
| DNHunt |
Jun 30 2004, 07:06 AM
Post
#8
|
|
914 Wizard? No way. I got too much to learn. Group: Members Posts: 4,099 Joined: 21-April 03 From: Gig Harbor, WA Member No.: 598 |
Yep, but not the way he's holding the wrench. I wondered if someone would notice. It's a posed picture.
Dave |
|
|
|
| newdeal2 |
Jun 30 2004, 07:14 AM
Post
#9
|
|
Unregistered |
I'm a stickler for detail and about to get into the same mode of operation on my first rebuild. I received the AA flat top pistons and for the money they look decent. The pistons are nicely done, wrist pins fit with ease and the cylinder walls have a nice fine cross hatch.
I will post pictures later. Peter 74 2 liter |
|
|
|
| Jake Raby |
Jun 30 2004, 07:34 AM
Post
#10
|
|
Engine Surgeon Group: Members Posts: 9,398 Joined: 31-August 03 From: Lost Member No.: 1,095 Region Association: South East States |
Double checking is good... ALWAYS.. I design and engineer the kits so none of the checking is needed from guys that don't have tools or plastigage.
With the kits I mock everything up, ensure its going to clear, set the tolerances and get it 100% ready to be cleaned and then assembled... Thats why the kit is not just a box of parts- the work takes hours and hours. Using an extension on the torque wrench is fine, adding an angle to the drive (like a crows foot) is not fine and requires a correction in the torque setting to be made. |
|
|
|
| DNHunt |
Jun 30 2004, 09:34 PM
Post
#11
|
|
914 Wizard? No way. I got too much to learn. Group: Members Posts: 4,099 Joined: 21-April 03 From: Gig Harbor, WA Member No.: 598 |
Tonight wasn't as fun as last night. I spent the evening cleaning some of the mating surfaces. For the record the kid disappeared fast when the word cleaning came up. So it was me, carb cleaner a plastic scaper and my thumbnail. Not sure what they used the lastime they put this together but Berryman's carb cleaner softened it pretty well.
I'm waiting on hardware now. It's probably a good thing cause it gives me time to clean then clean some more. Dave Attached image(s) 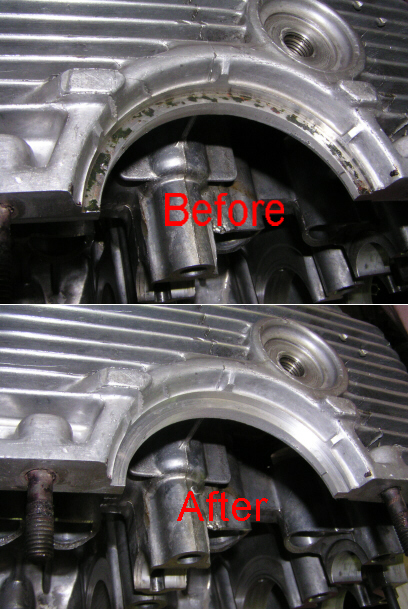
|
|
|
|
| DNHunt |
Jun 30 2004, 09:38 PM
Post
#12
|
|
914 Wizard? No way. I got too much to learn. Group: Members Posts: 4,099 Joined: 21-April 03 From: Gig Harbor, WA Member No.: 598 |
Taco plate area
Attached image(s) 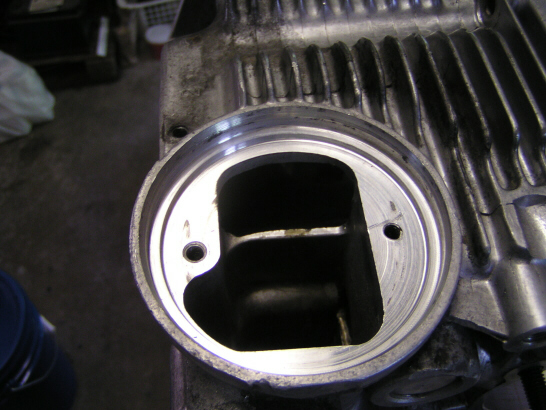
|
|
|
|
| Mueller |
Jun 30 2004, 09:44 PM
Post
#13
|
|
914 Freak! Group: Members Posts: 17,155 Joined: 4-January 03 From: Antioch, CA Member No.: 87 Region Association: None |
QUOTE Using an extension on the torque wrench is fine ...I think we spent 2 solid days debating the +/-'s of that statement in A&P school (IMG:style_emoticons/default/smile.gif)Me, same thought as you in the real world. look'n good Dave (IMG:style_emoticons/default/pray.gif) |
|
|
|
| Jake Raby |
Jun 30 2004, 09:48 PM
Post
#14
|
|
Engine Surgeon Group: Members Posts: 9,398 Joined: 31-August 03 From: Lost Member No.: 1,095 Region Association: South East States |
Even the "anal retentive" Naval Turbine instructors told us that rigid extensions were fine as long as torue was less than what would make the extension become torsional.....
The fun part is that most people don't know that torquing a bolt head instead of the nut requires 10% more torque to achieve the same tesnion on the fastener as tightening the nut. Hell, these engines are so forgiving that they can be assembled with apair of pliers and nothing else..... I have done it (IMG:style_emoticons/default/aktion035.gif) |
|
|
|
| brp914 |
Jun 30 2004, 10:08 PM
Post
#15
|
|
Unregistered |
I didn't see it mentioned here, so I will:
1. the 3 digit # stamped on the rod must be matched with the cap of the same #, and assembled on the crank with both #'s side by side. 2. All the rods should be mounted on the crank such that 3 digit #'s face up as viewed from above the engine. In other words, as if looking down on the engine installed in the car. |
|
|
|
| Jake Raby |
Jul 1 2004, 06:54 AM
Post
#16
|
|
Engine Surgeon Group: Members Posts: 9,398 Joined: 31-August 03 From: Lost Member No.: 1,095 Region Association: South East States |
Brp,
My rods have zero offset... They can be installed anyway that the installer see's fit. My rule of thumb is that "bearing tangs go toward the cam" and thats the way I install them... When I clearance the rods the numbers disappear in most cases. |
|
|
|
| DNHunt |
Jul 1 2004, 07:31 AM
Post
#17
|
|
914 Wizard? No way. I got too much to learn. Group: Members Posts: 4,099 Joined: 21-April 03 From: Gig Harbor, WA Member No.: 598 |
True no numbers but, there is plenty of red paint or marker on 1 side of the rod and blue on the other. They even marked the head of the rod bolts. I suppose you could mess up but, I think it would be difficult. The rods are also marked with an engraved # corresponding to the piston and wrist pin that they are balanced with. It's probably not quite idiot proof but darn near.
Dave |
|
|
|
| Jake Raby |
Jul 1 2004, 07:33 AM
Post
#18
|
|
Engine Surgeon Group: Members Posts: 9,398 Joined: 31-August 03 From: Lost Member No.: 1,095 Region Association: South East States |
There is no substiute for Indexed parts!
|
|
|
|
| Joe Ricard |
Jul 2 2004, 02:33 PM
Post
#19
|
|
CUMONIWANNARACEU Group: Members Posts: 6,811 Joined: 5-January 03 From: Gautier, MS Member No.: 92 |
How come # 2 connecting rod is the first one from the cam gear end of the engine? or furthest from the flywheel? Those silly germans (IMG:style_emoticons/default/wacko.gif)
|
|
|
|
| Jake Raby |
Jul 2 2004, 04:46 PM
Post
#20
|
|
Engine Surgeon Group: Members Posts: 9,398 Joined: 31-August 03 From: Lost Member No.: 1,095 Region Association: South East States |
It doesn't matter where they go... We number the parts for our working purposes during balancing. Since all rods are clearanced and balanced end to end there are no worries, there are no offsets on rods or pistons so in reality you could install any part in any hole and it would be fine. #2 is the furthest from the flywheel, and #4 is one notch back from it... #3 is closest to the flywheel and #1 is one notch forward of it.
The only part of dave's engine that would matter for index is the custom pistons, sincethey have valve reliefs and they must be indexed to align with the intake and exhaust valves... |
|
|
|
|
1 User(s) are reading this topic (1 Guests and 0 Anonymous Users)
0 Members:

|
Lo-Fi Version | Time is now: 16th July 2025 - 04:12 PM |
Invision Power Board
v9.1.4 © 2025 IPS, Inc.