|
|
|
Porsche, and the Porsche crest are registered trademarks of Dr. Ing. h.c. F. Porsche AG.
This site is not affiliated with Porsche in any way. Its only purpose is to provide an online forum for car enthusiasts. All other trademarks are property of their respective owners. |
|
|


| cary |
 Nov 28 2012, 09:49 PM Nov 28 2012, 09:49 PM
Post
#1
|
|
Advanced Member  Group: Members Posts: 3,900 Joined: 26-January 04 From: Sherwood Oregon Member No.: 1,608 Region Association: Pacific Northwest |
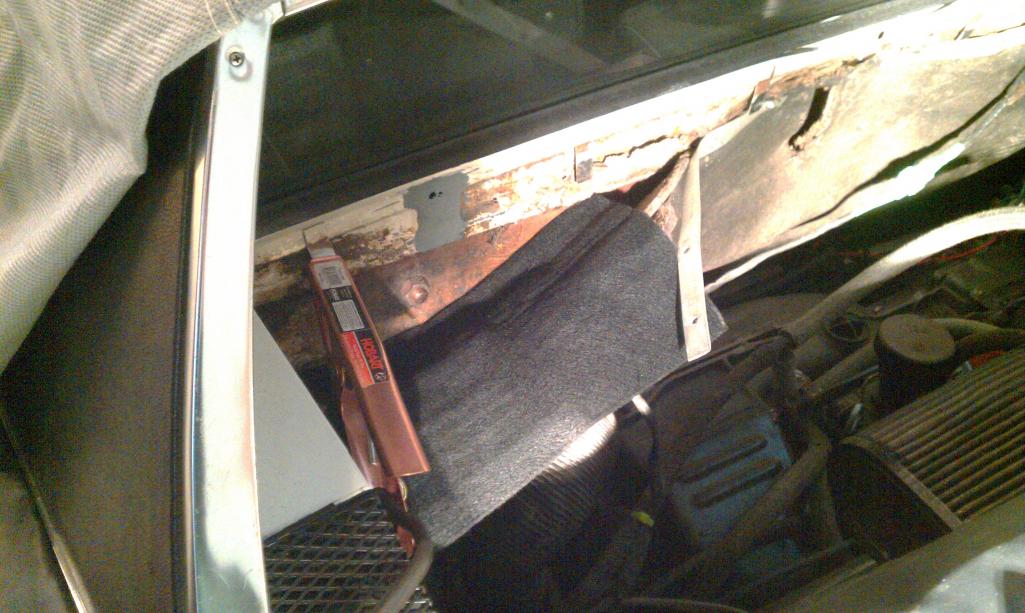
Taking a time out on my rustoration project.
Decided to tackle my problem with the engine lid hinge on my other car. Late last summer I found the hinge was coming away from the body. Hinge wasn't cracked. Spot welds were still intact. The damn firewall had cracked. Right above the top spot welds. (IMG:style_emoticons/default/sad.gif) (IMG:style_emoticons/default/sad.gif) 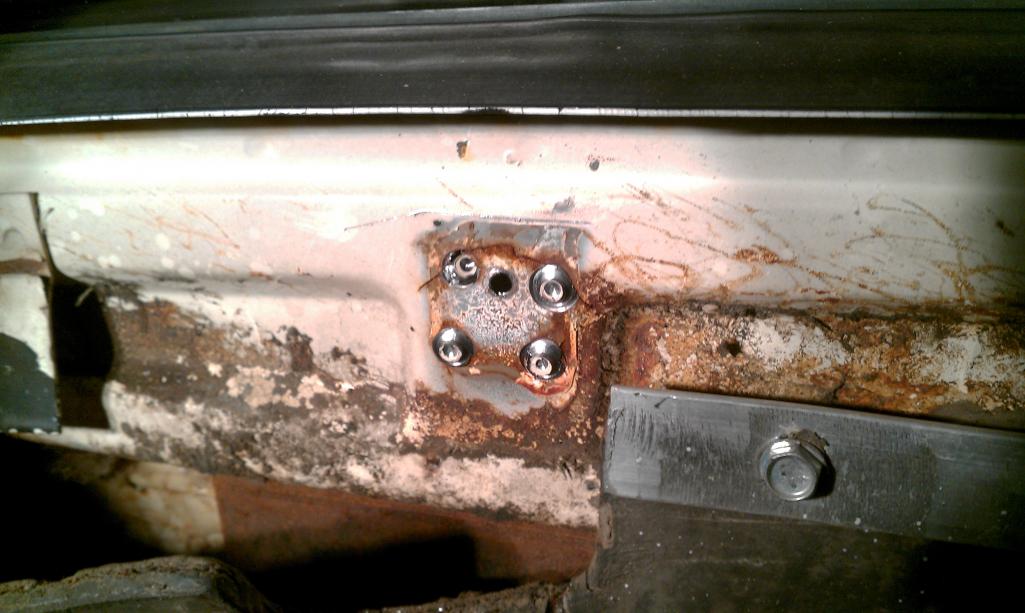 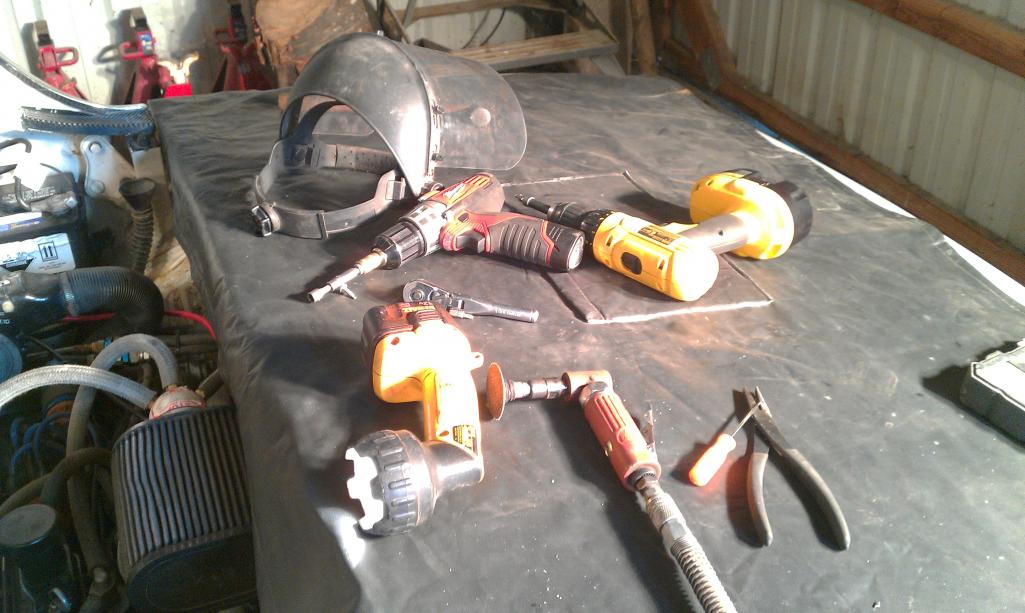 |
   |

 
|
  |
Replies(1 - 17)
| cary |
Nov 28 2012, 10:01 PM
Post
#2
|
|
Advanced Member Group: Members Posts: 3,900 Joined: 26-January 04 From: Sherwood Oregon Member No.: 1,608 Region Association: Pacific Northwest |
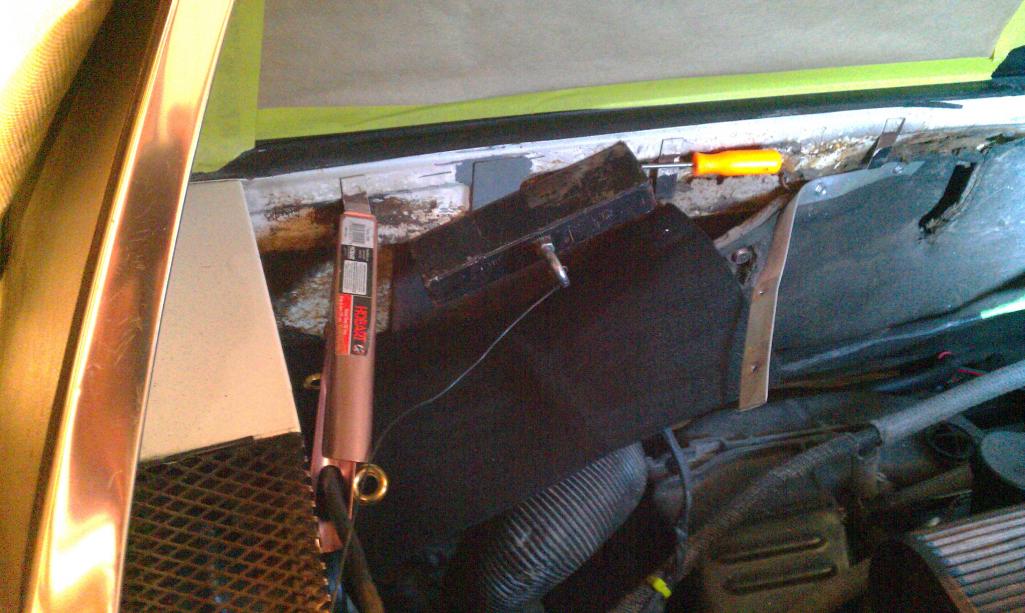
The extra hole was a feeble attempt at tightening it up last summer.
Tried a self taping screw. Didn't work Couldn't see the crack until the hinge was taken off. Man that is some thin metal ..................... Going to put in a patch. Left the shop with the weld thru primer drying on the work bench. I don't understand why the metal is so thin. I assume it has sometime to do with forming the ridges in the firewall. |
|
|
|
| partwerks |
Nov 28 2012, 11:09 PM
Post
#3
|
|
Senior Member Group: Members Posts: 1,593 Joined: 7-September 06 From: Grand Island, NE Member No.: 6,787 |
Ridges would probably be to stiffen up the sheet metal.
|
|
|
|
| aharder |
Nov 29 2012, 06:17 AM
Post
#4
|
|
Advanced Member Group: Members Posts: 4,422 Joined: 6-September 11 From: Dallas Texas Member No.: 13,524 Region Association: Southwest Region |
J West has the set up (IMG:style_emoticons/default/biggrin.gif)
http://www.jwesteng.com/porsche/914/ |
 |
|
| zambezi |
Nov 29 2012, 07:27 AM
Post
#5
|
|
Senior Member Group: Members Posts: 711 Joined: 14-April 08 From: Lafayette, LA Member No.: 8,920 Region Association: South East States |
I see a trunk hinge setup but i don't see anything for the engine lid from Jwest. Am I missing something?
|
|
|
|
| jimkelly |
Nov 29 2012, 07:40 AM
Post
#6
|
|
Delaware USA Group: Members Posts: 4,969 Joined: 5-August 04 From: Delaware, USA Member No.: 2,460 Region Association: MidAtlantic Region |
i don't think the engine lid brackets go bad very often.
jwest only has a trunk hinge repair kit. Attached image(s) 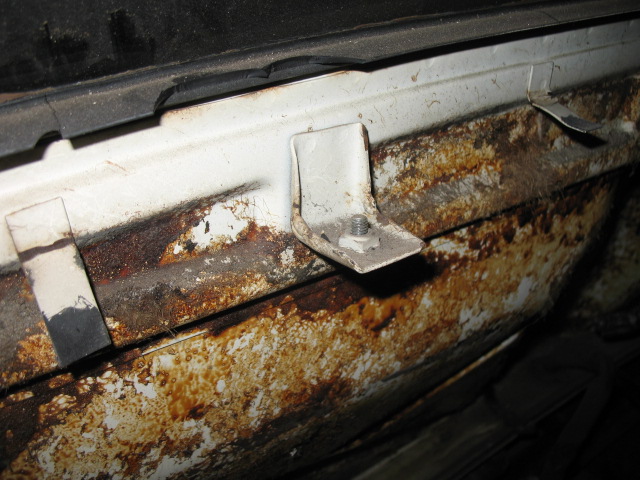
|
|
|
|
| cary |
Nov 29 2012, 09:56 AM
Post
#7
|
|
Advanced Member Group: Members Posts: 3,900 Joined: 26-January 04 From: Sherwood Oregon Member No.: 1,608 Region Association: Pacific Northwest |
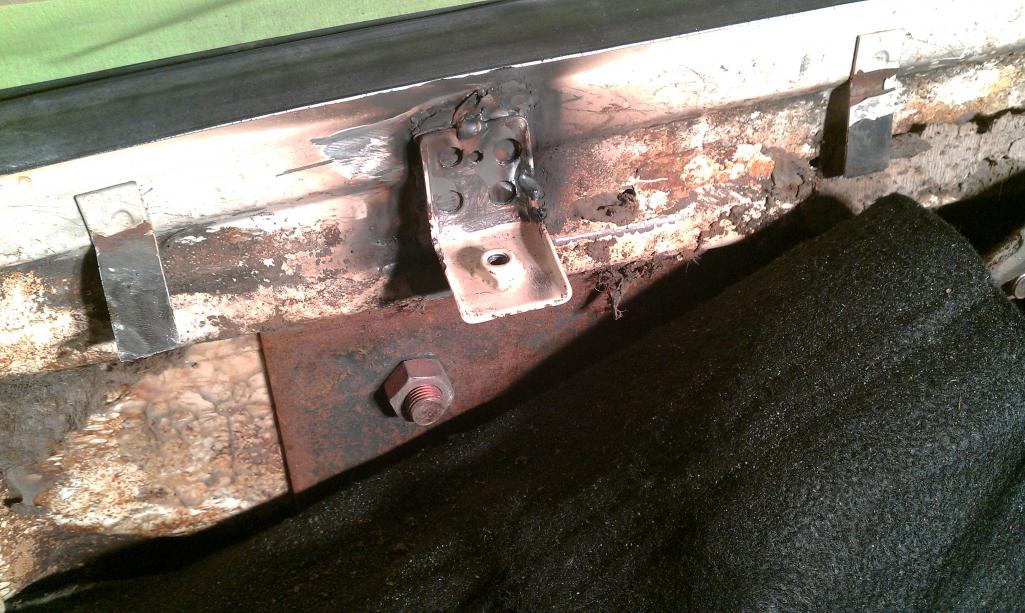
I think we'll attach the patch on top to tie it all together.
No way to access to butt weld. Might need to shorten the lid side of the hinge a smidgen to get the perfect fit. Or length the slot. |
|
|
|
| IronHillRestorations |
Nov 29 2012, 01:00 PM
Post
#8
|
|
I. I. R. C. Group: Members Posts: 6,732 Joined: 18-March 03 From: West TN Member No.: 439 Region Association: None |
If you overlay the metal it would push the engine lid rearward, and close the gap between the trunk lid, so slotting the holes is a good idea.
That's a tough place to fix. The two layers of metal and the bends in that top section make it a challenge. Have you tried a Blair Rotabroach? They make the best spot weld cutter. Not the cheapest spot weld cutter, but they last much longer and are faster and easier to use. http://www.blairequipment.com/Rotabroach_C...ta_cutters.html |
|
|
|
| SirAndy |
Nov 29 2012, 02:34 PM
Post
#9
|
|
Resident German Group: Admin Posts: 41,688 Joined: 21-January 03 From: Oakland, Kalifornia Member No.: 179 Region Association: Northern California |
QUOTE(jimkelly @ Nov 29 2012, 05:40 AM)  i don't think the engine lid brackets go bad very often. I dis-agree ... I see them fail all the time, they usually crack either at the 90 degree bend or the firewall itself cracks near the spot welds. This is *very* common! While you are in there, add a bit of metal right at the 90 degree bend on the hing to give it a bit more strength in that area. (IMG:style_emoticons/default/welder.gif) |
|
|
|
| mr914 |
Nov 29 2012, 04:15 PM
Post
#10
|
|
914 Hillbilly Group: Members Posts: 576 Joined: 11-January 03 From: Lincoln NE Member No.: 131 Region Association: None |
Where is it common to crack?
I'm having an alignment issue on my '71. Stiffened the hinge with a little weld bead this summer. Still the one side is 1/2" too far out |
|
|
|
| Jgilliam914 |
Nov 29 2012, 06:12 PM
Post
#11
|
|
914 Guru Group: Members Posts: 5,327 Joined: 30-July 12 From: Iowa / Florida Member No.: 14,732 Region Association: Upper MidWest |
QUOTE(SirAndy @ Nov 29 2012, 02:34 PM) QUOTE(jimkelly @ Nov 29 2012, 05:40 AM) i don't think the engine lid brackets go bad very often. I dis-agree ... I see them fail all the time, they usually crack either at the 90 degree bend or the firewall itself cracks near the spot welds. This is *very* common! While you are in there, add a bit of metal right at the 90 degree bend on the hing to give it a bit more strength in that area. (IMG:style_emoticons/default/welder.gif) (IMG:style_emoticons/default/agree.gif) I am in the process of welding 2 new hinges on mine. IMO one hinge becomes weak and puts the other in a bind then both are in the same shape.I thought welding up the weak areas in them but decided to replace them both. I bought them years ago and saw them when I moved this past summer and damned if I can find them now (IMG:style_emoticons/default/chair.gif) But I do have the area all prepped whenever I do find them |
|
|
|
| cary |
Nov 29 2012, 08:25 PM
Post
#12
|
|
Advanced Member Group: Members Posts: 3,900 Joined: 26-January 04 From: Sherwood Oregon Member No.: 1,608 Region Association: Pacific Northwest |
QUOTE(9146986 @ Nov 29 2012, 11:00 AM) Have you tried a Blair Rotabroach? They make the best spot weld cutter. No, but those where cut with my new set of Rotacut sheetmetal cutters. http://www.hougen.com/cutters/sheetmetal/Rotacut.html Trying to make smaller holes, broke the 1/4 inch one off in the first hole. (IMG:style_emoticons/default/sad.gif) (IMG:style_emoticons/default/sad.gif) I hate to say they work a bit better than the HF one. LOL. |
|
|
|
| cary |
Nov 29 2012, 08:36 PM
Post
#13
|
|
Advanced Member Group: Members Posts: 3,900 Joined: 26-January 04 From: Sherwood Oregon Member No.: 1,608 Region Association: Pacific Northwest |
Just thought I would add a little note.
Here's a product I use when welding or soldering brass pipe. Fire proof mat. 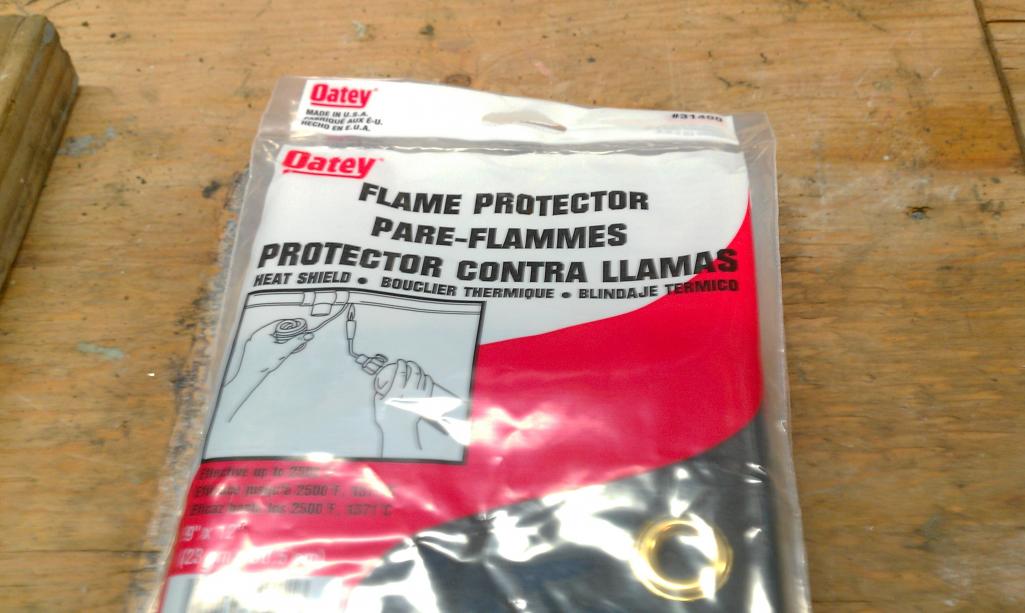 Bought this one at HD for $18 each. Kind of expensive. But better than a Car B Que. Bought two. 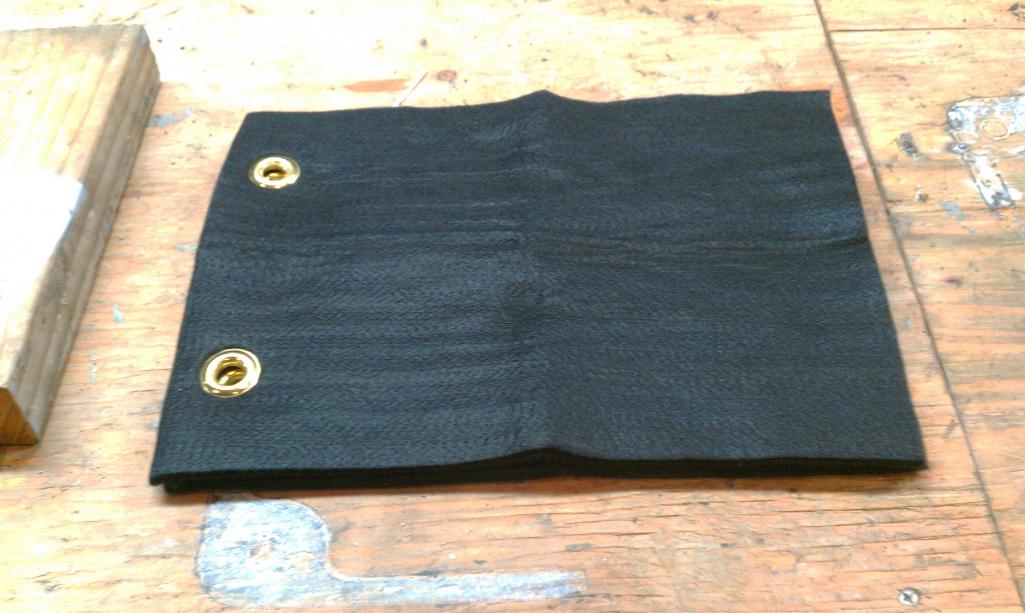 Didn't want to catch the engine sound deadening mat on fire. |
|
|
|
| cary |
Nov 29 2012, 08:40 PM
Post
#14
|
|
Advanced Member Group: Members Posts: 3,900 Joined: 26-January 04 From: Sherwood Oregon Member No.: 1,608 Region Association: Pacific Northwest |
Getting ready to weld on the patch.
 Prepped location with weld thru primer. |
|
|
|
| cary |
Nov 29 2012, 08:43 PM
Post
#15
|
|
Advanced Member Group: Members Posts: 3,900 Joined: 26-January 04 From: Sherwood Oregon Member No.: 1,608 Region Association: Pacific Northwest |
Aligning the patch and holding it with my Big Ass HF magnet.
 |
|
|
|
| cary |
Nov 29 2012, 08:45 PM
Post
#16
|
|
Advanced Member Group: Members Posts: 3,900 Joined: 26-January 04 From: Sherwood Oregon Member No.: 1,608 Region Association: Pacific Northwest |
Tacked in, ready to check alignment.
 |
|
|
|
| cary |
Nov 29 2012, 08:56 PM
Post
#17
|
|
Advanced Member Group: Members Posts: 3,900 Joined: 26-January 04 From: Sherwood Oregon Member No.: 1,608 Region Association: Pacific Northwest |
Here's it installed and covered with self etching primer.
Waiting for the primer to dry. Then I'll seam seal the top and sides. I'm pretty certain lack of weld thru primer was the culprit. Didn't grind the welds up tight. Might have issues with the other side in the future and may need to remove to get a CW alignment. Right now the lid is just a little lower than the two sides.  |
|
|
|
| cary |
Nov 29 2012, 09:02 PM
Post
#18
|
|
Advanced Member Group: Members Posts: 3,900 Joined: 26-January 04 From: Sherwood Oregon Member No.: 1,608 Region Association: Pacific Northwest |
But bad news. I found a little rust under the rear seal.
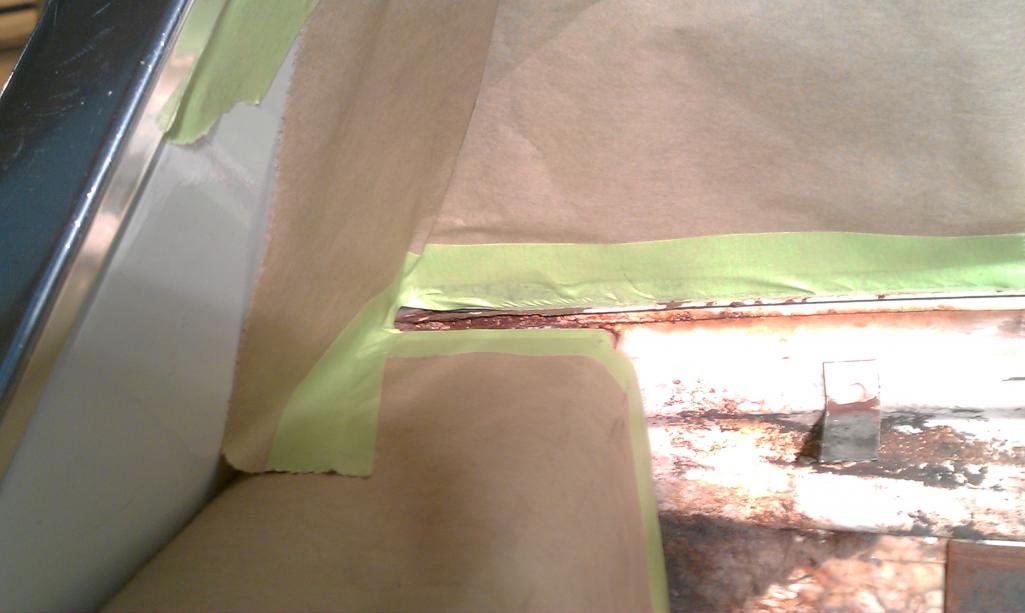 So letting a couple applications of Ospho to dry. Then I'll jam some Rustoleum into the location. After that, a trip to 914Rubber's website to replace the seal. |
|
|
|
|
1 User(s) are reading this topic (1 Guests and 0 Anonymous Users)
0 Members:

|
Lo-Fi Version | Time is now: 16th June 2024 - 01:43 PM |
Invision Power Board
v9.1.4 © 2024 IPS, Inc.