|
|
|
Porsche, and the Porsche crest are registered trademarks of Dr. Ing. h.c. F. Porsche AG.
This site is not affiliated with Porsche in any way. Its only purpose is to provide an online forum for car enthusiasts. All other trademarks are property of their respective owners. |
|
|


| dangrouche |
 Jun 7 2014, 03:34 PM Jun 7 2014, 03:34 PM
Post
#1
|
|
dangrouche  Group: Members Posts: 550 Joined: 1-May 04 From: San Francisco Bay Area Member No.: 2,012 Region Association: None |
I am going to replace the butyl on the rear glass; does the plastic rectangular surrounds (where the targa top mates into the rectangular hole) need to be removed prior to anything else, or does the targa trim come off with the surrounds attached?
Attached thumbnail(s) 
|
   |

 
|
  |
Replies(1 - 13)
| bdstone914 |
Jun 7 2014, 05:30 PM
Post
#2
|
|
bdstone914 Group: Members Posts: 4,537 Joined: 8-November 03 From: Riverside CA Member No.: 1,319 |
This come out with the pad. Removing and replacing the pad is a PITA.
Search for a thread on replacing the rear glass. For may not have to remove the top pad. |
|
|
|
| dangrouche |
Jun 7 2014, 05:39 PM
Post
#3
|
|
dangrouche Group: Members Posts: 550 Joined: 1-May 04 From: San Francisco Bay Area Member No.: 2,012 Region Association: None |
QUOTE(bdstone914 @ Jun 7 2014, 04:30 PM)  This come out with the pad. Removing and replacing the pad is a PITA. Search for a thread on replacing the rear glass. For may not have to remove the top pad. thanks Bruce |
|
|
|
| Mblizzard |
Jun 7 2014, 05:57 PM
Post
#4
|
|
Advanced Member Group: Members Posts: 3,033 Joined: 28-January 13 From: Knoxville Tn Member No.: 15,438 Region Association: South East States |
Pretty sure it has to come out to remove the glass. At least it seemed that way when I did mine.
|
|
|
|
| orthobiz |
Jun 7 2014, 06:39 PM
Post
#5
|
|
Senior Member Group: Members Posts: 1,754 Joined: 8-January 07 From: Cadillac, Michigan Member No.: 7,438 Region Association: Upper MidWest |
Top pad removal is really hard. Some of the screws may already be in crooked. Patience is the key. Don't forget the screws under the pad, in front of the window. And getting the latch surrounds off is almost impossible. Like building the pyramids, I think there is some kinda secret I don't know about that makes the job a piece of cake.
Paul |
|
|
|
| dangrouche |
Jun 7 2014, 07:48 PM
Post
#6
|
|
dangrouche Group: Members Posts: 550 Joined: 1-May 04 From: San Francisco Bay Area Member No.: 2,012 Region Association: None |
Paul, you are right, I think I have the two secrets here; probe around with a light and a scribe to find the head of the Phillips, once you know and see the phillip, unscrew it until it gets pretty loose, then use the magnet probe to retreive the screw. The other secret is for the targa latch. once all the screws of targa header are removed, there is enough play to pull the header to and fro, to get at the latch. Unhook the coil spring and use the Harbor Freight tool on a 10mm socket. Use a 7/16" wrench to turn the 10mm nut to break the tension. Once the 10mm gets loose, my two fingers rotated the socket from beneath the header and the 10mm screw comes out pretty easily. After Bruce gave me the info about the targa header being one piece, I removed my header in about one hour with relative ease. My underside screws were absent which made the removal pretty quick. I also used a small mirror to look into the holes where there were some screws.
Attached thumbnail(s) 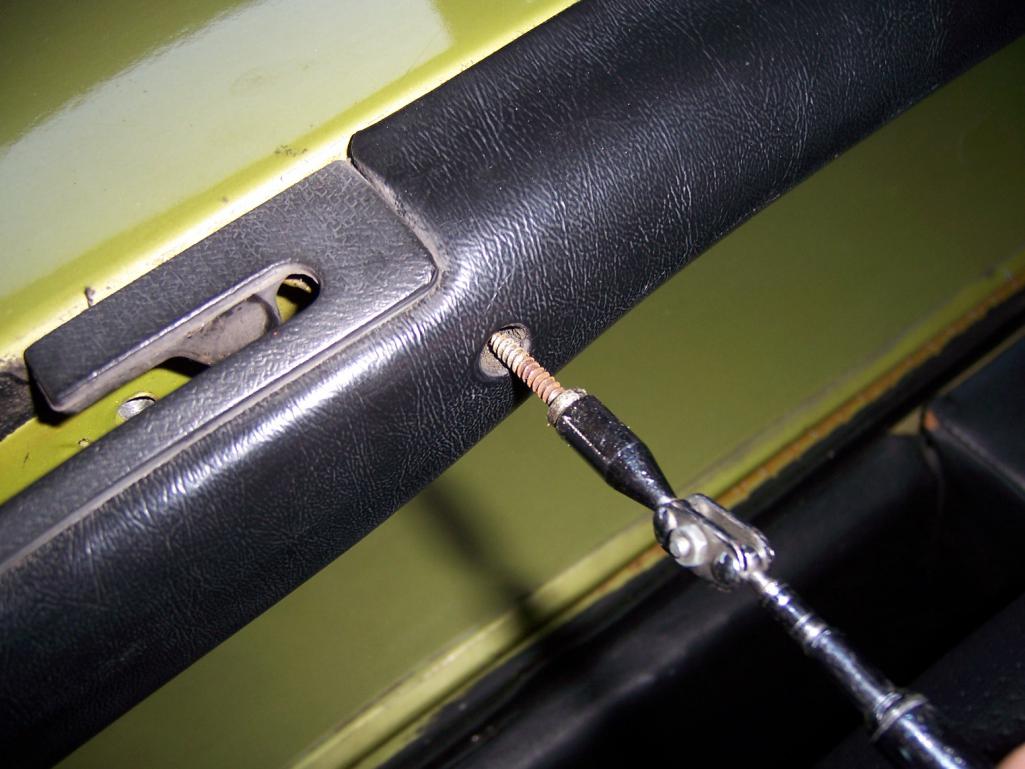 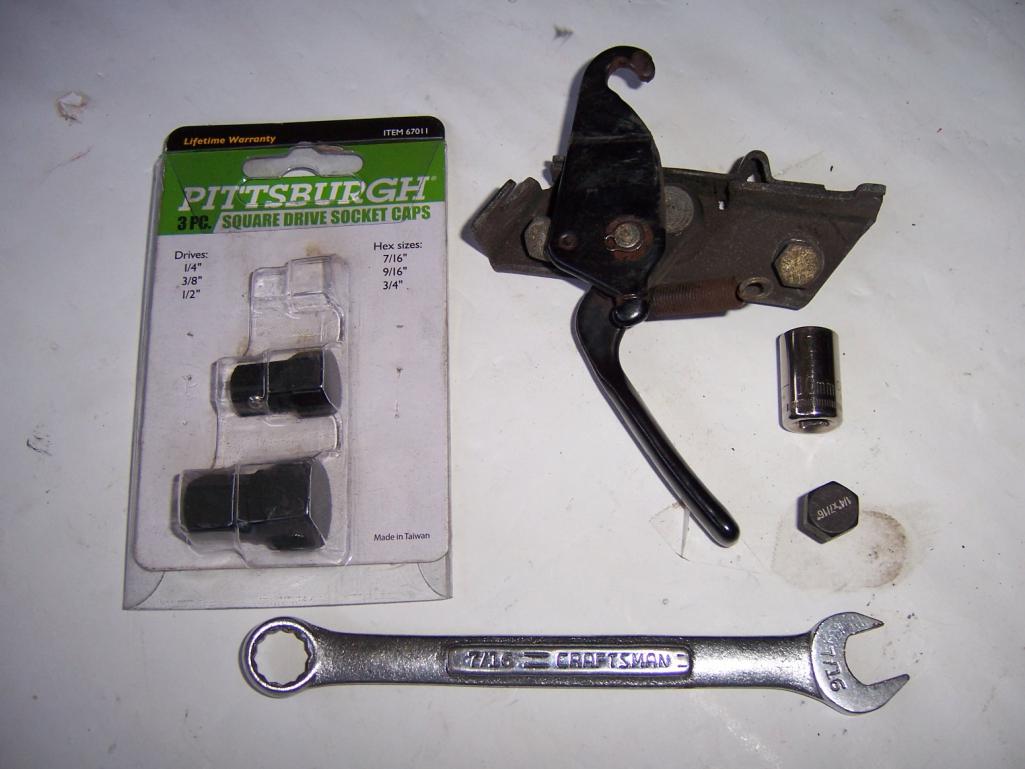
|
|
|
|
| bdstone914 |
Jun 7 2014, 07:57 PM
Post
#7
|
|
bdstone914 Group: Members Posts: 4,537 Joined: 8-November 03 From: Riverside CA Member No.: 1,319 |
You do not have to remove the targa latches to remove the pad. Once all the screws are out wiggle the pad loose and pul out as much as you can. Position the hook of the latch in the slot of the cover and you can remove the pad.
It is even more fun to install. |
|
|
|
| dangrouche |
Jun 7 2014, 08:32 PM
Post
#8
|
|
dangrouche Group: Members Posts: 550 Joined: 1-May 04 From: San Francisco Bay Area Member No.: 2,012 Region Association: None |
QUOTE(bdstone914 @ Jun 7 2014, 06:57 PM) You do not have to remove the targa latches to remove the pad. Once all the screws are out wiggle the pad loose and pul out as much as you can. Position the hook of the latch in the slot of the cover and you can remove the pad. It is even more fun to install. for some reason, as you stated, I was unable to wiggle out the targa pad with the latches in place. this is the reason I had to resort to removing the latch entirely. fortunately I have smaller fingers and I am able to get into those tight spaces. thanks |
|
|
|
| jmalone |
Jun 7 2014, 09:57 PM
Post
#9
|
|
Member Group: Members Posts: 119 Joined: 3-July 09 From: reno,NV Member No.: 10,529 Region Association: Northern California |
QUOTE(bdstone914 @ Jun 7 2014, 06:57 PM) You do not have to remove the targa latches to remove the pad. Once all the screws are out wiggle the pad loose and pul out as much as you can. Position the hook of the latch in the slot of the cover and you can remove the pad. It is even more fun to install. I agree with Bruce. I was able to remove the pad without removing the latches. Lucky cause I have sausage fingers! (IMG:style_emoticons/default/beerchug.gif) |
|
|
|
| pete000 |
Jun 7 2014, 11:33 PM
Post
#10
|
|
Senior Member Group: Members Posts: 1,885 Joined: 23-August 10 From: Bradenton Florida Member No.: 12,094 Region Association: South East States |
Just went through this on my car. Replaced the rear window. The pad is removed first. Then the latches. Near impossible to do the latches first. The pad is held in place with a bunch of sheet metal screws.
|
|
|
|
| Chris Pincetich |
Jun 8 2014, 11:55 AM
Post
#11
|
|
B-) Group: Members Posts: 2,082 Joined: 3-October 05 From: Point Reyes Station, CA Member No.: 4,907 Region Association: Northern California |
Don't loose patience! (IMG:style_emoticons/default/beerchug.gif)
Once I helped prep a 914 race car, and the owner was workin quick. After 15 minutes fussing w this pad removal, we lost patience and ripped it out. (IMG:style_emoticons/default/dry.gif) (IMG:style_emoticons/default/happy11.gif) Removed properly (I did it w latches in place, jut thread the needle) it takes time (IMG:style_emoticons/default/biggrin.gif) |
|
|
|
| PanelBilly |
Jun 8 2014, 01:59 PM
Post
#12
|
|
914 Guru Group: Members Posts: 5,817 Joined: 23-July 06 From: Kent, Wa Member No.: 6,488 Region Association: Pacific Northwest |
The first time I removed mine, I had to drill out most of the screws. It went back together with stainless square head screws.
|
|
|
|
| Dave_Darling |
Jun 8 2014, 10:33 PM
Post
#13
|
|
914 Idiot Group: Members Posts: 14,991 Joined: 9-January 03 From: Silicon Valley / Kailua-Kona Member No.: 121 Region Association: Northern California |
I seem to recall a couple of rather small screws in the area of the latch? They were gone on my car, but I've seen them on a couple of other cars, like Jenny's old car when we stripped it.
--DD |
|
|
|
| ruby914 |
Jun 9 2014, 09:54 AM
Post
#14
|
|
Senior Member Group: Members Posts: 720 Joined: 26-April 09 From: Hawthorne, Ca Member No.: 10,305 Region Association: None |
QUOTE(Dave_Darling @ Jun 8 2014, 09:33 PM) I seem to recall a couple of rather small screws in the area of the latch? They were gone on my car, but I've seen them on a couple of other cars, like Jenny's old car when we stripped it. --DD I recall those screws. I wonder what happened to them (IMG:style_emoticons/default/confused24.gif) never saw them again.(IMG:style_emoticons/default/biggrin.gif) I think, the may have held the latch covers in place. I always take off the pillar pads and unscrew one of the latches. |
|
|
|
|
1 User(s) are reading this topic (1 Guests and 0 Anonymous Users)
0 Members:

|
Lo-Fi Version | Time is now: 9th June 2024 - 12:35 PM |
Invision Power Board
v9.1.4 © 2024 IPS, Inc.