|
|
|
Porsche, and the Porsche crest are registered trademarks of Dr. Ing. h.c. F. Porsche AG.
This site is not affiliated with Porsche in any way. Its only purpose is to provide an online forum for car enthusiasts. All other trademarks are property of their respective owners. |
|
|


| tdgray |
 Aug 10 2005, 09:51 AM Aug 10 2005, 09:51 AM
Post
#1
|
|
Thank God Nemo is not here to see this  Group: Members Posts: 9,706 Joined: 5-August 03 From: Akron, OH Member No.: 984 Region Association: None |
So I figure I better start contributing with some real content rather than stupid jokes and snide remarks. So here goes.
I purchased my 1973 1.7L for $300.00. Damn good thing to because there was about 8 thousand times the rust that I could see (IMG:http://www.914world.com/bbs2/html/emoticons/dry.gif) (duh!) Before I tore the car apart I got the engine running. PO said fuel pump was bad. Turned out the relay was bad and in his attempts to fix the problem he reversed the fuel lines. Put a new relay fired right up...ran like crap but still it ran. (IMG:http://www.914world.com/bbs2/html/emoticons/biggrin.gif) After stripping all interior, electrical and accesories from the car the real work started. Nothing more than expected just a long list. Some of the problem area identified. 1) Rust in longs 2) Rear trunk and valance panel totally rusted out 3) Floorboards very rusted out - quite a few holes 4) Sill plates and door jams very questionable 5) Typical battery tray and engine shelf damage 6) Front trunk rusted around AC unit 7) Sail panels - bad PO repair with Bondo Just one note for the rest of this, I am not CptTripps... these pic's are over a years time span. The reason I am finally posting all this is to motivate me to get 'er done. It may not be realistic but I am still shooting for the FFC this year. I really have to get moving NOW! |
   |

 
|
  |
Replies(1 - 19)
| tdgray |
Aug 10 2005, 09:52 AM
Post
#2
|
|
Thank God Nemo is not here to see this Group: Members Posts: 9,706 Joined: 5-August 03 From: Akron, OH Member No.: 984 Region Association: None |
First task at hand was to cut the trunk and valance panel out. Lid was scrap. Got a few used pieces for replacement.
Attached image(s) 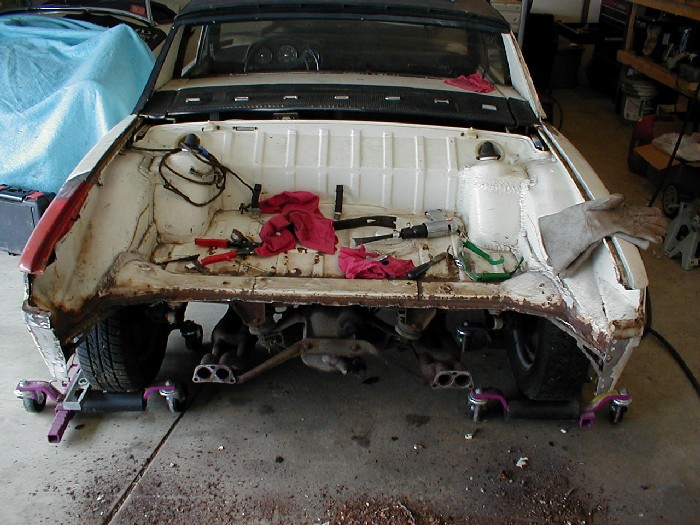
|
|
|
|
| tdgray |
Aug 10 2005, 09:53 AM
Post
#3
|
|
Thank God Nemo is not here to see this Group: Members Posts: 9,706 Joined: 5-August 03 From: Akron, OH Member No.: 984 Region Association: None |
All buttoned up... still needs finishing and rear trunk pan.
Attached image(s) 
|
|
|
|
| CptTripps |
Aug 10 2005, 09:53 AM
Post
#4
|
|
:: Punch and Pie :: Group: Members Posts: 3,585 Joined: 26-December 04 From: Tuscaloosa, AL and Akron, OH Member No.: 3,342 Region Association: Upper MidWest |
Man...you really have your work cut out for you...(No pun intended)
We'll motivate you...just you wait. |
|
|
|
| tdgray |
Aug 10 2005, 09:54 AM
Post
#5
|
|
Thank God Nemo is not here to see this Group: Members Posts: 9,706 Joined: 5-August 03 From: Akron, OH Member No.: 984 Region Association: None |
Next Task...
Drop the engine. Easy job took my brother and I about three hours. Attached image(s) 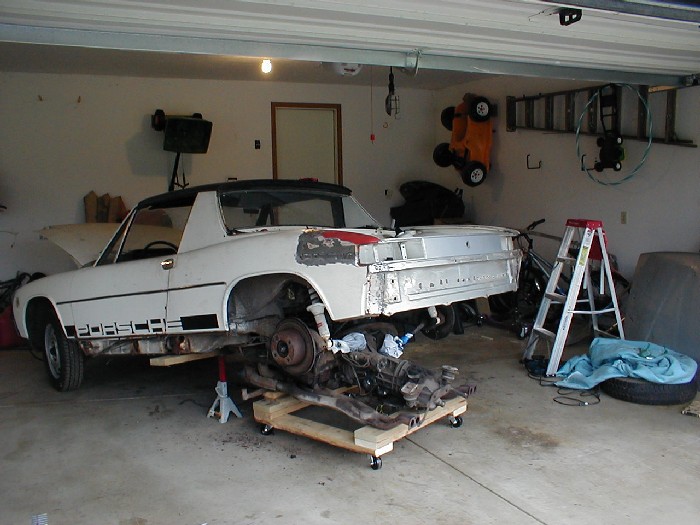
|
|
|
|
| tdgray |
Aug 10 2005, 09:55 AM
Post
#6
|
|
Thank God Nemo is not here to see this Group: Members Posts: 9,706 Joined: 5-August 03 From: Akron, OH Member No.: 984 Region Association: None |
Damn that engine looks big when it is not in the car
Attached image(s) 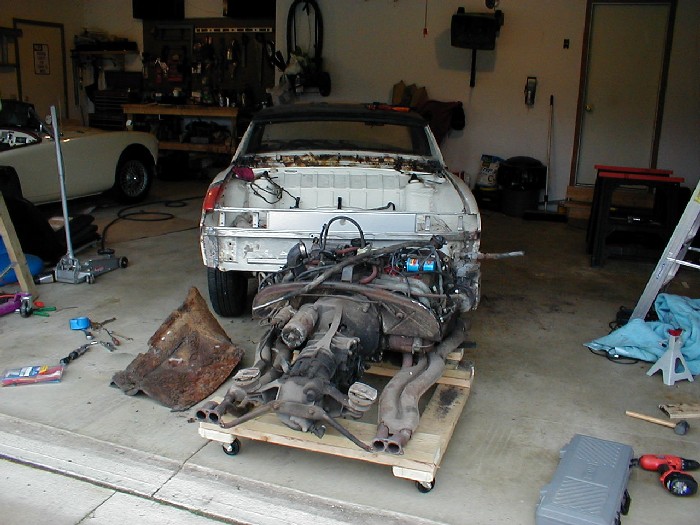
|
|
|
|
| tdgray |
Aug 10 2005, 09:55 AM
Post
#7
|
|
Thank God Nemo is not here to see this Group: Members Posts: 9,706 Joined: 5-August 03 From: Akron, OH Member No.: 984 Region Association: None |
Hell Hole after engine removal (IMG:http://www.914world.com/bbs2/html/emoticons/ohmy.gif)
Attached image(s) 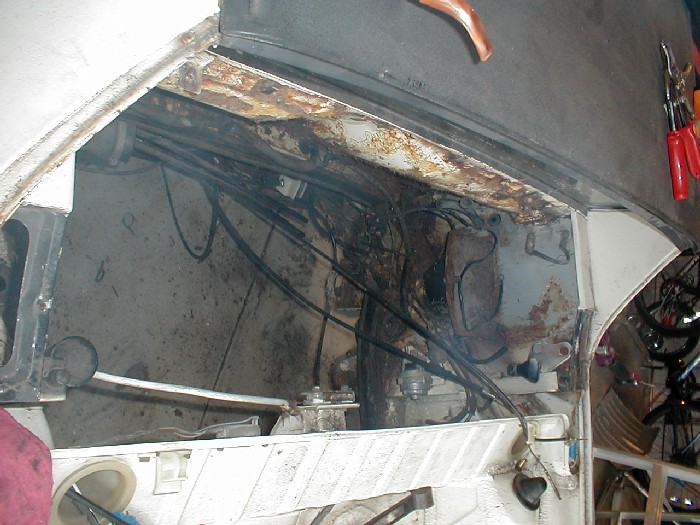
|
|
|
|
| tdgray |
Aug 10 2005, 09:56 AM
Post
#8
|
|
Thank God Nemo is not here to see this Group: Members Posts: 9,706 Joined: 5-August 03 From: Akron, OH Member No.: 984 Region Association: None |
Big Problem when removing the engine... had to cut the engine bar. YIKES (IMG:http://www.914world.com/bbs2/html/emoticons/huh.gif)
Attached image(s) 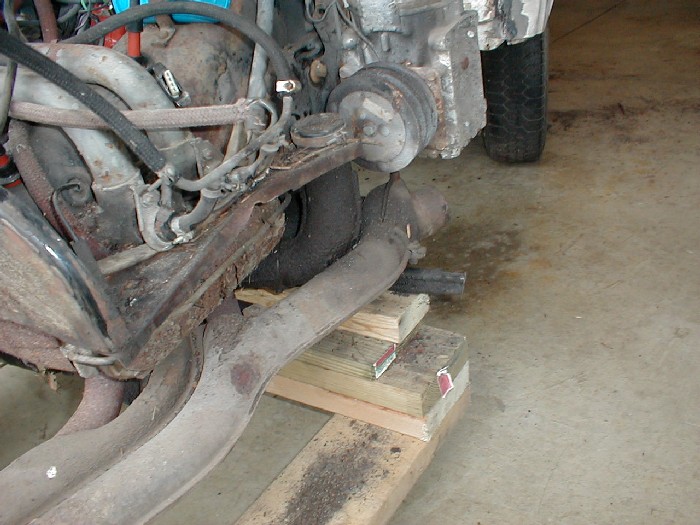
|
|
|
|
| tdgray |
Aug 10 2005, 09:57 AM
Post
#9
|
|
Thank God Nemo is not here to see this Group: Members Posts: 9,706 Joined: 5-August 03 From: Akron, OH Member No.: 984 Region Association: None |
Next Task.
Longs are solid but have some major patches of rust. Cut it out and patch new metal in. Oh the carnage Attached image(s) 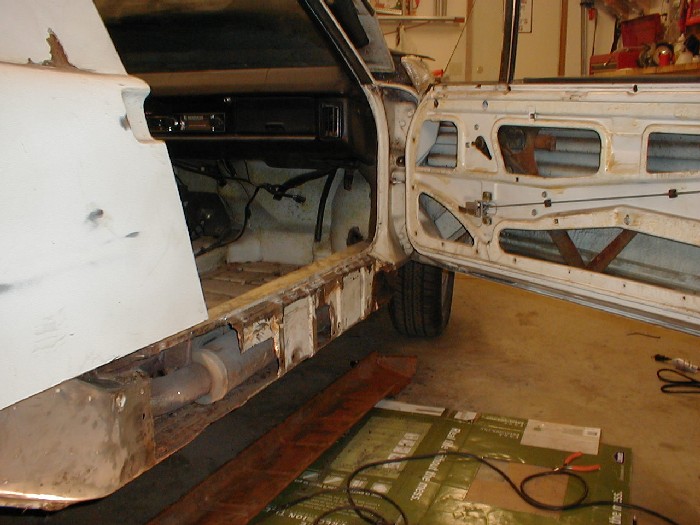
|
|
|
|
| tdgray |
Aug 10 2005, 09:59 AM
Post
#10
|
|
Thank God Nemo is not here to see this Group: Members Posts: 9,706 Joined: 5-August 03 From: Akron, OH Member No.: 984 Region Association: None |
Thanks to Dr. Evil for the clam shells... Just what the Dr ordered. (IMG:http://www.914world.com/bbs2/html/emoticons/biggrin.gif)
A little test fitting Attached image(s) 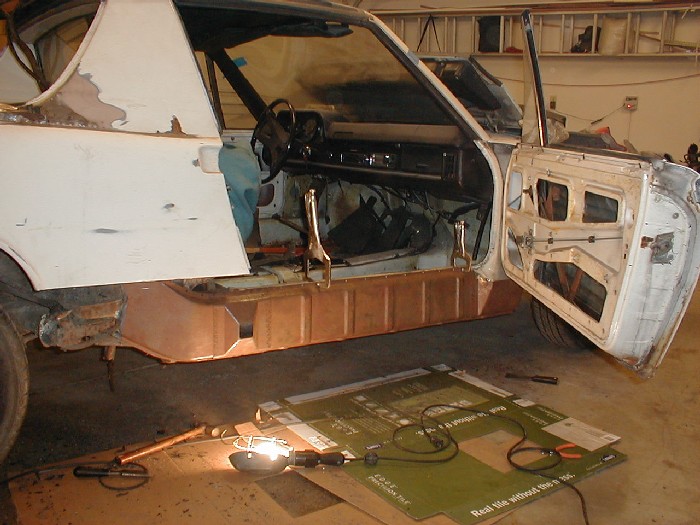
|
|
|
|
| tdgray |
Aug 10 2005, 10:00 AM
Post
#11
|
|
Thank God Nemo is not here to see this Group: Members Posts: 9,706 Joined: 5-August 03 From: Akron, OH Member No.: 984 Region Association: None |
My buddy Dave (acting like a dork). Leveling the car before welding the clams on.
Attached image(s) 
|
|
|
|
| tdgray |
Aug 10 2005, 10:01 AM
Post
#12
|
|
Thank God Nemo is not here to see this Group: Members Posts: 9,706 Joined: 5-August 03 From: Akron, OH Member No.: 984 Region Association: None |
Finished Welding... still a little clean up to do but that will come soon.
Attached image(s) 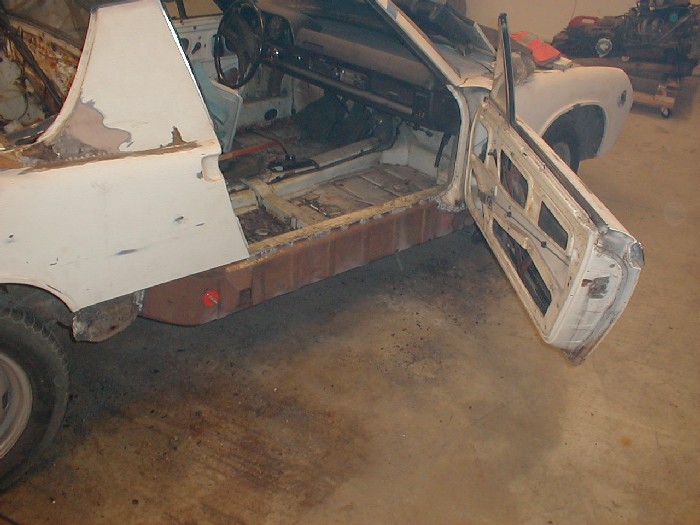
|
|
|
|
| tdgray |
Aug 10 2005, 10:02 AM
Post
#13
|
|
Thank God Nemo is not here to see this Group: Members Posts: 9,706 Joined: 5-August 03 From: Akron, OH Member No.: 984 Region Association: None |
Other side... rust was not as bad. Less patching to do Clam ON
Attached image(s) 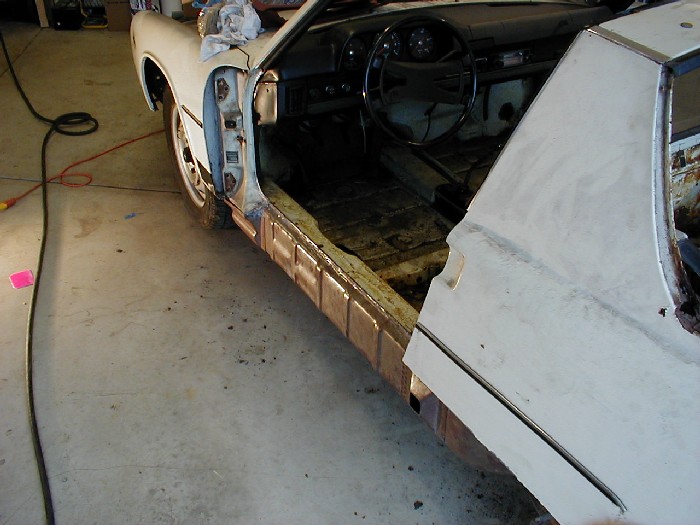
|
|
|
|
| tdgray |
Aug 10 2005, 10:04 AM
Post
#14
|
|
Thank God Nemo is not here to see this Group: Members Posts: 9,706 Joined: 5-August 03 From: Akron, OH Member No.: 984 Region Association: None |
Stripped Down. Doors and targa off now that I trust the frame rigidity. Ready for sills and door jambs.
Attached image(s) 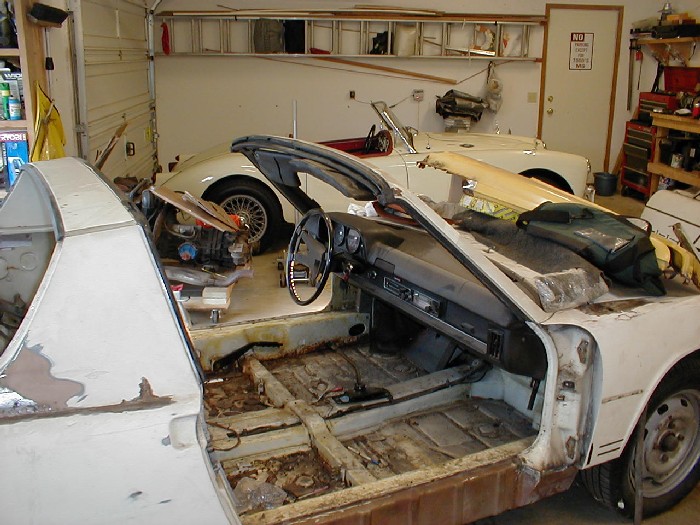
|
|
|
|
| tdgray |
Aug 10 2005, 10:05 AM
Post
#15
|
|
Thank God Nemo is not here to see this Group: Members Posts: 9,706 Joined: 5-August 03 From: Akron, OH Member No.: 984 Region Association: None |
Door jamb carnage. Also firewall damage along with inner fender damage.
Attached thumbnail(s) 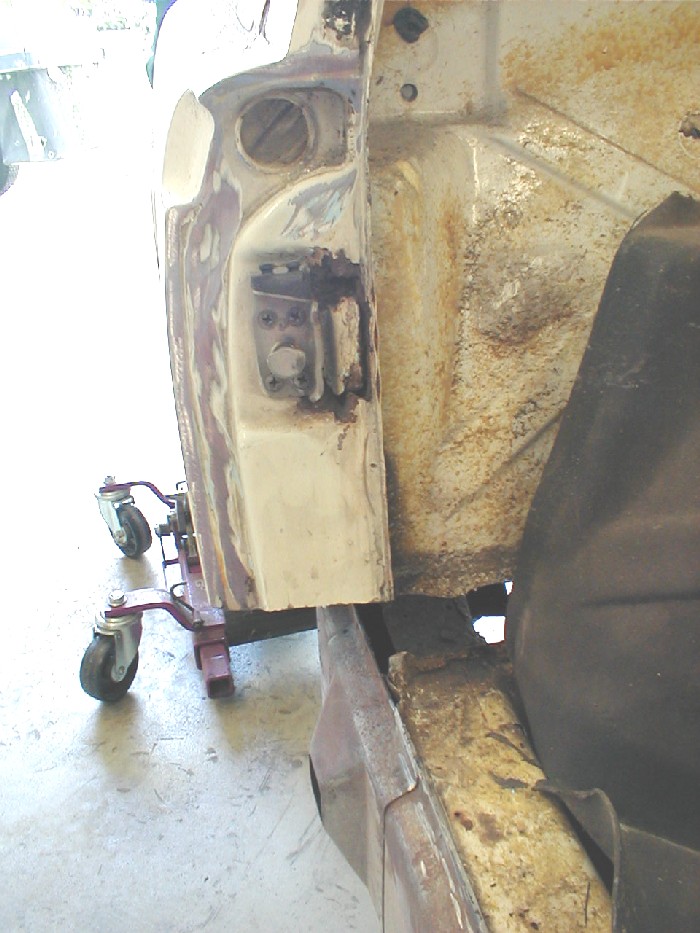
|
|
|
|
| tdgray |
Aug 10 2005, 10:07 AM
Post
#16
|
|
Thank God Nemo is not here to see this Group: Members Posts: 9,706 Joined: 5-August 03 From: Akron, OH Member No.: 984 Region Association: None |
Cut the door jamb out. Normally you would pull the fender. I decided not to mess with aligning the fender etc. My plan was to grind out the old and smooth in the new.
Attached image(s) 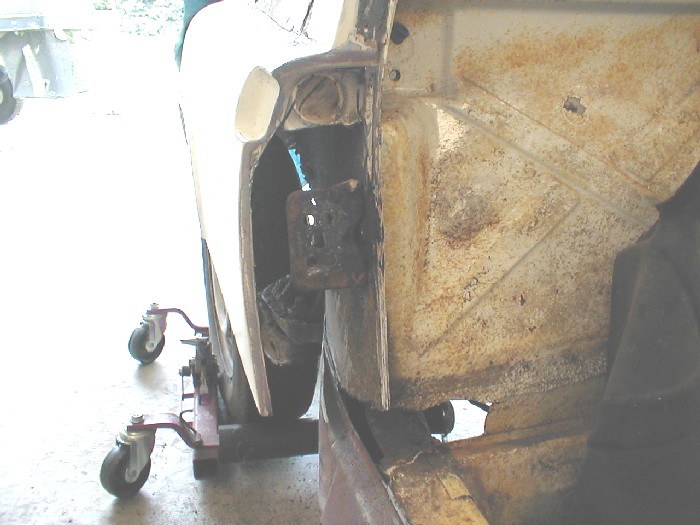
|
|
|
|
| tdgray |
Aug 10 2005, 10:08 AM
Post
#17
|
|
Thank God Nemo is not here to see this Group: Members Posts: 9,706 Joined: 5-August 03 From: Akron, OH Member No.: 984 Region Association: None |
Firewall and inner fender repairs... no making fun of my welds please (IMG:http://www.914world.com/bbs2/html/emoticons/dry.gif)
Attached thumbnail(s) 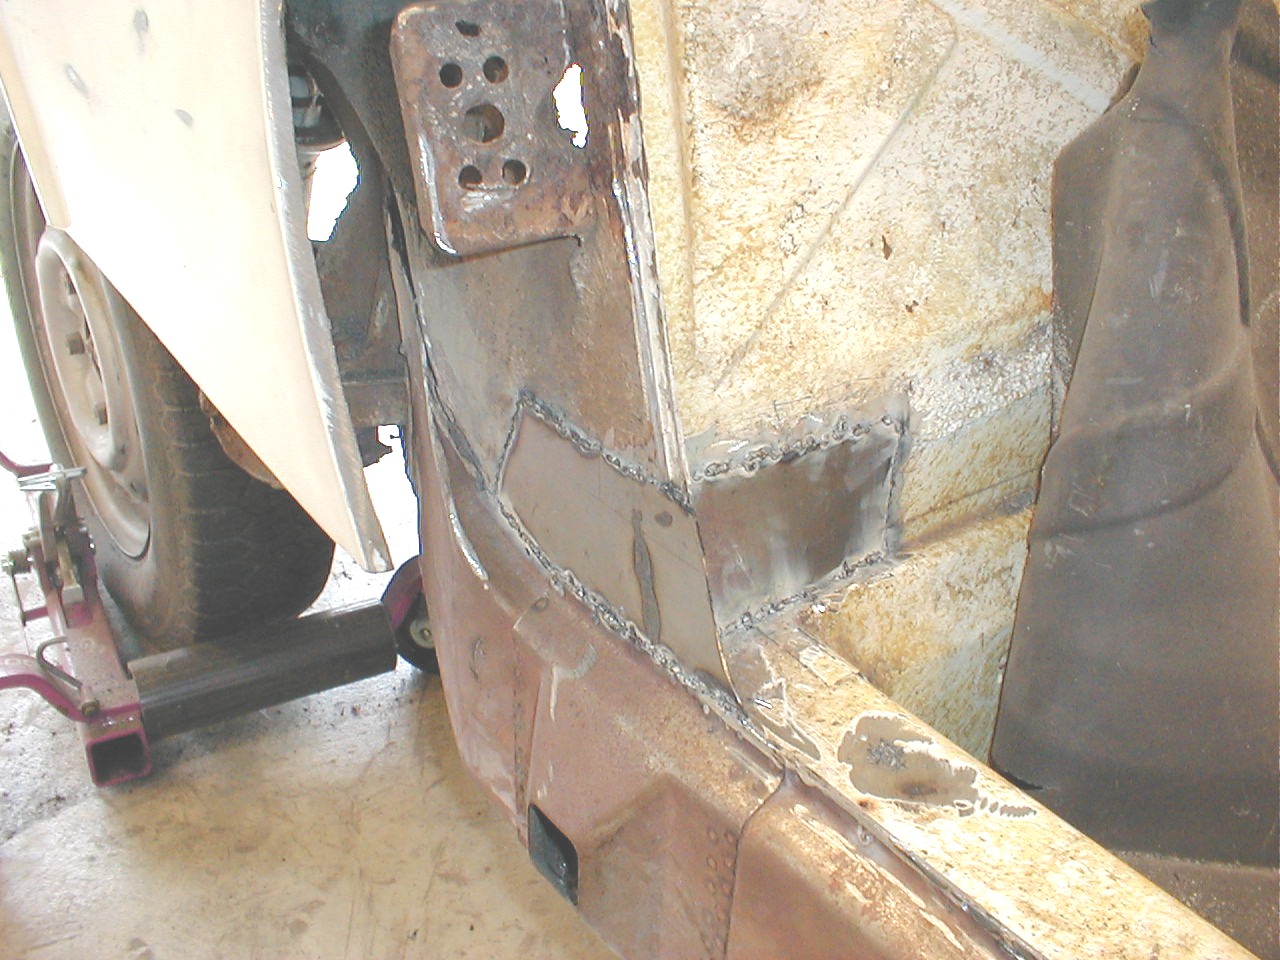
|
|
|
|
| tdgray |
Aug 10 2005, 10:10 AM
Post
#18
|
|
Thank God Nemo is not here to see this Group: Members Posts: 9,706 Joined: 5-August 03 From: Akron, OH Member No.: 984 Region Association: None |
New door jambs. I test fit these suckers about a million times. Normally they fit in behind the fender. I fit the flush with the fender. No problems with door clearance.
Attached thumbnail(s) 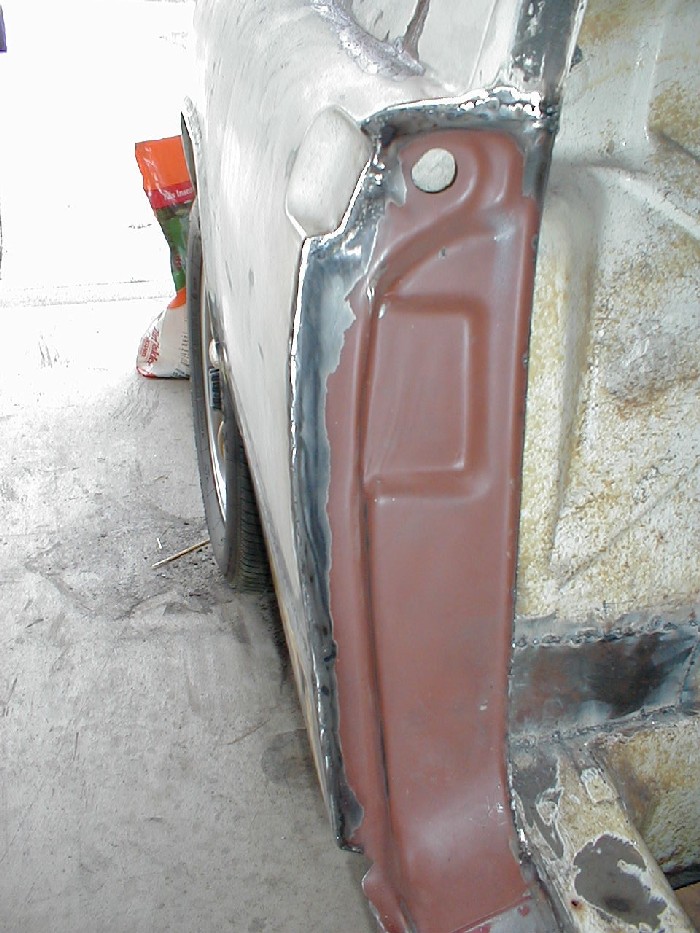
|
|
|
|
| tdgray |
Aug 10 2005, 10:12 AM
Post
#19
|
|
Thank God Nemo is not here to see this Group: Members Posts: 9,706 Joined: 5-August 03 From: Akron, OH Member No.: 984 Region Association: None |
Next new door sills. Pretty easy installation.
Attached image(s) 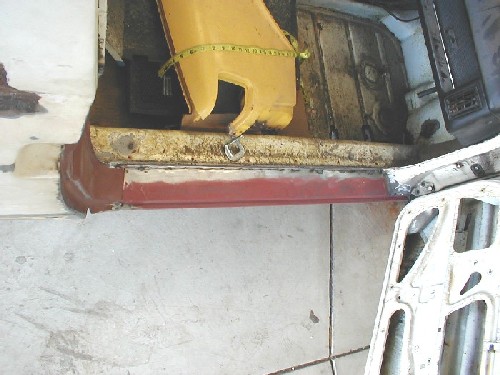
|
|
|
|
| tdgray |
Aug 10 2005, 10:13 AM
Post
#20
|
|
Thank God Nemo is not here to see this Group: Members Posts: 9,706 Joined: 5-August 03 From: Akron, OH Member No.: 984 Region Association: None |
Test fitting donor lower fender. Original was absolute shit
Attached image(s) 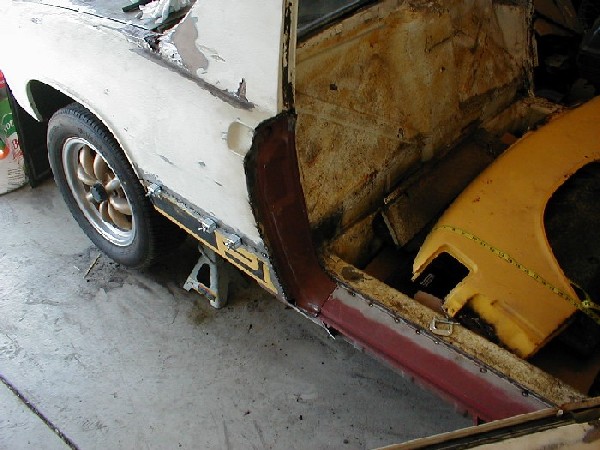
|
|
|
|
|
1 User(s) are reading this topic (1 Guests and 0 Anonymous Users)
0 Members:

|
Lo-Fi Version | Time is now: 2nd April 2026 - 07:17 PM |
Invision Power Board
v9.1.4 © 2026 IPS, Inc.