|
|
|
Porsche, and the Porsche crest are registered trademarks of Dr. Ing. h.c. F. Porsche AG.
This site is not affiliated with Porsche in any way. Its only purpose is to provide an online forum for car enthusiasts. All other trademarks are property of their respective owners. |
|
|


| PanelBilly |
 Jul 6 2009, 07:50 PM Jul 6 2009, 07:50 PM
Post
#1
|
|
914 Guru  Group: Members Posts: 5,906 Joined: 23-July 06 From: Kent, Wa Member No.: 6,488 Region Association: Pacific Northwest |
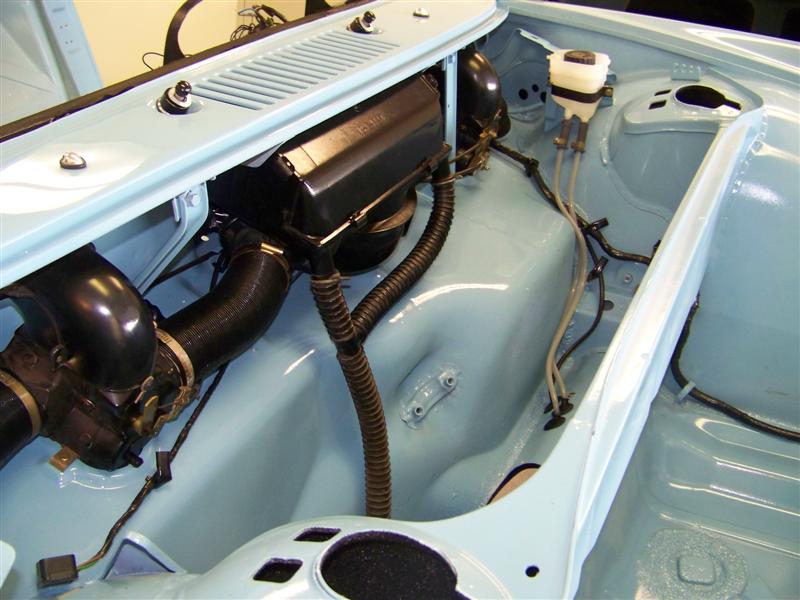 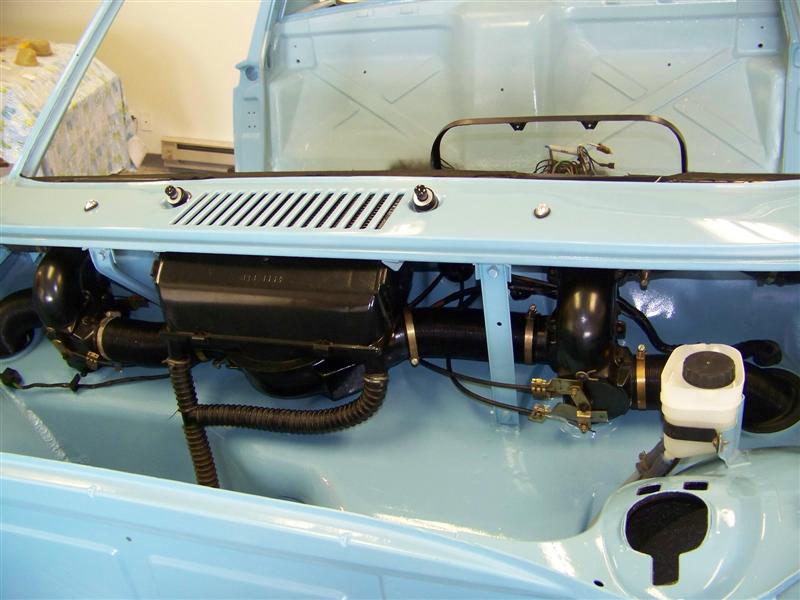 New tubes really add to the general fresh look to the front trunk. I had to make a bolt to hold the back of the winshield wiper assembly in place, but I got everything bolted up this weekend. Next comes the wiring in the dash I guess. The wire mess looks a bit overwelming. Any advice is welcome. And yes I know the light switches are out of order 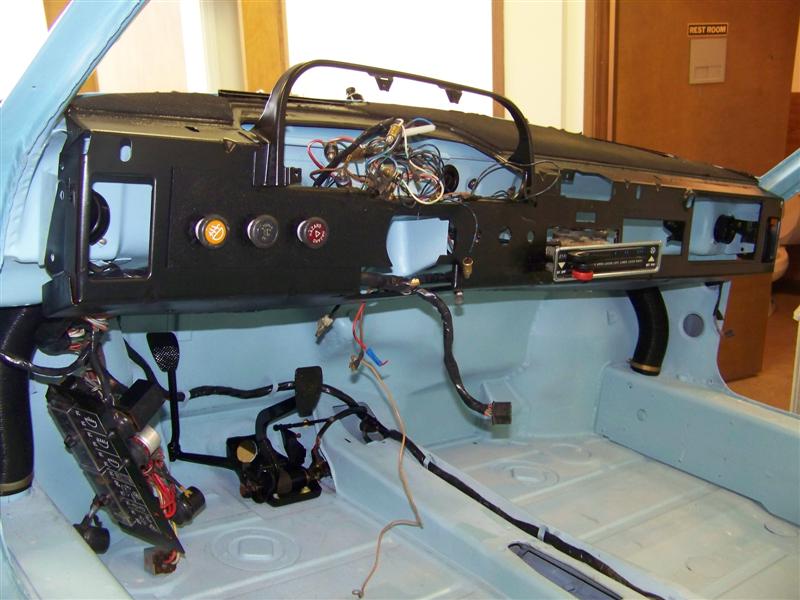 |
   |

 
|
  |
Replies(1 - 10)
| racunniff |
Jul 6 2009, 07:56 PM
Post
#2
|
|
volt914 Group: Members Posts: 172 Joined: 21-August 06 From: Fort Collins, CO Member No.: 6,705 Region Association: Rocky Mountains |
QUOTE(PanelBilly @ Jul 6 2009, 07:50 PM)  The wire mess looks a bit overwelming. Any advice is welcome. And yes I know the light switches are out of order Did you label the wires before you removed the harness? Or is this a new harness? Regardless - my advice on hooking everything back up is "one step at a time." Hook up the fuse panel. And then, one gadget at a time. Identify where you think something should plug in. Ideally, verify your choice with a voltmeter (if you have the switches hooked up). Hook up your gadget. Look/listen/smell for burning wires and blown fuses. Turn the switch on to your gadget. Look/listen/smell for burning wires and blown fuses. Verify proper operation. Move on to the next gadget. On the "burning wires" front - you should probably have quick access to the 12V battery during all this - so you can quickly disconnect if you start overheating something. I kept mine outside the car hooked up via jumper cables. Most of the wires are *not* fuse-protected (especially grounds) and they can smoke very very quickly. |
|
|
|
| 914Sixer |
Jul 6 2009, 07:56 PM
Post
#3
|
|
914 Guru Group: Members Posts: 9,198 Joined: 17-January 05 From: San Angelo Texas Member No.: 3,457 Region Association: Southwest Region |
Work being done the right way !!!!! Very clean and neat. (IMG:style_emoticons/default/piratenanner.gif)
|
|
|
|
| racunniff |
Jul 6 2009, 07:58 PM
Post
#4
|
|
volt914 Group: Members Posts: 172 Joined: 21-August 06 From: Fort Collins, CO Member No.: 6,705 Region Association: Rocky Mountains |
QUOTE(racunniff @ Jul 6 2009, 07:56 PM) QUOTE(PanelBilly @ Jul 6 2009, 07:50 PM) The wire mess looks a bit overwelming. Any advice is welcome. And yes I know the light switches are out of order ...my advice on hooking everything back up is "one step at a time." One more thing - sand all the paint and primer off of all the ground points before attaching ground wires. If you are worried about corrosion, drop a bit of dielectric grease on each one before plugging in the wire. |
|
|
|
| Cap'n Krusty |
Jul 6 2009, 08:18 PM
Post
#5
|
|
Cap'n Krusty Group: Members Posts: 10,794 Joined: 24-June 04 From: Santa Maria, CA Member No.: 2,246 Region Association: Central California |
Very nice! The factory wiring diagrams are in color, and each terminal on every electrical component is numbered and/or lettered, both in the diagram and on the parts thenselves. Makes it easy! Color diagrams are available on the Pelican Parts website.
Brown is ALWAYS ground, and brown with a stripe is a switched ground. All the rest of the stuff is pretty self explanatory. The Cap'n |
|
|
|
| FourBlades |
Jul 6 2009, 08:21 PM
Post
#6
|
|
From Wreck to Rockin Group: Members Posts: 2,056 Joined: 3-December 07 From: Brevard, FL Member No.: 8,414 Region Association: South East States |
I found that laying out the wiring in the car gives you a general idea what
device the wires should go to. The wires are all about the right length to get where they need to be without a lot of extra length. Get a color diagram from Prospero's Garage. It is easier to read than the hanes B&W pictures and it is laminated and sweat proof. I think I got mine on ebay. 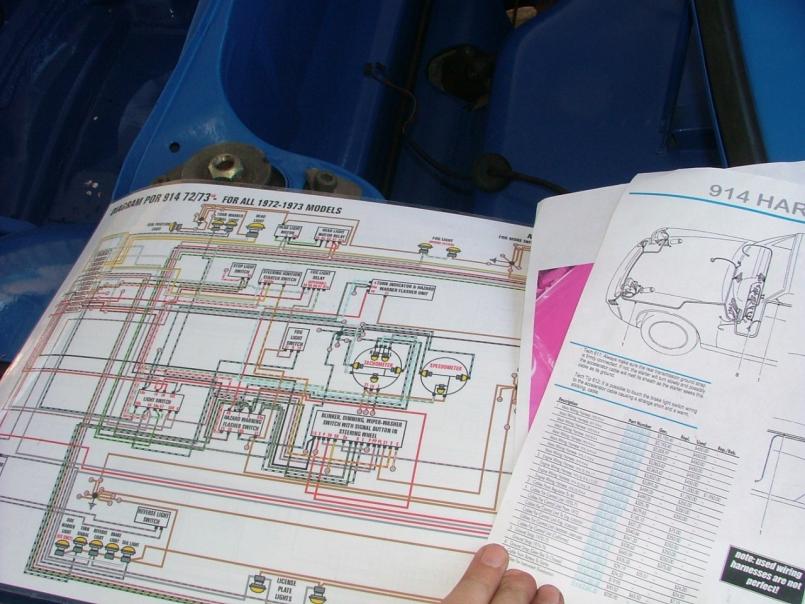 Here's some tips from an OLDE WORLDE mechanic that I plan to use pretty soon when I finally hook up a battery to the car. Put a 3 amp fuse between your battery and the positive wires. That way the fuse will blow if you have a short instead of cooking your wiring. Take all the fuses and relays out except the one for the circuit you are debugging. Add them back one at a time as you work through the systems. I have nearly all my wiring hooked up so we'll see soon how I did. John |
|
|
|
| racunniff |
Jul 6 2009, 08:31 PM
Post
#7
|
|
volt914 Group: Members Posts: 172 Joined: 21-August 06 From: Fort Collins, CO Member No.: 6,705 Region Association: Rocky Mountains |
QUOTE(FourBlades @ Jul 6 2009, 08:21 PM) I found that laying out the wiring in the car gives you a general idea what device the wires should go to. The wires are all about the right length to get where they need to be without a lot of extra length. Get a color diagram from Prospero's Garage. It is easier to read than the hanes B&W pictures and it is laminated and sweat proof. I think I got mine on ebay. Here's some tips from an OLDE WORLDE mechanic that I plan to use pretty soon when I finally hook up a battery to the car. Put a 3 amp fuse between your battery and the positive wires. That way the fuse will blow if you have a short instead of cooking your wiring. Take all the fuses and relays out except the one for the circuit you are debugging. Add them back one at a time as you work through the systems. I have nearly all my wiring hooked up so we'll see soon how I did. John All excellent advice - I wish I had thought of the 3 amp fuse trick! Note that many of the wiring diagrams are available online - 1974 at Pelican Parts http://www.pelicanparts.com/914/914_electrical_diagrams.htm and I've scanned & colorized the 1975 diagram at http://volt914.blogspot.com/2007/07/1975-c...ng-diagram.html (you'll need the Haines manual to make sense of mine, I did not want to scan the *whole* thing because of copyright issues). |
|
|
|
| watsonrx13 |
Jul 7 2009, 05:49 AM
Post
#8
|
|
Advanced Member Group: Members Posts: 2,735 Joined: 18-February 03 From: Plant City, FL Member No.: 312 Region Association: South East States |
QUOTE(FourBlades @ Jul 6 2009, 09:21 PM) I found that laying out the wiring in the car gives you a general idea what device the wires should go to. The wires are all about the right length to get where they need to be without a lot of extra length. Get a color diagram from Prospero's Garage. It is easier to read than the hanes B&W pictures and it is laminated and sweat proof. I think I got mine on ebay. Here's some tips from an OLDE WORLDE mechanic that I plan to use pretty soon when I finally hook up a battery to the car. Put a 3 amp fuse between your battery and the positive wires. That way the fuse will blow if you have a short instead of cooking your wiring. Take all the fuses and relays out except the one for the circuit you are debugging. Add them back one at a time as you work through the systems. I have nearly all my wiring hooked up so we'll see soon how I did. John John, I've been looking for these large laminated print outs for awhile.... Anyway, here's the link to Prospero's Garage, unfortunately they only have the diagrams from 70-73 for now.... BTW, the installation of the fresh air system looks great.... (IMG:style_emoticons/default/aktion035.gif) -- Rob |
|
|
|
| aircooledtechguy |
Jul 7 2009, 04:14 PM
Post
#9
|
|
The Aircooledtech Guy Group: Members Posts: 1,966 Joined: 8-November 08 From: Anacortes, WA Member No.: 9,730 Region Association: Pacific Northwest |
Billy, your work is really nice!! You're making good progress. Keep these updates coming (IMG:style_emoticons/default/popcorn[1].gif)
|
|
|
|
| BarberDave |
Jul 7 2009, 04:23 PM
Post
#10
|
|
Barberdave Group: Members Posts: 1,605 Joined: 12-January 03 From: Wauseon Ohio Member No.: 135 Region Association: Upper MidWest |
(IMG:style_emoticons/default/smilie_pokal.gif)
When you get done you will be required to change your screen name , from "Panel Billy " to Cool 914 Billy. Great job so far , be proud of it and your work!! Dave (IMG:style_emoticons/default/slap.gif) |
|
|
|
| Tom |
Jul 10 2009, 06:15 PM
Post
#11
|
|
Advanced Member Group: Members Posts: 2,139 Joined: 21-August 05 From: Port Orchard, WA 98367 Member No.: 4,626 Region Association: None |
Billy,
That is sure looking nice. Those cool wiring diagrams are sure nice too, too bad I'm color blind! (IMG:style_emoticons/default/biggrin.gif) . But I have had years of experience tracing wires with an ohm meter. Tom |
|
|
|
|
1 User(s) are reading this topic (1 Guests and 0 Anonymous Users)
0 Members:

|
Lo-Fi Version | Time is now: 19th July 2025 - 06:36 AM |
Invision Power Board
v9.1.4 © 2025 IPS, Inc.