|
|
|
Porsche, and the Porsche crest are registered trademarks of Dr. Ing. h.c. F. Porsche AG.
This site is not affiliated with Porsche in any way. Its only purpose is to provide an online forum for car enthusiasts. All other trademarks are property of their respective owners. |
|
|


| rwilner |
 Sep 27 2011, 08:29 PM Sep 27 2011, 08:29 PM
Post
#1
|
|
No Ghosts in the Machine  Group: Members Posts: 953 Joined: 30-March 10 From: Boston, MA Member No.: 11,530 Region Association: North East States |
Ok...
I'm converting my basically stock 2.0L (stock cam, euro Ps and Cs) over to microsquirt. Microsquirt is a megasquirt-derived fuel injection computer that's robot-soldered and factory encased in a weatherproof enclosure. The I/O is implemented as a single, 35-position weatherproof connector. The whole thing is about the size of 2 decks of cards. The system I'm installing was engineered and supplied 100% by McMark. My understanding is that he usually provides these systems for motors that he builds, but I talked him into providing one for me. Below, I will document the install details here for anyone else who talks McMark into selling them a system, or who attempts something similar someday. DISCLAIMER: I won't provide model numbers, prices, or any other info like that in this thread -- please contact McMark directly for those types of details. All I can say is that you get what you pay for and this is a top-notch system that will work for the remaining life of the car. The system provides the following components new:
OK, enough babbling, on to the install! (IMG:style_emoticons/default/chowtime.gif) |
   |

 
|
  |
Replies
| McMark |
Oct 2 2011, 06:14 PM
Post
#2
|
|
914 Freak! Group: Retired Admin Posts: 20,179 Joined: 13-March 03 From: Grand Rapids, MI Member No.: 419 Region Association: None |
Going in the mail tomorrow... (IMG:style_emoticons/default/drooley.gif)
Attached image(s)  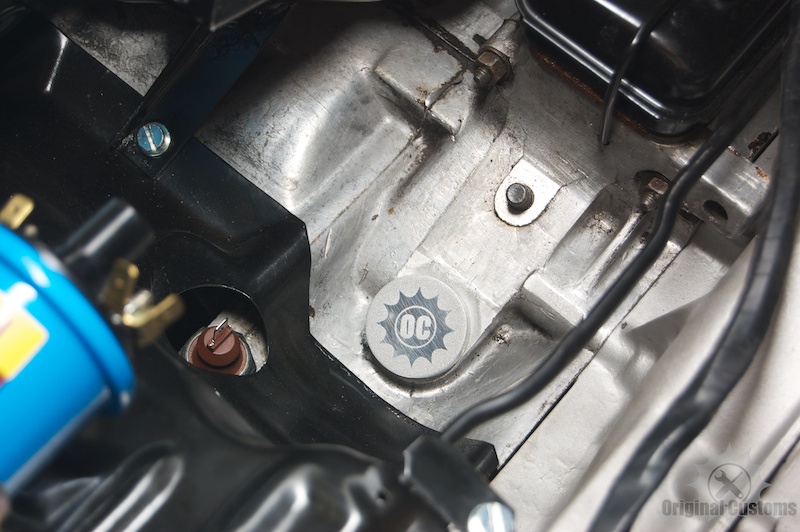
|
|
|
|
| rwilner |
Oct 2 2011, 06:40 PM
Post
#3
|
|
No Ghosts in the Machine Group: Members Posts: 953 Joined: 30-March 10 From: Boston, MA Member No.: 11,530 Region Association: North East States |
QUOTE(McMark @ Oct 2 2011, 08:14 PM)  Can't wait! Mark -- i found this link talking about how to wire up the innovate G5 gauge, looks straightforward |
|
|
|
| rwilner |
Oct 2 2011, 08:00 PM
Post
#4
|
|
No Ghosts in the Machine Group: Members Posts: 953 Joined: 30-March 10 From: Boston, MA Member No.: 11,530 Region Association: North East States |
Some progress this weekend.
I got the ignition coils mounted and the rest of the wiring harness installed. Here's what the ignition coils look like installed on Mark's custom brackets: (IMG:https://lh4.googleusercontent.com/-nuMTQYANwPw/TokSDbrtj1I/AAAAAAAAATA/Xk7Y94g22kY/s800/111001_3.JPG) Here's a closeup of the coil install, notice where the ground pickup is -- right on the bracket: (IMG:https://lh5.googleusercontent.com/-zDiDFk8GYdM/TokSJbOKPgI/AAAAAAAAATI/ROlTehnJMhU/s800/111001_4.JPG) (IMG:https://lh5.googleusercontent.com/-fVCAHivrfzg/TokSLIITthI/AAAAAAAAATM/UDmokJtS9Mc/s800/111001_5.JPG) Here's the wiring harness all dressed in. I also replaced all the engine tin and fan shroud screws (and in many cases, installed screws that were missing altogether) with stainless socket head cap screws. That blue paper towel in the distributor cavity will soon be replaced with a sweet OC plug! (IMG:https://lh3.googleusercontent.com/-1x89y4J6A4U/TokSL2B6TYI/AAAAAAAAATQ/7QB_b9hEDjw/s800/111001_6.JPG) I also mounted the MAP sensor and O2 sensor brain the factory location for the MPS. Per Mark's suggestion, to mount the O2 brain, I reformed a stainless P clamp to the profile of the O2 brain and lined the inside of the clamp with gasket material. My other idea was to get another air cleaner mount and attach it to the passenger side intake runners, and then mount the O2 brain to that. I like this better. (IMG:https://lh6.googleusercontent.com/-BR4IzijmoV4/TokSEOMMV3I/AAAAAAAAATE/qRr-n1Mv6z8/s800/111001_2.JPG) I noticed a small hole in the back of the MAP sensor. I thought this might have been the sensor's atmosphere reference (why else would there be a hole in the housing?), so I drilled a hole in the bracket to provide access -- check out the second hole from the right: (IMG:https://lh3.googleusercontent.com/-jdXrY7On6H8/TokSBeHwmeI/AAAAAAAAAS8/mxGPYx_RtrM/s800/111001_1.JPG) I'm also modifying the ash tray to become an iphone mount. Made some progress on that today also: (IMG:https://lh4.googleusercontent.com/-yWyLZTcKWUQ/TokSQ5qfrvI/AAAAAAAAATU/xjWPVqr9nVQ/s800/111001_7.JPG) (IMG:https://lh3.googleusercontent.com/-RA5FQNcCuRk/TokSRmyvAkI/AAAAAAAAATY/-fVW4Oxgdfc/s800/111001_8.JPG) I also got the interior disassembled to prepare for the gauge install, and designed my new gauge panel face. The small hole is for a toggle switch that turns my audio amplifier on and off: (IMG:https://lh3.googleusercontent.com/-BLTTAa0PGH4/TokVu7DOvhI/AAAAAAAAATk/Q-IaHUmdM48/s800/gauge%2520panel.png) That's it for now. Tomorrow I'm stopping by youdoit electronics on my way home to get what I need to make up my new gauge wiring harness. |
|
|
|
Posts in this topic
 rwilner My Microsquirt Conversion Sep 27 2011, 08:29 PM
 rwilner I started off by removing my motor. This was my f... Sep 27 2011, 09:06 PM porscheless Jeez Rich,
How bout a little degreaser in there.... Sep 28 2011, 05:10 AM
rwilner I started off by removing my motor. This was my f... Sep 27 2011, 09:06 PM porscheless Jeez Rich,
How bout a little degreaser in there.... Sep 28 2011, 05:10 AM
 rwilner I know joe, a little embarassing...Believe it or n... Sep 28 2011, 05:29 AM type47 subscribed! :) I think McMark will get alot o... Sep 28 2011, 06:14 AM sean_v8_914 I winder how big we can go with the stock plenum, ... Sep 28 2011, 07:47 AM rwilner
I winder how big we can go with the stock plenum,... Sep 28 2011, 08:16 AM ConeDodger
I winder how big we can go with the stock plenum... Sep 28 2011, 08:24 AM rick 918-S
[quote name='rwilner' post='1545600' date='Sep 28... Sep 28 2011, 08:30 AM ConeDodger :agree: McFuelInjection is going to really catch o... Sep 28 2011, 08:20 AM rwilner
:agree: McFuelInjection is going to really catch ... Sep 28 2011, 09:35 AM sean_v8_914 my question was aimed at displacement. max rpm wou... Sep 28 2011, 08:54 AM ConeDodger
my question was aimed at displacement. max rpm wo... Sep 28 2011, 09:11 AM sean_v8_914 Porsche used a vacuum plenum to get a usable vacuu... Sep 28 2011, 09:21 AM sean_v8_914 each throttle body is vac tapped to the plenum. th... Sep 28 2011, 09:27 AM sean_v8_914 car porn hijack...
my next 914 engine :headbanger... Sep 28 2011, 09:32 AM moparrob
car porn hijack...
my next 914 engine :headbange... Oct 2 2011, 08:49 PM sean_v8_914 Marks set up is super-clean. no dizzy, no vac line... Sep 28 2011, 09:40 AM tradisrad I'll be watching. Sep 28 2011, 10:03 AM r_towle I must agree I expected cleaner....lol
We joke in ... Sep 28 2011, 10:44 AM 904svo I ran into problems trying to use MAP, the vacuum ... Sep 28 2011, 11:28 AM 914_teener ....ok if this works well....I'm headed North ... Sep 28 2011, 08:30 PM rwilner Made some more progress tonight.
Not MS install r... Sep 29 2011, 08:02 PM 914_teener What AFR gauge did you buy...and where are you goi... Oct 2 2011, 11:54 PM rwilner
What AFR gauge did you buy...and where are you go... Oct 10 2011, 09:53 PM championgt1 Nice work. This is cool! Sep 29 2011, 09:05 PM kg6dxn Very nice! You will enjoy it. Oct 2 2011, 08:57 PM 76-914 Rich, is the top as viewed or is the panel upside ... Oct 2 2011, 09:35 PM rwilner
Rich, is the top as viewed or is the panel upside... Oct 3 2011, 05:13 AM type47 Don't forget that gasket/grommet for the oil p... Oct 3 2011, 05:31 AM rwilner
Don't forget that gasket/grommet for the oil ... Oct 3 2011, 06:12 AM r_towle Third page.
Slacker
:poke:
Rich Oct 5 2011, 12:41 PM rwilner
Third page.
Slacker
:poke:
Rich
Ha.
I did do ... Oct 5 2011, 12:47 PM rwilner Progress!
Got the interior pulled apart to get... Oct 10 2011, 09:29 PM rdauenhauer Looks like you already had to mod the base plate o... Oct 10 2011, 09:33 PM rwilner
Look like you already had to mod the base plate o... Oct 10 2011, 09:35 PM McMark Just thought of something, check the coil ground, ... Oct 10 2011, 09:39 PM rwilner
Just thought of something, check the coil ground,... Oct 10 2011, 09:42 PM rwilner
Just thought of something, check the coil ground... Oct 11 2011, 03:15 PM 76-914 Looking good Rich. I had the same staggered 3/2 se... Oct 10 2011, 09:58 PM McMark I'm assuming 'ring out' indicates zero... Oct 11 2011, 03:59 PM rwilner
I'm assuming 'ring out' indicates zer... Oct 11 2011, 06:21 PM rwilner Just thought I'd post a quick update...
All t... Oct 21 2011, 06:52 AM r_towle sweet....
Rich Oct 21 2011, 07:02 AM sean_v8_914 that's a good price. what did you pay for the ... Oct 21 2011, 07:17 AM rwilner
that's a good price. what did you pay for the... Oct 21 2011, 07:40 AM 914_teener
that's a good price. what did you pay for th... Oct 21 2011, 11:18 AM rwilner I got my engine back in the car. Some questions f... Oct 22 2011, 07:28 PM McMark The seal should hang down, and there should be a s... Oct 22 2011, 10:34 PM rwilner
The seal should hang down, and there should be a ... Oct 23 2011, 07:17 AM rwilner Had a fairly productive weekend.
I received Tom... Oct 23 2011, 09:00 PM radmelon Rich- where did you place the O2 sensor bung? Di... Nov 13 2011, 11:33 AM rwilner
Rich- where did you place the O2 sensor bung? D... Nov 13 2011, 07:07 PM 914_teener :popcorn:
Thanks for the update. I was wondering... Nov 14 2011, 12:38 AM rwilner More Progress...
I pulled a plug after my initial... Nov 18 2011, 08:50 AM ConeDodger Rich, I'm watching this with great interest. M... Nov 18 2011, 09:06 AM rwilner
Rich, I'm watching this with great interest. ... Nov 18 2011, 10:25 AM draganc Great work/job!!
And I'm gald you hav... Nov 18 2011, 09:14 AM zymurgist :cheer: :cheer: :cheer:
I nominate this thread... Nov 18 2011, 09:19 AM rwilner
:cheer: :cheer: :cheer:
I nominate this threa... Nov 18 2011, 09:58 AM type47 Updates? :popcorn: Feb 5 2012, 09:08 AM Racer Chris
Updates? :popcorn:
The day after Rich got the EF... Feb 5 2012, 09:38 AM rwilner
The day after Rich got the EFI operating correctl... Feb 8 2012, 12:18 PM rdauenhauer Good head of hair on the boy, Congrtats! Feb 8 2012, 01:11 PM rwilner Slowly working out my issues as time allows...
My... Feb 23 2012, 09:51 AM bohalrantipol Man this is good info! thanks for putting thi... Feb 24 2012, 01:56 PM falconfp2001
Slowly working out my issues as time allows...
M... Mar 6 2012, 02:41 PM rwilner
Where are you getting the tack signal for your ga... Mar 6 2012, 03:02 PM falconfp2001
[quote name='falconfp2001' post='1640455' date='M... Mar 6 2012, 06:28 PM rwilner A small update:
I have replaced the innovate O2 s... Mar 28 2012, 08:06 AM falconfp2001
A small update:
I have replaced the innovate O2 ... Apr 7 2012, 02:05 PM rwilner
How is the AEM controller? I think gonna switch ... Apr 7 2012, 04:02 PM rwilner Just a small update...
My car now revs to the red... Apr 10 2012, 07:01 AM r_towle nice....
I am somewhat available this weekend and... Mar 6 2012, 05:49 PM mightyohm Wow, nice job spotting that thread about the VR se... Apr 10 2012, 08:30 AM rwilner
Wow, nice job spotting that thread about the VR s... Apr 10 2012, 08:38 AM rwilner I just discovered a cool new feature of the MicroS... Apr 10 2012, 12:27 PM falconfp2001
I just discovered a cool new feature of the Micro... Apr 10 2012, 04:44 PM falconfp2001
I just discovered a cool new feature of the Micro... Apr 10 2012, 11:06 PM rwilner
Also the Latest MS Extra code lets you make the t... Apr 11 2012, 06:35 AM falconfp2001
Also the Latest MS Extra code lets you make the ... Apr 11 2012, 09:20 AM rwilner Over 1000 miles on this system now...I'm very ... Jun 17 2012, 05:31 AM rwilner
Over 1000 miles on this system now...I'm very... Aug 14 2012, 07:32 PM rwilner
Over 1000 miles on this system now...I'm ver... Aug 14 2012, 07:35 PM SirAndy I emailed sirandy to see if there's any way to... Aug 15 2012, 07:58 PM r_towle messing, no driving....
At least its fun...
Rich Apr 10 2012, 02:06 PM JmuRiz Very cool status updates (see, no one needs facebo... Aug 14 2012, 07:55 PM gothspeed Awesome thread :trophy: !!! ..... how... Jan 18 2014, 09:05 PM r_towle He sold it back to the original owner and bought a... Jan 19 2014, 09:22 AM gothspeed
He sold it back to the original owner and bought ... Jan 19 2014, 02:48 PM r_towle
He sold it back to the original owner and bought... Jan 19 2014, 02:58 PM gothspeed
[quote name='gothspeed' post='1985803' date='Jan ... Jan 19 2014, 03:02 PM rwilner
[quote name='gothspeed' post='1985803' date='Jan... Jun 28 2016, 07:39 PM r_towle I got one for you...
76, green with white interior... Jun 28 2016, 09:05 PM 2mAn
I got one for you...
Rich
enabler! :evilgr... Jun 28 2016, 10:15 PM rwilner
I got one for you...
76, green with white interio... Jun 29 2016, 06:32 AM mailmanboise Ive got a 73 with a 1.7 ish motor, I believe its h... Jan 8 2019, 10:56 PM
rwilner I know joe, a little embarassing...Believe it or n... Sep 28 2011, 05:29 AM type47 subscribed! :) I think McMark will get alot o... Sep 28 2011, 06:14 AM sean_v8_914 I winder how big we can go with the stock plenum, ... Sep 28 2011, 07:47 AM rwilner
I winder how big we can go with the stock plenum,... Sep 28 2011, 08:16 AM ConeDodger
I winder how big we can go with the stock plenum... Sep 28 2011, 08:24 AM rick 918-S
[quote name='rwilner' post='1545600' date='Sep 28... Sep 28 2011, 08:30 AM ConeDodger :agree: McFuelInjection is going to really catch o... Sep 28 2011, 08:20 AM rwilner
:agree: McFuelInjection is going to really catch ... Sep 28 2011, 09:35 AM sean_v8_914 my question was aimed at displacement. max rpm wou... Sep 28 2011, 08:54 AM ConeDodger
my question was aimed at displacement. max rpm wo... Sep 28 2011, 09:11 AM sean_v8_914 Porsche used a vacuum plenum to get a usable vacuu... Sep 28 2011, 09:21 AM sean_v8_914 each throttle body is vac tapped to the plenum. th... Sep 28 2011, 09:27 AM sean_v8_914 car porn hijack...
my next 914 engine :headbanger... Sep 28 2011, 09:32 AM moparrob
car porn hijack...
my next 914 engine :headbange... Oct 2 2011, 08:49 PM sean_v8_914 Marks set up is super-clean. no dizzy, no vac line... Sep 28 2011, 09:40 AM tradisrad I'll be watching. Sep 28 2011, 10:03 AM r_towle I must agree I expected cleaner....lol
We joke in ... Sep 28 2011, 10:44 AM 904svo I ran into problems trying to use MAP, the vacuum ... Sep 28 2011, 11:28 AM 914_teener ....ok if this works well....I'm headed North ... Sep 28 2011, 08:30 PM rwilner Made some more progress tonight.
Not MS install r... Sep 29 2011, 08:02 PM 914_teener What AFR gauge did you buy...and where are you goi... Oct 2 2011, 11:54 PM rwilner
What AFR gauge did you buy...and where are you go... Oct 10 2011, 09:53 PM championgt1 Nice work. This is cool! Sep 29 2011, 09:05 PM kg6dxn Very nice! You will enjoy it. Oct 2 2011, 08:57 PM 76-914 Rich, is the top as viewed or is the panel upside ... Oct 2 2011, 09:35 PM rwilner
Rich, is the top as viewed or is the panel upside... Oct 3 2011, 05:13 AM type47 Don't forget that gasket/grommet for the oil p... Oct 3 2011, 05:31 AM rwilner
Don't forget that gasket/grommet for the oil ... Oct 3 2011, 06:12 AM r_towle Third page.
Slacker
:poke:
Rich Oct 5 2011, 12:41 PM rwilner
Third page.
Slacker
:poke:
Rich
Ha.
I did do ... Oct 5 2011, 12:47 PM rwilner Progress!
Got the interior pulled apart to get... Oct 10 2011, 09:29 PM rdauenhauer Looks like you already had to mod the base plate o... Oct 10 2011, 09:33 PM rwilner
Look like you already had to mod the base plate o... Oct 10 2011, 09:35 PM McMark Just thought of something, check the coil ground, ... Oct 10 2011, 09:39 PM rwilner
Just thought of something, check the coil ground,... Oct 10 2011, 09:42 PM rwilner
Just thought of something, check the coil ground... Oct 11 2011, 03:15 PM 76-914 Looking good Rich. I had the same staggered 3/2 se... Oct 10 2011, 09:58 PM McMark I'm assuming 'ring out' indicates zero... Oct 11 2011, 03:59 PM rwilner
I'm assuming 'ring out' indicates zer... Oct 11 2011, 06:21 PM rwilner Just thought I'd post a quick update...
All t... Oct 21 2011, 06:52 AM r_towle sweet....
Rich Oct 21 2011, 07:02 AM sean_v8_914 that's a good price. what did you pay for the ... Oct 21 2011, 07:17 AM rwilner
that's a good price. what did you pay for the... Oct 21 2011, 07:40 AM 914_teener
that's a good price. what did you pay for th... Oct 21 2011, 11:18 AM rwilner I got my engine back in the car. Some questions f... Oct 22 2011, 07:28 PM McMark The seal should hang down, and there should be a s... Oct 22 2011, 10:34 PM rwilner
The seal should hang down, and there should be a ... Oct 23 2011, 07:17 AM rwilner Had a fairly productive weekend.
I received Tom... Oct 23 2011, 09:00 PM radmelon Rich- where did you place the O2 sensor bung? Di... Nov 13 2011, 11:33 AM rwilner
Rich- where did you place the O2 sensor bung? D... Nov 13 2011, 07:07 PM 914_teener :popcorn:
Thanks for the update. I was wondering... Nov 14 2011, 12:38 AM rwilner More Progress...
I pulled a plug after my initial... Nov 18 2011, 08:50 AM ConeDodger Rich, I'm watching this with great interest. M... Nov 18 2011, 09:06 AM rwilner
Rich, I'm watching this with great interest. ... Nov 18 2011, 10:25 AM draganc Great work/job!!
And I'm gald you hav... Nov 18 2011, 09:14 AM zymurgist :cheer: :cheer: :cheer:
I nominate this thread... Nov 18 2011, 09:19 AM rwilner
:cheer: :cheer: :cheer:
I nominate this threa... Nov 18 2011, 09:58 AM type47 Updates? :popcorn: Feb 5 2012, 09:08 AM Racer Chris
Updates? :popcorn:
The day after Rich got the EF... Feb 5 2012, 09:38 AM rwilner
The day after Rich got the EFI operating correctl... Feb 8 2012, 12:18 PM rdauenhauer Good head of hair on the boy, Congrtats! Feb 8 2012, 01:11 PM rwilner Slowly working out my issues as time allows...
My... Feb 23 2012, 09:51 AM bohalrantipol Man this is good info! thanks for putting thi... Feb 24 2012, 01:56 PM falconfp2001
Slowly working out my issues as time allows...
M... Mar 6 2012, 02:41 PM rwilner
Where are you getting the tack signal for your ga... Mar 6 2012, 03:02 PM falconfp2001
[quote name='falconfp2001' post='1640455' date='M... Mar 6 2012, 06:28 PM rwilner A small update:
I have replaced the innovate O2 s... Mar 28 2012, 08:06 AM falconfp2001
A small update:
I have replaced the innovate O2 ... Apr 7 2012, 02:05 PM rwilner
How is the AEM controller? I think gonna switch ... Apr 7 2012, 04:02 PM rwilner Just a small update...
My car now revs to the red... Apr 10 2012, 07:01 AM r_towle nice....
I am somewhat available this weekend and... Mar 6 2012, 05:49 PM mightyohm Wow, nice job spotting that thread about the VR se... Apr 10 2012, 08:30 AM rwilner
Wow, nice job spotting that thread about the VR s... Apr 10 2012, 08:38 AM rwilner I just discovered a cool new feature of the MicroS... Apr 10 2012, 12:27 PM falconfp2001
I just discovered a cool new feature of the Micro... Apr 10 2012, 04:44 PM falconfp2001
I just discovered a cool new feature of the Micro... Apr 10 2012, 11:06 PM rwilner
Also the Latest MS Extra code lets you make the t... Apr 11 2012, 06:35 AM falconfp2001
Also the Latest MS Extra code lets you make the ... Apr 11 2012, 09:20 AM rwilner Over 1000 miles on this system now...I'm very ... Jun 17 2012, 05:31 AM rwilner
Over 1000 miles on this system now...I'm very... Aug 14 2012, 07:32 PM rwilner
Over 1000 miles on this system now...I'm ver... Aug 14 2012, 07:35 PM SirAndy I emailed sirandy to see if there's any way to... Aug 15 2012, 07:58 PM r_towle messing, no driving....
At least its fun...
Rich Apr 10 2012, 02:06 PM JmuRiz Very cool status updates (see, no one needs facebo... Aug 14 2012, 07:55 PM gothspeed Awesome thread :trophy: !!! ..... how... Jan 18 2014, 09:05 PM r_towle He sold it back to the original owner and bought a... Jan 19 2014, 09:22 AM gothspeed
He sold it back to the original owner and bought ... Jan 19 2014, 02:48 PM r_towle
He sold it back to the original owner and bought... Jan 19 2014, 02:58 PM gothspeed
[quote name='gothspeed' post='1985803' date='Jan ... Jan 19 2014, 03:02 PM rwilner
[quote name='gothspeed' post='1985803' date='Jan... Jun 28 2016, 07:39 PM r_towle I got one for you...
76, green with white interior... Jun 28 2016, 09:05 PM 2mAn
I got one for you...
Rich
enabler! :evilgr... Jun 28 2016, 10:15 PM rwilner
I got one for you...
76, green with white interio... Jun 29 2016, 06:32 AM mailmanboise Ive got a 73 with a 1.7 ish motor, I believe its h... Jan 8 2019, 10:56 PM |
1 User(s) are reading this topic (1 Guests and 0 Anonymous Users)
0 Members:

|
Lo-Fi Version | Time is now: 2nd June 2024 - 03:19 AM |
Invision Power Board
v9.1.4 © 2024 IPS, Inc.