|
|
|
Porsche, and the Porsche crest are registered trademarks of Dr. Ing. h.c. F. Porsche AG.
This site is not affiliated with Porsche in any way. Its only purpose is to provide an online forum for car enthusiasts. All other trademarks are property of their respective owners. |
|
|


| vintage914racer |
 Nov 21 2016, 10:58 PM Nov 21 2016, 10:58 PM
Post
#1
|
|
Member  Group: Members Posts: 463 Joined: 28-December 03 From: Minneapolis, MN Member No.: 1,473 |
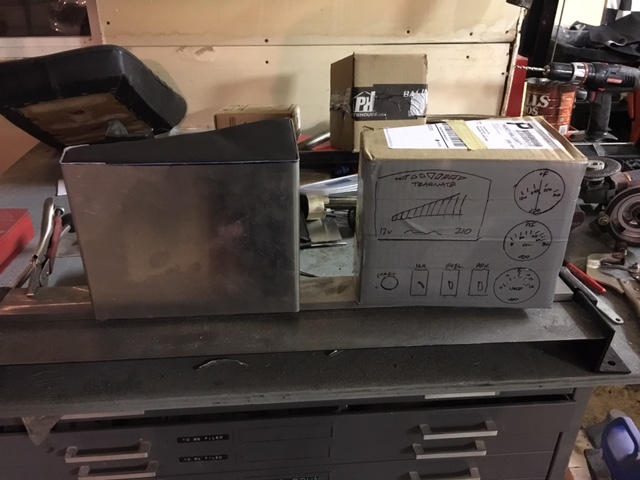
Long story short, a couple of years ago I had premature engine failure on my 914-6 track car. If you're bored you can check out part 1 and part 2 of my engine misadventure. Otherwise, I'll continue on the the regular scheduled dash programming...
We all know how the slippery slope works and before you knew it I had the car apart in hundreds of pieces tackling various "cheaper" projects while amassing engine parts and waiting for the engine builder. One of the projects I wanted to tackle for years was a dash rebuild. You see this car has been a track car since 1972 and judging by the great number of patches to the existing dash I wouldn't be surprised if it was original to the track car build. 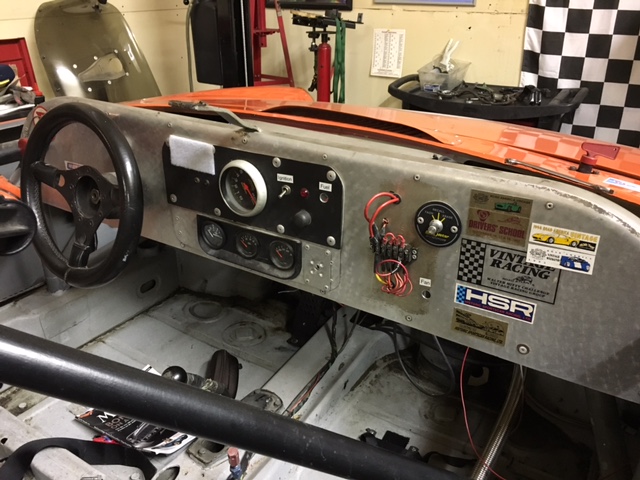 At any rate the dash was riddled wtih holes, a complete rats nest of wires and a melange of various metallic and composite (fancy word for cheap plastic) finishes. My goal was to set about cleaning up the aesthetic, going a bit modern on the gauge front and clean up the wiring with a new fused junction box. And so it began... The first step was making a trip to the local metal supplier. Now, if you're in Minneapolis you shoudl check out Discount Steel. As a complete metal shopping newb I was a little apprehensive, but upon arrival the folks were friendly, overwhelmingly helpful and generally a good lot. Armed with a couple strips of aluminum sheet I headed home. 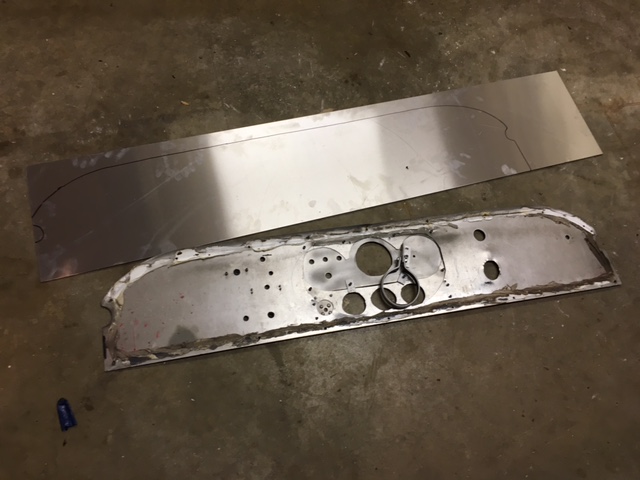 I proceeded to trace my old dash panel with a Sharpie and cut out a new panel. After some trimming, fitting, trimming, fitting, trimming and re-fitting I settled on a fit that I was happy with. If you're wondering why all the trimming let's just say I'm a measure 12 times and still cut wrong kind of guy. 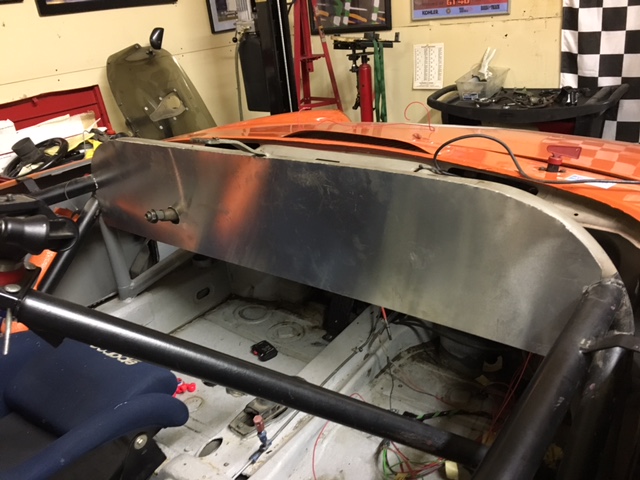 After a bit of drilling I had the panel mocked up and in place. 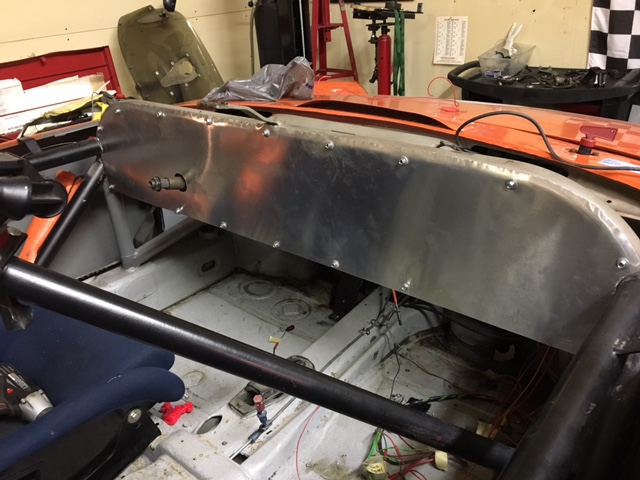 Satisfied with the fit I moved on to the next step... |
   |

 
|
  |
Replies
| vintage914racer |
Nov 21 2016, 11:16 PM
Post
#2
|
|
Member Group: Members Posts: 463 Joined: 28-December 03 From: Minneapolis, MN Member No.: 1,473 |
The next step was to build a gauge pod that tiled towards the driver for easy viewing. One of my biggest gripes from the old dash was that I always felt like I had to go out of my way to view the gauges. Looking away from what's ahead of you is not the best approach when you're hurtling down the track at 100mph. So I set off to change that starting with a duct tape and cardboard template.
 In the photo you can see my expert (wink wink) drawing skills. The plan was to integrate 2 1/16th diameter VDO gauges for oil pressure, oil temp and volts, then install a Traqmate Traqdash with integrated tach, speedo and other potential plugs-ins. I built the pod with provision for three switches, with two immediately planned for ignition and the fuel pump respectively. After a trip to Harbor Freight for the finest Chinese sheet metal brake priced under $50 I had my pod bent and ready for drilling. 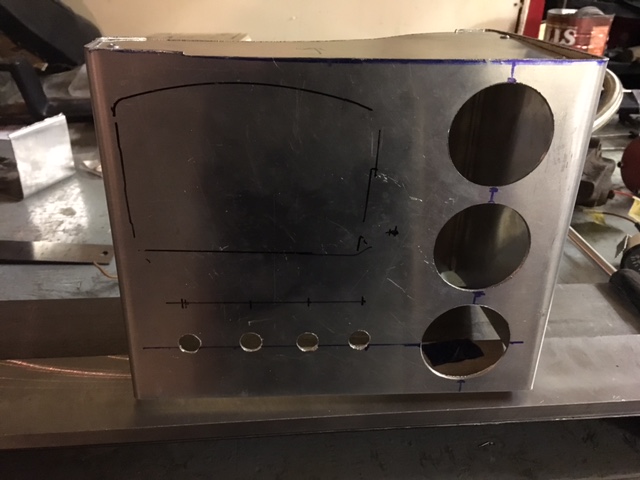 Once the holes were drilled I fabbed up top and bottom access plates for the pod using some aluminum sheet and aluminum angle that I threaded to accept allens for installatin/removal. I don't have any good shots of the panels so you'll just have to take my word for it. I'd never lie to you (IMG:style_emoticons/default/smile.gif) I then moved on to step three: upholstery. 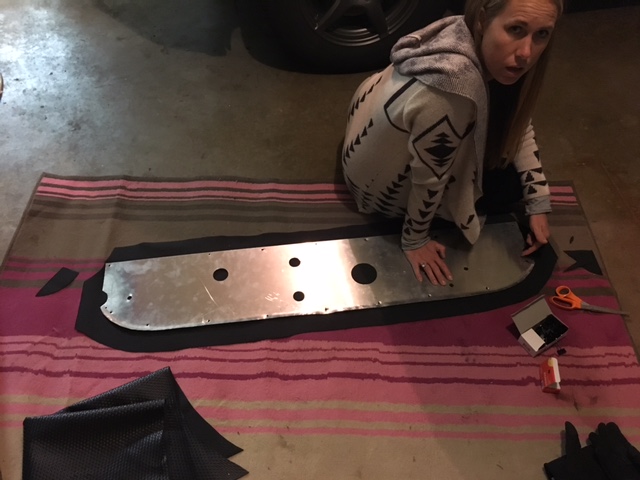 This is where my craftmaster wife came in. I'd consider her the MacGyver of home crafting. That's her in the photos. I'd attribute the deer in the headlights look to the razor blade I may have been recklessy waving around or perhaps the 3M spray adhesive that was aimed her way. 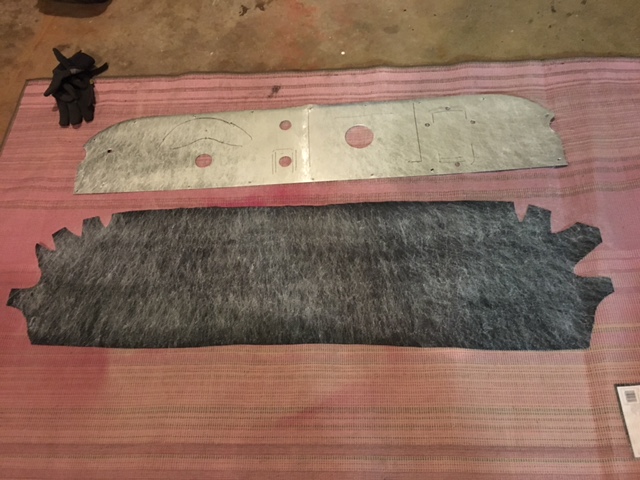 Much like before after some trimming, a little more trimming and an extra side of trimming the basketweave vinyl was cut, adhestive sprayed and vinyl applied. If you're intriqued by the sacrificial pink rug under that's my special 914 project rug. It's my way of looking uber masculine when working on my car. It's come in handy laying under the car more than once. 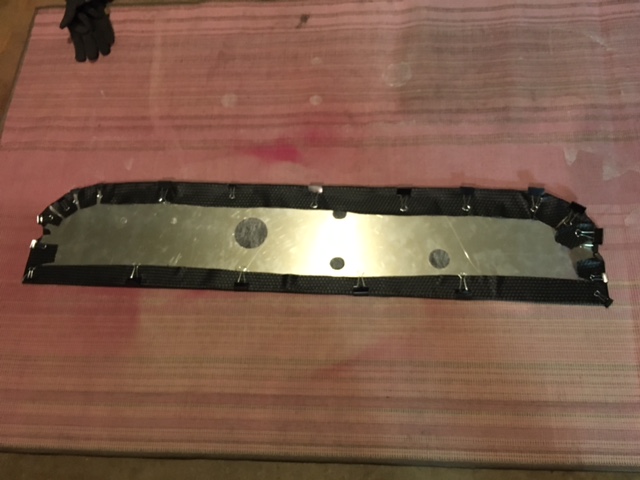 Once applied I used some fancy binder clips that I may or may not have found in the supply closet at work to keep the vinyl in place. Now, if you're worried about me taking supplies from work I'll have you know I returned the clips after I used them. I call it recycling (IMG:style_emoticons/default/smile.gif) |
|
|
|
Posts in this topic
 vintage914racer My Track Dash Reconstruction Nov 21 2016, 10:58 PM
 vintage914racer As the dash slowly started to take form I couldn... Nov 21 2016, 11:24 PM vintage914racer In my head there were two things working against m... Nov 21 2016, 11:39 PM vintage914racer So, to make a long story a little less long, I com... Nov 21 2016, 11:42 PM carcus Great work!!! Looks awesome!!... Nov 22 2016, 02:24 AM
 vintage914racer
Great work!!! Looks awesome!... Nov 22 2016, 06:55 AM mgp4591 What a cool upgrade, making the car look better an... Nov 22 2016, 02:32 AM RobW :agree:
Nice job! There's nothing more s... Nov 22 2016, 07:00 AM jmitro very nice job! great work Nov 22 2016, 07:03 AM Frankvw Great update ! And kudos to the craftmaster wi... Nov 22 2016, 07:07 AM vintage914racer
Great update ! And kudos to the craftmaster w... Nov 22 2016, 07:23 AM tygaboy Another great example of getting in there and just... Nov 22 2016, 07:54 AM vintage914racer
Another great example of getting in there and jus... Nov 22 2016, 05:23 PM whitetwinturbo :headbanger: :headbanger: :headbanger: ............ Nov 23 2016, 11:14 PM gms Ben, It looks very nice! Nov 25 2016, 10:26 AM
vintage914racer
Great work!!! Looks awesome!... Nov 22 2016, 06:55 AM mgp4591 What a cool upgrade, making the car look better an... Nov 22 2016, 02:32 AM RobW :agree:
Nice job! There's nothing more s... Nov 22 2016, 07:00 AM jmitro very nice job! great work Nov 22 2016, 07:03 AM Frankvw Great update ! And kudos to the craftmaster wi... Nov 22 2016, 07:07 AM vintage914racer
Great update ! And kudos to the craftmaster w... Nov 22 2016, 07:23 AM tygaboy Another great example of getting in there and just... Nov 22 2016, 07:54 AM vintage914racer
Another great example of getting in there and jus... Nov 22 2016, 05:23 PM whitetwinturbo :headbanger: :headbanger: :headbanger: ............ Nov 23 2016, 11:14 PM gms Ben, It looks very nice! Nov 25 2016, 10:26 AM |
1 User(s) are reading this topic (1 Guests and 0 Anonymous Users)
0 Members:

|
Lo-Fi Version | Time is now: 27th May 2026 - 02:28 AM |
Invision Power Board
v9.1.4 © 2026 IPS, Inc.