|
|
|
Porsche, and the Porsche crest are registered trademarks of Dr. Ing. h.c. F. Porsche AG.
This site is not affiliated with Porsche in any way. Its only purpose is to provide an online forum for car enthusiasts. All other trademarks are property of their respective owners. |
|
|


| Tenner |
 May 13 2019, 08:33 AM May 13 2019, 08:33 AM
Post
#1
|
|
Newbie  Group: Members Posts: 20 Joined: 22-June 10 From: Germany Member No.: 11,863 Region Association: Germany |
As I have written before in Superhawk996 thread, I build the inner longitudinal myself. However, it took more than 6 months for me to come to a useful conclusion and 3-4 attempts with different approaches. The aim was to form the longitudinal from one piece of sheet metal to have as few welds as possible at the end. The starting point was, except for the first attempt, a 1000x500mm large, 1.2mm thick steel sheet. At the first attempt, I first put down the lower edge and then brought the rounding into the metal sheet with a stretching and compression device. At the end of the procedure, the lower edge lay flat on the repair panel of the inner wheelhouse.
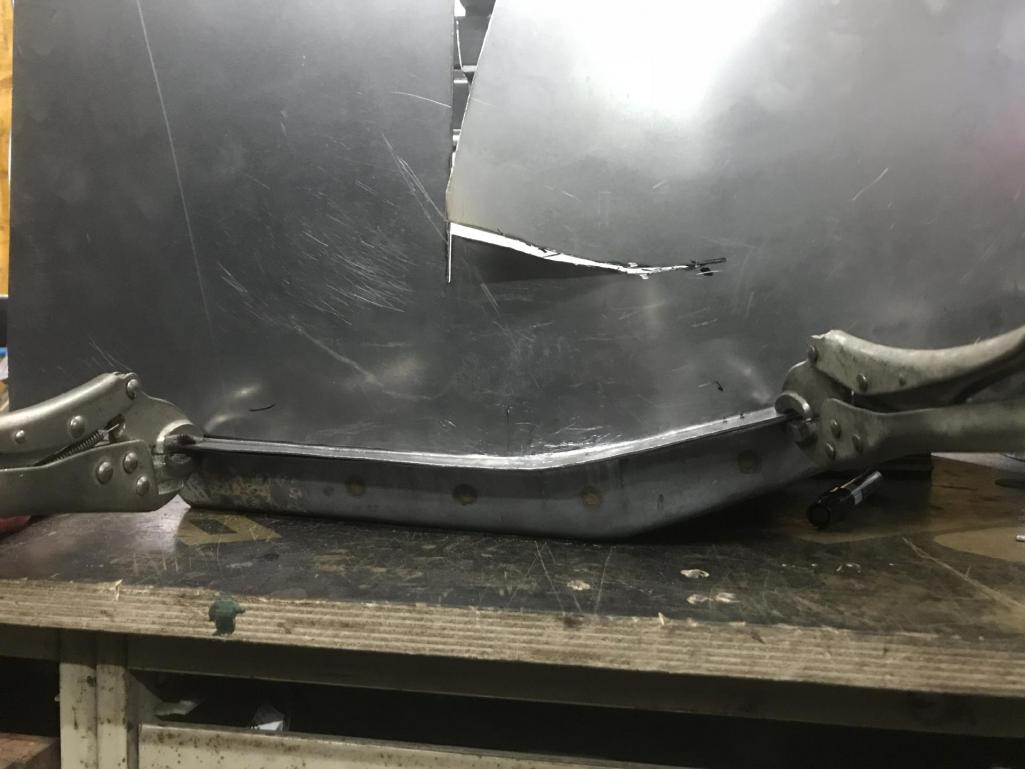  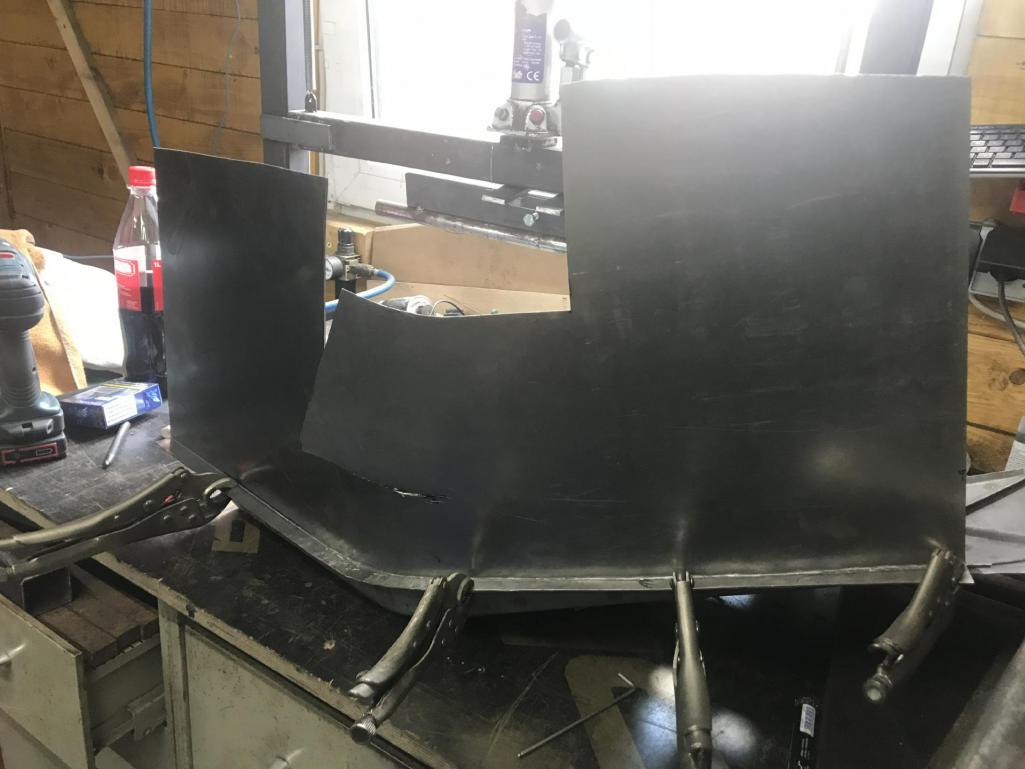 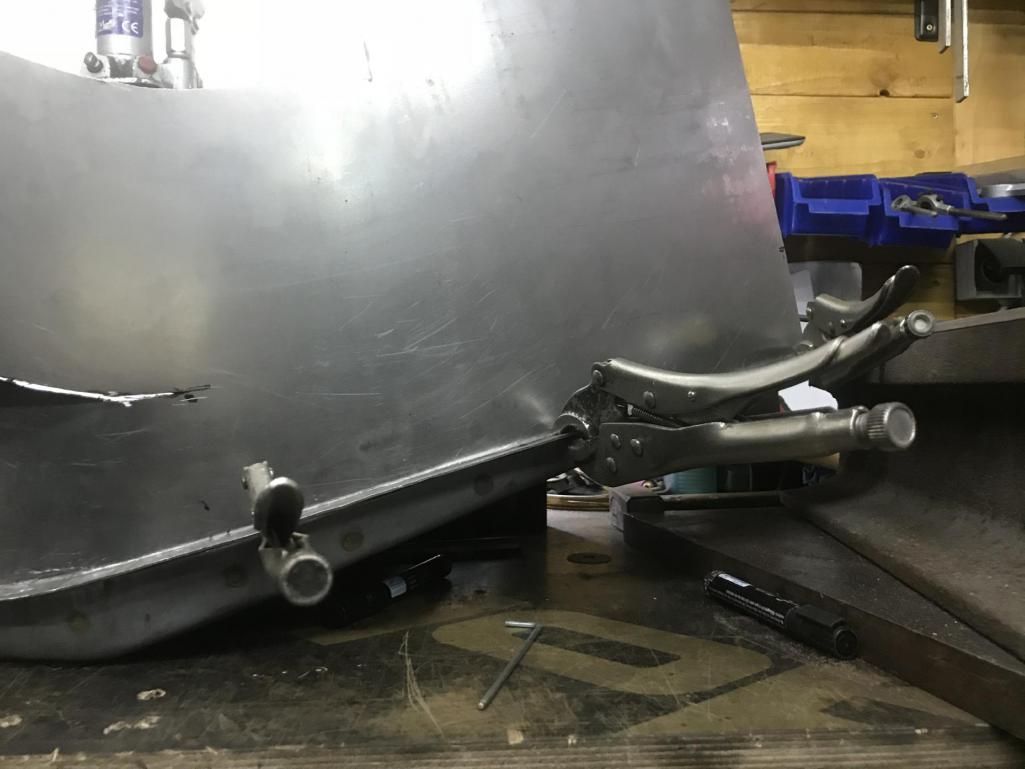 In the next step, the second "edge" had to be bent. Since this edge is less an edge than a curve, I built a tool to bend the sheet. 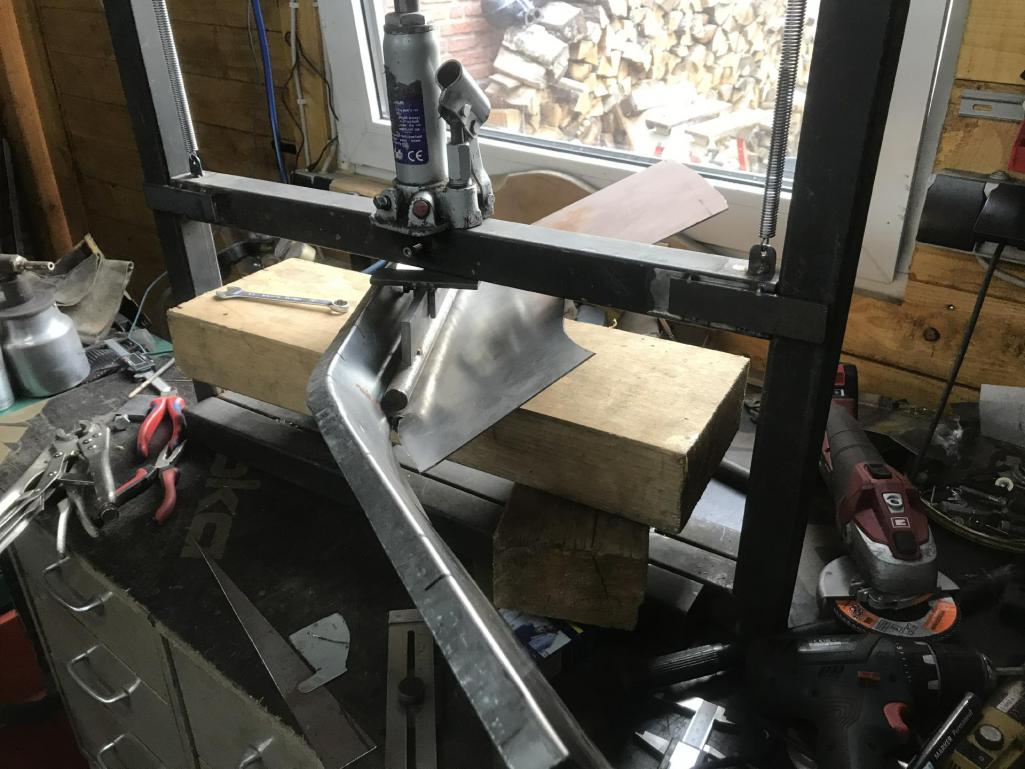 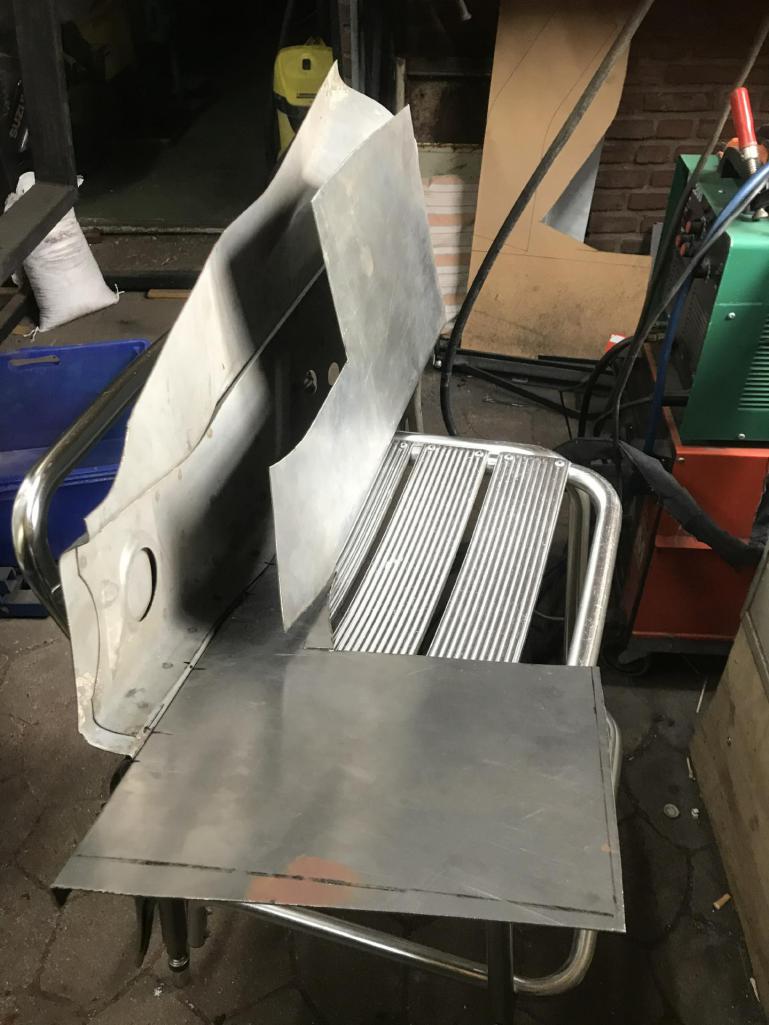 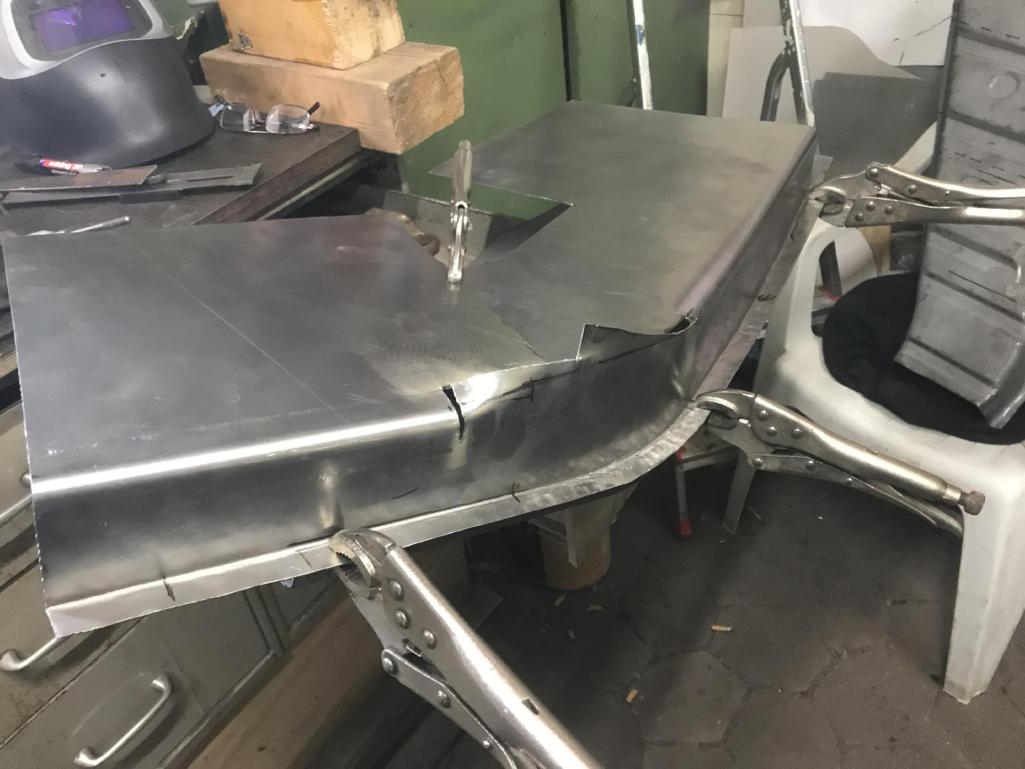 The top edge / rounding and the first attempt was done ... 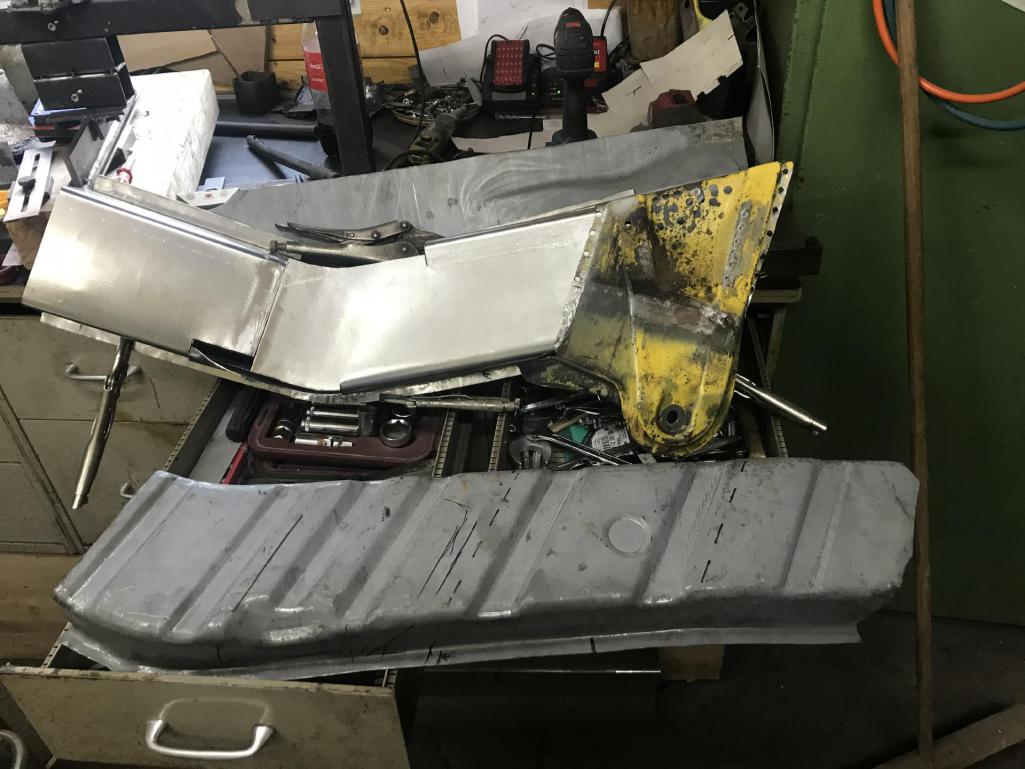 basically quite good, but unfortunately I had to realize that the part was a bit short. When fitting, I noticed that the sheet metal at the longitudinal in the passenger compartment was very thin. I had to cut much more out of the longitudinal. In addition, my repair sheet was 1.5mm and not as original 1.2mm. The second attempt was a single failure, too short at the front, too long at the back and too little material in the width. For the 3rd attempt, I ordered 1.2mm sheet metal and started again. Since the 1st edge already has a rather complex shape and the forming with the stretching and compression tool was a pita, I made a knocking mold out of a 1m long angle iron. 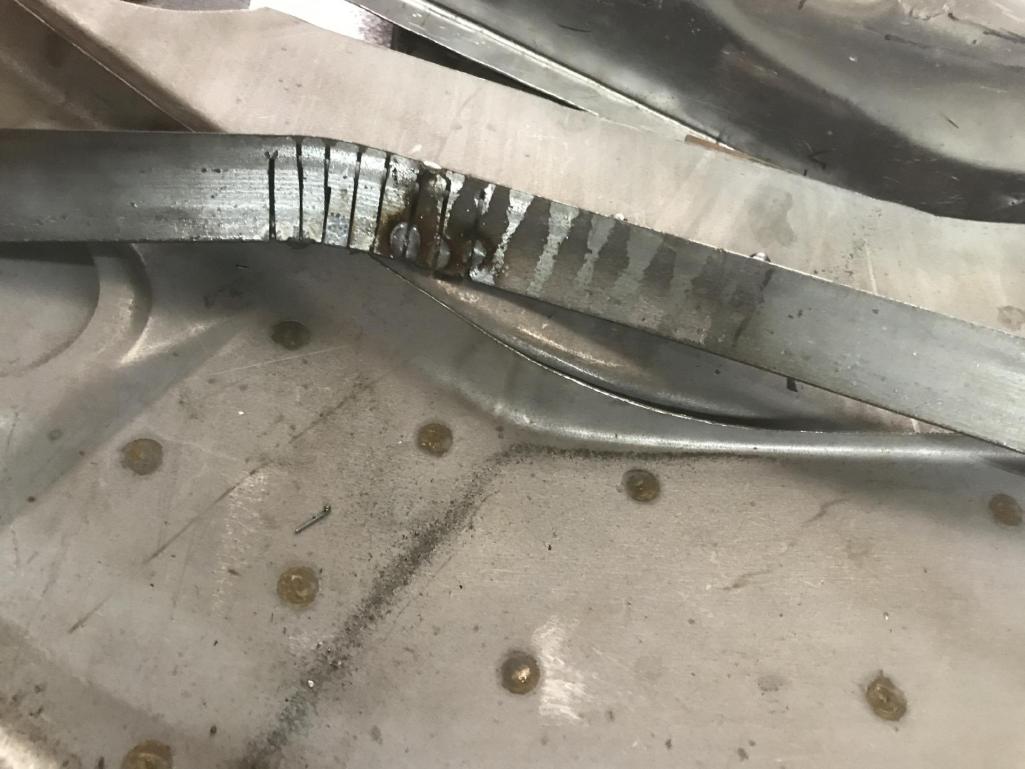 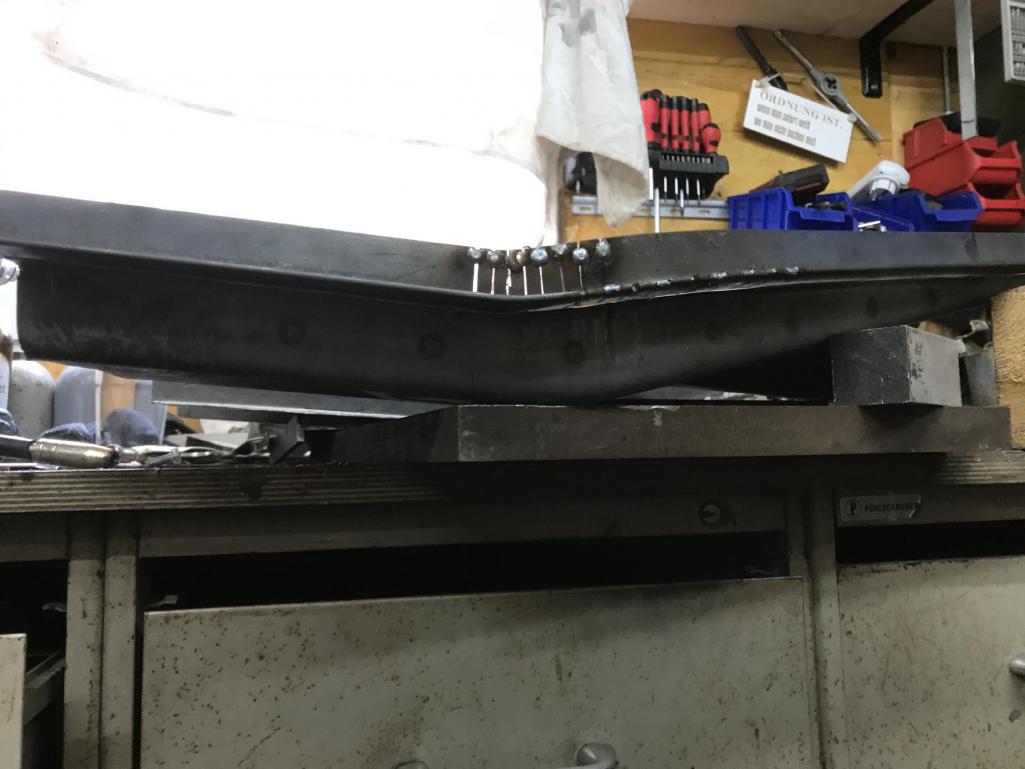 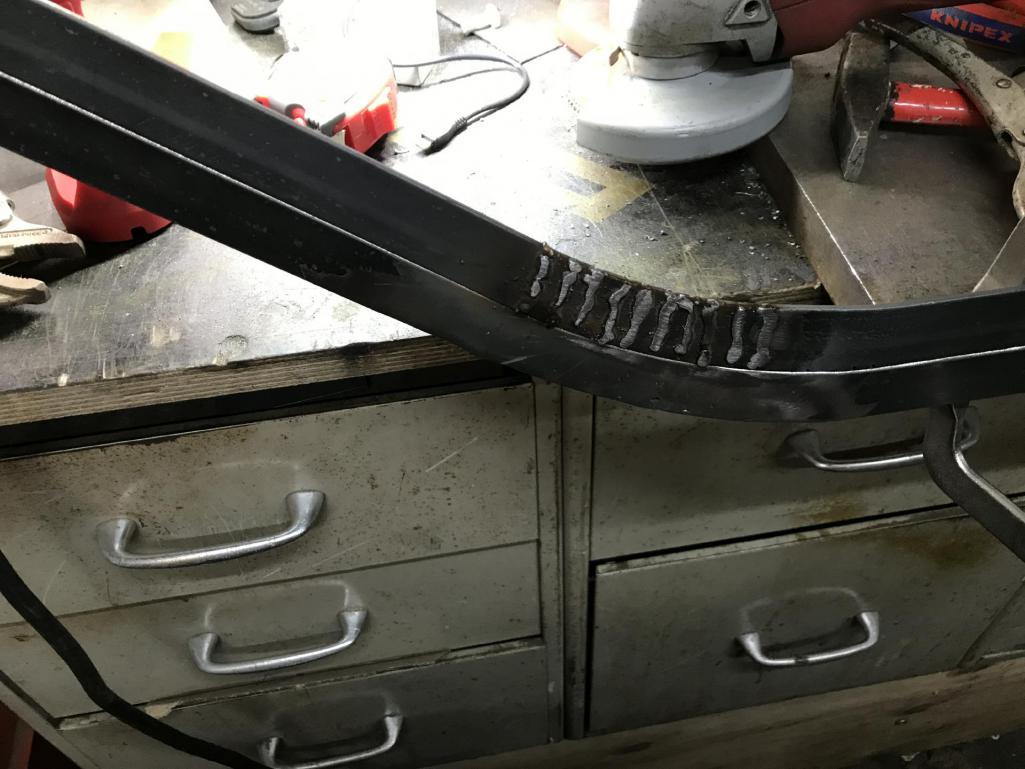 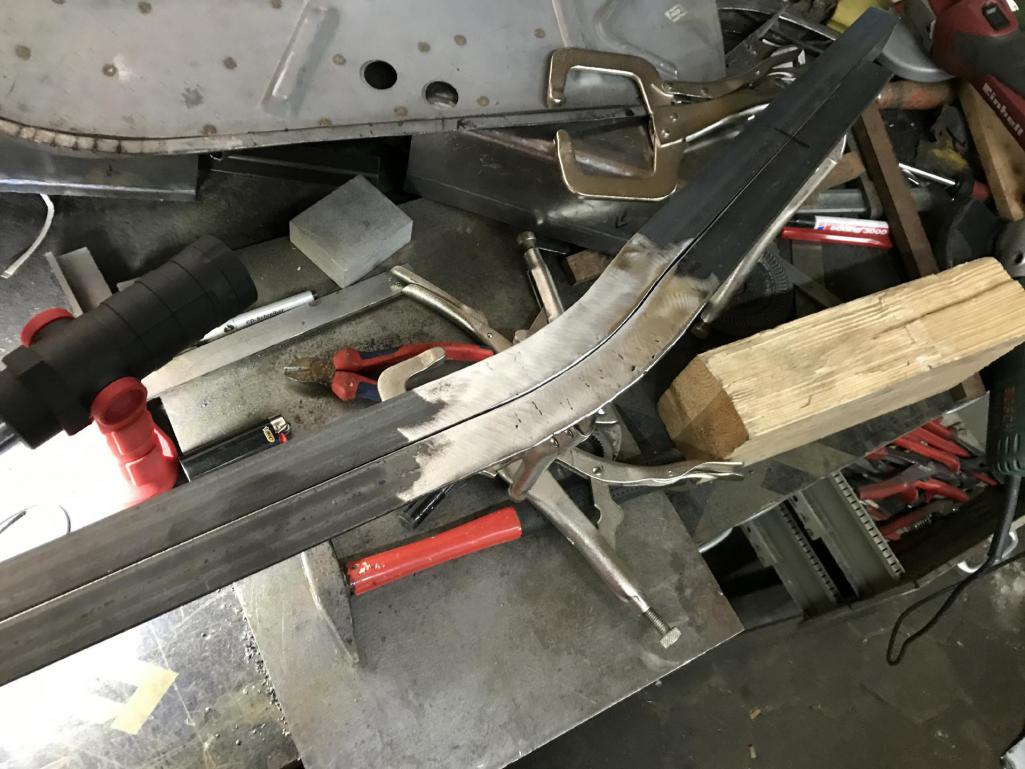 The sheet metal is clamped in between and the sheet has its profile. Then the edge is shaped with a hammer. 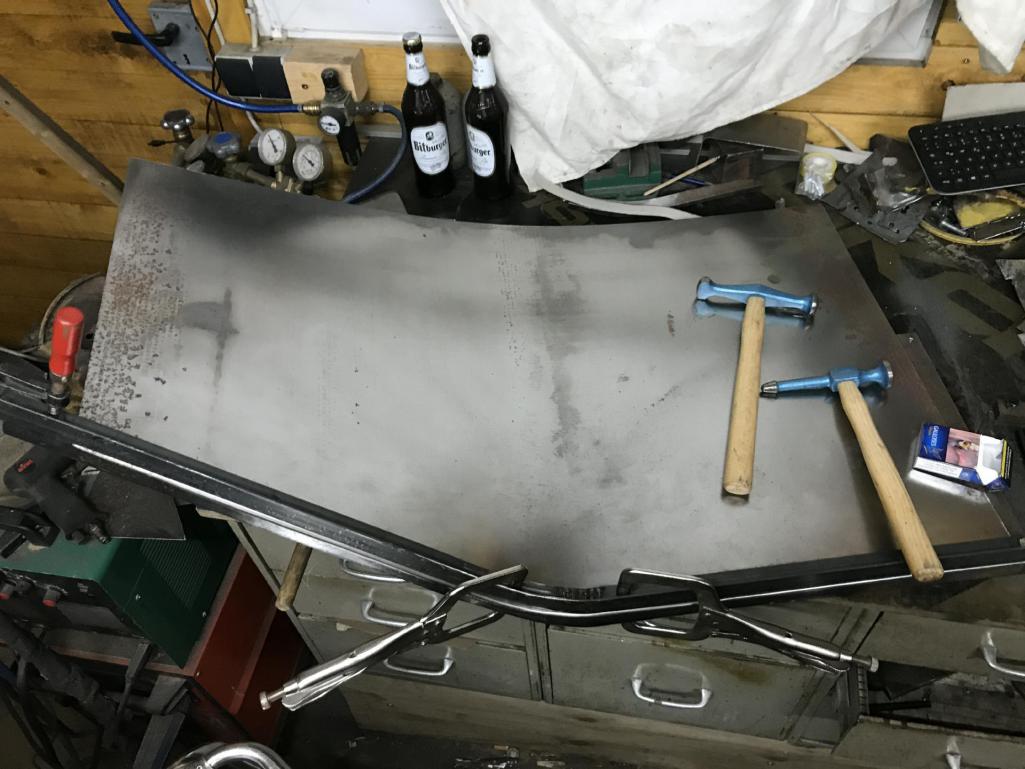  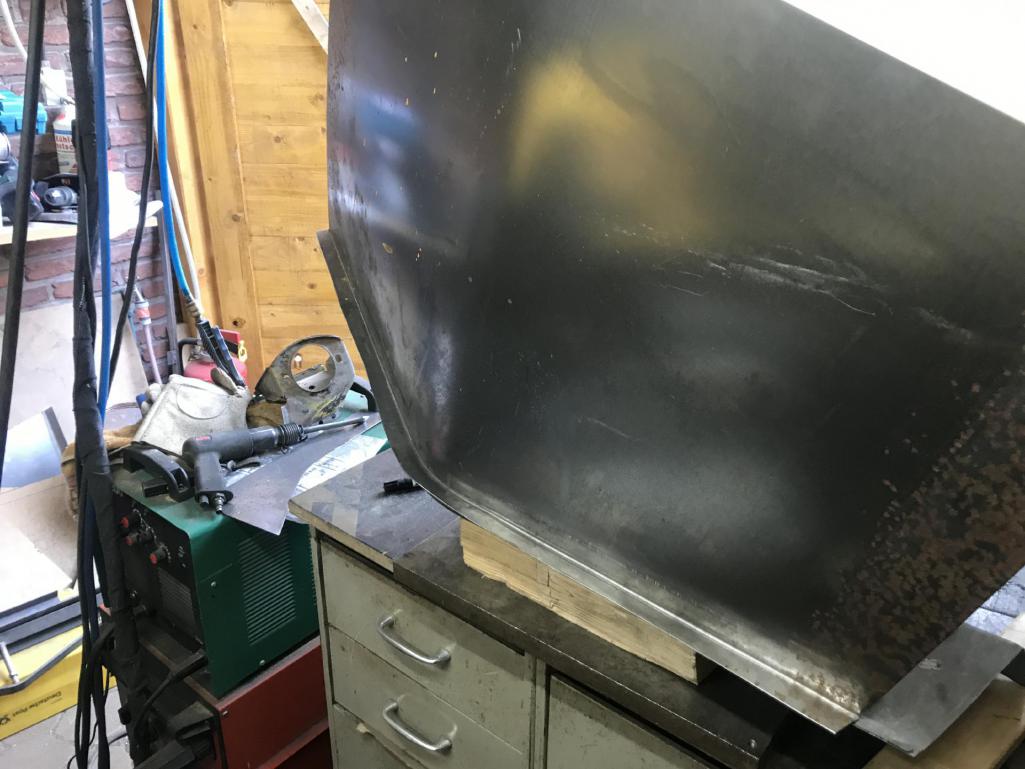 |
   |

 
|
  |
Replies
| Tenner |
May 13 2019, 08:40 AM
Post
#2
|
|
Newbie Group: Members Posts: 20 Joined: 22-June 10 From: Germany Member No.: 11,863 Region Association: Germany |
Also very tedious, but the result is good.
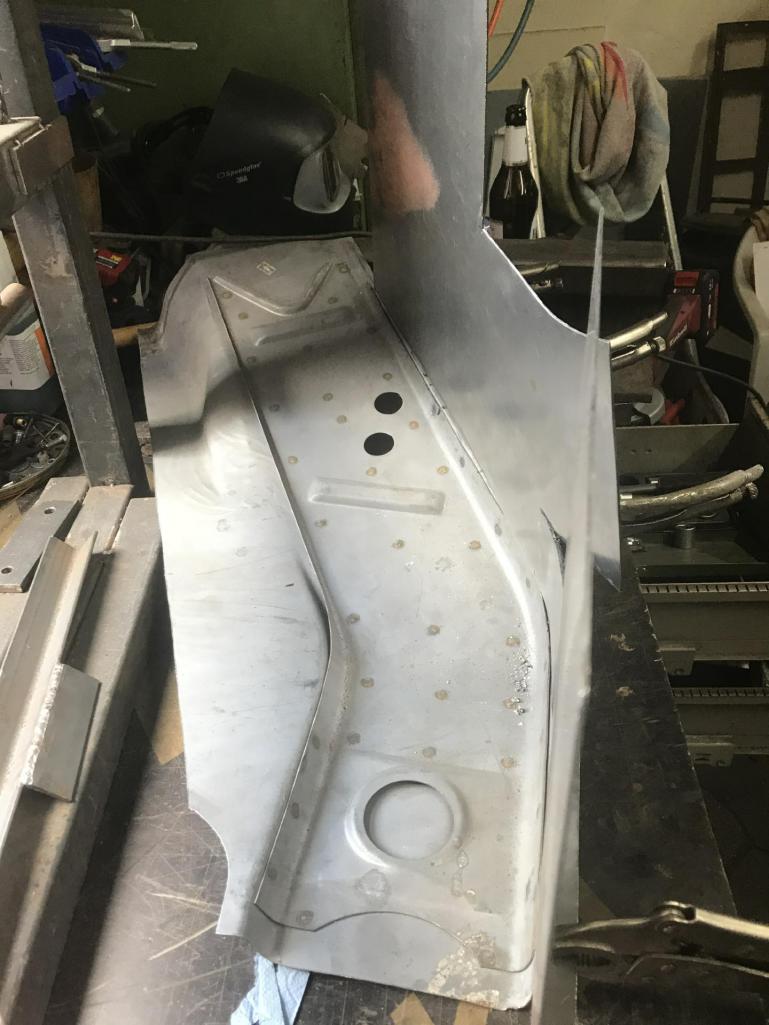
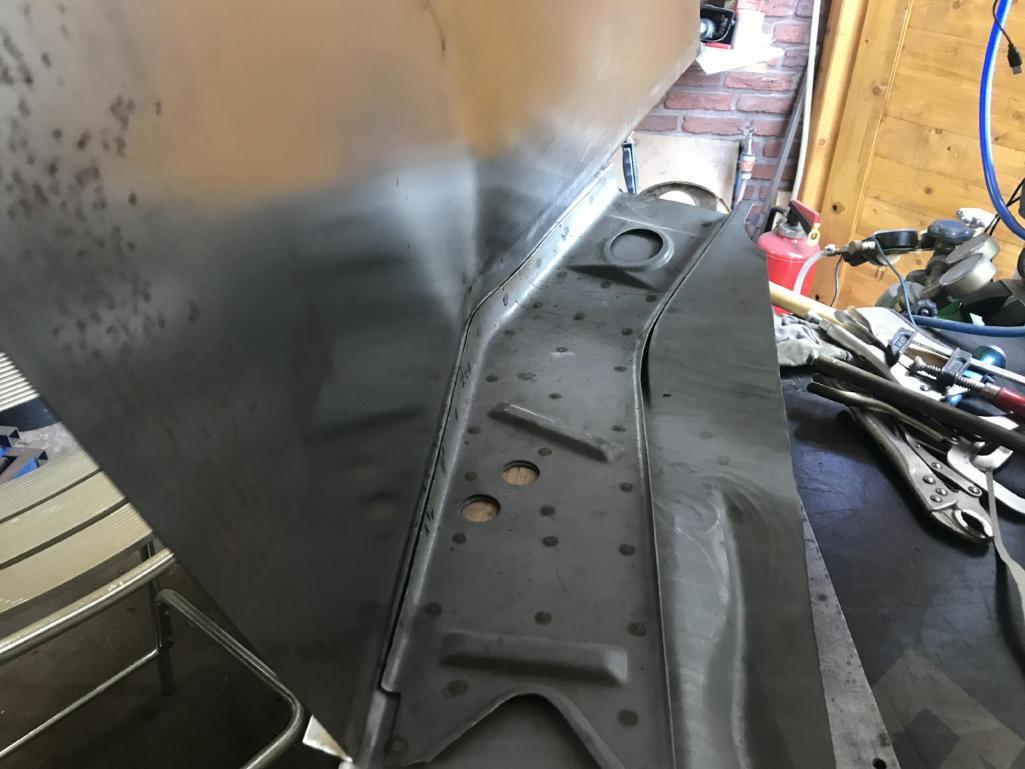 The next steps I did exactly as I did on the first try. But the sheet was useless too. At the last edge (Welding to the inner wheelhouse) I confused the dimensions front / rear, so that the box in the front of the engine compartment was too wide and too narrow at the back. Stupidly, I had already cut off the excess material, otherwise I could have straightened the edge again and turn again. Despite the failures my motivation was unbroken. 3. Attempt. This time I built a second knock mold for the upper edge. 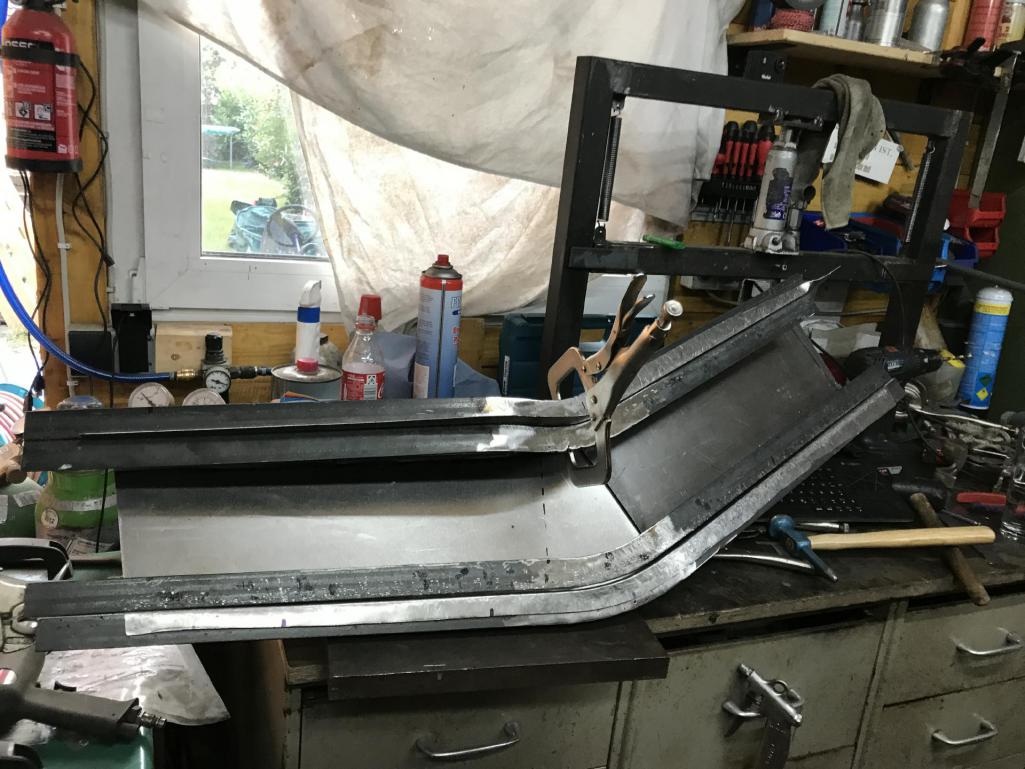 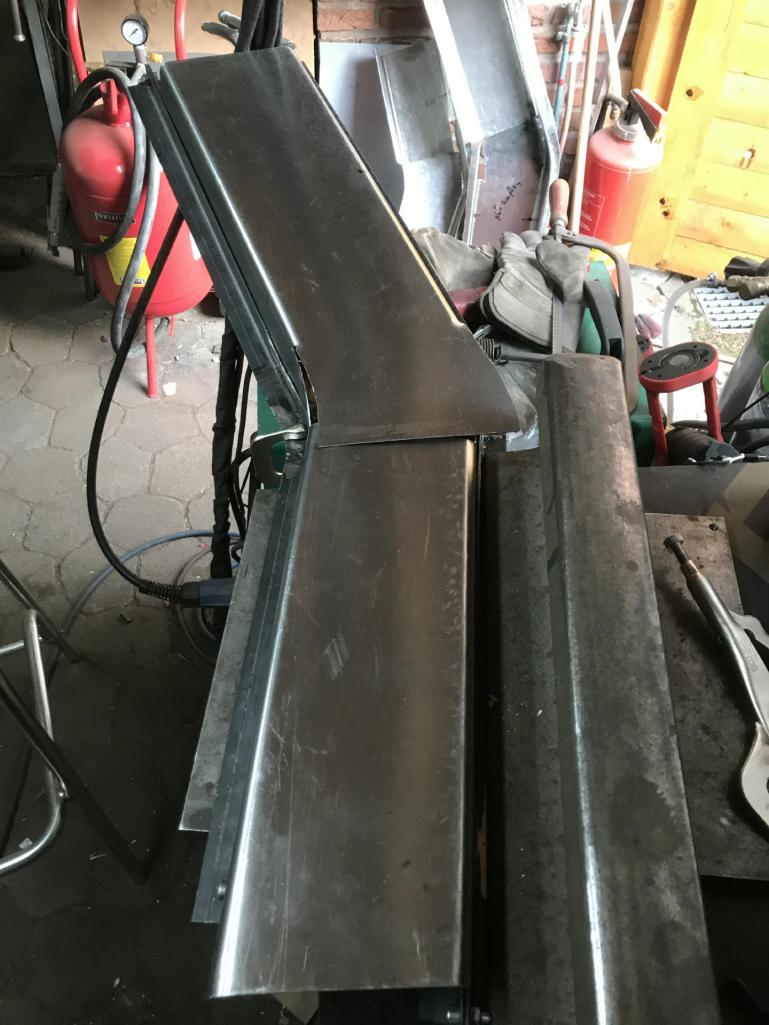 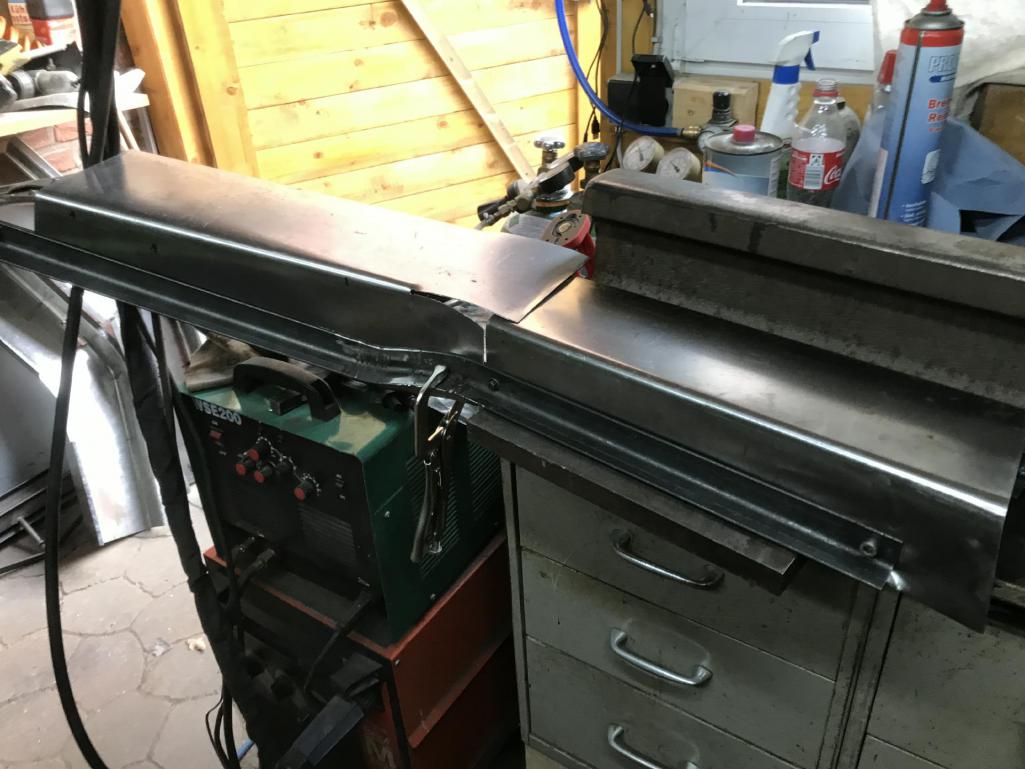 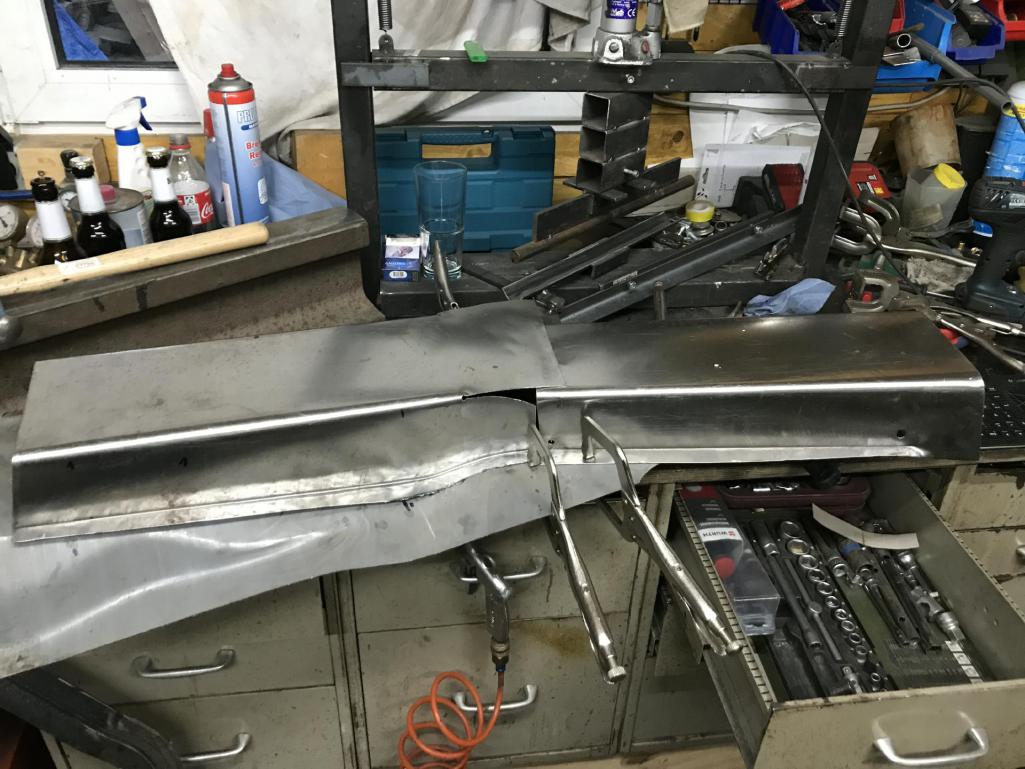 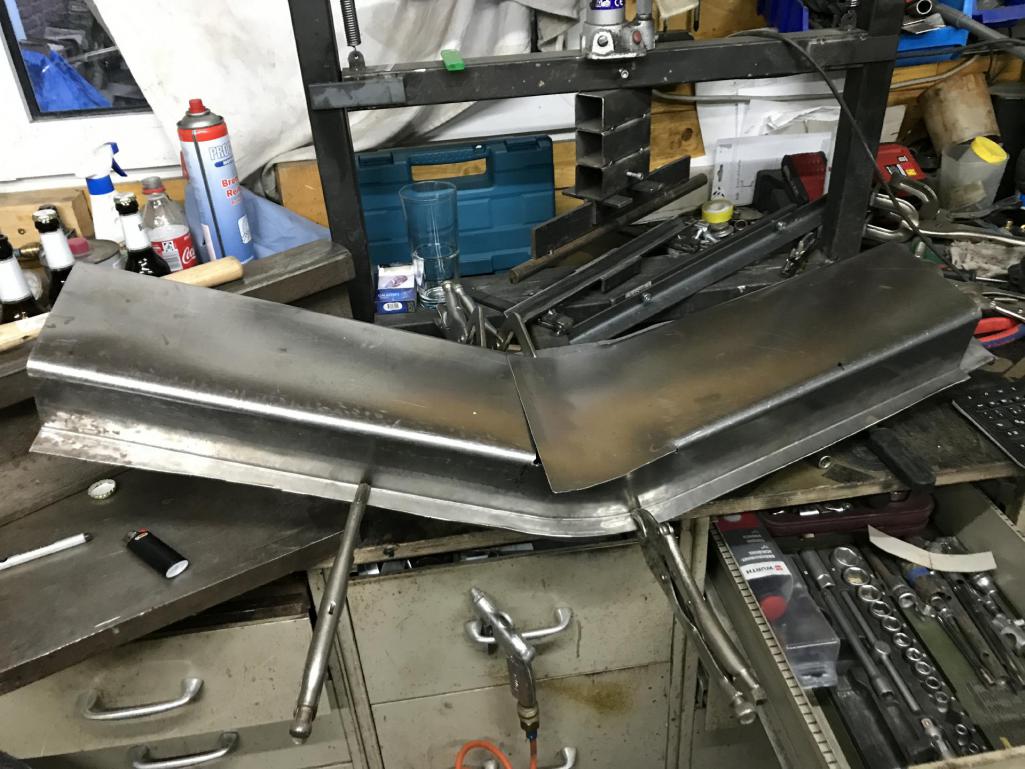 In the last 3 weeks I have adapted the new repair sheet to the body, and vice versa. I started with the inner longitudinal. At the front it fits quite well.  Since I wanted to save as much of the internal reinforcement as possible, I peeled off so much metal that only healthy material was left over. The overlap of internal reinforcement and the sill should be sufficient to stabilize the weld. The weld between original sills and repair panel is then hidden under the rear axle mount. 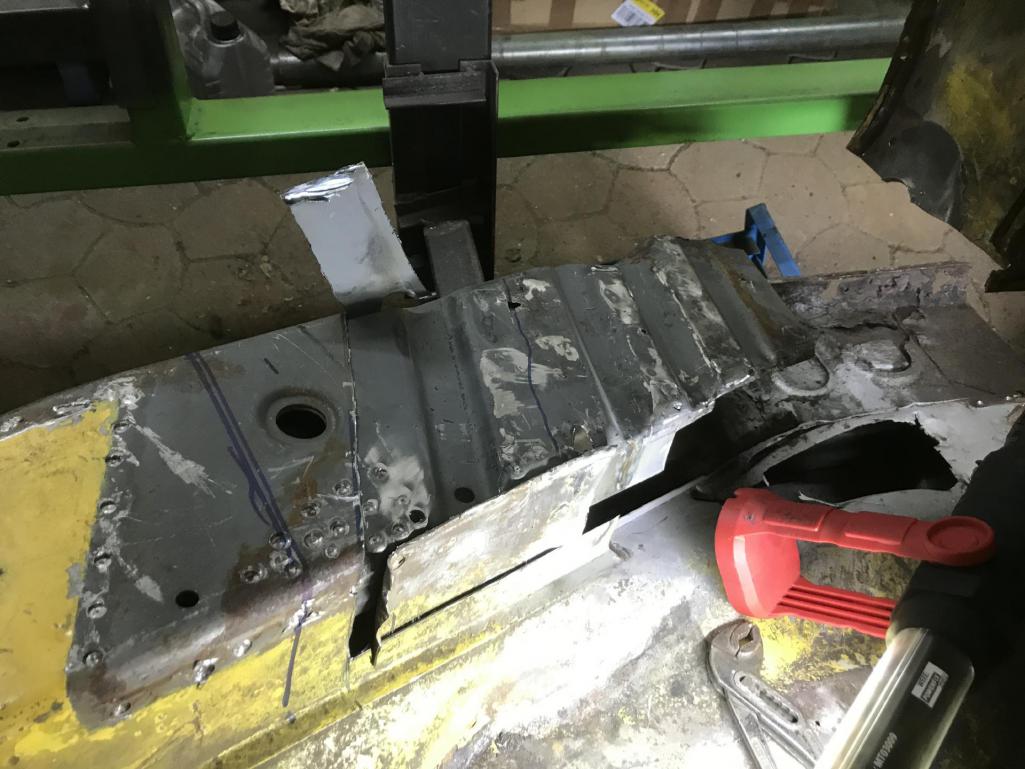 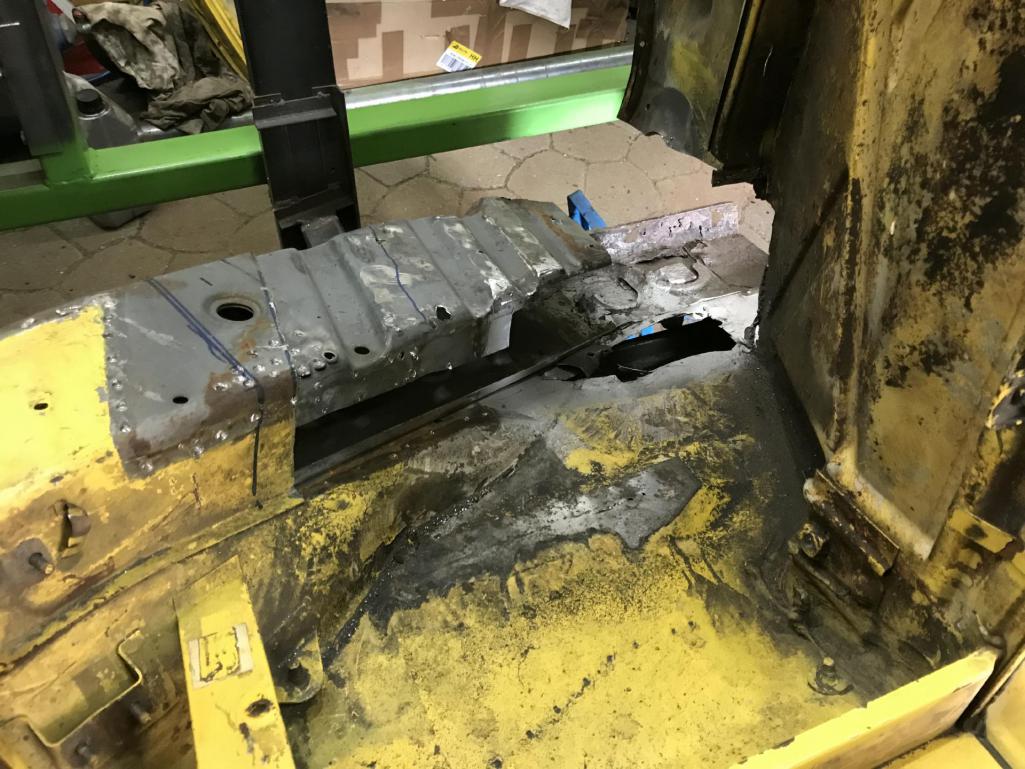   After a bit of grinding and filing, the sheet was in the right place. 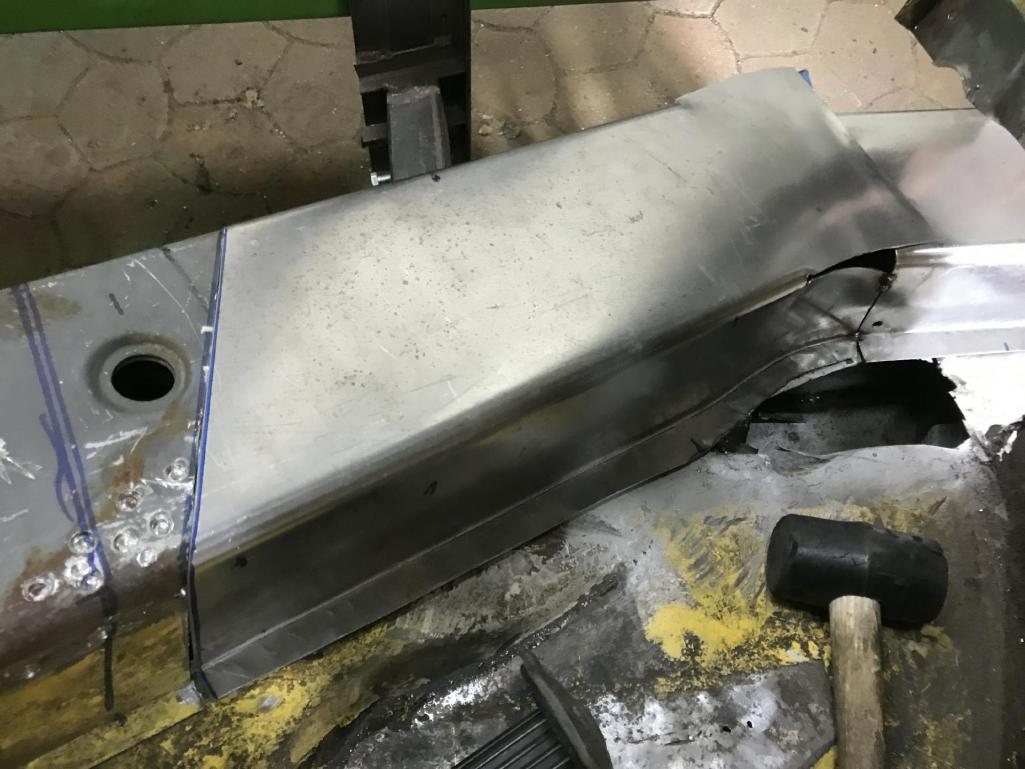 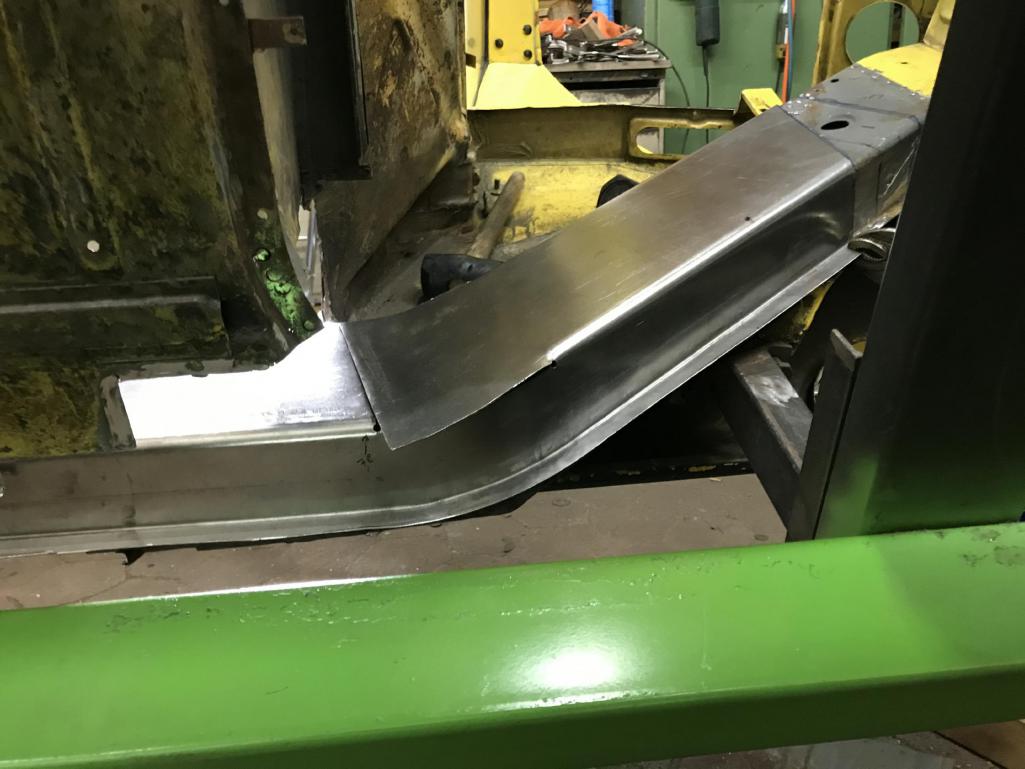 |
|
|
|
Posts in this topic
 Tenner My Hellhole Repair May 13 2019, 08:33 AM
 Garland Love it, keep it up. May 13 2019, 08:46 AM Tenner
Next to do, inner wheelhouse.
It's alwa... May 13 2019, 08:47 AM defianty Crikey that's a lot of work. Nicely done thoug... May 13 2019, 09:27 AM dr914@autoatlanta.com certainly some excellent work, you talented guy... May 13 2019, 09:47 AM 76-914 Nice work and great attitude. I usually have a gra... May 13 2019, 09:54 AM Superhawk996 :wttc:
I love seeing how folks attack similar pr... May 13 2019, 11:49 AM mbseto Man, that's some beautiful work. Valuable thr... May 13 2019, 12:42 PM bbrock Simply amazing.
f8Y2ZflC7hg May 13 2019, 04:28 PM billium01 Looks great! Just FYI for anyone reading this ... May 13 2019, 05:38 PM Tenner Thank you for the kind words and the encouragement... May 14 2019, 12:47 AM Tenner only small but steady progress.
I've been wor... May 23 2019, 03:52 AM Jeff Hail The high road always has the better view. That... May 23 2019, 08:43 PM Tenner Hello Jeff, thank you, guys like you, bbrock, Supe... Jun 25 2019, 01:59 AM
Garland Love it, keep it up. May 13 2019, 08:46 AM Tenner
Next to do, inner wheelhouse.
It's alwa... May 13 2019, 08:47 AM defianty Crikey that's a lot of work. Nicely done thoug... May 13 2019, 09:27 AM dr914@autoatlanta.com certainly some excellent work, you talented guy... May 13 2019, 09:47 AM 76-914 Nice work and great attitude. I usually have a gra... May 13 2019, 09:54 AM Superhawk996 :wttc:
I love seeing how folks attack similar pr... May 13 2019, 11:49 AM mbseto Man, that's some beautiful work. Valuable thr... May 13 2019, 12:42 PM bbrock Simply amazing.
f8Y2ZflC7hg May 13 2019, 04:28 PM billium01 Looks great! Just FYI for anyone reading this ... May 13 2019, 05:38 PM Tenner Thank you for the kind words and the encouragement... May 14 2019, 12:47 AM Tenner only small but steady progress.
I've been wor... May 23 2019, 03:52 AM Jeff Hail The high road always has the better view. That... May 23 2019, 08:43 PM Tenner Hello Jeff, thank you, guys like you, bbrock, Supe... Jun 25 2019, 01:59 AM
 DRPHIL914
Hello Jeff, thank you, guys like you, bbrock, Sup... Feb 11 2021, 09:28 AM saigon71 Absolutely outstanding metal work.
Well done si... Jun 25 2019, 05:18 AM Cairo94507 :popcorn: :beer2: Jun 25 2019, 06:46 AM Krieger You have excellent metal skills. I am glad you de... Jun 25 2019, 07:17 AM Tenner Long time since my last post but the Project is st... Feb 11 2021, 05:53 AM Tenner RE: My Hellhole Repair Feb 11 2021, 05:57 AM Tenner Firewall rebuild
Feb 11 2021, 06:03 AM saigon71 Some amazing metal work going on there - well done... Feb 11 2021, 06:41 AM michelko
Some amazing metal work going on there - well don... Feb 11 2021, 06:56 AM TRS63 Amazing work, thanks for Sharing!
Where are y... Feb 11 2021, 06:59 AM michelko
Amazing work, thanks for Sharing!
Where are ... Feb 11 2021, 08:02 AM Superhawk996 Glad to see this is still moving forward.
Great... Feb 11 2021, 07:20 AM mate914 Nice metal surgery.... Be sure to coat inside the ... Feb 11 2021, 08:11 AM mskala Awesome job. If you are putting in the 4-cyl engi... Feb 11 2021, 09:58 AM Rleog Great work. Keep us posted.
Michelko: “ fanta... Feb 11 2021, 01:56 PM 930cabman Time, patience, skill, ........
Keep it going you... Feb 11 2021, 05:49 PM Tenner Thank you all for the kind words. :)
@[url=ht... Feb 12 2021, 03:41 AM Krieger WOW! Fantastic work! Feb 12 2021, 08:47 AM jd74914 Looking awesome!!
Could you post some mor... Feb 12 2021, 11:16 AM Dion Fantastic work. Nice to see another 914 being resc... Feb 13 2021, 07:49 AM Tenner it's been a bit since my last post.
Here's... Apr 15 2021, 05:34 AM Tenner After repairing all of the rust perforations in th... Apr 15 2021, 05:47 AM Tenner @[url=http://www.914world.com/bbs2/index.php?showu... Apr 15 2021, 05:53 AM Cairo94507 :beer1: :popcorn: :trophy: Apr 15 2021, 07:08 AM 76-914 Love this thread. :beer2: Apr 15 2021, 02:31 PM MM1 Vielen Dank! Sehr cool . . . :gerflag: Apr 15 2021, 03:19 PM Montreal914 Bumping this up... :)
@Tenner : I just went thr... May 14 2023, 02:33 PM Vysoc Very nice work, you encourage us all!!... May 14 2023, 07:47 PM Cairo94507 The skills we see here are just amazing. :trophy... May 15 2023, 06:24 AM
DRPHIL914
Hello Jeff, thank you, guys like you, bbrock, Sup... Feb 11 2021, 09:28 AM saigon71 Absolutely outstanding metal work.
Well done si... Jun 25 2019, 05:18 AM Cairo94507 :popcorn: :beer2: Jun 25 2019, 06:46 AM Krieger You have excellent metal skills. I am glad you de... Jun 25 2019, 07:17 AM Tenner Long time since my last post but the Project is st... Feb 11 2021, 05:53 AM Tenner RE: My Hellhole Repair Feb 11 2021, 05:57 AM Tenner Firewall rebuild
Feb 11 2021, 06:03 AM saigon71 Some amazing metal work going on there - well done... Feb 11 2021, 06:41 AM michelko
Some amazing metal work going on there - well don... Feb 11 2021, 06:56 AM TRS63 Amazing work, thanks for Sharing!
Where are y... Feb 11 2021, 06:59 AM michelko
Amazing work, thanks for Sharing!
Where are ... Feb 11 2021, 08:02 AM Superhawk996 Glad to see this is still moving forward.
Great... Feb 11 2021, 07:20 AM mate914 Nice metal surgery.... Be sure to coat inside the ... Feb 11 2021, 08:11 AM mskala Awesome job. If you are putting in the 4-cyl engi... Feb 11 2021, 09:58 AM Rleog Great work. Keep us posted.
Michelko: “ fanta... Feb 11 2021, 01:56 PM 930cabman Time, patience, skill, ........
Keep it going you... Feb 11 2021, 05:49 PM Tenner Thank you all for the kind words. :)
@[url=ht... Feb 12 2021, 03:41 AM Krieger WOW! Fantastic work! Feb 12 2021, 08:47 AM jd74914 Looking awesome!!
Could you post some mor... Feb 12 2021, 11:16 AM Dion Fantastic work. Nice to see another 914 being resc... Feb 13 2021, 07:49 AM Tenner it's been a bit since my last post.
Here's... Apr 15 2021, 05:34 AM Tenner After repairing all of the rust perforations in th... Apr 15 2021, 05:47 AM Tenner @[url=http://www.914world.com/bbs2/index.php?showu... Apr 15 2021, 05:53 AM Cairo94507 :beer1: :popcorn: :trophy: Apr 15 2021, 07:08 AM 76-914 Love this thread. :beer2: Apr 15 2021, 02:31 PM MM1 Vielen Dank! Sehr cool . . . :gerflag: Apr 15 2021, 03:19 PM Montreal914 Bumping this up... :)
@Tenner : I just went thr... May 14 2023, 02:33 PM Vysoc Very nice work, you encourage us all!!... May 14 2023, 07:47 PM Cairo94507 The skills we see here are just amazing. :trophy... May 15 2023, 06:24 AM |
1 User(s) are reading this topic (1 Guests and 0 Anonymous Users)
0 Members:

|
Lo-Fi Version | Time is now: 9th June 2024 - 02:49 AM |
Invision Power Board
v9.1.4 © 2024 IPS, Inc.