|
|
|
Porsche, and the Porsche crest are registered trademarks of Dr. Ing. h.c. F. Porsche AG.
This site is not affiliated with Porsche in any way. Its only purpose is to provide an online forum for car enthusiasts. All other trademarks are property of their respective owners. |
|
|


| Doug Leggins |
 Oct 4 2005, 08:55 PM Oct 4 2005, 08:55 PM
Post
#1
|
|
Senior Member  Group: Benefactors Posts: 1,358 Joined: 6-February 03 From: Nashville, Indiana Member No.: 261 Region Association: None |
The teener kicked my ass tonight! I simply wore myself out trying to get the rear trunk torsion bar behind the trunk roller.
I searched for as much info as I cold find before beginning this task. I modified my 12" adjustable wrench as mentioned on other threads on this topic. This tool proved to be a very good lever for pushing the torsion bar back. I could get the torsion bar pushed/twisted back well enough but I could not get it around the hinge roller/pin. I tried several times but could not find a way to get the roller behind the pin on the hinge. I tried to remove the hinge then hold the torsion bar back as far as I could and then reinstall the hinge -This is the task the wore me out! No matter how or what I tried I could not find a way to get the bar behind the roller. Anyone know the secret/technique to get the torsion bar in place? Here is a pic of the wrench with a notch cut out on the end. Attached image(s) 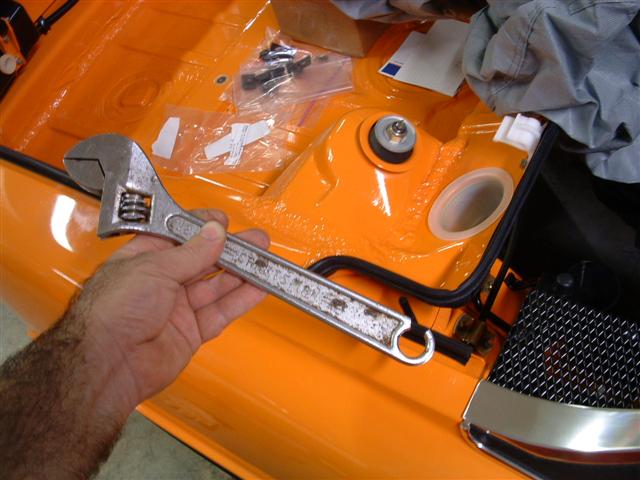
|
   |

 
|
  |
Replies
| jrmdir |
Aug 10 2021, 11:19 AM
Post
#2
|
|
Member Group: Members Posts: 224 Joined: 13-May 21 From: Central Ohio Member No.: 25,544 Region Association: Upper MidWest |
[/quote]
How did you determine the location of the JWest brackets? I have them and the tool to do this job. Was the engine installed when you did it? [/quote] Yes the engine is in and I removed the trunk lid. The kit is great but the instructions about locating the right spot for the holes didn't sound easy to me: Put the lid back on and do the trial and error thing! So I figured the best thing would be to try to make sure the center of the new bolt lined up with where the prior center of the welded bracket had been. So before I ground off the spot welds, I spent some time re-forming the broken off bracket until it fit back where it was - with the broken edges lined up with the metal still on the car. Then I screwed the old mounting bolt most of the way through (see photo) put a dab of white grease on the end and set it back in place so the grease transferred to the body. Probably overkill bc there was a definite dimple stamped into the body right were the grease ended up. Not sure if this was a a factory guide point but it seemed so. I only had to to one side so I don't know if they're all like that. Next I drilled a 5/16 hole at that center point. (start with a 1/8" drill and work up because there is a 2nd layer of metal partially behind that will cause a larger drill to walk off center. AMHIK!) Finally, I found a suitable bushing to allow me to put a longer 5/16 bolt through the large rod end hole, added a thin washer and stuck it through the new hole in the body with a nut and washer on the wheel well side. So, with the pivot point theoretically right where it used to be, I was able to rotate the new bracket around to find the best clearance for the four bolts and scribe for the bolt holes. So after all this verbiage, the big disclaimer is that I've yet to reinstall the lid - but will do that today. However since I drilled larger mounting holes as suggested - for adjustment - I'm pretty confident it will work out just fine. Ron 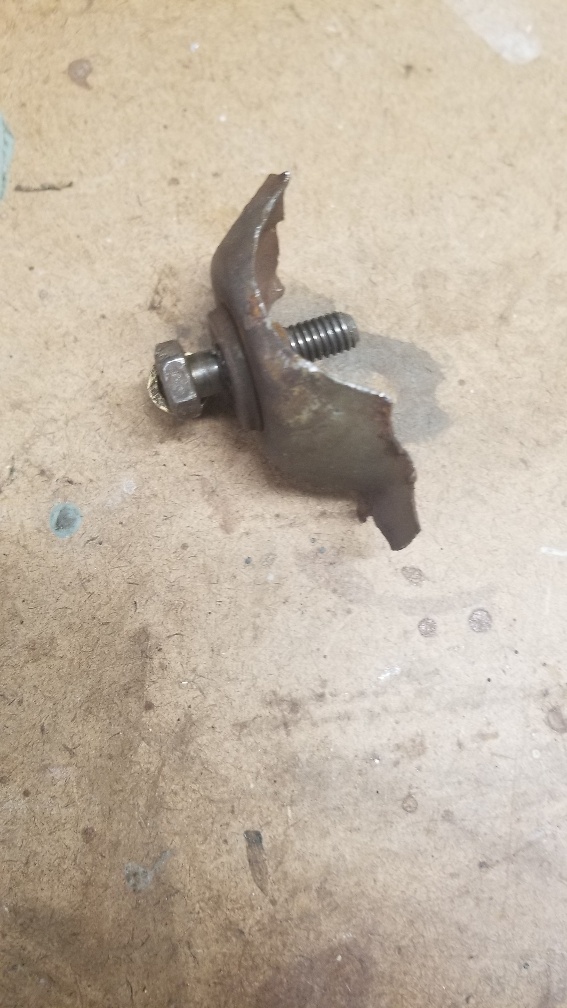 |
|
|
|
Posts in this topic
Doug Leggins I need help with rear trunk torsion bar Oct 4 2005, 08:55 PM Doug Leggins Trying to bet the black torsion bar behind the bra... Oct 4 2005, 09:03 PM Rand Taking mine OUT was a careful process... putting o... Oct 4 2005, 09:07 PM Joe Sharp Doug: I take my 1/4 screw driver extention and a d... Oct 4 2005, 10:06 PM Air_Cooled_Nut Though I can't help, this topic is perfect bec... Oct 4 2005, 10:19 PM olav To get that puppy on you need to:
Preload torsion... Oct 4 2005, 10:51 PM Doug Leggins I thought about the shock kits, even had it on the... Oct 4 2005, 10:53 PM olav There's a "special" tool to do this with and t... Oct 4 2005, 10:59 PM Doug Leggins
Doug Leggins Trying to bet the black torsion bar behind the bra... Oct 4 2005, 09:03 PM Rand Taking mine OUT was a careful process... putting o... Oct 4 2005, 09:07 PM Joe Sharp Doug: I take my 1/4 screw driver extention and a d... Oct 4 2005, 10:06 PM Air_Cooled_Nut Though I can't help, this topic is perfect bec... Oct 4 2005, 10:19 PM olav To get that puppy on you need to:
Preload torsion... Oct 4 2005, 10:51 PM Doug Leggins I thought about the shock kits, even had it on the... Oct 4 2005, 10:53 PM olav There's a "special" tool to do this with and t... Oct 4 2005, 10:59 PM Doug Leggins 

