|
|
|
Porsche, and the Porsche crest are registered trademarks of Dr. Ing. h.c. F. Porsche AG.
This site is not affiliated with Porsche in any way. Its only purpose is to provide an online forum for car enthusiasts. All other trademarks are property of their respective owners. |
|
|


| Chad911sc |
 Apr 25 2025, 05:50 PM Apr 25 2025, 05:50 PM
Post
#1
|
|
Member  Group: Members Posts: 243 Joined: 24-September 24 From: Florida Member No.: 28,374 Region Association: South East States |
So after 5 long months of work, I finally have the 2056 built and installed. (IMG:style_emoticons/default/piratenanner.gif)
I have a couple questions about the 123 4RV distributor. I haven’t hooked it up to power yet, but from my understanding, you hook up only the red wire and then power the ignition and a light should come on in the body of the distributor. 1) Since our motors go in a CW direction, the first movement of the distributor goes clockwise until the light turns off? Then CCW until the green light comes on? Correct? 2) The engine has dual carb Webber 40’s/Web cam 86a/Mild port and polished stock valve heads. My question is what setting should I use on the distributor? From what I see it looks like curve #3. Does this sound right? 3) Do I use the vacuum port on the distributor body to the base of one of my carbs, or do I plug it off, or do I leave it open? Thanks in advance for any info! Attached thumbnail(s) 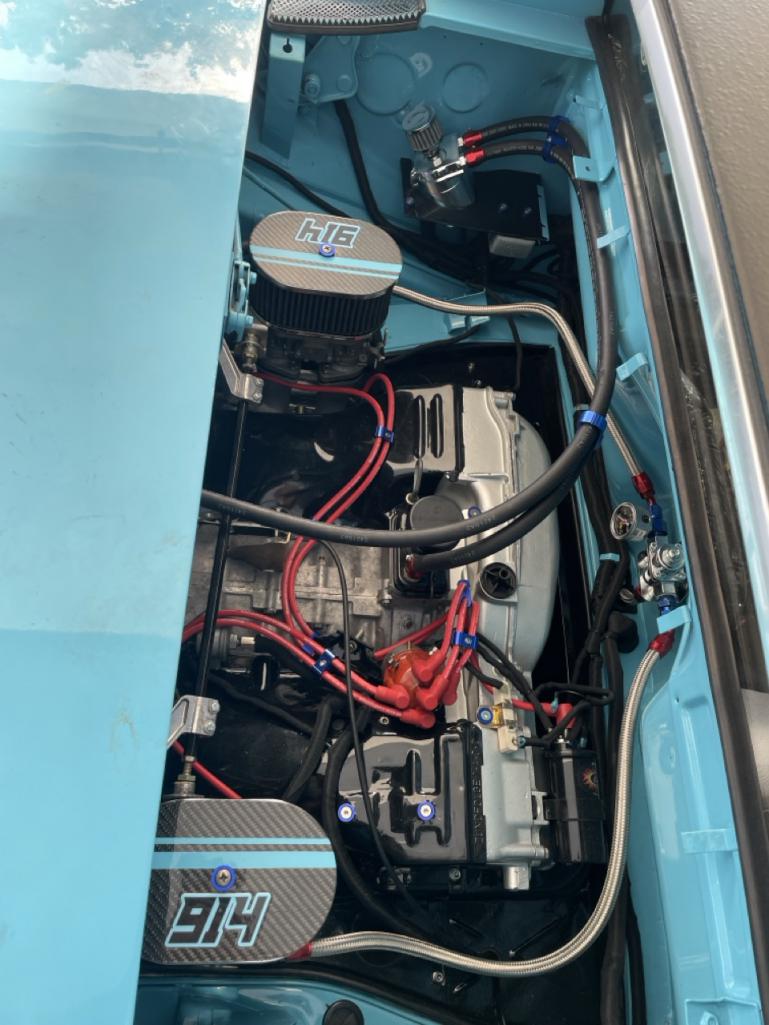 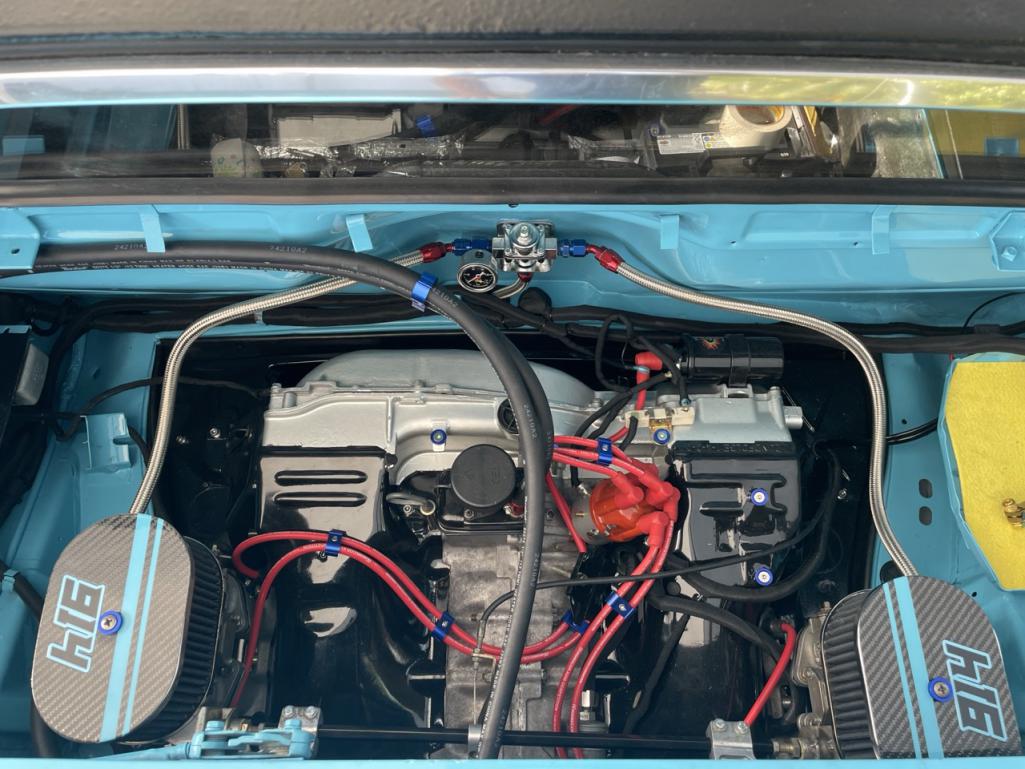 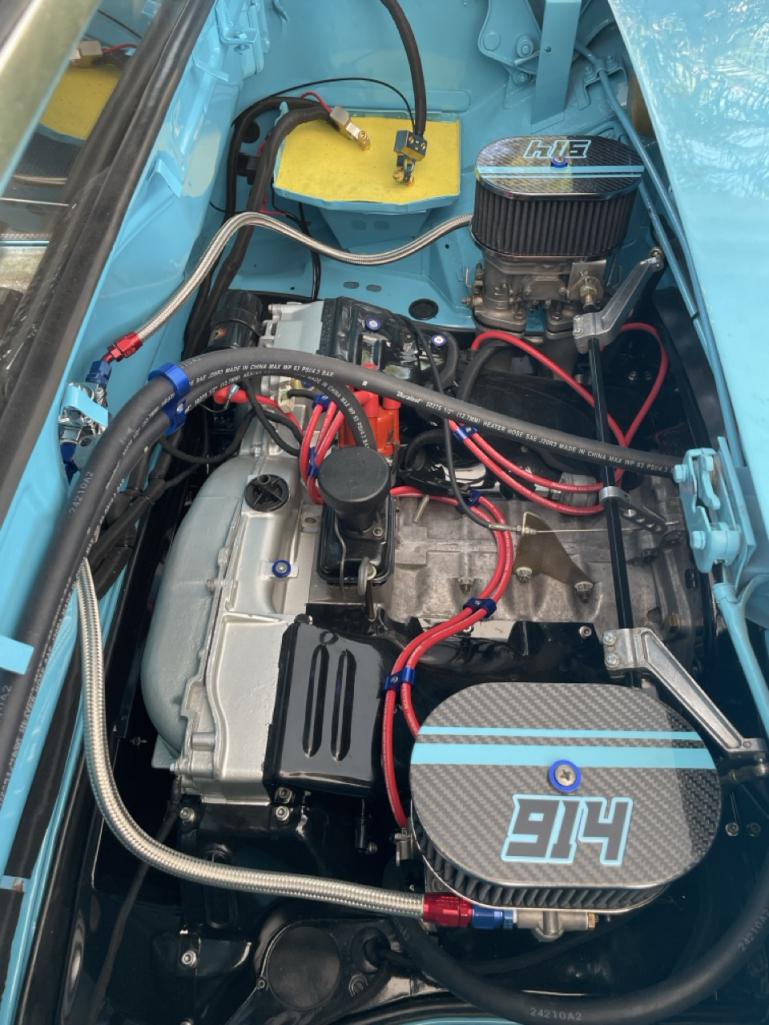 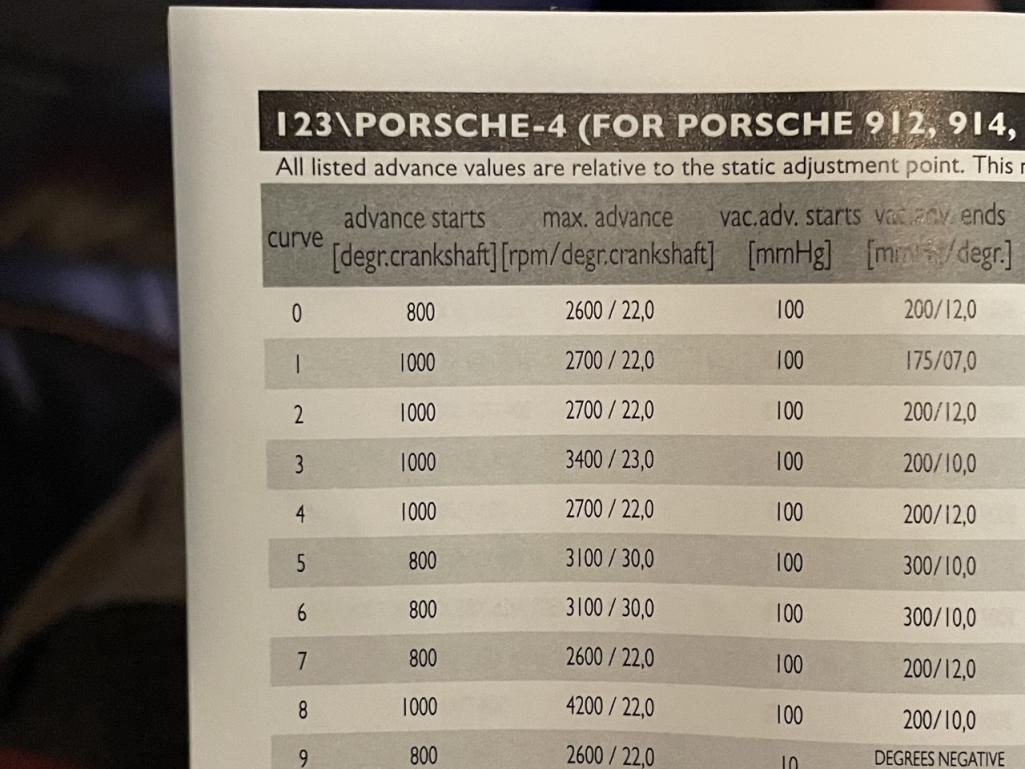
|
   |

 
|
  |
Replies
| Chad911sc |
May 1 2025, 09:29 AM
Post
#2
|
|
Member Group: Members Posts: 243 Joined: 24-September 24 From: Florida Member No.: 28,374 Region Association: South East States |
The header is super beefy and very well built for sure. The problem I had was the exhaust pipe from cylinder #4 had a small deflection where the final bend was. I couldn’t see it, and it had me using a weighted big rubber mallet beating on the collector. I couldn’t get it to seat into the 4 pipes. Had about 2 more inches to go, but no matter how hard I hit it, it wouldn’t budge. I contacted MSDS to get some tips on how to get it to seat, and he responded immediately with tips and tricks to get it to seat. I took it back apart and sanded off the ceramic coating that I had applied by them, thinking it was just the coating was too thick. But after reassembly, it still wound not seat. I took it back apart again and that’s when I found the deflection at the last bend. I contacted them again via email, and again they immediately responded with the offer to send me a new ceramic coated #4 cylinder pipe shipped to me for free. He then sent me another email right after that with the idea to hit it with the belt sander to remove the deflection, and that worked perfectly. Two heads are always better than one. This site proves that every day!
The other thing I had to do, is pretty much what every new exhaust should have done to it, and that is after mounting it and torquing it down, look at your copper gaskets and see if there is any part of the copper gaskets that has no marks on it. Take the copper gasket and lay it on top of the pipe and figure out at what place it isn’t seating all the way and file it down to fit precisely level so that when it’s installed you have the best chance of complete sealing on the first try. And don’t forget to anneal the copper gaskets as well to soften them up. Attached thumbnail(s) 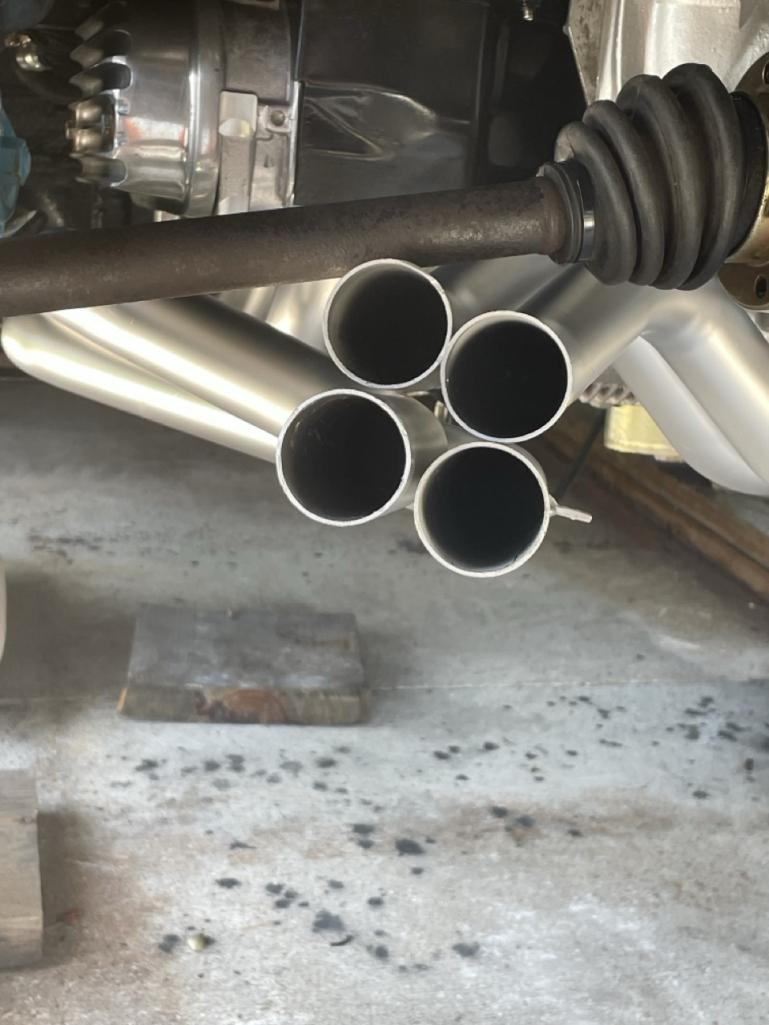 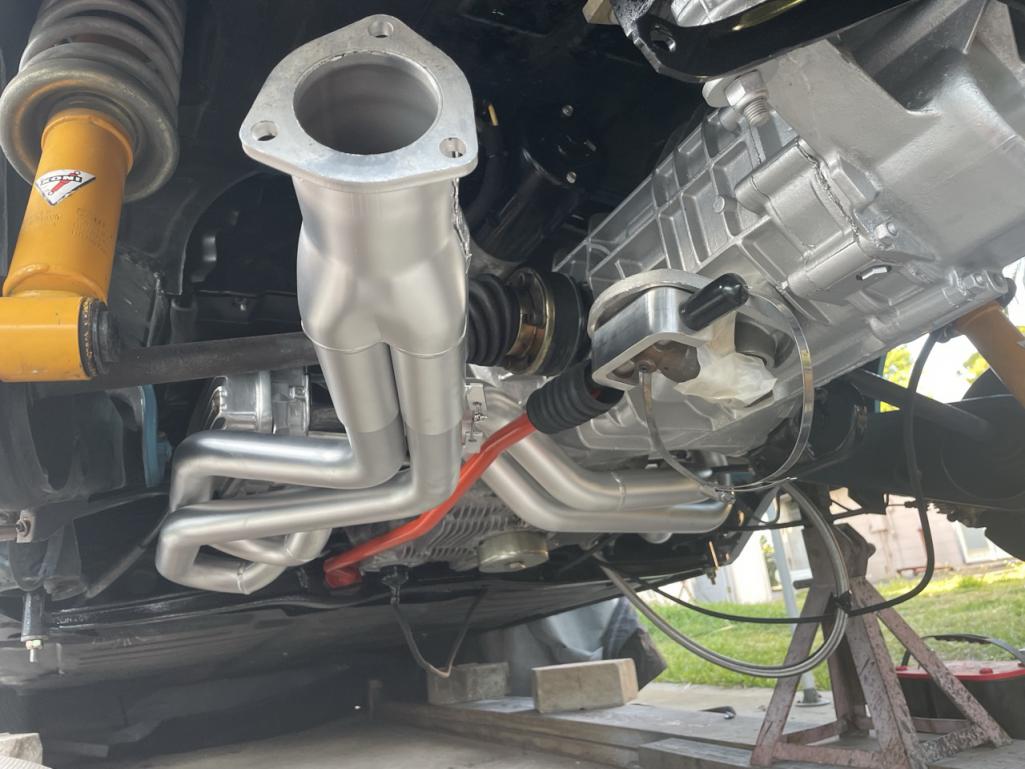 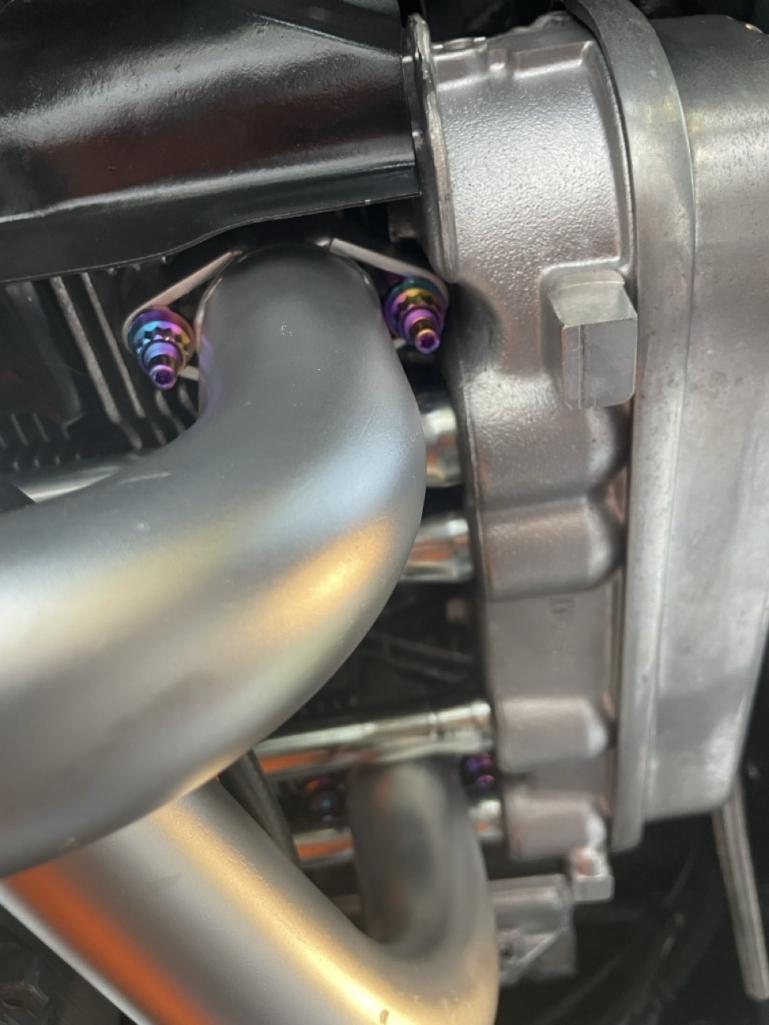 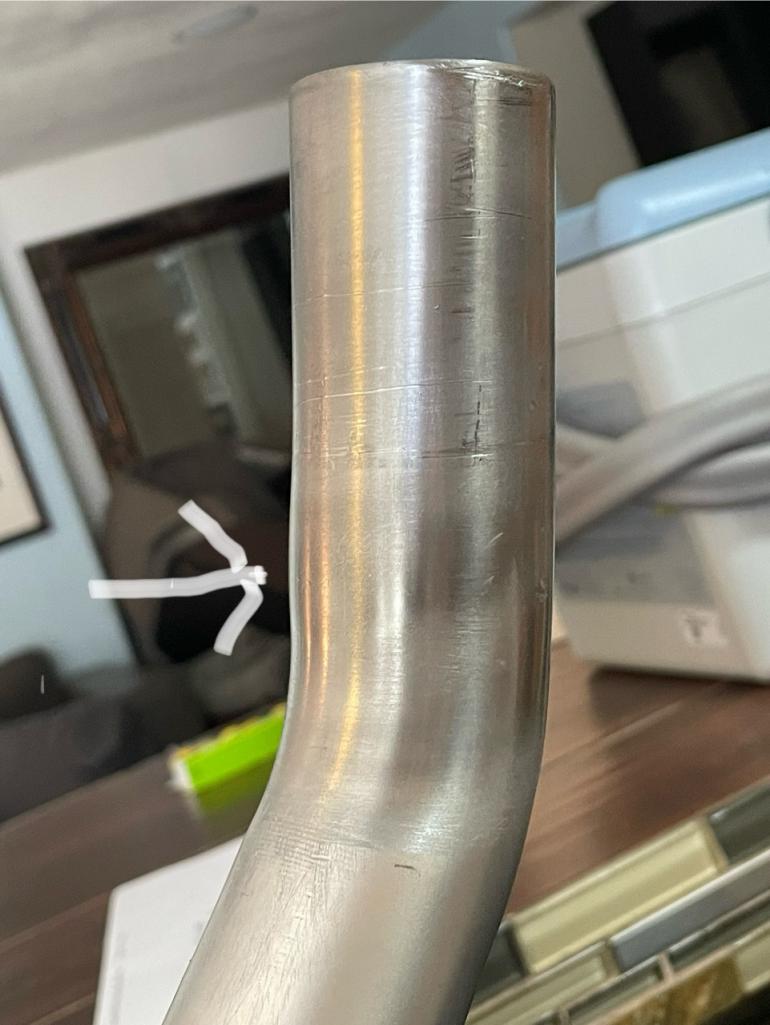 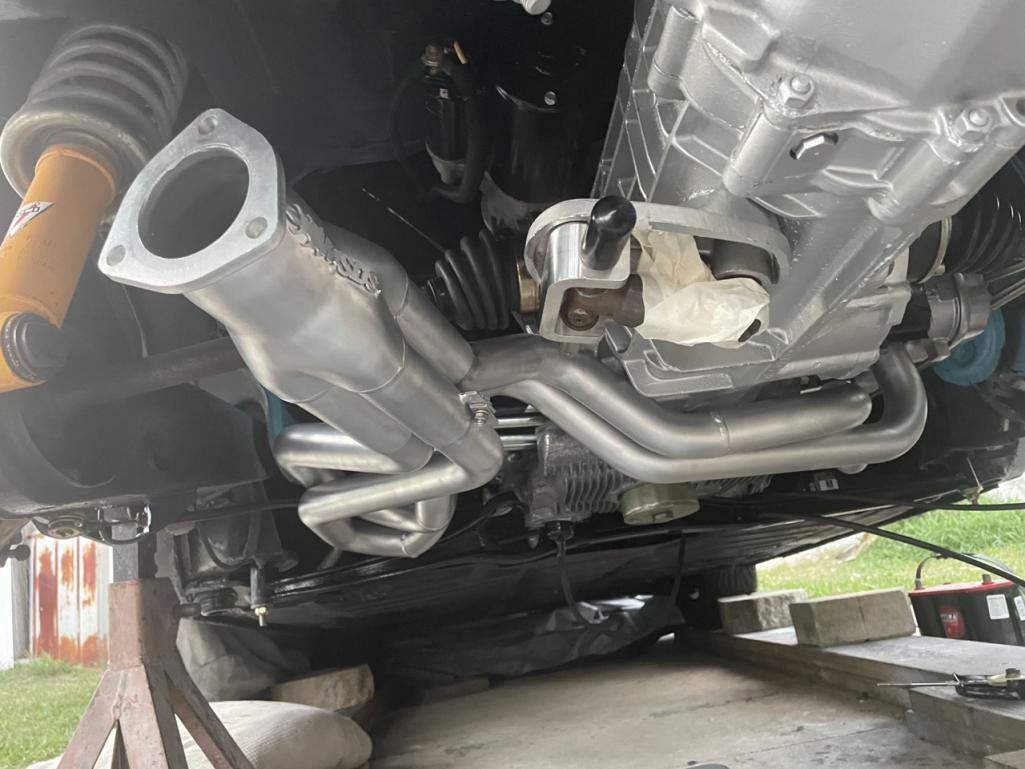 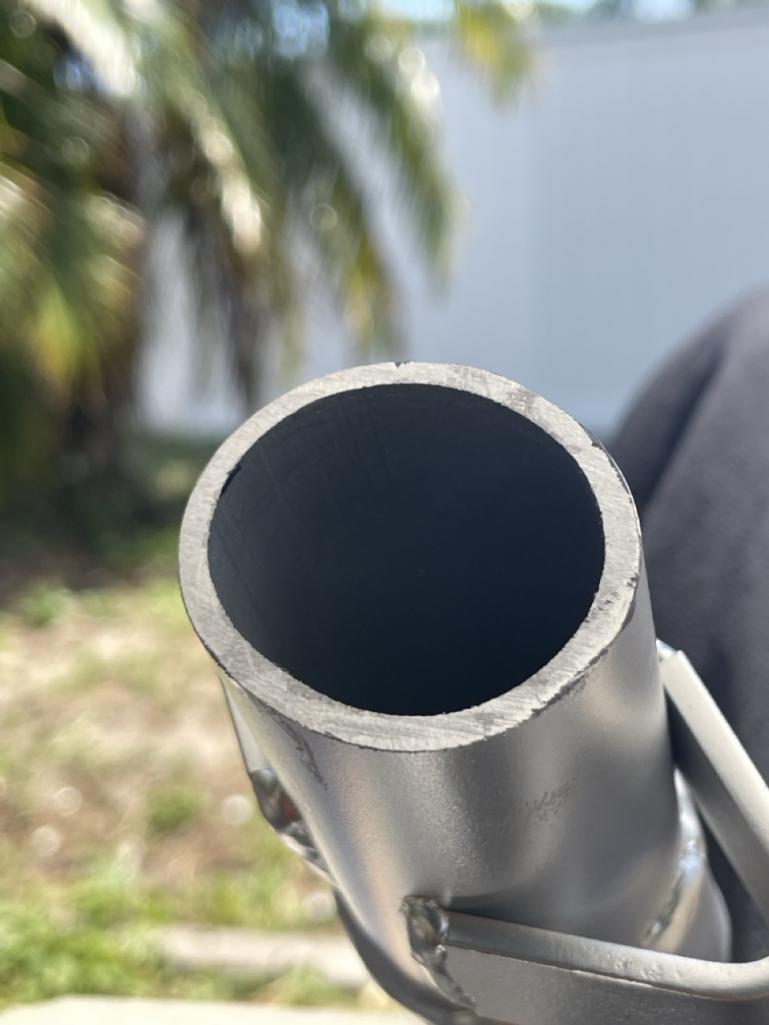 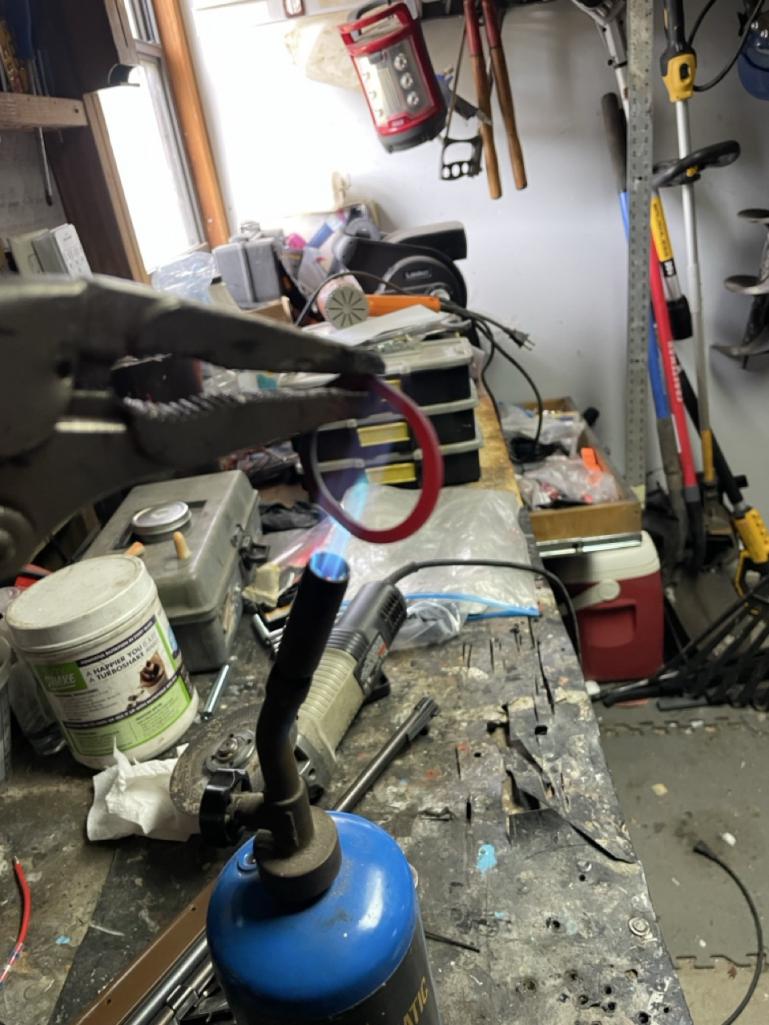
|
|
|
|
| bajafreaks |
May 1 2025, 09:54 AM
Post
#3
|
|
Member Group: Members Posts: 111 Joined: 7-February 14 From: Gardnerville, Nevada Member No.: 16,969 Region Association: Northern California |
QUOTE(Chad911sc @ May 1 2025, 08:29 AM)  The header is super beefy and very well built for sure. The problem I had was the exhaust pipe from cylinder #4 had a small deflection where the final bend was. I couldn’t see it, and it had me using a weighted big rubber mallet beating on the collector. I couldn’t get it to seat into the 4 pipes. Had about 2 more inches to go, but no matter how hard I hit it, it wouldn’t budge. I contacted MSDS to get some tips on how to get it to seat, and he responded immediately with tips and tricks to get it to seat. I took it back apart and sanded off the ceramic coating that I had applied by them, thinking it was just the coating was too thick. But after reassembly, it still wound not seat. I took it back apart again and that’s when I found the deflection at the last bend. I contacted them again via email, and again they immediately responded with the offer to send me a new ceramic coated #4 cylinder pipe shipped to me for free. He then sent me another email right after that with the idea to hit it with the belt sander to remove the deflection, and that worked perfectly. Two heads are always better than one. This site proves that every day! The other thing I had to do, is pretty much what every new exhaust should have done to it, and that is after mounting it and torquing it down, look at your copper gaskets and see if there is any part of the copper gaskets that has no marks on it. Take the copper gasket and lay it on top of the pipe and figure out at what place it isn’t seating all the way and file it down to fit precisely level so that when it’s installed you have the best chance of complete sealing on the first try. And don’t forget to anneal the copper gaskets as well to soften them up. Thanks for the input and pics, the headers do look impressive. Did you purchase the pipe from the collector to the muffler or was it custom made? Thats the area I'm still concerned about everything pass the collector I guess there are a few muffler applications that MSDS recommends one in a one out, I'd prefer to buy all the pieces and simply bolt it together. I just dont want it all hanging down not looking clean and at the same time not too loud. |
|
|
|
Posts in this topic
Chad911sc New engine finally in! Apr 25 2025, 05:50 PM Front yard mechanic I was told to use 5 seems to run great Apr 25 2025, 07:03 PM Cairo94507 Wow! That looks amazing. :beer2: Apr 26 2025, 06:30 AM Chad911sc Thanks for the replies fellas!
Hadn’t even l... Apr 27 2025, 06:42 AM moto914 Looks like a lot of good work. Apr 27 2025, 07:44 AM sb914 Very tidy looking. Apr 27 2025, 08:19 AM technicalninja Curve 3 looks fine for an initial setting to me.
... Apr 27 2025, 08:54 AM
Front yard mechanic I was told to use 5 seems to run great Apr 25 2025, 07:03 PM Cairo94507 Wow! That looks amazing. :beer2: Apr 26 2025, 06:30 AM Chad911sc Thanks for the replies fellas!
Hadn’t even l... Apr 27 2025, 06:42 AM moto914 Looks like a lot of good work. Apr 27 2025, 07:44 AM sb914 Very tidy looking. Apr 27 2025, 08:19 AM technicalninja Curve 3 looks fine for an initial setting to me.
... Apr 27 2025, 08:54 AM emerygt350
Curve 3 looks fine for an initial setting to me.
... Apr 27 2025, 09:49 AM
emerygt350
Curve 3 looks fine for an initial setting to me.
... Apr 27 2025, 09:49 AM emerygt350 dupe Apr 27 2025, 09:49 AM Chad911sc Yeah 3 is what I read on a couple other sites as w... Apr 27 2025, 07:48 PM Chad911sc Oh yeah…and is there any thought on the vacuum a... Apr 27 2025, 07:52 PM emerygt350 I have run it with and without. Many with the 123... Apr 28 2025, 04:35 AM emerygt350 And is that a ballast resistor near the coil? Apr 28 2025, 04:37 AM Shivers Nice job, that’s a beauty! Apr 28 2025, 05:59 AM Spoke Looks fantastic. Apr 28 2025, 12:28 PM technicalninja Vacuum advance is helpful for street. Will improve... Apr 28 2025, 12:44 PM friethmiller Your engine bay is the "Tits!" Nice... Apr 28 2025, 01:54 PM emerygt350 I think you may be thinking of the Bluetooth versi... Apr 28 2025, 02:50 PM Chad911sc Ok….im just going to plug it off for now and onc... Apr 28 2025, 09:33 PM emerygt350 The Bosch coils had it built in so no ballast was ... Apr 29 2025, 04:57 AM Superhawk996
The Bosch coils had it built in so no ballast was... May 1 2025, 06:40 AM GBX0073 Wow Great Job !!! Apr 29 2025, 10:39 AM Root_Werks Really clean install, looks good!
:driving: Apr 29 2025, 12:40 PM Chad911sc Working on the Stainless Exhaust today, still need... Apr 30 2025, 05:22 AM worn
Working on the Stainless Exhaust today, still nee... Apr 30 2025, 05:33 PM emerygt350 I would look up the coil if nobody chimes in on th... Apr 30 2025, 06:08 AM Chad911sc Thanks again for all the wonderful compliments... May 1 2025, 06:31 AM Chad911sc Pics of the exhaust…it being mated up to the MSD... May 1 2025, 06:35 AM bajafreaks
Pics of the exhaust…it being mated up to the MS... May 1 2025, 08:36 AM Chad911sc Yes the Pertronix coil already has 3.0 ohms of res... May 1 2025, 07:39 AM Chad911sc Yes I built it custom for my application.
It take... May 1 2025, 08:14 PM bajafreaks
Yes I built it custom for my application.
It tak... May 2 2025, 07:39 AM Tonyooc Very clean install, nice job. May 4 2025, 09:09 AM
emerygt350 dupe Apr 27 2025, 09:49 AM Chad911sc Yeah 3 is what I read on a couple other sites as w... Apr 27 2025, 07:48 PM Chad911sc Oh yeah…and is there any thought on the vacuum a... Apr 27 2025, 07:52 PM emerygt350 I have run it with and without. Many with the 123... Apr 28 2025, 04:35 AM emerygt350 And is that a ballast resistor near the coil? Apr 28 2025, 04:37 AM Shivers Nice job, that’s a beauty! Apr 28 2025, 05:59 AM Spoke Looks fantastic. Apr 28 2025, 12:28 PM technicalninja Vacuum advance is helpful for street. Will improve... Apr 28 2025, 12:44 PM friethmiller Your engine bay is the "Tits!" Nice... Apr 28 2025, 01:54 PM emerygt350 I think you may be thinking of the Bluetooth versi... Apr 28 2025, 02:50 PM Chad911sc Ok….im just going to plug it off for now and onc... Apr 28 2025, 09:33 PM emerygt350 The Bosch coils had it built in so no ballast was ... Apr 29 2025, 04:57 AM Superhawk996
The Bosch coils had it built in so no ballast was... May 1 2025, 06:40 AM GBX0073 Wow Great Job !!! Apr 29 2025, 10:39 AM Root_Werks Really clean install, looks good!
:driving: Apr 29 2025, 12:40 PM Chad911sc Working on the Stainless Exhaust today, still need... Apr 30 2025, 05:22 AM worn
Working on the Stainless Exhaust today, still nee... Apr 30 2025, 05:33 PM emerygt350 I would look up the coil if nobody chimes in on th... Apr 30 2025, 06:08 AM Chad911sc Thanks again for all the wonderful compliments... May 1 2025, 06:31 AM Chad911sc Pics of the exhaust…it being mated up to the MSD... May 1 2025, 06:35 AM bajafreaks
Pics of the exhaust…it being mated up to the MS... May 1 2025, 08:36 AM Chad911sc Yes the Pertronix coil already has 3.0 ohms of res... May 1 2025, 07:39 AM Chad911sc Yes I built it custom for my application.
It take... May 1 2025, 08:14 PM bajafreaks
Yes I built it custom for my application.
It tak... May 2 2025, 07:39 AM Tonyooc Very clean install, nice job. May 4 2025, 09:09 AM |
1 User(s) are reading this topic (1 Guests and 0 Anonymous Users)
0 Members:

|
Lo-Fi Version | Time is now: 14th December 2025 - 12:31 PM |
Invision Power Board
v9.1.4 © 2025 IPS, Inc.