|
|
|
Porsche, and the Porsche crest are registered trademarks of Dr. Ing. h.c. F. Porsche AG.
This site is not affiliated with Porsche in any way. Its only purpose is to provide an online forum for car enthusiasts. All other trademarks are property of their respective owners. |
|
|

  |

| FUEL14 |
 Sep 11 2020, 07:45 PM Sep 11 2020, 07:45 PM
Post
#1
|
|
Member  Group: Members Posts: 56 Joined: 11-August 18 From: Melbourne, Australia Member No.: 22,382 Region Association: Australia and New Zealand |
Hi, excuse the dumb question, but I'm a bit lost. I did not dismantle my car pre-restoration, so I did not experience these coming out.
I want to know how the brackets keep the buckets attached to the inside of the fender. I know that I need to place the bracket over the back of the bucket and tighten with the nut, but I can't see how the open ends of the bracket arms attach to the car. Am I missing something? What function do the 3 asymmetrical holes on the bracket arms serve? Thank you, Luke. (IMG:http://www.914world.com/bbs2/uploads_offsite/i.postimg.cc-22382-1599875141.1.jpg) |
   |

 
|
| TonyA |
Sep 11 2020, 07:52 PM
Post
#2
|
|
Nachmal Group: Members Posts: 672 Joined: 17-November 16 From: Hilltown PA Member No.: 20,596 Region Association: North East States |
The brackets do not attach to the car it just puts pressure against the fender. Install the bucket from the front then put the bracket on the back and install the nut and tighten and thats it.
|
|
|
|
| FUEL14 |
Sep 11 2020, 08:03 PM
Post
#3
|
|
Member Group: Members Posts: 56 Joined: 11-August 18 From: Melbourne, Australia Member No.: 22,382 Region Association: Australia and New Zealand |
QUOTE(TonyA @ Sep 12 2020, 11:52 AM)  The brackets do not attach to the car it just puts pressure against the fender. Install the bucket from the front then put the bracket on the back and install the nut and tighten and thats it. Ahh.. bucket from the FRONT. That's what I didn't understand. I was trying from the inside of the fender. Thank you very much. |
|
|
|
| bbrock |
Sep 11 2020, 09:06 PM
Post
#4
|
|
914 Guru Group: Members Posts: 5,269 Joined: 17-February 17 From: Montana Member No.: 20,845 Region Association: Rocky Mountains |
Your buckets are missing the plastic discs with electrical contacts for the bulbs. Do you still have those?
|
|
|
|
| Mikey914 |
Sep 12 2020, 03:17 AM
Post
#5
|
|
The rubber man Group: Members Posts: 12,772 Joined: 27-December 04 From: Hillsboro, OR Member No.: 3,348 Region Association: None |
Yes you can install these, but you will disappointed when you try to hook up the electrical.
|
|
|
|
| rhodyguy |
Sep 12 2020, 06:48 AM
Post
#6
|
|
Chimp Sanctuary NW. Check it out. Group: Members Posts: 22,252 Joined: 2-March 03 From: Orion's Bell. The BELL! Member No.: 378 Region Association: Galt's Gulch |
Used housings are fairly cheap. I wouldn't fight with the ones you have.
|
|
|
|
| Jett |
Sep 12 2020, 11:01 AM
Post
#7
|
|
Senior Member Group: Members Posts: 1,697 Joined: 27-July 14 From: Seattle Member No.: 17,686 Region Association: Pacific Northwest |
QUOTE(rhodyguy @ Sep 12 2020, 05:48 AM) Used housing are fairly cheap. I wouldn't fight with the ones you have. +1 |
|
|
|
| rgalla9146 |
Sep 12 2020, 03:50 PM
Post
#8
|
|
Advanced Member Group: Members Posts: 4,950 Joined: 23-November 05 From: Paramus NJ Member No.: 5,176 Region Association: None |
1. Get good buckets
2. Get long nose needle nose pliers. 3. raise the nose. 4. remove front wheels. 5. suffer |
|
|
|
| rhodyguy |
Sep 12 2020, 04:59 PM
Post
#9
|
|
Chimp Sanctuary NW. Check it out. Group: Members Posts: 22,252 Joined: 2-March 03 From: Orion's Bell. The BELL! Member No.: 378 Region Association: Galt's Gulch |
To add to the joy, there should be a 'rubber' sleeve on both sides that the TS wiring runs thru and covers the connections at the signal housing. 914rubber offers those.
|
|
|
|
| FUEL14 |
Sep 12 2020, 11:00 PM
Post
#10
|
|
Member Group: Members Posts: 56 Joined: 11-August 18 From: Melbourne, Australia Member No.: 22,382 Region Association: Australia and New Zealand |
Thanks for all the answers. I do have the brand new electrical boots from914 Rubber ready to go on when the wiring is hooked up.
Regarding the discs with the connections, this is a problem. Mine are in bad shape and I have been searching for replacements. As far as I can find out, it's not possible to buy them by themselves. Is that the case? Do I have to get new buckets just because those parts are kaput? Aside from those parts, the buckets are solid and perfectly fine. I understand that you say new buckets are cheap, but please consider that I have to apply the USD > AUD exchange rate and then shipping to the other side of the World, which adds up to be more than you might pay. That's been the case with my entire build so far... (IMG:style_emoticons/default/sad.gif) (IMG:http://www.914world.com/bbs2/uploads_offsite/i.postimg.cc-22382-1599973245.1.jpg) (IMG:http://www.914world.com/bbs2/uploads_offsite/i.postimg.cc-22382-1599973245.2.jpg) |
|
|
|
| Mikey914 |
Sep 12 2020, 11:54 PM
Post
#11
|
|
The rubber man Group: Members Posts: 12,772 Joined: 27-December 04 From: Hillsboro, OR Member No.: 3,348 Region Association: None |
I do have some of the plastic ones in stock
These are Euro version https://914rubber.com/front-turn-signal-wit...ro-lens-for-914 Not really happy with the plastic on these as it is plastic Attached thumbnail(s) 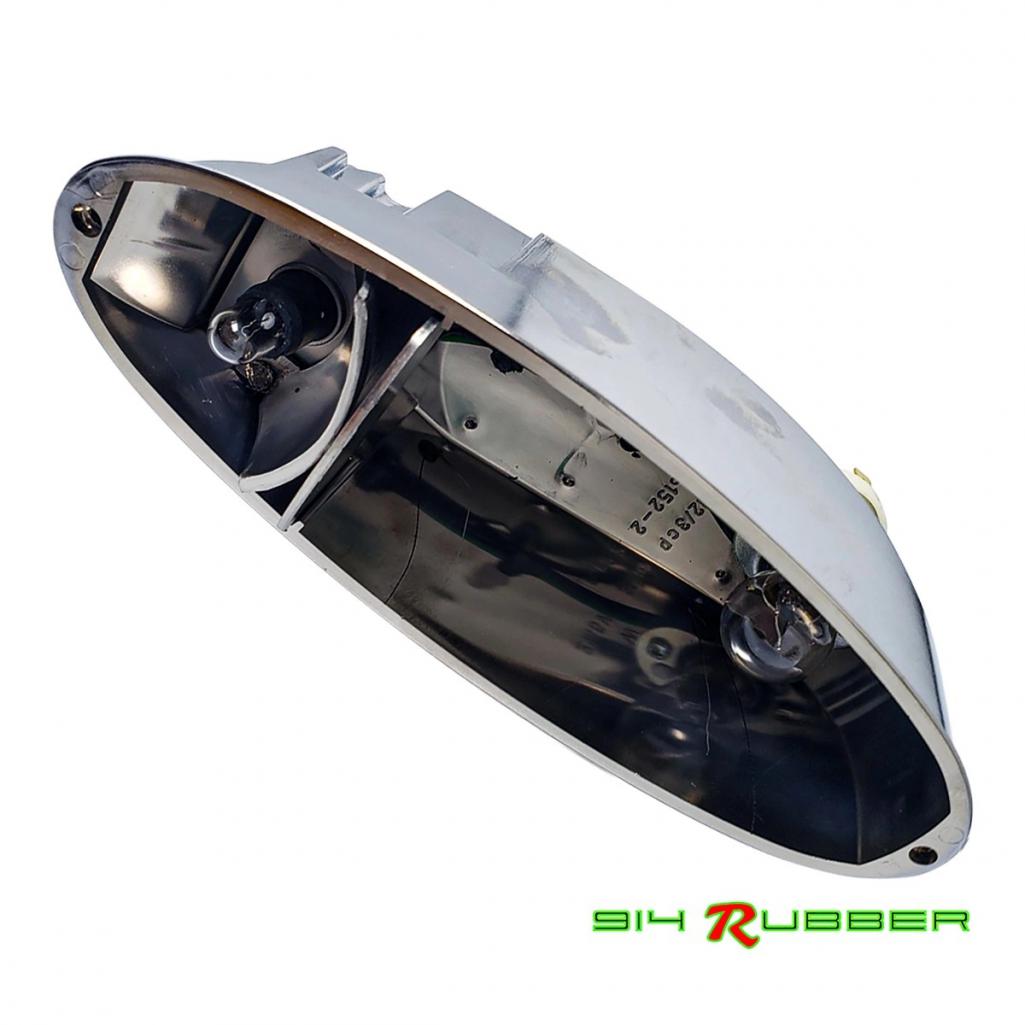 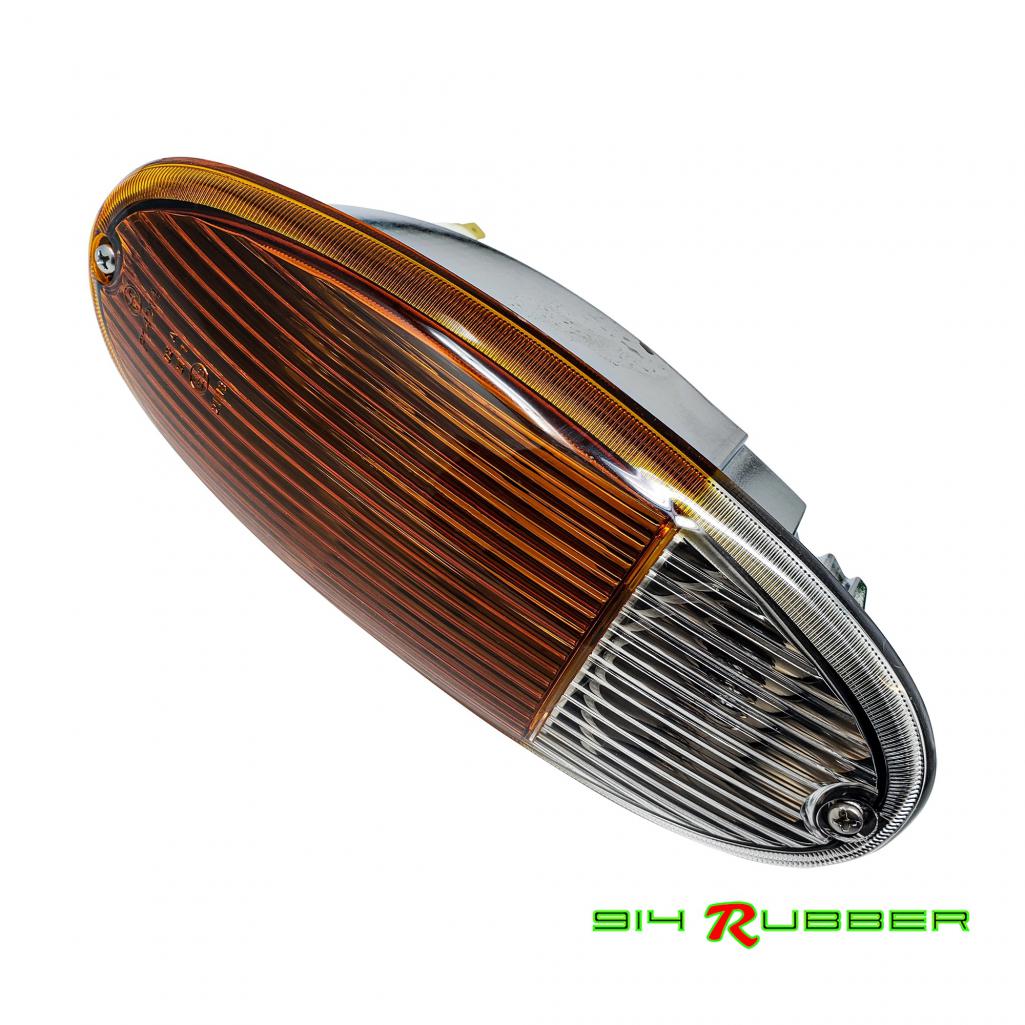
|
|
|
|
| rhodyguy |
Sep 13 2020, 06:37 AM
Post
#12
|
|
Chimp Sanctuary NW. Check it out. Group: Members Posts: 22,252 Joined: 2-March 03 From: Orion's Bell. The BELL! Member No.: 378 Region Association: Galt's Gulch |
Those discs are rubbish. Broken in multiple spots. Horrid corrosion. Not NEW housings. Serviceable used ones. You should be able to find a set for $50ish USD. Post a WTB (preferring down under) and see what comes of it. Just one of the fun parts of 914 ownership.
|
|
|
|
| bbrock |
Sep 13 2020, 10:35 AM
Post
#13
|
|
914 Guru Group: Members Posts: 5,269 Joined: 17-February 17 From: Montana Member No.: 20,845 Region Association: Rocky Mountains |
Well, I hate throwing things that are still serviceable away and considering where you live, I'd try to find some of the contact discs with a WTB and clean up the buckets. The tabs the discs snap on to are corroded so you will need to glue the discs on but that's no biggie. Here are some before and after pics of mine.
(IMG:http://www.914world.com/bbs2/uploads/post-20845-1586146511_thumb.jpg) (IMG:http://www.914world.com/bbs2/uploads/post-20845-1586146588_thumb.jpg) (IMG:http://www.914world.com/bbs2/uploads/post-20845-1586146861_thumb.jpg) (IMG:http://www.914world.com/bbs2/uploads/post-20845-1586148448_thumb.jpg) |
|
|
|
| Mikey914 |
Sep 13 2020, 01:21 PM
Post
#14
|
|
The rubber man Group: Members Posts: 12,772 Joined: 27-December 04 From: Hillsboro, OR Member No.: 3,348 Region Association: None |
Nice job
|
|
|
|
| FUEL14 |
Sep 13 2020, 05:23 PM
Post
#15
|
|
Member Group: Members Posts: 56 Joined: 11-August 18 From: Melbourne, Australia Member No.: 22,382 Region Association: Australia and New Zealand |
Wow, great job cleaning them up. Thanks again for all the answers, I appreciate the knowledge and info.
// Luke. |
|
|
|
| FUEL14 |
Sep 13 2020, 05:46 PM
Post
#16
|
|
Member Group: Members Posts: 56 Joined: 11-August 18 From: Melbourne, Australia Member No.: 22,382 Region Association: Australia and New Zealand |
Well, I got them in and they look good from the front, despite much attention still needed at the back...
(IMG:http://www.914world.com/bbs2/uploads_offsite/i.postimg.cc-22382-1600040764.1.jpg) |
|
|
|
| Chris H. |
Sep 13 2020, 06:56 PM
Post
#17
|
|
Senior Member Group: Members Posts: 4,079 Joined: 2-January 03 From: Chicago 'burbs Member No.: 73 Region Association: Upper MidWest |
Let's see some more pics of your car!
|
|
|
|
| FUEL14 |
Sep 13 2020, 07:35 PM
Post
#18
|
|
Member Group: Members Posts: 56 Joined: 11-August 18 From: Melbourne, Australia Member No.: 22,382 Region Association: Australia and New Zealand |
QUOTE(Chris H. @ Sep 14 2020, 10:56 AM) Let's see some more pics of your car! Hi Chris, please see links in my signature for my build thread and my Instagram account. |
|
|
|
| Chris H. |
Sep 13 2020, 09:20 PM
Post
#19
|
|
Senior Member Group: Members Posts: 4,079 Joined: 2-January 03 From: Chicago 'burbs Member No.: 73 Region Association: Upper MidWest |
Oh nice, how did I miss that? Looking great! Love the color.
|
|
|
|
|
1 User(s) are reading this topic (1 Guests and 0 Anonymous Users)
0 Members:

|
Lo-Fi Version | Time is now: 2nd April 2026 - 12:19 PM |
Invision Power Board
v9.1.4 © 2026 IPS, Inc.