|
|
|
Porsche, and the Porsche crest are registered trademarks of Dr. Ing. h.c. F. Porsche AG.
This site is not affiliated with Porsche in any way. Its only purpose is to provide an online forum for car enthusiasts. All other trademarks are property of their respective owners. |
|
|


| Doug Leggins |
 Mar 14 2004, 08:19 PM Mar 14 2004, 08:19 PM
Post
#1
|
|
Senior Member  Group: Benefactors Posts: 1,358 Joined: 6-February 03 From: Nashville, Indiana Member No.: 261 Region Association: None |
Had the opportunity to work on the project a bit lately. Painted some of the suspension pieces, did a little detail painting and have done some prep work on the tub getting it ready for some POR15.
My painter and I have decided to pull the car out of the corner and get busy getting her done. I painted several small parts with Metal Mask from the folks that supply the POR15 paint. I was not impressed with the finish. It is tough to get the finish to look like it should. I did get lucky and the color of the metal mask is close to the color of my powder coated parts. I was able to use it on a couple of surfaces that the powder coater masked off but shouldn't have. Here are the metal mask painted parts Attached image(s) 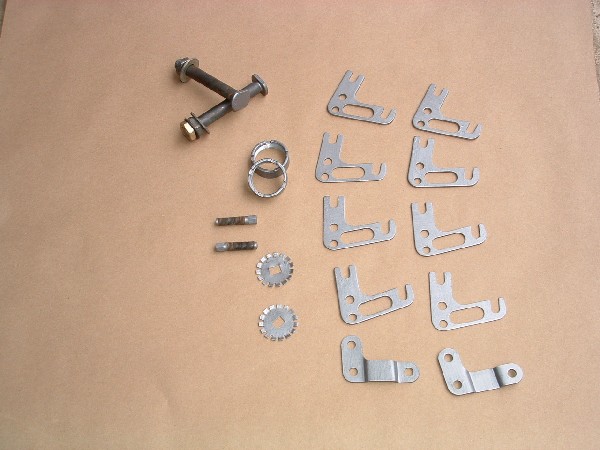
|
   |

 
|
  |
Replies(1 - 13)
| Doug Leggins |
Mar 14 2004, 08:21 PM
Post
#2
|
|
Senior Member Group: Benefactors Posts: 1,358 Joined: 6-February 03 From: Nashville, Indiana Member No.: 261 Region Association: None |
A little detail painting on the front a arm ends
Attached image(s) 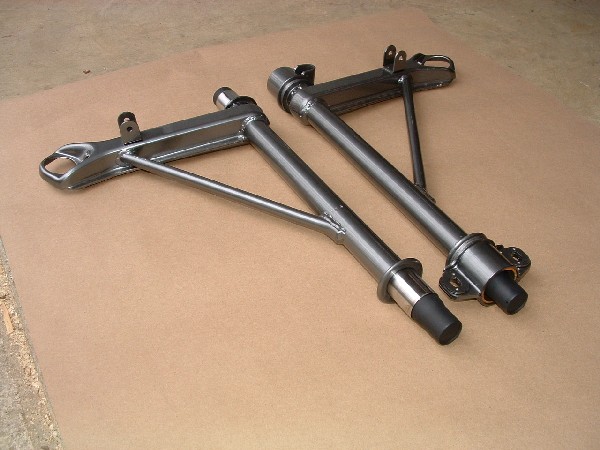
|
|
|
|
| Doug Leggins |
Mar 14 2004, 08:24 PM
Post
#3
|
|
Senior Member Group: Benefactors Posts: 1,358 Joined: 6-February 03 From: Nashville, Indiana Member No.: 261 Region Association: None |
prep for POR15
Attached image(s) 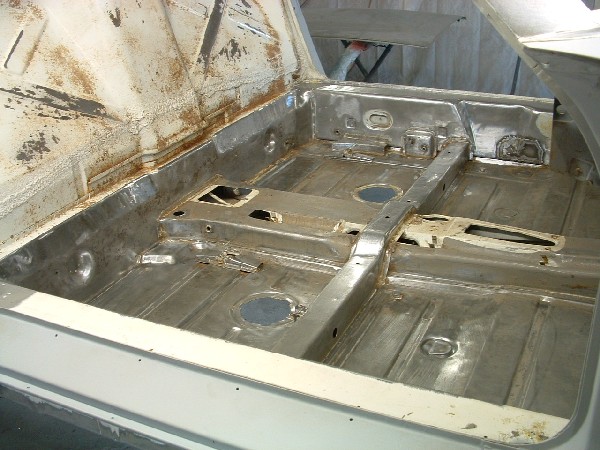
|
|
|
|
| Doug Leggins |
Mar 14 2004, 08:26 PM
Post
#4
|
|
Senior Member Group: Benefactors Posts: 1,358 Joined: 6-February 03 From: Nashville, Indiana Member No.: 261 Region Association: None |
more prep for POR15
Attached image(s) 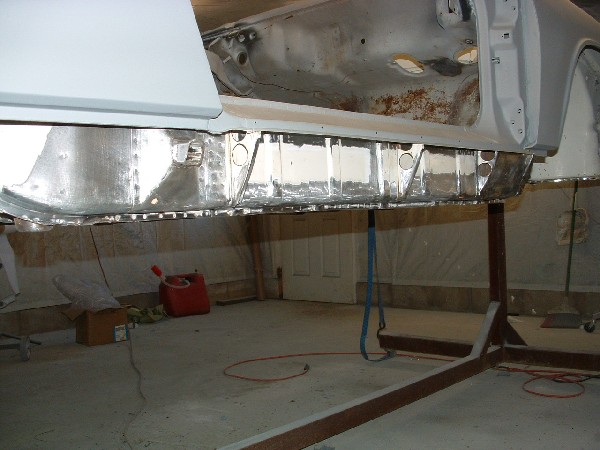
|
|
|
|
| DrifterJay |
Mar 14 2004, 08:26 PM
Post
#5
|
|
I break stuff... Group: Members Posts: 1,034 Joined: 25-May 03 From: Oceanside, California Member No.: 737 Region Association: None |
damn could eat off that floorpan....*almost* amazing work...I hope one day to be able to something like that myself when I settle down.. (IMG:style_emoticons/default/smile.gif)
|
|
|
|
| Doug Leggins |
Mar 14 2004, 08:28 PM
Post
#6
|
|
Senior Member Group: Benefactors Posts: 1,358 Joined: 6-February 03 From: Nashville, Indiana Member No.: 261 Region Association: None |
A little primer
Attached image(s) 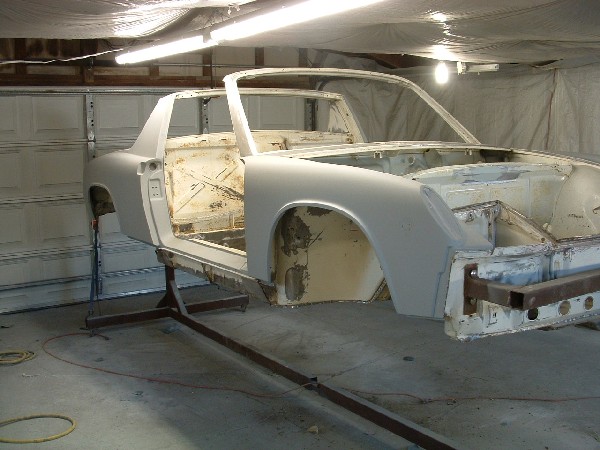
|
|
|
|
| Doug Leggins |
Mar 14 2004, 08:31 PM
Post
#7
|
|
Senior Member Group: Benefactors Posts: 1,358 Joined: 6-February 03 From: Nashville, Indiana Member No.: 261 Region Association: None |
Last pic for now.
New engine shelf, battery tray and support in place and POR15 applied Attached image(s) 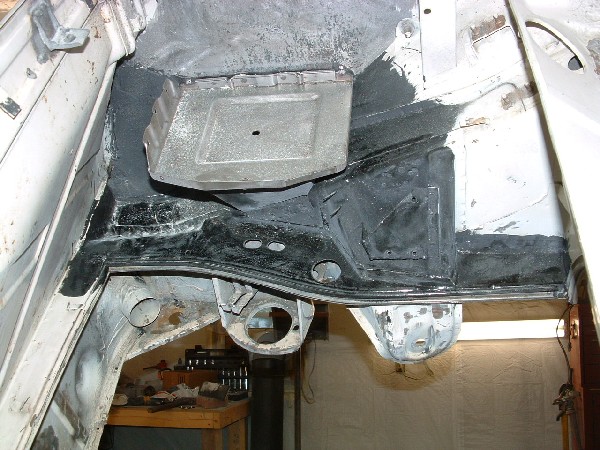
|
|
|
|
| seanery |
Mar 14 2004, 08:55 PM
Post
#8
|
|
waiting to rebuild whitey! Group: Retired Admin Posts: 15,852 Joined: 7-January 03 From: Indy Member No.: 100 Region Association: None |
looks nice Doug!
|
|
|
|
| East coaster |
Mar 14 2004, 09:37 PM
Post
#9
|
|
Senior Member Group: Members Posts: 1,673 Joined: 28-March 03 From: Brigantine, NJ Member No.: 487 Region Association: None |
NICE!
|
|
|
|
| Engman |
Mar 14 2004, 09:53 PM
Post
#10
|
|
Zoisite Group: Benefactors Posts: 1,349 Joined: 25-March 03 From: New Albany, IN Member No.: 475 |
Nice - what/how did you strip the interior floorpans?
It must have taken some time! Nice work! M |
|
|
|
| GWN7 |
Mar 15 2004, 12:01 AM
Post
#11
|
|
King of Road Trips Group: Members Posts: 6,280 Joined: 31-December 02 From: Winnipeg, MB, Canada Member No.: 56 Region Association: Northstar Region |
Nice (IMG:style_emoticons/default/smilie_pokal.gif)
The self looks much better in there than in my basement. (IMG:style_emoticons/default/beerchug.gif) |
|
|
|
| Britain Smith |
Mar 15 2004, 12:41 AM
Post
#12
|
|
Nano Member Group: Members Posts: 2,354 Joined: 27-February 03 From: Hillsboro, OR Member No.: 364 |
What color is the powercoating...that is the look that I am going for. Is it something like Chrome Black?
-Britain |
|
|
|
| rick 918-S |
Mar 15 2004, 12:54 AM
Post
#13
|
|
Hey nice rack! -Celette Group: Members Posts: 20,462 Joined: 30-December 02 From: Now in Superior WI Member No.: 43 Region Association: Northstar Region |
|
|
|
|
| Doug Leggins |
Mar 15 2004, 08:17 AM
Post
#14
|
|
Senior Member Group: Benefactors Posts: 1,358 Joined: 6-February 03 From: Nashville, Indiana Member No.: 261 Region Association: None |
I stripped the interior floor pans with every tool that I could find. Kept trying to find one that would make it easy - never found it. It has been knuckle scraping, finger cutting, keep on going kind of work. I've never used sand blasting, but seems to me that it may be the way to go on the interior floor pans.
I have used a die grinder with a 3M abrasive pad, an angle grinder with a wheel that looks like folded/faned sandpaper, a drill with wire wheels and a dremel tool. A drill with a cupped wire wheel works sorta good and then the dremel for the tight spots. Britain - yep - the powder coater called it "Black Chrome". He said that some shops call it Anthracite or Gun Metal. The coater showed me some pics of black Cobra Mustangs with wheels that were powder coated this color. They looked great. The pics of the wheels sold me on the color. I'm really happy with the color! |
|
|
|
|
1 User(s) are reading this topic (1 Guests and 0 Anonymous Users)
0 Members:

|
Lo-Fi Version | Time is now: 18th May 2024 - 09:44 PM |
Invision Power Board
v9.1.4 © 2024 IPS, Inc.