|
|
|
Porsche, and the Porsche crest are registered trademarks of Dr. Ing. h.c. F. Porsche AG.
This site is not affiliated with Porsche in any way. Its only purpose is to provide an online forum for car enthusiasts. All other trademarks are property of their respective owners. |
|
|


| Cire |
 Nov 3 2009, 05:04 PM Nov 3 2009, 05:04 PM
Post
#21
|
|
Member  Group: Members Posts: 279 Joined: 12-March 09 From: Tucson, Arizona Member No.: 10,155 Region Association: None |
Howdy All,
This is the start of a new thread and the progress I am making on this little 914 car. First off, let me give you a little history. I had a WANTED ad in the craigslist area for Tucson and PHX. I got a call from a man stating he had a 914 that he wanted 1500 bucks for. We talked about the car. It ran, drove and he said it would make the drive to Tucson. We talked a little more and we determined he would take 1300 bucks for it. I arrange a rental car, drove to Prescott, dropped off the rental and then met the guy. It was a little rough at first but the car did start and drive... Well? No. Badly... Yes. I decided to go for it and started out the drive. It did infact make it all the way home in the heat of the day and over the mountains. = ) Anyway, so its now home, on stands and ready to begin its new life. Here are some pictures to start the thread. Eric 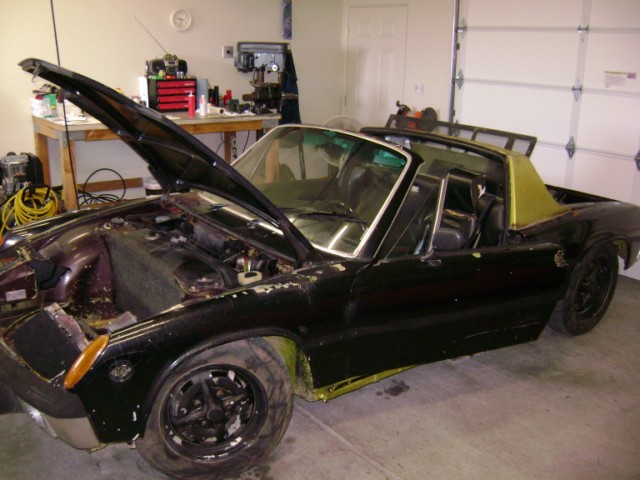 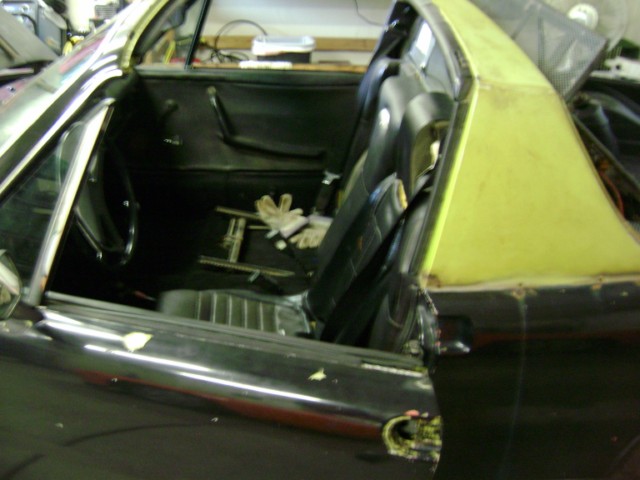 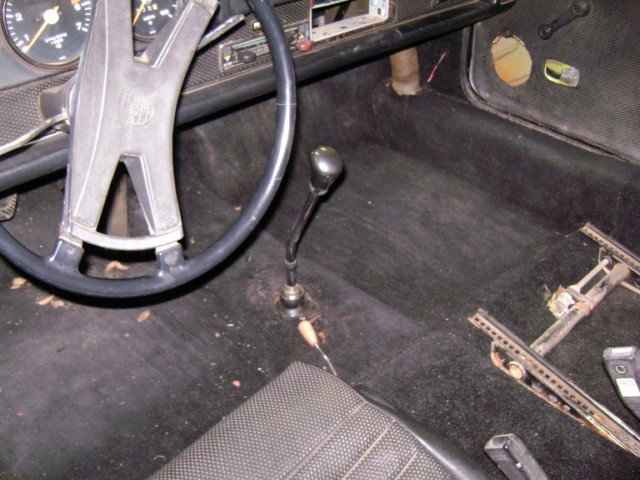 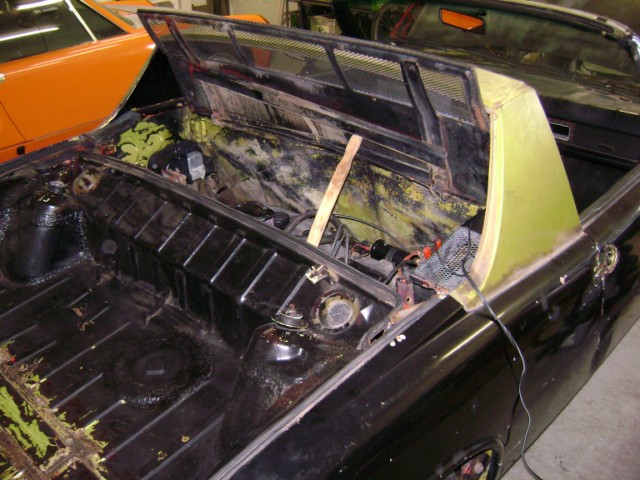 |
   |

 
|
Posts in this topic
 Cire Start of a new Project Thread Nov 3 2009, 05:04 PM
 Cire I have decided to take it down to the bare metal. ... Nov 3 2009, 05:28 PM
 Cire RE: Start of a new Project Thread Nov 3 2009, 05:30 PM Cire My goal with the car is a light weight -simple- re... Nov 3 2009, 05:45 PM Cire
How do I get rid of this box (voltage regulator?... Nov 3 2009, 05:49 PM Cire I was told that sand blasting the car is the best ... Nov 3 2009, 06:02 PM Cire Well, I had it sand blasted. The guy came to my h... Nov 6 2009, 06:09 PM john grier Hey there Eric,
What you are doing is admireable. ... Nov 6 2009, 07:09 PM Cheapsnake Welcome to the madness Eric and congrats on the pu... Nov 6 2009, 07:13 PM Cire
Welcome to the madness Eric and congrats on the p... Nov 6 2009, 08:39 PM Cheapsnake No disrespect to this forum but if you're look... Nov 7 2009, 06:58 AM my928s4 Nice job on the sandblasting, sure wish I had done... Nov 7 2009, 08:57 AM Cire = ) Things are moving along. Are these added or ... Nov 14 2009, 09:23 AM Cire I just got the Engman Long Internal Kit installed.... Nov 14 2009, 09:26 AM Cire Stiffened the rear support and fixed the trunk are... Nov 14 2009, 09:29 AM PanelBilly Put your door back on, RIGHT NOW. Before you go an... Nov 14 2009, 10:29 AM Cire Here is the fixed hole where the AC unit used to b... Nov 14 2009, 07:05 PM Cire RE: Start of a new Project Thread Nov 14 2009, 07:07 PM JRust Nice work & quick! Way to tear into it :D Nov 15 2009, 02:00 AM SECHSER wow! very inspiring.. thank you for sharing th... Nov 15 2009, 02:07 AM plymouth37 I wish I could be half as productive as you are, N... Nov 15 2009, 12:51 PM Cire
I wish I could be half as productive as you are, ... Nov 18 2009, 08:26 PM Cire I decided to brace the sitting area. Here is my w... Nov 18 2009, 08:30 PM Cire I also decided to build a Rottisserie.
Eric
... Nov 18 2009, 08:32 PM Gint That's a Delphi car! Going to paint it th... Nov 19 2009, 09:04 AM Cire
That's a Delphi car! Going to paint it t... Nov 19 2009, 11:16 AM Cire RE: Start of a new Project Thread Nov 20 2009, 05:24 AM Cire RE: Start of a new Project Thread Nov 20 2009, 06:42 AM strawman Nice progress! I would suggest that you consid... Nov 20 2009, 09:46 AM Vacca Rabite :agree:
Widen the stance. You really don't ev... Nov 20 2009, 11:32 AM bigkensteele
:agree:
Widen the stance. You really don't e... Nov 20 2009, 12:39 PM Vacca Rabite
I was at HF this morning looking at engine stand ... Nov 21 2009, 11:43 AM Cire I got 90% of my welding done. Most of the holes a... Nov 30 2009, 07:38 AM Cire
:agree:
Widen the stance. You really don't e... Nov 20 2009, 05:08 PM Cire RE: Start of a new Project Thread Nov 20 2009, 05:10 PM Cire RE: Start of a new Project Thread Nov 20 2009, 05:12 PM Lou W Looking great, keep up the good work. :beer2: Nov 21 2009, 04:19 AM Cire More pictures....
Jan 31 2010, 07:54 PM Cire RE: Start of a new Project Thread Jan 31 2010, 07:56 PM Cire On the third picture... Where it shows the rear s... Jan 31 2010, 08:05 PM Cire Where we started....
Where we are....
Jan 31 2010, 08:07 PM bcaschera Good work!! If i were to post a where it w... Jan 31 2010, 11:40 PM Cire More Pictures. I got the Rob Mayeur Long Kit inst... Feb 16 2010, 07:41 AM Cire RE: Start of a new Project Thread Feb 16 2010, 07:43 AM Cire RE: Start of a new Project Thread Feb 16 2010, 07:45 AM Cire RE: Start of a new Project Thread Feb 16 2010, 07:46 AM Cire RE: Start of a new Project Thread Feb 16 2010, 07:48 AM Cire RE: Start of a new Project Thread Feb 16 2010, 07:49 AM Cire RE: Start of a new Project Thread Feb 16 2010, 07:51 AM Cire RE: Start of a new Project Thread Feb 16 2010, 07:53 AM Cire RE: Start of a new Project Thread Feb 16 2010, 07:54 AM Cire RE: Start of a new Project Thread Feb 16 2010, 07:56 AM Cire Argggg I got a 911 a arm verses a 914... Spent h... Feb 16 2010, 07:58 AM Cire Tomorrow the guy comes to Soda Blast it one more t... Feb 16 2010, 09:33 AM PH1
LOL Did I mention I sold my house and all this ... Feb 16 2010, 09:39 PM Krieger914 Awesome work! Please store it or ship with yo... Feb 16 2010, 09:55 PM rick 918-S All that work! Where the heck are you moving? ... Feb 16 2010, 10:01 PM Cire
All that work! Where the heck are you moving?... Feb 16 2010, 10:07 PM Cire So the car has the Engman stiffening internal kit.... Feb 17 2010, 06:55 PM Cire RE: Start of a new Project Thread Feb 17 2010, 06:57 PM Cire RE: Start of a new Project Thread Feb 17 2010, 06:59 PM Cire RE: Start of a new Project Thread Feb 17 2010, 07:01 PM Cire RE: Start of a new Project Thread Feb 17 2010, 07:02 PM Cire RE: Start of a new Project Thread Feb 17 2010, 07:04 PM Cire RE: Start of a new Project Thread Feb 17 2010, 07:06 PM Cire RE: Start of a new Project Thread Feb 17 2010, 07:07 PM Cire Door Time. I decided to cut up a door and see abo... Feb 19 2010, 11:59 AM Cire
Door Time. I decided to cut up a door and see ab... Feb 19 2010, 12:01 PM Cire RE: Start of a new Project Thread Feb 19 2010, 12:02 PM MDG The pics in Post 76 . . . that's a long way in... Feb 19 2010, 12:11 PM Cire
The pics in Post 76 . . . that's a long way i... Feb 23 2010, 07:24 PM Cire RE: Start of a new Project Thread Feb 23 2010, 07:26 PM Cire RE: Start of a new Project Thread Feb 23 2010, 07:30 PM Cire RE: Start of a new Project Thread Feb 23 2010, 07:32 PM Cire RE: Start of a new Project Thread Feb 23 2010, 07:33 PM Cire 4 hours of blowing sand out of every hole I could ... Feb 23 2010, 07:35 PM Cire Now for the prime-ing.... = )
Feb 23 2010, 07:36 PM Cire RE: Start of a new Project Thread Feb 23 2010, 07:38 PM Cire RE: Start of a new Project Thread Feb 23 2010, 07:39 PM Cire RE: Start of a new Project Thread Feb 23 2010, 07:41 PM Cire RE: Start of a new Project Thread Feb 23 2010, 07:43 PM Cire Tomorrow we shoot the yellow color. = ) Whew... ... Feb 23 2010, 07:44 PM oz371 Lookin good. Keep us posted! :beer2: Feb 23 2010, 07:56 PM
Cire RE: Start of a new Project Thread Nov 3 2009, 05:30 PM Cire My goal with the car is a light weight -simple- re... Nov 3 2009, 05:45 PM Cire
How do I get rid of this box (voltage regulator?... Nov 3 2009, 05:49 PM Cire I was told that sand blasting the car is the best ... Nov 3 2009, 06:02 PM Cire Well, I had it sand blasted. The guy came to my h... Nov 6 2009, 06:09 PM john grier Hey there Eric,
What you are doing is admireable. ... Nov 6 2009, 07:09 PM Cheapsnake Welcome to the madness Eric and congrats on the pu... Nov 6 2009, 07:13 PM Cire
Welcome to the madness Eric and congrats on the p... Nov 6 2009, 08:39 PM Cheapsnake No disrespect to this forum but if you're look... Nov 7 2009, 06:58 AM my928s4 Nice job on the sandblasting, sure wish I had done... Nov 7 2009, 08:57 AM Cire = ) Things are moving along. Are these added or ... Nov 14 2009, 09:23 AM Cire I just got the Engman Long Internal Kit installed.... Nov 14 2009, 09:26 AM Cire Stiffened the rear support and fixed the trunk are... Nov 14 2009, 09:29 AM PanelBilly Put your door back on, RIGHT NOW. Before you go an... Nov 14 2009, 10:29 AM Cire Here is the fixed hole where the AC unit used to b... Nov 14 2009, 07:05 PM Cire RE: Start of a new Project Thread Nov 14 2009, 07:07 PM JRust Nice work & quick! Way to tear into it :D Nov 15 2009, 02:00 AM SECHSER wow! very inspiring.. thank you for sharing th... Nov 15 2009, 02:07 AM plymouth37 I wish I could be half as productive as you are, N... Nov 15 2009, 12:51 PM Cire
I wish I could be half as productive as you are, ... Nov 18 2009, 08:26 PM Cire I decided to brace the sitting area. Here is my w... Nov 18 2009, 08:30 PM Cire I also decided to build a Rottisserie.
Eric
... Nov 18 2009, 08:32 PM Gint That's a Delphi car! Going to paint it th... Nov 19 2009, 09:04 AM Cire
That's a Delphi car! Going to paint it t... Nov 19 2009, 11:16 AM Cire RE: Start of a new Project Thread Nov 20 2009, 05:24 AM Cire RE: Start of a new Project Thread Nov 20 2009, 06:42 AM strawman Nice progress! I would suggest that you consid... Nov 20 2009, 09:46 AM Vacca Rabite :agree:
Widen the stance. You really don't ev... Nov 20 2009, 11:32 AM bigkensteele
:agree:
Widen the stance. You really don't e... Nov 20 2009, 12:39 PM Vacca Rabite
I was at HF this morning looking at engine stand ... Nov 21 2009, 11:43 AM Cire I got 90% of my welding done. Most of the holes a... Nov 30 2009, 07:38 AM Cire
:agree:
Widen the stance. You really don't e... Nov 20 2009, 05:08 PM Cire RE: Start of a new Project Thread Nov 20 2009, 05:10 PM Cire RE: Start of a new Project Thread Nov 20 2009, 05:12 PM Lou W Looking great, keep up the good work. :beer2: Nov 21 2009, 04:19 AM Cire More pictures....
Jan 31 2010, 07:54 PM Cire RE: Start of a new Project Thread Jan 31 2010, 07:56 PM Cire On the third picture... Where it shows the rear s... Jan 31 2010, 08:05 PM Cire Where we started....
Where we are....
Jan 31 2010, 08:07 PM bcaschera Good work!! If i were to post a where it w... Jan 31 2010, 11:40 PM Cire More Pictures. I got the Rob Mayeur Long Kit inst... Feb 16 2010, 07:41 AM Cire RE: Start of a new Project Thread Feb 16 2010, 07:43 AM Cire RE: Start of a new Project Thread Feb 16 2010, 07:45 AM Cire RE: Start of a new Project Thread Feb 16 2010, 07:46 AM Cire RE: Start of a new Project Thread Feb 16 2010, 07:48 AM Cire RE: Start of a new Project Thread Feb 16 2010, 07:49 AM Cire RE: Start of a new Project Thread Feb 16 2010, 07:51 AM Cire RE: Start of a new Project Thread Feb 16 2010, 07:53 AM Cire RE: Start of a new Project Thread Feb 16 2010, 07:54 AM Cire RE: Start of a new Project Thread Feb 16 2010, 07:56 AM Cire Argggg I got a 911 a arm verses a 914... Spent h... Feb 16 2010, 07:58 AM Cire Tomorrow the guy comes to Soda Blast it one more t... Feb 16 2010, 09:33 AM PH1
LOL Did I mention I sold my house and all this ... Feb 16 2010, 09:39 PM Krieger914 Awesome work! Please store it or ship with yo... Feb 16 2010, 09:55 PM rick 918-S All that work! Where the heck are you moving? ... Feb 16 2010, 10:01 PM Cire
All that work! Where the heck are you moving?... Feb 16 2010, 10:07 PM Cire So the car has the Engman stiffening internal kit.... Feb 17 2010, 06:55 PM Cire RE: Start of a new Project Thread Feb 17 2010, 06:57 PM Cire RE: Start of a new Project Thread Feb 17 2010, 06:59 PM Cire RE: Start of a new Project Thread Feb 17 2010, 07:01 PM Cire RE: Start of a new Project Thread Feb 17 2010, 07:02 PM Cire RE: Start of a new Project Thread Feb 17 2010, 07:04 PM Cire RE: Start of a new Project Thread Feb 17 2010, 07:06 PM Cire RE: Start of a new Project Thread Feb 17 2010, 07:07 PM Cire Door Time. I decided to cut up a door and see abo... Feb 19 2010, 11:59 AM Cire
Door Time. I decided to cut up a door and see ab... Feb 19 2010, 12:01 PM Cire RE: Start of a new Project Thread Feb 19 2010, 12:02 PM MDG The pics in Post 76 . . . that's a long way in... Feb 19 2010, 12:11 PM Cire
The pics in Post 76 . . . that's a long way i... Feb 23 2010, 07:24 PM Cire RE: Start of a new Project Thread Feb 23 2010, 07:26 PM Cire RE: Start of a new Project Thread Feb 23 2010, 07:30 PM Cire RE: Start of a new Project Thread Feb 23 2010, 07:32 PM Cire RE: Start of a new Project Thread Feb 23 2010, 07:33 PM Cire 4 hours of blowing sand out of every hole I could ... Feb 23 2010, 07:35 PM Cire Now for the prime-ing.... = )
Feb 23 2010, 07:36 PM Cire RE: Start of a new Project Thread Feb 23 2010, 07:38 PM Cire RE: Start of a new Project Thread Feb 23 2010, 07:39 PM Cire RE: Start of a new Project Thread Feb 23 2010, 07:41 PM Cire RE: Start of a new Project Thread Feb 23 2010, 07:43 PM Cire Tomorrow we shoot the yellow color. = ) Whew... ... Feb 23 2010, 07:44 PM oz371 Lookin good. Keep us posted! :beer2: Feb 23 2010, 07:56 PM  |
1 User(s) are reading this topic (1 Guests and 0 Anonymous Users)
0 Members:

|
Lo-Fi Version | Time is now: 4th July 2025 - 01:30 PM |
Invision Power Board
v9.1.4 © 2025 IPS, Inc.