|
|
|
Porsche, and the Porsche crest are registered trademarks of Dr. Ing. h.c. F. Porsche AG.
This site is not affiliated with Porsche in any way. Its only purpose is to provide an online forum for car enthusiasts. All other trademarks are property of their respective owners. |
|
|

  |

| RiqueMar |
 Jan 21 2012, 02:55 AM Jan 21 2012, 02:55 AM
Post
#281
|
|
Enrique Allen Mar  Group: Members Posts: 2,264 Joined: 28-August 08 From: San Diego, CA Member No.: 9,478 Region Association: Southern California |
QUOTE(Socalandy @ Jan 20 2012, 03:04 PM)  a few more pics of the engine and I had the valve cover done in a wrinkle finish and block sanded the letters and now I plan on doing the same for the lowers I always love the wrinkle black with the 'PORSCHE' script, did it on my car, and man does it look awesome no matter what the engine! Looking good! |
   |

 
|
| Socalandy |
Jan 22 2012, 02:48 PM
Post
#282
|
|
Its got to be Yellow!!! Group: Members Posts: 2,432 Joined: 29-August 09 From: Orange Member No.: 10,742 Region Association: Southern California |
preparing the jams for the rear quarter. everywhere there's a joint (IMG:style_emoticons/default/elvira.gif) there's more rust (IMG:style_emoticons/default/headbang.gif)
Attached thumbnail(s) 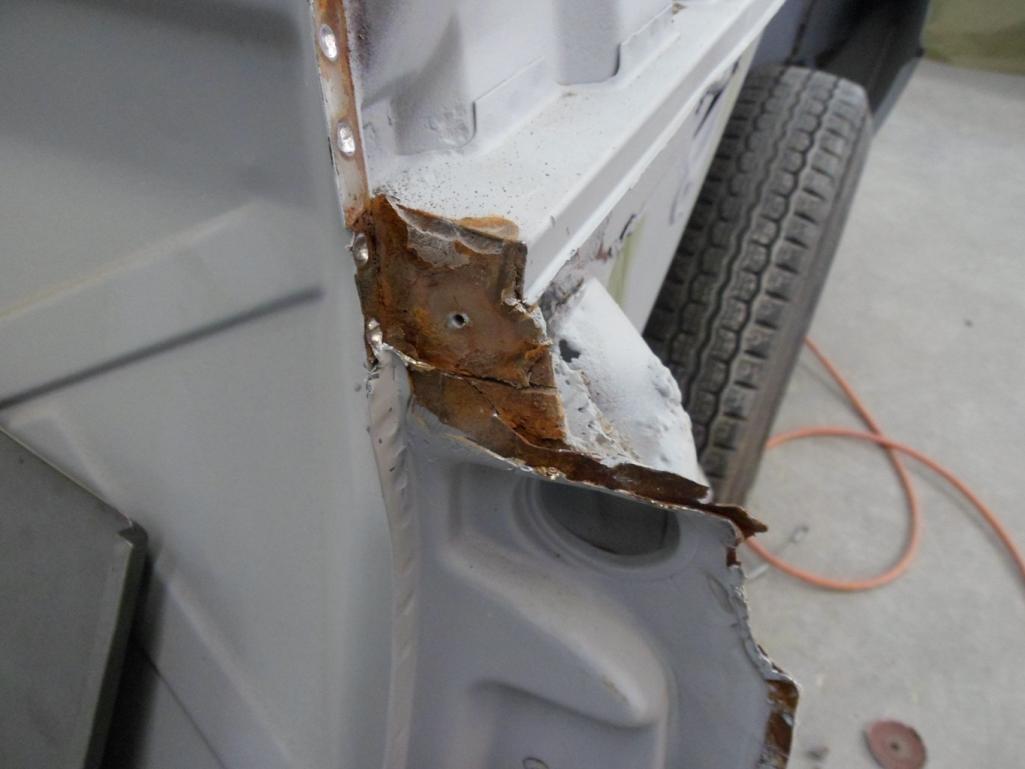 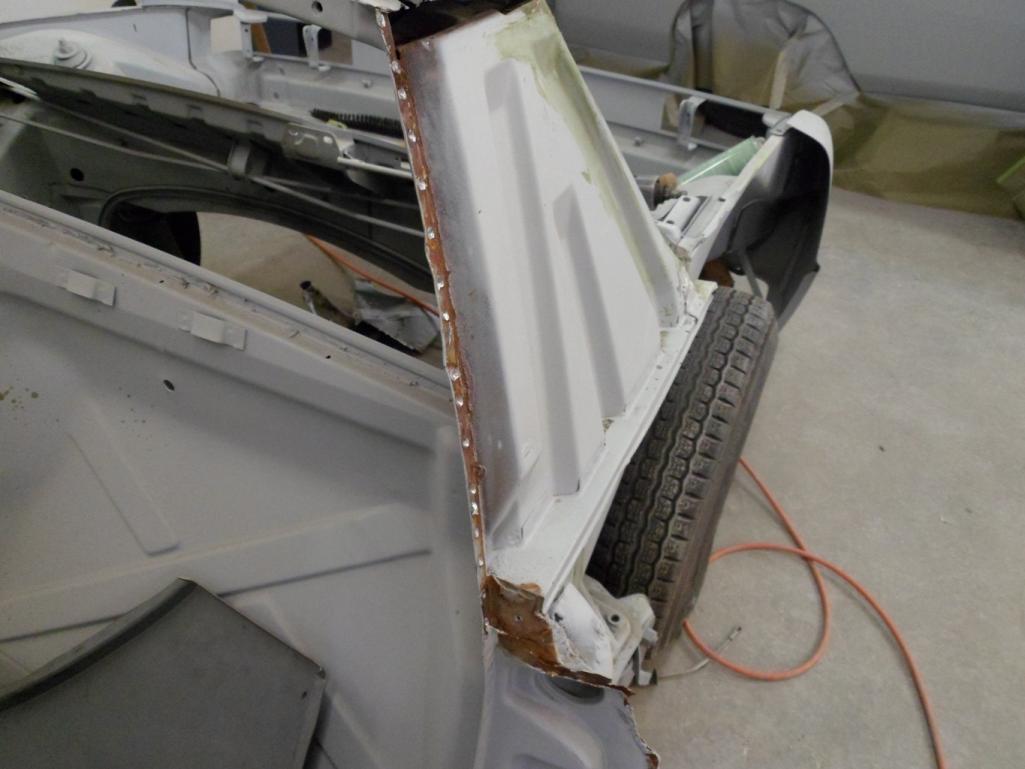 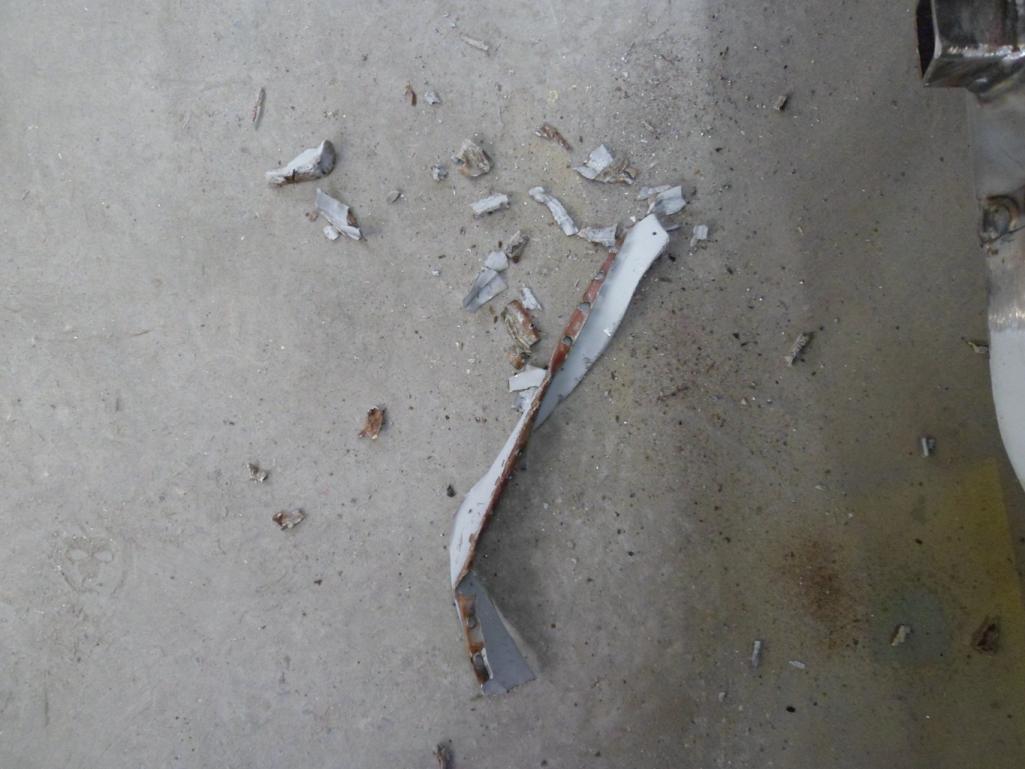 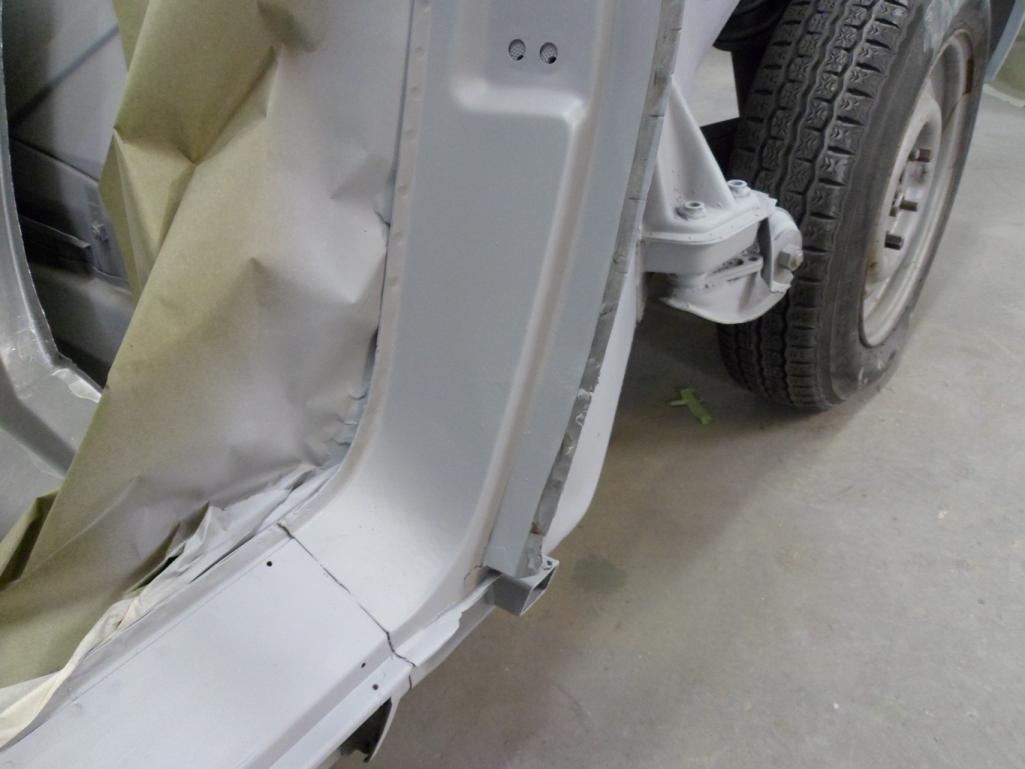
|
|
|
|
| Socalandy |
Feb 2 2012, 11:24 PM
Post
#283
|
|
Its got to be Yellow!!! Group: Members Posts: 2,432 Joined: 29-August 09 From: Orange Member No.: 10,742 Region Association: Southern California |
trimming rear quarters and removing seam sealer. I see the importance in removing with all the rust living underneath (IMG:style_emoticons/default/blink.gif)
Attached thumbnail(s) 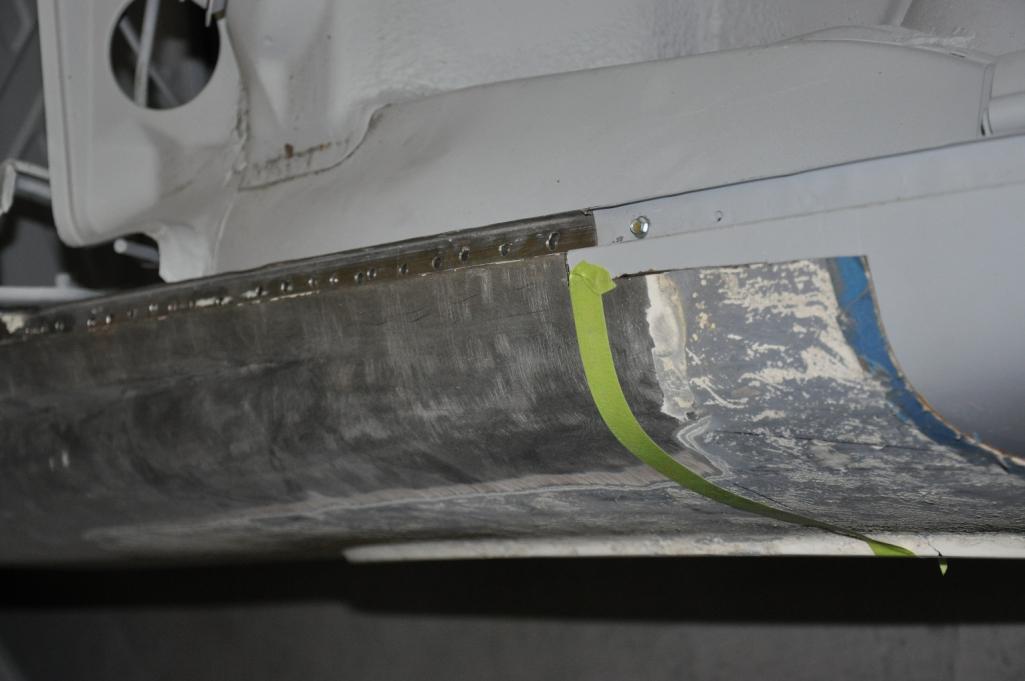 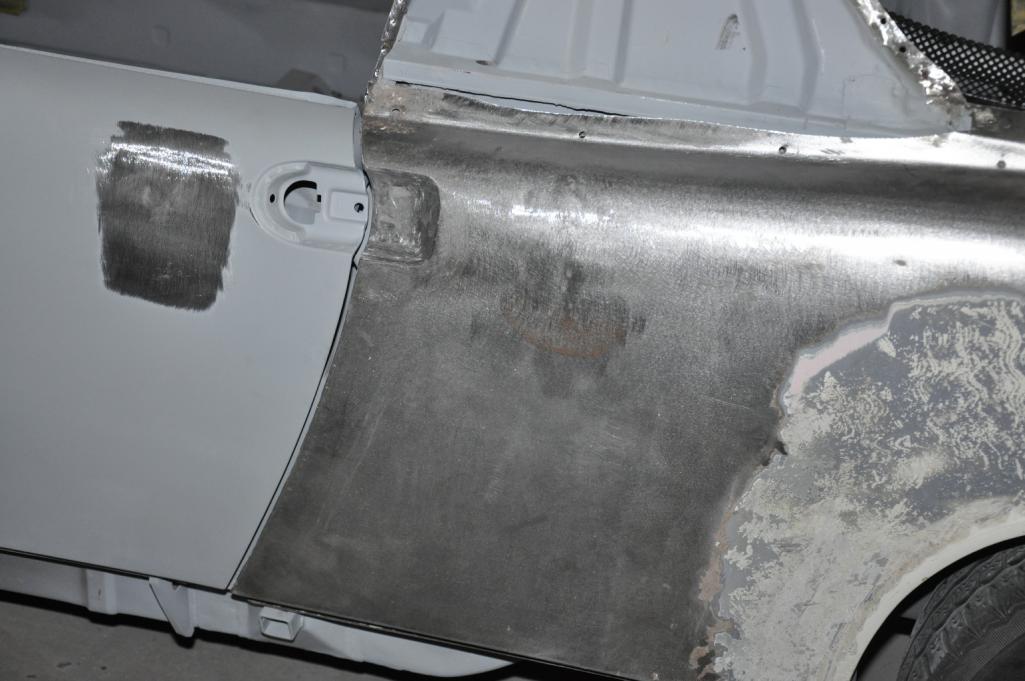 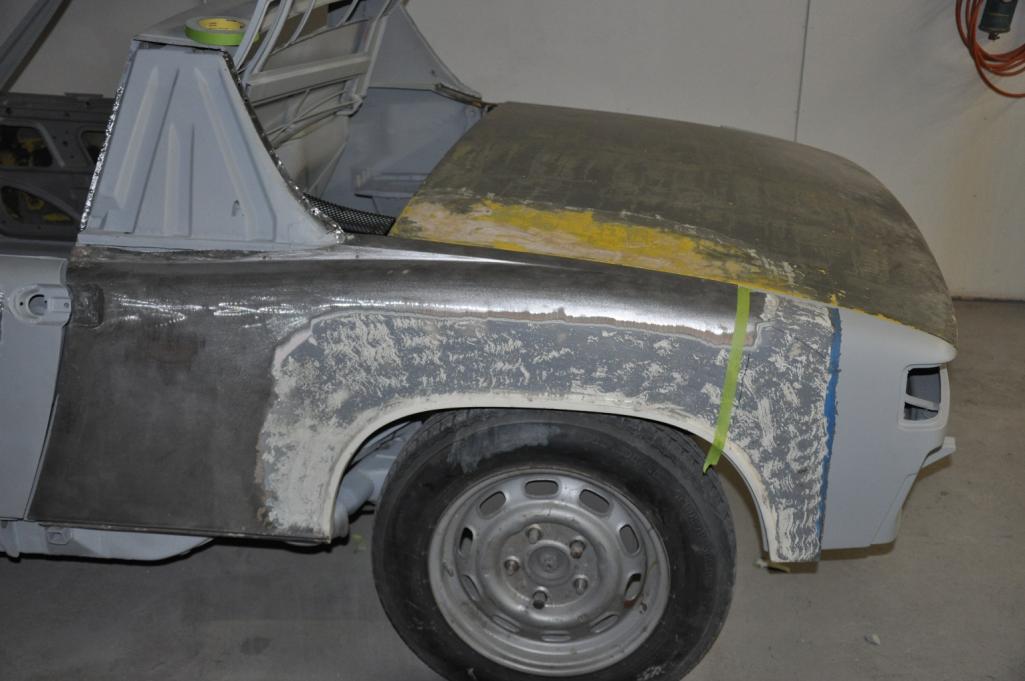 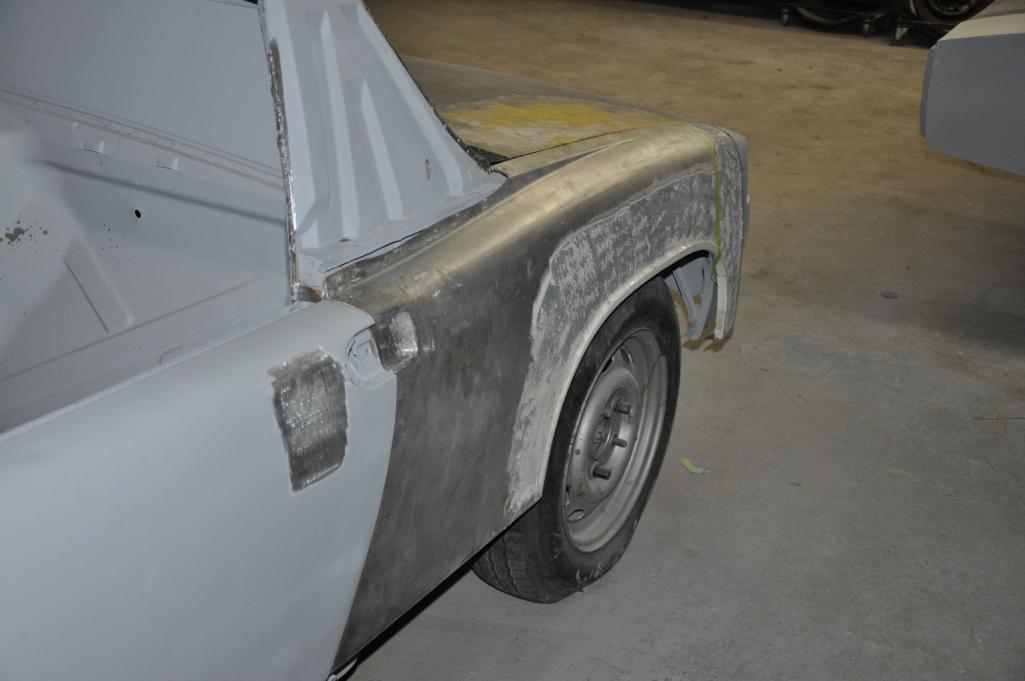
|
|
|
|
| Socalandy |
Feb 2 2012, 11:28 PM
Post
#284
|
|
Its got to be Yellow!!! Group: Members Posts: 2,432 Joined: 29-August 09 From: Orange Member No.: 10,742 Region Association: Southern California |
The rumors are true (IMG:style_emoticons/default/sad.gif)
Attached thumbnail(s) 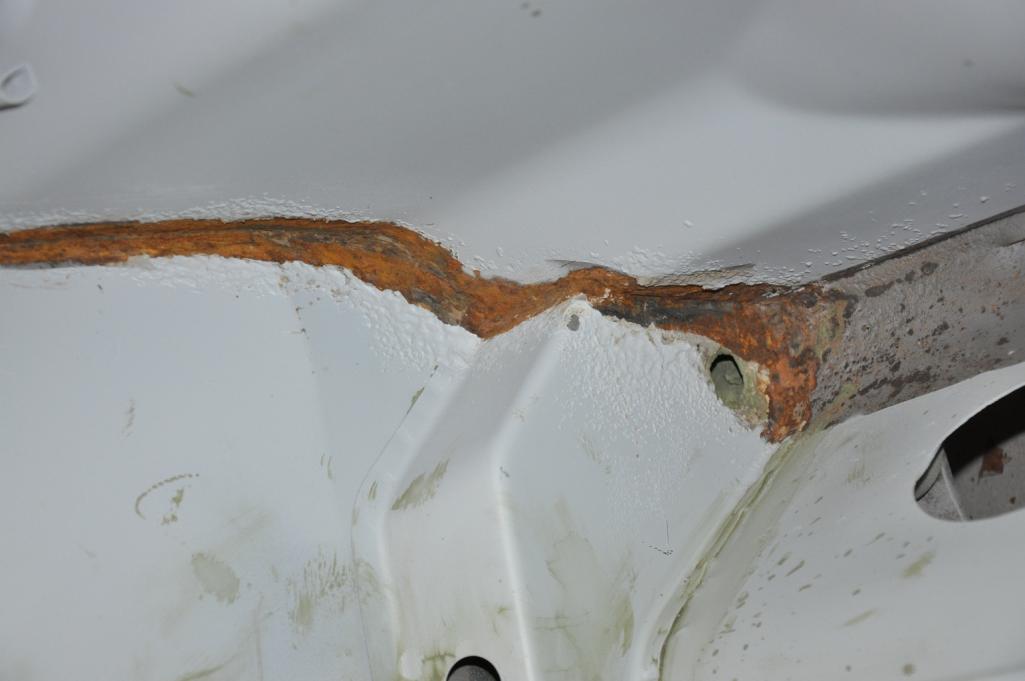 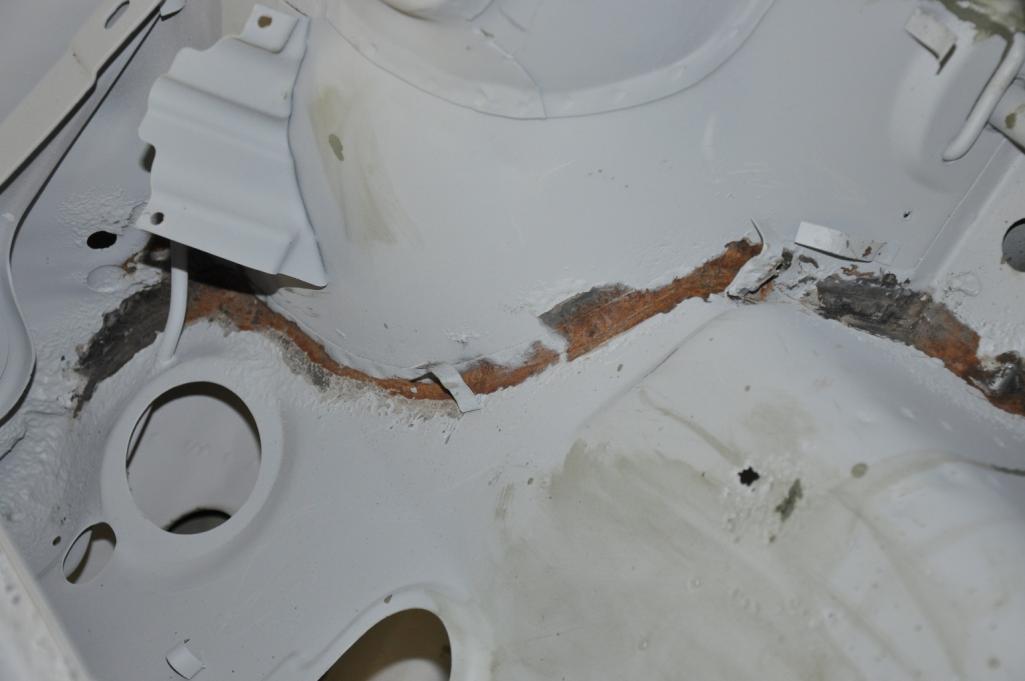 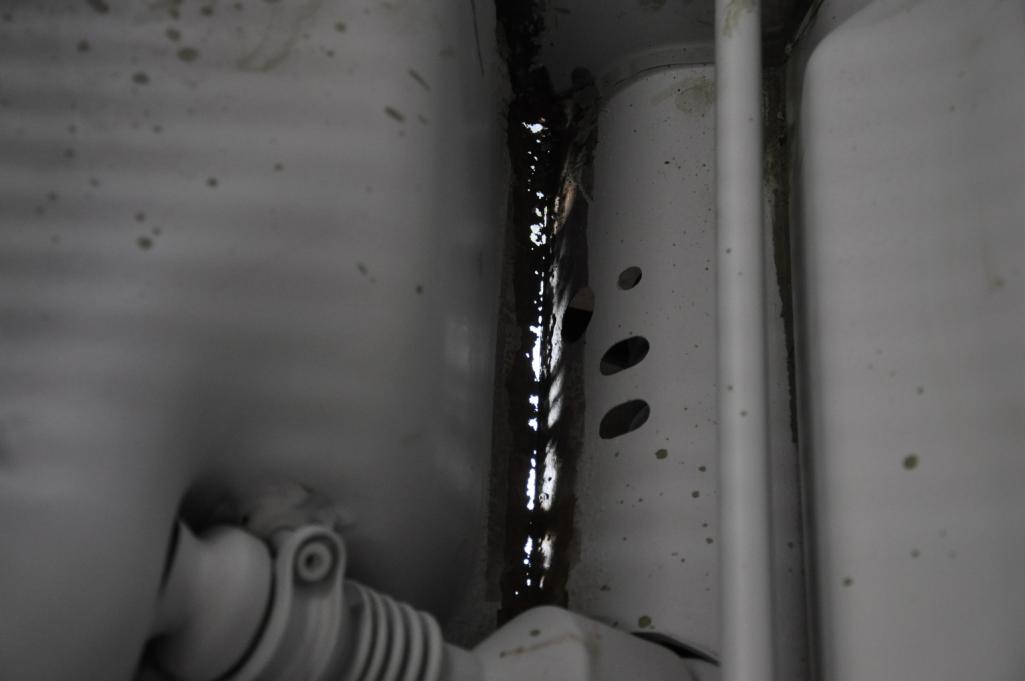 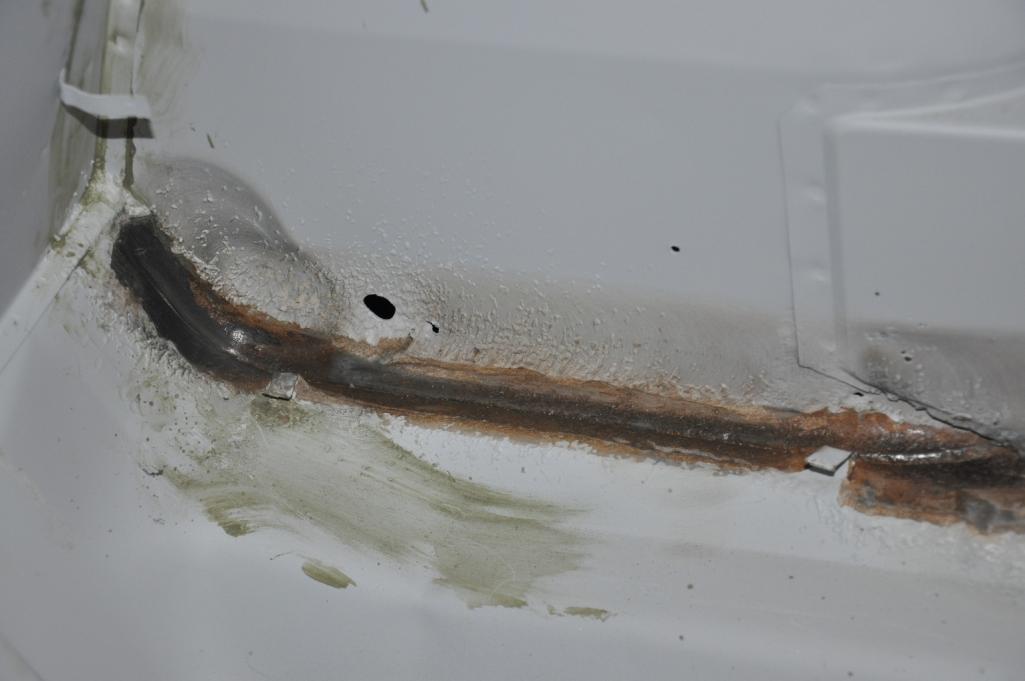
|
|
|
|
| Socalandy |
Feb 2 2012, 11:33 PM
Post
#285
|
|
Its got to be Yellow!!! Group: Members Posts: 2,432 Joined: 29-August 09 From: Orange Member No.: 10,742 Region Association: Southern California |
the rust dust is flying
Attached thumbnail(s) 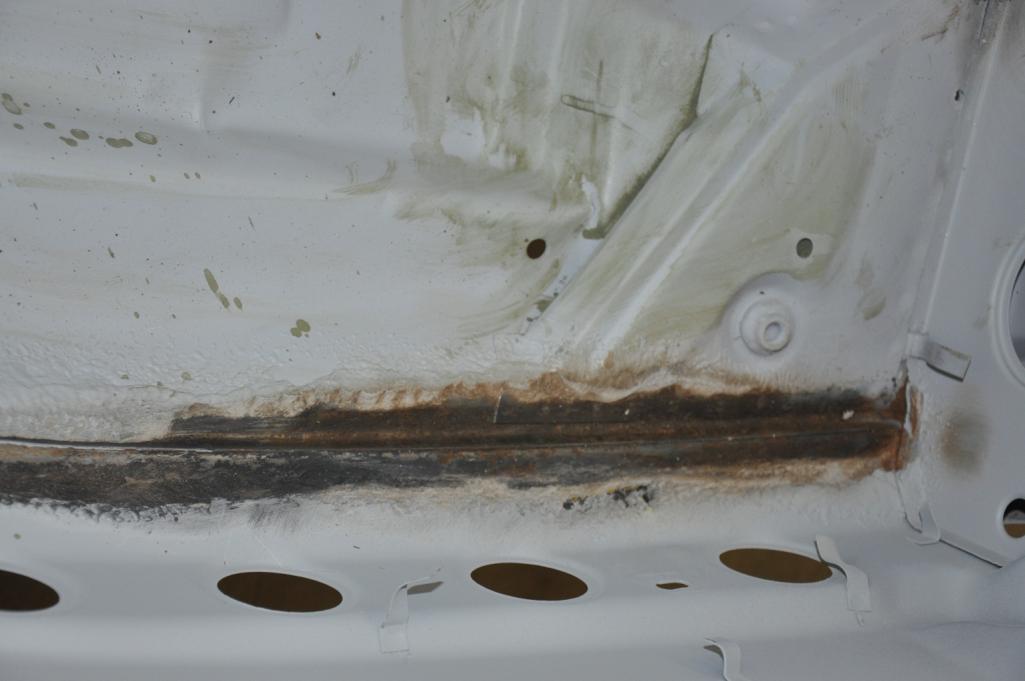 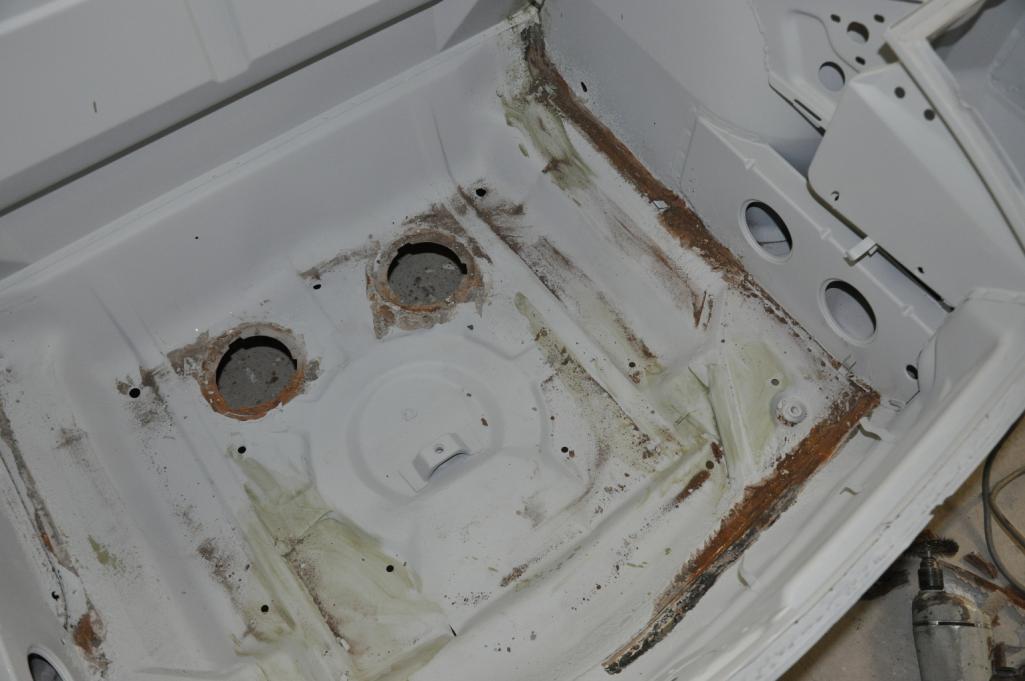
|
|
|
|
| jules2c |
Feb 5 2012, 05:50 PM
Post
#286
|
|
Newbie Group: Members Posts: 16 Joined: 15-January 12 From: Milton Keynes Member No.: 14,010 Region Association: None |
I am sorry but I just can't seem to understand this system, the build is amazing. There was a mention of the third seatbelt holes only being on early models just wanted to know how to really confirm age of car.
|
|
|
|
| Socalandy |
Feb 10 2012, 07:12 PM
Post
#287
|
|
Its got to be Yellow!!! Group: Members Posts: 2,432 Joined: 29-August 09 From: Orange Member No.: 10,742 Region Association: Southern California |
This was all the feedback I got and from that info would assume all cars with the fixed passenger seat would have them.
QUOTE(jules2c @ Feb 5 2012, 03:50 PM) I am sorry but I just can't seem to understand this system, the build is amazing. There was a mention of the third seatbelt holes only being on early models just wanted to know how to really confirm age of car. |
|
|
|
| Socalandy |
Feb 10 2012, 07:17 PM
Post
#288
|
|
Its got to be Yellow!!! Group: Members Posts: 2,432 Joined: 29-August 09 From: Orange Member No.: 10,742 Region Association: Southern California |
lower valve covers were a bit of work milling them down, then out for the wrinkle finish and the grain sanding the fins but I'm happy with the look.
Last step in selling my 72 was get the stock seats redone since the Scheel's go in the -6 Glad I bought the roll of basket weave!! Attached thumbnail(s) 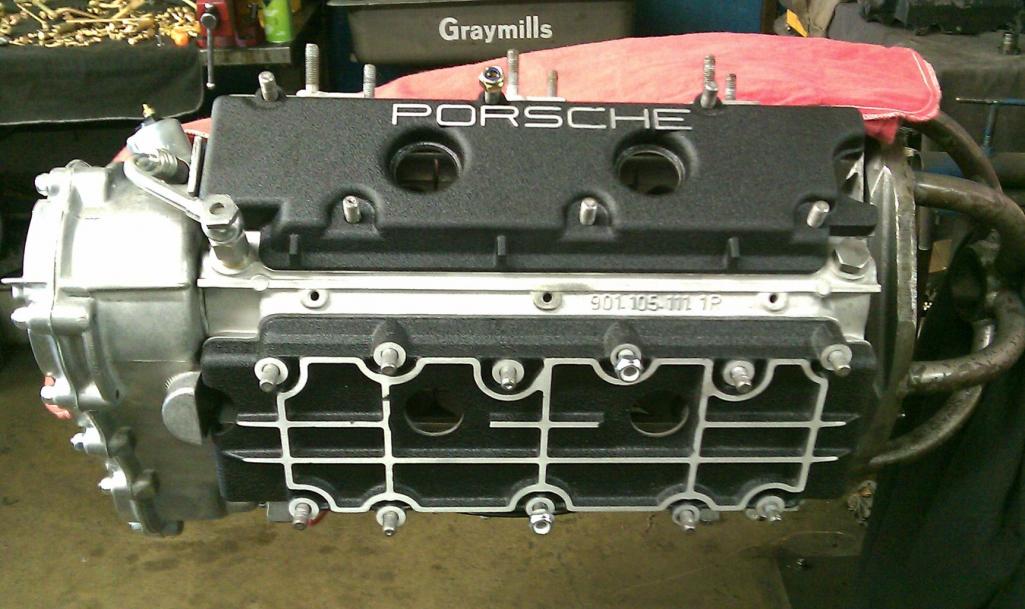 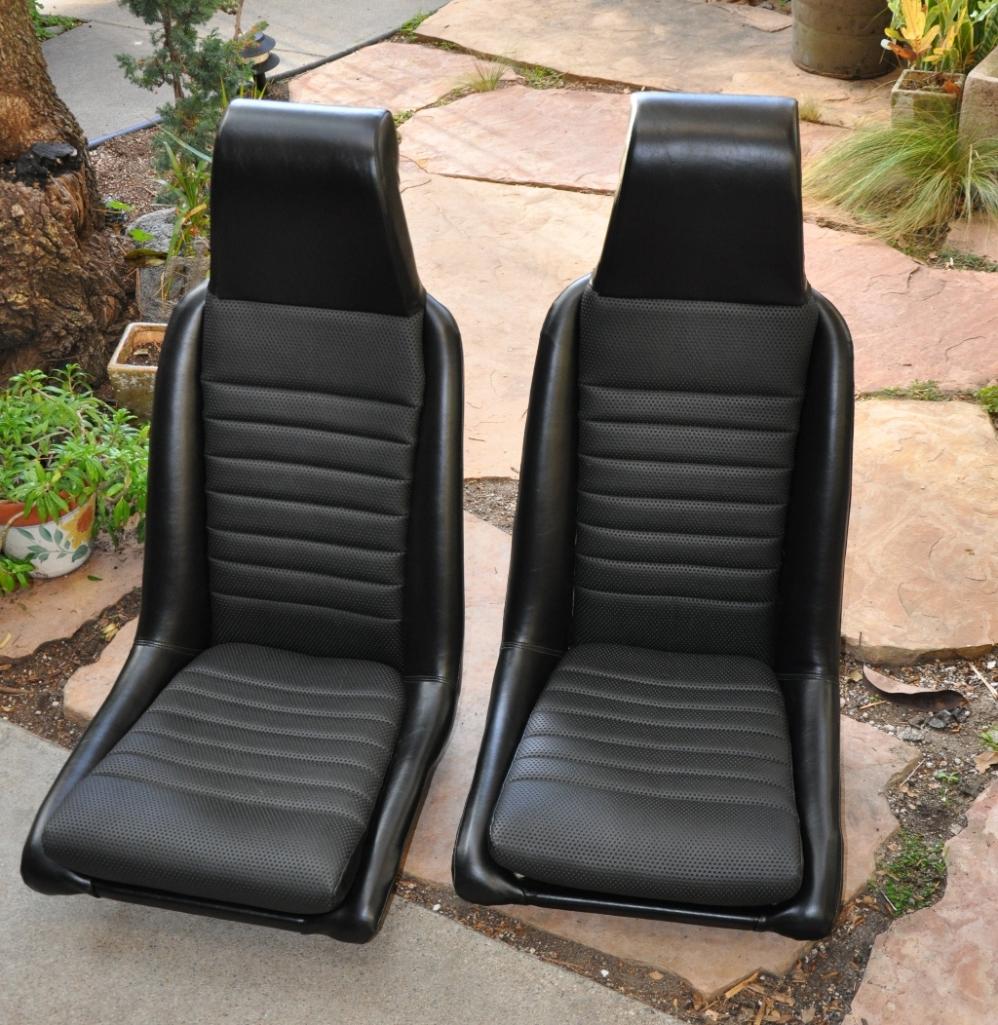 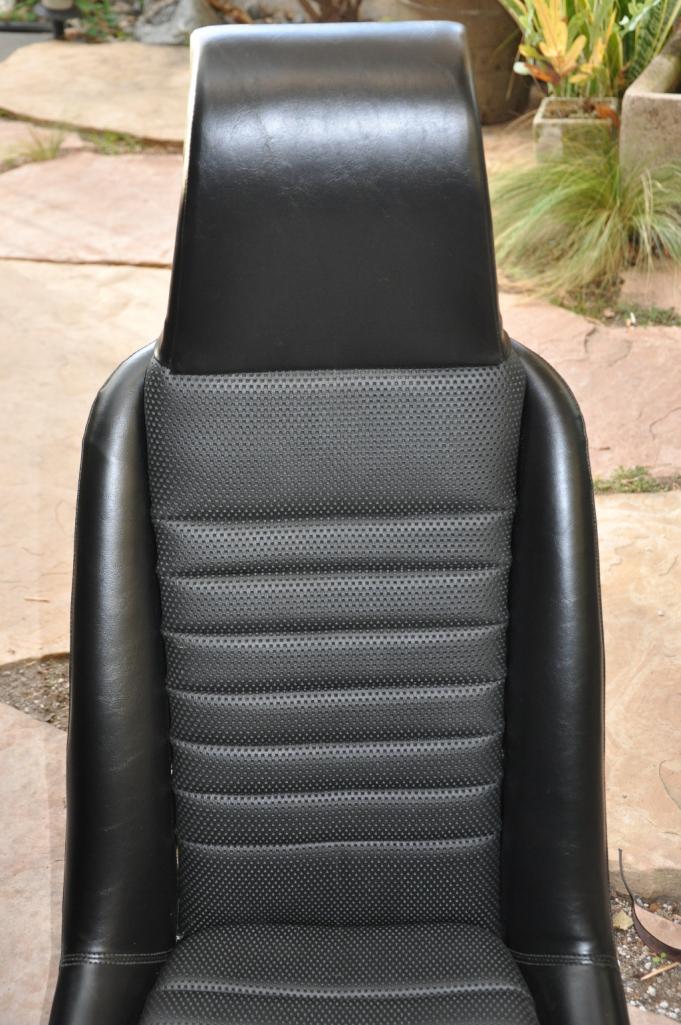 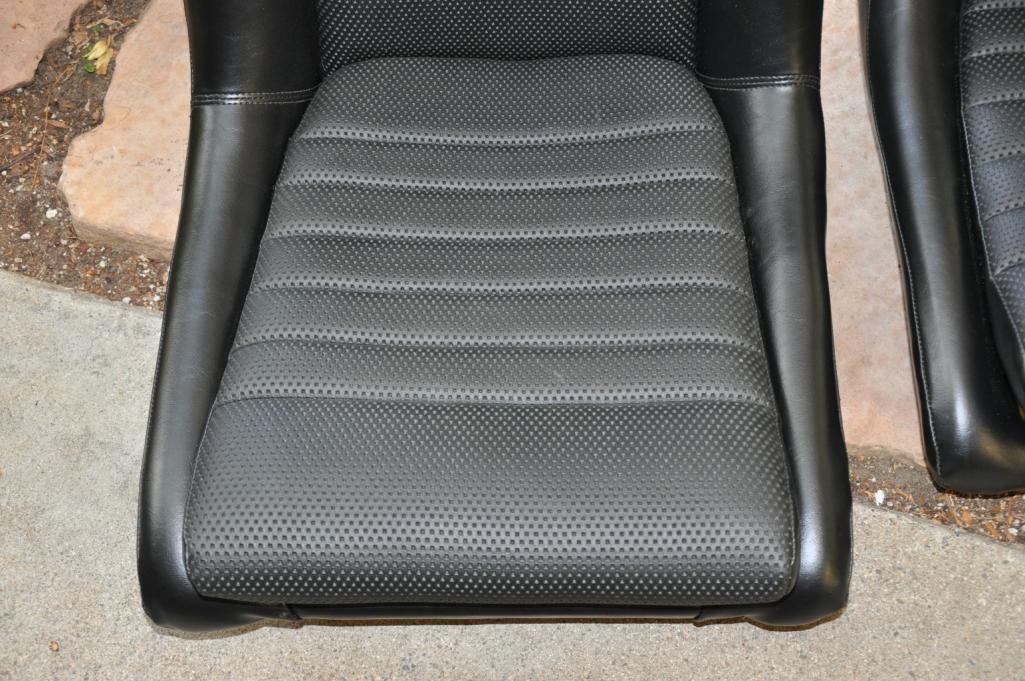
|
|
|
|
| MecGen |
Feb 11 2012, 07:15 AM
Post
#289
|
|
8 Easy Steps Group: Members Posts: 848 Joined: 8-January 05 From: Laval, Canada Member No.: 3,421 |
Hi Andy
This is a real test to your motivation, and your killing it (IMG:style_emoticons/default/aktion035.gif) Really nice to see you taking the time to save this 914 and bring it back to where few of us believe they should be, in the front of the pack QUOTE(Socalandy @ Jan 14 2012, 10:56 PM) and order/install console stiffiner kit. I've been out of the game for a while, can you explain ? are you talking about a tie rod support system? Thanks in advance and good luck whith the build Regards |
|
|
|
| 9fourteen |
Feb 11 2012, 09:06 AM
Post
#290
|
|
Newbie Group: Members Posts: 42 Joined: 20-November 06 From: Cincinnati, OH Member No.: 7,239 Region Association: Upper MidWest |
QUOTE(Socalandy @ Dec 18 2011, 09:45 PM) the green stuff is the eastwood converter that ran out and got wiped off, it covered way better than expected and flows into every little creveice. We drilled a few holes to treat enclosed areas. This cars internal areas are sealed (IMG:style_emoticons/default/aktion035.gif) Did you prep those areas any before you sprayed that stuff in there? Like blow it out, wash it out with rust converter, then water, etc or did you just spray it in there. Just curious. That stuff looks like it might be the way to go for treating the "can't reach" areas. Just wandering what else is involved with using it. |
|
|
|
| Socalandy |
Feb 11 2012, 09:50 AM
Post
#291
|
|
Its got to be Yellow!!! Group: Members Posts: 2,432 Joined: 29-August 09 From: Orange Member No.: 10,742 Region Association: Southern California |
The stiffining kit is installed in the rear wheel wells and around the swing arm console and is recomended for larger motors. this pic is of someones conversion.
As for the the coating from Eastwood I cleaned out what I cound reach and sprayed it in. Here's a paste from their website... Internal Frame Coating destroys rust hiding inside the chassis, so it doesn’t rust its way throughYou spend time and money restoring a chassis...but what about all that rust inside the frame? Use our Internal Frame Coating to make your chassis rust-free throughout! •Tough phenolic resin penetrates, converts and encapsulates the rust on the internal surface •Zinc phosphate seals it to prevent future corrosion •24"-long tube with conical nozzle reaches in to spray coating in a radial pattern for complete coverage •Covers 10 sq. ft. per can •Fully cures in 24 hours Attached image(s) 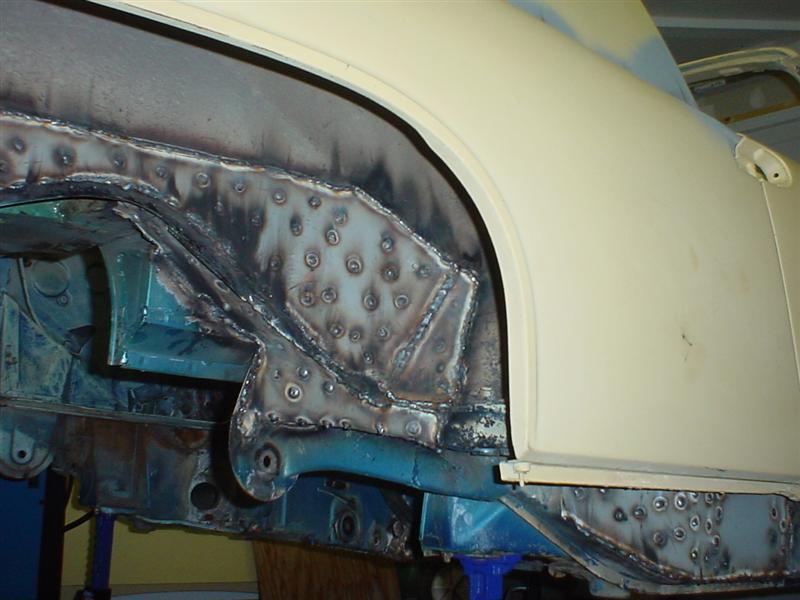
|
|
|
|
| JoeSharp |
Feb 11 2012, 09:53 AM
Post
#292
|
|
In Irvine, Ca. May 15-18 Group: Members Posts: 3,947 Joined: 9-July 03 From: DeLand, Florida Member No.: 898 Region Association: South East States |
Thanks for bring the stuff by Andy, the car is coming along nicely.
|
|
|
|
| Socalandy |
Feb 15 2012, 10:18 PM
Post
#293
|
|
Its got to be Yellow!!! Group: Members Posts: 2,432 Joined: 29-August 09 From: Orange Member No.: 10,742 Region Association: Southern California |
Thanks Joe!!
Some more progress with the stiffining in so now the rear quarters can go on next Attached thumbnail(s) 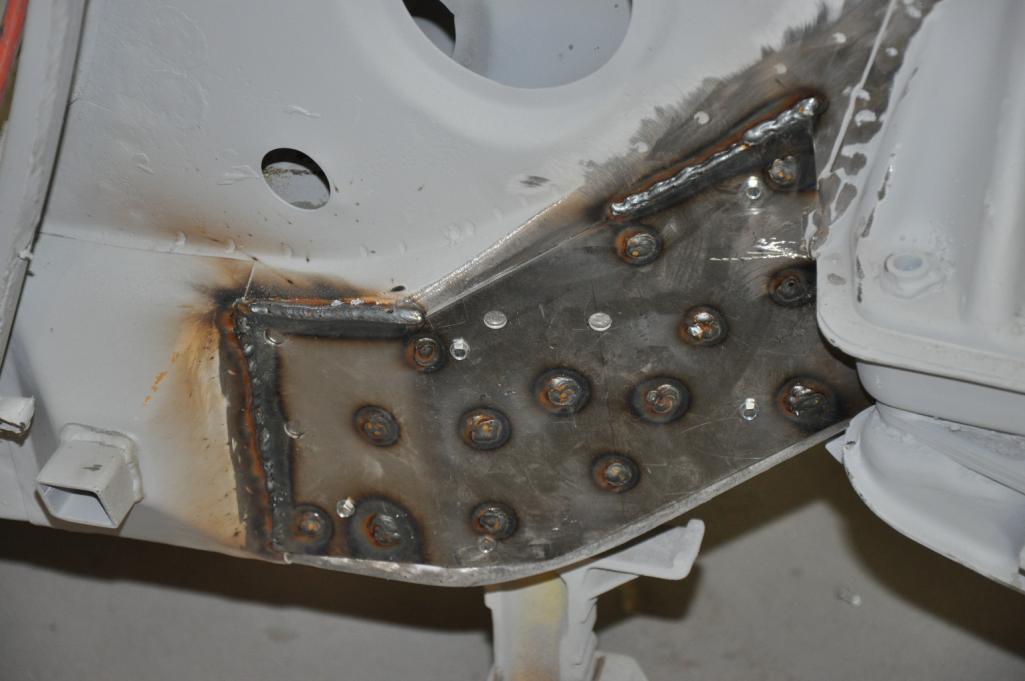 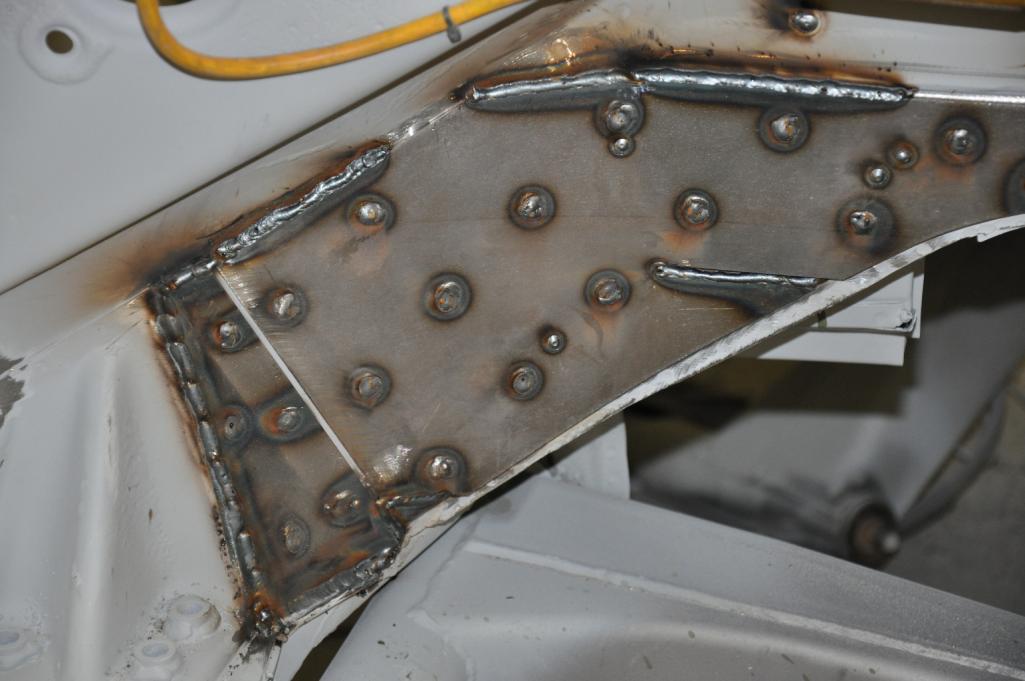 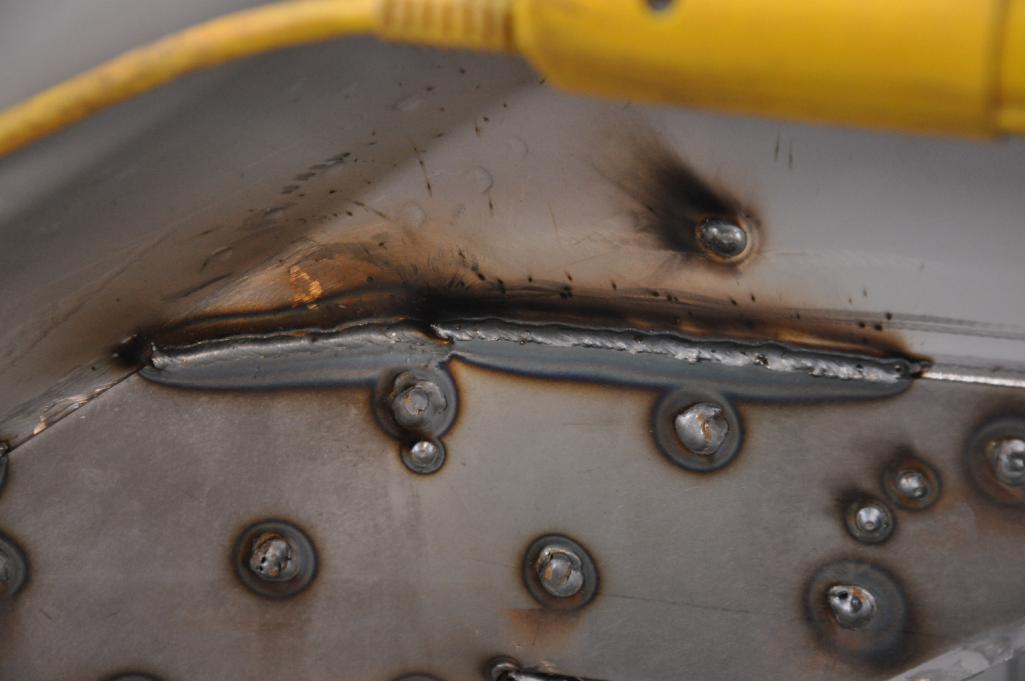 
|
|
|
|
| Socalandy |
Feb 15 2012, 10:22 PM
Post
#294
|
|
Its got to be Yellow!!! Group: Members Posts: 2,432 Joined: 29-August 09 From: Orange Member No.: 10,742 Region Association: Southern California |
(IMG:style_emoticons/default/welder.gif) and grinding
Attached thumbnail(s) 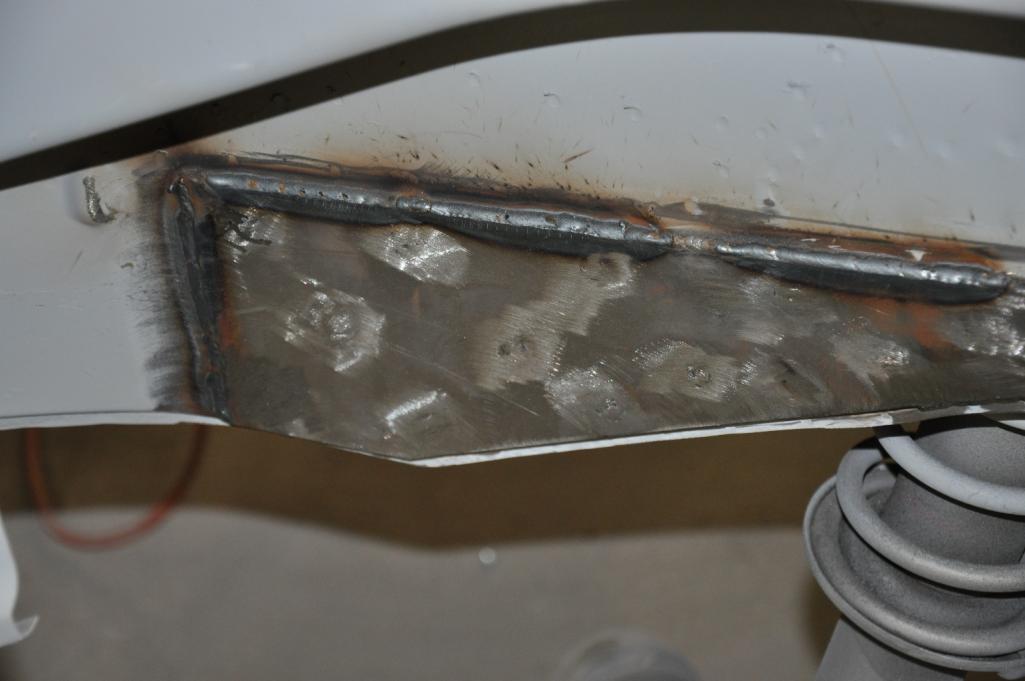 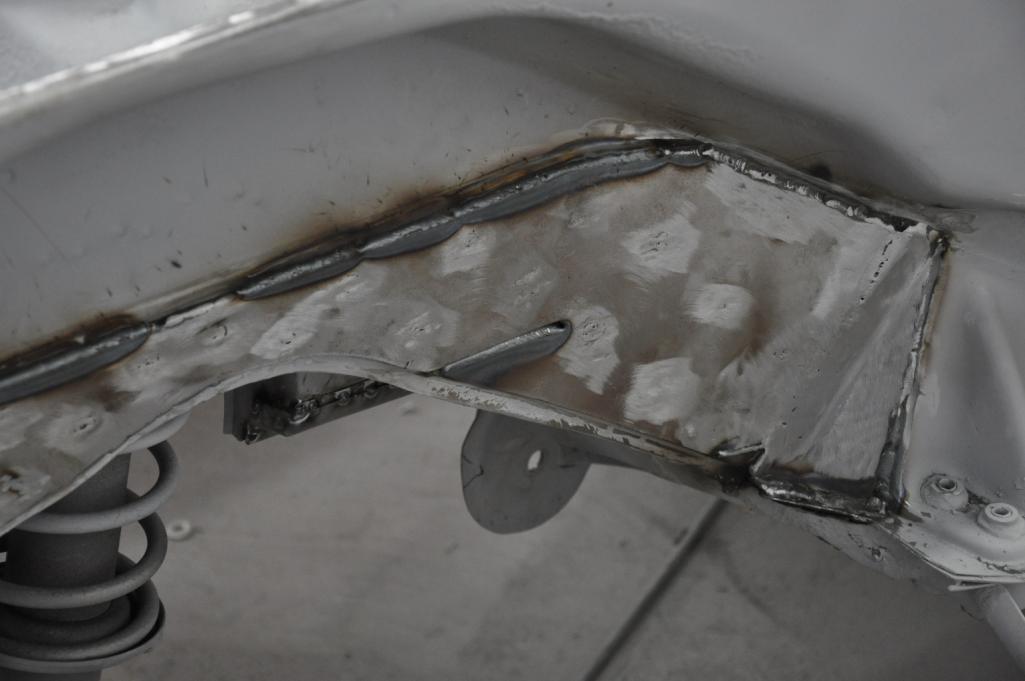 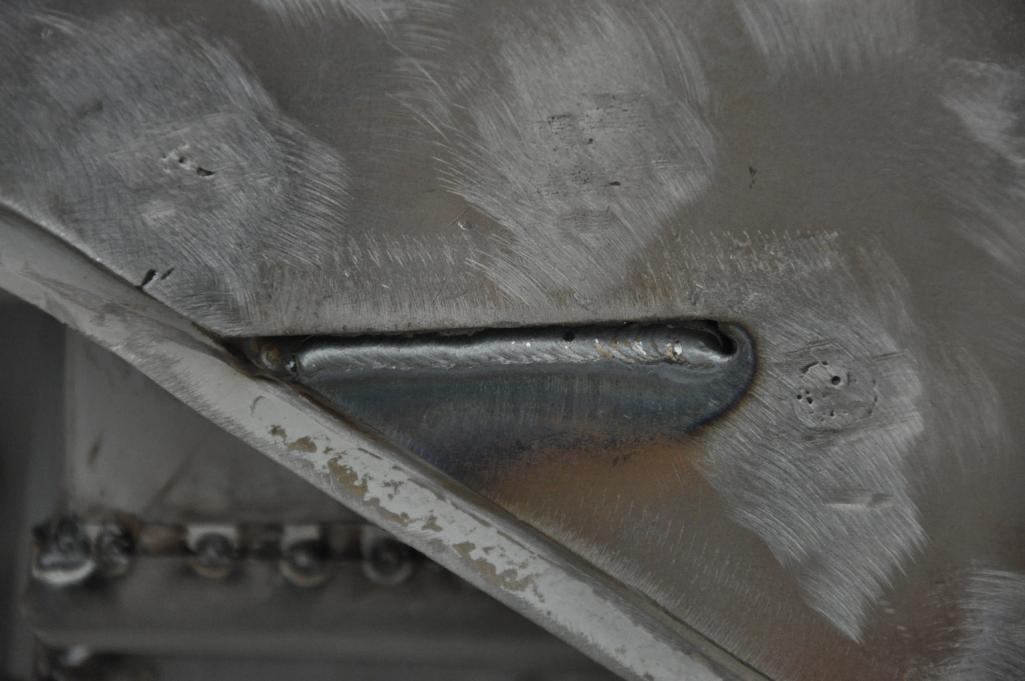 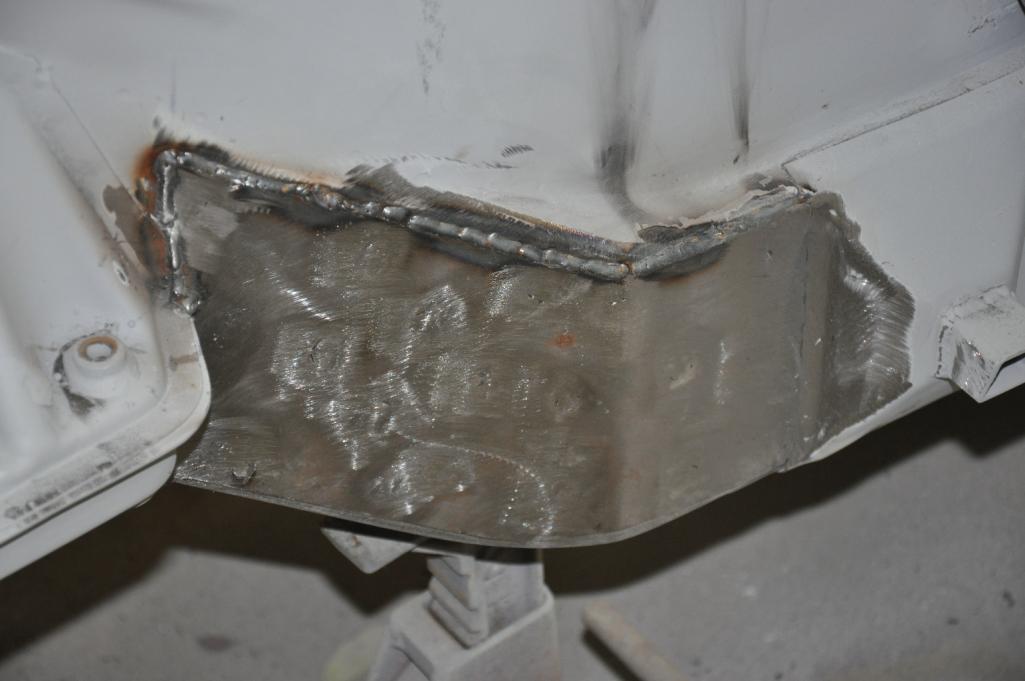
|
|
|
|
| 6freak |
Feb 16 2012, 08:50 AM
Post
#295
|
|
MR.C Group: Members Posts: 4,740 Joined: 19-March 08 From: Tacoma WA Member No.: 8,829 Region Association: Pacific Northwest |
QUOTE(RiqueMar @ Jan 21 2012, 12:55 AM) QUOTE(Socalandy @ Jan 20 2012, 03:04 PM) a few more pics of the engine and I had the valve cover done in a wrinkle finish and block sanded the letters and now I plan on doing the same for the lowers I always love the wrinkle black with the 'PORSCHE' script, did it on my car, and man does it look awesome no matter what the engine! Looking good! I agree looks good ..I did the letters on mine in Gold ..matches the ingine lid letters...nice work Mr MikeC (IMG:style_emoticons/default/smile.gif) |
|
|
|
| Socalandy |
Feb 22 2012, 09:45 PM
Post
#296
|
|
Its got to be Yellow!!! Group: Members Posts: 2,432 Joined: 29-August 09 From: Orange Member No.: 10,742 Region Association: Southern California |
So the passenger side quarter is on and the drivers side is tacked in and its looking like a complete 914 body (IMG:style_emoticons/default/piratenanner.gif)
Attached thumbnail(s) 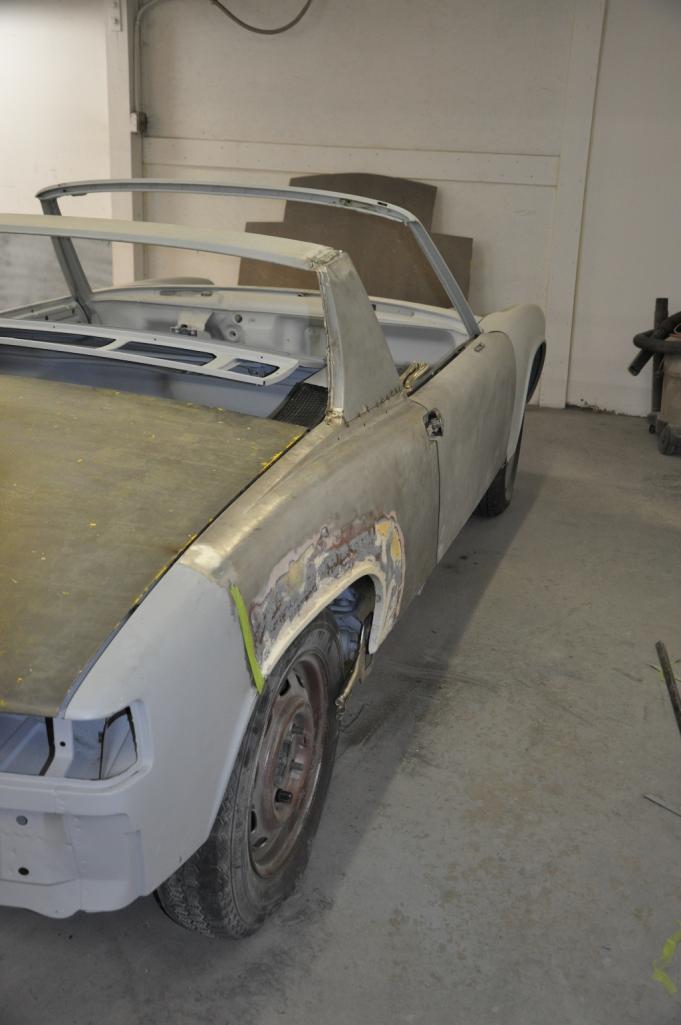 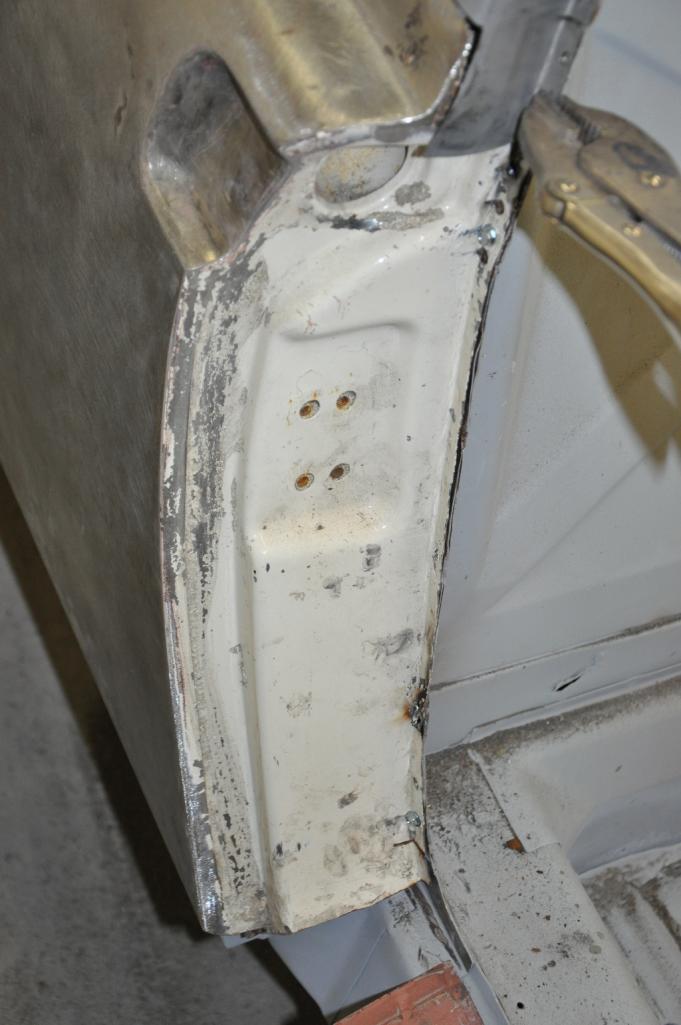 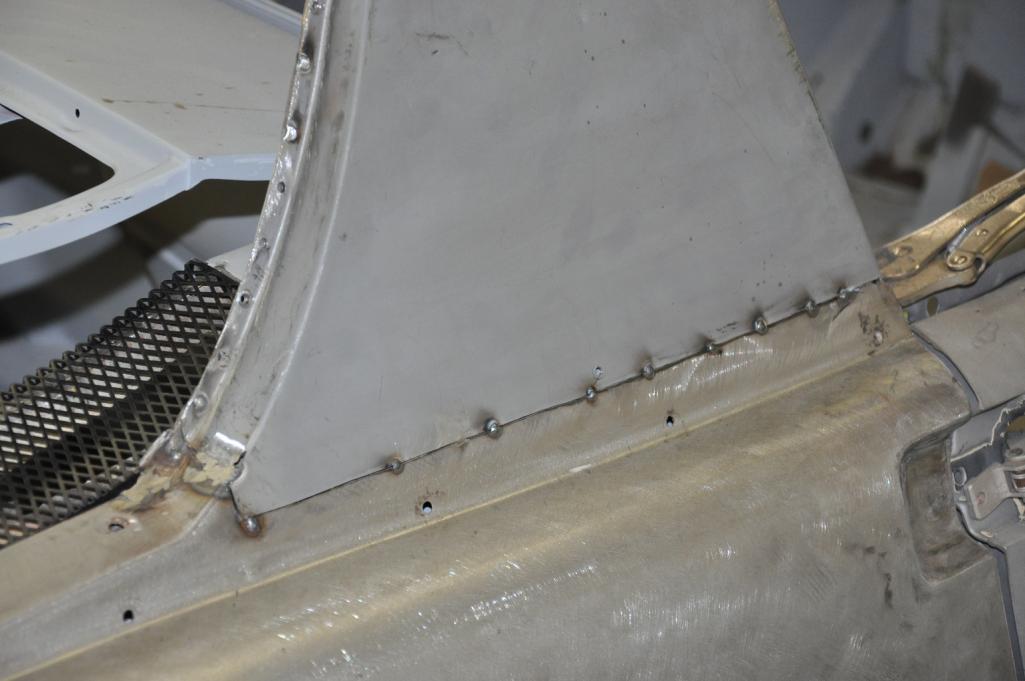 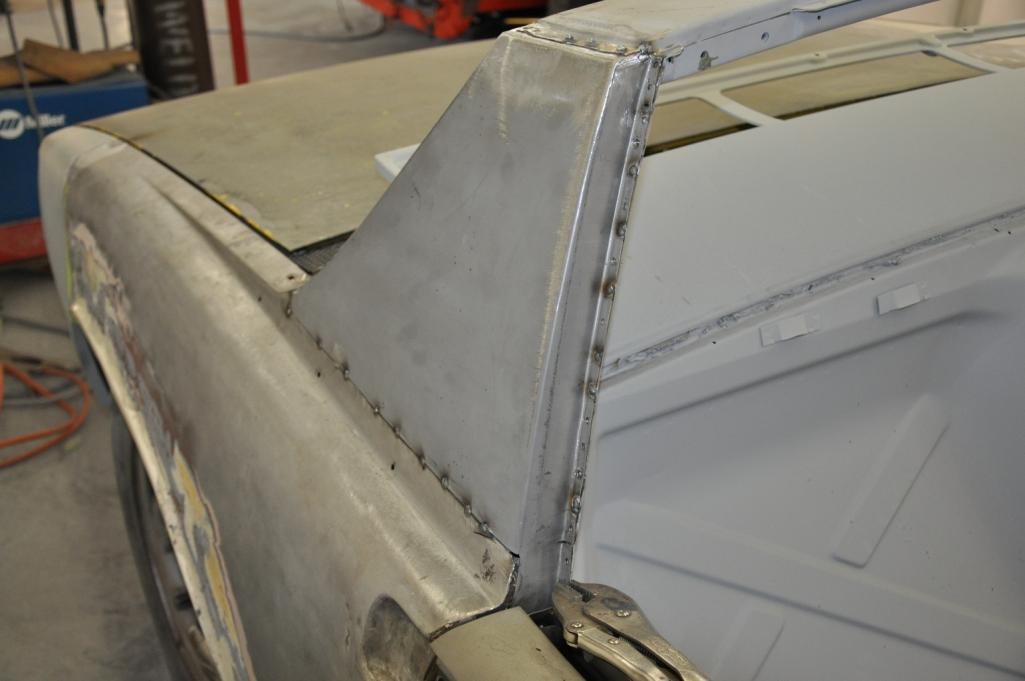
|
|
|
|
| Socalandy |
Feb 22 2012, 09:49 PM
Post
#297
|
|
Its got to be Yellow!!! Group: Members Posts: 2,432 Joined: 29-August 09 From: Orange Member No.: 10,742 Region Association: Southern California |
Attached thumbnail(s) 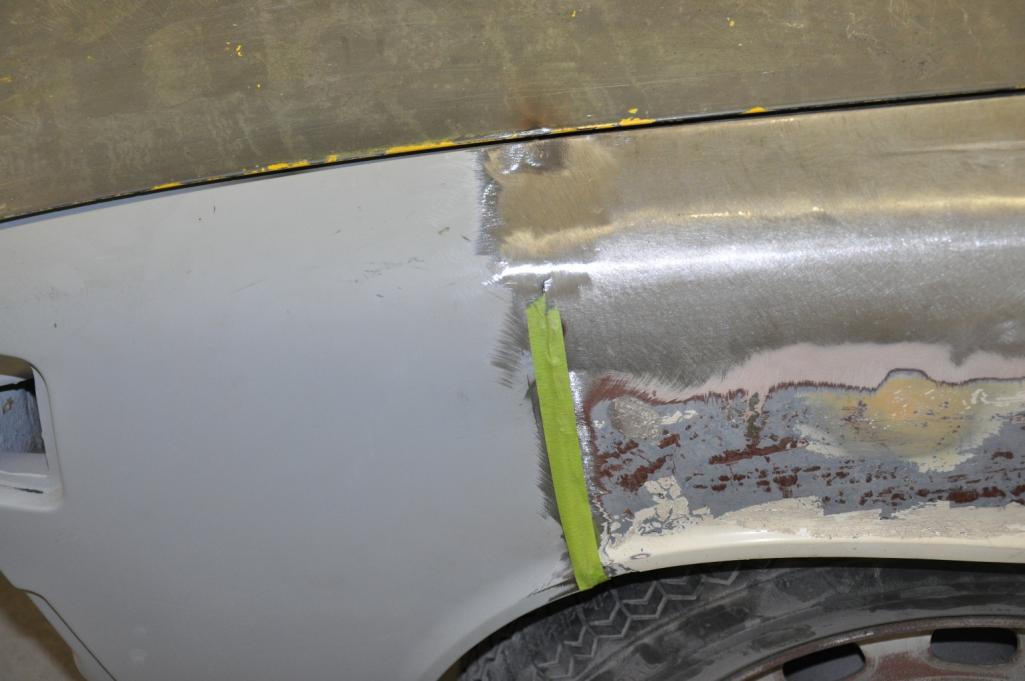 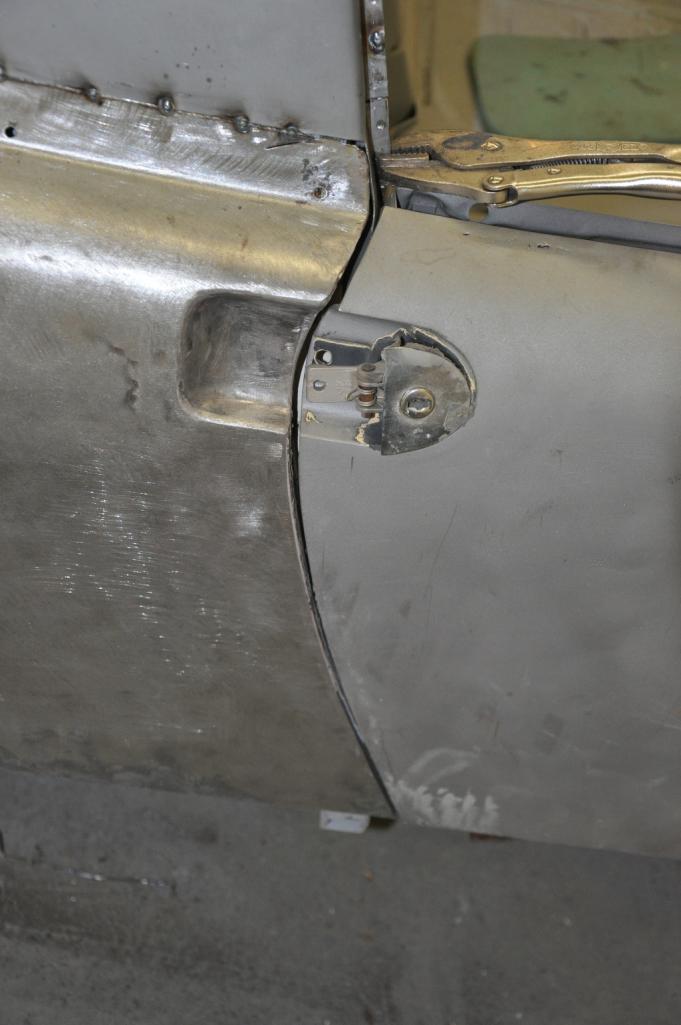 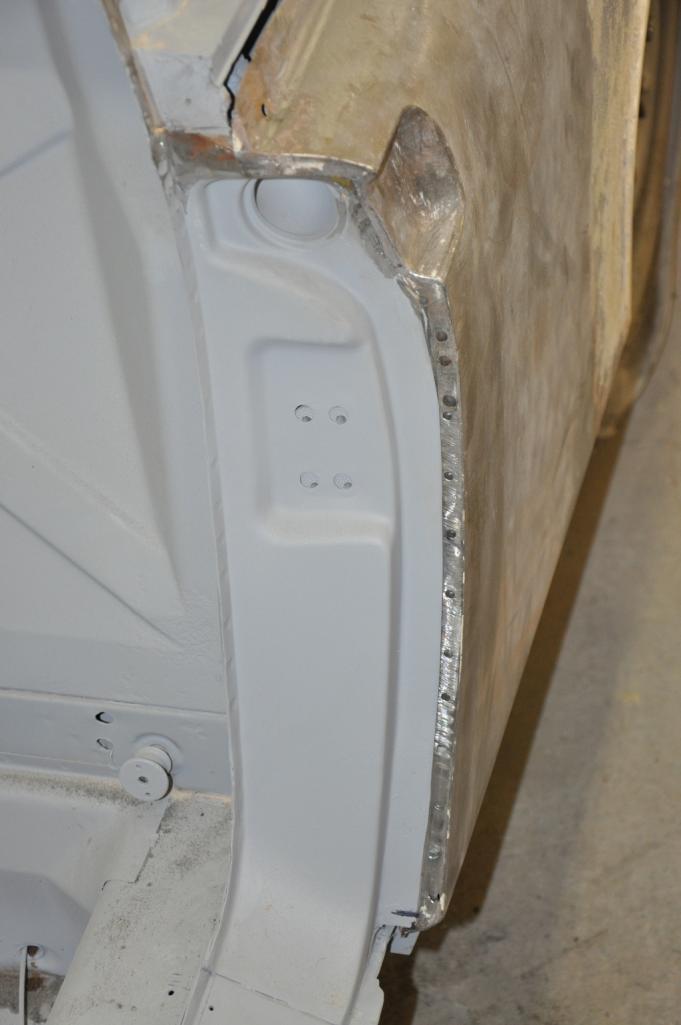 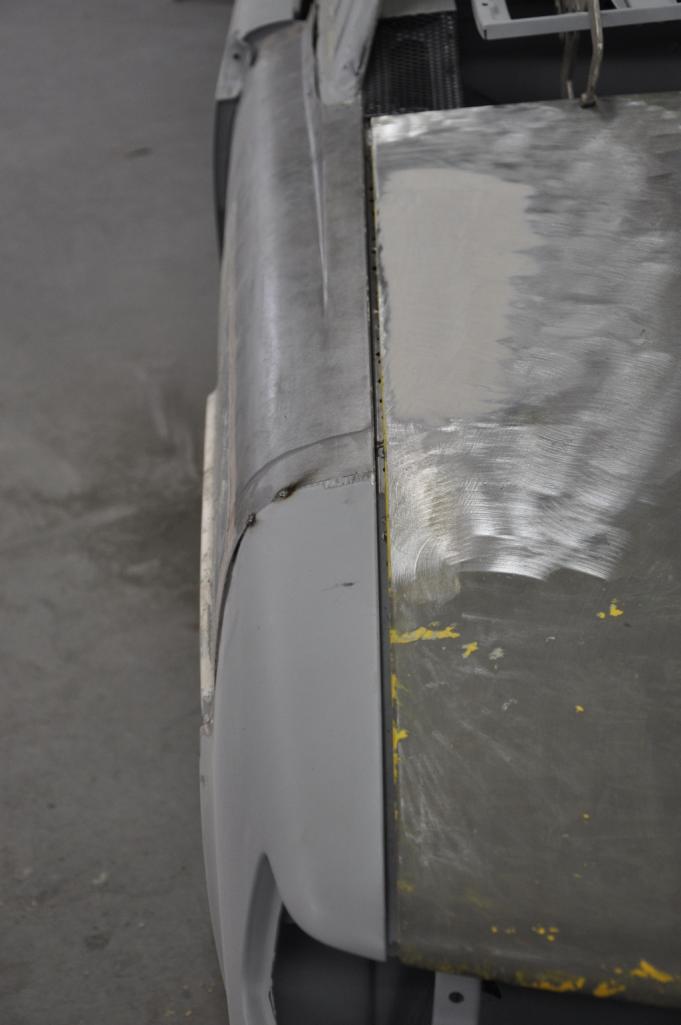
|
|
|
|
| Socalandy |
Feb 22 2012, 09:53 PM
Post
#298
|
|
Its got to be Yellow!!! Group: Members Posts: 2,432 Joined: 29-August 09 From: Orange Member No.: 10,742 Region Association: Southern California |
Attached thumbnail(s) 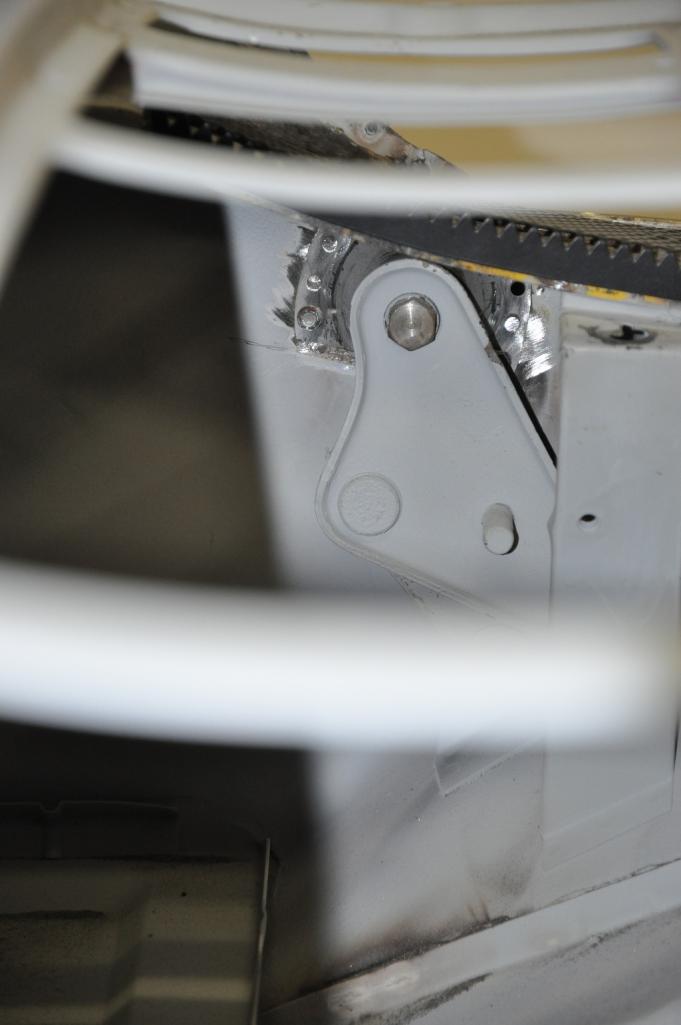 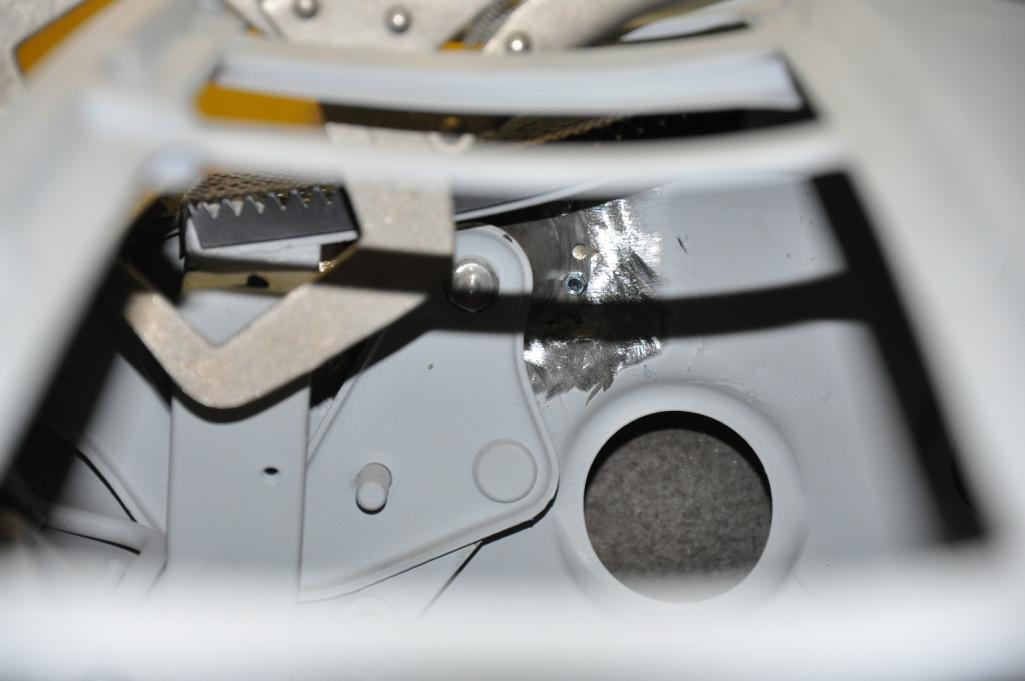 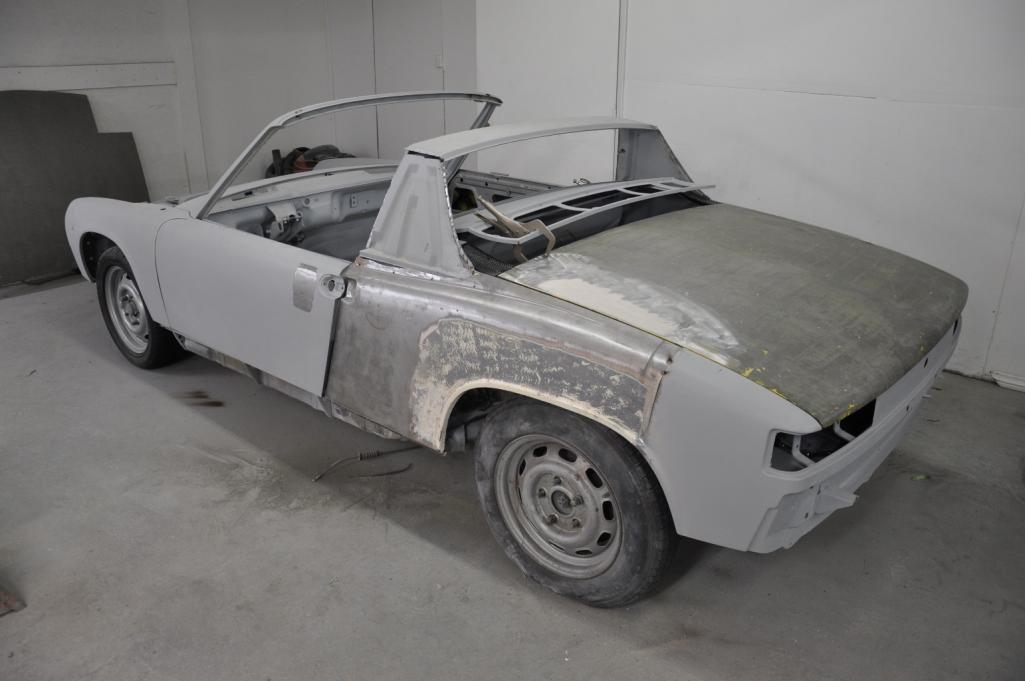 
|
|
|
|
| MikeSpraggi |
Feb 22 2012, 10:55 PM
Post
#299
|
|
Senior Member Group: Members Posts: 781 Joined: 7-February 05 From: Silver Spring, Md Member No.: 3,570 Region Association: MidAtlantic Region |
Looking good Andy! Making good progress.
|
|
|
|
| Socalandy |
Feb 23 2012, 10:37 PM
Post
#300
|
|
Its got to be Yellow!!! Group: Members Posts: 2,432 Joined: 29-August 09 From: Orange Member No.: 10,742 Region Association: Southern California |
Anyone seen this area dimpled like this? Maybe for the wiper motor. most likly a PO did it but I want to pound it back into shape even know its behind the dash and I dont think it was a factory adjustment
Thanks in advance!! Attached thumbnail(s) 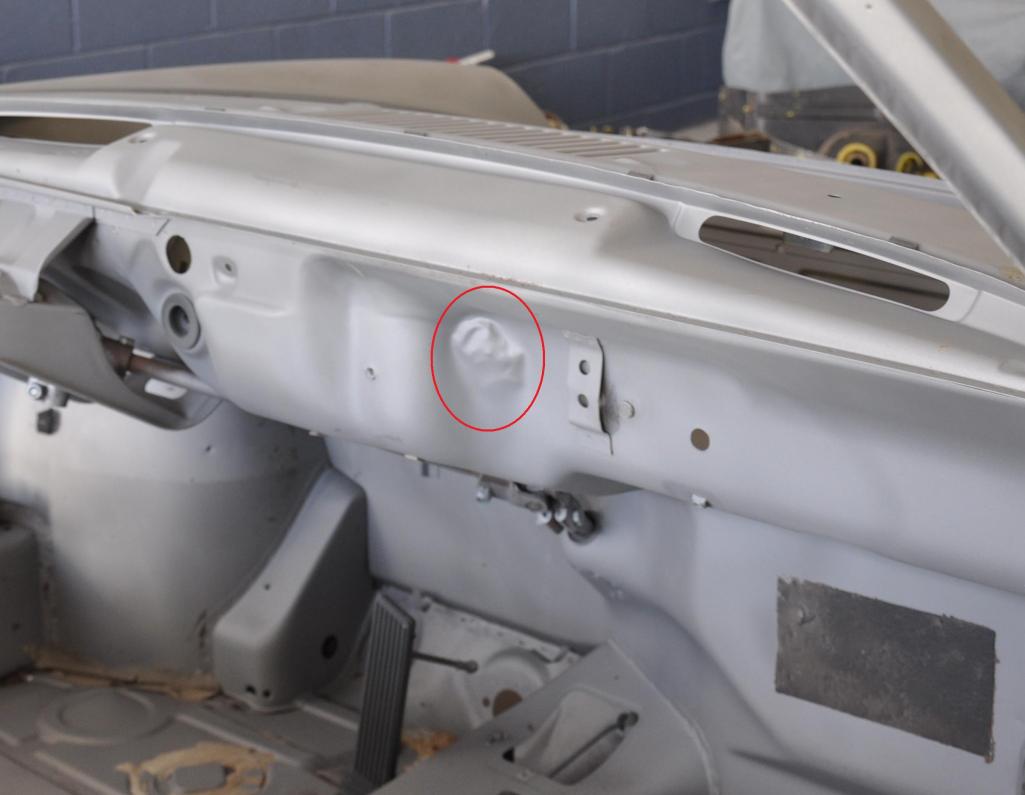
|
|
|
|
|
1 User(s) are reading this topic (1 Guests and 0 Anonymous Users)
0 Members:

|
Lo-Fi Version | Time is now: 1st August 2026 - 01:50 AM |
Invision Power Board
v9.1.4 © 2026 IPS, Inc.