|
|
|
Porsche, and the Porsche crest are registered trademarks of Dr. Ing. h.c. F. Porsche AG.
This site is not affiliated with Porsche in any way. Its only purpose is to provide an online forum for car enthusiasts. All other trademarks are property of their respective owners. |
|
|


| wertygrog |
 Nov 24 2009, 11:42 PM Nov 24 2009, 11:42 PM
Post
#1
|
|
wertygrog  Group: Members Posts: 428 Joined: 12-November 05 From: Long Beach, CA Member No.: 5,114 Region Association: Southern California |
Hi guys, so a little background first if that’s okay, my name’s Brent and I’m an aerospace engineering undergrad student in Daytona Beach, FL. My daily driver (and first car) is my ’74 914 2.0L. I’ve grown fond of the type 4 engine despite its ahem…slowness. Anyways I recently bought a sand rail frame as an impulse buy. I got it mostly complete minus engine for $500, so I ask who could say no to that? I certainly couldn’t, answers I! The plan is to make it street legal so I can cruise the town, the beach, and even do some off-roading. The transmission is a ’66 Beetle swingaxle tranny with a big differential and off-road gears. I wasn’t interested in a gimpy type 1 engine, so I started collecting parts for a type 4 build. My friends call the 2.0 engine in my 914 the “2-Point-Slow”, so I decided to designate this engine the “2-Point-Go!” The exclamation point is actually part of the name, FYI. This was my first engine build of any type. I’ve worked on my 914 a lot so I’m familiar with the operation and tuning of these engines better than any other engine, so I decided to give it a shot. It would be a very quick and cheap build, because A ) I don’t have much money and B ) I want the rail on the road sometime this century. Here’s a few pics of the sand rail. Her name is Lobo. This is because my dad had an r/c car that said Lobo on the side- this car has sentimental value for me and the sand rail happens to look like it. Lobo is Spanish for wolf; I think this fact is also very cool and it was the clincher for naming the rail Lobo.
Attached thumbnail(s) 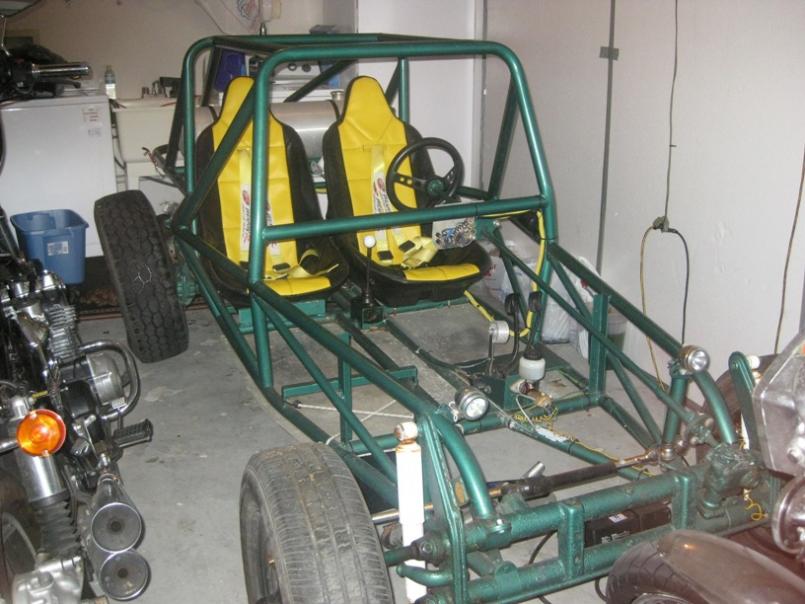 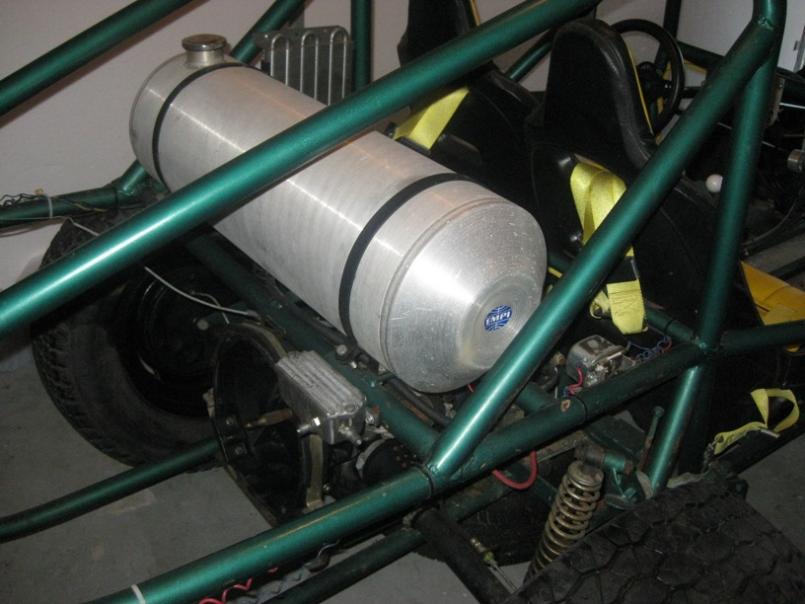 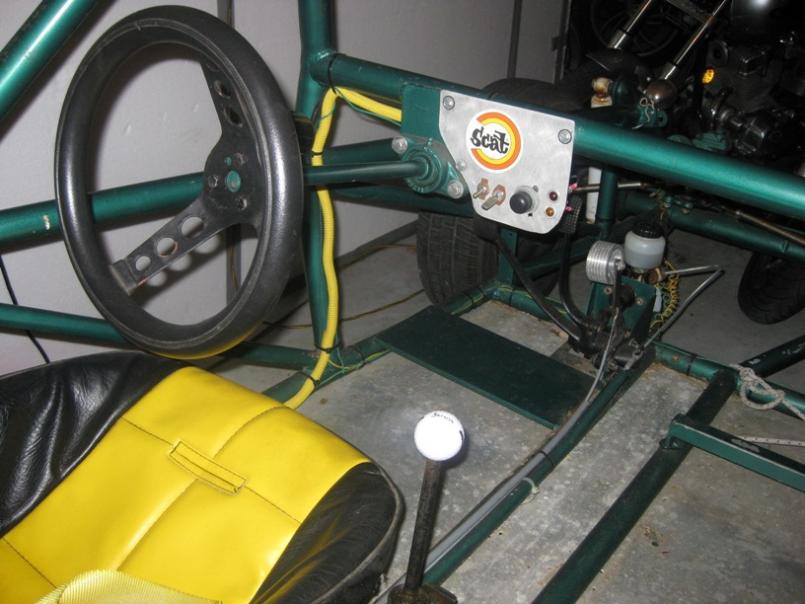
|
   |

 
|
  |
Replies(1 - 19)
| wertygrog |
Nov 24 2009, 11:43 PM
Post
#2
|
|
wertygrog Group: Members Posts: 428 Joined: 12-November 05 From: Long Beach, CA Member No.: 5,114 Region Association: Southern California |
Step one was to buy a few core engines and tear them down. I got a complete core 1.8L for free, and a core 2.0L bus engine for $75 on craigslist. Taking them apart would have been more pleasant had they not been infested with giant cockroaches! I used three bottles of WD-40 killing them as they scurried away from the motor. The situation reminded me of that arcade game Whack-A-Mole. Traumatizing indeed, but I finally found a use for WD-40. Here’s some pics of the nasty cores before I realized they had hundreds of cockroaches in them…ick!
Attached thumbnail(s) 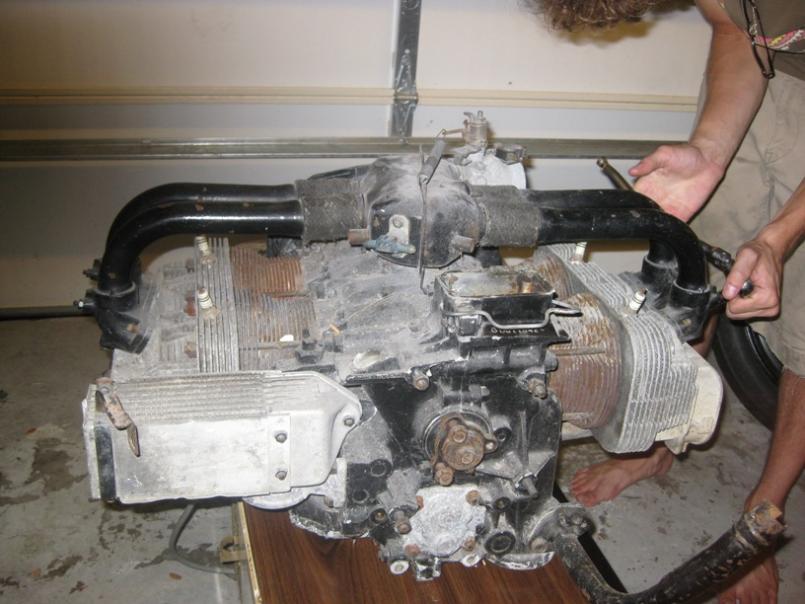 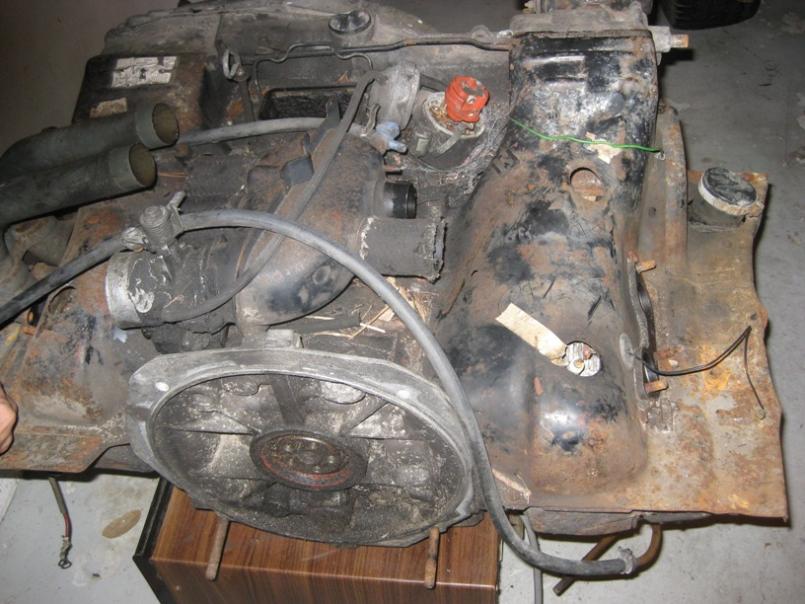
|
|
|
|
| wertygrog |
Nov 24 2009, 11:45 PM
Post
#3
|
|
wertygrog Group: Members Posts: 428 Joined: 12-November 05 From: Long Beach, CA Member No.: 5,114 Region Association: Southern California |
I wanted a 2.0L engine, so I decided to use most of the bus engine parts. The internals were in good shape, although the previous rebuilder lost some man-points for forgetting to install half the wristpin circlips. I wasn’t happy with the bus heads or cam, so I went with the 1.8L heads and a Webcam #73 grind that I got complete with gear and lifters for $75 on craigslist. This is a rather mild cam with more lift but comparable duration to a stock 914 cam. I was considering turboing the engine at some point, so the low lobe overlap (8 degrees) would be perfect for boost. The 1.8L heads were superior to the 2.0L bus heads in every way I could compare them. I spent $125 to get them cleaned up, flycut a little bit, and valves ground into the seats. One of the head gaskets had failed and messed up the seating surface, hence the flycutting. Needless to say I wouldn’t be using head gaskets on this build!
Attached thumbnail(s) 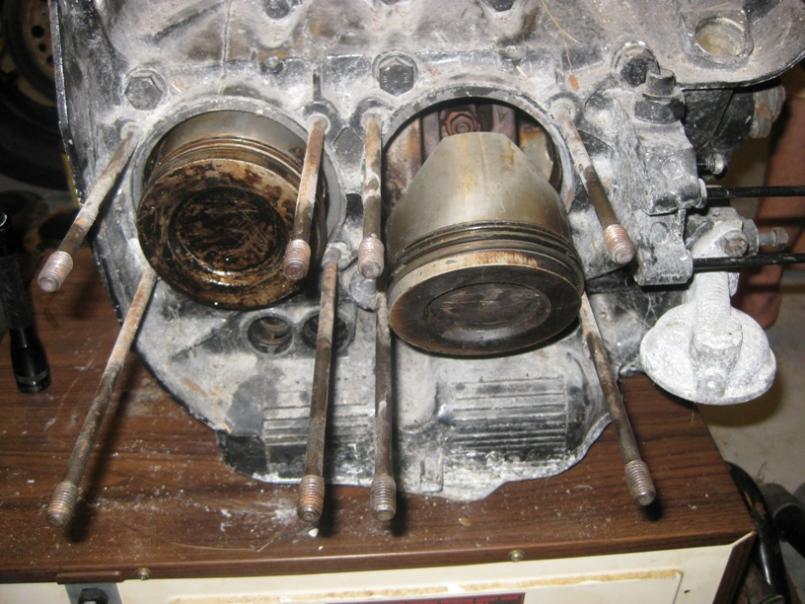 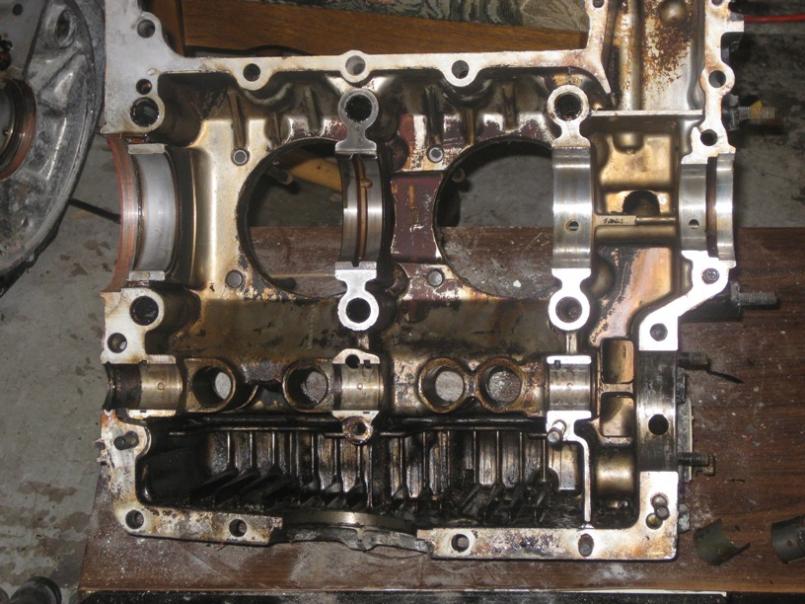
|
|
|
|
| wertygrog |
Nov 24 2009, 11:49 PM
Post
#4
|
|
wertygrog Group: Members Posts: 428 Joined: 12-November 05 From: Long Beach, CA Member No.: 5,114 Region Association: Southern California |
more
Attached thumbnail(s) 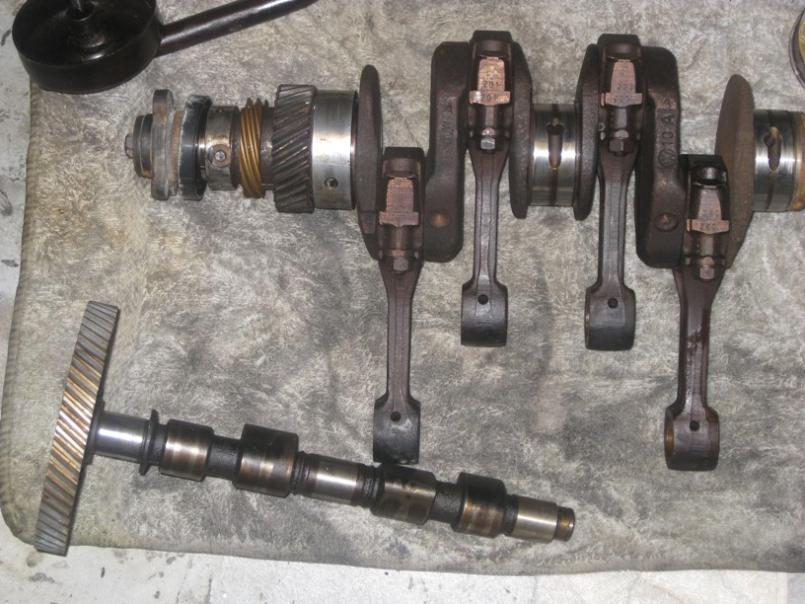
|
|
|
|
| wertygrog |
Nov 24 2009, 11:52 PM
Post
#5
|
|
wertygrog Group: Members Posts: 428 Joined: 12-November 05 From: Long Beach, CA Member No.: 5,114 Region Association: Southern California |
After taking the two donor engines apart, it was inspection time. The bus case had been align bored (there was an elephant on the main bearing shells and the journals mic’ed out std), so I couldn’t swap in one of the other sets of nice bearings I had laying around. The #2 bearing plasti-guaged in the tolerance range however so I decided to use them…remember this is a quick budget build (I’m a po’ college kid). The rod bearings and wrist pin bushings looked good so I used them as well. After picking parts out came all the cleaning! I probably spent more than 50 bucks on rags, simple green, and carb cleaner throughout the build….and countless hours removing old dirt and oil. Here’s some before and after shots of the 1.8L heads after getting them cleaned up. I also painted the fan shroud like so.
Attached thumbnail(s) 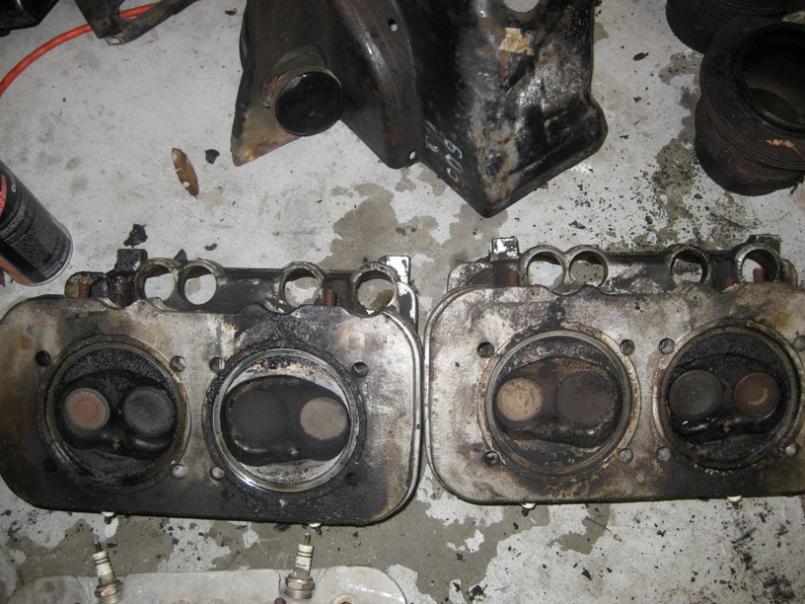 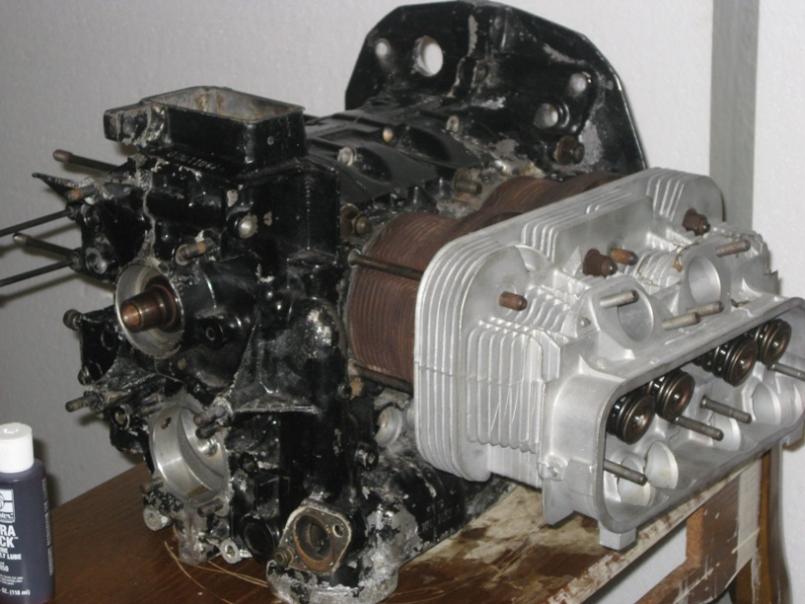 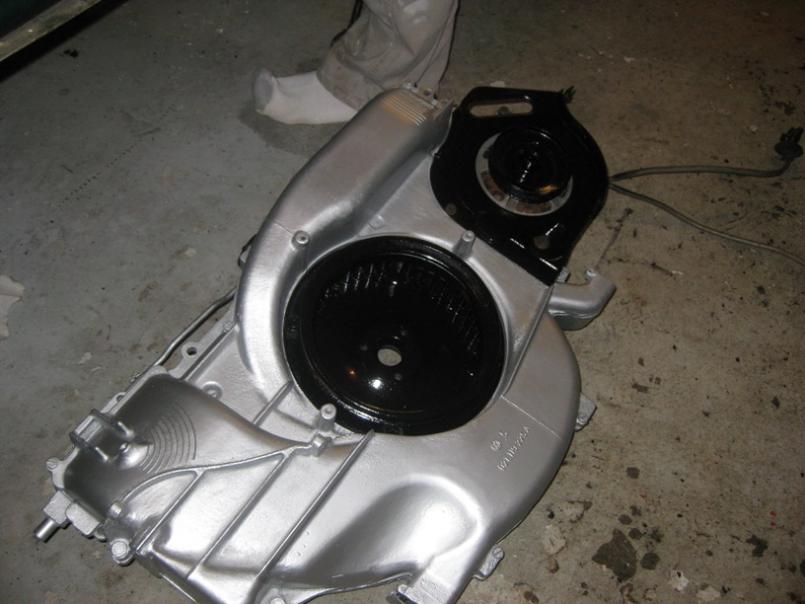
|
|
|
|
| wertygrog |
Nov 24 2009, 11:54 PM
Post
#6
|
|
wertygrog Group: Members Posts: 428 Joined: 12-November 05 From: Long Beach, CA Member No.: 5,114 Region Association: Southern California |
After cleaning comes measuring and adjusting. I threw the short block together and luckily everything spun nice and smooth. All the clearances looked good…one of the nice things about working with mostly stock parts! Next up was deck height. I was shooting for between 0.030” and 0.040.” Two of the thin metal shims under the jugs got me about 0.037” which I was happy with. I had a set of 914 pistons lying around but I went with the heavily-dished bus pistons for CR reasons. So with 0.036” DH, 15cc piston dish, and 53cc chambers, I’m looking at 7.6:1 CR. Works for me, especially with the low valve overlap! Hooking up the valve train and smooshing some clay on the pistons confirmed I have tons of piston/valve clearance. This wasn’t the case earlier in the mockup when I didn’t have the dots on the cam gear oriented correctly!
Attached thumbnail(s) 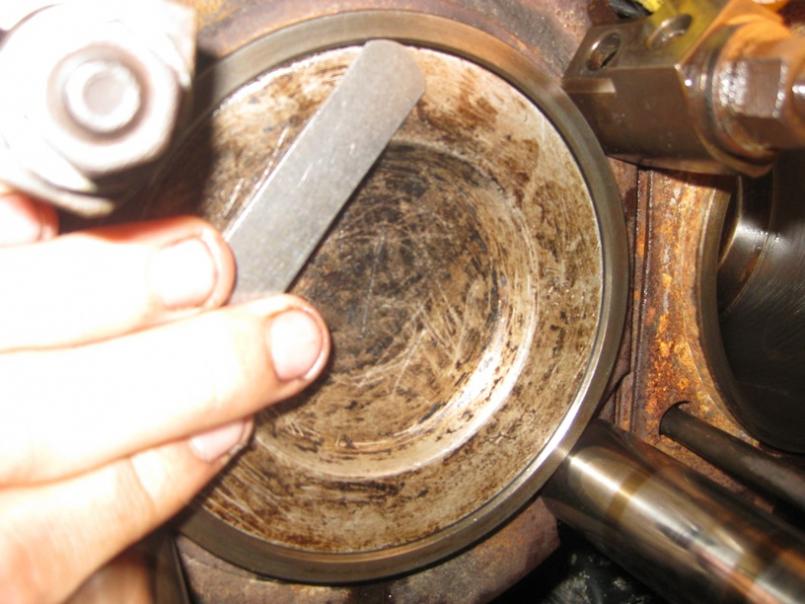 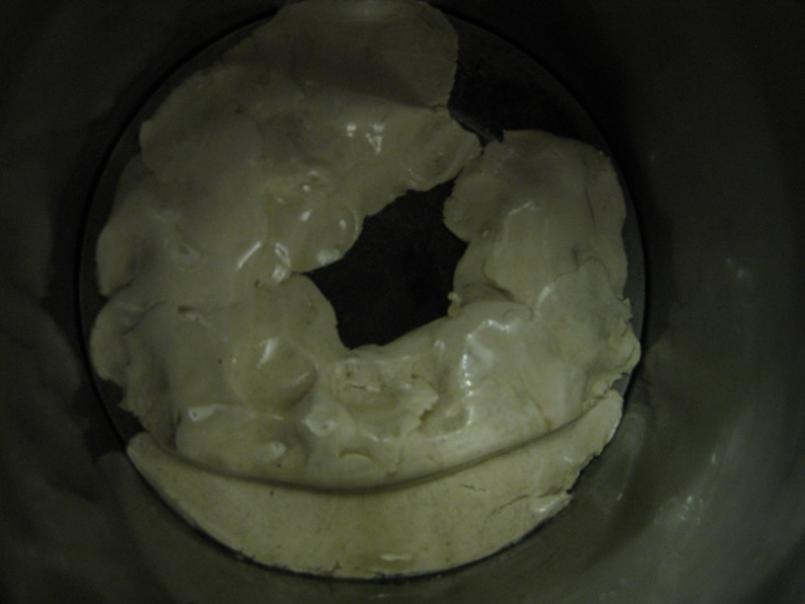 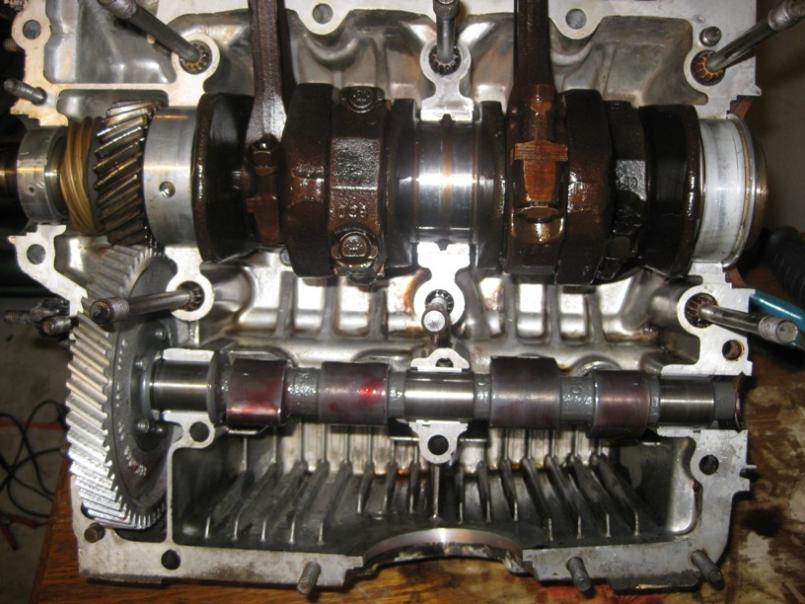
|
|
|
|
| wertygrog |
Nov 24 2009, 11:55 PM
Post
#7
|
|
wertygrog Group: Members Posts: 428 Joined: 12-November 05 From: Long Beach, CA Member No.: 5,114 Region Association: Southern California |
The next item to check is the valvetrain geometry. My configuration was sufficiently different from the stock configuration to completely throw off the geometry. I found the half lift point using a borrowed dial indicator to confirm this. I decided that shimming the rocker stands was necessary. Cutting the pushrods would have probably been the better option but I have no way of cutting them accurately or precisely. I bought some rocker shims, filed them to a correct and consistent thickness and bam! Done. Here’s some shots of that and a shot of the 1.8L core engine mocked up in the rail to check for fitment- it’s close!
Attached thumbnail(s) 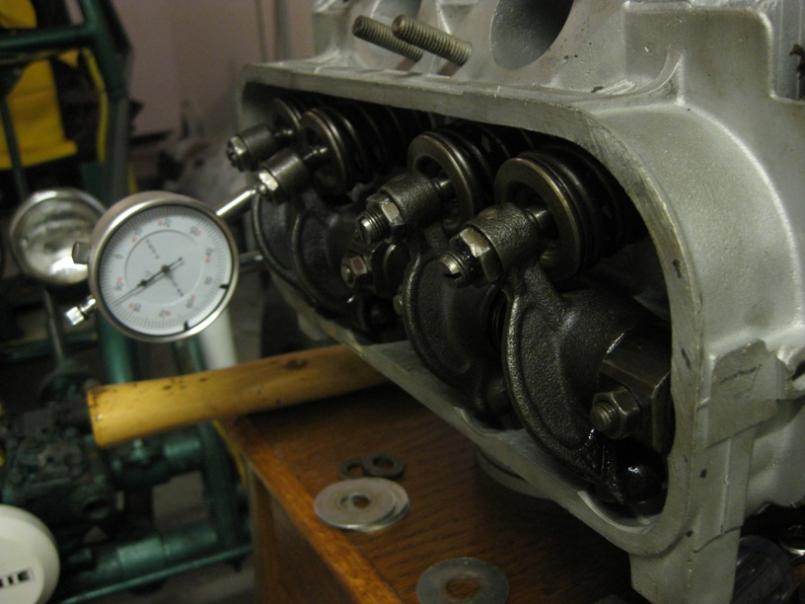 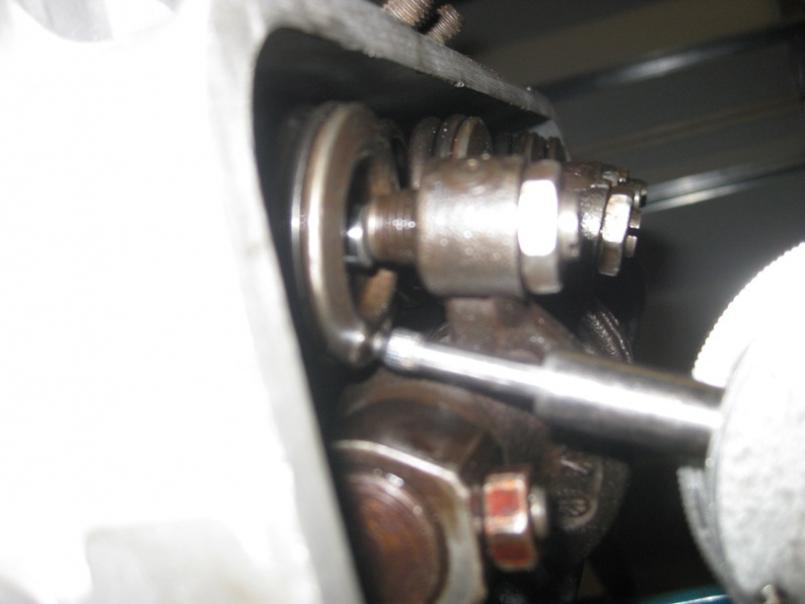 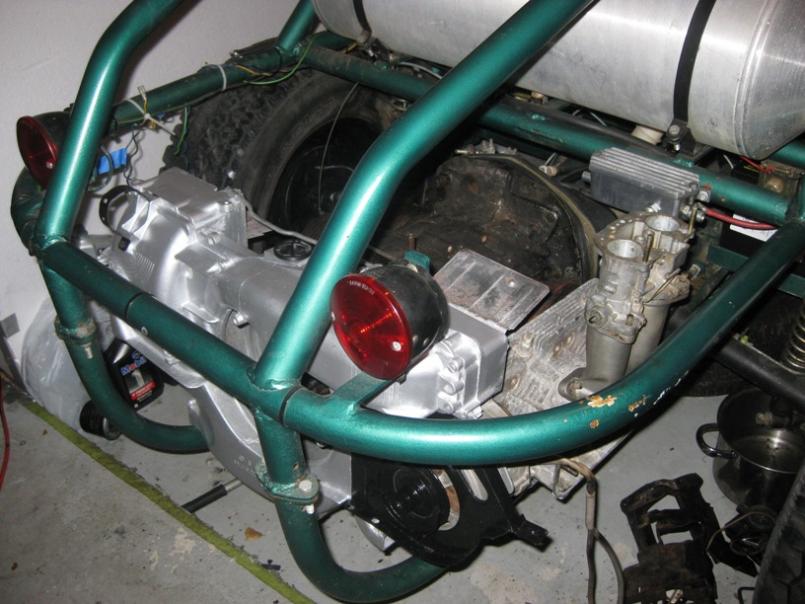
|
|
|
|
| wertygrog |
Nov 24 2009, 11:58 PM
Post
#8
|
|
wertygrog Group: Members Posts: 428 Joined: 12-November 05 From: Long Beach, CA Member No.: 5,114 Region Association: Southern California |
So I’ve checked almost everything, now it’s time for jugs and rings. I got the bus cylinders honed. There’s some ridge near TDC but I’m okay with that for now…once I have more cashola, better jugs will be installed. I got Grant rings ($30), and adjusted the gaps to 0.017” top ring and 0.015” bottom ring. This is a little larger than some folks have recommended, but if I turbo the engine it will run rather hot. Some of the rings didn’t need to be filed at all. They went in really easy and I was happy with the ring land clearances.
Attached thumbnail(s) 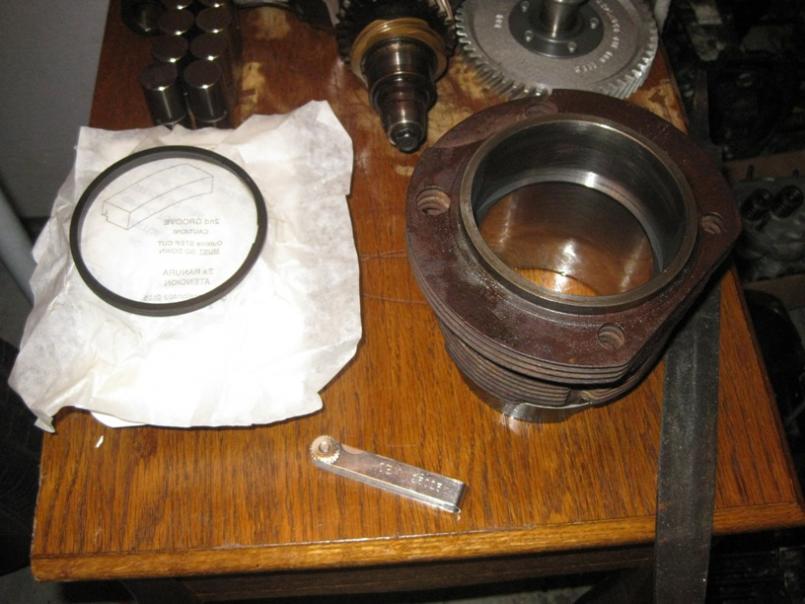 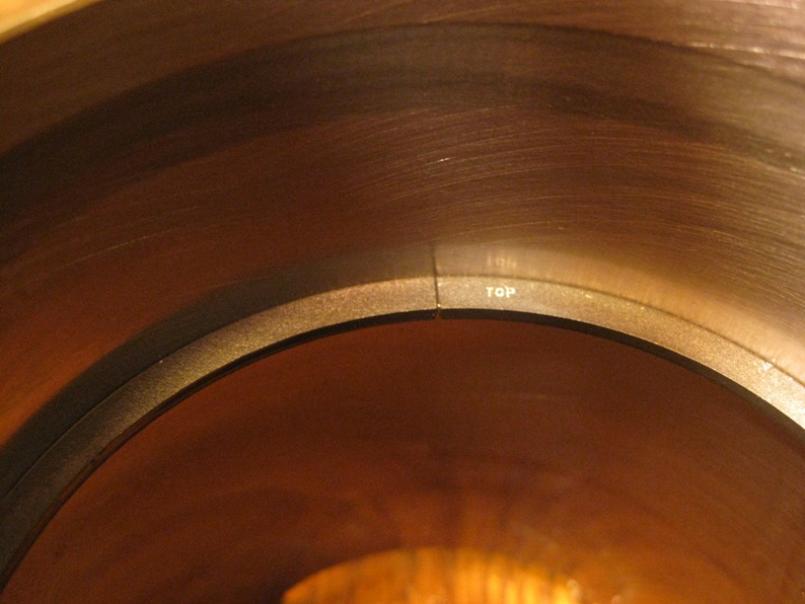 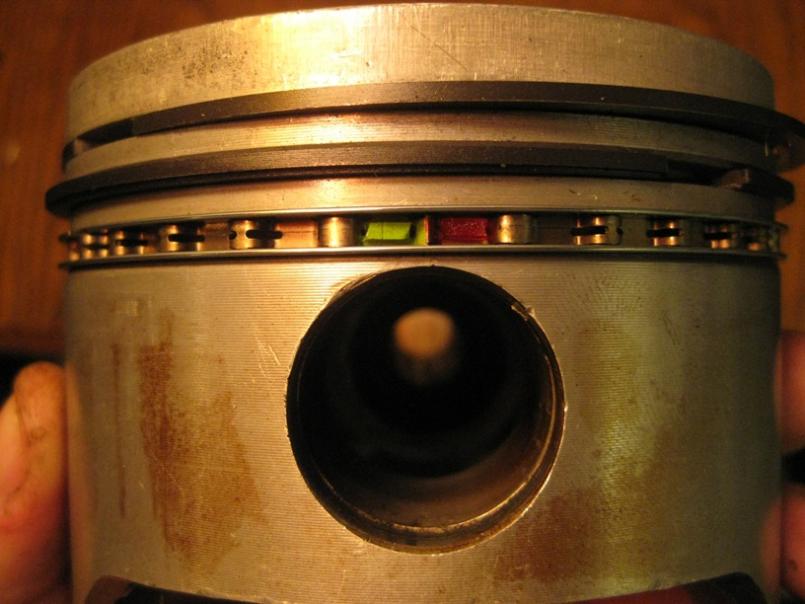
|
|
|
|
| wertygrog |
Nov 25 2009, 12:00 AM
Post
#9
|
|
wertygrog Group: Members Posts: 428 Joined: 12-November 05 From: Long Beach, CA Member No.: 5,114 Region Association: Southern California |
Finally, it’s time for more cleaning (snore!) and the final build (yay!). I got some Loctite 518 for the case halves and some RTV for some select areas. The only new seals/gaskets I got were pushrod tube seals, front and rear mains, valve cover gaskets, and sump plate gaskets. I also got some Permatex Super Slick lube for the cam lobes. This cam was broken in by the guy I got it from. Unfortunately the lifters got swapped around so I’m taking every precaution to prevent any issues there. I wanted to sacrifice a goat or something to improve my chances, but I couldn’t figure out where I could buy a goat in Daytona Beach. Here’s some shots of the final assembly. It went wicked fast now that all the cleaning and adjusting have been taken care of! I decided to install a windage tray in this motor, mostly because I like the word ‘windage.’
Attached thumbnail(s) 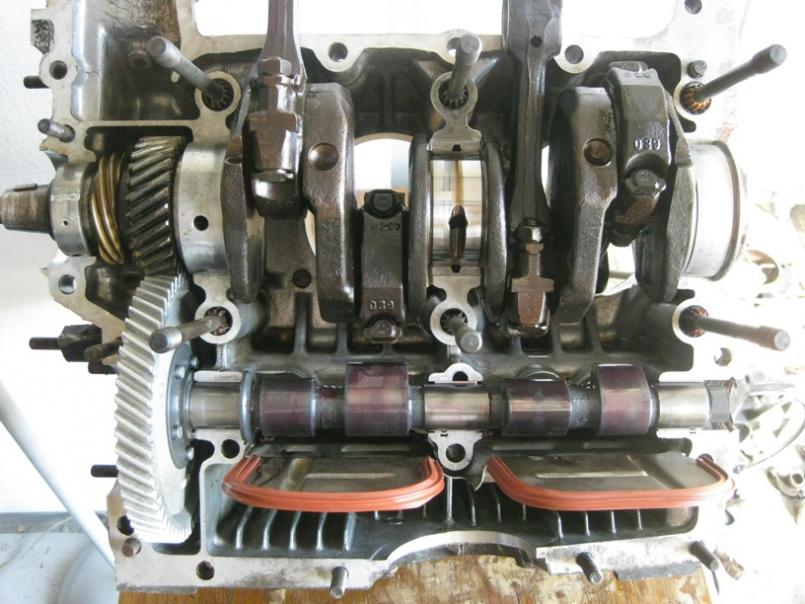 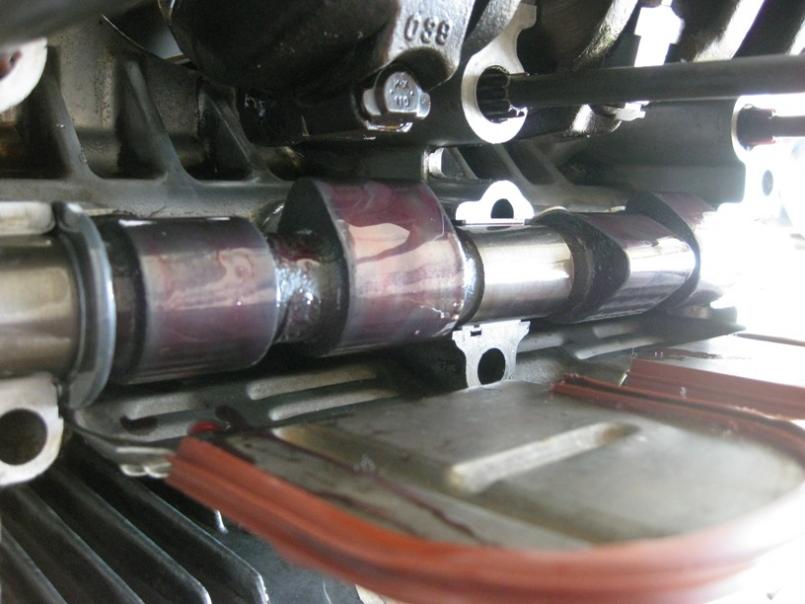 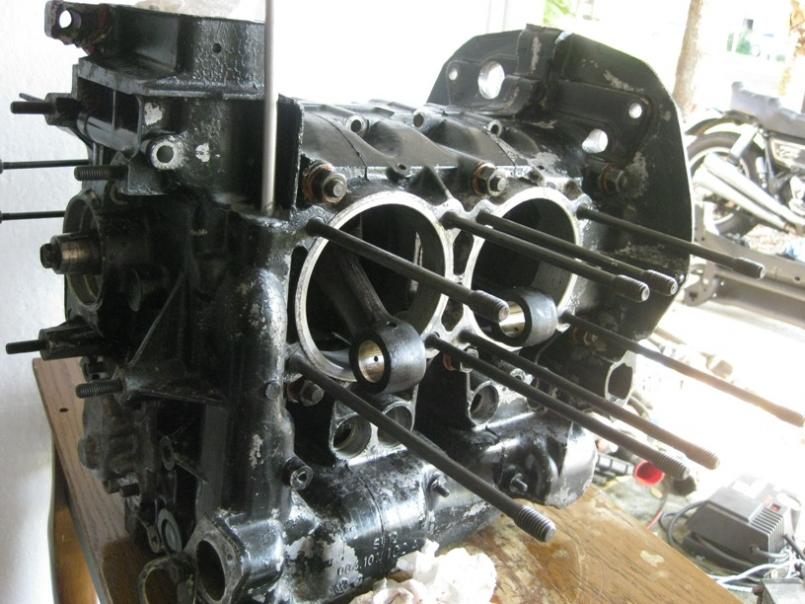
|
|
|
|
| wertygrog |
Nov 25 2009, 12:01 AM
Post
#10
|
|
wertygrog Group: Members Posts: 428 Joined: 12-November 05 From: Long Beach, CA Member No.: 5,114 Region Association: Southern California |
Once the short block was together, I stuck the pistons on. This went pretty well, partly because I had about a dozen wristpins lying around, so I could pick the ones that fit the best. I remembered to install the wristpin circlips unlike the last guy to build this motor. I also paid attention to the arrows pointing towards the flywheel on each piston top. Sliding the jugs on took a little practice. A ring compressor helped a lot! For this engine I decided to go with the 914 style oil filler and dipstick, so I drilled a hole in the case for a dipstick tube (which I got at the hardware store).
Attached thumbnail(s) 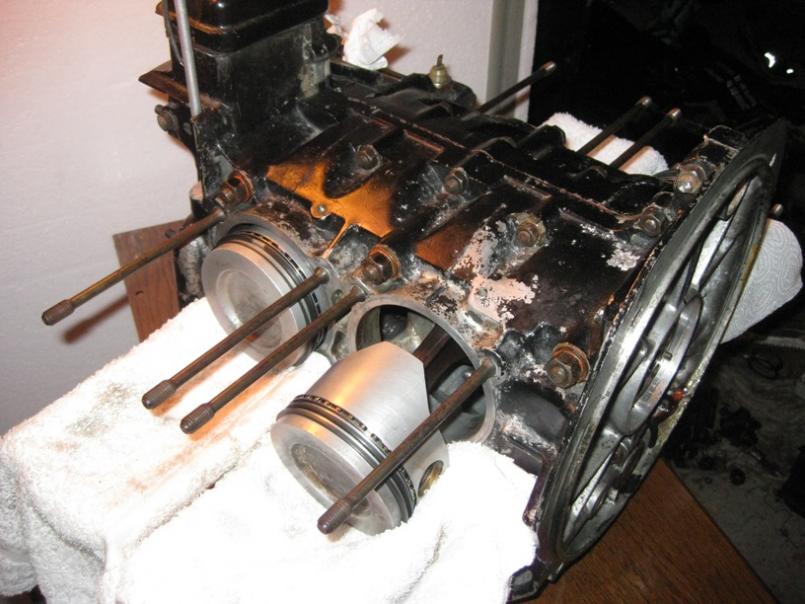 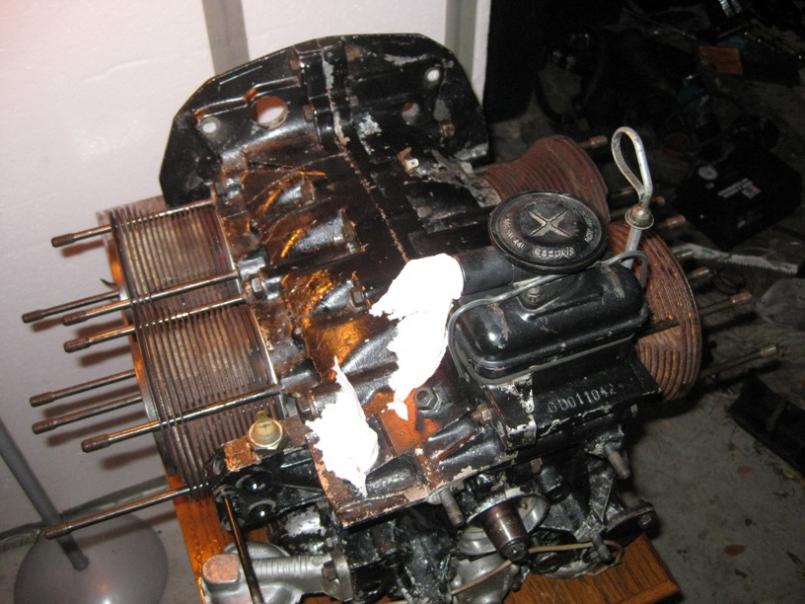
|
|
|
|
| wertygrog |
Nov 25 2009, 12:02 AM
Post
#11
|
|
wertygrog Group: Members Posts: 428 Joined: 12-November 05 From: Long Beach, CA Member No.: 5,114 Region Association: Southern California |
more
Attached thumbnail(s) 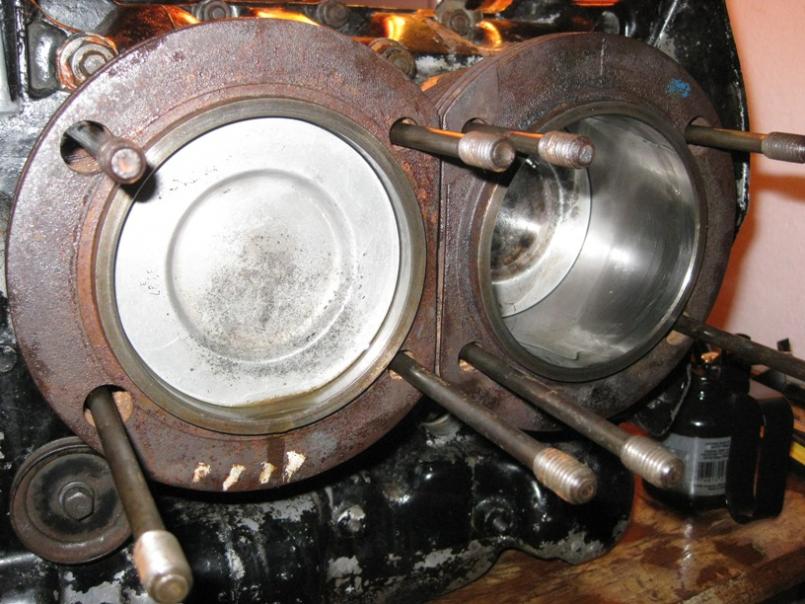
|
|
|
|
| wertygrog |
Nov 25 2009, 12:04 AM
Post
#12
|
|
wertygrog Group: Members Posts: 428 Joined: 12-November 05 From: Long Beach, CA Member No.: 5,114 Region Association: Southern California |
Next up is the heads! That’s my brother Greg torquing the head nuts with a borrowed torque wrench (we have no tools here at college other than wrenches, sockets, and screwdrivers). No head gaskets or anything is sealing the heads to the jugs except really clean metal! I’m getting all my torque specs from an 80’s vintage 914 repair book whilst building the engine (finally a place to use the word ‘whilst’)!
Attached thumbnail(s) 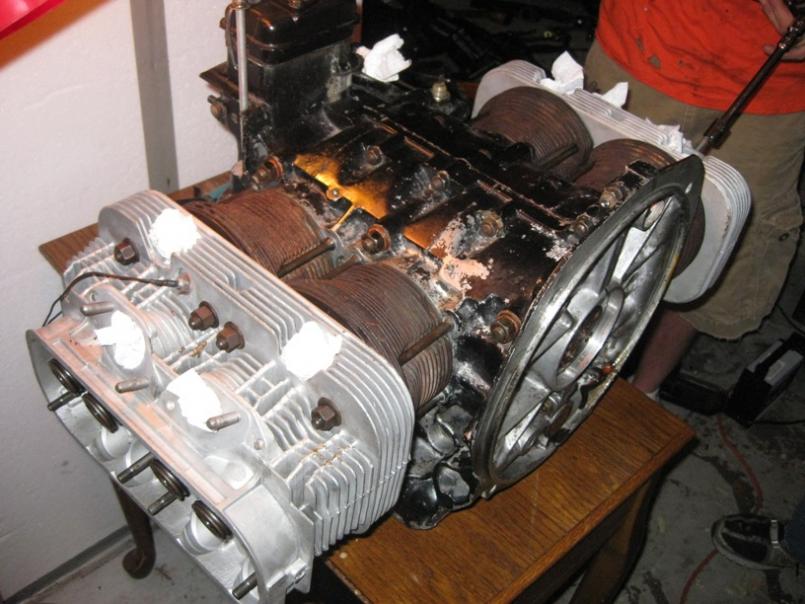 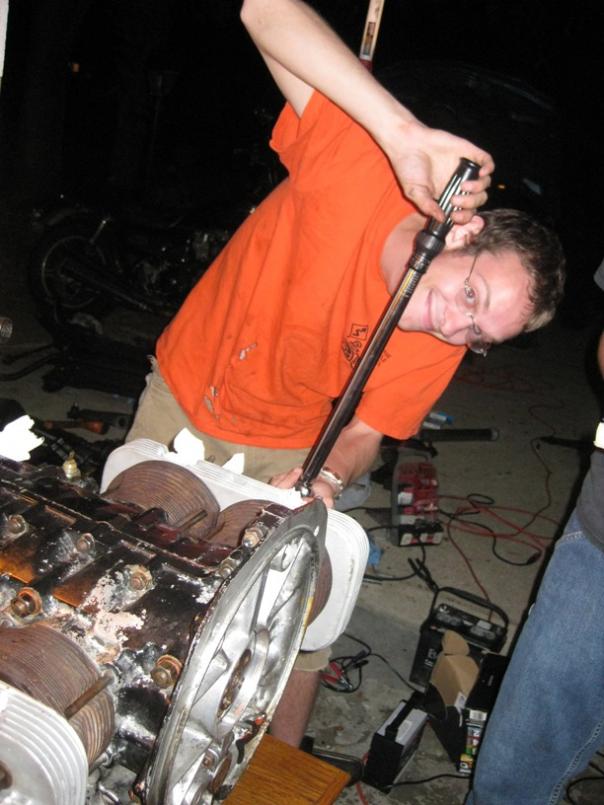
|
|
|
|
| wertygrog |
Nov 25 2009, 12:05 AM
Post
#13
|
|
wertygrog Group: Members Posts: 428 Joined: 12-November 05 From: Long Beach, CA Member No.: 5,114 Region Association: Southern California |
Okay, so the long block is done minus the valvetrain stuff (which I’ll do right before firing it off). Next I set the endplay using three shims. I had a bunch of shims lying around so I picked the ones that gave a good endplay of about 0.006.” The flywheel and clutch are up next! To mate a type 4 to a swingaxle tranny requires a few things. First off you need a flywheel from a vw bus because the ring gear offset is different than a 914 flywheel. These came in 200mm, 215mm, and 228mm clutch diameters depending on the year of the bus the flywheel is from. 215mm is the biggest that’ll fit in the swingaxle tranny without clearancing the bell housing, and it comes from a ’74-’75 bus (the 1.8L engine years). I scored one of these on the samba for $25.00. The center of the flywheel needs to be machined out to accept a pilot bushing because the tranny input shaft isn’t long enough to reach the pilot bushing in the type 4 crank. In addition to the flywheel, I scored a new pressure plate and clutch disk from a guy on the samba for $25.00. Since I had an early swingaxle tranny (’66), the throw-out bearing is the unsupported style- it doesn’t have a guide tube for the TO bearing like the later trannies do. So I needed to buy an adapter disk that goes on the pressure plate in order to prevent the TO bearing from getting chewed up. Here’s some shots! The carbs are Spanish 40IDF’s I got used for $200. I rebuilt them carefully with rebuild kits…New rebuild kits (see I buy some stuff new!).
Attached thumbnail(s) 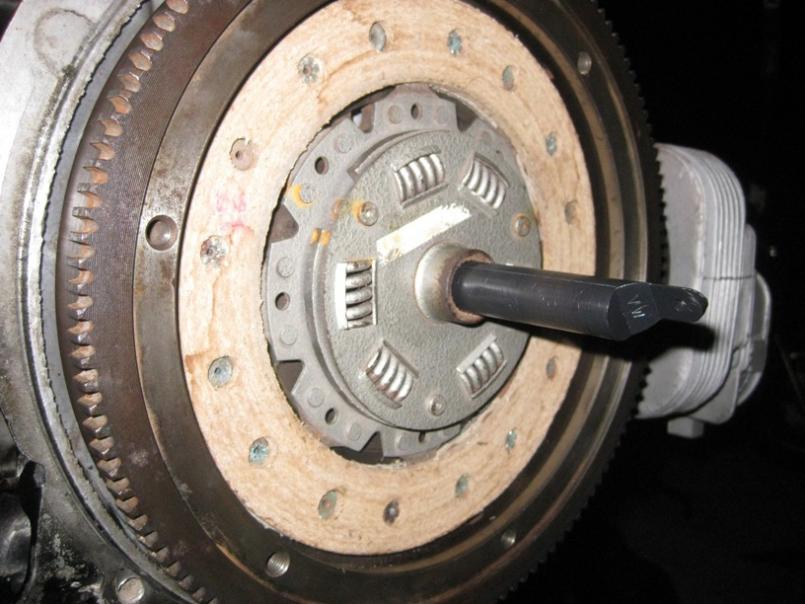 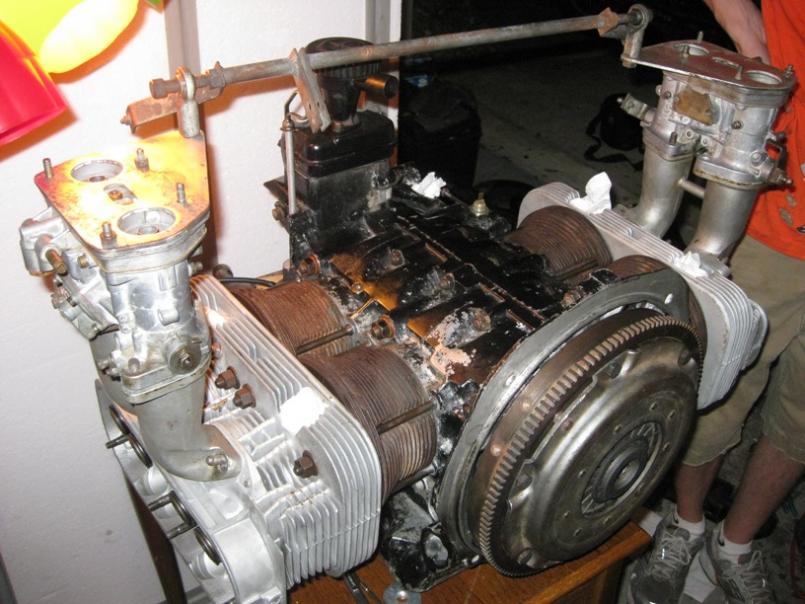
|
|
|
|
| wertygrog |
Nov 25 2009, 12:07 AM
Post
#14
|
|
wertygrog Group: Members Posts: 428 Joined: 12-November 05 From: Long Beach, CA Member No.: 5,114 Region Association: Southern California |
After dealing with all that, I put on the cooling system, which I’d previously cleaned up and painted. You can sort of see the yellow spiral I painted on the impeller...more on this later!
Attached thumbnail(s) 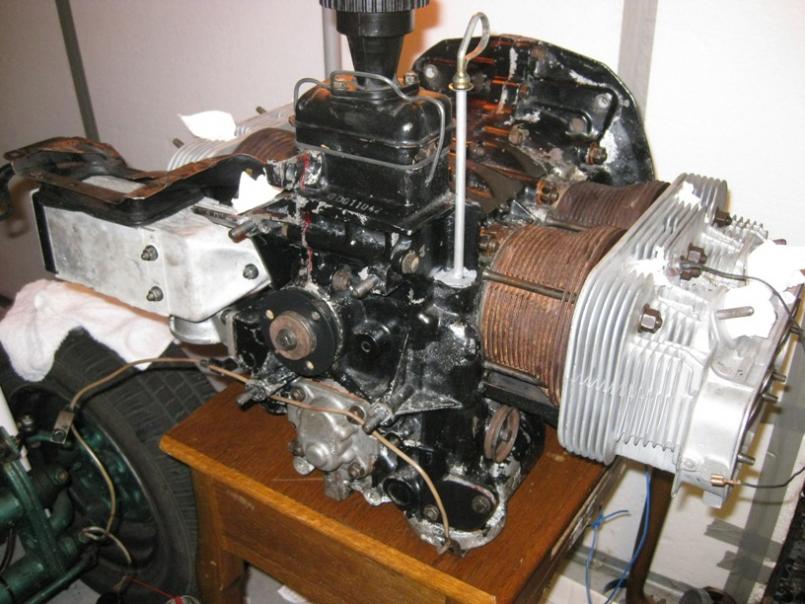 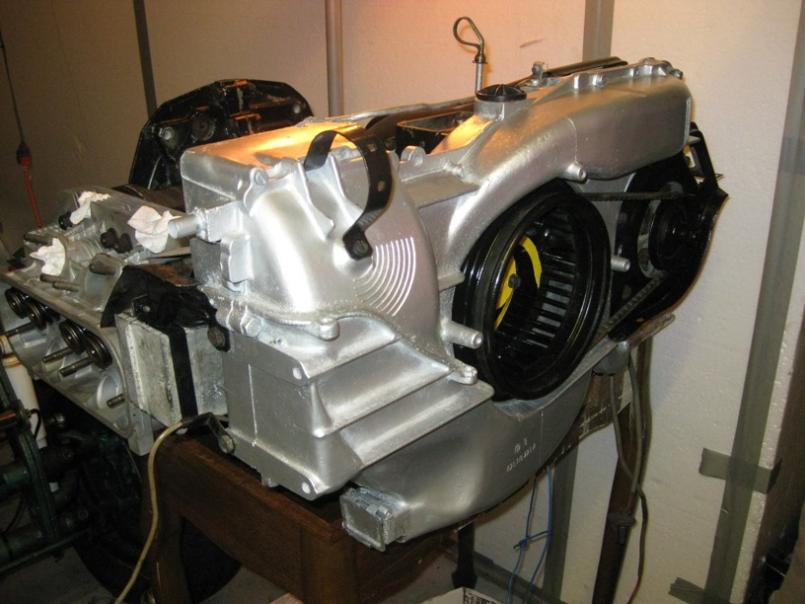
|
|
|
|
| wertygrog |
Nov 25 2009, 12:08 AM
Post
#15
|
|
wertygrog Group: Members Posts: 428 Joined: 12-November 05 From: Long Beach, CA Member No.: 5,114 Region Association: Southern California |
Now the motor is ready to go in Lobo! Fitting it in was really tricky with it all assembled, but we got it in! The exhaust is an old Eurorace header system we scored on the samba for $200. It doesn’t have the stinger on it yet in these pics. And later we cleaned the rust off with some Muriatic acid…smelly!
Attached thumbnail(s) 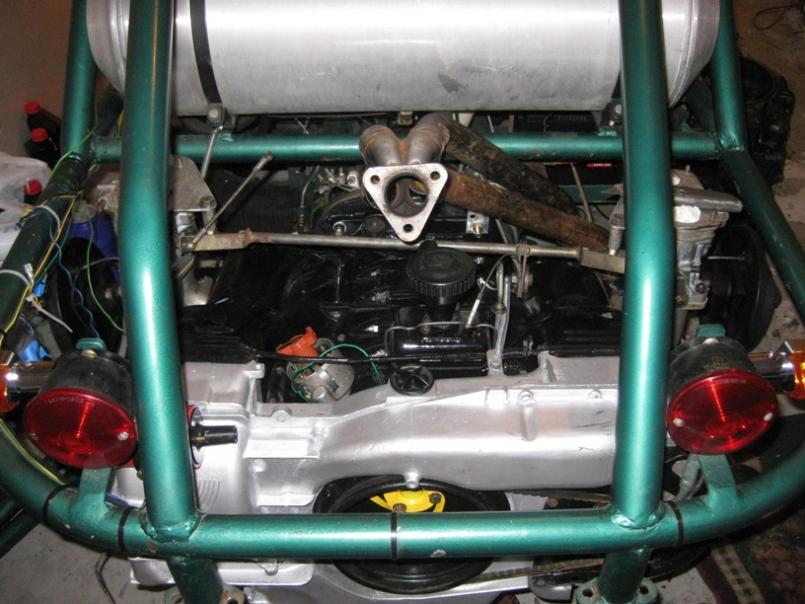 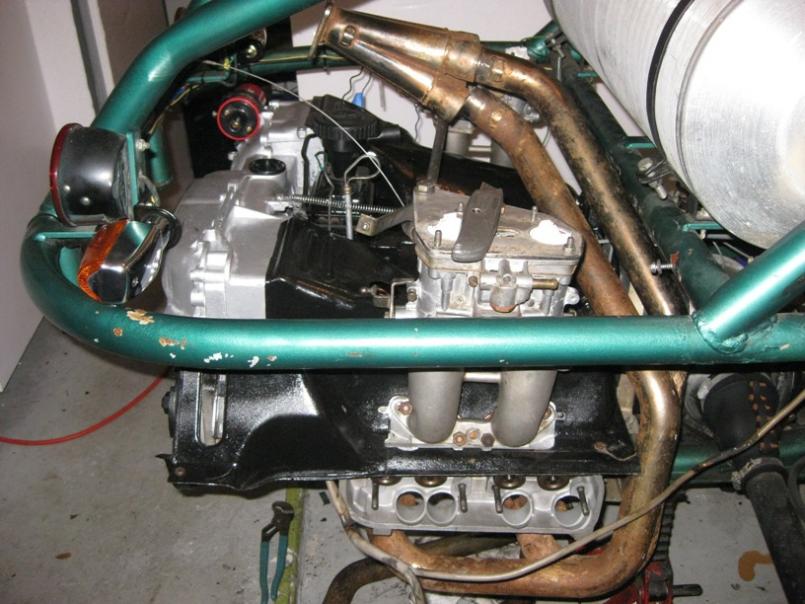
|
|
|
|
| wertygrog |
Nov 25 2009, 12:09 AM
Post
#16
|
|
wertygrog Group: Members Posts: 428 Joined: 12-November 05 From: Long Beach, CA Member No.: 5,114 Region Association: Southern California |
Okay, a week later it was time to fire off the 2-Point-Go! This week was spent doing the myriad of random tasks associated with installing an engine for the first time in a vehicle. I made a motor mount crossbar to support the engine, wired up the engine, hooked up an MSD unit I had laying around, doing up a basic fuel system, carb linkage, valve adjust, rough timing, etc etc etc blah blah. I filled the engine with Valvoline VR-1 20W50 conventional oil, and I used a $$$ Mobil 1 filter. Here’s a shot taken right before attempting to fire the engine off. Cross your fingers!!! Like the impeller spiral? Unfortunately I got the spiral in the wrong direction...that’s what too much Yuengling beer will do to ya! (IMG:style_emoticons/default/wink.gif) Anyways I took all the plugs out of the engine and turned it over, waiting for the oil idiot light to go out. I was under the impression that the engine should prime after a couple seconds or so. After a minute or so the light was still on, so I said what the heck and got the engine ready to fire. The light would go out or it wouldn’t, and I didn’t like turning the engine over waiting for the light to go out…nerve-wracking!
Attached thumbnail(s) 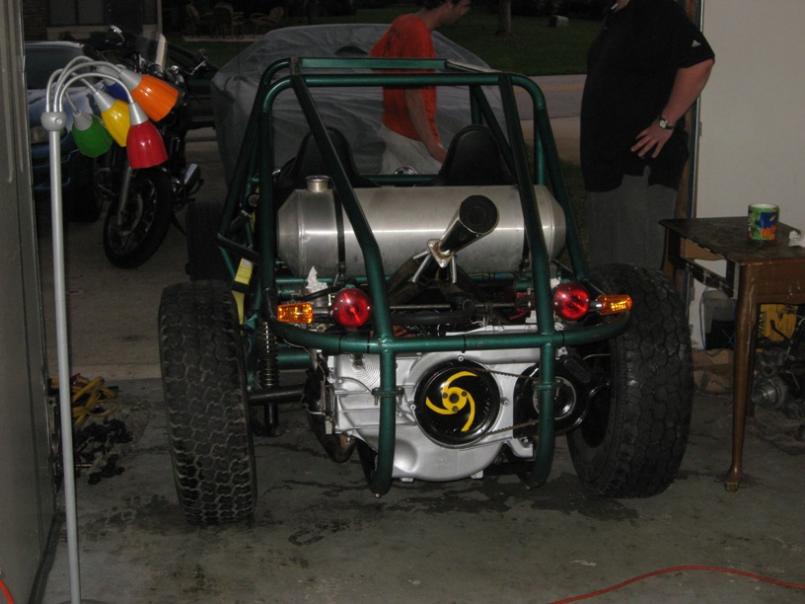
|
|
|
|
| wertygrog |
Nov 25 2009, 12:11 AM
Post
#17
|
|
wertygrog Group: Members Posts: 428 Joined: 12-November 05 From: Long Beach, CA Member No.: 5,114 Region Association: Southern California |
To end the suspense (haha), the engine started! It ran for about 10 minutes at >2000rpm as I played with the timing, mixture, etc….then……BANG!!! Engine dies. I’m not sure what went wrong but I’m having visions of dropped valve seats, seized bearings, etc. I mess around with the engine for a bit and finally I take the cap off the dizzy, and find that I can spin the rotor freely 360 degrees. Uh oh! Turns out that I hadn’t clamped the dizzy back down after adjusting the timing, and it traveled upwards until it was no longer engaged into the drive pinion. I reset the timing and Vroom, all is well. WHEW!! Thanks for the ulcer, Mr. Engine! Both the oil pressure and generator idiot lights went out so I was 2 for 2 there. Here’s some more pics because if you’re still reading you’re probably bored of reading. That’s not me in the pics fyi.
Attached thumbnail(s) 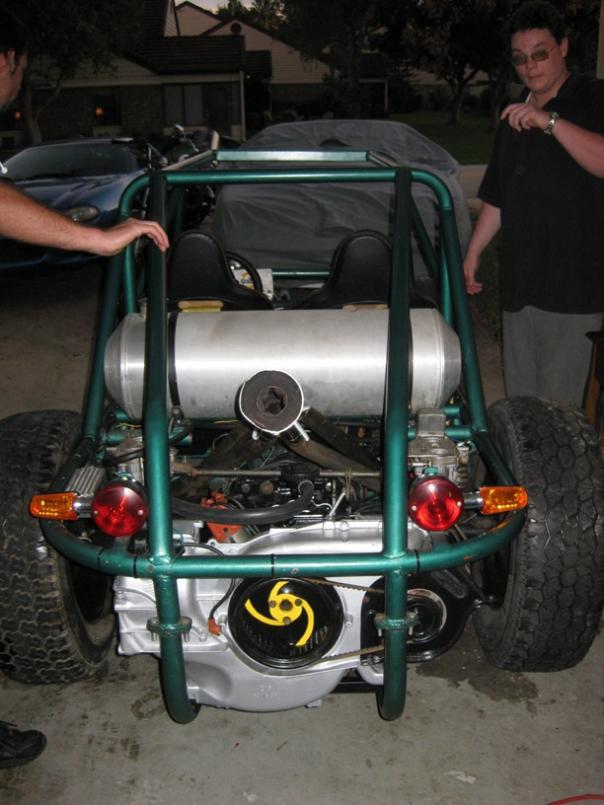 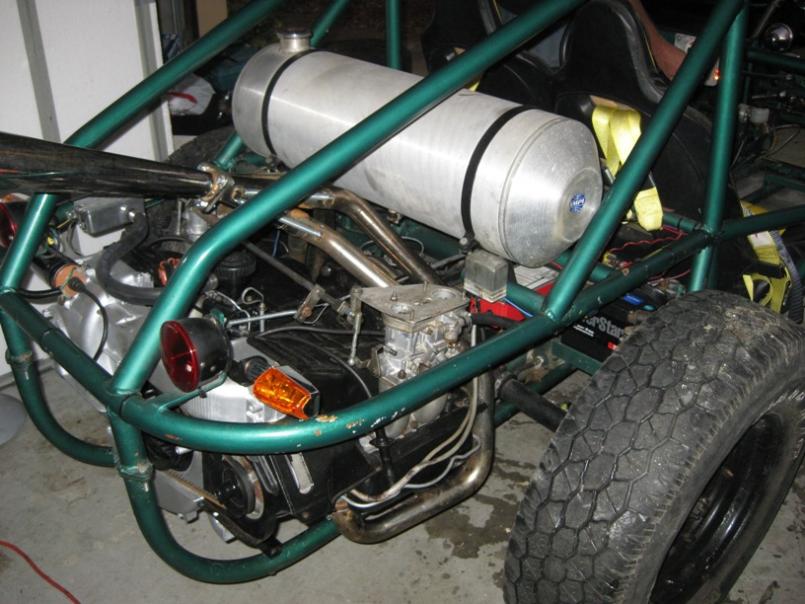
|
|
|
|
| wertygrog |
Nov 25 2009, 12:12 AM
Post
#18
|
|
wertygrog Group: Members Posts: 428 Joined: 12-November 05 From: Long Beach, CA Member No.: 5,114 Region Association: Southern California |
more
Attached thumbnail(s) 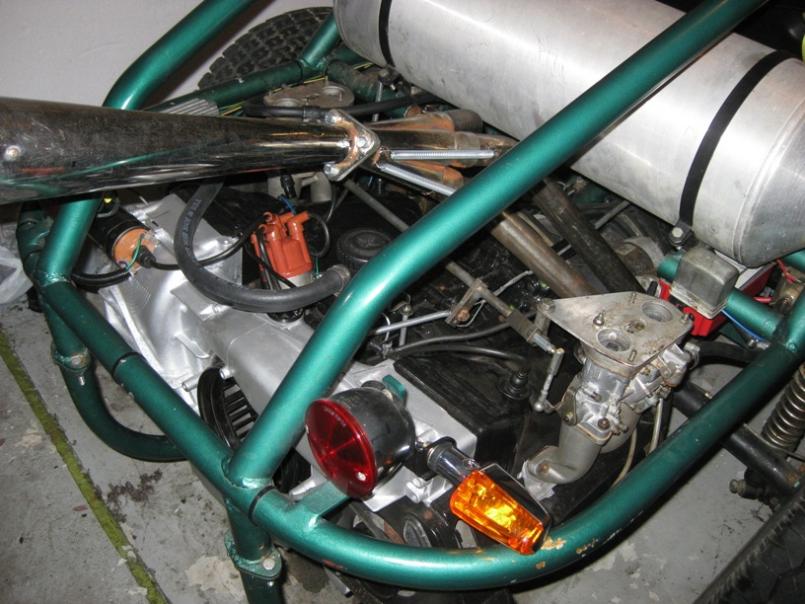
|
|
|
|
| wertygrog |
Nov 25 2009, 12:12 AM
Post
#19
|
|
wertygrog Group: Members Posts: 428 Joined: 12-November 05 From: Long Beach, CA Member No.: 5,114 Region Association: Southern California |
Here’s a little cell phone video of the initial startup, if I can figure out how to upload it! It sounds much better in person…the Eurorace with the baffled stinger really sounds good IMO. I still can’t believe how fast it revs compared to the 2.0L in my 914!
http://www.youtube.com/watch?v=SUVSCZMQqJY |
|
|
|
| wertygrog |
Nov 25 2009, 12:15 AM
Post
#20
|
|
wertygrog Group: Members Posts: 428 Joined: 12-November 05 From: Long Beach, CA Member No.: 5,114 Region Association: Southern California |
About a week after running the engine, I got around to setting the timing (8 deg BTDC @ 800RPM) and getting the jetting right (50 idles, 125 mains). Turned out that 55 idles were too rich, which surprised me. At this point I changed oil and filter, adjusted the valves (all were still pretty close), and took her for a spin! I gave her half throttle at 1500RPM in 3rd, and she started accelerating pretty nicely. Right at 2000RPM I was pushed into the seat and the engine sounded great! I wasn’t brave enough to take her above 2300RPM, at least not until I get the brakes working better! I’m not so sure anymore if I’m going to need the turbo! Here’s a pic of Lobo with headlights, directionals, and vintage Cibie fogs! I’ve cleaned her up even better since I took this shot.
Attached thumbnail(s) 
|
|
|
|
|
1 User(s) are reading this topic (1 Guests and 0 Anonymous Users)
0 Members:

|
Lo-Fi Version | Time is now: 19th May 2024 - 03:55 PM |
Invision Power Board
v9.1.4 © 2024 IPS, Inc.