|
|
|
Porsche, and the Porsche crest are registered trademarks of Dr. Ing. h.c. F. Porsche AG.
This site is not affiliated with Porsche in any way. Its only purpose is to provide an online forum for car enthusiasts. All other trademarks are property of their respective owners. |
|
|

  |

| Cevan |
 Apr 18 2010, 02:05 PM Apr 18 2010, 02:05 PM
Post
#1
|
|
Senior Member  Group: Members Posts: 1,079 Joined: 11-December 06 From: Western Massachusetts Member No.: 7,351 |
Can a novice rebuild a TypeIV? I figure, why not. This is my engine build thread. I actually started last December tearing down my tired 2.0 engine. My plan was to rebuild it using 96mm P/Cs and a set of Webers I already had. My plan was to source parts from the Type IV store and have Len Hoffman rebuild my heads. I had Jake balance the rotating parts as well.
   While I waited for parts and machine work, I had my 901 tranny rebuilt. I sent my gearstack to the good Dr. along with a couple of synchos and a set of dogteeth from another box. It was pretty straight forward putting it all back together. All new seals and a fillup with Swepco and it's good to go. 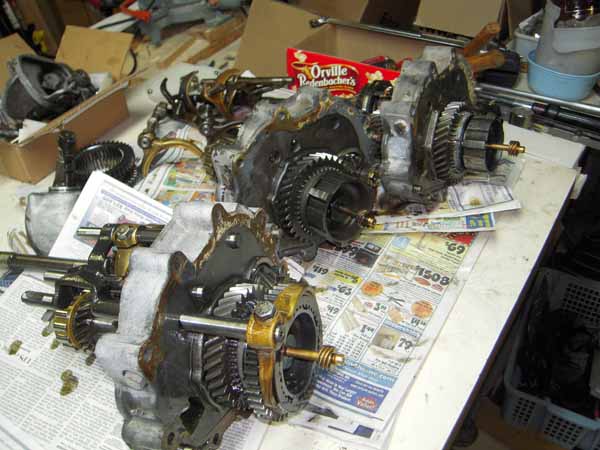 New stack is in! 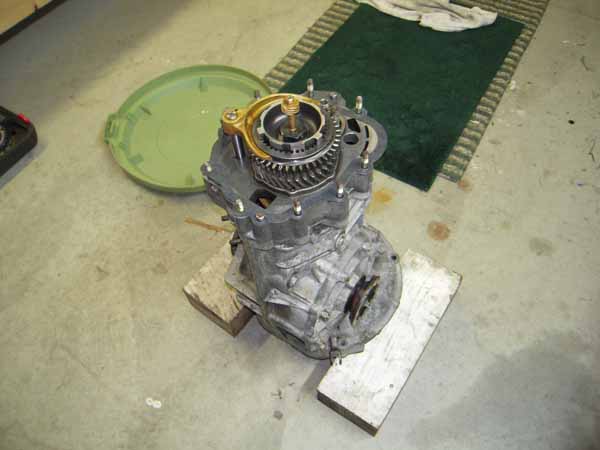 New input shaft seal. Good time to clean and inspect the fork and throwout bearing. 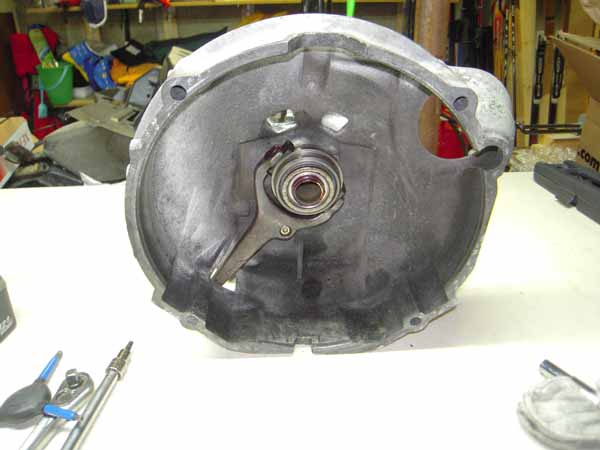 Another job I did in the interim was to rebuild the carbs and fabricate a linkage. There sure are a lot of little parts to a pair of carbs. 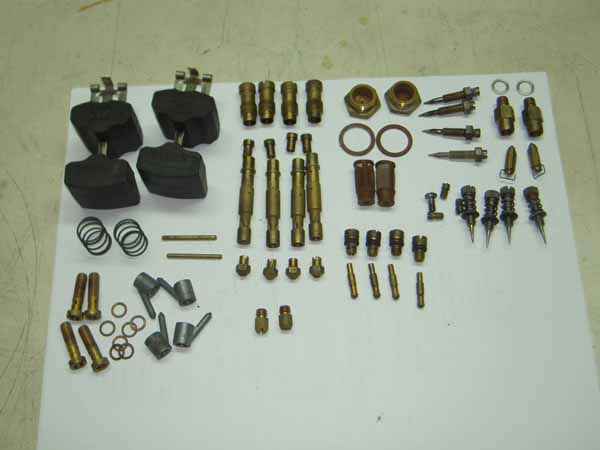 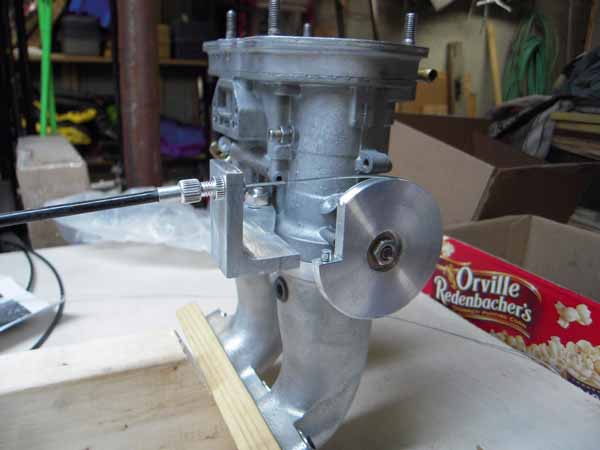 The design I used connects the stock throttle cable to two cables, each going to a carb. 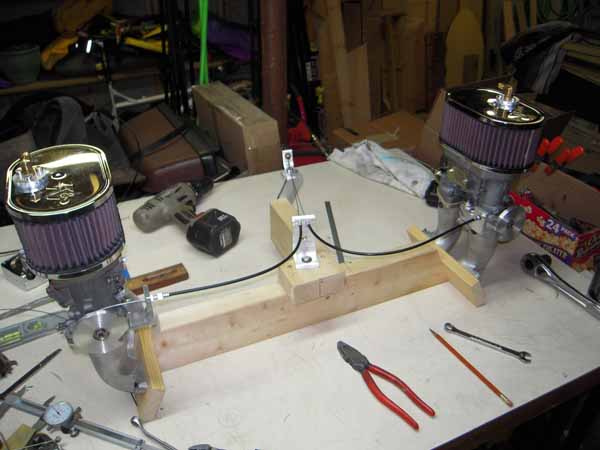 |
   |

 
|
| Cevan |
Apr 18 2010, 02:14 PM
Post
#2
|
|
Senior Member Group: Members Posts: 1,079 Joined: 11-December 06 From: Western Massachusetts Member No.: 7,351 |
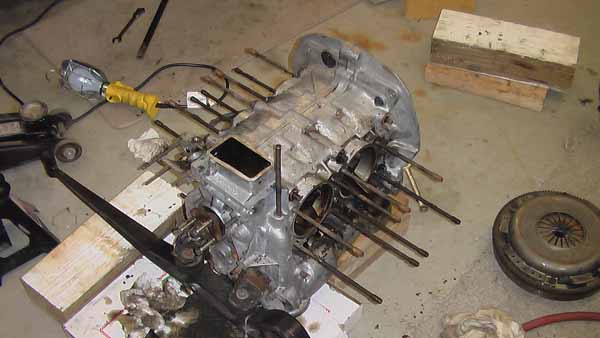
Parts are here!!
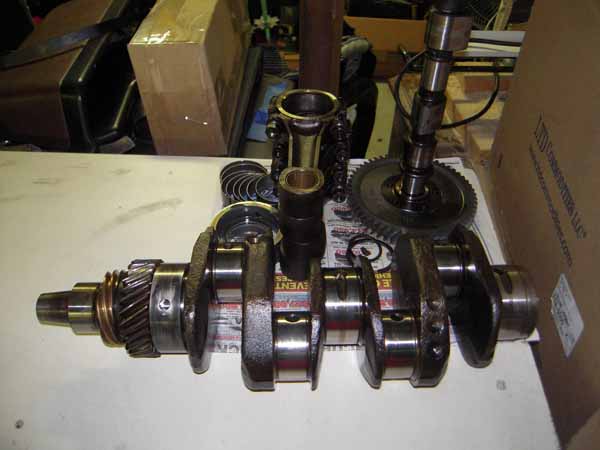
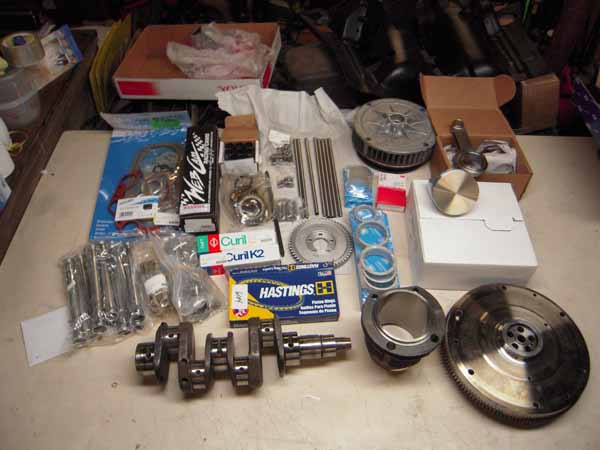 Clamping my flywheel to a workbench made a good solid stand for the crank. 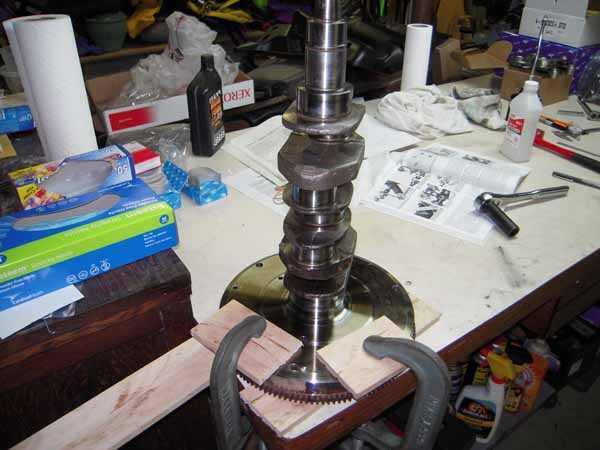 Rods are on. 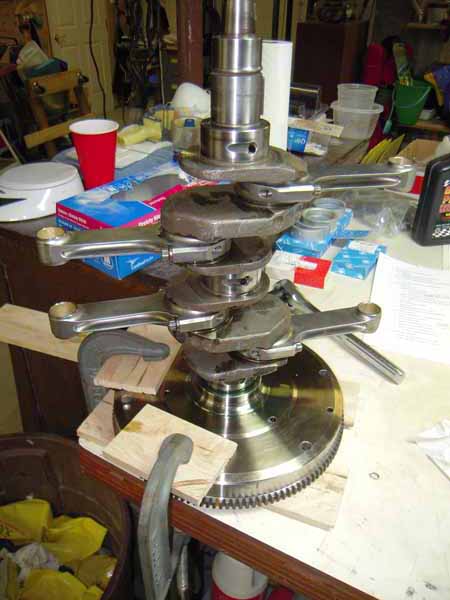 Here I made a stand to support one side of the case, high enough to be able to insert the case thru bolts from underneath. 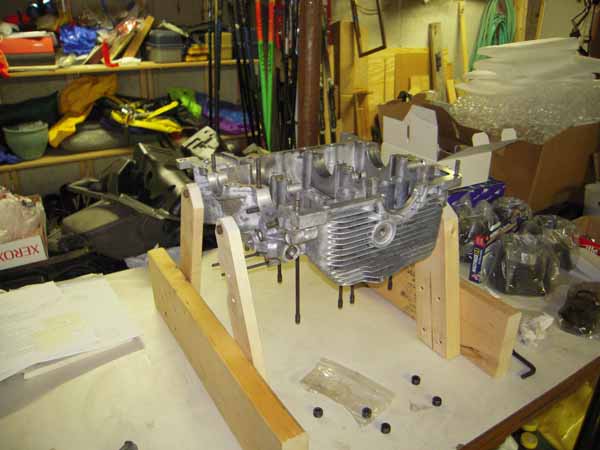 Anyone for some pan-seared cam drive gear with a side of dizzy drive gear? This worked really well for heating up the gears. 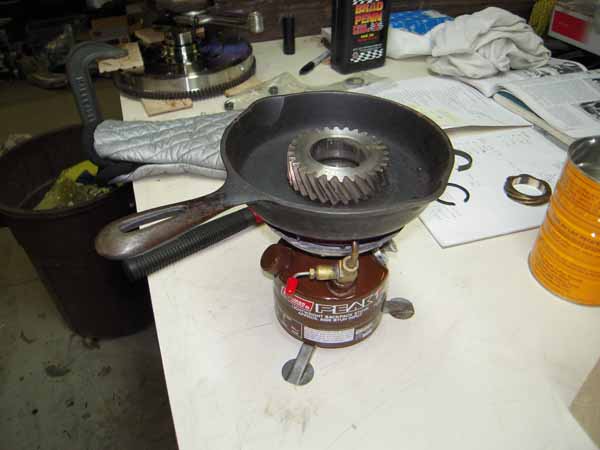 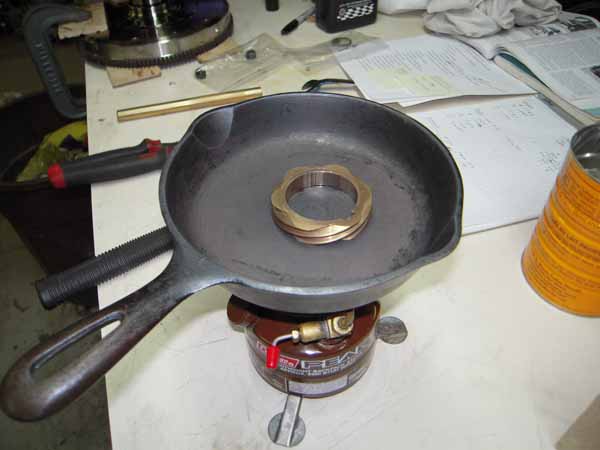 Gears are on. 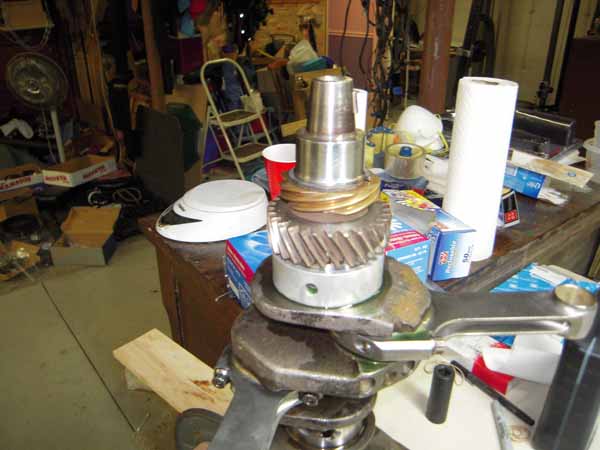 Crank is done. 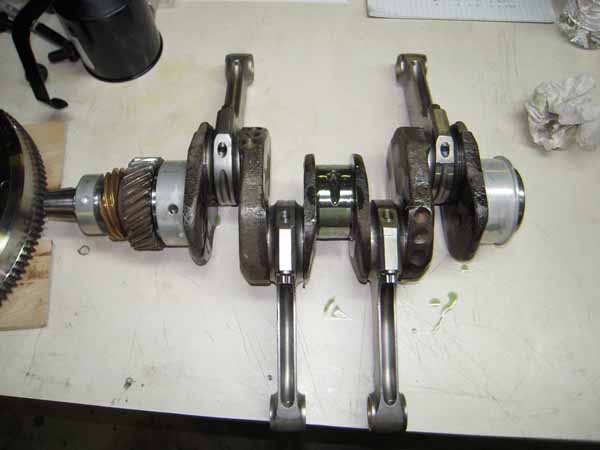 |
|
|
|
| Cevan |
Apr 18 2010, 02:26 PM
Post
#3
|
|
Senior Member Group: Members Posts: 1,079 Joined: 11-December 06 From: Western Massachusetts Member No.: 7,351 |
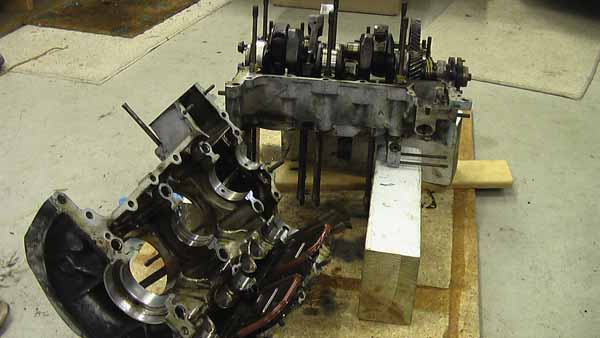
Test fit crank. Nice and smooth.
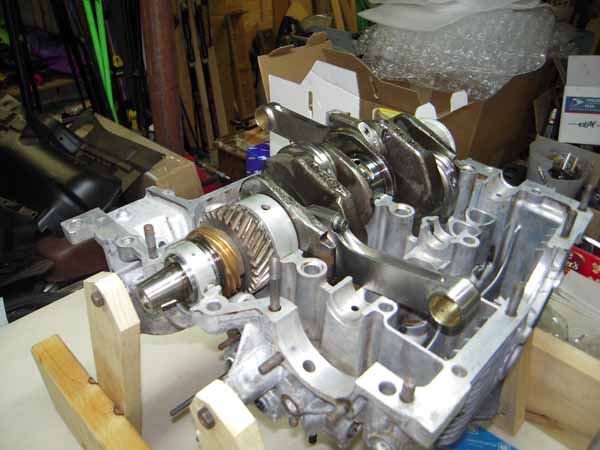 Case halves together and case thru bolts torqued. Spins nice. 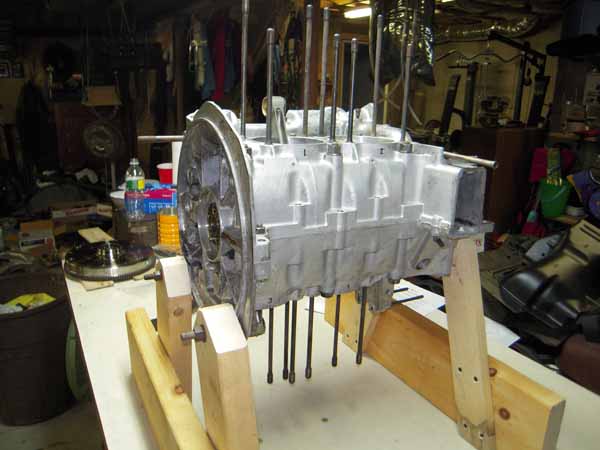 Cam installed. 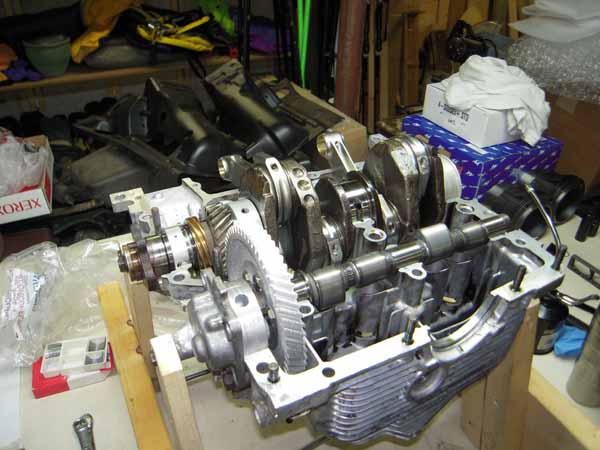 Good clearance around the oil pump. 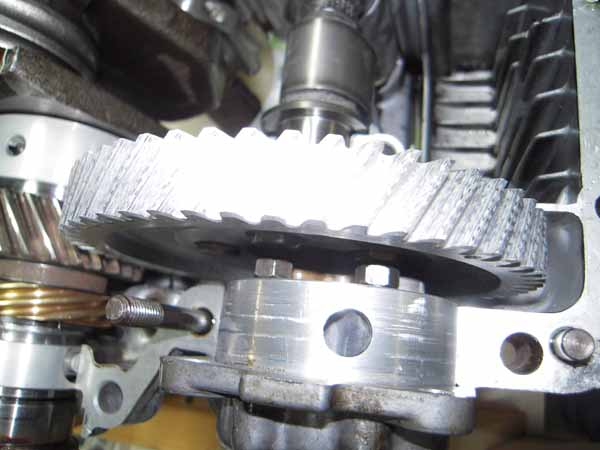 Other case half prepped. 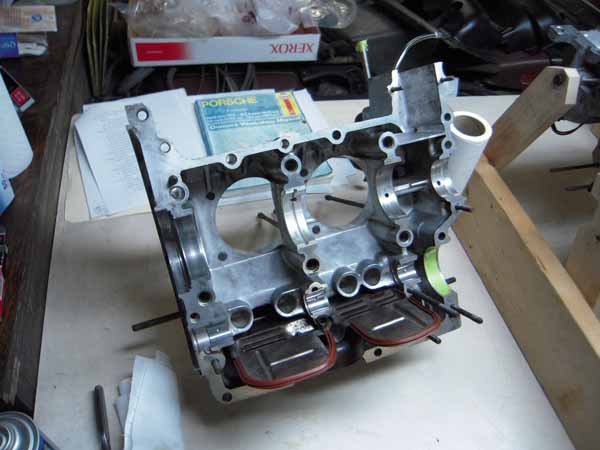 A short block is born!! 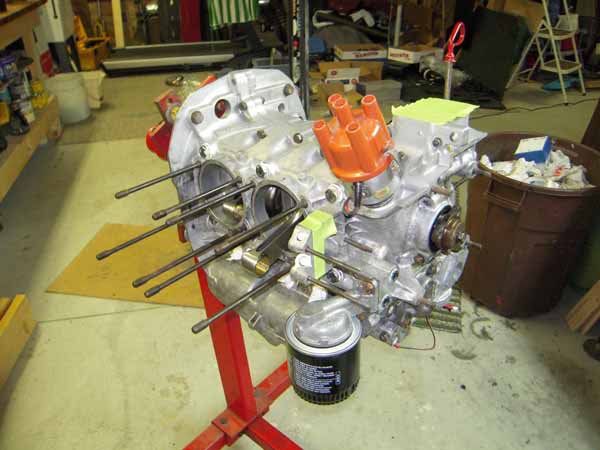  Measuring deck height. This took me a long time, mostly due to refining my technique to get repeatable results. I also used a straight edge and feeler gauges as a back up. 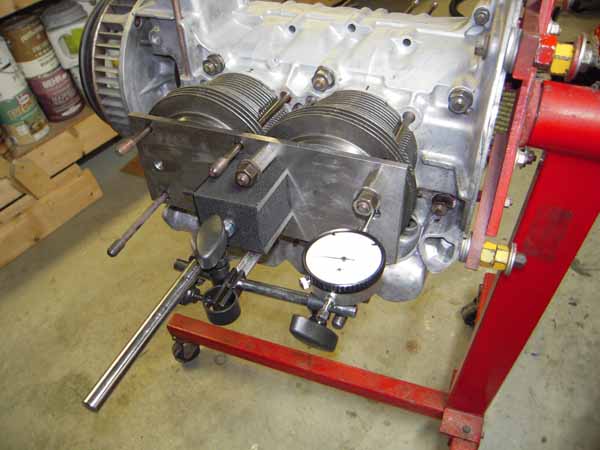 |
|
|
|
| TravisG |
Apr 18 2010, 03:23 PM
Post
#4
|
|
Member Group: Members Posts: 71 Joined: 8-June 09 From: Supply, NC Member No.: 10,449 Region Association: MidAtlantic Region |
(IMG:style_emoticons/default/wub.gif) That is some great looking work you have done there! I am jealous. Have you ever thought about producing and selling that carb linkage setup? It looks much better than a cross bar setup. |
|
|
|
| jsayre914 |
Apr 18 2010, 05:48 PM
Post
#5
|
|
Speed Up !!! Group: Members Posts: 3,188 Joined: 10-February 08 From: Timonium MD 21093 Member No.: 8,696 Region Association: MidAtlantic Region |
(IMG:style_emoticons/default/drunk.gif)
That looks great, are you putting rebuilt heads on there or did you spring for the new ones? this may be your first T4 but i cant believe you havent done this before... (IMG:style_emoticons/default/idea.gif) where are all the empty beer bottles, and spilled oil ?? |
|
|
|
| Cevan |
Apr 18 2010, 06:42 PM
Post
#6
|
|
Senior Member Group: Members Posts: 1,079 Joined: 11-December 06 From: Western Massachusetts Member No.: 7,351 |
Heads were just rebuilt by Len Hoffman. All new hardware. I did about six months of research before I turned a wrench. I've usually rewarded myself with a beverage or two after a session of working on the motor.
|
|
|
|
| BigDBass |
Apr 18 2010, 07:36 PM
Post
#7
|
|
Dumb Question Champion Group: Members Posts: 1,438 Joined: 11-January 06 From: Chicago (south 'burbs) Member No.: 5,405 Region Association: Upper MidWest |
Wow, impressive and inspiring to say the least. Fess up. You've built other engines, just not a Type IV before, right?!
|
|
|
|
| Tom |
Apr 18 2010, 07:53 PM
Post
#8
|
|
Advanced Member Group: Members Posts: 2,139 Joined: 21-August 05 From: Port Orchard, WA 98367 Member No.: 4,626 Region Association: None |
Looks like you are doing the build the right way, lots of research and info before turning wrenches, good job. Hope all turns out well.
Tom |
|
|
|
| bandjoey |
Apr 18 2010, 08:21 PM
Post
#9
|
|
bandjoey Group: Members Posts: 4,926 Joined: 26-September 07 From: Bedford Tx Member No.: 8,156 Region Association: Southwest Region |
Beautiful work. What incresae in HP do you think it'll run?
Also run a new thread on your accel cable setup. Where did you get it/parts, etc. And close up pics. Thanks. |
|
|
|
| Gint |
Apr 18 2010, 08:47 PM
Post
#10
|
|
Mike Ginter Group: Admin Posts: 16,075 Joined: 26-December 02 From: Denver CO. Member No.: 20 Region Association: Rocky Mountains |
I like that throttle cable setup. Nice work. Let us know how that works when it's up and running eh?
|
|
|
|
| Van |
Apr 19 2010, 10:04 AM
Post
#11
|
|
Member Group: Members Posts: 199 Joined: 15-January 08 From: Hyde Park, NY Member No.: 8,571 |
Lookin' great!!
|
|
|
|
| tat2dphreak |
Apr 19 2010, 11:47 AM
Post
#12
|
|
stoya, stoya, stoya Group: Benefactors Posts: 8,797 Joined: 6-June 03 From: Wylie, TX Member No.: 792 Region Association: Southwest Region |
is this one of Jake's Kits?
good looking work! |
|
|
|
| Cevan |
Apr 28 2010, 12:35 PM
Post
#13
|
|
Senior Member Group: Members Posts: 1,079 Joined: 11-December 06 From: Western Massachusetts Member No.: 7,351 |
I received a package this week from Len Hoffman. These are 2.0 heads he rebuilt for me with all new hardware. Beautiful work, IMHO.
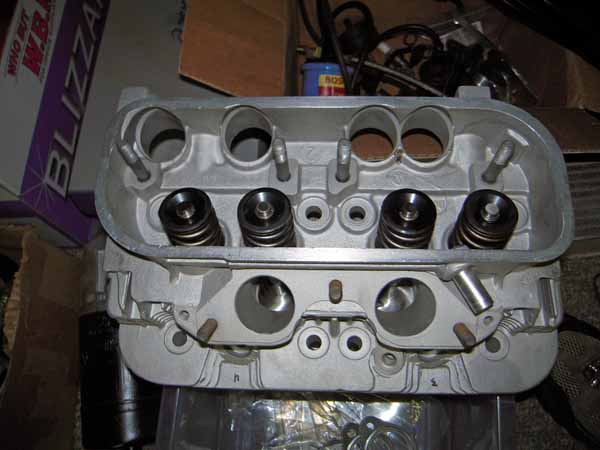 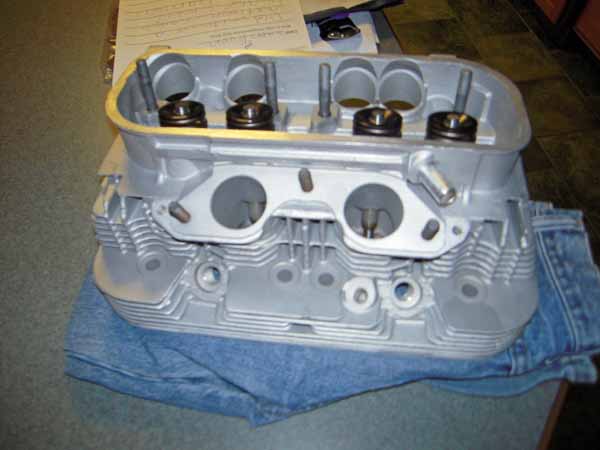   I also got the rings installed and the pistons installed into the cylinders. 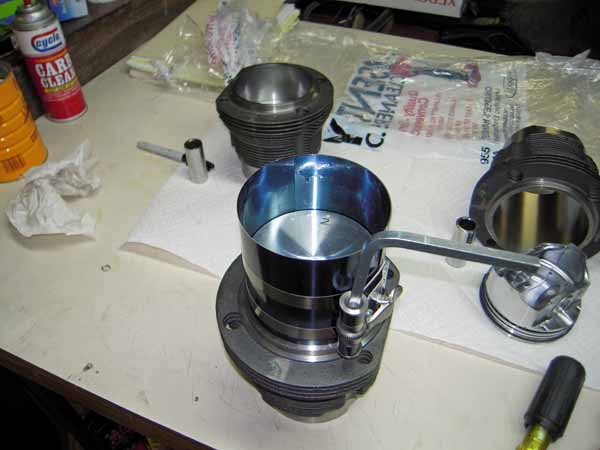 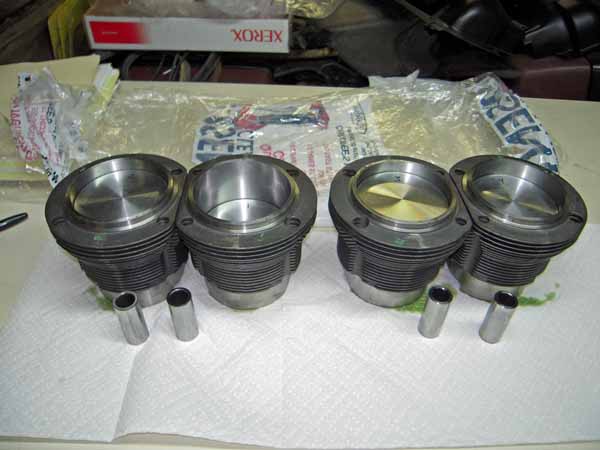 |
|
|
|
| Cevan |
Apr 28 2010, 12:43 PM
Post
#14
|
|
Senior Member Group: Members Posts: 1,079 Joined: 11-December 06 From: Western Massachusetts Member No.: 7,351 |
To answers a couple of questions above. This is not a Raby kit. I did a cam consult with Jake back in January and bought one of his valvetrain kits, as well as most of the other parts. Jake also did the balancing work on the rotating parts. As the title states, this is my first engine build (of any kind).
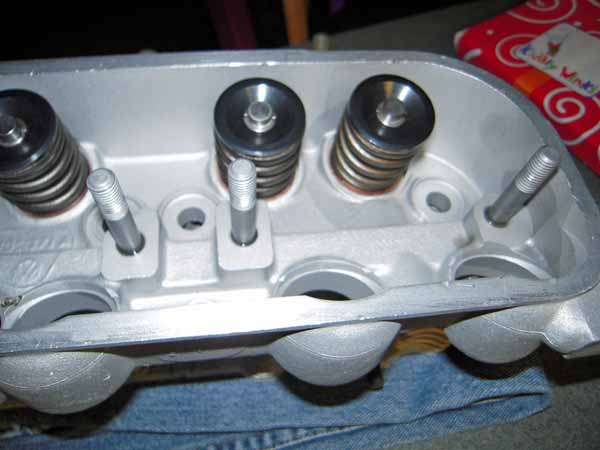
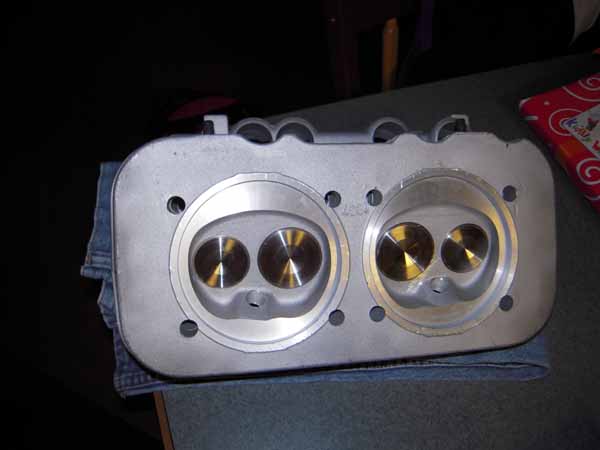
So next comes installing the piston and cylinder into the rod. I thought the triple wound spiral retainers would be a pain to install here, but I've come to learn that every process has a technique. The first time I tried to install one, I couldn't. I didn't think there was any way to get them in without damaging the piston, so I put everything down and came back to it the next day. And the next day, it was easy. 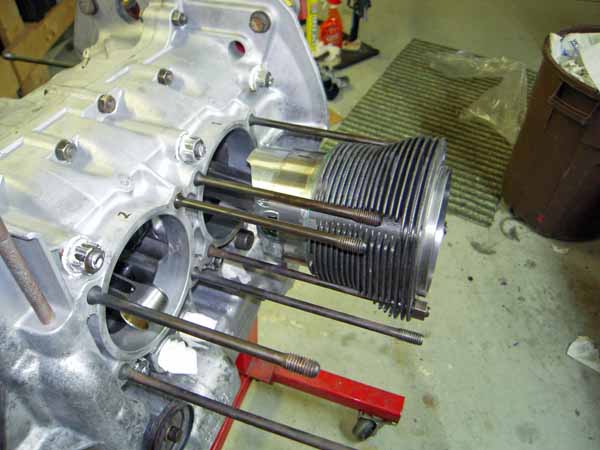 Then the head. I used a little Curil T under the washers for the 4 lower headstuds. One side is done! 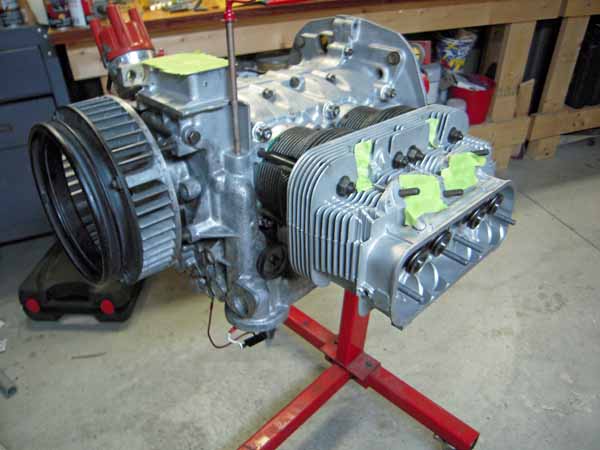  |
|
|
|
| jeffdon |
Apr 28 2010, 01:39 PM
Post
#15
|
|
Senior Member Group: Members Posts: 1,094 Joined: 24-October 06 From: oakland, ca Member No.: 7,087 Region Association: None |
Good going. Tape up those lifter holes too. I did not, and dropped a washer down the sump when putting my tins back under the cylinders. Had to yank it all apart...
Fired mine for the first time about a month ago. Grinned like an idiot all through celebratory pints down at the pub! |
|
|
|
| Dr Evil |
Apr 28 2010, 03:59 PM
Post
#16
|
|
Send me your transmission! Group: Members Posts: 23,000 Joined: 21-November 03 From: Loveland, OH 45140 Member No.: 1,372 Region Association: MidAtlantic Region |
(IMG:style_emoticons/default/thumb3d.gif)
Just a few questions: - Did you use assembly lube on the internal parts before the cases were put together? - Did you put sealant at the base of the cylinders? - Did you make sure to position the piston rings at 33* intervals with the oil ring spaces not at the bottom? - Did you check the registers on the case to make sure they were not collapsed? Just a couple of gotchas that came to mind. You seem on the ball, though (IMG:style_emoticons/default/smile.gif) |
|
|
|
| Cevan |
Apr 28 2010, 04:20 PM
Post
#17
|
|
Senior Member Group: Members Posts: 1,079 Joined: 11-December 06 From: Western Massachusetts Member No.: 7,351 |
QUOTE(Dr Evil @ Apr 28 2010, 05:59 PM)  (IMG:style_emoticons/default/thumb3d.gif) Just a few questions: - Did you use assembly lube on the internal parts before the cases were put together? - Did you put sealant at the base of the cylinders? - Did you make sure to position the piston rings at 33* intervals with the oil ring spaces not at the bottom? - Did you check the registers on the case to make sure they were not collapsed? Just a couple of gotchas that came to mind. You seem on the ball, though (IMG:style_emoticons/default/smile.gif) I'm using Brad Penn 30wt break-in oil on the internal parts and cam lube for the lobes and lifter faces. I used Curil T at the base of the cylinders. Rings positioned per the instructions from Hastings. Registers are not collapsed. I'm adjusting the width of the solid rocker spacer on the valvetrain now. |
|
|
|
| Dr Evil |
Apr 28 2010, 04:32 PM
Post
#18
|
|
Send me your transmission! Group: Members Posts: 23,000 Joined: 21-November 03 From: Loveland, OH 45140 Member No.: 1,372 Region Association: MidAtlantic Region |
Excellent. Why Curil T? It is the non-hardening (curing) type of sealant, correct? You are using this outside? I would recommend going with a high temp silly cone on the outside of the cylinder bases.
|
|
|
|
| Cevan |
May 9 2010, 07:59 AM
Post
#19
|
|
Senior Member Group: Members Posts: 1,079 Joined: 11-December 06 From: Western Massachusetts Member No.: 7,351 |
Here's a quick update on my engine build.
Here's a link to my valvetrain geometry fun. I cut my pushrods with a hacksaw. I know this sounds like swatting a fly with an Uzi, but I cut them all about .100 over and then used a benchtop sander to get them to the final length. 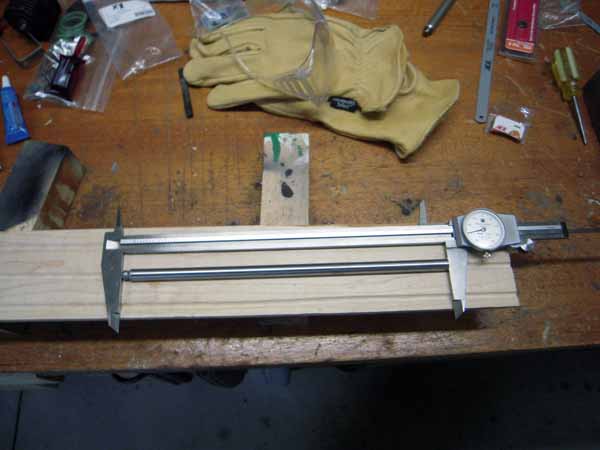  Here is the valvetrain installed. Each of the aluminum rockershaft spacers had to be taken down a little in order to achieve the right amount of side play. I tried to shoot for about .004 here. Just another thing that adds to the amount of hours it's taking to build this engine. 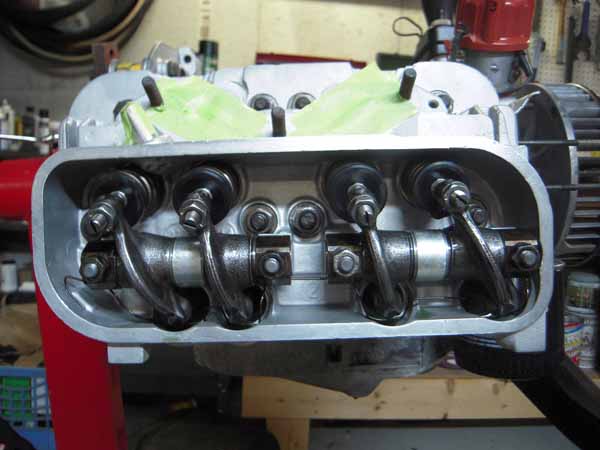 |
|
|
|
| Cevan |
May 9 2010, 08:05 AM
Post
#20
|
|
Senior Member Group: Members Posts: 1,079 Joined: 11-December 06 From: Western Massachusetts Member No.: 7,351 |
Completed long block!!
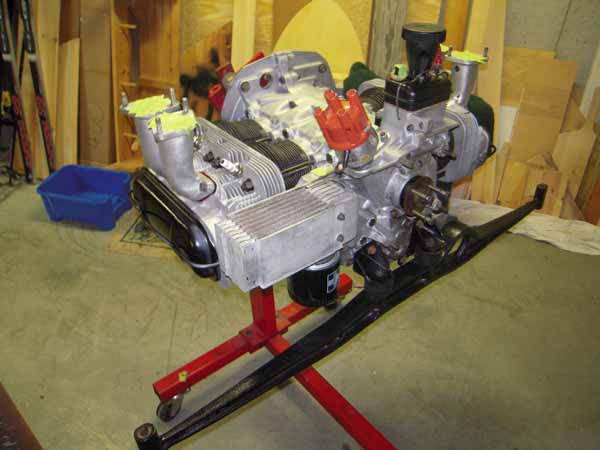 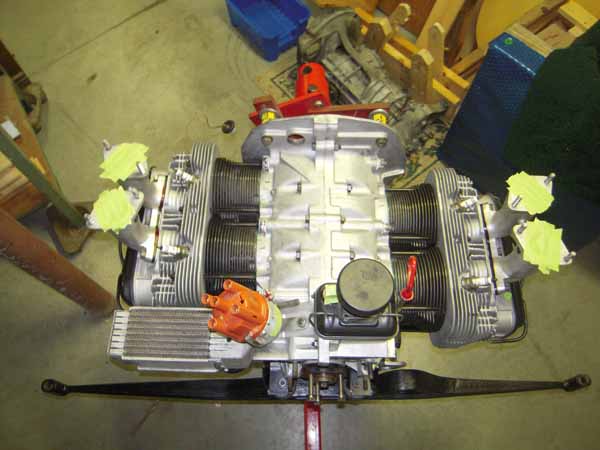 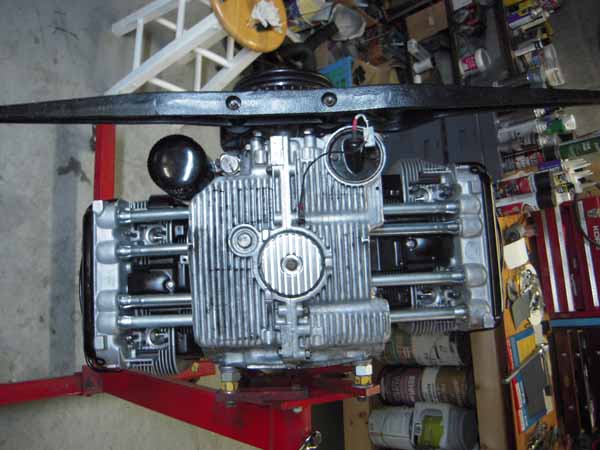 Now I just had to recruit my wife and 17 year old son to help me get it off the engine stand, out of my cellar and into the garage. Installed the flywheel, clutch and pressure plate. I had these parts balanced by Jake Raby. Even the individual bolts were balanced so they were indexed to the pressure plate. Might as well install the 901 while I've got the teenager around. 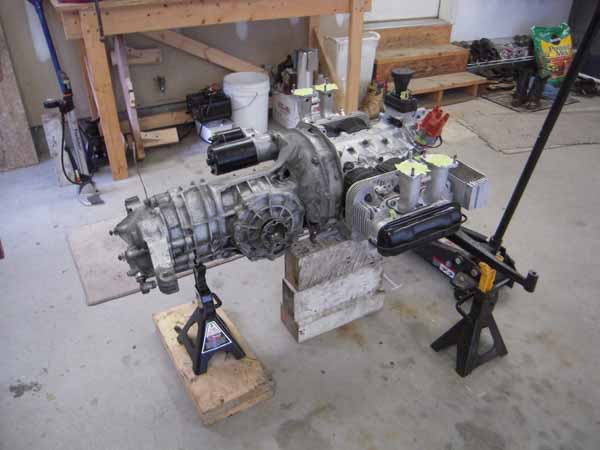 |
|
|
|
|
1 User(s) are reading this topic (1 Guests and 0 Anonymous Users)
0 Members:

|
Lo-Fi Version | Time is now: 21st May 2024 - 04:54 PM |
Invision Power Board
v9.1.4 © 2024 IPS, Inc.