|
|
|
Porsche, and the Porsche crest are registered trademarks of Dr. Ing. h.c. F. Porsche AG.
This site is not affiliated with Porsche in any way. Its only purpose is to provide an online forum for car enthusiasts. All other trademarks are property of their respective owners. |
|
|

 Model Specific Information
914/4: 70 71 72 73 74 75 76 914/6: 70 71 72
  |

| Pat Garvey |
 May 15 2010, 08:27 PM May 15 2010, 08:27 PM
Post
#1
|
|
Do I or don't I...........?  Group: Members Posts: 5,900 Joined: 24-March 06 From: SE PA, near Philly Member No.: 5,765 Region Association: North East States |
As many of you know, I have a tank problem, from fibe years (almost) gas sitting in the tank. I bought a good tank, with a bad finish. I'm documenting the rstor of it here.
Phase One - the easy part. I used the evap tank to rehone my finishing skills. It was presentable to most, but not to me. Stripped to bare metal, primed, wet sanded & 3 final coats of black satin. Three days later - wet sanded with 800 grit, Turtle Wax rubbing compound, and Meguiars Show car Glaze. Too shiney, but blame it on intense wet sanding! Pics show it all. Pat Phase Two - Fuel collar. Not too bad after some high grit sanding. We'll see how tha finish coat sticks. Stay tuned, because the tank comes next! For those who think I'm sitting on my ass, pontificating - think again! Pat Attached image(s) 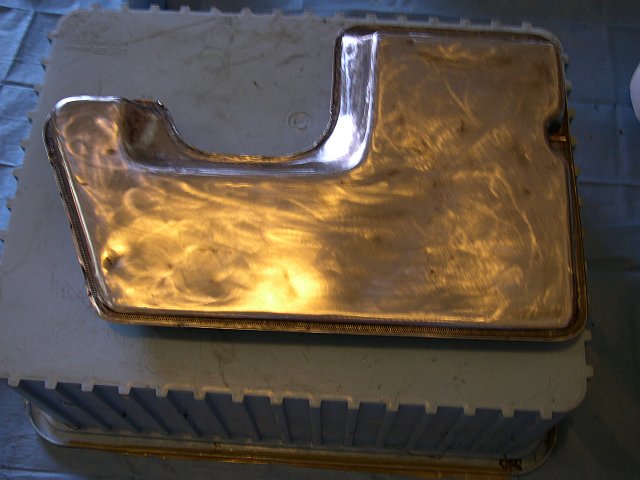 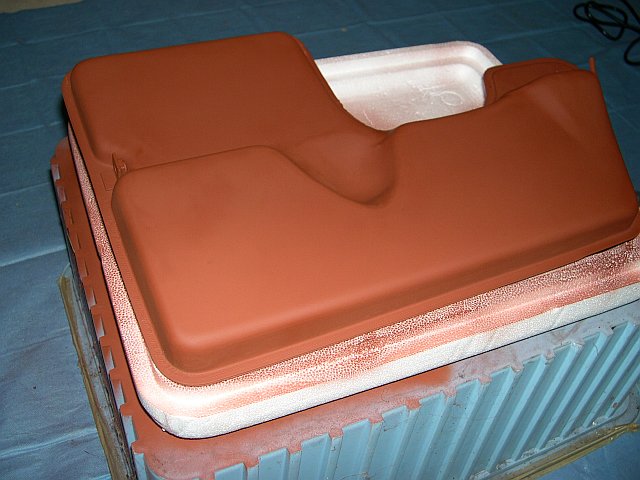 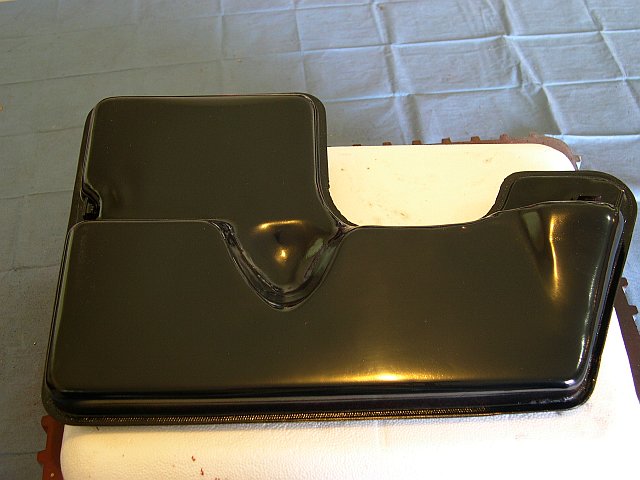 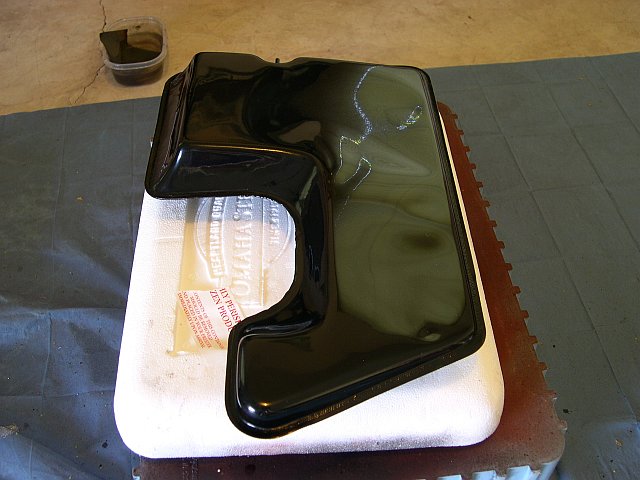 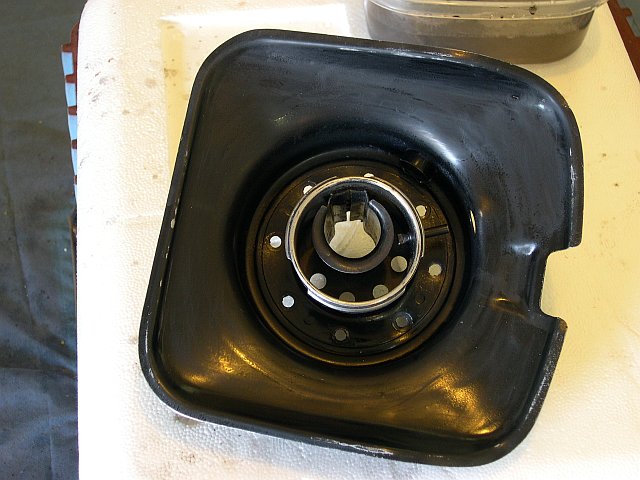
|
   |

 
|
| Tom_T |
May 15 2010, 11:18 PM
Post
#2
|
|
TMI.... Group: Members Posts: 8,321 Joined: 19-March 09 From: Orange, CA Member No.: 10,181 Region Association: Southern California |
Pat - what was the red primer you used (name/brand) & where do you get it?
Keep up the posts as the project progresses plz! |
|
|
|
| tod914 |
May 16 2010, 05:35 PM
Post
#3
|
|
Advanced Member Group: Members Posts: 3,755 Joined: 19-January 03 From: Lincoln Park, NJ Member No.: 170 |
Pat looks real nice. I used the Mequires too. Definetly makes the paint very glossy, but looks real good.
|
|
|
|
| Pat Garvey |
May 16 2010, 06:41 PM
Post
#4
|
|
Do I or don't I...........? Group: Members Posts: 5,900 Joined: 24-March 06 From: SE PA, near Philly Member No.: 5,765 Region Association: North East States |
QUOTE(Tom_T @ May 15 2010, 11:18 PM)  Pat - what was the red primer you used (name/brand) & where do you get it? Keep up the posts as the project progresses plz! Tom, It's Krylon. Yeah, I know that many people thru the years have poo-poo'd it as "non-professional". Fact is this - I've used Krylon products successfully for years. It's all in the preparation, and the tasks between coats. When I first started on this evaporator, I though about just simply taking it down to bare metal with finer & finer grits. I have a Craftsman triple head sander that I use because it moves around corners nicely. But first I used a product called Citrus Strip - you can get it at any FLAPS & comes in brush-on or spray version. I've used the spray version a bunch of times & prefer it because it doesn't leave a mess behind. Spray it on, wait 12-24 hours & the paint amost slides off usually. In this case it didn't get everything, so I brought the sander into play. As you can see, that was the end of the rest of the paint, though I did take the metal down to 800 grit. Next, I wiped everything down with laquer thinner. Opened all doors & ran like hell,even though I wore protection. Didn't smoke my pipe that afternoon! Next came the Rustoleum Rust Tough. It's formulated so that it checks rust, so long as you've scraped any chunks of rust off. I didn't want o take a chance with that, which is why I sanded. Two coats, let dry for 36-48 hrs. Wet sand & let dry. Smooth as a babies bottom & ready to topcoat. Recommend this product. Pat |
|
|
|
| Pat Garvey |
May 16 2010, 06:49 PM
Post
#5
|
|
Do I or don't I...........? Group: Members Posts: 5,900 Joined: 24-March 06 From: SE PA, near Philly Member No.: 5,765 Region Association: North East States |
QUOTE(tod914 @ May 16 2010, 05:35 PM) Pat looks real nice. I used the Mequires too. Definetly makes the paint very glossy, but looks real good. Yeah, quite frankly it's too glossy, but I'll accept it. Can't wait to apply the L43 that you sent on the tank ! That will be glossy too, because I love wet sanding & rubbing compound. But then, the tank should be glossy. Keep watching - the fuel collar get started tomorrow afternnon. After that - the big boy (tank). Pat |
|
|
|
| Tom_T |
May 17 2010, 12:38 AM
Post
#6
|
|
TMI.... Group: Members Posts: 8,321 Joined: 19-March 09 From: Orange, CA Member No.: 10,181 Region Association: Southern California |
Thanx for the step-by-step Pat!
I'll have to see whether I need a full repaint or touch up whenever I get to that point, but I need to swap evap tanks since some past shock insert work dinged the edge/sea. fortunately I have another one in good shape in my donor shell. |
|
|
|
| Pat Garvey |
May 20 2010, 06:49 PM
Post
#7
|
|
Do I or don't I...........? Group: Members Posts: 5,900 Joined: 24-March 06 From: SE PA, near Philly Member No.: 5,765 Region Association: North East States |
So, the collar is now done. Came ou pretty nice - same method as evap tank.
Next will be the tank & it will be the most difficult since it is BIG. Note that the gas filler/collar has a brass tube, which lead to the evaporator. Never noted that be fore & wonder why they used bras for this simple part? BTW, I left the backside of the collar as delivered from the Factory. Thankfully, the PO left it alone. Still tryinf several jigs for the main tank - not happy with any of them. Attached image(s) 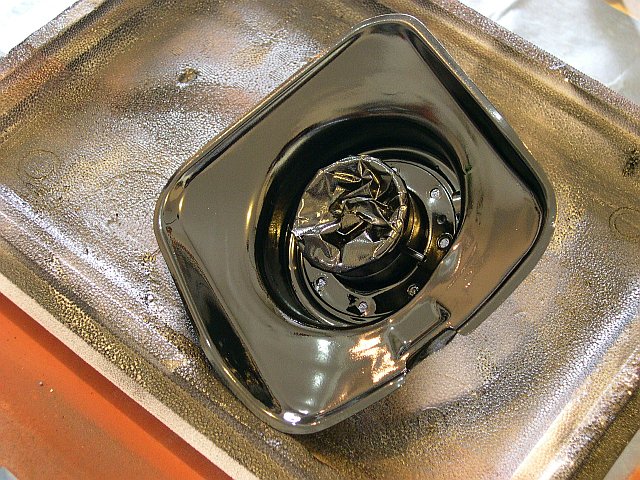 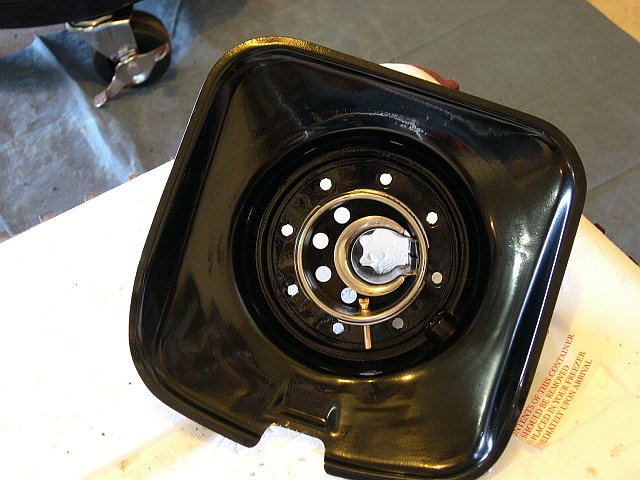 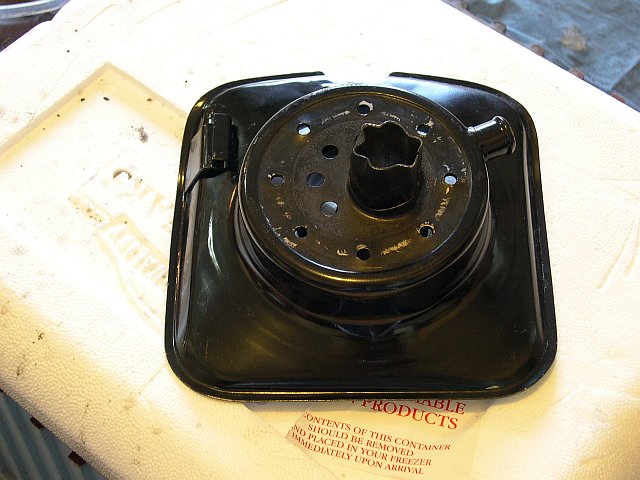
|
|
|
|
| Tom_T |
May 21 2010, 12:36 AM
Post
#8
|
|
TMI.... Group: Members Posts: 8,321 Joined: 19-March 09 From: Orange, CA Member No.: 10,181 Region Association: Southern California |
QUOTE(Pat Garvey @ May 20 2010, 05:49 PM) So, the collar is now done. Came ou pretty nice - same method as evap tank. Next will be the tank & it will be the most difficult since it is BIG. Note that the gas filler/collar has a brass tube, which lead to the evaporator. Never noted that be fore & wonder why they used bras for this simple part? BTW, I left the backside of the collar as delivered from the Factory. Thankfully, the PO left it alone. Still tryinf several jigs for the main tank - not happy with any of them. Looks real good Pat! (IMG:style_emoticons/default/smilie_pokal.gif) Although I'm glad to see you advertising for a better gas cap than that paper wadding buddy! (IMG:style_emoticons/default/biggrin.gif) |
|
|
|
| kharma |
May 21 2010, 06:26 AM
Post
#9
|
|
Member Group: Members Posts: 72 Joined: 13-November 07 From: Billerica MA Member No.: 8,328 Region Association: North East States |
Watching with great interest... redoing all the fueling will be my first step when I finally have time to play with the car. My tank is pretty bad off, but I should have another one on my doorstep in a few days.
|
|
|
|
| tod914 |
May 21 2010, 09:20 AM
Post
#10
|
|
Advanced Member Group: Members Posts: 3,755 Joined: 19-January 03 From: Lincoln Park, NJ Member No.: 170 |
A jig to paint the tank Pat? I layed mine on a large box upside down first. Put a coat on the bottom and sides and let it dry. Then you can lay it the sides to do the top and sides again. You can almost set it up right while it's on its side. You'll be alble to get a very nice coat on all the visable portions no problem like that. Once the bottom is painted, you could also set the stamp seam (lip on bottom) between 2 pieces of lumber to keep it upright. Turning out very nice btw.
|
|
|
|
| Pat Garvey |
May 21 2010, 06:03 PM
Post
#11
|
|
Do I or don't I...........? Group: Members Posts: 5,900 Joined: 24-March 06 From: SE PA, near Philly Member No.: 5,765 Region Association: North East States |
QUOTE(tod914 @ May 21 2010, 09:20 AM) A jig to paint the tank Pat? I layed mine on a large box upside down first. Put a coat on the bottom and sides and let it dry. Then you can lay it the sides to do the top and sides again. You can almost set it up right while it's on its side. You'll be alble to get a very nice coat on all the visable portions no problem like that. Once the bottom is painted, you could also set the stamp seam (lip on bottom) between 2 pieces of lumber to keep it upright. Turning out very nice btw. Tod, I know the method I'll use for painting. Just trying to make a jig for easier sanding. I know what you're saying about painting (I'll suspend mine from the ceiling for that). Just trying to make a multi-use jig for sanding. Can't help being me - I want to be able to yank this sucker out & show it to a judge - "how's that for proper finish?' We start tomorrow! Pic's forthcoming. Pat ps - thanks for the goo buddy. Test sprayed today - it's dead nuts right on. I owe you! |
|
|
|
| Pat Garvey |
May 21 2010, 06:06 PM
Post
#12
|
|
Do I or don't I...........? Group: Members Posts: 5,900 Joined: 24-March 06 From: SE PA, near Philly Member No.: 5,765 Region Association: North East States |
QUOTE(Tom_T @ May 21 2010, 12:36 AM) QUOTE(Pat Garvey @ May 20 2010, 05:49 PM) So, the collar is now done. Came ou pretty nice - same method as evap tank. Next will be the tank & it will be the most difficult since it is BIG. Note that the gas filler/collar has a brass tube, which lead to the evaporator. Never noted that be fore & wonder why they used bras for this simple part? BTW, I left the backside of the collar as delivered from the Factory. Thankfully, the PO left it alone. Still tryinf several jigs for the main tank - not happy with any of them. Looks real good Pat! (IMG:style_emoticons/default/smilie_pokal.gif) Although I'm glad to see you advertising for a better gas cap than that paper wadding buddy! (IMG:style_emoticons/default/biggrin.gif) What! Works in hillbillyland! |
|
|
|
| Pat Garvey |
May 21 2010, 06:11 PM
Post
#13
|
|
Do I or don't I...........? Group: Members Posts: 5,900 Joined: 24-March 06 From: SE PA, near Philly Member No.: 5,765 Region Association: North East States |
QUOTE(kharma @ May 21 2010, 06:26 AM) Watching with great interest... redoing all the fueling will be my first step when I finally have time to play with the car. My tank is pretty bad off, but I should have another one on my doorstep in a few days. Just make certain that you prep the inside first. Some are really bad (my original included) and some are RTP (ready to paint). Mine was in-between. Used metal Ready & it is ......ready. Stuff works if the only have light corrosion. Listen to the guys who've done it before. DIOAF - do it once & forget it! Pat |
|
|
|
| Tom_T |
May 21 2010, 06:22 PM
Post
#14
|
|
TMI.... Group: Members Posts: 8,321 Joined: 19-March 09 From: Orange, CA Member No.: 10,181 Region Association: Southern California |
QUOTE(Pat Garvey @ May 21 2010, 05:06 PM) What! Works in hillbillyland! Careful now - I resemble that remark! ... my Maternal side comes a bit southeast of you in Hill Billy Land, around Berkeley Springs & Paw Paw WVa! (IMG:style_emoticons/default/biggrin.gif) |
|
|
|
| tod914 |
May 21 2010, 07:03 PM
Post
#15
|
|
Advanced Member Group: Members Posts: 3,755 Joined: 19-January 03 From: Lincoln Park, NJ Member No.: 170 |
Pat your more meticulous than I thought! Now you really have my respect hehe. Glad the paint worked out for you.
|
|
|
|
| Pat Garvey |
May 22 2010, 04:08 PM
Post
#16
|
|
Do I or don't I...........? Group: Members Posts: 5,900 Joined: 24-March 06 From: SE PA, near Philly Member No.: 5,765 Region Association: North East States |
Well, I started sanding the tank today. Initially, I was trying 400 grit and it did well at smoothing some areas. Other areas had been heavily sprayed by he PO, resulting in heavy orange-peel, and 400 wouldn't do the job (just kept loading up with paint). So I switched to my 3 head rotary & 150 grit. Worked well at removing the heavy stuff, but quickly cut through everything, to bare metal in some areas, before I abandoned it for the day.
I have two questions for any experts out there: 1. Is it really necessary for me to take the entire tank to bare metal? I'll do it, but just wonder....there is a very good basic finish under the black topcoat. 2. I'll be straying from my usual paint choices. Will be using L43 Gray-Black paint, provided by Tod914, so I'll need a good automotive primer. Suggestions? This is what I'm starting with...... Attached image(s) 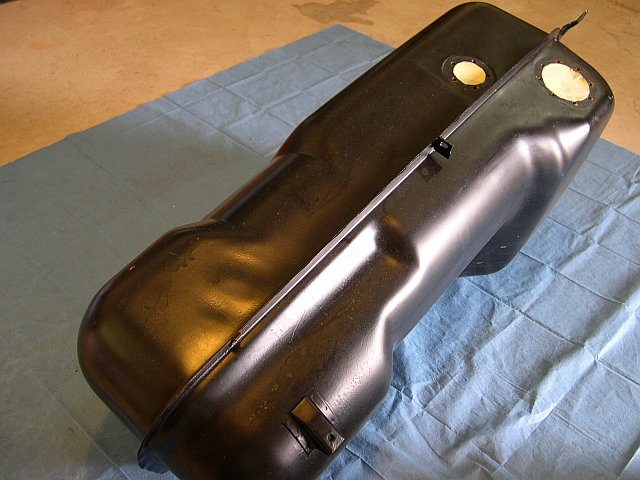 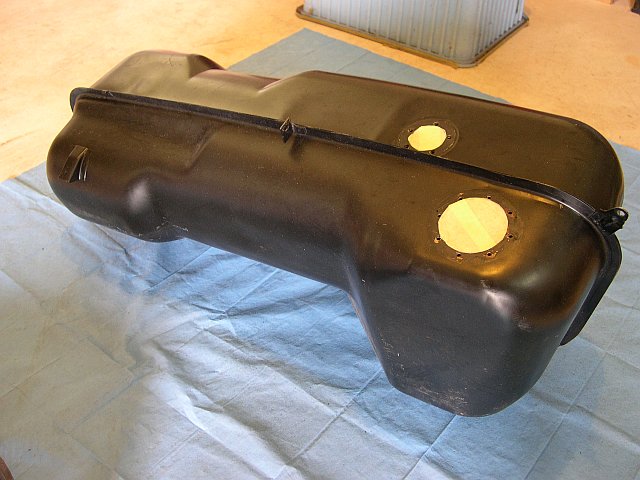
|
|
|
|
| Tom_T |
May 23 2010, 08:19 PM
Post
#17
|
|
TMI.... Group: Members Posts: 8,321 Joined: 19-March 09 From: Orange, CA Member No.: 10,181 Region Association: Southern California |
Pat, the problem you need to assess is whether the underlying paint to steel is well bonded or not, so that you won't have flaking later on. This is especially critical on the inside, since the flakes could clog up the sock, fuels lines, etc.
If it is a good base coat, then just sand, prep & repaint where needed & do the full top coat to the proper Tod914 color! (IMG:style_emoticons/default/biggrin.gif) |
|
|
|
| MrKona |
May 23 2010, 11:18 PM
Post
#18
|
|
Senior Member Group: Members Posts: 597 Joined: 25-July 05 From: Santa Rosa, CA Member No.: 4,469 Region Association: None |
QUOTE(Pat Garvey @ May 22 2010, 02:08 PM) 2. I'll be straying from my usual paint choices. Will be using L43 Gray-Black paint, provided by Tod914, so I'll need a good automotive primer. Suggestions? This is what I'm starting with...... Pat - I second the L43. I recently repainted an original four-spoke steering wheel with the L43 I purchased from Wolfsurg West. I'm also going to be refinishing a fuel tank soon. Last night I compared the relatively untouched underside of the expansion tank to my newly re-painted steering wheel, and the L43 was pretty much dead-on. |
|
|
|
| Pat Garvey |
May 27 2010, 06:37 PM
Post
#19
|
|
Do I or don't I...........? Group: Members Posts: 5,900 Joined: 24-March 06 From: SE PA, near Philly Member No.: 5,765 Region Association: North East States |
QUOTE(MrKona @ May 23 2010, 11:18 PM) QUOTE(Pat Garvey @ May 22 2010, 02:08 PM) 2. I'll be straying from my usual paint choices. Will be using L43 Gray-Black paint, provided by Tod914, so I'll need a good automotive primer. Suggestions? This is what I'm starting with...... Pat - I second the L43. I recently repainted an original four-spoke steering wheel with the L43 I purchased from Wolfsurg West. I'm also going to be refinishing a fuel tank soon. Last night I compared the relatively untouched underside of the expansion tank to my newly re-painted steering wheel, and the L43 was pretty much dead-on. Guys - I just want to clarify something here! My original tank, evaporator and fuel collar still sit under the front boot. They are ORIGINAL to this 914. Just wanted to get that straight. Now, the original fuel collar and expansion tank (complete with decal) are satin black. The tank is original and gray-black. This is what I'm trying to reproduce - the tank! The other parts will be available for sale soon, and they are sweet! 914 gas tanks came in two verifiable shades (a third is unverified) - satin black, and gray/satin black. My 72 was a transition car. It came with gray/satin black tank. Pics available. If I continue to take my time, and dodge the high humidtity, my replacement tank should equal my original (sans interior rust). Watch for updates. |
|
|
|
| scotty b |
Jun 2 2010, 07:28 PM
Post
#20
|
|
rust free you say ? Group: Members Posts: 16,375 Joined: 7-January 05 From: richmond, Va. Member No.: 3,419 Region Association: None |
No need to go to bare metal unless there is rust showing. As for how far to go ? Just take it to the original paint, you'll know if it is or not as soon as a spot breaks through. Jusat get a decent coat of sealer/primer before topcoating. This will prevent any reactions between the new and old, and will also help to fill the sanding scratches. (IMG:style_emoticons/default/smile.gif)
|
|
|
|
|
1 User(s) are reading this topic (1 Guests and 0 Anonymous Users)
0 Members:

|
Lo-Fi Version | Time is now: 9th June 2026 - 12:04 AM |
Invision Power Board
v9.1.4 © 2026 IPS, Inc.