|
|
|
Porsche, and the Porsche crest are registered trademarks of Dr. Ing. h.c. F. Porsche AG.
This site is not affiliated with Porsche in any way. Its only purpose is to provide an online forum for car enthusiasts. All other trademarks are property of their respective owners. |
|
|

  |

| Mark Henry |
 Jun 20 2014, 11:55 AM Jun 20 2014, 11:55 AM
Post
#141
|
|
that's what I do!  Group: Members Posts: 20,065 Joined: 27-December 02 From: Port Hope, Ontario Member No.: 26 Region Association: Canada |
QUOTE(PanelBilly @ Jun 17 2014, 06:46 PM)  I sent my oil pump off to Henry Schmit for a rebuild and flow improvement. Came back 6 days later! That's service! I was wondering what he does for "flow inprovement"? I surfaced mine for tighter tolerances, radiused a few sharp edges and DFL (dry film lube) the interior of the pump. I can't see it needing much more improvement... the freaking pump is huge. |
   |

 
|
| PanelBilly |
Jun 21 2014, 12:11 AM
Post
#142
|
|
914 Guru Group: Members Posts: 5,805 Joined: 23-July 06 From: Kent, Wa Member No.: 6,488 Region Association: Pacific Northwest |
QUOTE(Luke M @ Jun 20 2014, 10:36 AM) QUOTE(PanelBilly @ Jun 17 2014, 03:46 PM) I sent my oil pump off to Henry Schmit for a rebuild and flow improvement. Came back 6 days later! That's service! You mind sharing what this cost you. I have 2 pumps that I need to have looked over for a future project. Thanks, $180 plus shipping both ways |
|
|
|
| PanelBilly |
Jun 29 2014, 06:16 PM
Post
#143
|
|
914 Guru Group: Members Posts: 5,805 Joined: 23-July 06 From: Kent, Wa Member No.: 6,488 Region Association: Pacific Northwest |
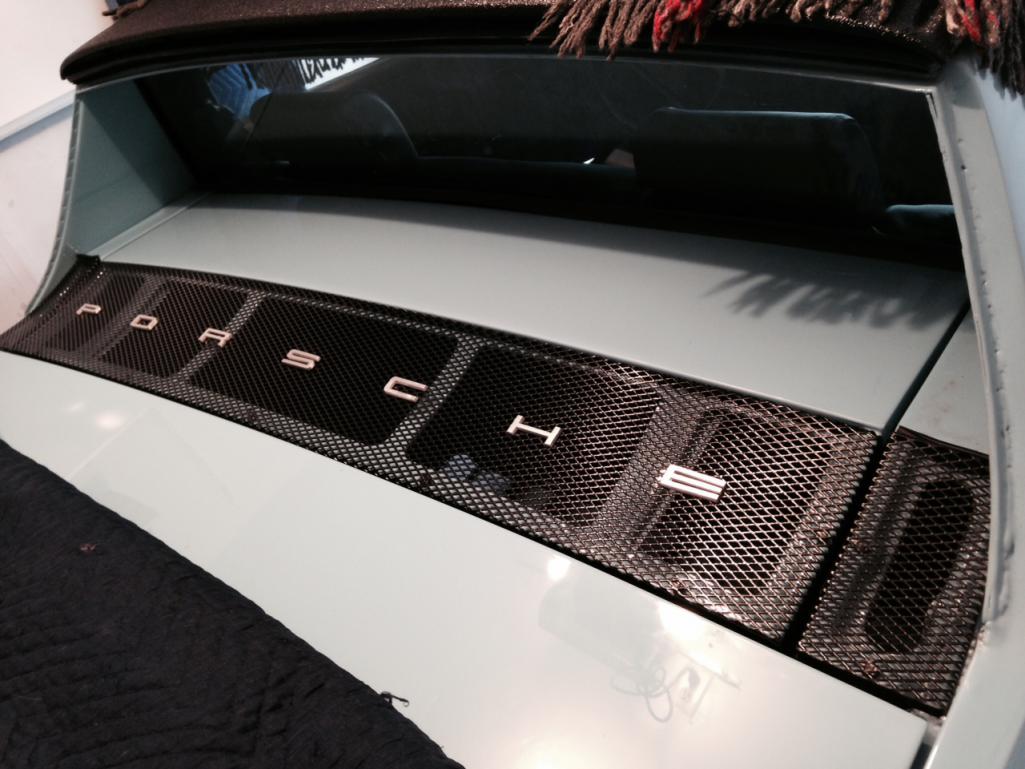
I slotted the brackets that attach the engine lid to the body and used the new quick disconnect hardware to install it. I don't remember if there is a rubber trim between the grill and the lid. I'll need to check 914 Rubber's site. Never painted the ribs under the grill black. Not sure if I'm going to or just leave it alone. Blue looks nice through the grill anyways.
 |
|
|
|
| PanelBilly |
Aug 10 2014, 11:11 AM
Post
#144
|
|
914 Guru Group: Members Posts: 5,805 Joined: 23-July 06 From: Kent, Wa Member No.: 6,488 Region Association: Pacific Northwest |
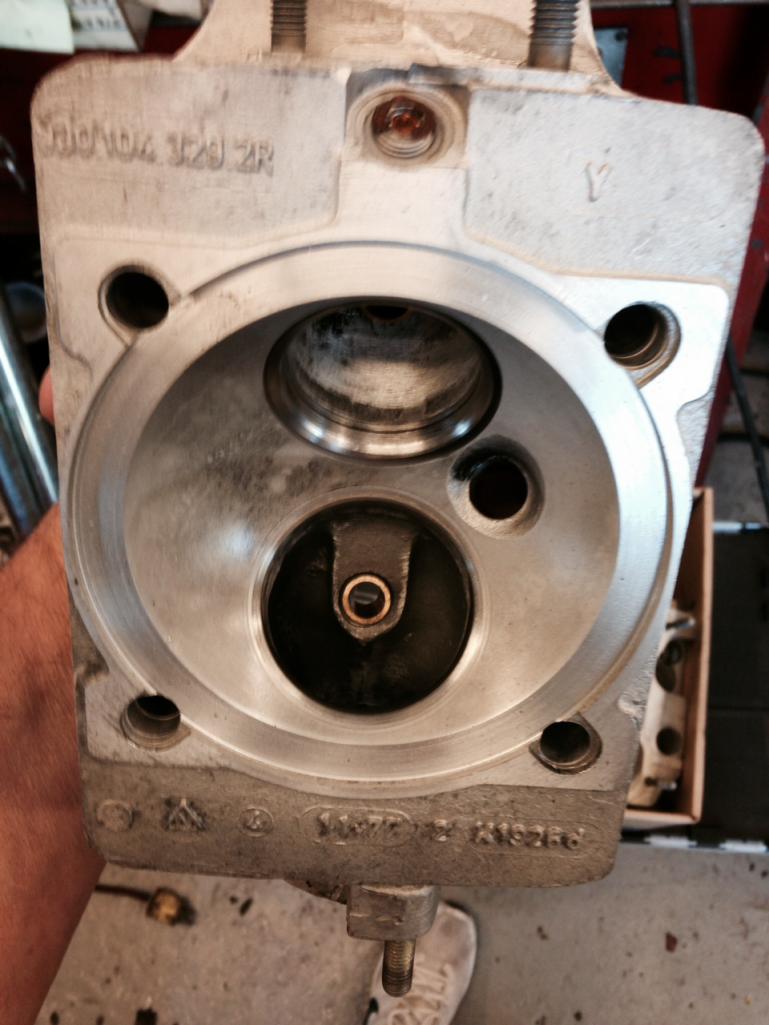
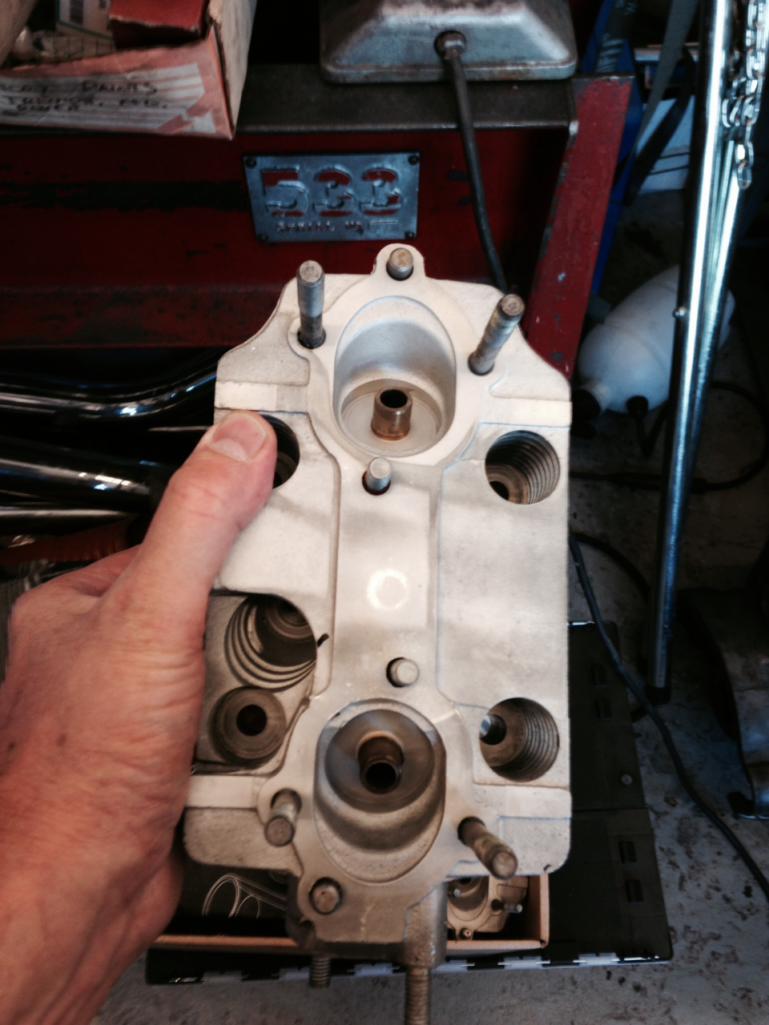
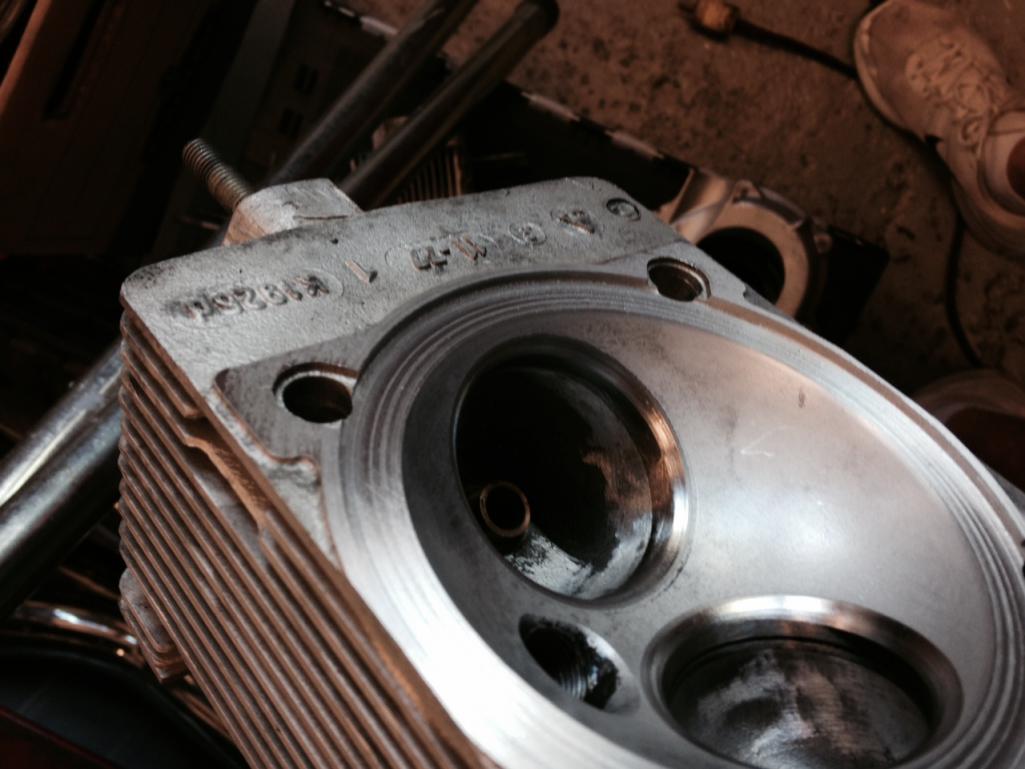
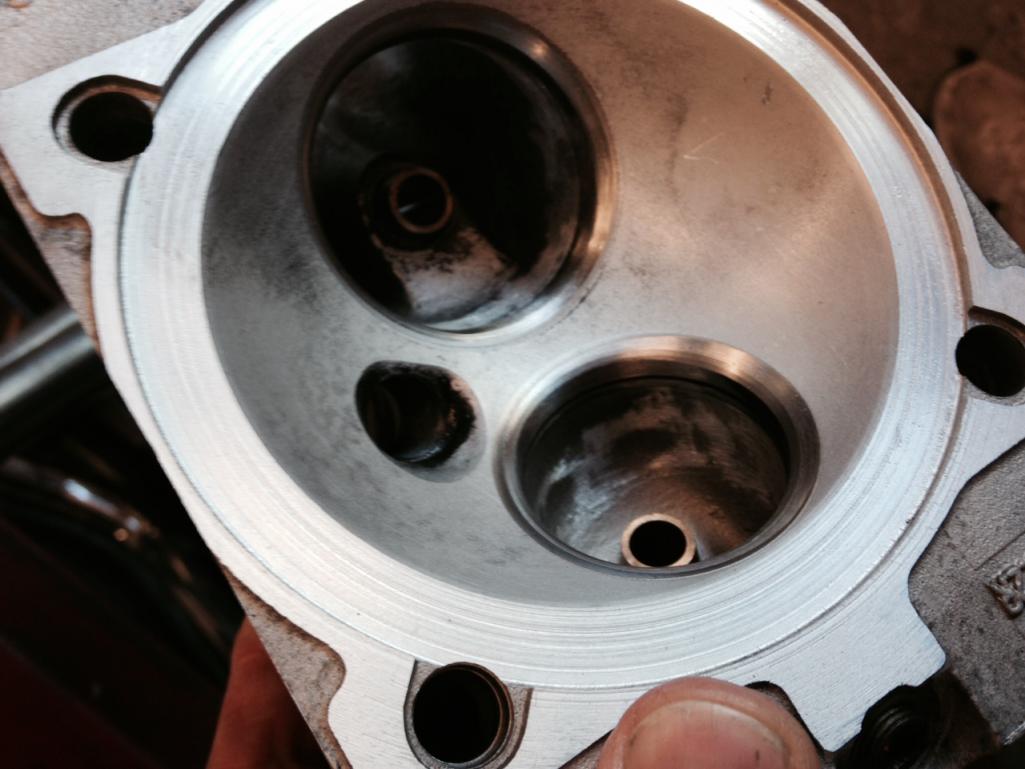
Finely some good news on the engine. The heads have been machined and the new valve guides are installed and reamed. The builder is off in the San Juans for a week, but his assistant reports that assembly is close. I see where he ground some material from the inside of the head where the valves seat. I have know idea what he's doing. Something about flow is all I heard him say. Just trusting that he knows more than me on this stuff.
    |
|
|
|
| effutuo101 |
Aug 11 2014, 08:49 AM
Post
#145
|
|
Advanced Member Group: Members Posts: 2,734 Joined: 10-April 05 From: Lemon Grove Member No.: 3,914 Region Association: Southern California |
nice! looking good.
|
|
|
|
| PanelBilly |
Sep 6 2014, 06:00 PM
Post
#146
|
|
914 Guru Group: Members Posts: 5,805 Joined: 23-July 06 From: Kent, Wa Member No.: 6,488 Region Association: Pacific Northwest |
I was at the engine shop yesterday and found out that they were looking for the green vitron o rings that I had requested they use for sealing up the case. They had a gasket kit, but it has the blue rings (which I understand leak) and I want the engine to be as leak free as possible. Tried to order them from Pelican, but can't find them in the catalog. Left a "help" message for their parts department. Damn, I knew this would happen. Thing is ready to put together and were waiting for a part!
|
|
|
|
| PanelBilly |
Sep 13 2014, 01:56 PM
Post
#147
|
|
914 Guru Group: Members Posts: 5,805 Joined: 23-July 06 From: Kent, Wa Member No.: 6,488 Region Association: Pacific Northwest |
Got the o rings from Pelican and dropped them off at the builder yesterday. He said the assembly would begin next week.
|
|
|
|
| PanelBilly |
Sep 13 2014, 07:48 PM
Post
#148
|
|
914 Guru Group: Members Posts: 5,805 Joined: 23-July 06 From: Kent, Wa Member No.: 6,488 Region Association: Pacific Northwest |
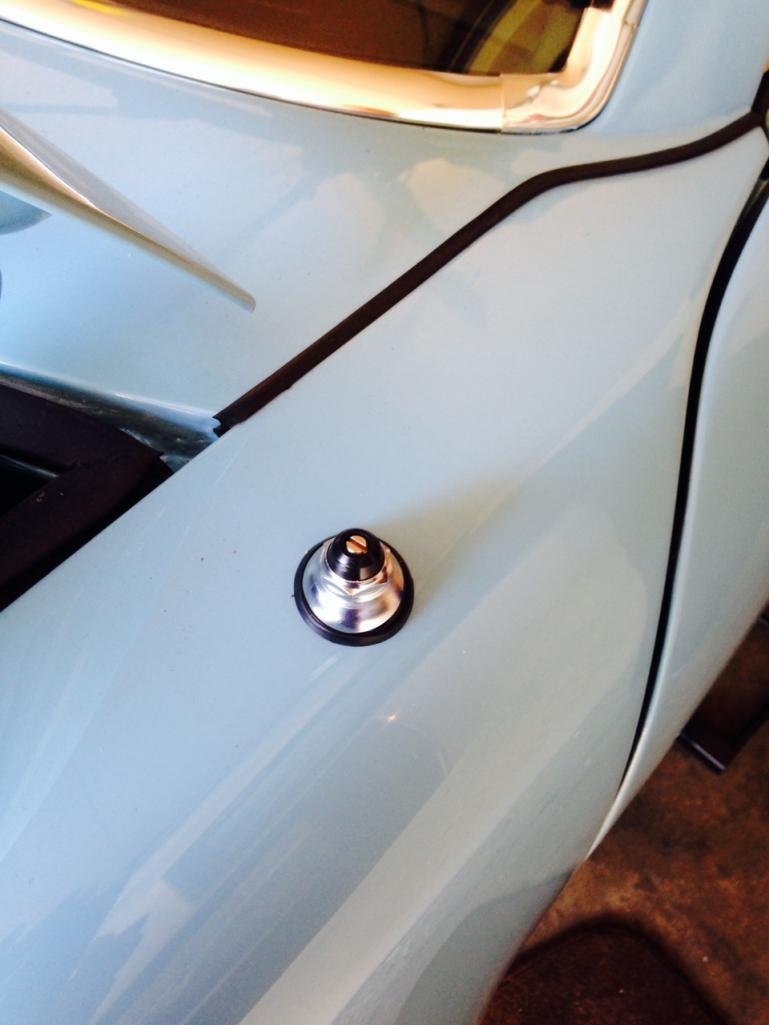
Don't know if I'll ever install a radio, but since I left a hole in the fender, I put in an antenna. One of the best deals I got for this car. Only $15 from Pelican
 |
|
|
|
| PanelBilly |
Nov 1 2014, 05:22 PM
Post
#149
|
|
914 Guru Group: Members Posts: 5,805 Joined: 23-July 06 From: Kent, Wa Member No.: 6,488 Region Association: Pacific Northwest |
Put the refinished trim on the sail panels today
Attached image(s) 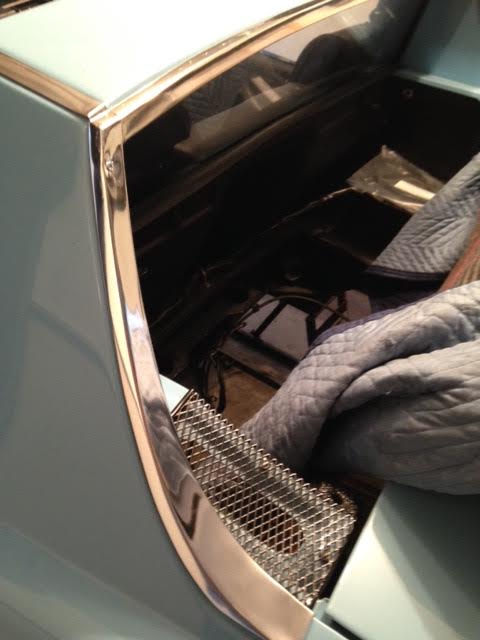
|
|
|
|
| FourBlades |
Nov 1 2014, 05:26 PM
Post
#150
|
|
From Wreck to Rockin Group: Members Posts: 2,054 Joined: 3-December 07 From: Brevard, FL Member No.: 8,414 Region Association: South East States |
|
|
|
|
| Mblizzard |
Nov 1 2014, 08:41 PM
Post
#151
|
|
Advanced Member Group: Members Posts: 3,033 Joined: 28-January 13 From: Knoxville Tn Member No.: 15,438 Region Association: South East States |
QUOTE(PanelBilly @ May 23 2014, 07:04 PM) I picked up two of the metal targa hinge covers and replaced the plastic ones that I had on the car. The plastic was OK, but they were both a little warped. I painted the covers with some undercoat spray and they came out looking very much like the leather on the pad. I'm sure glad I had used stainless steel square head screws on the pad. Made removal and installation much easier. Where did you find the metal covers? |
|
|
|
| PanelBilly |
Nov 2 2014, 11:32 AM
Post
#152
|
|
914 Guru Group: Members Posts: 5,805 Joined: 23-July 06 From: Kent, Wa Member No.: 6,488 Region Association: Pacific Northwest |
Mr Stone
|
|
|
|
| JRust |
Nov 2 2014, 11:40 AM
Post
#153
|
|
914 Guru Group: Members Posts: 6,307 Joined: 10-January 03 From: Corvallis Oregon Member No.: 129 Region Association: Pacific Northwest |
Looking great Billy! I vote for painting the ribs black on your engine lid. While the blue looks nice. I think it looks better with the Ribs black. The ribs themselves really aren't that appealing(to me). So I like them being the same black as the grill. Having said that your car is gorgeous & will look great however you do it.
Great news on your motor (IMG:style_emoticons/default/piratenanner.gif) . Good to hear things coming together for you. It's been a long haul but will be totally worth it. I see many awards coming your way (IMG:style_emoticons/default/first.gif) |
|
|
|
| PanelBilly |
Nov 3 2014, 06:07 PM
Post
#154
|
|
914 Guru Group: Members Posts: 5,805 Joined: 23-July 06 From: Kent, Wa Member No.: 6,488 Region Association: Pacific Northwest |
Got a call from the shop today and the engine is nearly done. They just need to do a few more things. Somehow I misplaced the oil sump cover (or its in their shop somewhere), so it looks like I need to get another one.
|
|
|
|
| PanelBilly |
Nov 7 2014, 04:17 PM
Post
#155
|
|
914 Guru Group: Members Posts: 5,805 Joined: 23-July 06 From: Kent, Wa Member No.: 6,488 Region Association: Pacific Northwest |
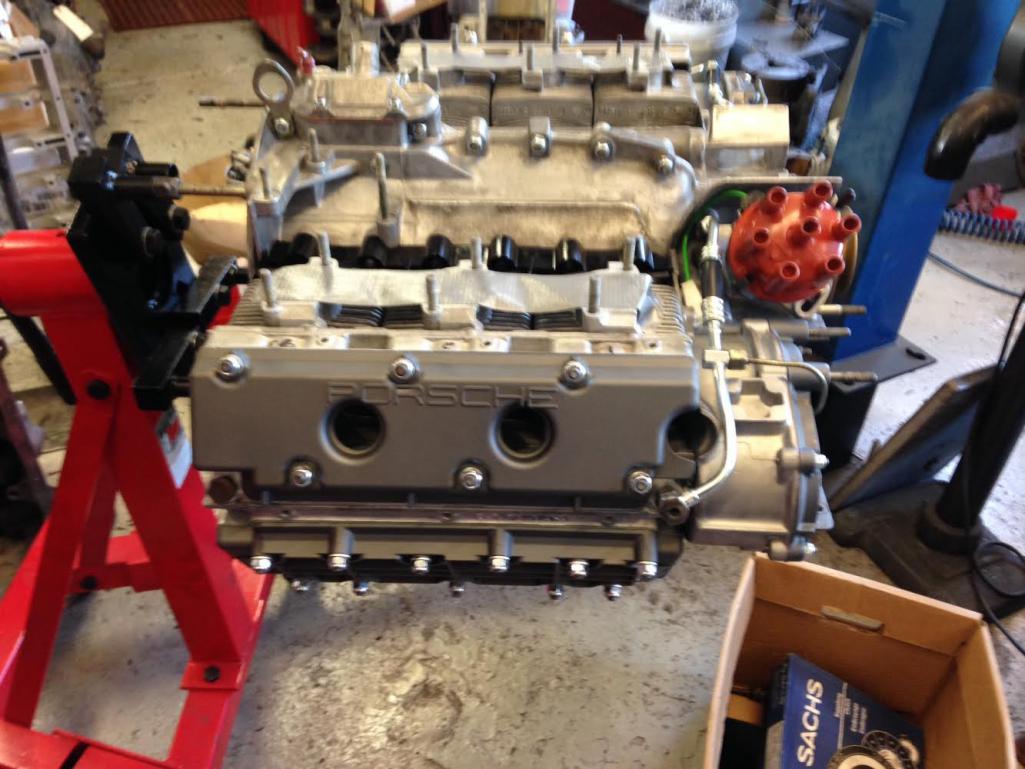
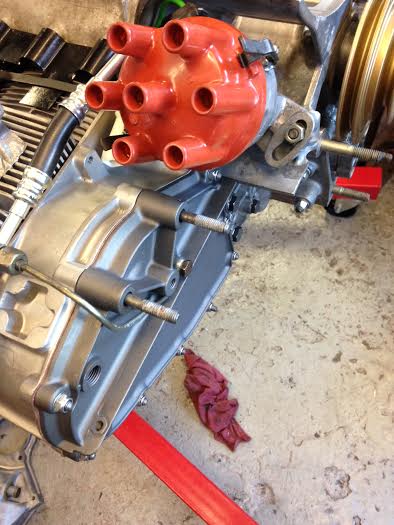
The engine work is nearly complete and I'll be bringing this baby home to get it ready for INSTALLATION. I need to figure out why the 2 bolts hanging out of the
timing chain covers are so long and if they should be replaced with shorter ones. There's also some long bolts for the engine mount that i suspect should be replaced with shorter ones. 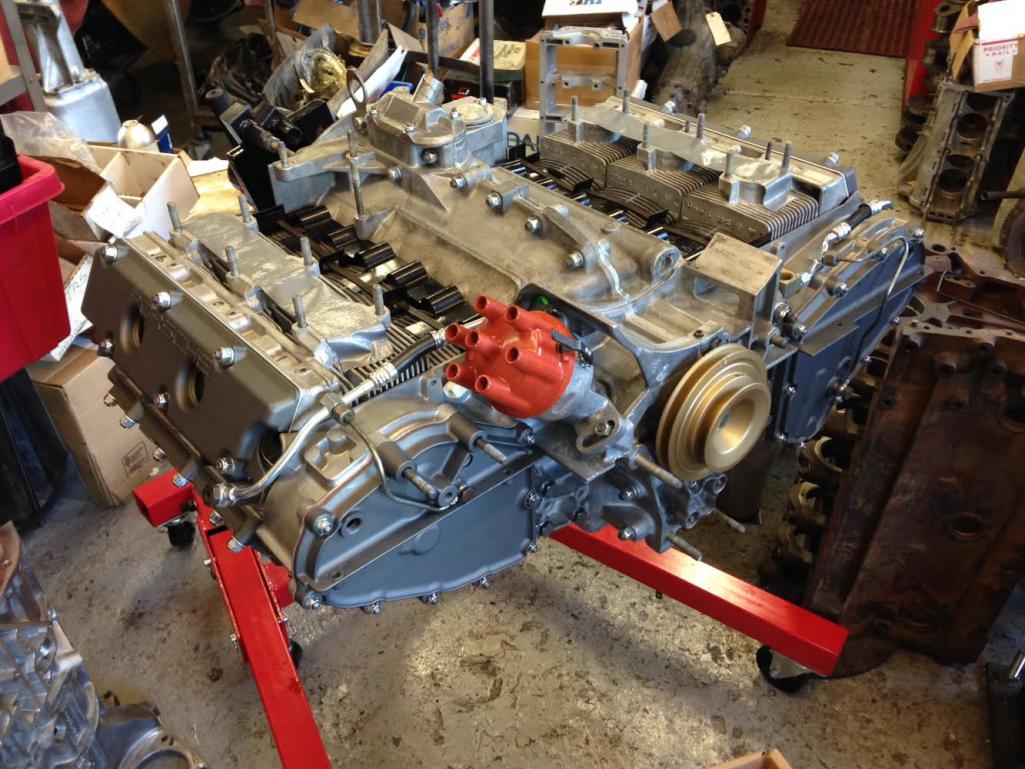 |
|
|
|
| PanelBilly |
Nov 7 2014, 08:02 PM
Post
#156
|
|
914 Guru Group: Members Posts: 5,805 Joined: 23-July 06 From: Kent, Wa Member No.: 6,488 Region Association: Pacific Northwest |
   |
|
|
|
| EdwardBlume |
Nov 8 2014, 07:48 AM
Post
#157
|
|
914 Wizard Group: Members Posts: 12,338 Joined: 2-January 03 From: SLO Member No.: 81 Region Association: Central California |
(IMG:style_emoticons/default/smilie_pokal.gif) (IMG:style_emoticons/default/smilie_pokal.gif) (IMG:style_emoticons/default/smilie_pokal.gif)
Get that thing back on the road! (IMG:style_emoticons/default/driving.gif) |
|
|
|
| PanelBilly |
Nov 11 2014, 10:39 PM
Post
#158
|
|
914 Guru Group: Members Posts: 5,805 Joined: 23-July 06 From: Kent, Wa Member No.: 6,488 Region Association: Pacific Northwest |
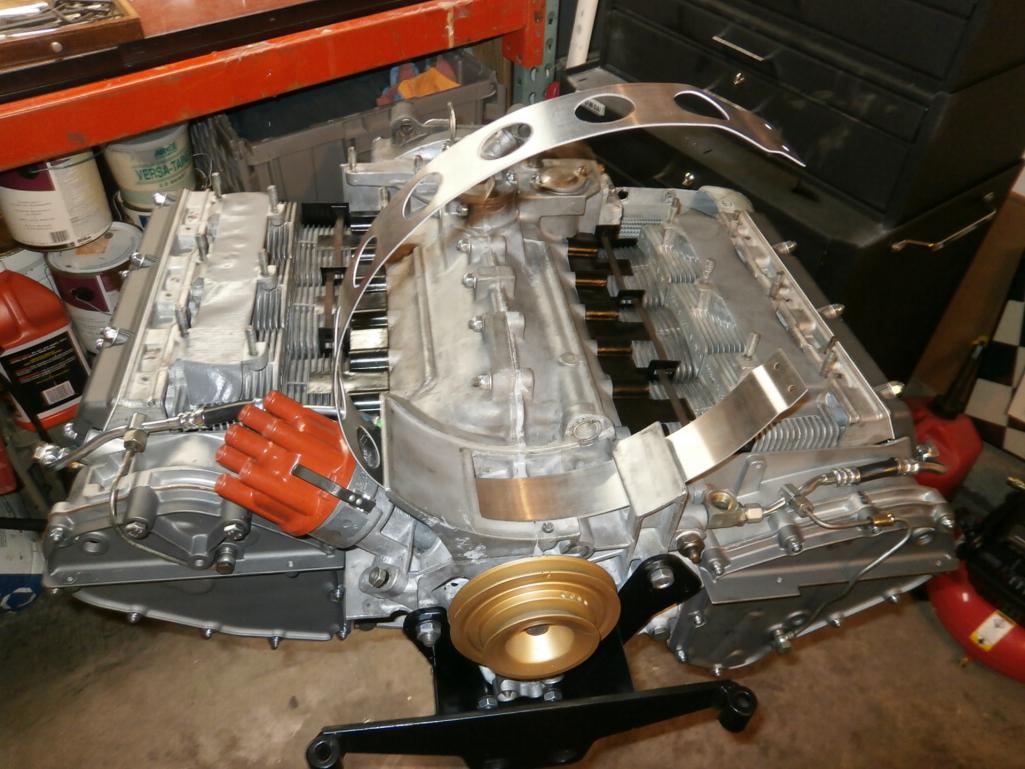
The engine is in my garage now!
|
|
|
|
| PanelBilly |
Nov 15 2014, 01:27 PM
Post
#159
|
|
914 Guru Group: Members Posts: 5,805 Joined: 23-July 06 From: Kent, Wa Member No.: 6,488 Region Association: Pacific Northwest |
So the engine goes together. First the alternator wires need to be pulled through the shroud and the rubber grommet needs to be set.
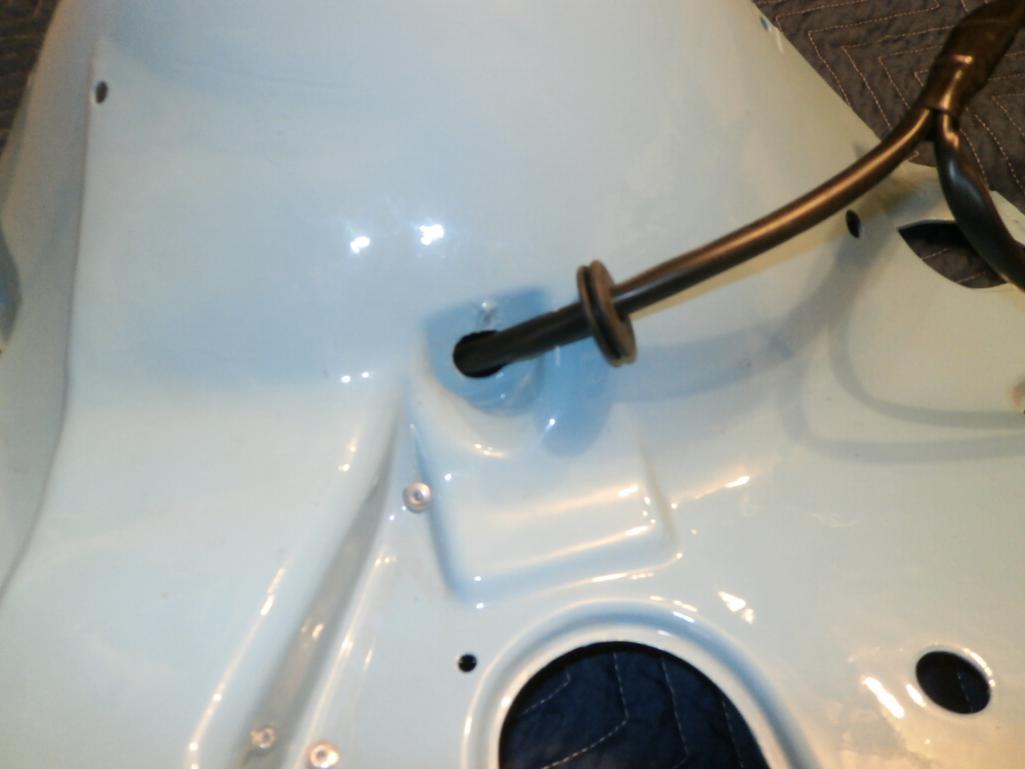 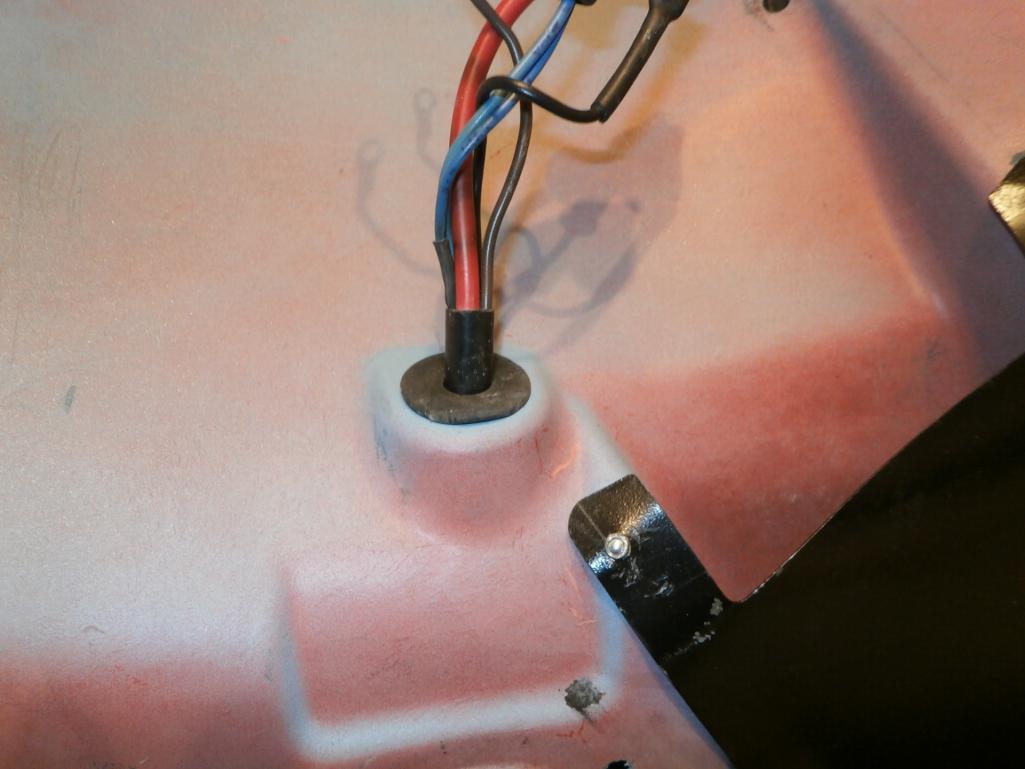 Then the wires slip through the inner cover that directs air evenly over the cylinders. 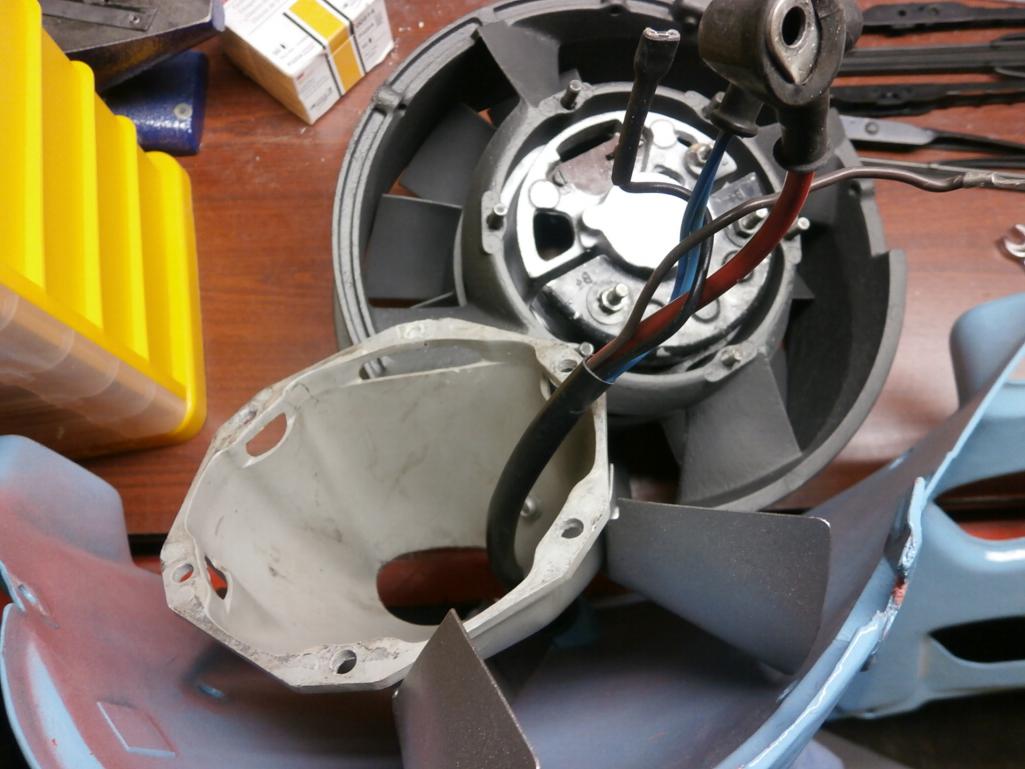 Then bolted to alternator. 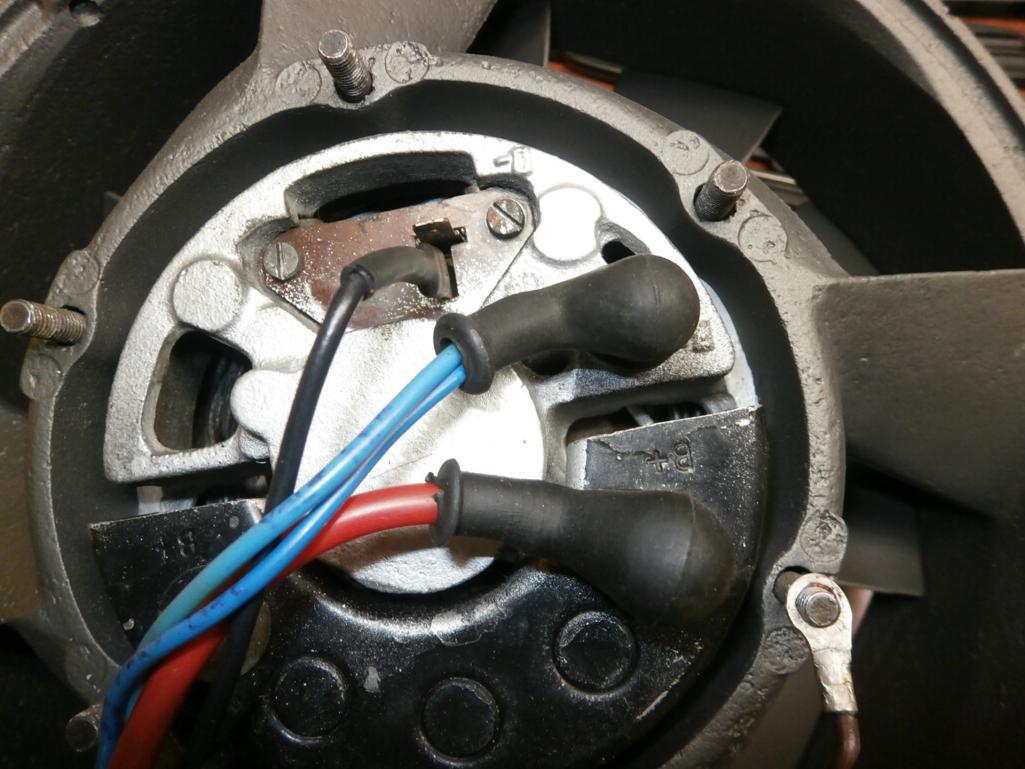 Ground wire to alternator case is a challenge to do. 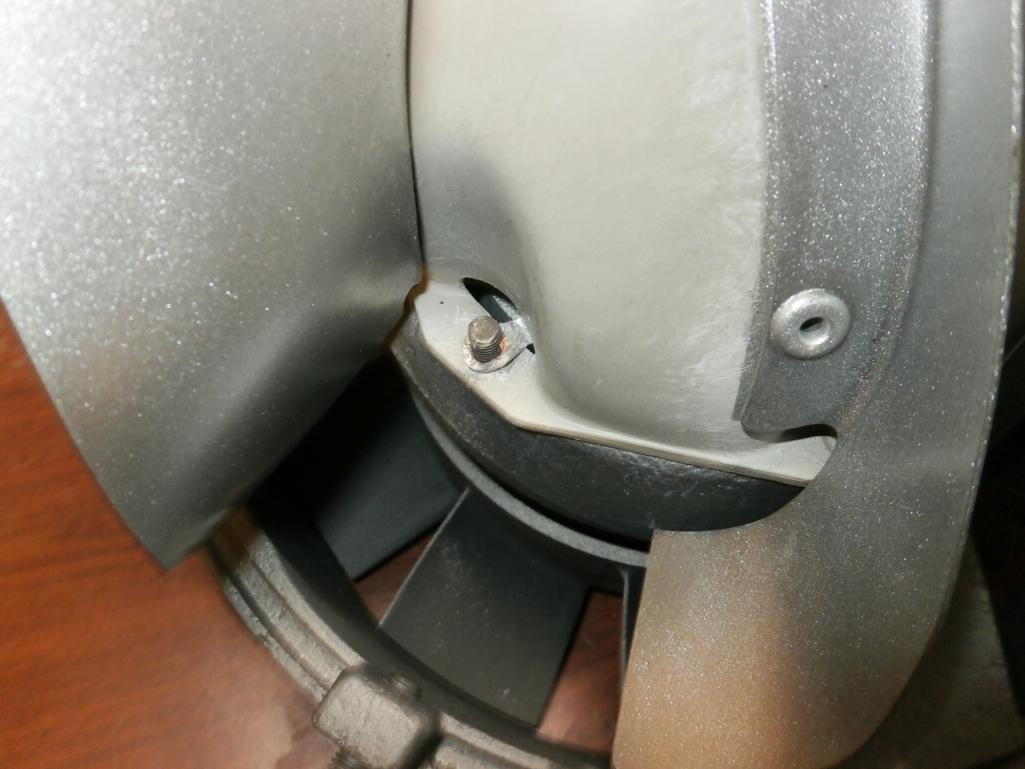 |
|
|
|
| PanelBilly |
Nov 15 2014, 01:33 PM
Post
#160
|
|
914 Guru Group: Members Posts: 5,805 Joined: 23-July 06 From: Kent, Wa Member No.: 6,488 Region Association: Pacific Northwest |
Fan housing strap was more fun.
 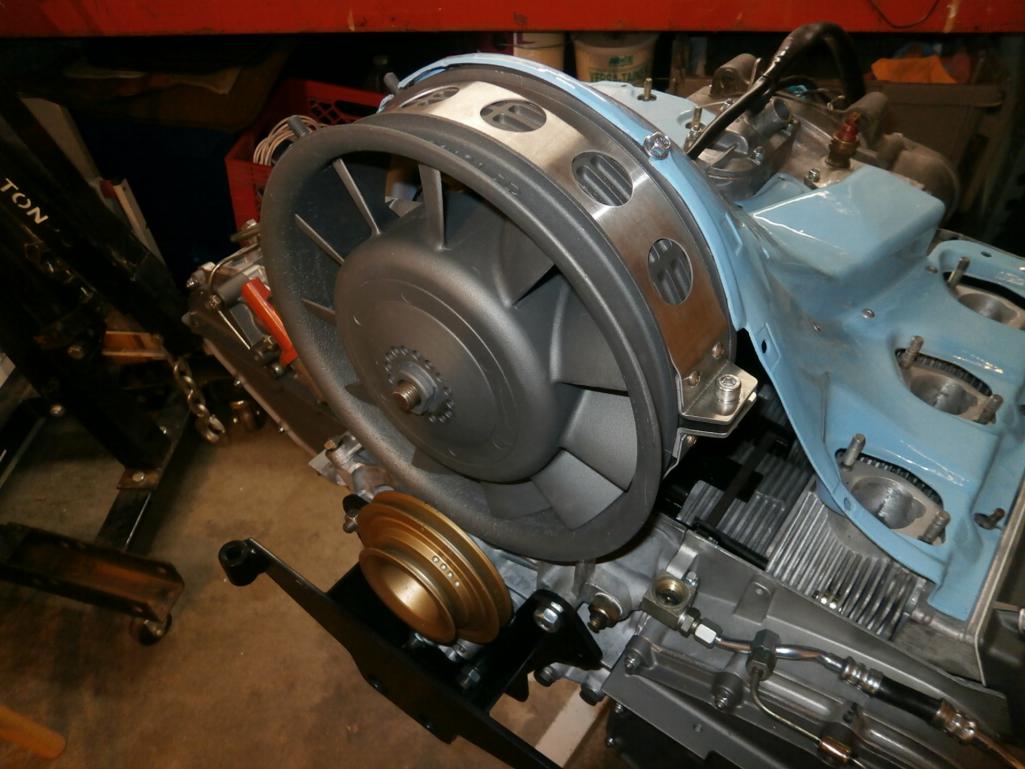 And now I'm trying to decide what hardware to use to secure the shroud. Just used some bolts that were in the scrap pile.  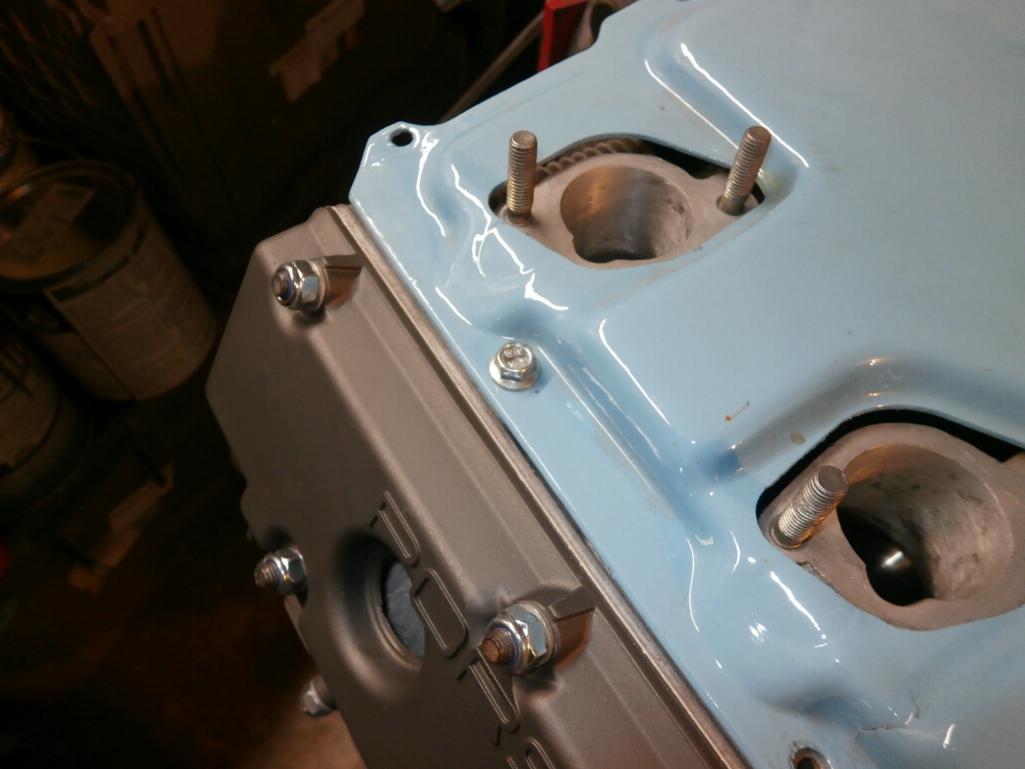 Attached thumbnail(s) 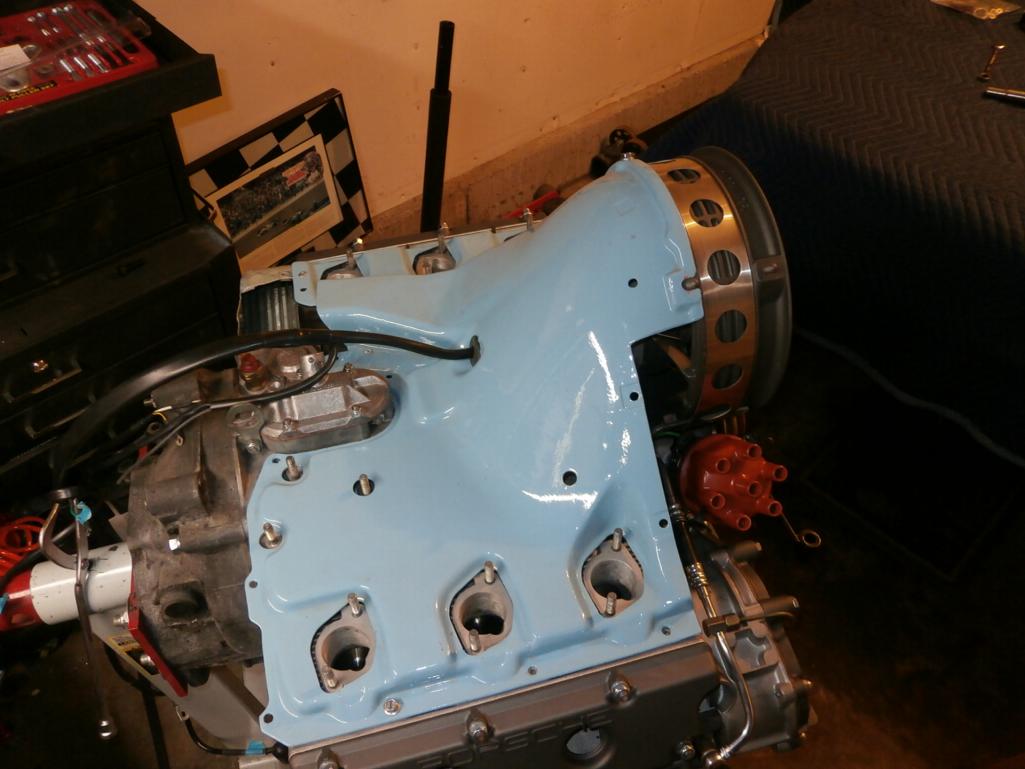
|
|
|
|
|
1 User(s) are reading this topic (1 Guests and 0 Anonymous Users)
0 Members:

|
Lo-Fi Version | Time is now: 11th May 2024 - 11:52 PM |
Invision Power Board
v9.1.4 © 2024 IPS, Inc.