|
|
|
Porsche, and the Porsche crest are registered trademarks of Dr. Ing. h.c. F. Porsche AG.
This site is not affiliated with Porsche in any way. Its only purpose is to provide an online forum for car enthusiasts. All other trademarks are property of their respective owners. |
|
|

  |

| RJMII |
 Nov 15 2010, 05:30 PM Nov 15 2010, 05:30 PM
Post
#61
|
|
Jim McIntosh  Group: Members Posts: 3,125 Joined: 11-September 07 From: Sandy, Utah Member No.: 8,112 Region Association: None |
My health has picked back up, I am stoked! I get to start working on wheels and emblems again this week.
I think I've pretty much got the code issues resolved and need to run another prototype to finalize the notion that they are ready. The bit wasn't fitting between the lip of the wheel and the petals, and was causing high spots. |
   |

 
|
| nsr-jamie |
Nov 16 2010, 04:41 AM
Post
#62
|
|
914 guy in Japan Group: Members Posts: 1,182 Joined: 7-November 07 From: Nagoya, Japan Member No.: 8,305 Region Association: None |
Hi Jim, glad you are better and back to work on those cool parts.....looking forward to seeing them in person and those cool GT logos too.
Do you have any access to stereolithiography equipment or rapid prototyping 3D printers? If so, it might be a lot easier to manufacture small amounts of the wheels and be a lot cheaper too. |
|
|
|
| RJMII |
Nov 16 2010, 08:10 AM
Post
#63
|
|
Jim McIntosh Group: Members Posts: 3,125 Joined: 11-September 07 From: Sandy, Utah Member No.: 8,112 Region Association: None |
Jamie, thank you!
No, I don't. If I went that route, they wouldn't be billet aluminum. (IMG:style_emoticons/default/wink.gif) |
|
|
|
| RJMII |
Dec 6 2010, 08:33 PM
Post
#64
|
|
Jim McIntosh Group: Members Posts: 3,125 Joined: 11-September 07 From: Sandy, Utah Member No.: 8,112 Region Association: None |
Look, a pile of squared circles!
and a lurry picture of prototype number five next to number four. The differences are the holes in the webbing, the petals are separated from the lip and have more definition, and the petals have a larger corner radius along the outer edge that makes them more rounded and smooth. Attached image(s) 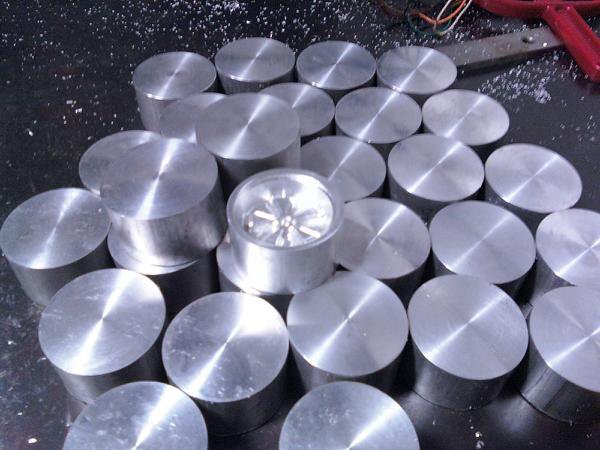 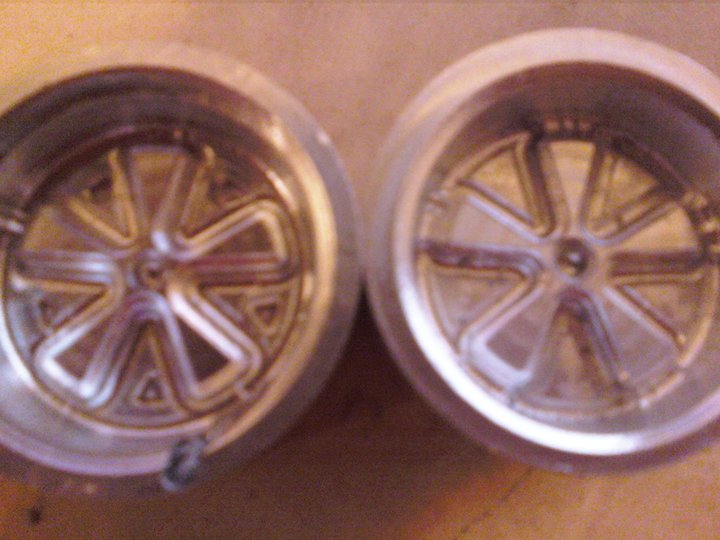
|
|
|
|
| RJMII |
Dec 6 2010, 08:34 PM
Post
#65
|
|
Jim McIntosh Group: Members Posts: 3,125 Joined: 11-September 07 From: Sandy, Utah Member No.: 8,112 Region Association: None |
I ran several different sets of code on number five to varying depths, fixing screw ups along the way.
|
|
|
|
| rick 918-S |
Dec 6 2010, 09:22 PM
Post
#66
|
|
Hey nice rack! -Celette Group: Members Posts: 21,078 Joined: 30-December 02 From: Now in Superior WI Member No.: 43 Region Association: Northstar Region |
That looks bitchin Jim. (IMG:style_emoticons/default/aktion035.gif) Keep at it! (IMG:style_emoticons/default/smilie_pokal.gif)
|
|
|
|
| jetboy |
Dec 6 2010, 10:30 PM
Post
#67
|
|
914 Uber Noob Group: Members Posts: 205 Joined: 16-September 05 From: Riverside, CA Member No.: 4,810 Region Association: Southern California |
wow. thats some nice progress.
|
|
|
|
| BKLA |
Dec 7 2010, 07:38 PM
Post
#68
|
|
Really old member Group: Members Posts: 1,253 Joined: 14-August 05 From: OR Member No.: 4,590 Region Association: Pacific Northwest |
All that hard work is paying off!!
Great job!!!!! |
|
|
|
| RJMII |
Dec 17 2010, 11:33 AM
Post
#69
|
|
Jim McIntosh Group: Members Posts: 3,125 Joined: 11-September 07 From: Sandy, Utah Member No.: 8,112 Region Association: None |
New addition to my wheel making!
The 3 Jaw chuck bolts directly to my mill bed, or the rotary table. It holds the wheels in place MUCH more securely than the little vise I was using. The rotary table also has a new addition; a stepper motor! Now it needs wired and the backlash taken out. Attached image(s) 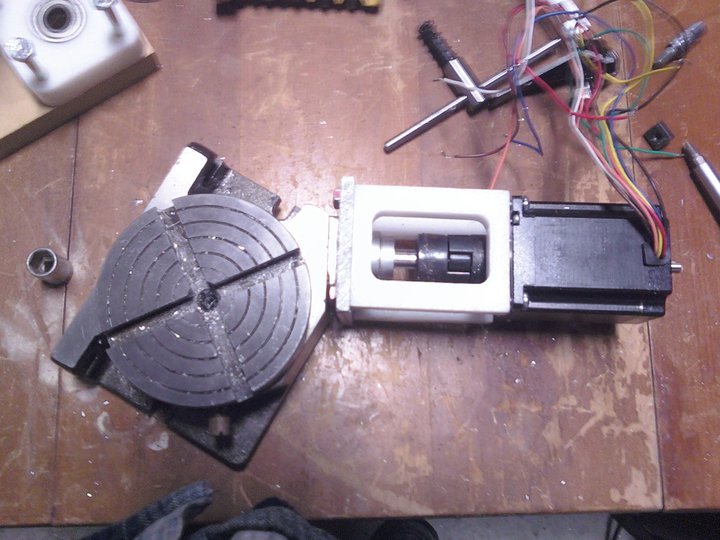 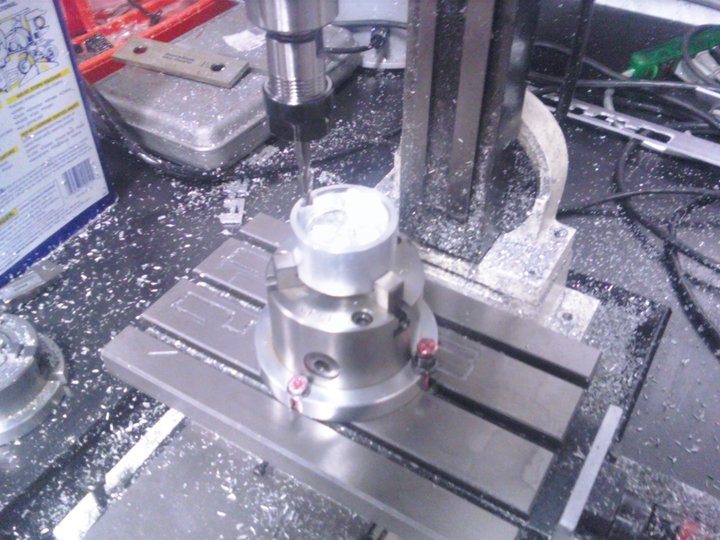
|
|
|
|
| rick 918-S |
Dec 17 2010, 12:58 PM
Post
#70
|
|
Hey nice rack! -Celette Group: Members Posts: 21,078 Joined: 30-December 02 From: Now in Superior WI Member No.: 43 Region Association: Northstar Region |
New tools are the best!
|
|
|
|
| RJMII |
Dec 19 2010, 09:13 PM
Post
#71
|
|
Jim McIntosh Group: Members Posts: 3,125 Joined: 11-September 07 From: Sandy, Utah Member No.: 8,112 Region Association: None |
here is prototype number 7. (IMG:style_emoticons/default/smile.gif) I'm getting the back sides of the wheels figured out, and have the fronts pretty much wrapped up. The only thing missing is the hole for the bolt to hold it onto the car.
Attached image(s) 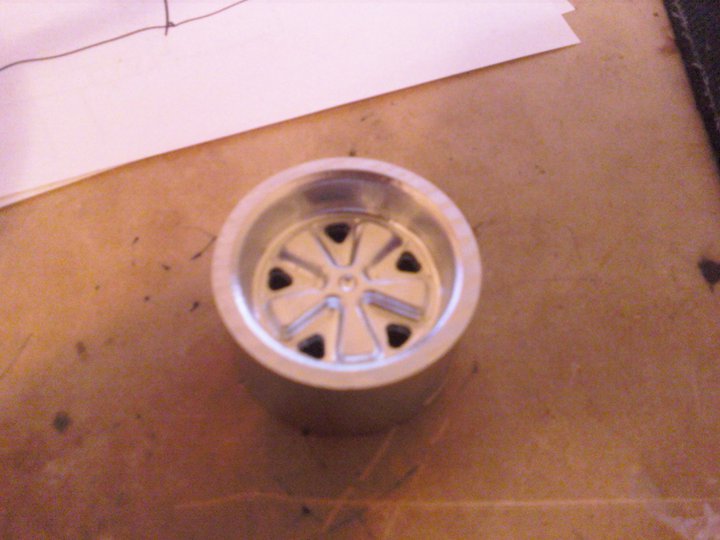 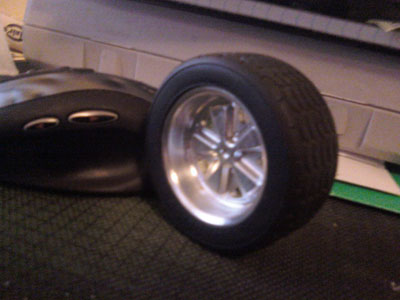
|
|
|
|
| BKLA |
Dec 20 2010, 08:48 AM
Post
#72
|
|
Really old member Group: Members Posts: 1,253 Joined: 14-August 05 From: OR Member No.: 4,590 Region Association: Pacific Northwest |
Wow! Looking great!!!
|
|
|
|
| rick 918-S |
Dec 20 2010, 11:32 AM
Post
#73
|
|
Hey nice rack! -Celette Group: Members Posts: 21,078 Joined: 30-December 02 From: Now in Superior WI Member No.: 43 Region Association: Northstar Region |
That's set to kill! (IMG:style_emoticons/default/drooley.gif)
|
|
|
|
| RJMII |
Dec 23 2010, 07:52 PM
Post
#74
|
|
Jim McIntosh Group: Members Posts: 3,125 Joined: 11-September 07 From: Sandy, Utah Member No.: 8,112 Region Association: None |
4th axis and tailstock bolted to the mill. I should be able to work on the code for the area the tire mounts in on the outside of the wheel now.
Attached image(s) 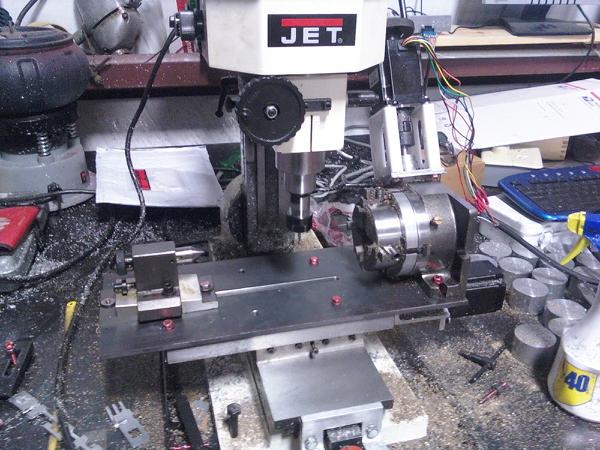
|
|
|
|
| RJMII |
Apr 21 2011, 04:54 PM
Post
#75
|
|
Jim McIntosh Group: Members Posts: 3,125 Joined: 11-September 07 From: Sandy, Utah Member No.: 8,112 Region Association: None |
We moved last month, and my brother was kind enough to spend the day on one of his weekends off to help me relocate all of my machining equpment from my dad's shop to the garage that is basically on the other side of the wall from my living room. My CNC mill is less that 30 foot from my couch that I lounge on while healing and resting. (IMG:style_emoticons/default/smile.gif) Things are getting easier and looking up for me.
Attached thumbnail(s) 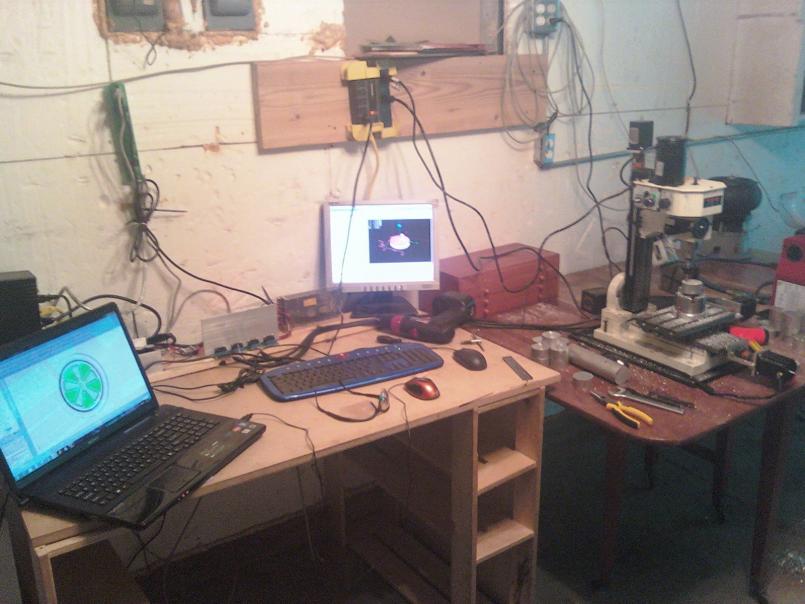
|
|
|
|
| RJMII |
Apr 21 2011, 04:56 PM
Post
#76
|
|
Jim McIntosh Group: Members Posts: 3,125 Joined: 11-September 07 From: Sandy, Utah Member No.: 8,112 Region Association: None |
a close up of the tool path on my EMC/linux box.
the red lines are the ones that are done for this particular wheel. Attached thumbnail(s) 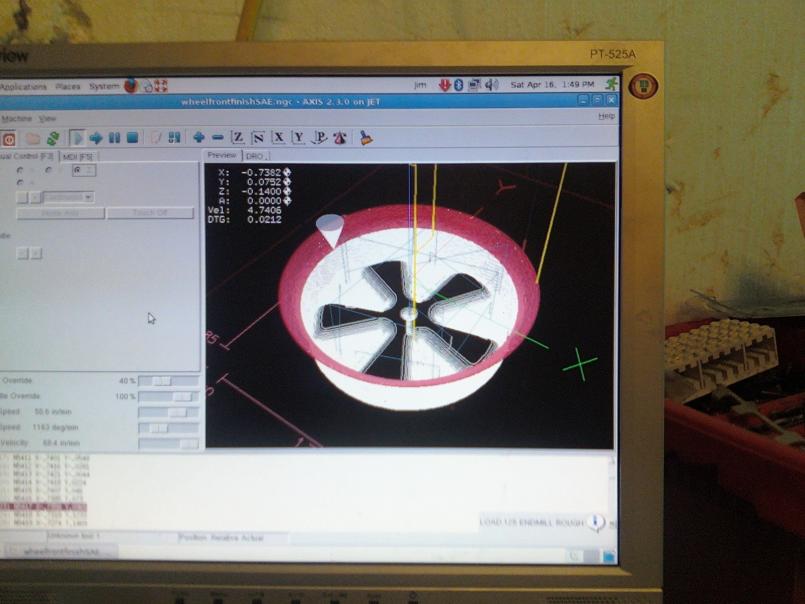
|
|
|
|
| RJMII |
Apr 21 2011, 04:57 PM
Post
#77
|
|
Jim McIntosh Group: Members Posts: 3,125 Joined: 11-September 07 From: Sandy, Utah Member No.: 8,112 Region Association: None |
This is the beginning of the pile of blanks that are ready for the above pictured tool path.
Attached thumbnail(s) 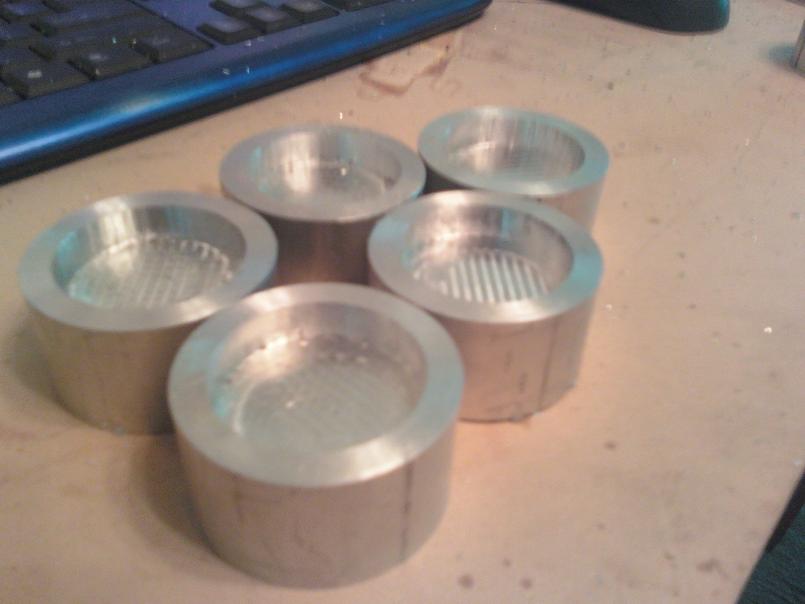
|
|
|
|
| RJMII |
Apr 21 2011, 04:58 PM
Post
#78
|
|
Jim McIntosh Group: Members Posts: 3,125 Joined: 11-September 07 From: Sandy, Utah Member No.: 8,112 Region Association: None |
This is the wheel that was cut out from the above pictured tool path.
Attached thumbnail(s) 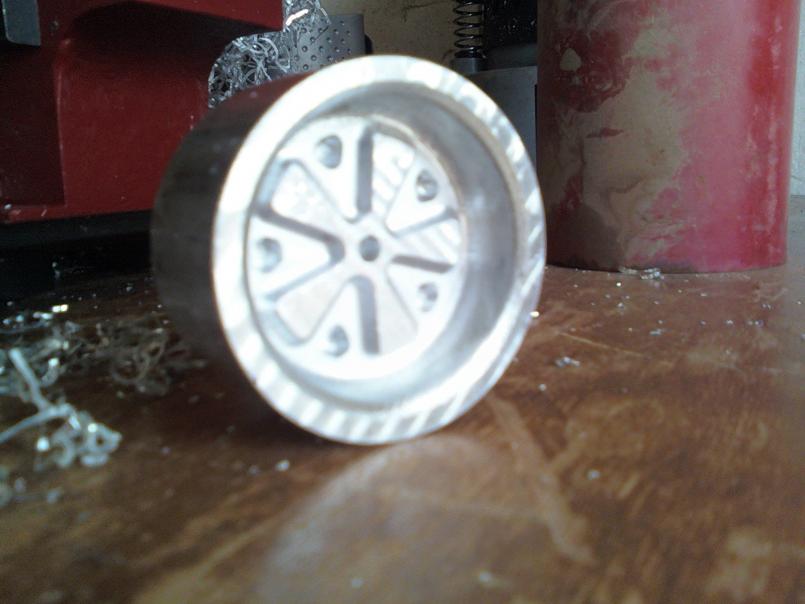
|
|
|
|
| Cairo94507 |
Apr 21 2011, 04:58 PM
Post
#79
|
|
Michael Group: Members Posts: 10,437 Joined: 1-November 08 From: Auburn, CA Member No.: 9,712 Region Association: Northern California |
Wow! That is crazy cool. How cool would it be to have one big enough for a paper weight on your desk?
|
|
|
|
| RJMII |
Apr 21 2011, 04:59 PM
Post
#80
|
|
Jim McIntosh Group: Members Posts: 3,125 Joined: 11-September 07 From: Sandy, Utah Member No.: 8,112 Region Association: None |
and here is another one that had a couple of glitches on the back side, and the 3 jaw chuck was .030" off center for the face. It's now a paperweight somewhere else w/out the tire on it.
Attached thumbnail(s) 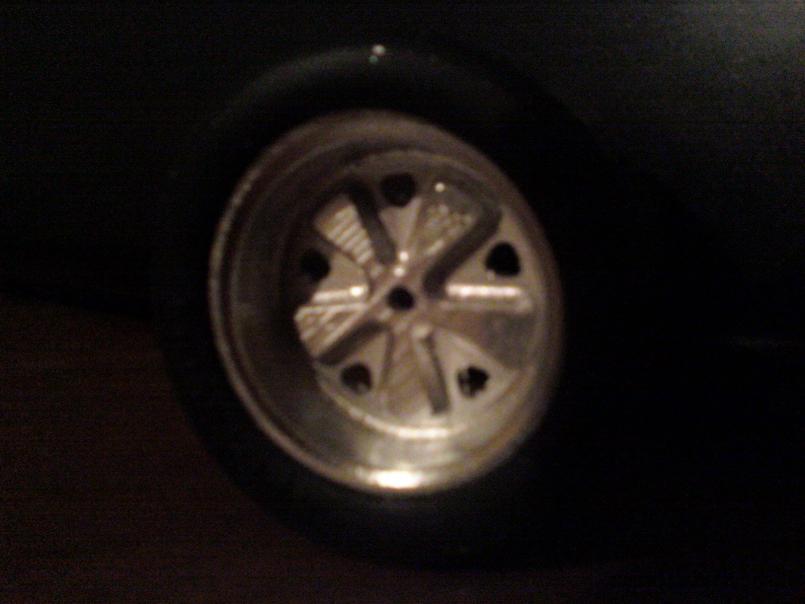
|
|
|
|
|
1 User(s) are reading this topic (1 Guests and 0 Anonymous Users)
0 Members:

|
Lo-Fi Version | Time is now: 18th September 2025 - 10:22 PM |
Invision Power Board
v9.1.4 © 2025 IPS, Inc.