|
|
|
Porsche, and the Porsche crest are registered trademarks of Dr. Ing. h.c. F. Porsche AG.
This site is not affiliated with Porsche in any way. Its only purpose is to provide an online forum for car enthusiasts. All other trademarks are property of their respective owners. |
|
|

  |

| tomeric914 |
 Sep 6 2012, 07:15 PM Sep 6 2012, 07:15 PM
Post
#61
|
|
One Lap of America in a 914!  Group: Members Posts: 1,296 Joined: 25-May 08 From: Syracuse, NY Member No.: 9,101 Region Association: North East States |
Going faster means I need to scrub off more speed too. As I mentioned in another thread, this resulted in warped rotors. The low front air dam does its job well keeping air from under the car, but unfortunately blocks airflow to the front brakes. It was amazing how hot the front fenders got!
So first, get the old rotors off 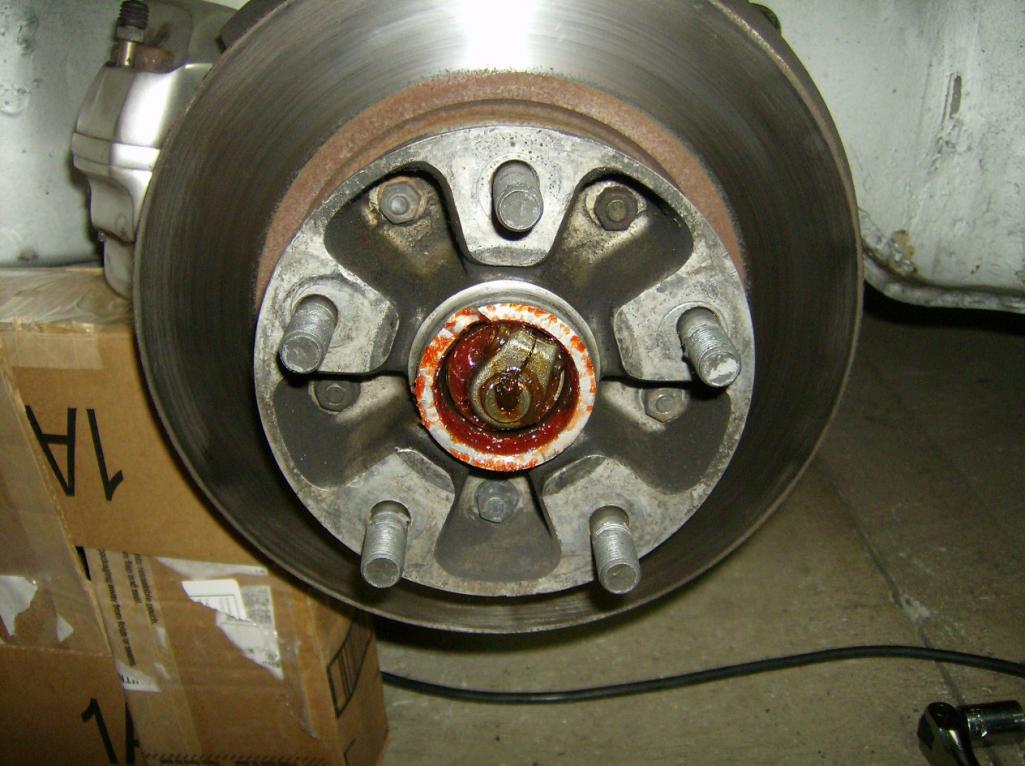 Clean up the spindle and remove the original backing plates 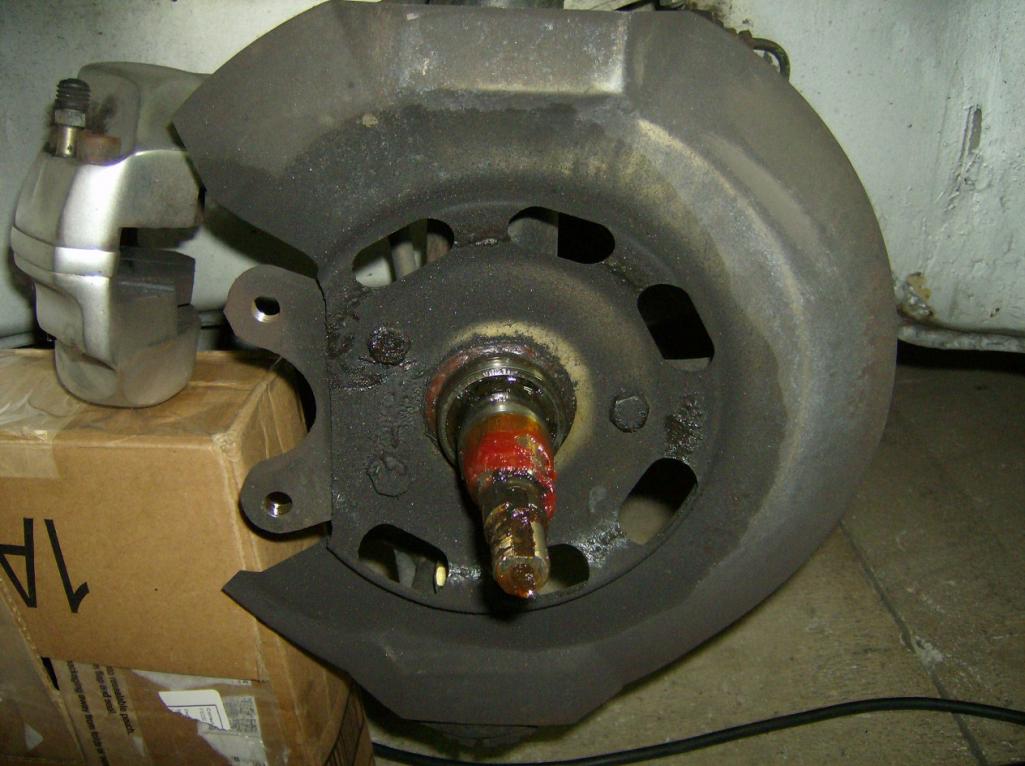 Put the new AJ ducted backing plates on 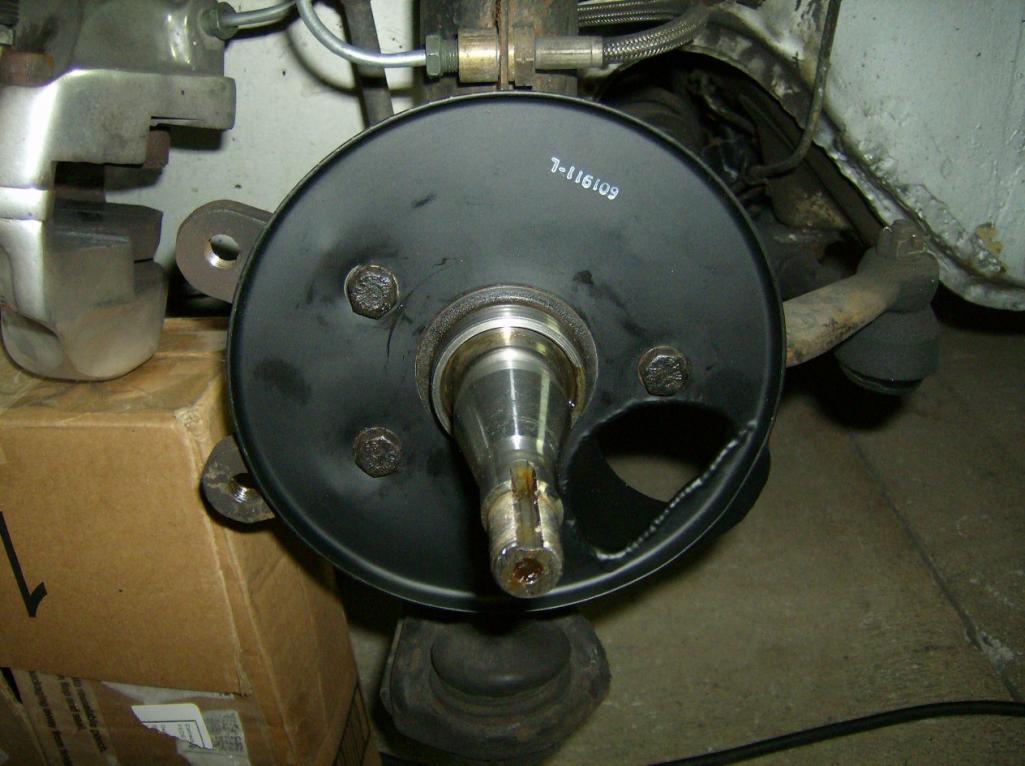 Disassemble the rotor from the hub 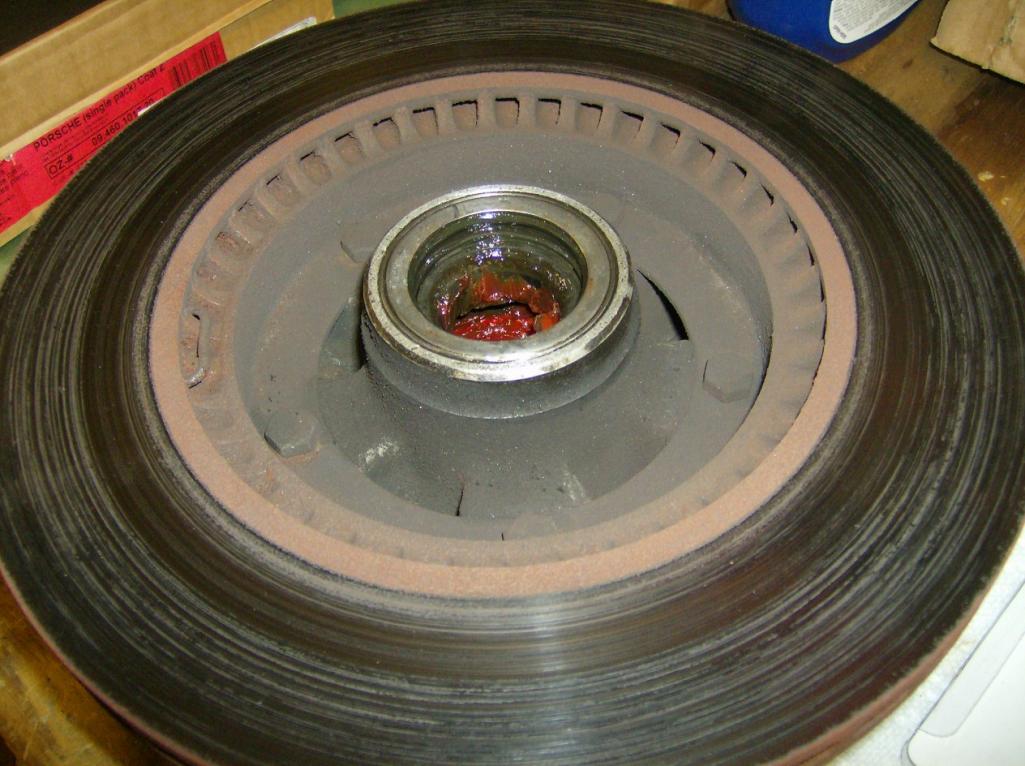 Smart racing is no longer and I couldn't find the air blockoff plates so I drew my own on AutoCAD from dimensions found online and had them waterjet locally out of stainless. 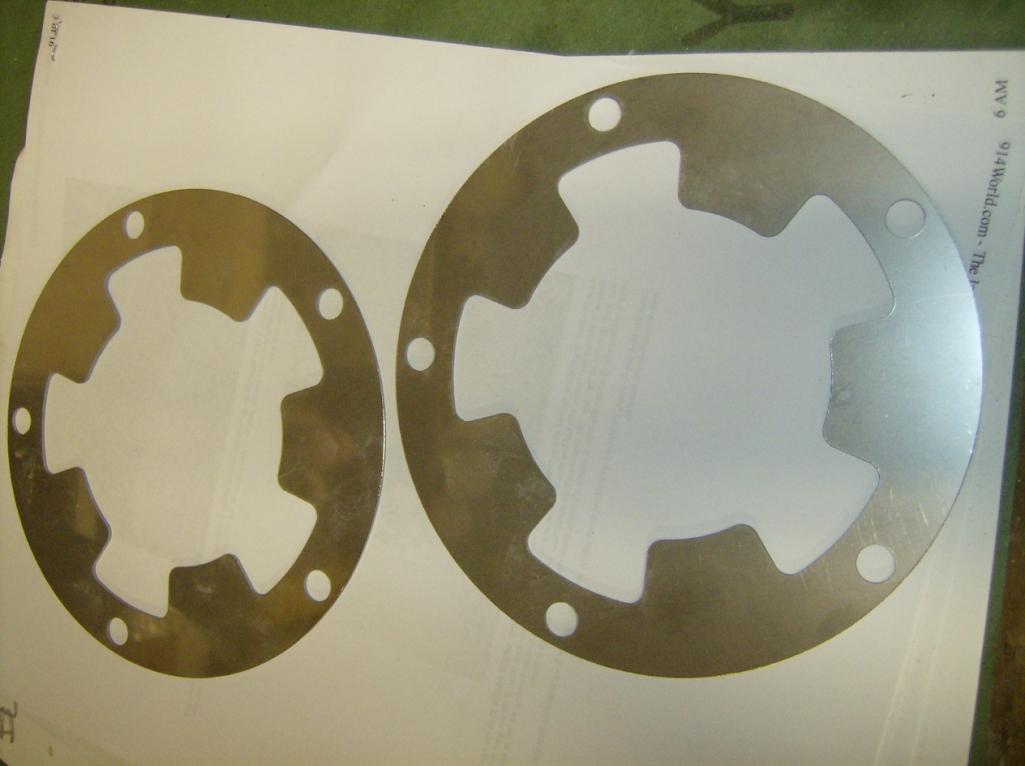 Install the blockoffs and massage them a little to fit just right 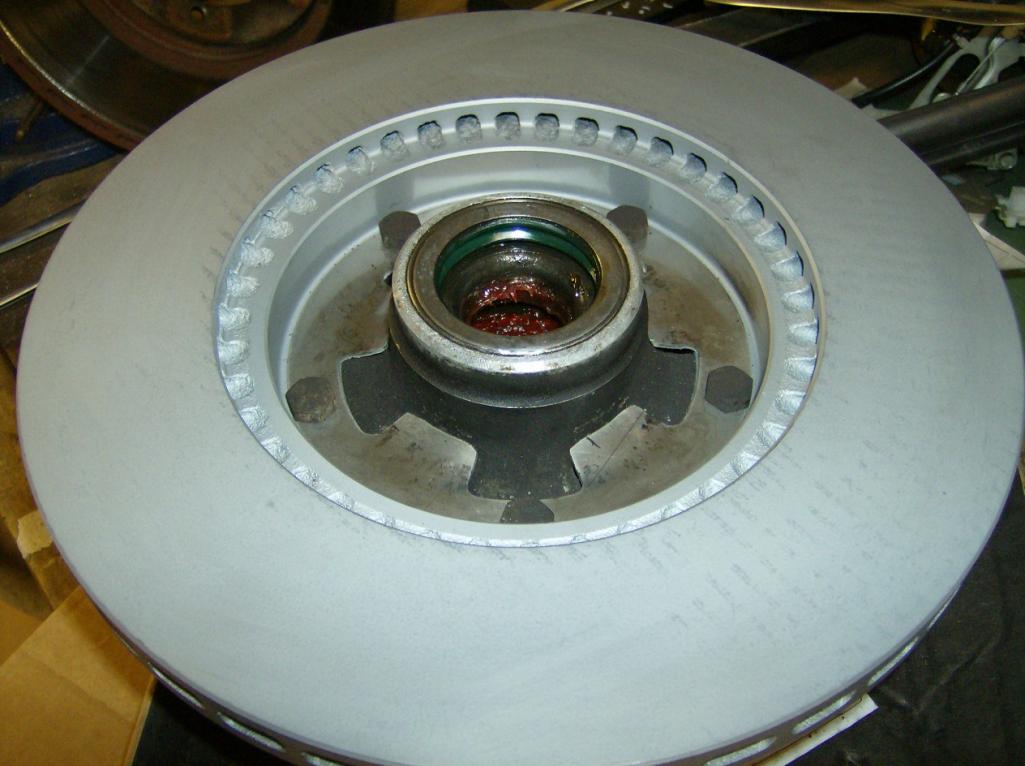 Put the rotor back on and massage the ducted backing plates to fit just right. BTW, the DAPO put the front wheel bearing seals in backwards. I didn't have new ones to put in so those pictured here are installed incorrectly! 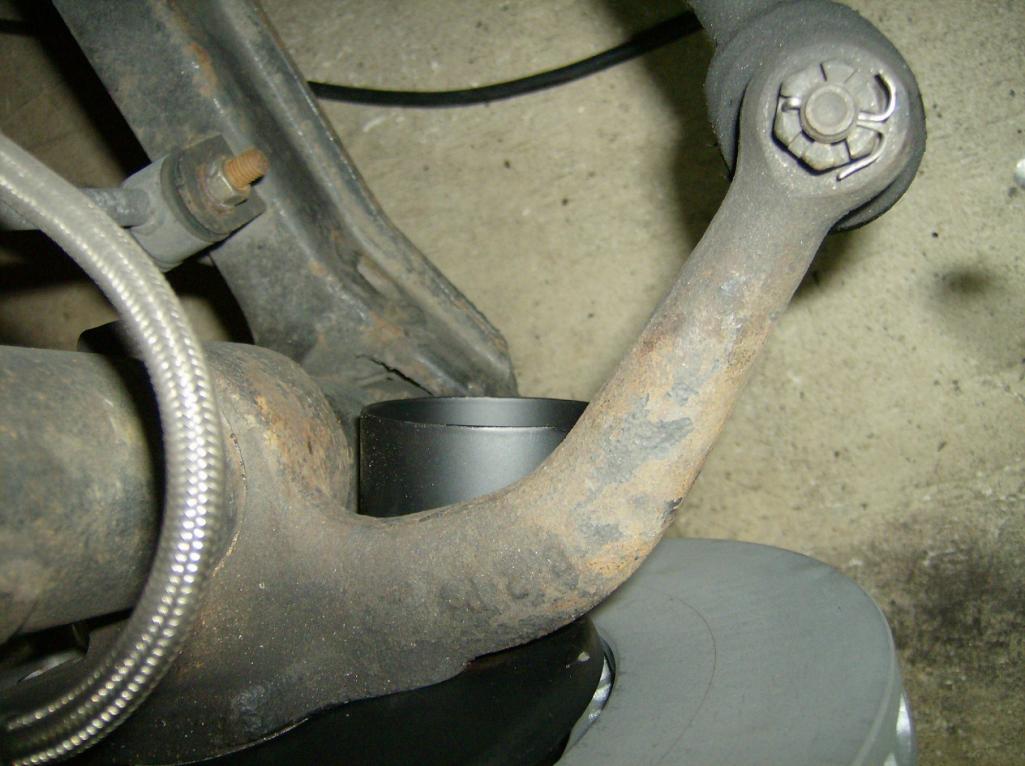 Put it all back together and drive it  I found Zimmerman rotors on www.partsgeek.com for a decent price and free shipping. Next is to fabricate some duct manifolds for the A-arms and purchase some not so cheap silicone or neoprene duct. |
   |

 
|
| somd914 |
Sep 8 2012, 06:34 AM
Post
#62
|
|
Member Group: Members Posts: 1,171 Joined: 21-February 11 From: Southern Maryland Member No.: 12,741 Region Association: MidAtlantic Region |
Tom,
Awesome build. I'm loving your old 2056 in my car, but give me a call when your ready for another engine swap, I'll gladly take this one (IMG:style_emoticons/default/smile.gif) |
|
|
|
| tomeric914 |
Apr 5 2014, 08:42 PM
Post
#63
|
|
One Lap of America in a 914! Group: Members Posts: 1,296 Joined: 25-May 08 From: Syracuse, NY Member No.: 9,101 Region Association: North East States |
Been busy this winter but haven't posted much to the build thread. I put a "How-to" together for a cost effective rear coil over setup here:
http://www.914world.com/bbs2/index.php?showtopic=229288 As well as swapped out my awesome Brembo AM calipers from Eric at PMB for a set of 4 piston Wilwoods with a lot more pad area and thickness. The Wilwoods were literally a bolt on with a 2mm spacer. Why more pad area? Mainly for better longevity and a slightly better heat sink. Of course this required a strut housing swap to go from 3" spacing to 3.5" spacing. Consider that thread your winter time entertainment (IMG:style_emoticons/default/chair.gif) I also insulated the hard line which runs about an inch away from the rotor face with fire sleeve. ...and "while I was in there" I swapped out the stock bushings for Rebel Racing Teflon RSR setup. Anyways, a couple of pics for your enjoyment! 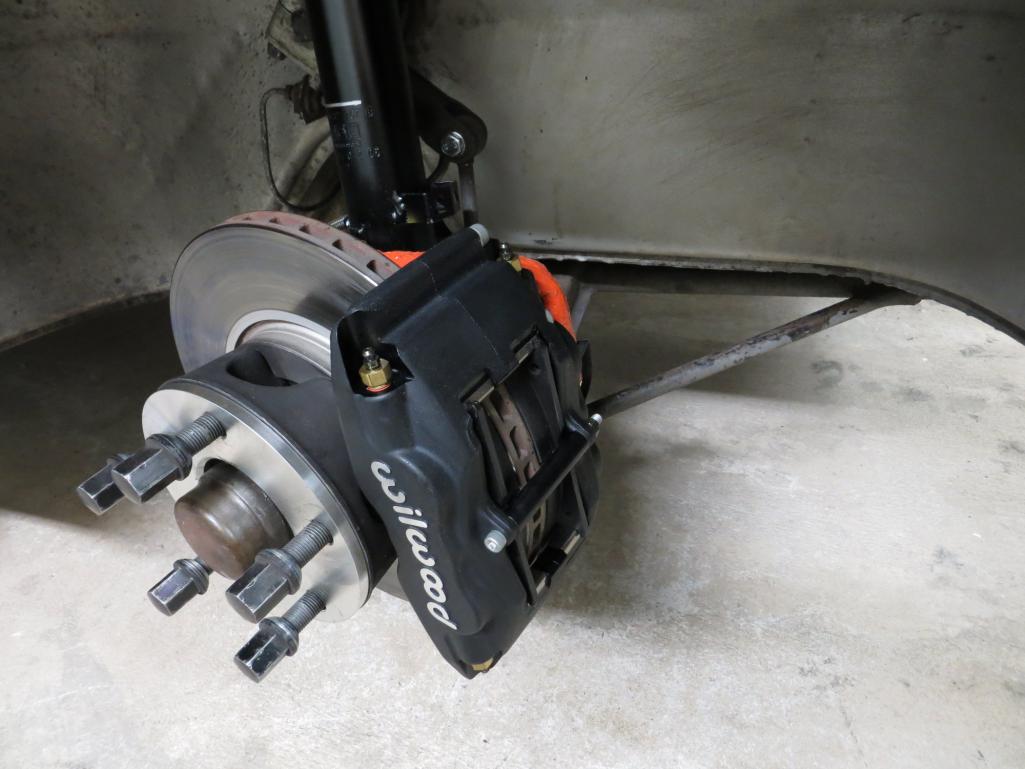 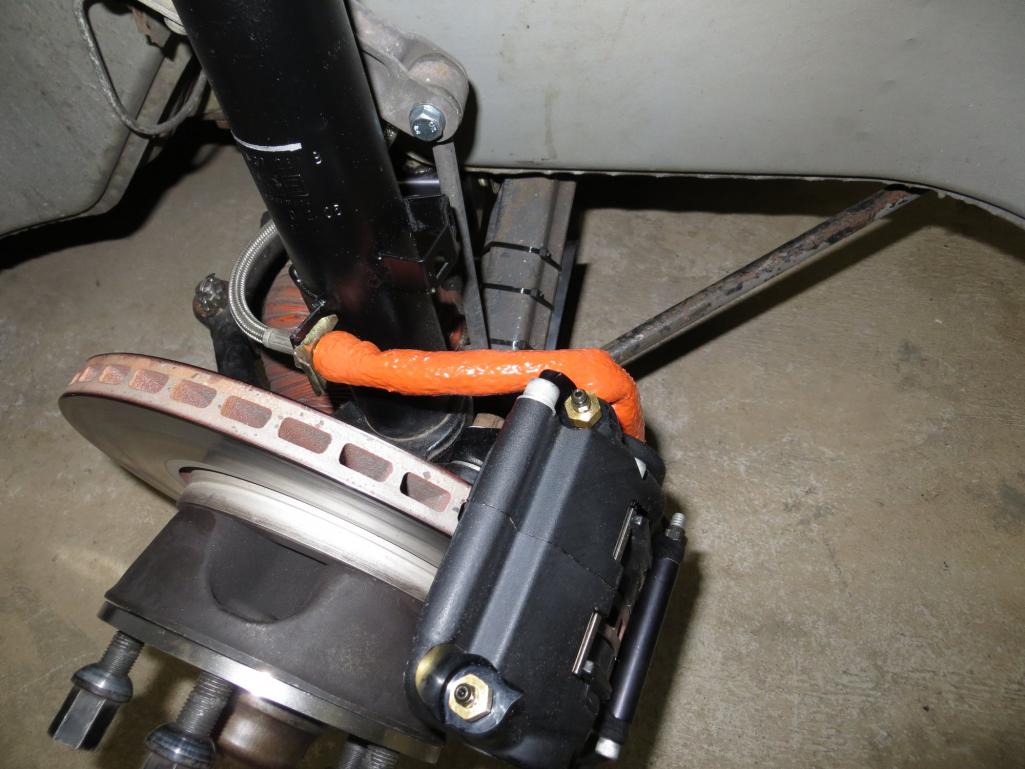 |
|
|
|
| jaxdream |
Apr 6 2014, 09:14 AM
Post
#64
|
|
Senior Member Group: Members Posts: 974 Joined: 8-July 08 From: North Central Tennessee Member No.: 9,270 Region Association: South East States |
Forgive my ignorance Tom , what was the "blockoff" plates installed on the back of the rotors for blocking off ???
GR8 thread man !!!! (IMG:style_emoticons/default/piratenanner.gif) Jack |
|
|
|
| tomeric914 |
Apr 6 2014, 09:41 AM
Post
#65
|
|
One Lap of America in a 914! Group: Members Posts: 1,296 Joined: 25-May 08 From: Syracuse, NY Member No.: 9,101 Region Association: North East States |
QUOTE(jaxdream @ Apr 6 2014, 10:14 AM)  Forgive my ignorance Tom , what was the "blockoff" plates installed on the back of the rotors for blocking off ??? Jack, no problem! The blockoff plates force all of the air through the radial vent holes inside the disc. Without the blockoff, the air would blow past the vent holes and out the 5 big holes in the hub. Those 5 big holes correspond with the stud locations. The blockoffs are only needed when air is ducted to the rotors like I have done. |
|
|
|
| tomeric914 |
Apr 7 2014, 09:12 PM
Post
#66
|
|
One Lap of America in a 914! Group: Members Posts: 1,296 Joined: 25-May 08 From: Syracuse, NY Member No.: 9,101 Region Association: North East States |
Finally added my Sheridan rear spoiler. One of the nicest aftermarket fiberglass components I have purchased.
Link to the "How-To" portion of installing the rear spoiler: http://www.914world.com/bbs2/index.php?s=&...t&p=2022462 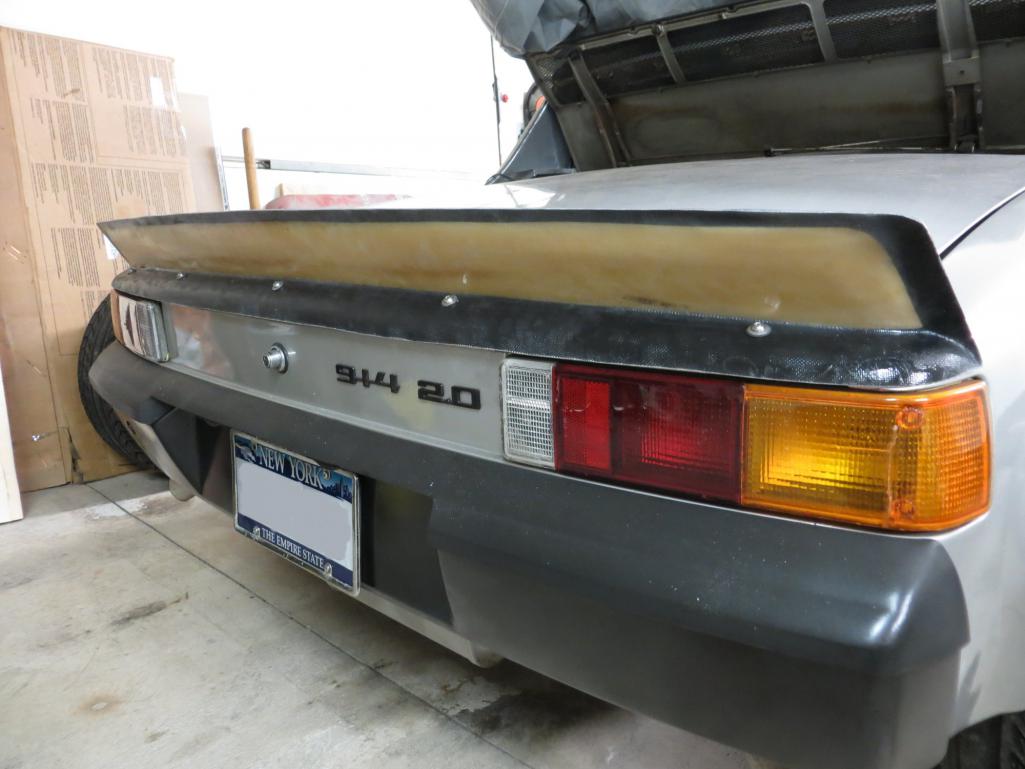 |
|
|
|
| arkitect |
May 2 2015, 10:18 AM
Post
#67
|
|
Senior Member Group: Members Posts: 617 Joined: 3-March 10 From: Stockton, CA Member No.: 11,426 Region Association: None |
Cool thread, have not seen this type of rear spoiler. Is the plan to paint it or leave it raw looking?
Dave |
|
|
|
| tomeric914 |
May 2 2015, 12:58 PM
Post
#68
|
|
One Lap of America in a 914! Group: Members Posts: 1,296 Joined: 25-May 08 From: Syracuse, NY Member No.: 9,101 Region Association: North East States |
QUOTE(arkitect @ May 2 2015, 12:18 PM) Cool thread, have not seen this type of rear spoiler. Is the plan to paint it or leave it raw looking? Dave Thanks Dave. I'm leaving the spoiler raw for now. |
|
|
|
| Maltese Falcon |
May 2 2015, 03:58 PM
Post
#69
|
|
914 Guru Group: Members Posts: 5,130 Joined: 14-September 04 From: Mulholland SoCal Member No.: 2,755 Region Association: None |
Excellent craftsmanship here Tom...I dig the silver paint with gt flares (IMG:style_emoticons/default/driving.gif)
Marty |
|
|
|
| Luke M |
May 3 2015, 06:48 PM
Post
#70
|
|
Senior Member Group: Members Posts: 1,448 Joined: 8-February 05 From: WNY Member No.: 3,574 Region Association: North East States |
Hey Tom,
Nice car you got there. Would you be willing to share more info on the 3.0 to 3.2 EFI intake conv. ? |
|
|
|
| tomeric914 |
Jun 30 2017, 06:49 PM
Post
#71
|
|
One Lap of America in a 914! Group: Members Posts: 1,296 Joined: 25-May 08 From: Syracuse, NY Member No.: 9,101 Region Association: North East States |
Just updating my thread with post I recently made here
I was looking for a 20.64mm master cylinder option and stumbled across a thread on Pelican where someone had put a 1990's Corrado master cylinder in a 911 or 914. There was only but one picture and not much of a write-up so I figured I'd try and document what I did. This master cylinder uses the same pushrod that you already have, though some adjustment will be necessary. You will also need to bend new brake lines if you want to do it right. As with any brake work. If you don't know what the hell you're doing, don't do this. Parts: 357 611 019 - this is for the 20.64mm master cylinder 357 611 019 B - this is for the 22.22mm master cylinder 911 355 322 00 - straight reservoir feed fitting 911 355 323 00 - angled reservoir feed fitting 7mm blue braided brake reservoir hose (IMG:http://www.914world.com/bbs2/uploads/post-9101-1498608352_thumb.jpg) You'll need to decide which master cylinder is right for your application. For example, my braking system is pretty much all mid-1980's Carrera sized calipers and referencing Bill Verberg's brake page, I found that the mid-1980's Carrera used a 20.64mm master cylinder. I also knew that my pedal travel was more than I liked while on track. https://members.rennlist.com/1976c38/brakes.htm I purchased all of the parts through Pelican, the 357 611 019 (20.64mm) is an ATE unit made of aluminum and was only about $100. The 357 611 019 B (22.22mm) is made by a few companies, is a cast iron unit and about $50. Here's where you are today: [img]http://www.914world.com/bbs2/uploads/post-9101-1498609158_thumb.jpg [/img] 1. Drain your reservoir using a turkey baster so you don't wear the entire contents of the reservoir. 2. Disconnect all brake lines, the reservoir feed lines and unbolt the master cylinder. 3. Loosen the locknut and unthread the master cylinder pushrod from the pedal cluster, then run a tap through the threaded portion still on the pedal cluster to clean it up. Make sure the threads on the pushrod are clean and that the locknut threads all the way down on the pushrod. (I had to find a thinner locknut for my application. You may or may not need to do the same). 4. Unbox your new master cylinder and pop in the fittings as shown in the picture below. Use a dab of brake fluid to help lubricate the fitting where it inserts into the master cylinder. ALSO, you'll need to plug one of the extra ports on the master cylinder that you aren't using as seen below. I placed a piece of tape over all of the openings while fitting the master cylinder to keep dirt out. (IMG:http://www.914world.com/bbs2/uploads/post-9101-1498609492_thumb.jpg) 5. Grease the tip of the pushrod before installing the master cylinder. Torque the two 8mm nuts to 18 ft-lbs. I left the washers off. VERY IMPORTANT - now adjust the pedal free play to approximately 1mm by turning the pushrod inside the car at the pedal cluster. Once adjusted, tighten down the locknut. Make sure that the brake light switch lever is in the correct position to actuate when the brake pedal is depressed. (IMG:http://www.914world.com/bbs2/uploads/post-9101-1498609869_thumb.jpg) 6. Back under the vehicle, decide how you will connect the reservoir to the master cylinder. The metal ends of my plastic lines were rusty so I decided to cut them off and use a short length of 7mm blue braided reservoir hose to each line. You could also run the blue braided hose all the way from the reservoir to master cylinder. Use a dab of brake fluid to make it easier to install the hose on the fittings. (IMG:http://www.914world.com/bbs2/uploads/post-9101-1498610136_thumb.jpg) 7. Next, bend new brake lines for the front brakes and a short piece for the rears. (IMG:http://www.914world.com/bbs2/uploads/post-9101-1498610475_thumb.jpg) 8. Last, but not least, bleed the brakes reinstall the bottom pan and enjoy your new firmer, but not too firm, pedal feel! (IMG:http://www.914world.com/bbs2/uploads/post-9101-1498610623_thumb.jpg) |
|
|
|
| tomeric914 |
Jan 14 2018, 11:02 AM
Post
#72
|
|
One Lap of America in a 914! Group: Members Posts: 1,296 Joined: 25-May 08 From: Syracuse, NY Member No.: 9,101 Region Association: North East States |
With the Christmas break, I finally took the time to relocate my brake ducts from the A-arm scoops underneath to an integrated location within the oil cooler housing. The trick was finding a location where they did not interfere with the suspension or steering.
I found a couple of 2.5" aluminum elbows off eBay and fit them just above the A-arm behind the sway bar links. 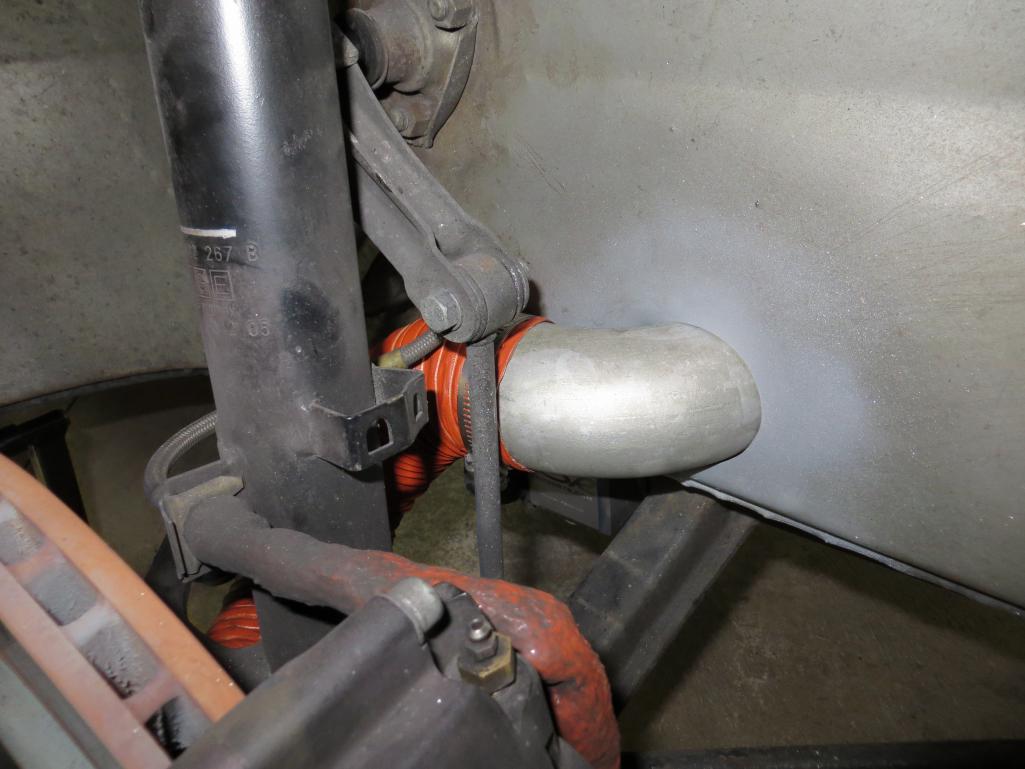 I also discovered that my sway bar had shifted itself to the right and was in contact with the strut housing. Weird that it hadn't happened in the past 10 years. 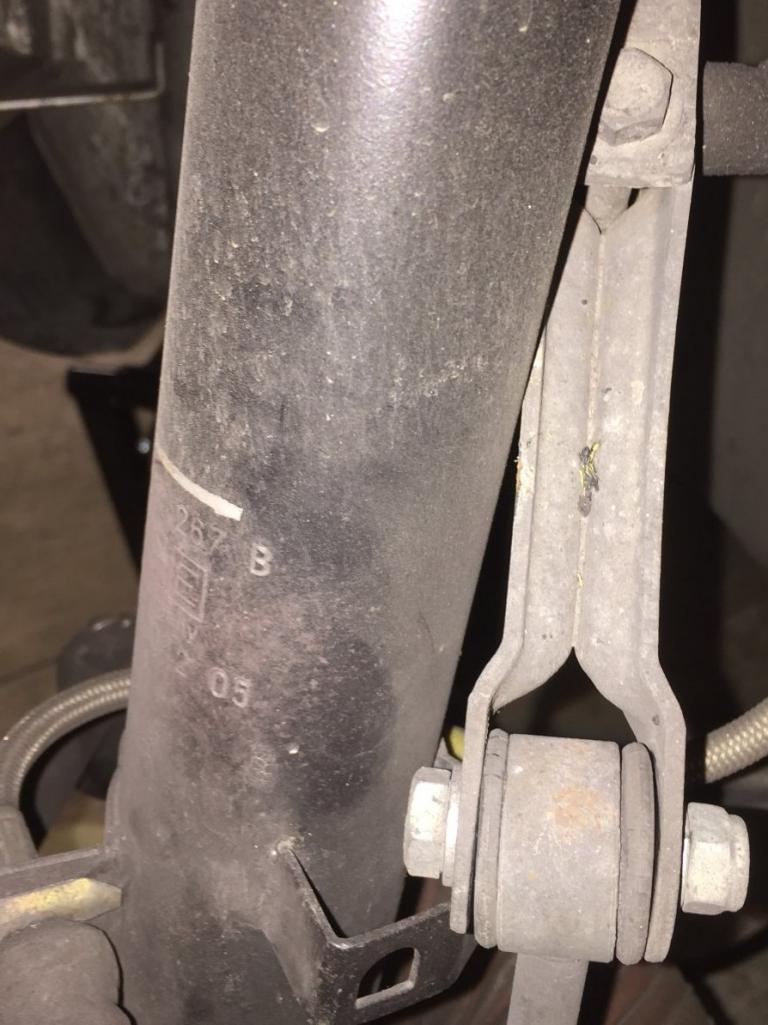 This is the stock 15mm sway bar so I picked up a couple of split clamps from McMaster along with a couple of nylon washers to prevent future squeaking. 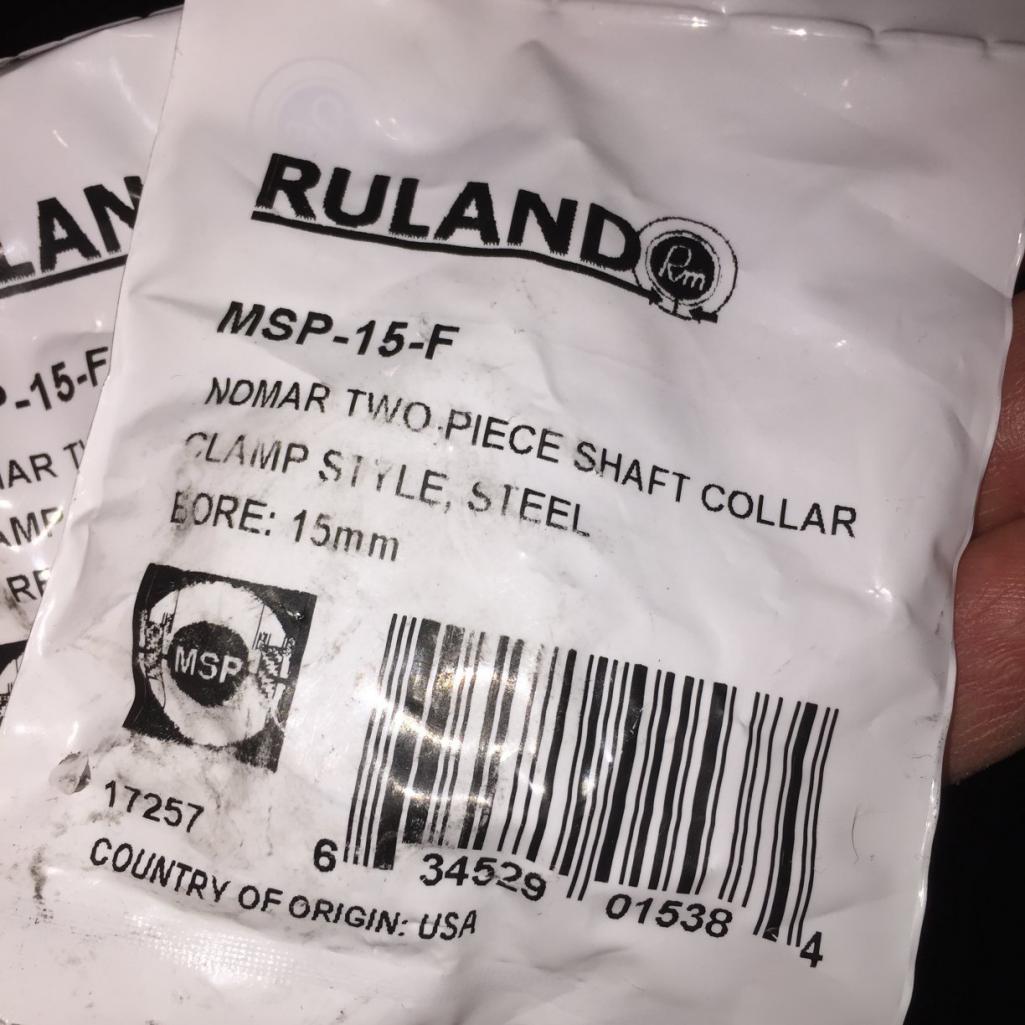 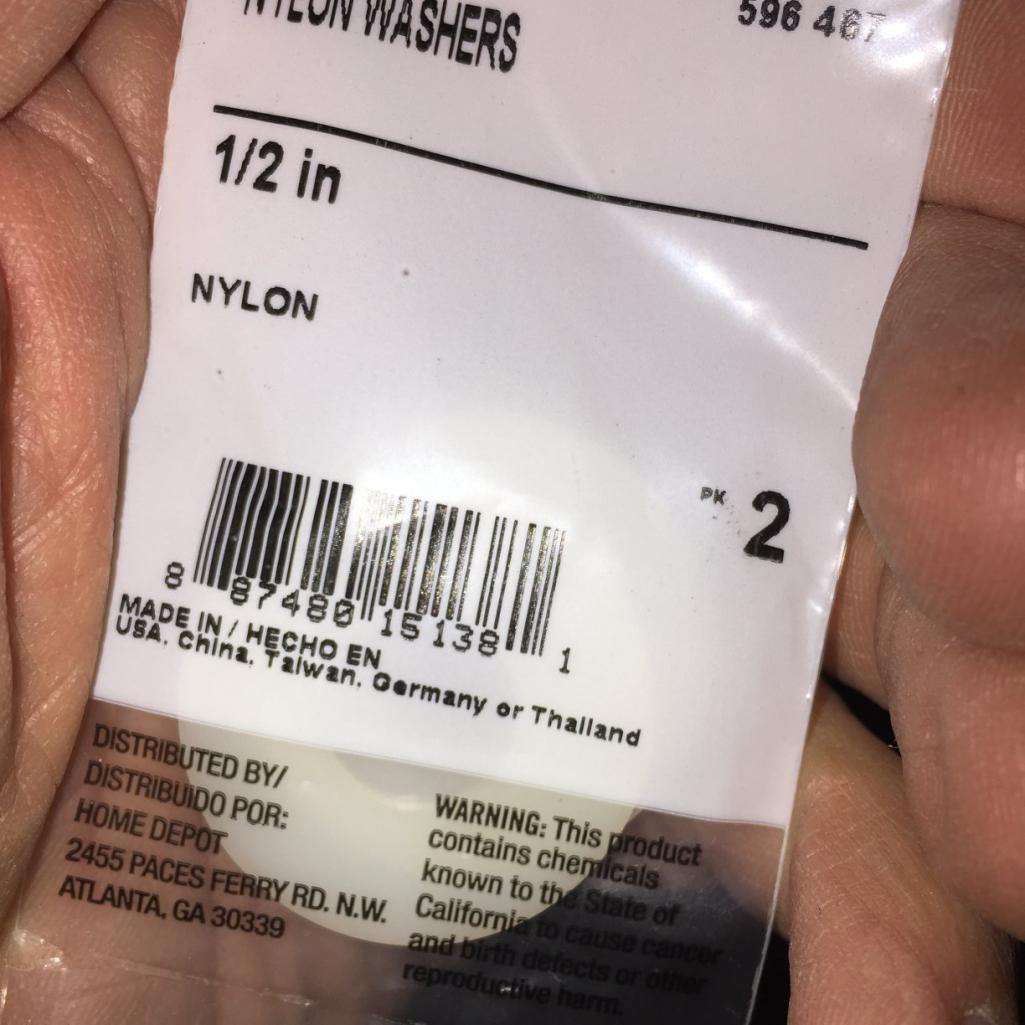 First, I re-centered the sway bar. I drilled the 1/2" washers to 5/8", since the local hardware store only had 1/2", and then slit the washers so that they could be installed without removing the bar. They cannot be slipped over the ends of a stock bar because the bar is tapered to a square which engages the sway bar arms. Then, I installed the split collars next to the washers on each side. 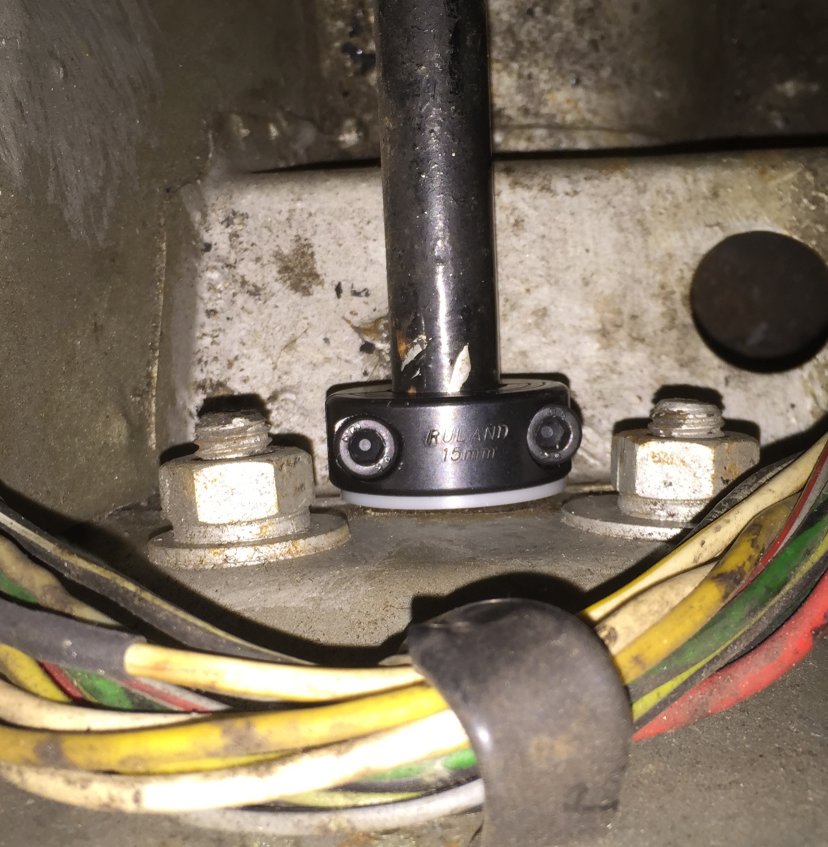 |
|
|
|
| Cupomeat |
Jan 15 2018, 01:00 PM
Post
#73
|
|
missing my NY 914 in VA Group: Members Posts: 1,341 Joined: 26-November 07 From: Oakton VA Member No.: 8,376 Region Association: MidAtlantic Region |
Looks great! Let's see if the rotor cracking is reduced.
|
|
|
|
| totle |
Sep 7 2018, 02:18 AM
Post
#74
|
|
Newbie Group: Members Posts: 43 Joined: 18-October 10 From: Norway Member No.: 12,280 Region Association: Europe |
Tomeric, can you please share a picture of how you routed the oil lines into the tunnel from the engine side?
Great build thread by the way. I was planning to route the lines the same way you have done |
|
|
|
| tomeric914 |
Sep 7 2018, 04:07 PM
Post
#75
|
|
One Lap of America in a 914! Group: Members Posts: 1,296 Joined: 25-May 08 From: Syracuse, NY Member No.: 9,101 Region Association: North East States |
QUOTE(totle @ Sep 7 2018, 04:18 AM) ...can you please share a picture of how you routed the oil lines into the tunnel from the engine side? Post #53 has all of the important views as far as where I cut and what I used to line the sharp edges with. http://www.914world.com/bbs2/index.php?s=&...t&p=1670785 From the engine firewall side, I fed the lines in through the heater duct. I don't have any pics of that, but it should be self explanatory. I did connect the two lines going to the heater duct to a 200 deg F Mocal thermostat. 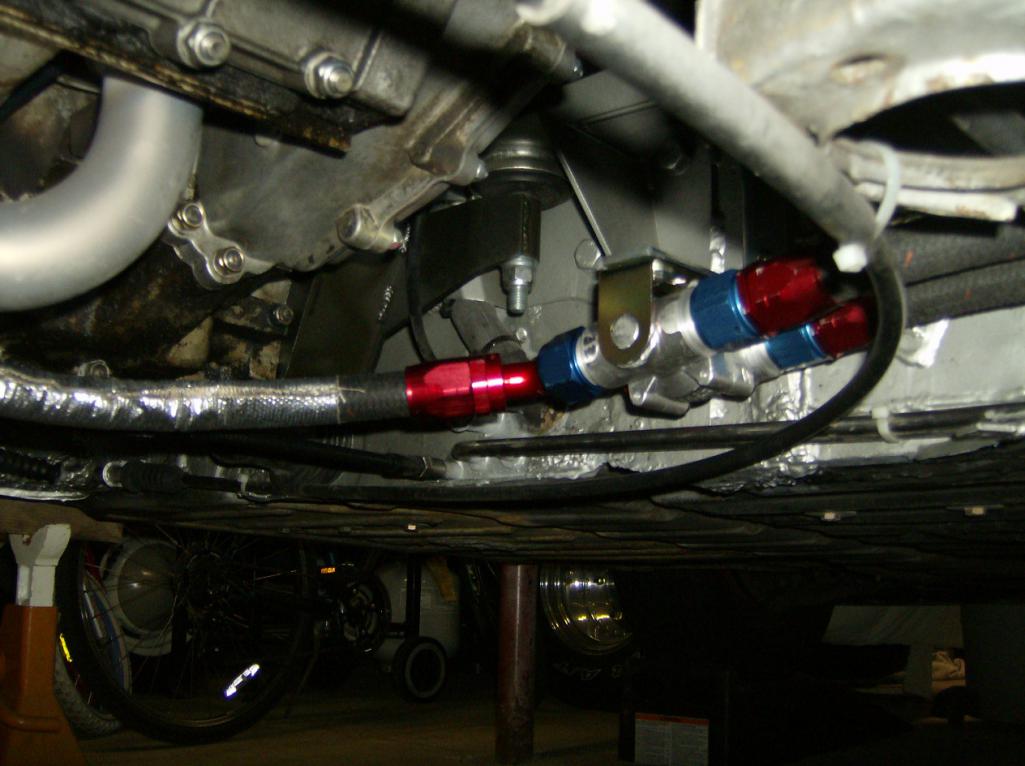 |
|
|
|
| totle |
Sep 8 2018, 02:49 PM
Post
#76
|
|
Newbie Group: Members Posts: 43 Joined: 18-October 10 From: Norway Member No.: 12,280 Region Association: Europe |
Thanks. Ok, thought you routed it outside the heater duct.
Great, thanks |
|
|
|
| tomeric914 |
Jan 19 2020, 12:24 PM
Post
#77
|
|
One Lap of America in a 914! Group: Members Posts: 1,296 Joined: 25-May 08 From: Syracuse, NY Member No.: 9,101 Region Association: North East States |
Late update...
A few years ago, when @cupomeat and I ran one lap together, I installed a 600 watt Bluetooth amp so we could have some tunes on the road wirelessly routed from our phones. While the theory was good, it's still loud as $%#@ in the car at speed and there really was no bass. With a little research, we came up with the Sound Ordnance B-8PTD which is an 8", 125 watt, self powered amp. This neatly and conveniently connected into the Bluetooth amp's RCA outputs. The next trick was mounting since the car is set up for track duty with a roll cage and containment seats bolted pretty close to the floor. It couldn't go on the passenger footwell because there are oil lines there and it's already cramped for the passenger. It couldn't go behind either seat because they are all the way back (I'm 6'-3"). It could fit between the seats like the Ford GT because I have no firewall pad. I disassembled the amp and put bolts through the baseplate which were nutted on the outside, basically making each of them a stud so that I could bolt it through the firewall with nylock nuts. On a side note, I learned that that the Sound Ordnance box is sealed when I didn't seal up two holes that I had placed in the wrong location on the backplate. The result was a hissing noise at every bass hit! While this isn't a huge sub, it is more than enough to fill in the missing bass in the small 914 cabin. 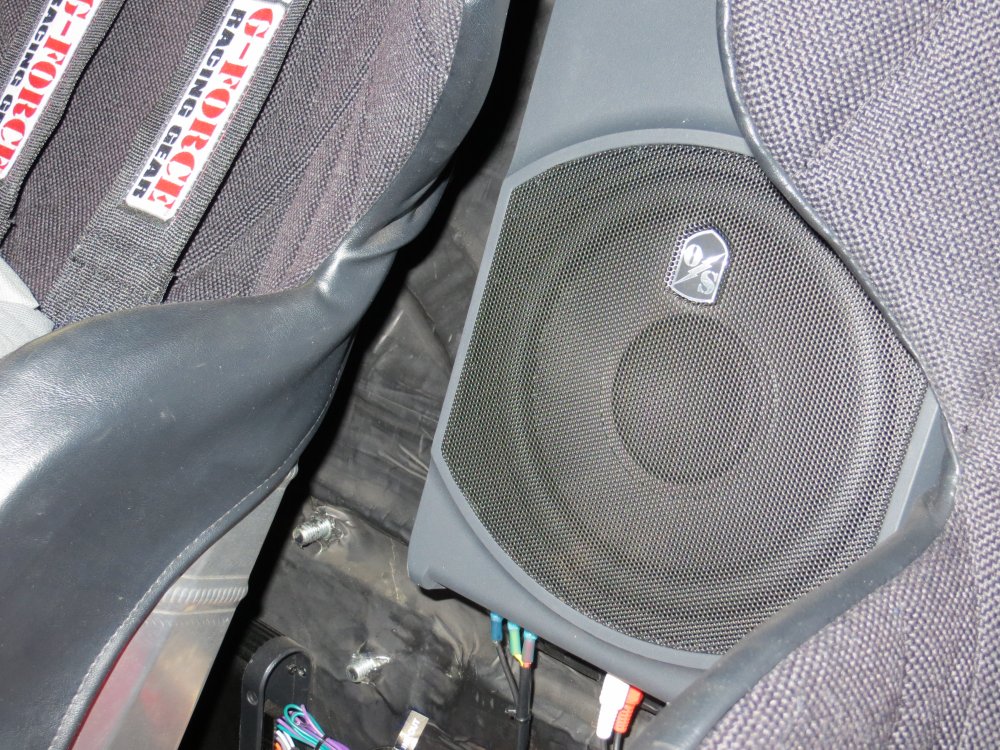 |
|
|
|
| tomeric914 |
Feb 10 2023, 09:50 PM
Post
#78
|
|
One Lap of America in a 914! Group: Members Posts: 1,296 Joined: 25-May 08 From: Syracuse, NY Member No.: 9,101 Region Association: North East States |
Well apparently I have not updated this thread in a while. The brakes got upgraded again to thicker and slightly larger diameter rotors just for giggles and to try and eliminate rotor cracking every 10 or so track days.
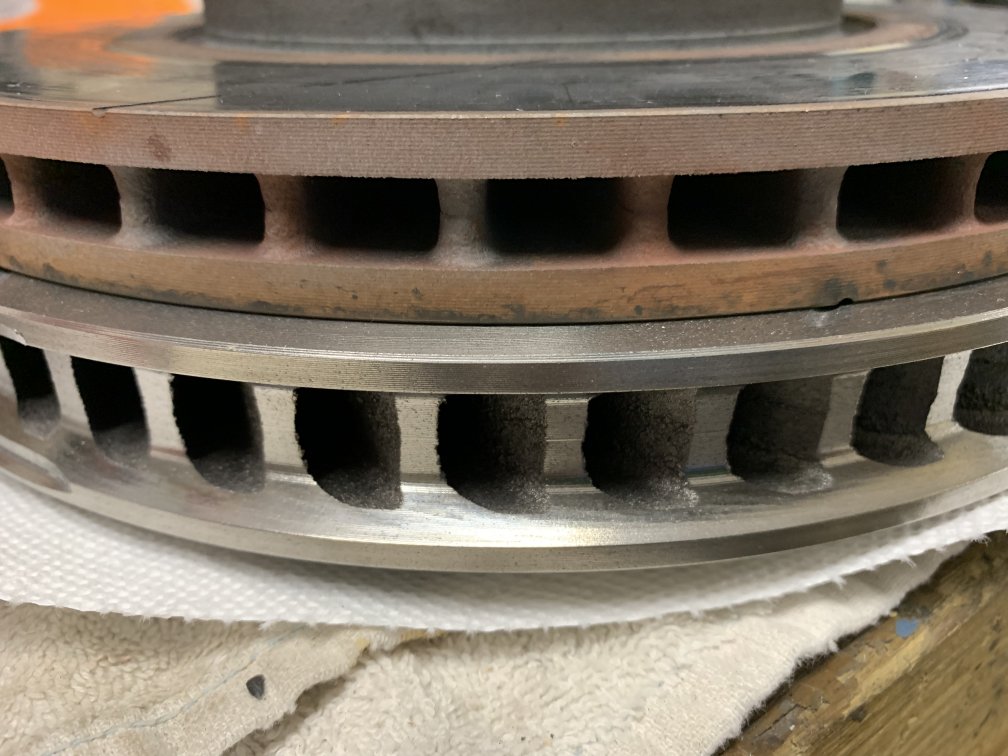 So yeah, those are a bit thicker at 1.21" vs the stock 911 SC discs at 0.81". The rotrs got mounted to hats I think I found in the Classifieds a while back that came from RSR here: https://www.rsrproducts.com/product-page/re...rotor-hats-pair Then I designed the caliper brackets and gave Xometry.com a try. Only took a couple of weeks and was relatively inexpensive. To be honest, I rapid prototyped (3D printed) the brackets out of plastic first to verify the fit. 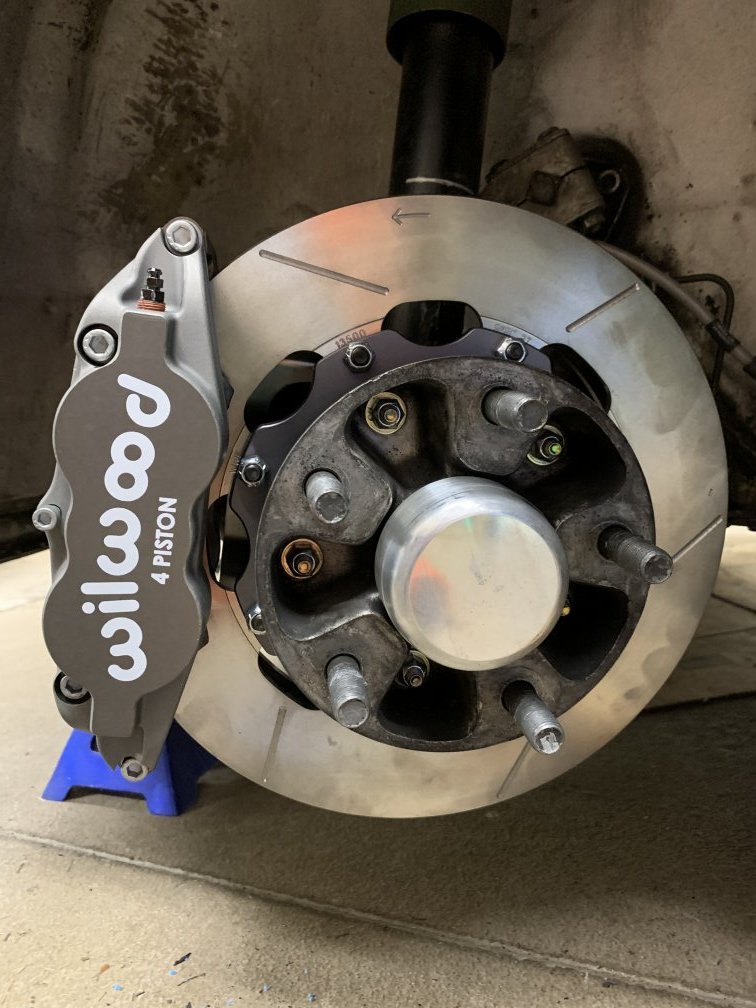 Brakes work great with no issues so far! ...but, more to come. |
|
|
|
| tomeric914 |
Feb 18 2023, 06:35 PM
Post
#79
|
|
One Lap of America in a 914! Group: Members Posts: 1,296 Joined: 25-May 08 From: Syracuse, NY Member No.: 9,101 Region Association: North East States |
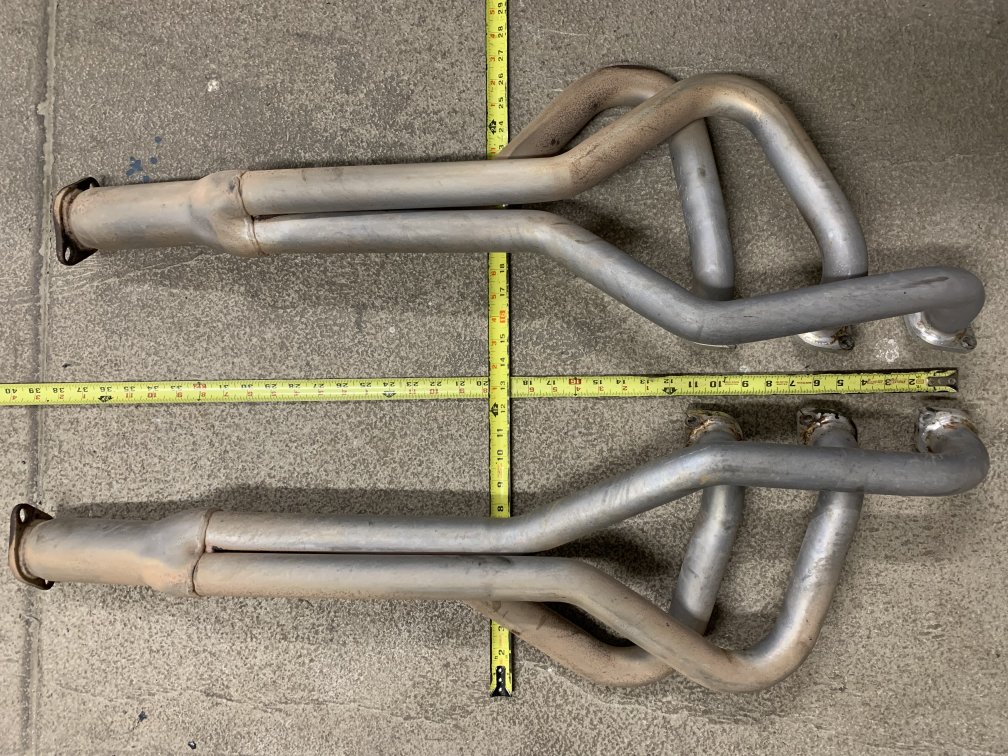
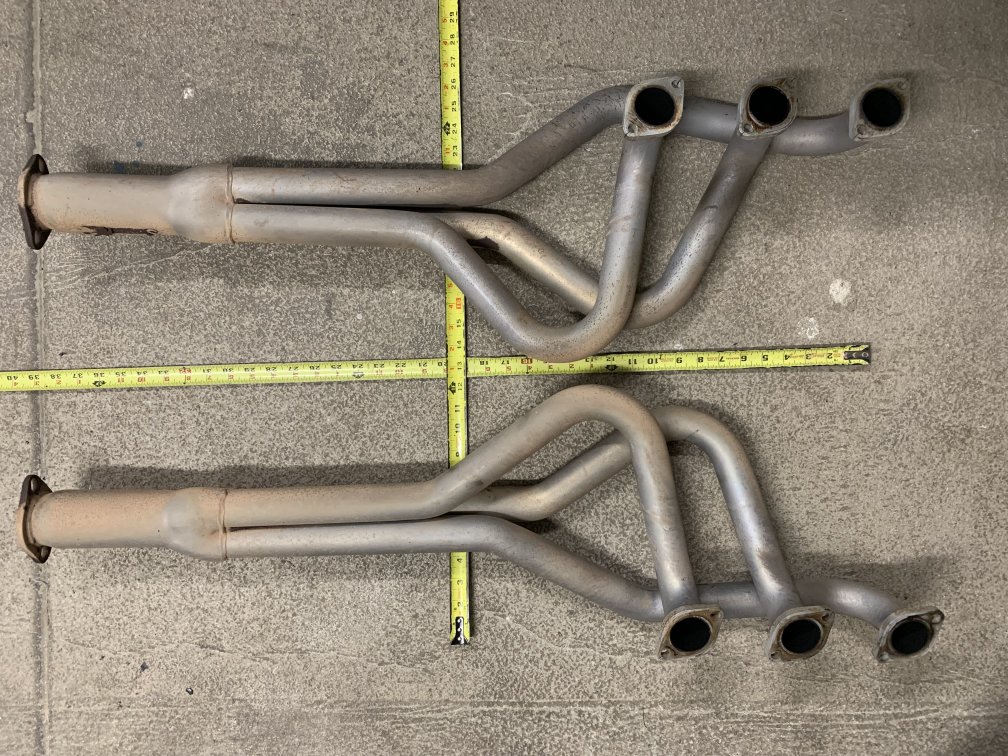
More updates incoming. After 12 years of abuse and probably about 50k track miles, the drivetrain is coming out to do some chassis repairs. WHILE I'M IN THERE it's time to recoat the MSDS headers. A huge shout out to @Maltese Falcon for building a great set of headers that have been awesome!
  |
|
|
|
| 930cabman |
Dec 21 2025, 01:52 PM
Post
#80
|
|
Advanced Member Group: Members Posts: 4,379 Joined: 12-November 20 From: Buffalo Member No.: 24,877 Region Association: North East States |
just happened on this build, thanks for documenting.
Is your only teener a track car? |
|
|
|
|
3 User(s) are reading this topic (1 Guests and 0 Anonymous Users)
2 Members: SO.O.C914er, mgp4591

|
Lo-Fi Version | Time is now: 21st December 2025 - 11:31 PM |
Invision Power Board
v9.1.4 © 2025 IPS, Inc.