|
|

|
Porsche, and the Porsche crest are registered trademarks of Dr. Ing. h.c. F. Porsche AG.
This site is not affiliated with Porsche in any way. Its only purpose is to provide an online forum for car enthusiasts. All other trademarks are property of their respective owners. |
|
|
  |
| Valy |
 Feb 4 2012, 09:47 AM Feb 4 2012, 09:47 AM
Post
#161
|
|
Senior Member    Group: Members Posts: 1,677 Joined: 6-April 10 From: Sunnyvale, CA Member No.: 11,573 Region Association: Northern California |
|
| saigon71 |
 Feb 5 2012, 10:10 AM Feb 5 2012, 10:10 AM
Post
#162
|
|
Advanced Member     Group: Members Posts: 2,019 Joined: 1-June 09 From: Dillsburg, PA Member No.: 10,428 Region Association: MidAtlantic Region 

|
Removed the drivers side jacking donut and most of the drivers side jack post. Found a large mouse nest inside the long...looks like it has been holding water and rusting for a long time. (IMG:style_emoticons/default/evilgrin.gif)
This side is nearly as bad as the passenger. I am bummed out and taking the day off: 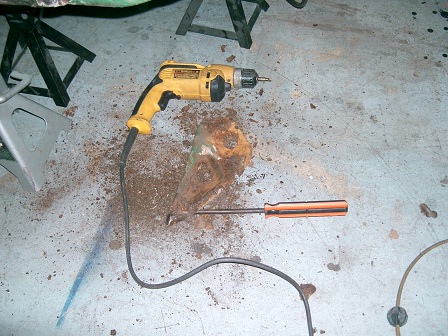 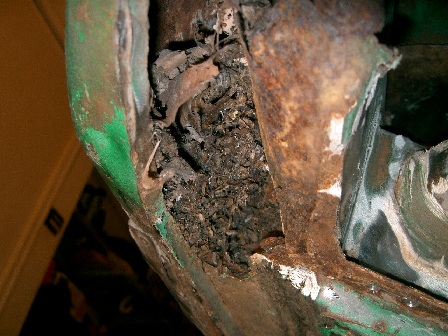 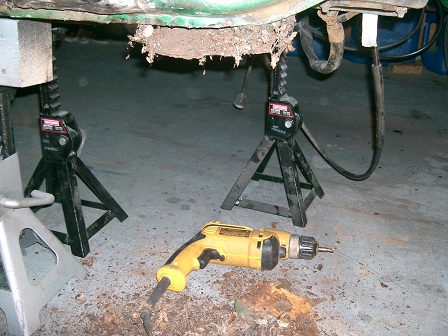 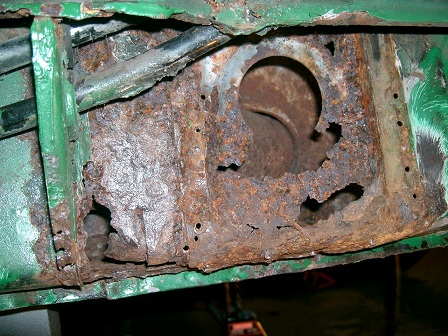 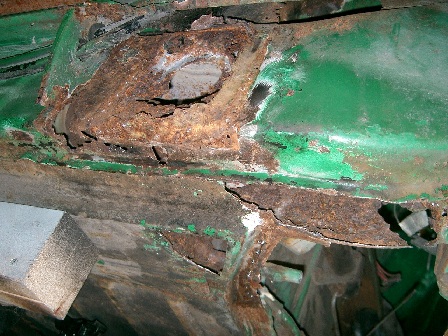 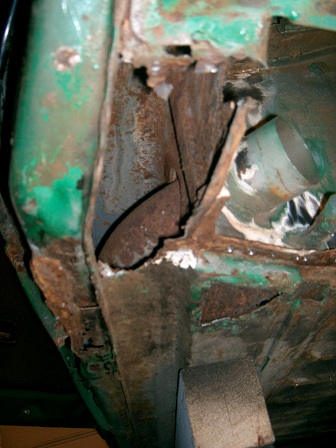 |
| hot_shoe914 |
 Feb 5 2012, 10:35 AM Feb 5 2012, 10:35 AM
Post
#163
|
|
on ramp passer     Group: Members Posts: 3,807 Joined: 20-November 07 From: Earle, Ar. Member No.: 8,354 Region Association: None |
(IMG:style_emoticons/default/sad.gif) (IMG:style_emoticons/default/sad.gif) (IMG:style_emoticons/default/sad.gif) (IMG:style_emoticons/default/sad.gif) (IMG:style_emoticons/default/sad.gif) (IMG:style_emoticons/default/sad.gif) (IMG:style_emoticons/default/sad.gif) (IMG:style_emoticons/default/sad.gif) (IMG:style_emoticons/default/sad.gif) (IMG:style_emoticons/default/sad.gif) (IMG:style_emoticons/default/sad.gif) (IMG:style_emoticons/default/sad.gif) (IMG:style_emoticons/default/sad.gif) (IMG:style_emoticons/default/sad.gif)
|
| saigon71 |
 Mar 4 2012, 05:46 PM Mar 4 2012, 05:46 PM
Post
#164
|
|
Advanced Member     Group: Members Posts: 2,019 Joined: 1-June 09 From: Dillsburg, PA Member No.: 10,428 Region Association: MidAtlantic Region 

|
My quest to drive the car to Hershey this year ended upon discovering how bad the driver's side "hell hole" was. Had to take some time off and step away from the project.
Like Spraggi says..."next year." (IMG:style_emoticons/default/dry.gif) I was devastated about it, but got back to work today. Started drilling out spot welds on the underside of the long, sill and clamshell and cut the rusty sill and door jamb out...trying to do it without a massive cut on the fender: 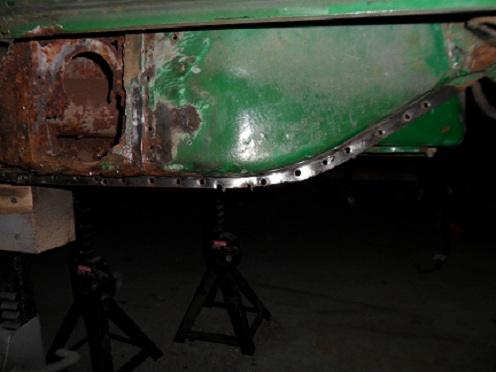 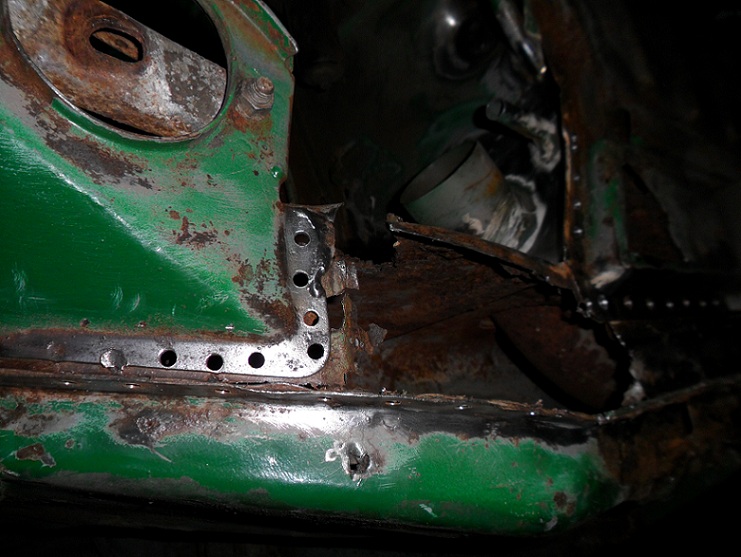 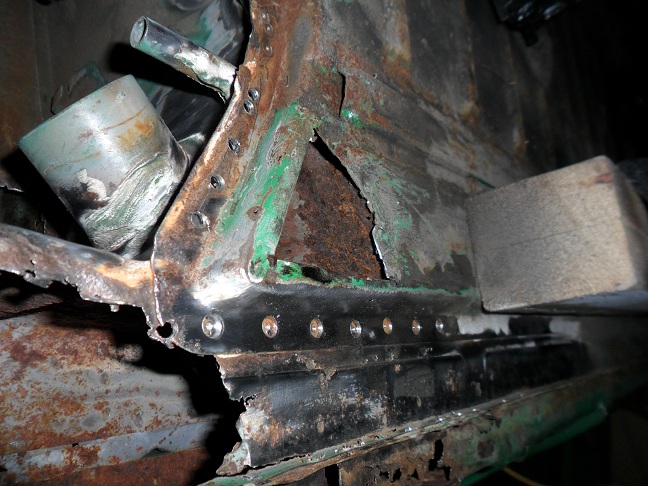 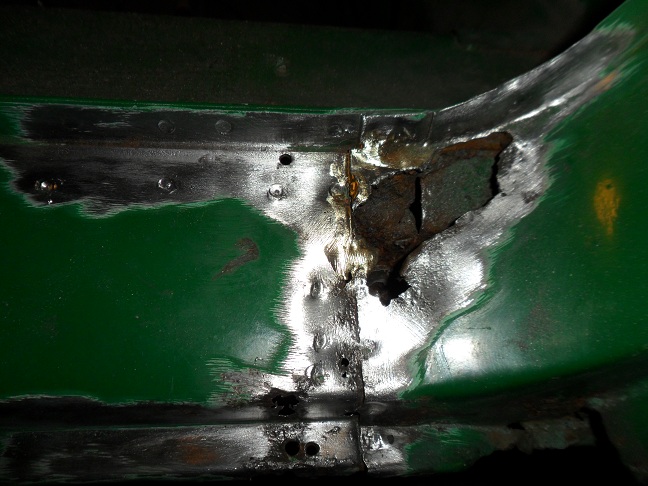 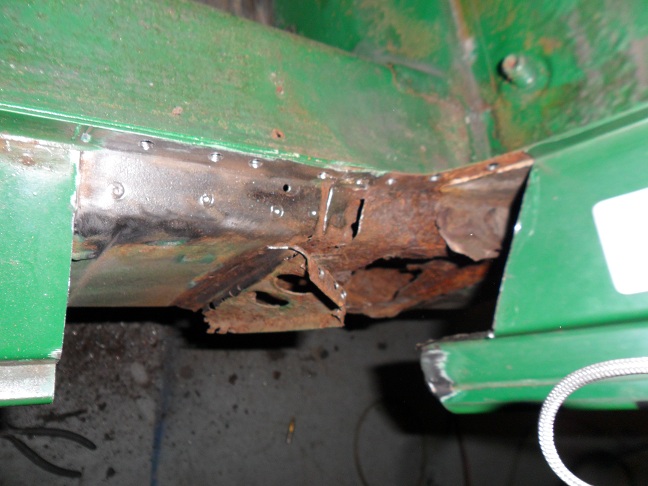 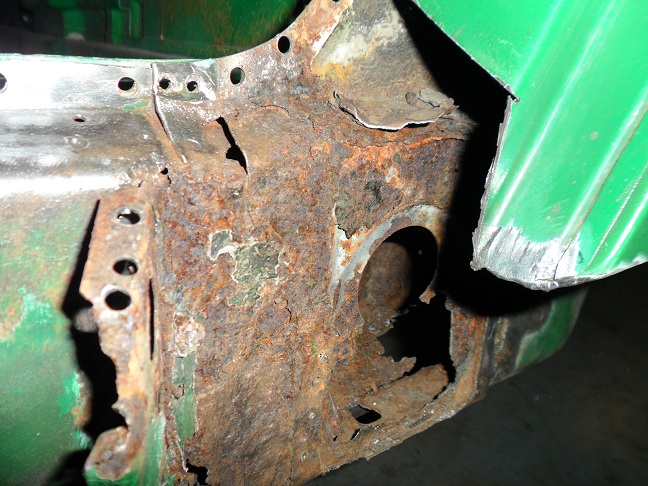 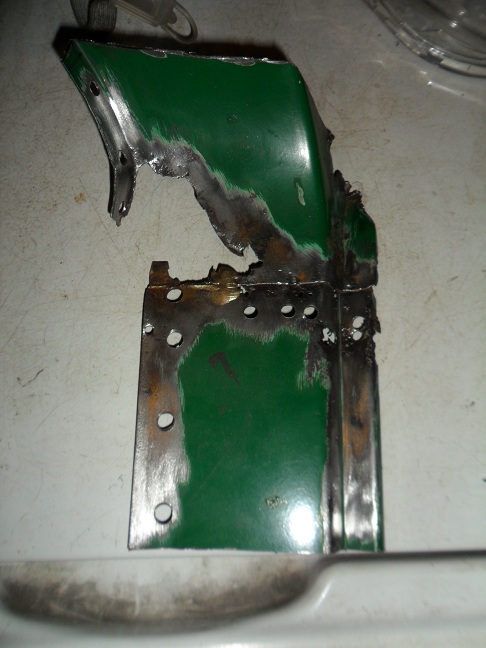 Wire-wheeled the seam between the upper & lower firewall....this looks eerily similar to the same area on the passenger side: 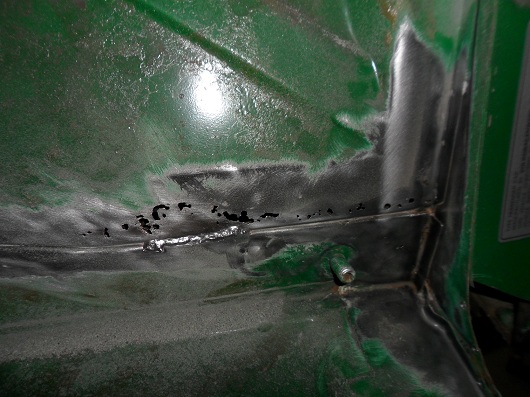 |
| FourBlades |
 Mar 4 2012, 06:59 PM Mar 4 2012, 06:59 PM
Post
#165
|
|
From Wreck to Rockin     Group: Members Posts: 2,056 Joined: 3-December 07 From: Brevard, FL Member No.: 8,414 Region Association: South East States 
|
You are making great progress and got serious skills. (IMG:style_emoticons/default/piratenanner.gif)
Loving this thread. (IMG:style_emoticons/default/chowtime.gif) Keep the faith. John |
| scotty b |
 Mar 4 2012, 09:48 PM Mar 4 2012, 09:48 PM
Post
#166
|
|
rust free you say ?                Group: Members Posts: 16,375 Joined: 7-January 05 From: richmond, Va. Member No.: 3,419 Region Association: None |
GO BOB GO !!! (IMG:style_emoticons/default/beerchug.gif)
|
| okieflyr |
 Mar 5 2012, 11:41 AM Mar 5 2012, 11:41 AM
Post
#167
|
|
9fauxteen    Group: Members Posts: 816 Joined: 9-January 05 From: Phila PA Member No.: 3,426 Region Association: North East States |
Bob your car is in very capable hands and will be a nice treasure when your done!
|
| saigon71 |
 Mar 8 2012, 06:58 AM Mar 8 2012, 06:58 AM
Post
#168
|
|
Advanced Member     Group: Members Posts: 2,019 Joined: 1-June 09 From: Dillsburg, PA Member No.: 10,428 Region Association: MidAtlantic Region 

|
The cutting continued yesterday. (IMG:style_emoticons/default/sawzall-smiley.gif)
Got a line on a drivers side longitudinal from Bruce (Bdstone) on this site from a recently restored car with front end damage. The problem is that I need tell him where to cut it at. Drilled out the spot welds on the rear firewall that held the rusty metal in place and cut out the bad section & cut away part of the rusty clam shell forward of the jack post and the long aft of the jack post. I was able to get a good look back into the long. It looks pretty solid aft of the engine mount, but I still need to get in there to clean to make sure. Damn that mouse nest held a lot of water! 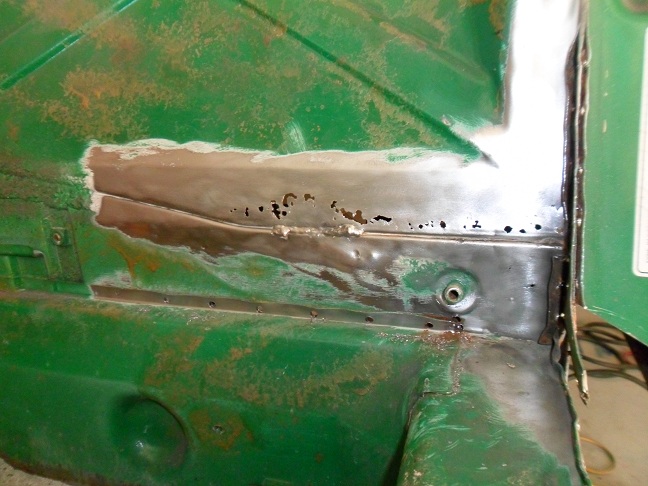 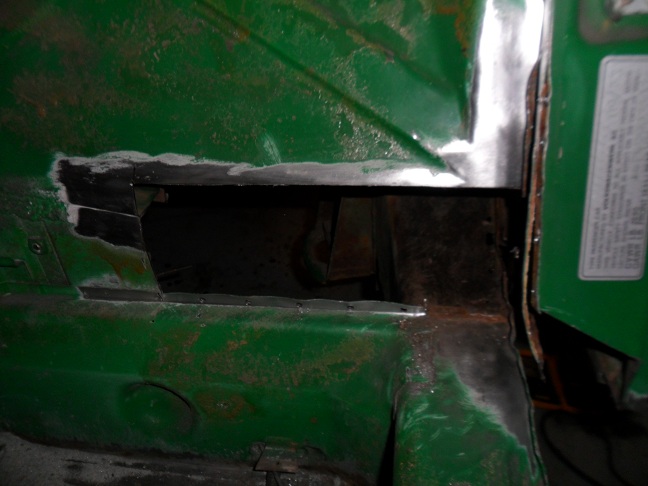 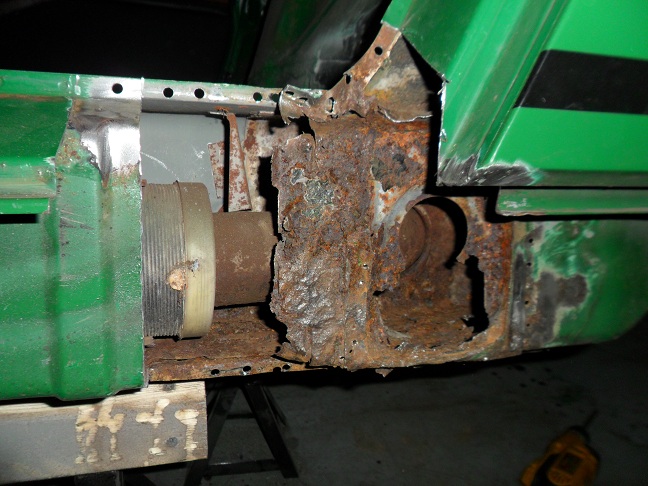 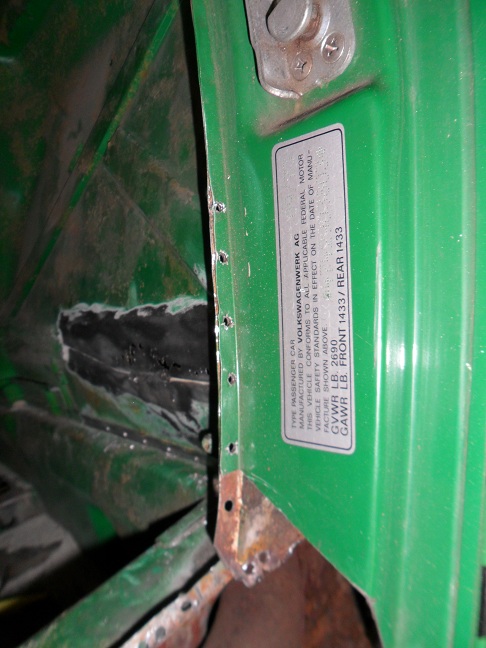 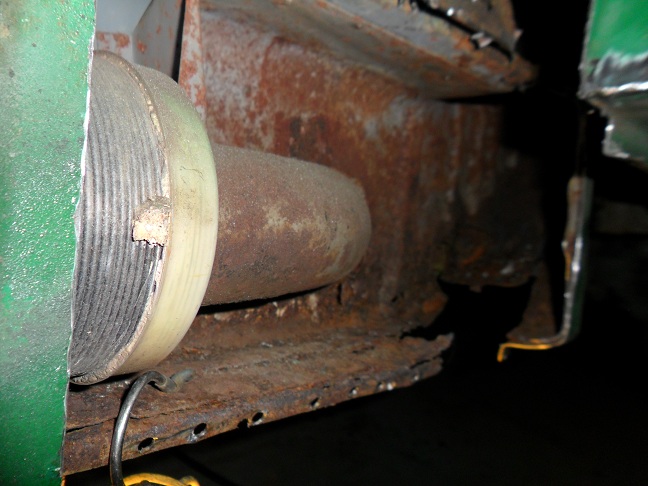 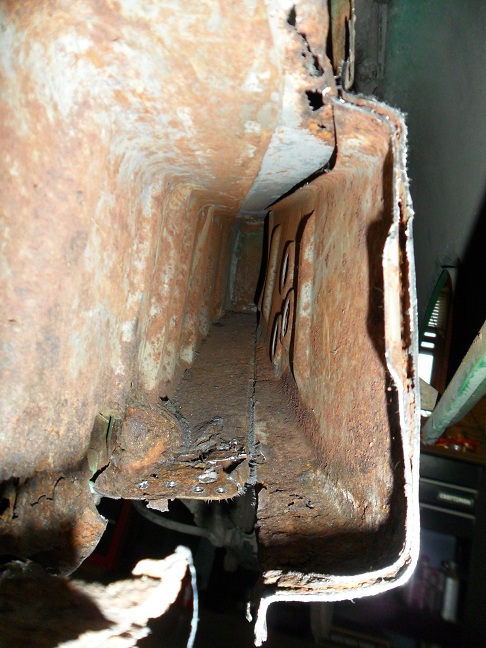 |
| saigon71 |
 Mar 11 2012, 06:48 PM Mar 11 2012, 06:48 PM
Post
#169
|
|
Advanced Member     Group: Members Posts: 2,019 Joined: 1-June 09 From: Dillsburg, PA Member No.: 10,428 Region Association: MidAtlantic Region 

|
(IMG:style_emoticons/default/headbang.gif) (IMG:style_emoticons/default/sawzall-smiley.gif)
More cutting. Just like on the passenger side, there was rust through at the bottom of the front fender well where it meets the long. I opened it up to take a look. The front 2" of the inner long is rusted through on the bottom and it crept up about an inch on the outer clamshell. With both sides open, I was able to blast compressed air through the remaining section to get the loose rust out: 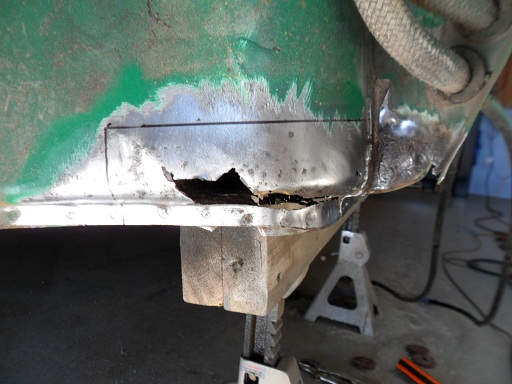 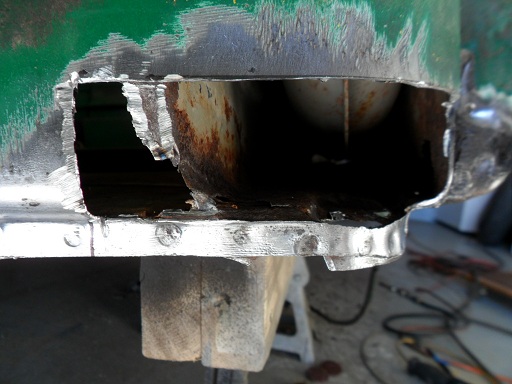 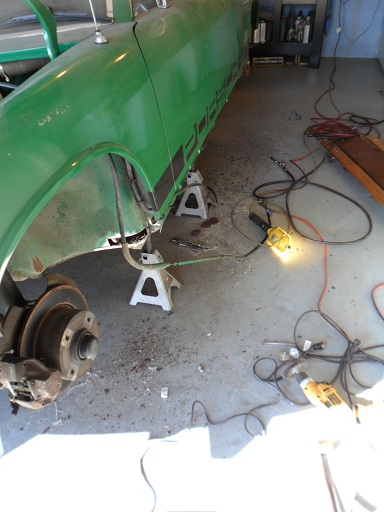 Cleaned the bottom with a wire wheel. The rust through on the bottom is isolated to the very front and about 9" around the old jackpost...right around the area of the mouse nest: 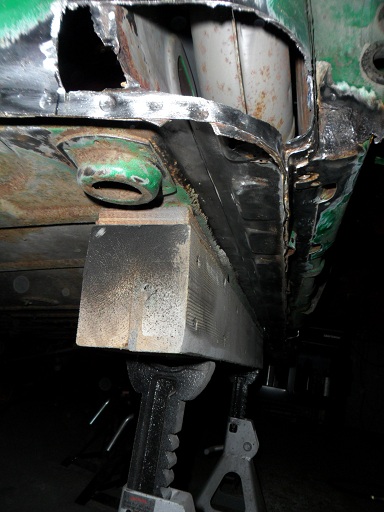 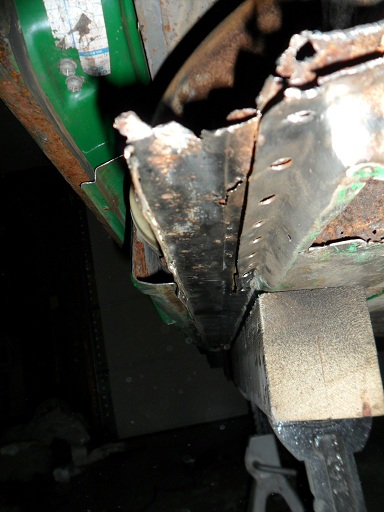 After cutting out most of the rusty sections of longitudinal, this is what I am left with. The car started to sag so I tightened up the turnbuckle...still not sure I want to replace the entire long, but I am scratching my head for another solution. I have been in contact with Brad Mayner about his long kit: 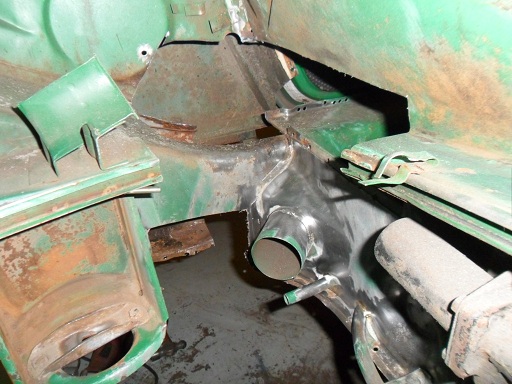 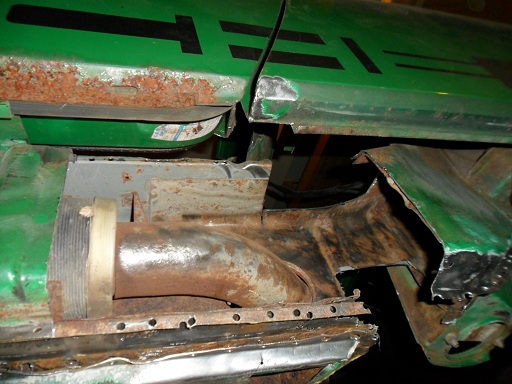 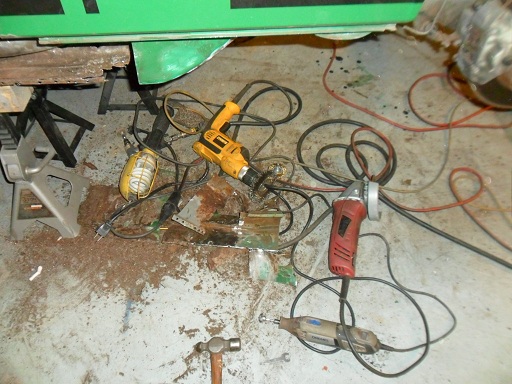 |
| saigon71 |
 Mar 21 2012, 06:36 PM Mar 21 2012, 06:36 PM
Post
#170
|
|
Advanced Member     Group: Members Posts: 2,019 Joined: 1-June 09 From: Dillsburg, PA Member No.: 10,428 Region Association: MidAtlantic Region 

|
While figuring out the best way to repair the long, I started tearing into the "box" below the front door jamb. Three layers and all had serious rust problems. I saved what I could of the old pieces and added new metal. The innermost level was completely shot and had to be made from scratch. Additionally, the vertical support piece in the front of the wheel well was rusted out about an 1 1/2" up from the pan.
Went to work (IMG:style_emoticons/default/sawzall-smiley.gif) fabircating all the pieces. Sprayed all rusty metal with ospho & hit everything else with weld-thru primer: 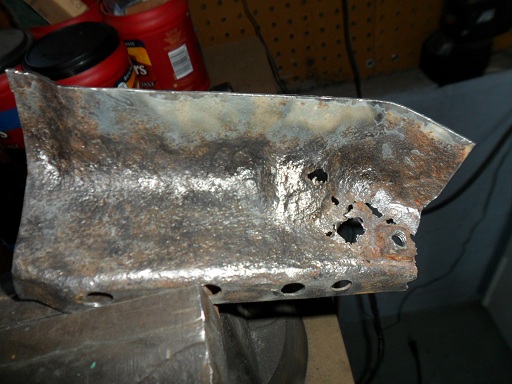 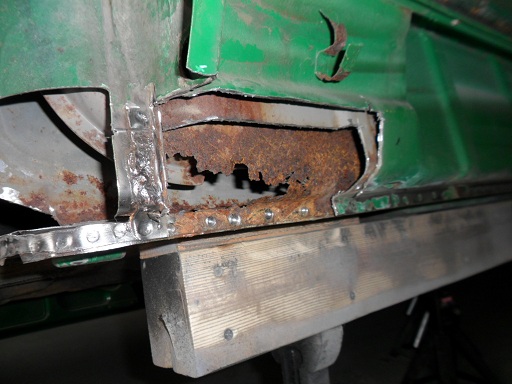 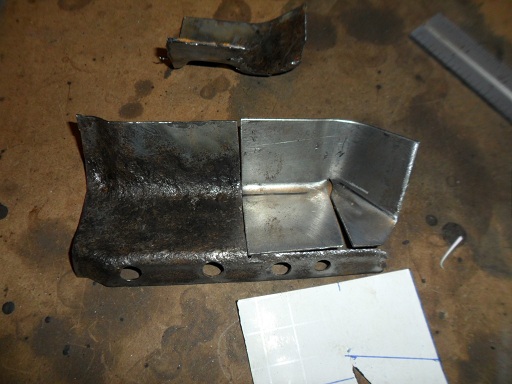 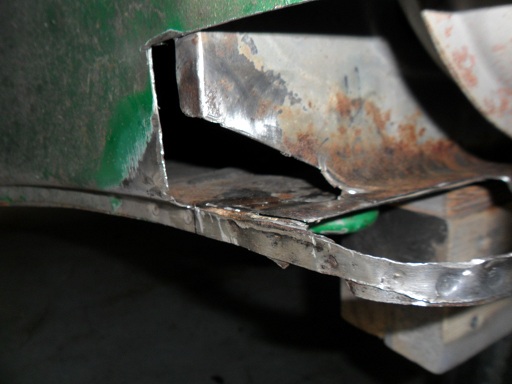 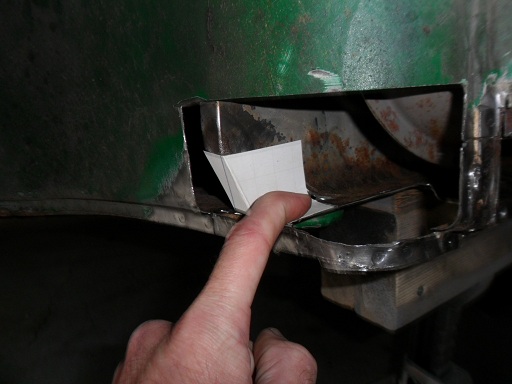 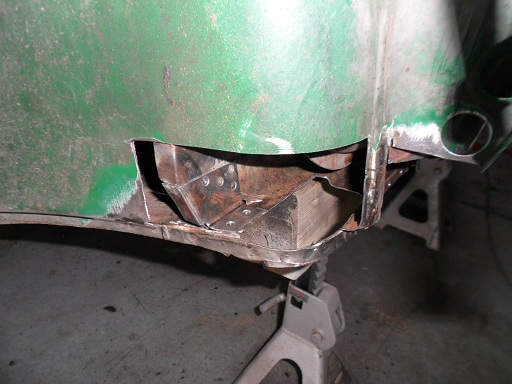 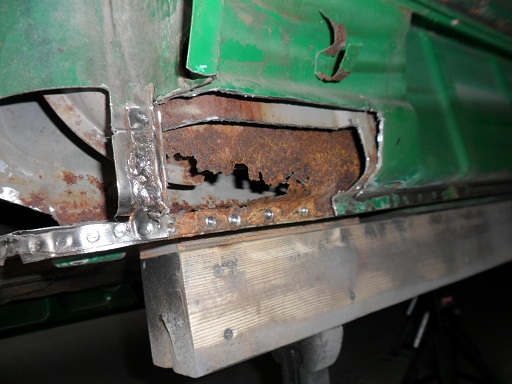 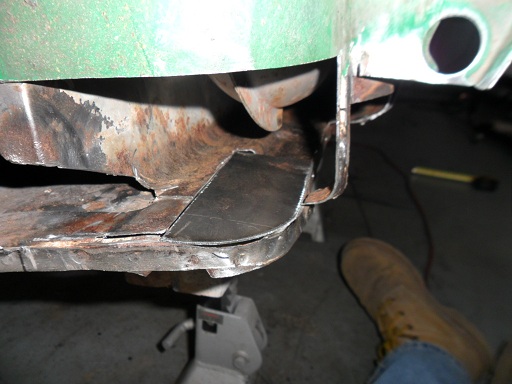 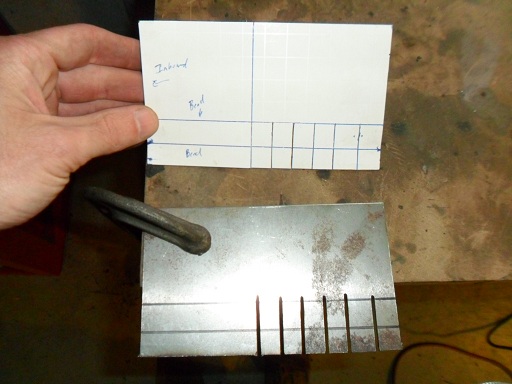 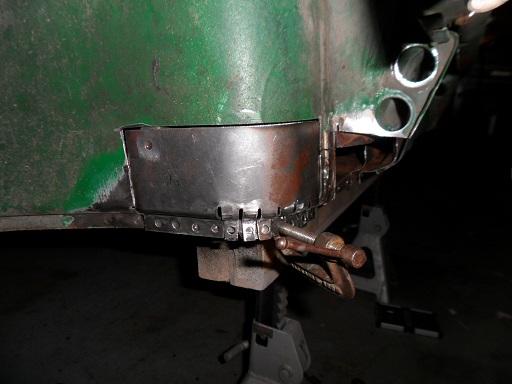 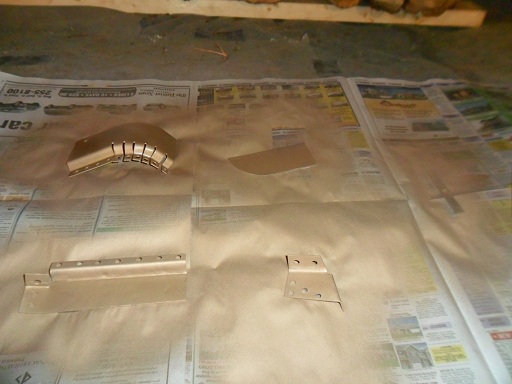 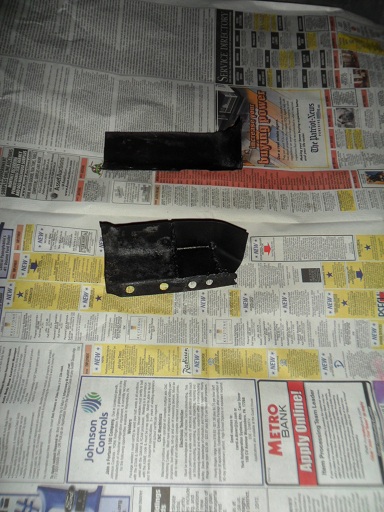 Found some rust under the seam sealer in the front fender well, cleaned the area and prepped for ospho: 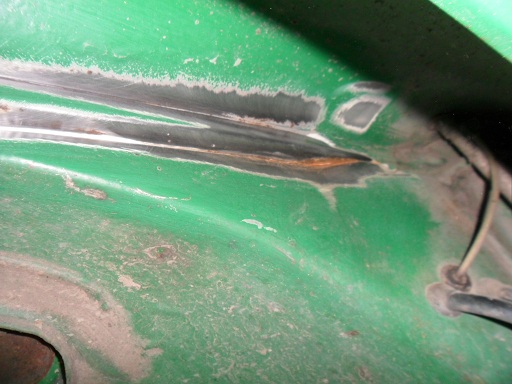 |
| hot_shoe914 |
 Mar 21 2012, 08:33 PM Mar 21 2012, 08:33 PM
Post
#171
|
|
on ramp passer     Group: Members Posts: 3,807 Joined: 20-November 07 From: Earle, Ar. Member No.: 8,354 Region Association: None |
Dude, you are amazing! (IMG:style_emoticons/default/first.gif)
|
| saigon71 |
 Apr 4 2012, 07:47 PM Apr 4 2012, 07:47 PM
Post
#172
|
|
Advanced Member     Group: Members Posts: 2,019 Joined: 1-June 09 From: Dillsburg, PA Member No.: 10,428 Region Association: MidAtlantic Region 

|
Had to pull the antenna out to get at some rust in the wheel well. While it was out, I cleaned it up, lubed it and ospho'd/painted the rusty mounting point:
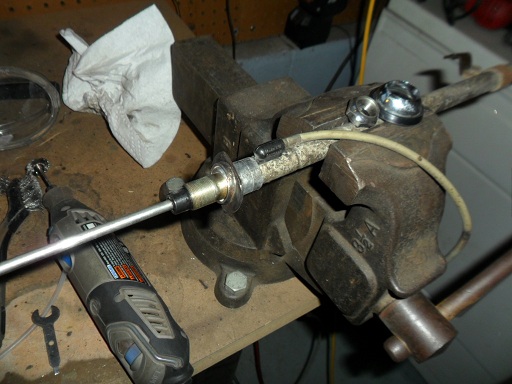 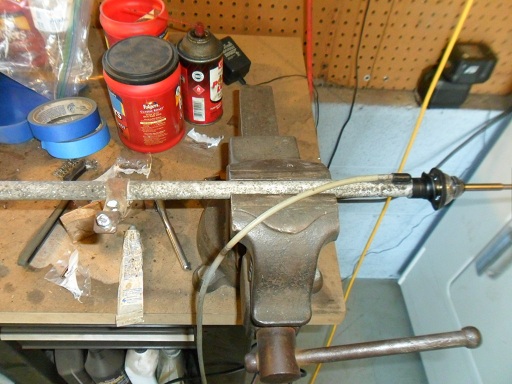 Primed, seam-sealed and painted the passenger door jamb: 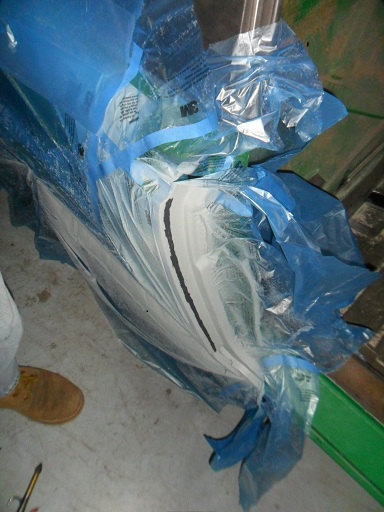 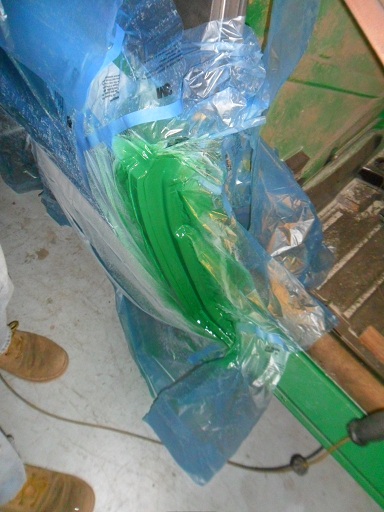 The drivers side inner suspension drain hole was plugged solid with dirt & scale. using an assortment of screwdrivers, small picks, safety wire and compressed air I was able to clear it: 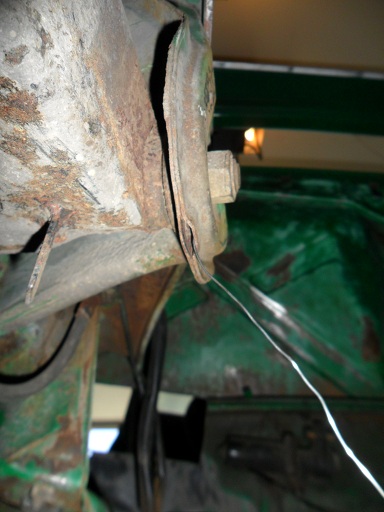 Picked up a rattle can extension for use with Eastwood's rust converter so I could reach into the clamshell to protect the metal...it made a hell of a mess. I have had problems with heavy coats of this stuff staying tacky so I applied a little extra heat with a space heater for a couple of days: 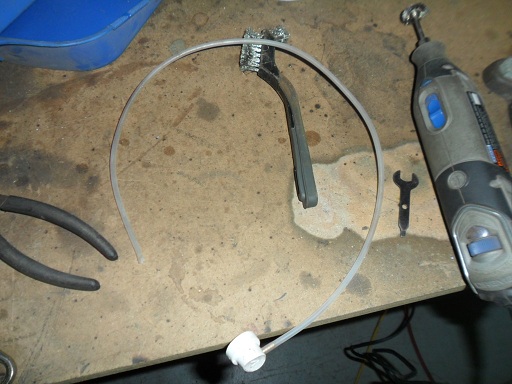 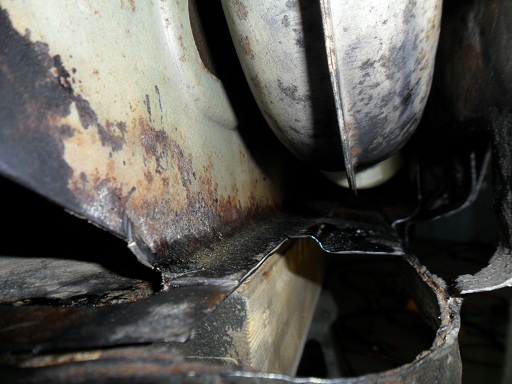 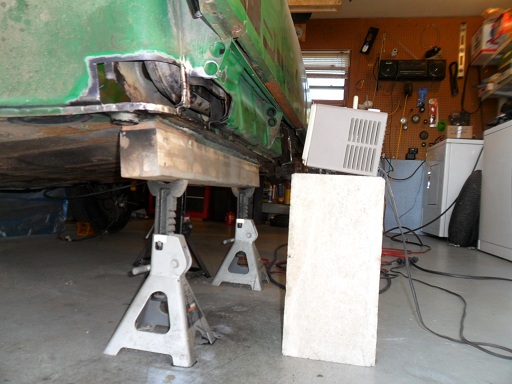 |
| scotty b |
 Apr 4 2012, 08:14 PM Apr 4 2012, 08:14 PM
Post
#173
|
|
rust free you say ?                Group: Members Posts: 16,375 Joined: 7-January 05 From: richmond, Va. Member No.: 3,419 Region Association: None |
2 weeks left (IMG:style_emoticons/default/poke.gif) (IMG:style_emoticons/default/poke.gif)
|
| saigon71 |
 Apr 5 2012, 04:04 PM Apr 5 2012, 04:04 PM
Post
#174
|
|
Advanced Member     Group: Members Posts: 2,019 Joined: 1-June 09 From: Dillsburg, PA Member No.: 10,428 Region Association: MidAtlantic Region 

|
|
| jsayre914 |
 Apr 5 2012, 04:08 PM Apr 5 2012, 04:08 PM
Post
#175
|
|
Speed Up !!!     Group: Members Posts: 3,210 Joined: 10-February 08 From: Timonium MD 21093 Member No.: 8,696 Region Association: MidAtlantic Region |
Just put the engine in and the wheels back on. Its not so far
(IMG:style_emoticons/default/rolleyes.gif) |
| saigon71 |
 Apr 5 2012, 04:15 PM Apr 5 2012, 04:15 PM
Post
#176
|
|
Advanced Member     Group: Members Posts: 2,019 Joined: 1-June 09 From: Dillsburg, PA Member No.: 10,428 Region Association: MidAtlantic Region 

|
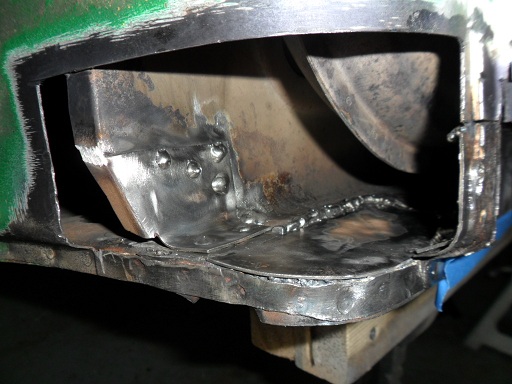
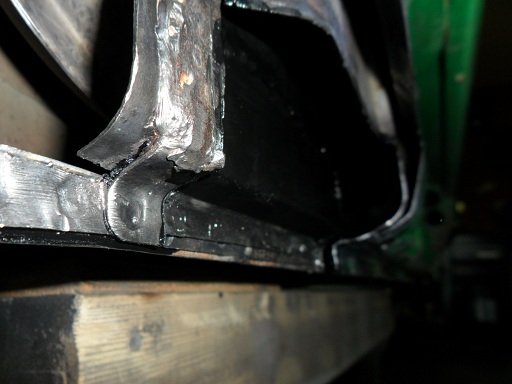
Prepped all parts for welding the lower fender well and front box & started welding. I had some problems with burn-thru on the inner layer of the box, so I had to turn the mig down to a lower setting:
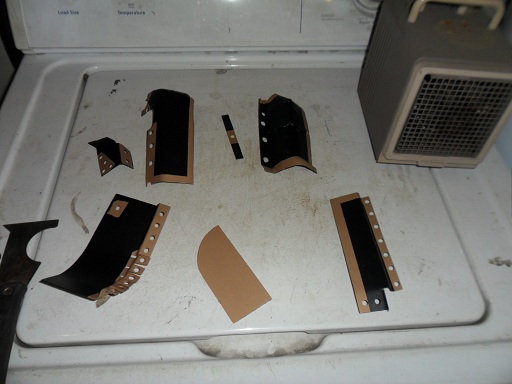 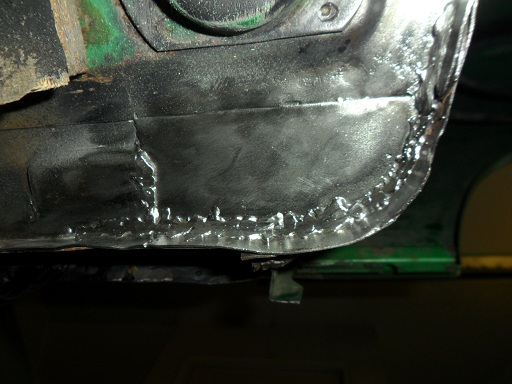 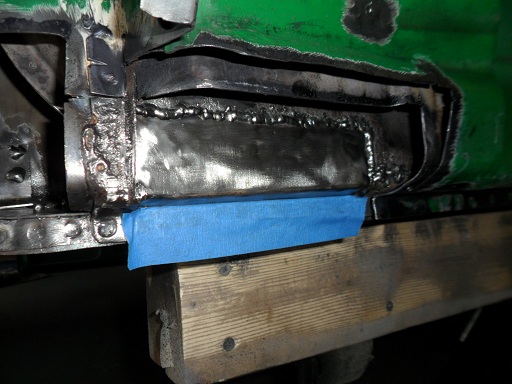   The lower fender at the door jamb was rusted through so I hammered out some small patches. It was a royal PITA welding & grinding in the bottom of the front door jamb: 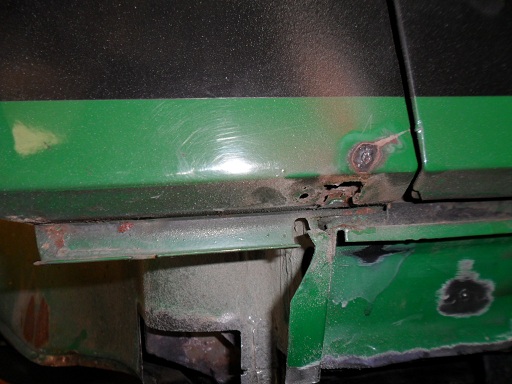 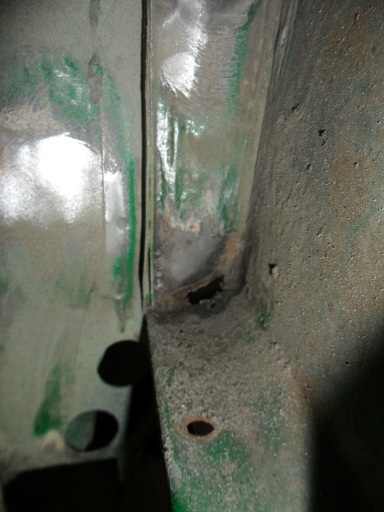 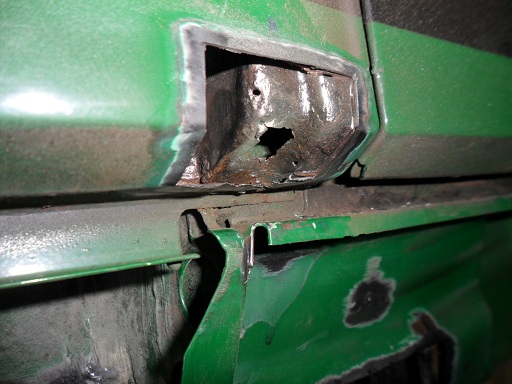 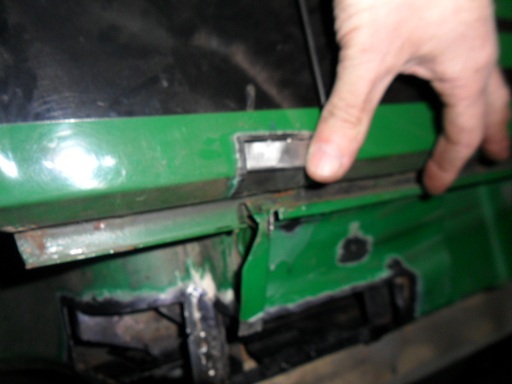 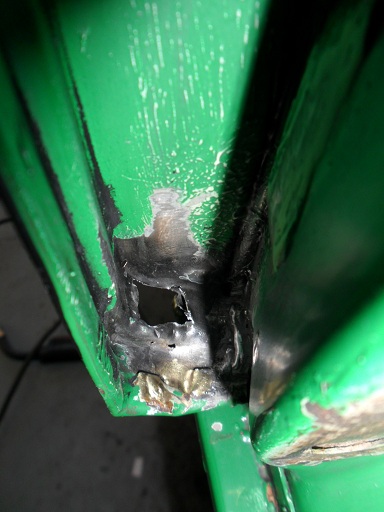 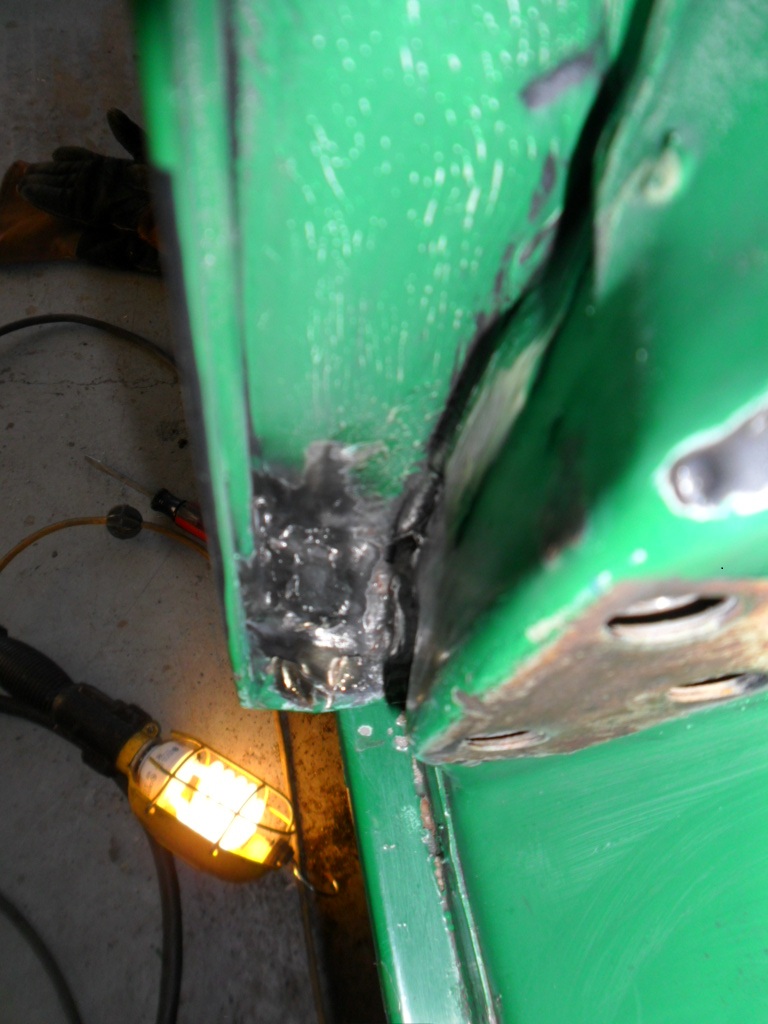 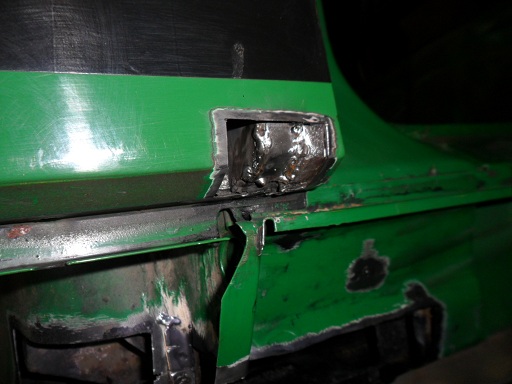 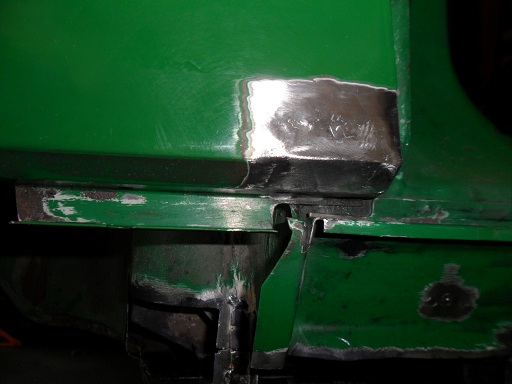 |
| saigon71 |
 Apr 8 2012, 05:38 PM Apr 8 2012, 05:38 PM
Post
#177
|
|
Advanced Member     Group: Members Posts: 2,019 Joined: 1-June 09 From: Dillsburg, PA Member No.: 10,428 Region Association: MidAtlantic Region 

|
Welded in layer two of the rebuilt front box today & applied rust encapsulator. Progress is slow in this area due to the rustproofing after each layer:
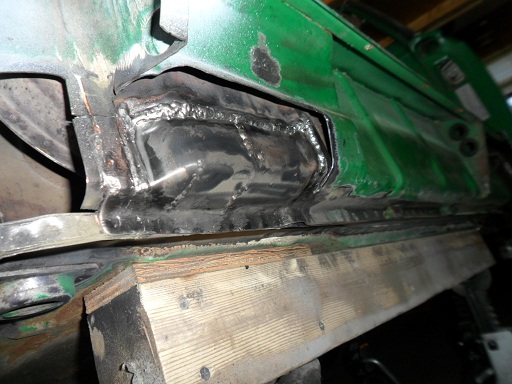 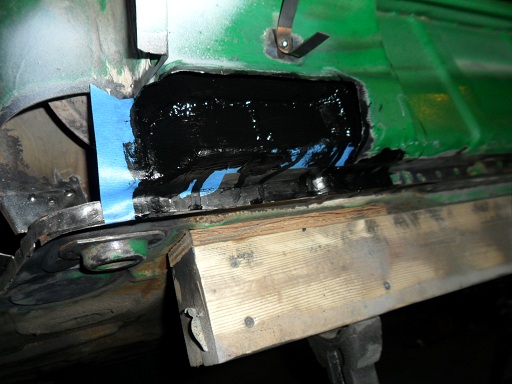 Welded on a newly made holder for the gas tank expansion lines: 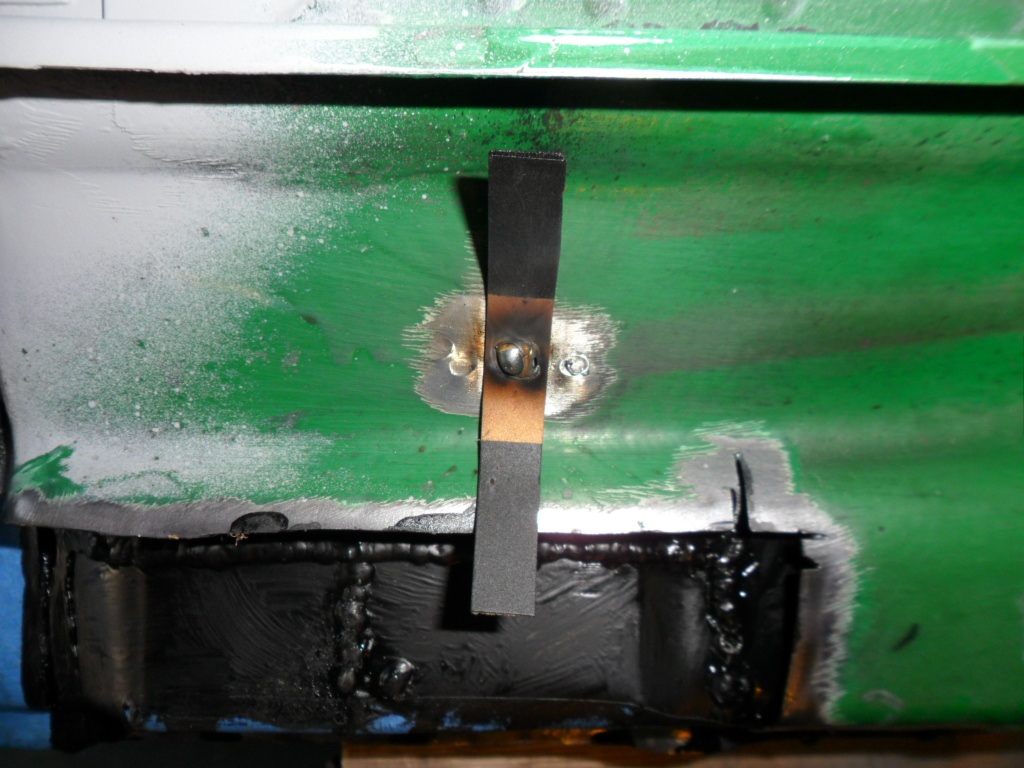 Finished sanding the spot putty on the lower fender & shot it with primer: 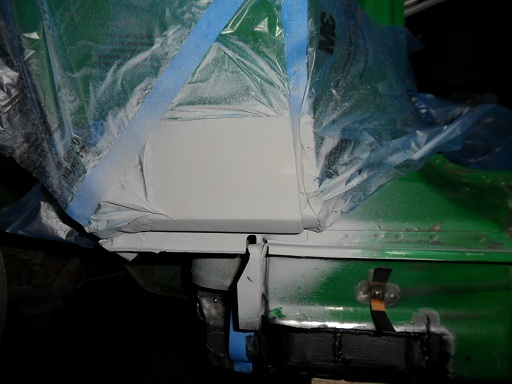 |
| saigon71 |
 Apr 16 2012, 12:10 PM Apr 16 2012, 12:10 PM
Post
#178
|
|
Advanced Member     Group: Members Posts: 2,019 Joined: 1-June 09 From: Dillsburg, PA Member No.: 10,428 Region Association: MidAtlantic Region 

|
Welded & ground the outer layer of the front pillar box:
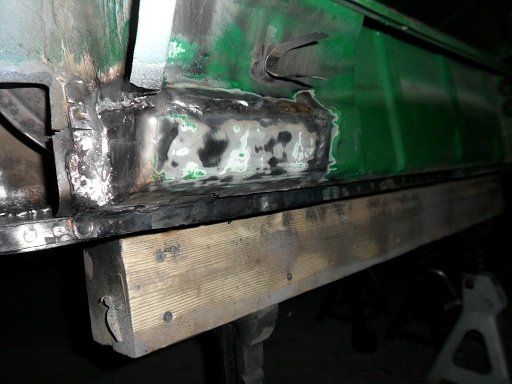 Had to modify some tools to clean the inside of the remaining long. A small wire brush fit well into a 3' piece of PVC so I could reach into the long to remove some scale. To get the crud out of the outer suspension console, I taped some hose on the air chuck and fed it through the holes on the inside of the long. The area was then sprayed with Rust Encapsulator: 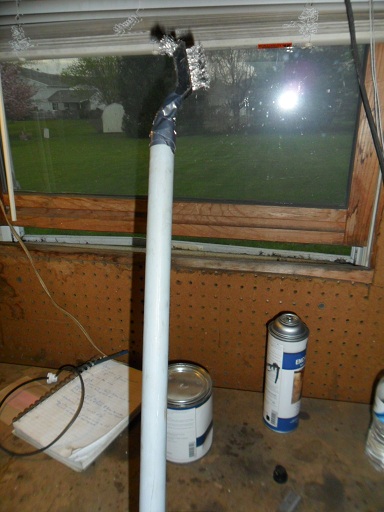 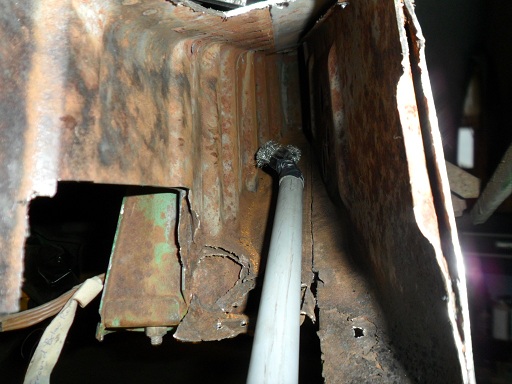 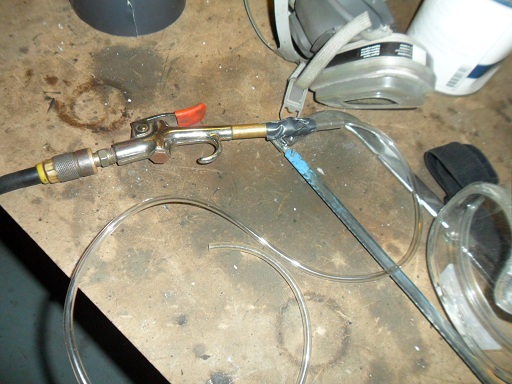 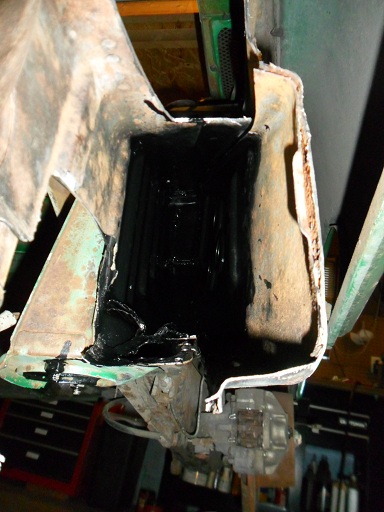 |
| OllieG |
 Apr 20 2012, 02:59 PM Apr 20 2012, 02:59 PM
Post
#179
|
|
OllieG   Group: Members Posts: 212 Joined: 6-July 11 From: UK Member No.: 13,282 Region Association: England |
Fantastic thread!...discovered it just in time before I start some major hell hole repairs of my own.
Meticulous work Bob, nice one! Cheers, Ollie. |
| saigon71 |
 May 1 2012, 07:43 AM May 1 2012, 07:43 AM
Post
#180
|
|
Advanced Member     Group: Members Posts: 2,019 Joined: 1-June 09 From: Dillsburg, PA Member No.: 10,428 Region Association: MidAtlantic Region 

|
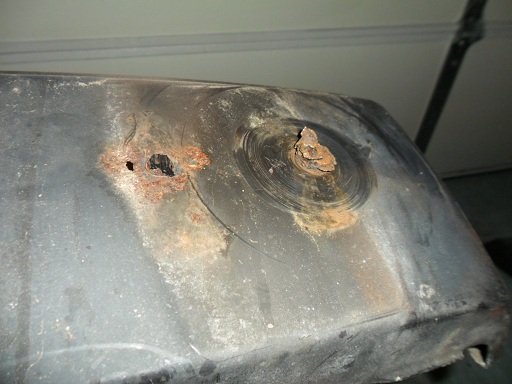
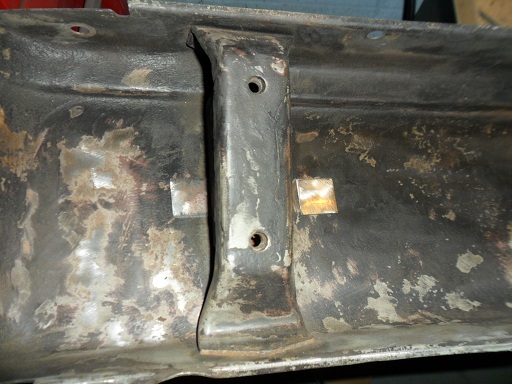
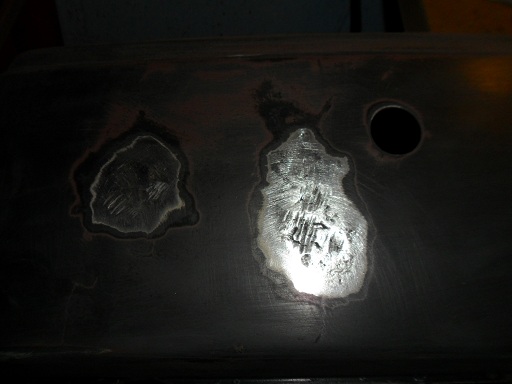
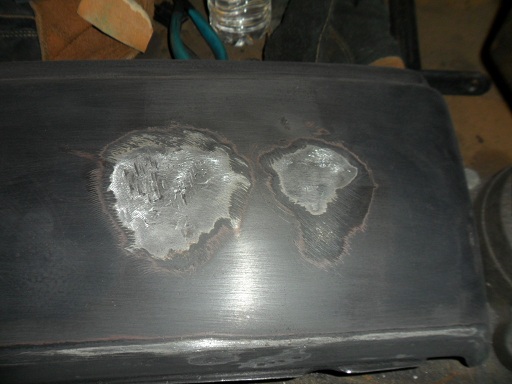
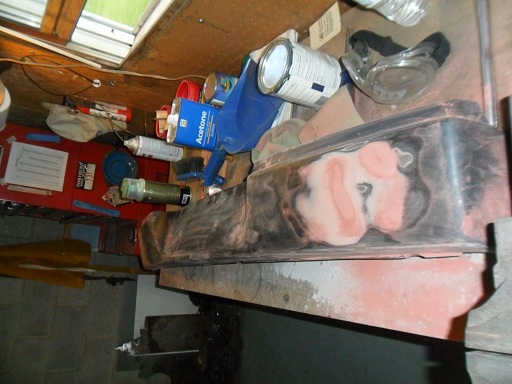
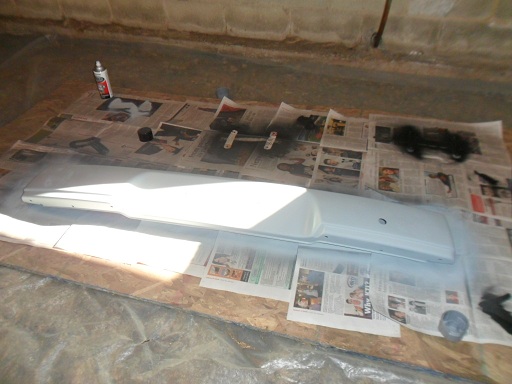
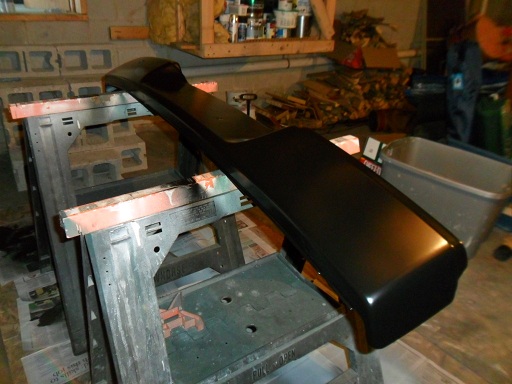
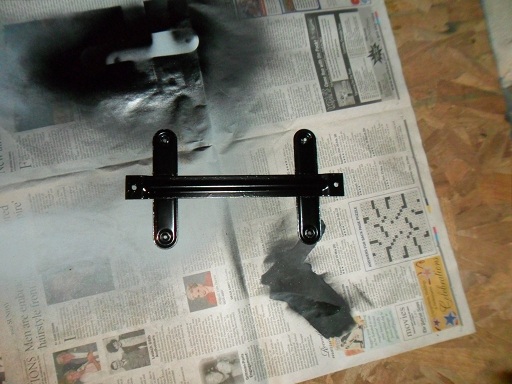
Went to work on the bumper I bought at Hershey. It was pretty clean, but there was some "surface" rust under one of the tits. All four bolts broke off when removing them. I tried pulling the tits off my old bumper and the same thing happened. I wasn't a big fan of the look of the 74 bumpers, so the bumper got backdated. Welded backers on the holes & filled with weld. There were still a couple of slight low spots where the tits were, so I had to apply a light layer of filler before priming and painting:
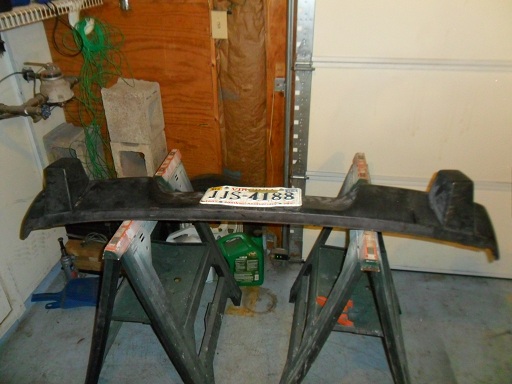         |
  |
1 User(s) are reading this topic (1 Guests and 0 Anonymous Users)
0 Members:

|
Lo-Fi Version | Time is now: 1st November 2025 - 02:51 AM |
Invision Power Board
v9.1.4 © 2025 IPS, Inc.


