|
|
|
Porsche, and the Porsche crest are registered trademarks of Dr. Ing. h.c. F. Porsche AG.
This site is not affiliated with Porsche in any way. Its only purpose is to provide an online forum for car enthusiasts. All other trademarks are property of their respective owners. |
|
|

  |

| hot_shoe914 |
 May 9 2011, 09:04 AM May 9 2011, 09:04 AM
Post
#21
|
|
on ramp passer  Group: Members Posts: 3,807 Joined: 20-November 07 From: Earle, Ar. Member No.: 8,354 Region Association: None |
Very nice Bob, you look like you have been taking lessons from Scotty. Very impressive work. Git 'er Done! (IMG:style_emoticons/default/welder.gif)
|
   |

 
|
| saigon71 |
May 9 2011, 01:50 PM
Post
#22
|
|
Advanced Member Group: Members Posts: 2,026 Joined: 1-June 09 From: Dillsburg, PA Member No.: 10,428 Region Association: MidAtlantic Region |
QUOTE(hot_shoe914 @ May 9 2011, 11:04 AM)  Very nice Bob, you look like you have been taking lessons from Scotty. Very impressive work. Git 'er Done! (IMG:style_emoticons/default/welder.gif) Thanks Shoe...I ask Scotty questions every time I see him. (IMG:style_emoticons/default/biggrin.gif) |
|
|
|
| Ian Stott |
May 9 2011, 03:31 PM
Post
#23
|
|
Senior Member Group: Members Posts: 907 Joined: 28-January 08 From: Moncton/Canada Member No.: 8,635 Region Association: Canada |
Beautiful work like that is the reason we never want to give up our cars, I don't think there are many shops that would be that picky about angles and straight lines. My hat off to you, gonna be a great example of a nice teener when done, hope to see it at Hershey or some other event in the future. Oh and don't forget what a great motivator cash is, your jackstands will bring a better than normal amount when you are finished if you show pics of what they have been holding up!
Ian Stott Moncton Canada |
|
|
|
| saigon71 |
May 15 2011, 06:32 PM
Post
#24
|
|
Advanced Member Group: Members Posts: 2,026 Joined: 1-June 09 From: Dillsburg, PA Member No.: 10,428 Region Association: MidAtlantic Region |
While waiting on the inner "ply" for the outer wheelhouse from Restoration Design, I decided to start tackling the passenger side firewall and some other miscellaneous items. This is what I started with:
  I opted to cut out all rusted metal in one chunk:  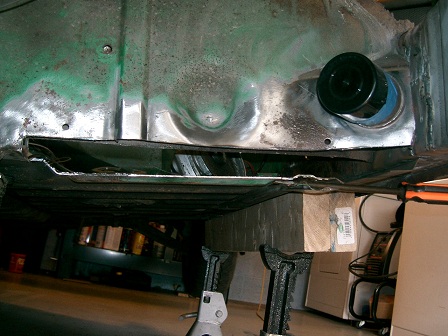 |
|
|
|
| saigon71 |
May 15 2011, 06:42 PM
Post
#25
|
|
Advanced Member Group: Members Posts: 2,026 Joined: 1-June 09 From: Dillsburg, PA Member No.: 10,428 Region Association: MidAtlantic Region |
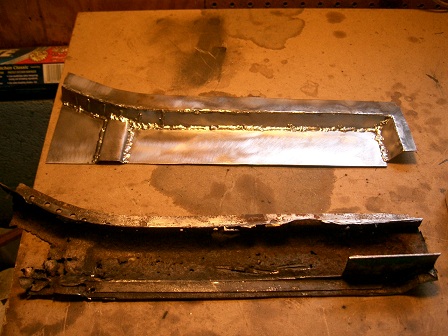
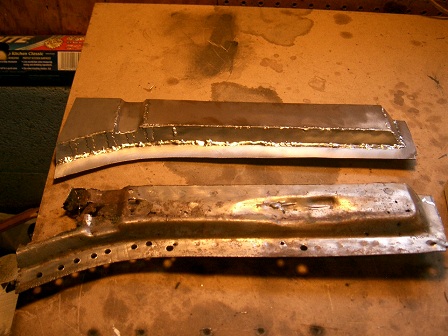
Cutting - continued:
 Luckily, it looks like the rust only crept about an inch or so up into the firewall...this shot is looking between inner & outer firewall. 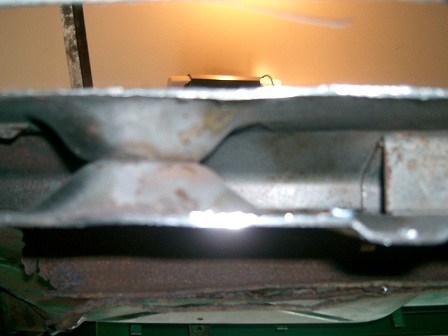 The damaged area: 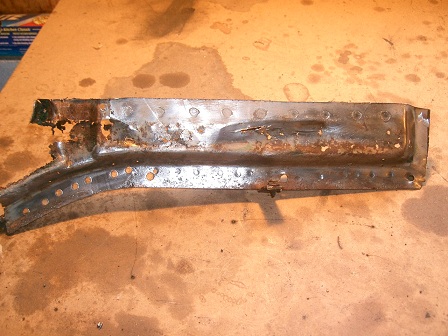 Short on money, but long on time & sheet metal, I decided to try to fabricate a replacement piece...started by cutting the bottom curved piece at the base of the firewall and went from there. The most difficult part for me was the compound bend, where I had to cut slits to get the right contour, then fill with weld. I left it a little long in all dimensions, so I could trim it as needed for the final fit. Still need to weld all seams on this, but I am pleased with how it is shaping up: 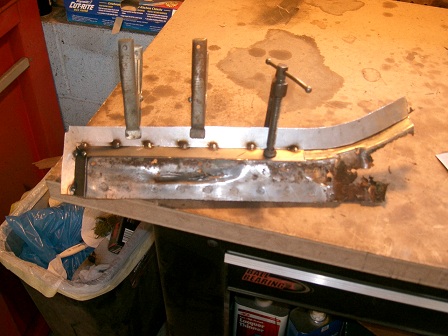 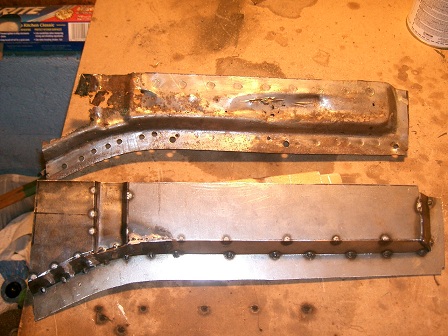 |
|
|
|
| saigon71 |
May 15 2011, 06:49 PM
Post
#26
|
|
Advanced Member Group: Members Posts: 2,026 Joined: 1-June 09 From: Dillsburg, PA Member No.: 10,428 Region Association: MidAtlantic Region |
Fabrication - continued:
 Finally finished the front hood channel. One section was fabricated & replaced. All rust was treated with Ospho, two coats of Rust Bullet then two coats of brushed on acrylic enamel: 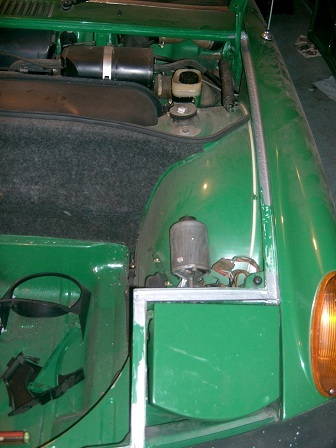 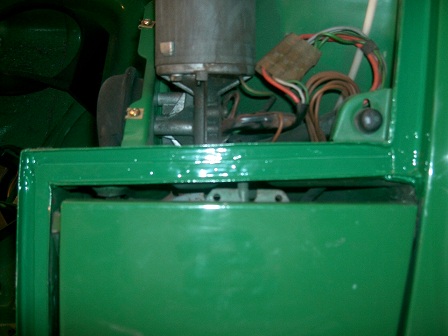 My virtual junkyard: 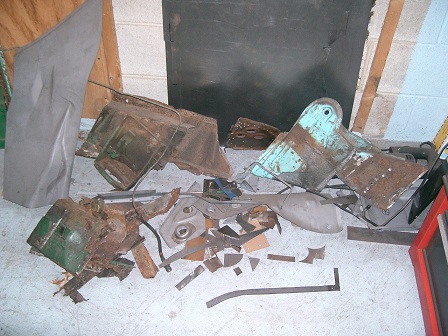  |
|
|
|
| saigon71 |
May 15 2011, 06:50 PM
Post
#27
|
|
Advanced Member Group: Members Posts: 2,026 Joined: 1-June 09 From: Dillsburg, PA Member No.: 10,428 Region Association: MidAtlantic Region |
Shingle tar plug glued in:
 |
|
|
|
| Mike Bellis |
May 15 2011, 09:45 PM
Post
#28
|
|
Resident Electrician Group: Members Posts: 8,348 Joined: 22-June 09 From: Midlothian TX Member No.: 10,496 Region Association: None |
Nice work! (IMG:style_emoticons/default/first.gif)
|
|
|
|
| AndyB |
May 16 2011, 03:26 AM
Post
#29
|
|
The Governor is watching me Group: Members Posts: 1,115 Joined: 10-April 10 From: Philadelphia New York Member No.: 11,595 Region Association: North East States |
Looking good Bob keep it up (IMG:style_emoticons/default/welder.gif)
|
|
|
|
| saigon71 |
May 16 2011, 05:22 AM
Post
#30
|
|
Advanced Member Group: Members Posts: 2,026 Joined: 1-June 09 From: Dillsburg, PA Member No.: 10,428 Region Association: MidAtlantic Region |
Thanks gents!
11 months till Hershey...11 months till Hershey...11 months till Hershey (IMG:style_emoticons/default/sawzall-smiley.gif) (IMG:style_emoticons/default/welder.gif) (IMG:style_emoticons/default/beer3.gif) |
|
|
|
| type47 |
May 16 2011, 06:14 AM
Post
#31
|
|
Viermeister Group: Members Posts: 4,254 Joined: 7-August 03 From: Vienna, VA Member No.: 994 Region Association: MidAtlantic Region |
Like Spraggi says, don't set yourself a deadline (IMG:style_emoticons/default/biggrin.gif)
|
|
|
|
| saigon71 |
May 17 2011, 07:10 PM
Post
#32
|
|
Advanced Member Group: Members Posts: 2,026 Joined: 1-June 09 From: Dillsburg, PA Member No.: 10,428 Region Association: MidAtlantic Region |
Zipped up the seams on the replacement floorpan piece today, the piece is now in the crawl space (paint room) drying, after getting sprayed with primer:
  Pulled out the gas tank, following the Pelican article...was not surprised to find more rust under the tank: 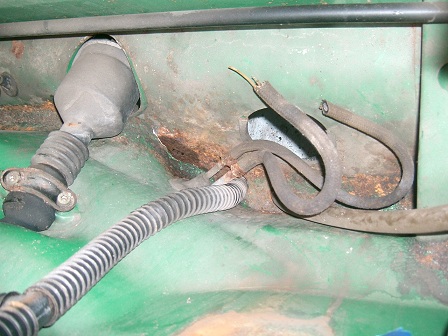 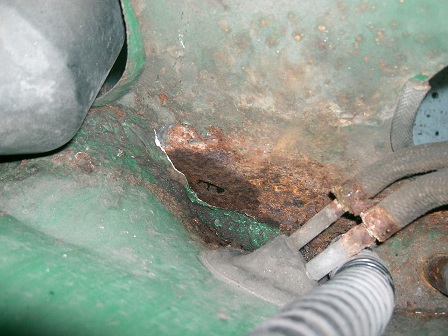 |
|
|
|
| saigon71 |
May 17 2011, 07:23 PM
Post
#33
|
|
Advanced Member Group: Members Posts: 2,026 Joined: 1-June 09 From: Dillsburg, PA Member No.: 10,428 Region Association: MidAtlantic Region |
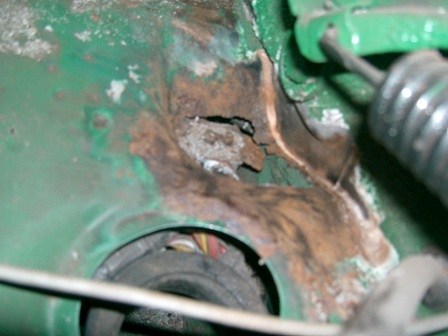
Found another large spot of rust where the front trunk latch cable attaches under the dash. The mounting point is completely gone and all that remains is a hole. My question is...what would cause this area to rust out so bad? Fender to cowl seals?
  Finally, my gas tank is rusty inside. How rusty is too rusty? Can I dump all the rust out and expect this to not get much worse if I keep gas in the tank? My goal here is a reliable daily driver...am I asking for trouble if I don't re-seal this tank? 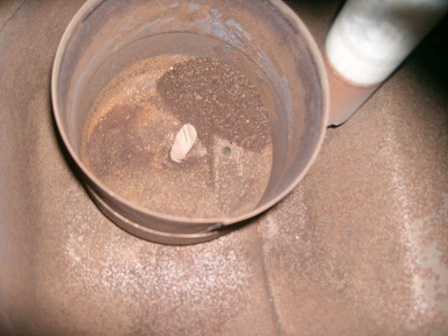 |
|
|
|
| mepstein |
May 17 2011, 07:53 PM
Post
#34
|
|
914-6 GT in waiting Group: Members Posts: 20,763 Joined: 19-September 09 From: Landenberg, PA/Wilmington, DE Member No.: 10,825 Region Association: MidAtlantic Region |
QUOTE(saigon71 @ May 17 2011, 09:23 PM) Found another large spot of rust where the front trunk latch cable attaches under the dash. The mounting point is completely gone and all that remains is a hole. My question is...what would cause this area to rust out so bad? Fender to cowl seals? Finally, my gas tank is rusty inside. How rusty is too rusty? Can I dump all the rust out and expect this to not get much worse if I keep gas in the tank? My goal here is a reliable daily driver...am I asking for trouble if I don't re-seal this tank? My white car had the same issue. The pocket holds water. Mixed with dirt and a mouse nest it stayed damp for a long time. Also check down near your pedal cluster, in back of seats under the tar and any "pocket" that holds water. Clean out the gas tank to bare metal. There are lots of how to threads. |
 |
|
| draganc |
May 21 2011, 03:46 PM
Post
#35
|
|
Senior Member Group: Members Posts: 725 Joined: 2-November 09 From: central new jersey Member No.: 11,000 Region Association: North East States |
QUOTE(saigon71 @ May 15 2011, 04:42 PM) Cutting - continued: Luckily, it looks like the rust only crept about an inch or so up into the firewall...this shot is looking between inner & outer firewall. The damaged area: Short on money, but long on time & sheet metal, I decided to try to fabricate a replacement piece...started by cutting the bottom curved piece at the base of the firewall and went from there. The most difficult part for me was the compound bend, where I had to cut slits to get the right contour, then fill with weld. I left it a little long in all dimensions, so I could trim it as needed for the final fit. Still need to weld all seams on this, but I am pleased with how it is shaping up: Great work man! |
|
|
|
| saigon71 |
May 23 2011, 07:26 PM
Post
#36
|
|
Advanced Member Group: Members Posts: 2,026 Joined: 1-June 09 From: Dillsburg, PA Member No.: 10,428 Region Association: MidAtlantic Region |
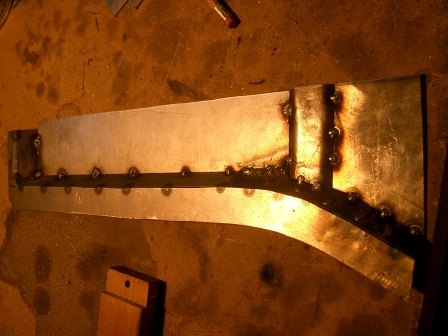
Restoration Design shipped me the inner ply for the wheelhouse section last week:
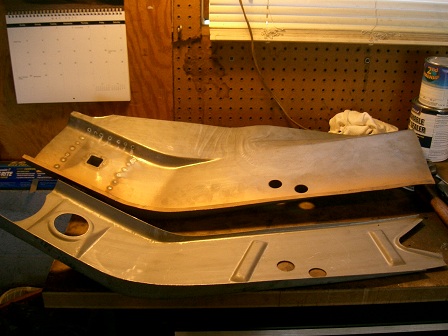 Drilled holes for the rosette welds: 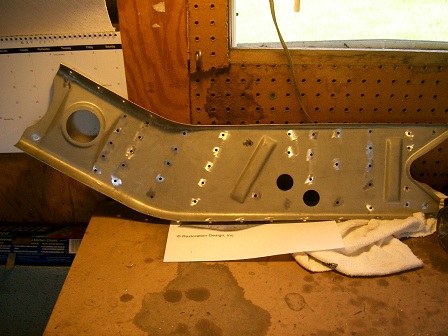 Fabricated a cover plate for inside of the jack post & welded it on. Sprayed both parts with weld thru primer: 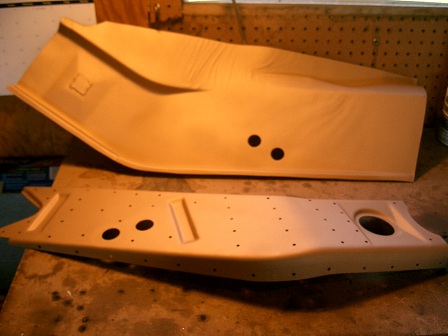 Two plies welded together:  Finished product...weld thru primer on the seams, rust encapsulator everywhere else. I hope to start welding this in tomorrow: 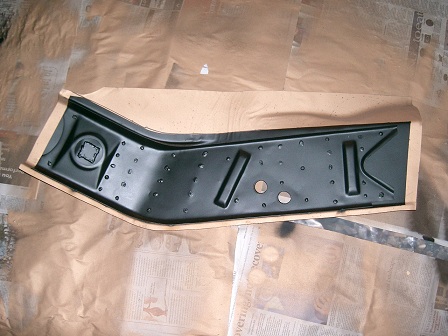 |
|
|
|
| saigon71 |
May 23 2011, 07:27 PM
Post
#37
|
|
Advanced Member Group: Members Posts: 2,026 Joined: 1-June 09 From: Dillsburg, PA Member No.: 10,428 Region Association: MidAtlantic Region |
Dropped the rusty fuel tank off at the radiator shop today. The guy said he needed to drop it in an acid bath and see what is left before we make a determination. I had to take it apart at the shop and I forgot to take note of the layout of the tank outlets. Does the large one go in the front or rear with the tank in the car? Sock on the larger line?
|
|
|
|
| saigon71 |
May 23 2011, 07:48 PM
Post
#38
|
|
Advanced Member Group: Members Posts: 2,026 Joined: 1-June 09 From: Dillsburg, PA Member No.: 10,428 Region Association: MidAtlantic Region |
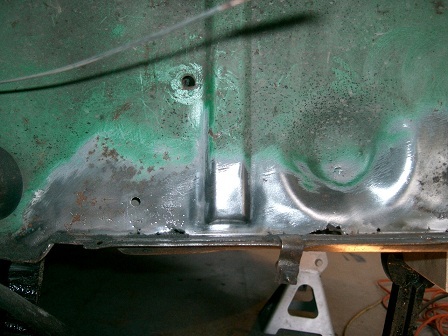
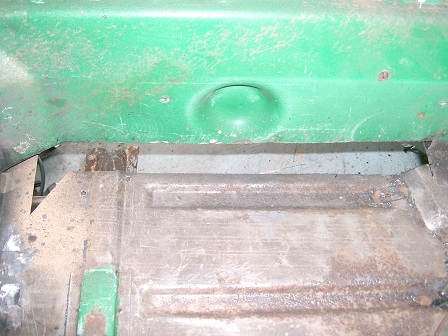
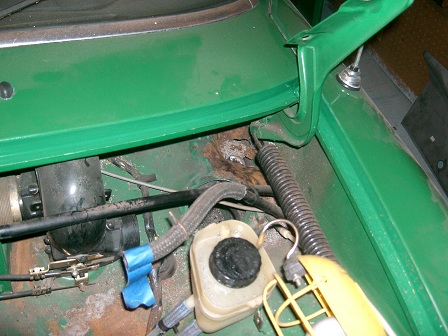
The area where the front hood release was rusted so bad, the hood release was just hanging there under the dash, supported only by the cable tube:
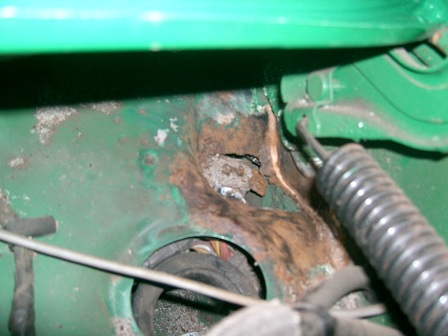 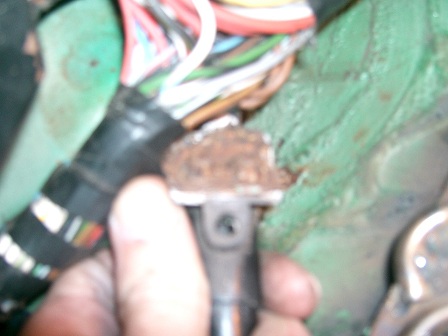 The cable assembly had to be removed to gain access to the area. Plus, the bolts were a rusty mess. Vice grips were the only way to break them loose: 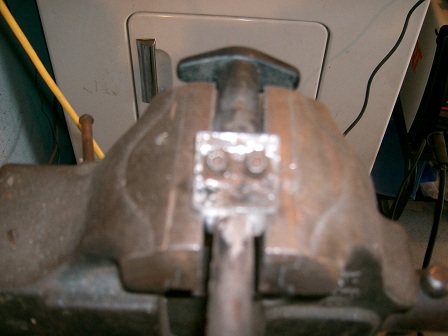 Welding upside down really sucks! (IMG:style_emoticons/default/mad.gif) I had better access to this from under the dash. After hitting everything with a dremmel tool wire wheel attachment, I bent up a doubler plate out of 20ga sheet metal and tacked it on with my body folded up under the dash. I had some burn through on some of the weaker metal so I had to rule out completely welding the seams, but was able to get it tacked in place. Raked my spine on the body braces twice getting out of the car - ouch. 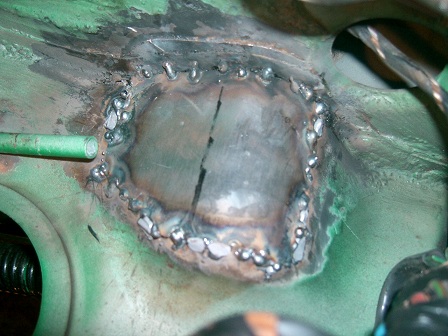  |
|
|
|
| saigon71 |
May 23 2011, 07:50 PM
Post
#39
|
|
Advanced Member Group: Members Posts: 2,026 Joined: 1-June 09 From: Dillsburg, PA Member No.: 10,428 Region Association: MidAtlantic Region |
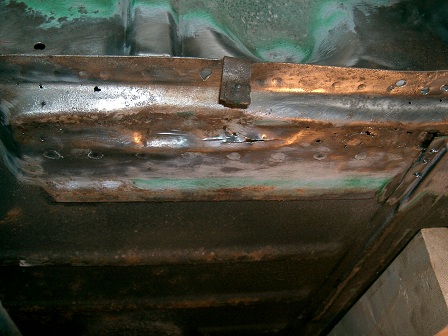
With the burn thru problem and the fact that it was such a PITA working in this tight space, I opted use a liberal application of JB Weld on both top & bottom to fill between the tack welds. It is certainly not my best work, but I believe it will be strong and functional. This area will be inspected once in a while after the car is on the road:
From above: 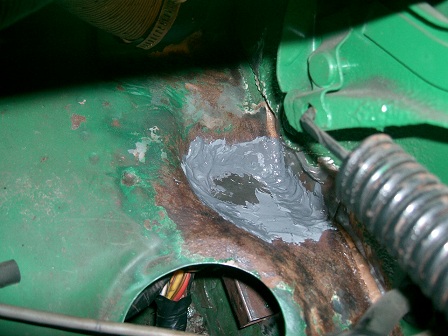 From below: 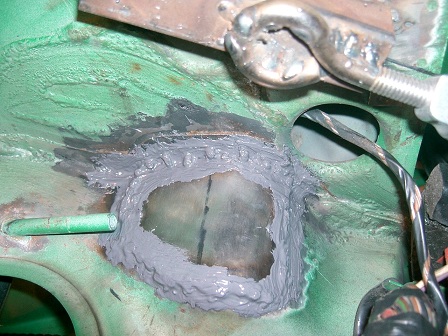 |
|
|
|
| saigon71 |
May 23 2011, 08:22 PM
Post
#40
|
|
Advanced Member Group: Members Posts: 2,026 Joined: 1-June 09 From: Dillsburg, PA Member No.: 10,428 Region Association: MidAtlantic Region |
QUOTE(Ian Stott @ May 9 2011, 05:31 PM) Beautiful work like that is the reason we never want to give up our cars, I don't think there are many shops that would be that picky about angles and straight lines. My hat off to you, gonna be a great example of a nice teener when done, hope to see it at Hershey or some other event in the future. Oh and don't forget what a great motivator cash is, your jackstands will bring a better than normal amount when you are finished if you show pics of what they have been holding up! Ian Stott Moncton Canada Thanks Ian. (IMG:style_emoticons/default/dry.gif) Interesting...never saw jackstands as an appreciating investment! Is is springtime in Monctom yet? Bob |
|
|
|
|
2 User(s) are reading this topic (2 Guests and 0 Anonymous Users)
0 Members:

|
Lo-Fi Version | Time is now: 11th June 2026 - 12:10 PM |
Invision Power Board
v9.1.4 © 2026 IPS, Inc.