|
|
|
Porsche, and the Porsche crest are registered trademarks of Dr. Ing. h.c. F. Porsche AG.
This site is not affiliated with Porsche in any way. Its only purpose is to provide an online forum for car enthusiasts. All other trademarks are property of their respective owners. |
|
|

  |

| Trekkor |
 Jul 18 2004, 11:44 PM Jul 18 2004, 11:44 PM
Post
#1
|
|
I do things...  Group: Members Posts: 7,809 Joined: 2-December 03 From: Napa, Ca Member No.: 1,413 Region Association: Northern California |
O.K. folks, here it is from start to finish:
First you must remove the seam sealer and body tar from the inside corner of the longs. Attached image(s) 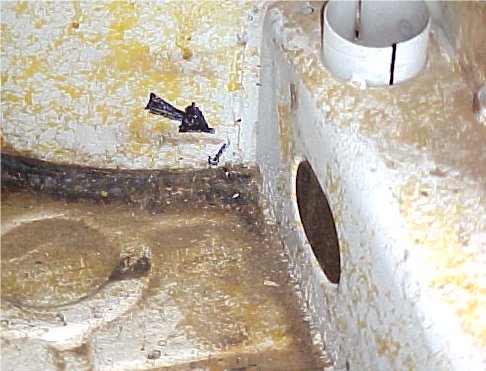
|
   |

 
|
| Trekkor |
Jul 18 2004, 11:45 PM
Post
#2
|
|
I do things... Group: Members Posts: 7,809 Joined: 2-December 03 From: Napa, Ca Member No.: 1,413 Region Association: Northern California |
It is very thick in the corners.
Attached image(s) 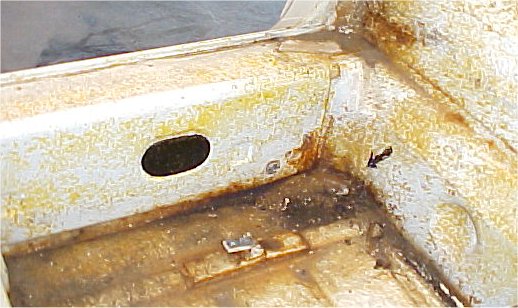
|
|
|
|
| Trekkor |
Jul 18 2004, 11:48 PM
Post
#3
|
|
I do things... Group: Members Posts: 7,809 Joined: 2-December 03 From: Napa, Ca Member No.: 1,413 Region Association: Northern California |
notice the bead of seam sealer that must come out so the sheet metal can fit to the floor pan tight.
Attached image(s) 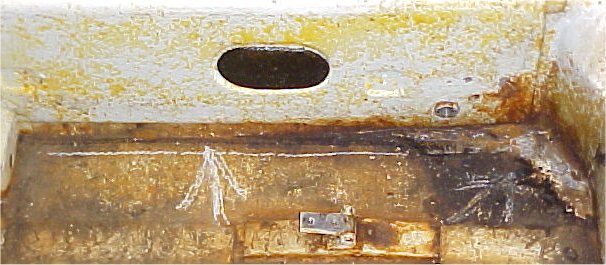
|
|
|
|
| Trekkor |
Jul 18 2004, 11:49 PM
Post
#4
|
|
I do things... Group: Members Posts: 7,809 Joined: 2-December 03 From: Napa, Ca Member No.: 1,413 Region Association: Northern California |
another
Attached image(s) 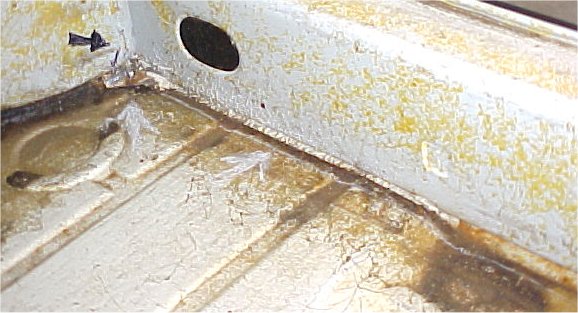
|
|
|
|
| Trekkor |
Jul 18 2004, 11:51 PM
Post
#5
|
|
I do things... Group: Members Posts: 7,809 Joined: 2-December 03 From: Napa, Ca Member No.: 1,413 Region Association: Northern California |
an air chisel works very well to remove the material
Attached image(s) 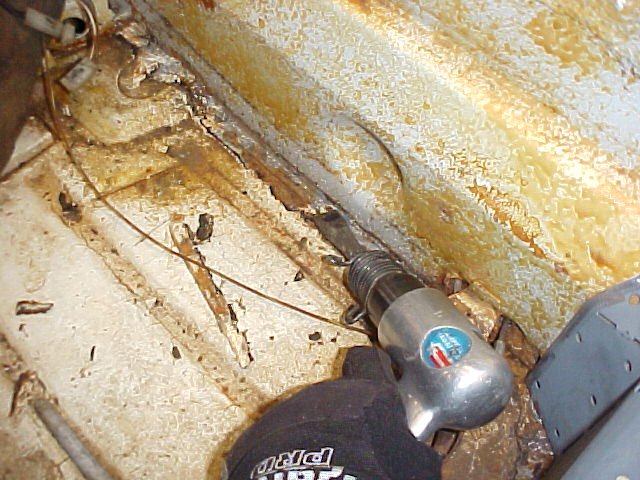
|
|
|
|
| Trekkor |
Jul 18 2004, 11:53 PM
Post
#6
|
|
I do things... Group: Members Posts: 7,809 Joined: 2-December 03 From: Napa, Ca Member No.: 1,413 Region Association: Northern California |
the width of the chisel point using careful, short bursts will quickly break out the tar.
Attached image(s) 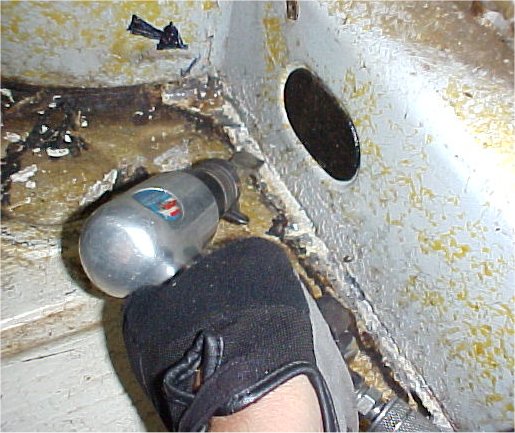
|
|
|
|
| Trekkor |
Jul 18 2004, 11:54 PM
Post
#7
|
|
I do things... Group: Members Posts: 7,809 Joined: 2-December 03 From: Napa, Ca Member No.: 1,413 Region Association: Northern California |
tar out
Attached image(s) 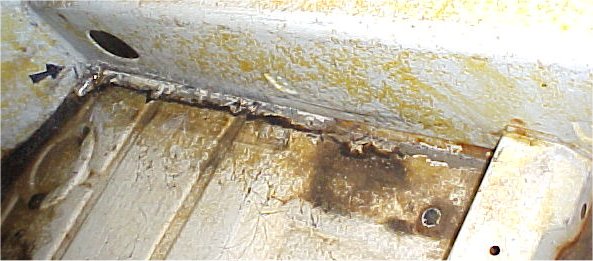
|
|
|
|
| Trekkor |
Jul 18 2004, 11:56 PM
Post
#8
|
|
I do things... Group: Members Posts: 7,809 Joined: 2-December 03 From: Napa, Ca Member No.: 1,413 Region Association: Northern California |
without removal of the seam sealer and tar the sheet metal panels will not fit properly.
Attached image(s) 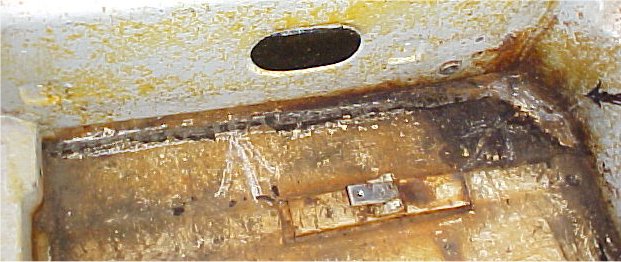
|
|
|
|
| Trekkor |
Jul 18 2004, 11:57 PM
Post
#9
|
|
I do things... Group: Members Posts: 7,809 Joined: 2-December 03 From: Napa, Ca Member No.: 1,413 Region Association: Northern California |
passenger side drops right in.
Attached image(s) 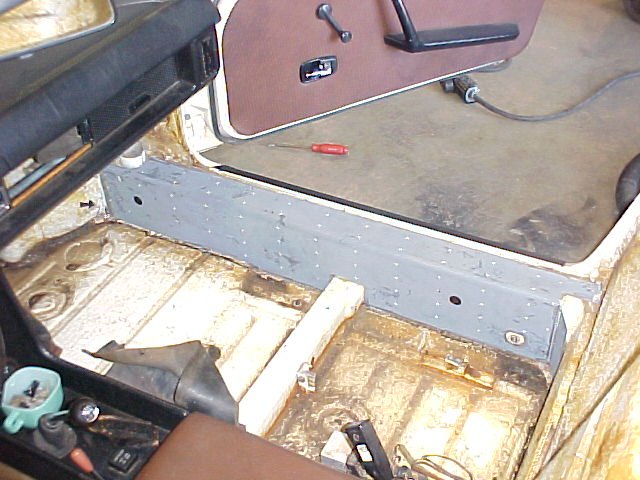
|
|
|
|
| Trekkor |
Jul 18 2004, 11:59 PM
Post
#10
|
|
I do things... Group: Members Posts: 7,809 Joined: 2-December 03 From: Napa, Ca Member No.: 1,413 Region Association: Northern California |
driver side in. the area around the e-brake handle needs to be worked to fit the contour (IMG:style_emoticons/default/smash.gif)
Attached image(s) 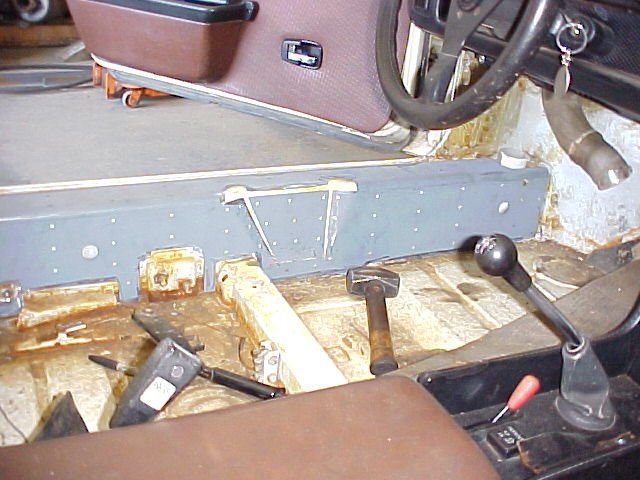
|
|
|
|
| Trekkor |
Jul 19 2004, 12:01 AM
Post
#11
|
|
I do things... Group: Members Posts: 7,809 Joined: 2-December 03 From: Napa, Ca Member No.: 1,413 Region Association: Northern California |
more (IMG:style_emoticons/default/smash.gif)
I like to grind the edges for a good bite with the welder Attached image(s) 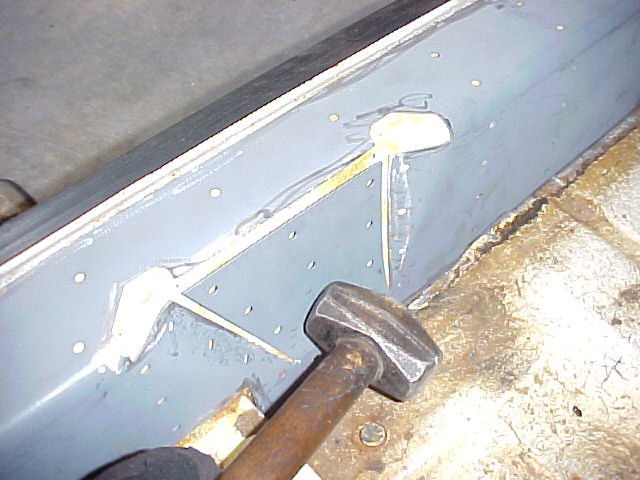
|
|
|
|
| Trekkor |
Jul 19 2004, 12:03 AM
Post
#12
|
|
I do things... Group: Members Posts: 7,809 Joined: 2-December 03 From: Napa, Ca Member No.: 1,413 Region Association: Northern California |
the inside corners need to be bent and worked into place (IMG:style_emoticons/default/smash.gif)
Attached image(s) 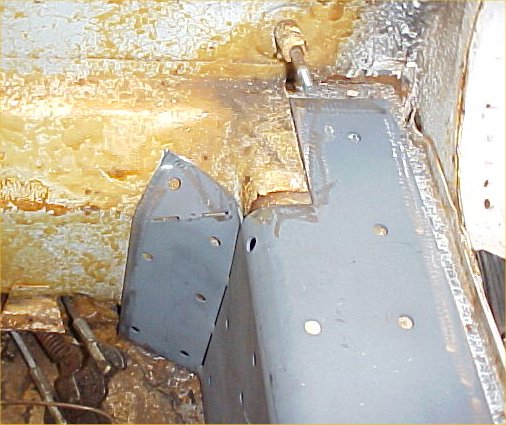
|
|
|
|
| Trekkor |
Jul 19 2004, 12:04 AM
Post
#13
|
|
I do things... Group: Members Posts: 7,809 Joined: 2-December 03 From: Napa, Ca Member No.: 1,413 Region Association: Northern California |
other side
Attached image(s) 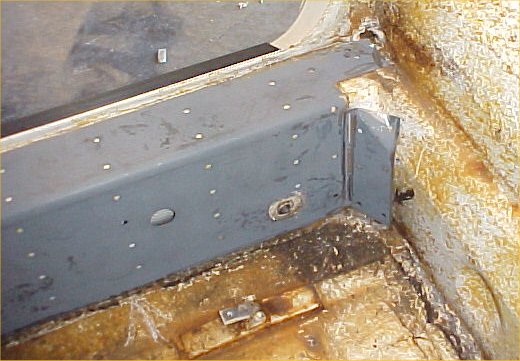
|
|
|
|
| Trekkor |
Jul 19 2004, 12:06 AM
Post
#14
|
|
I do things... Group: Members Posts: 7,809 Joined: 2-December 03 From: Napa, Ca Member No.: 1,413 Region Association: Northern California |
back piece in .
3 sided dry fitment. Make sure it fits tight before any welding begins. Attached image(s) 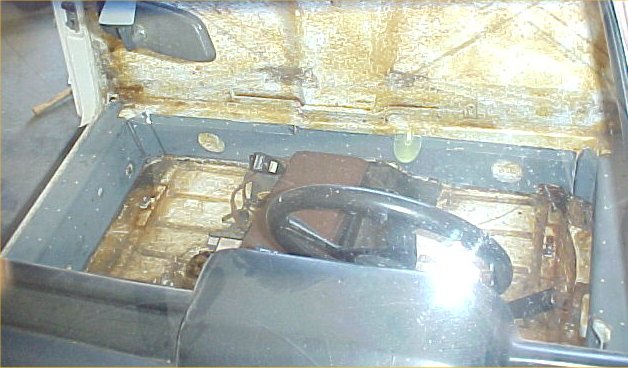
|
|
|
|
| Trekkor |
Jul 19 2004, 12:11 AM
Post
#15
|
|
I do things... Group: Members Posts: 7,809 Joined: 2-December 03 From: Napa, Ca Member No.: 1,413 Region Association: Northern California |
(IMG:style_emoticons/default/welder.gif)
put the weld in the hole and burn into the car's long. then back fill the holes and make good contact into the long sheetmetal. It takes practice. Use low voltage and fast wire speed. Attached image(s) 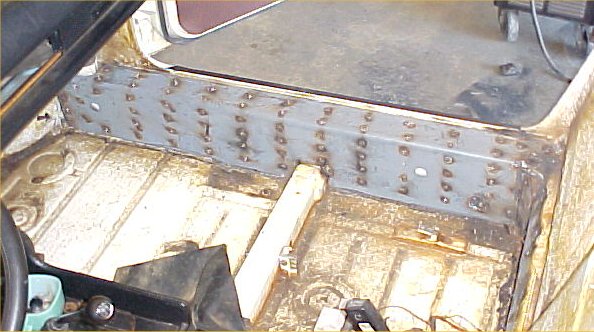
|
|
|
|
| Trekkor |
Jul 19 2004, 12:13 AM
Post
#16
|
|
I do things... Group: Members Posts: 7,809 Joined: 2-December 03 From: Napa, Ca Member No.: 1,413 Region Association: Northern California |
mask off the interior and windows so as not to damage them. Ask me how I know (IMG:style_emoticons/default/headbang.gif)
grind your work Attached image(s) 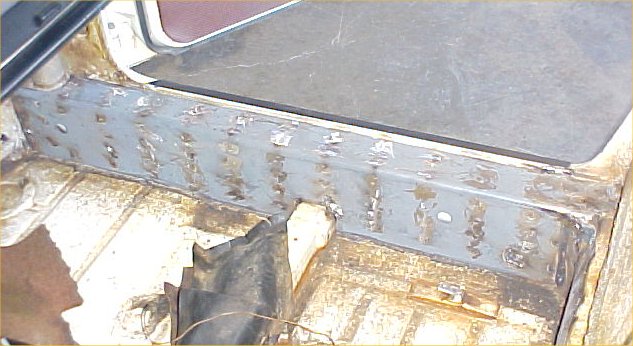
|
|
|
|
| jgiroux67 |
Jul 19 2004, 12:13 AM
Post
#17
|
|
Guitar Shredder Group: Members Posts: 593 Joined: 4-June 04 From: Turlock, CA Member No.: 2,157 |
What are the black ovals for that are on the passenger side long's? Are they for access to the heater hose or what?
|
|
|
|
| Trekkor |
Jul 19 2004, 12:17 AM
Post
#18
|
|
I do things... Group: Members Posts: 7,809 Joined: 2-December 03 From: Napa, Ca Member No.: 1,413 Region Association: Northern California |
driver side and ground down
Attached image(s) 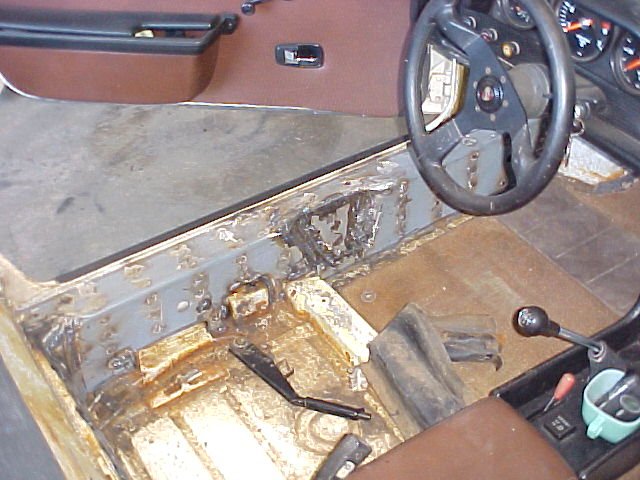
|
|
|
|
| Trekkor |
Jul 19 2004, 12:18 AM
Post
#19
|
|
I do things... Group: Members Posts: 7,809 Joined: 2-December 03 From: Napa, Ca Member No.: 1,413 Region Association: Northern California |
back plate
Attached image(s) 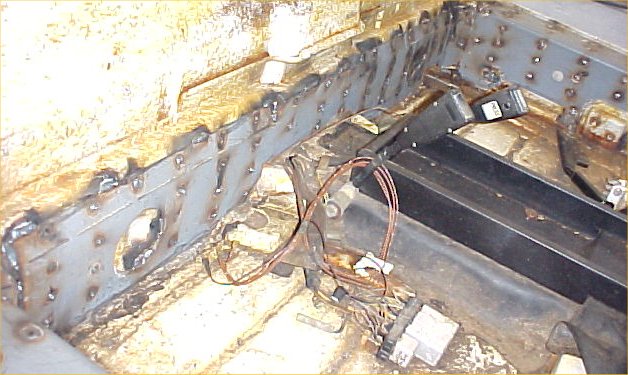
|
|
|
|
| Trekkor |
Jul 19 2004, 12:20 AM
Post
#20
|
|
I do things... Group: Members Posts: 7,809 Joined: 2-December 03 From: Napa, Ca Member No.: 1,413 Region Association: Northern California |
all three sides tied in (IMG:style_emoticons/default/welder.gif)
Attached image(s) 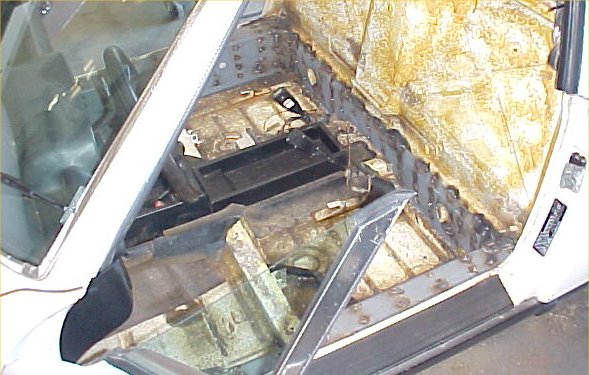
|
|
|
|
|
1 User(s) are reading this topic (1 Guests and 0 Anonymous Users)
0 Members:

|
Lo-Fi Version | Time is now: 30th May 2026 - 07:13 PM |
Invision Power Board
v9.1.4 © 2026 IPS, Inc.