|
|
|
Porsche, and the Porsche crest are registered trademarks of Dr. Ing. h.c. F. Porsche AG.
This site is not affiliated with Porsche in any way. Its only purpose is to provide an online forum for car enthusiasts. All other trademarks are property of their respective owners. |
|
|

  |

| Trekkor |
 Jul 19 2004, 12:21 AM Jul 19 2004, 12:21 AM
Post
#21
|
|
I do things...  Group: Members Posts: 7,809 Joined: 2-December 03 From: Napa, Ca Member No.: 1,413 Region Association: Northern California |
corner detail shot
Attached image(s) 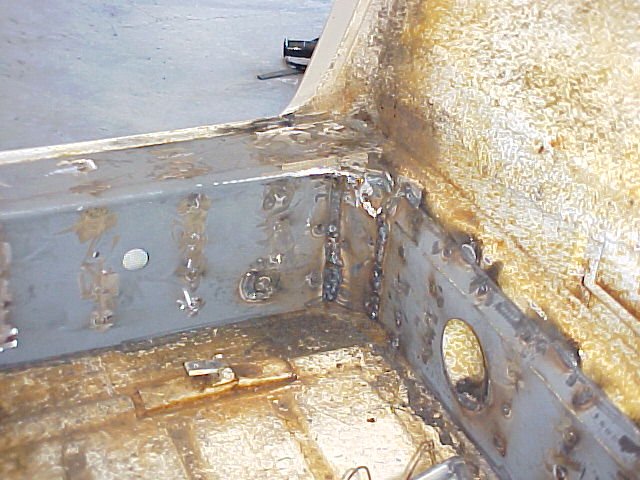
|
   |

 
|
| Trekkor |
Jul 19 2004, 12:23 AM
Post
#22
|
|
I do things... Group: Members Posts: 7,809 Joined: 2-December 03 From: Napa, Ca Member No.: 1,413 Region Association: Northern California |
ready for paint
Attached image(s) 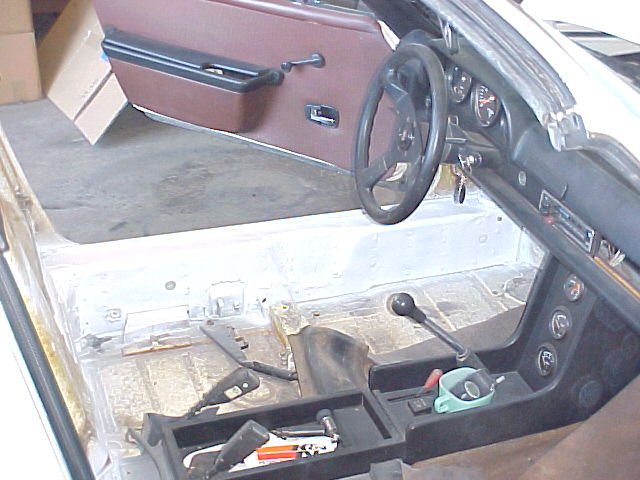
|
|
|
|
| Trekkor |
Jul 19 2004, 12:24 AM
Post
#23
|
|
I do things... Group: Members Posts: 7,809 Joined: 2-December 03 From: Napa, Ca Member No.: 1,413 Region Association: Northern California |
paint
Attached image(s) 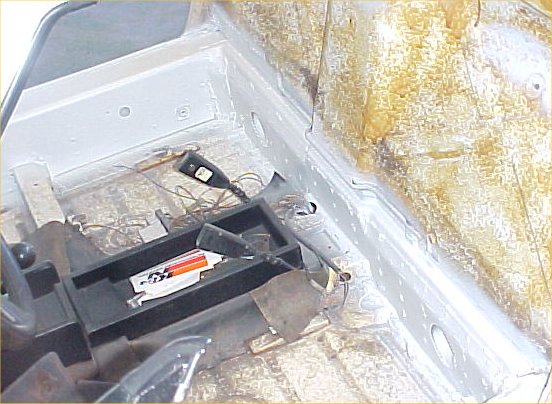
|
|
|
|
| Trekkor |
Jul 19 2004, 12:26 AM
Post
#24
|
|
I do things... Group: Members Posts: 7,809 Joined: 2-December 03 From: Napa, Ca Member No.: 1,413 Region Association: Northern California |
rattle can , daddy (IMG:style_emoticons/default/cool_shades.gif)
Attached image(s) 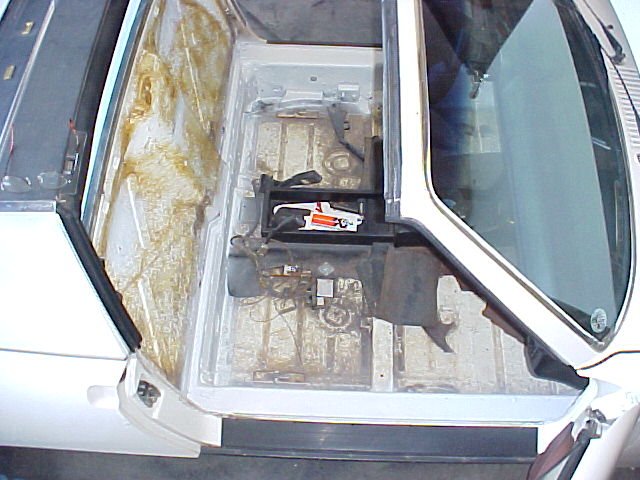
|
|
|
|
| Trekkor |
Jul 19 2004, 12:27 AM
Post
#25
|
|
I do things... Group: Members Posts: 7,809 Joined: 2-December 03 From: Napa, Ca Member No.: 1,413 Region Association: Northern California |
spray it
Attached image(s) 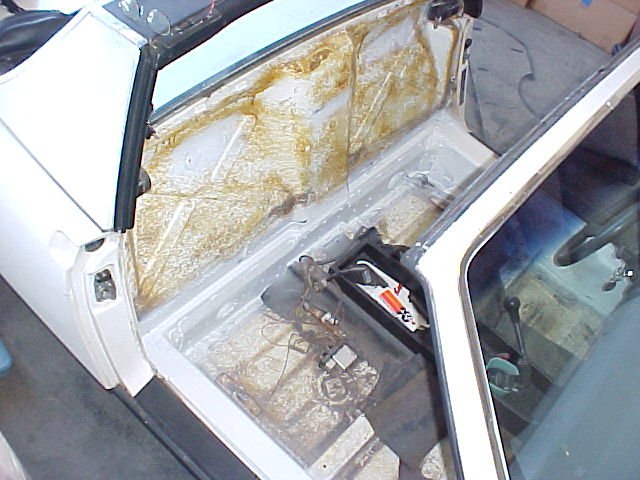
|
|
|
|
| Trekkor |
Jul 19 2004, 12:28 AM
Post
#26
|
|
I do things... Group: Members Posts: 7,809 Joined: 2-December 03 From: Napa, Ca Member No.: 1,413 Region Association: Northern California |
bird's eye
Attached image(s) 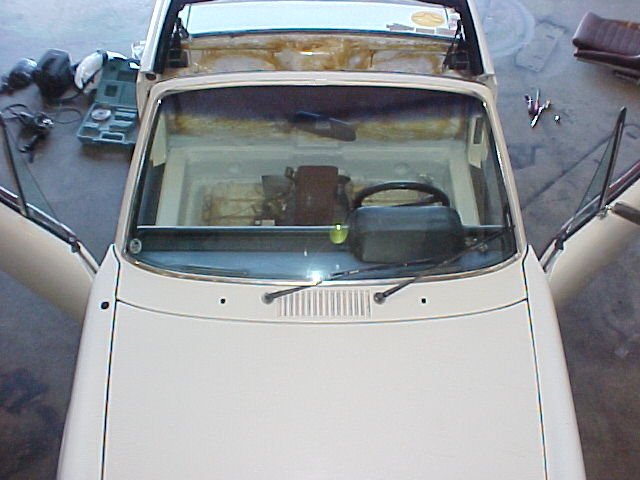
|
|
|
|
| Trekkor |
Jul 19 2004, 12:40 AM
Post
#27
|
|
I do things... Group: Members Posts: 7,809 Joined: 2-December 03 From: Napa, Ca Member No.: 1,413 Region Association: Northern California |
The black ovals are tar pieces that cover access holes to the paper air tubes.
This install took about six hours. Why do it? Simple...It makes an instant, noticable differance in all around handling and steering response. Obvious stiffening and strengthening can be had for 18#'s of metal. Take out and leave out the sound deadening matte behind your back pad and it's a three pound investment. The car will stay flatter and turn in smoother in the fast turns. My car does not lift the front wheels anymore. I also added a rear stock sway bar to go with the package. I believe that my car is now very well balanced for me and now I must gain experience to drive it well. No understeer at all to speak of. Oversteer is only present when throttle induced ( the good kind ). Come to Marina and feel the car. Trekkor Hope you enjoyed my little show (IMG:style_emoticons/default/welder.gif) |
|
|
|
| RON S. |
Jul 19 2004, 04:58 AM
Post
#28
|
|
9140430841, FINALLY RUNNING Group: Members Posts: 1,216 Joined: 22-May 03 From: WALTERBORO,S.C. Member No.: 724 Region Association: South East States |
Great job, (IMG:style_emoticons/default/smilie_pokal.gif)
That is a great documentary on your install. At bare minimum,you've given someone else an education,and some encouragement to tackle their own job. You should let us know where you got your kit,and for how much$$$$. Ron |
|
|
|
| sgomes |
Jul 19 2004, 06:38 AM
Post
#29
|
|
Electric Member Group: Members Posts: 815 Joined: 6-May 04 From: Campbell, CA Member No.: 2,029 |
Awesome job both with the welding and the pictorial! (I think that is the first time I've seen someone add the arrows ON THE CAR and not with photoshop!)
(IMG:style_emoticons/default/smilie_pokal.gif) (IMG:style_emoticons/default/smilie_pokal.gif) (IMG:style_emoticons/default/smilie_pokal.gif) I vote for "classic" status! Anyone second the nomination? (IMG:style_emoticons/default/wavey.gif) |
|
|
|
| seanery |
Jul 19 2004, 08:10 AM
Post
#30
|
|
waiting to rebuild whitey! Group: Retired Admin Posts: 15,857 Joined: 7-January 03 From: Indy Member No.: 100 Region Association: None |
The kit is Engman's Inner Long Reinforcement kit Available Here
|
|
|
|
| nebreitling |
Jul 19 2004, 01:19 PM
Post
#31
|
|
Member Emeritus Group: Members Posts: 3,314 Joined: 26-March 03 From: San Francisco Member No.: 478 |
QUOTE(sgomes @ Jul 19 2004, 04:38 AM) I vote for "classic" status! Anyone second the nomination? (IMG:style_emoticons/default/wavey.gif) I second that! Trekkor just showed me this at the AX in Alameda. I must say that just jumping up and down on the longs, one can notice a substantial improvement. i'm thinking about it now... |
|
|
|
| buck toenges |
Jul 19 2004, 01:33 PM
Post
#32
|
|
Senior Member Group: Members Posts: 555 Joined: 25-November 03 From: Fort wayne In Member No.: 1,388 Region Association: None |
How do you think that this "inner" kit compares with those "outer" longitunal kits? Same amount of stiffness? Less weight?
|
|
|
|
| bperry |
Jul 19 2004, 04:55 PM
Post
#33
|
|
Lurker Group: Members Posts: 477 Joined: 16-February 04 From: Dallas, Tx Member No.: 1,661 |
Out of curiousity, which welder did you use and did you use gas
or just flux wire? --- bill |
|
|
|
| Katmanken |
Jul 19 2004, 05:19 PM
Post
#34
|
|
You haven't seen me if anybody asks... Group: Members Posts: 4,738 Joined: 14-June 03 From: USA Member No.: 819 Region Association: Upper MidWest |
I'm still trying to figure out how he welded all those little holes...... (IMG:style_emoticons/default/blowtorch.gif)
to a painted metal chassis....... (IMG:style_emoticons/default/blink.gif) Without going through a paint strip step. Ken (IMG:style_emoticons/default/biggrin.gif) |
|
|
|
| Trekkor |
Jul 19 2004, 05:26 PM
Post
#35
|
|
I do things... Group: Members Posts: 7,809 Joined: 2-December 03 From: Napa, Ca Member No.: 1,413 Region Association: Northern California |
Miller wire feeder mig welder.
When the wire hits the metel kit it burns right through the painted surface, then you swirl a puddle of metal to fill the hole. Very simple. You'll be a pro in ten minutes. (IMG:style_emoticons/default/wink.gif) Attached image(s) 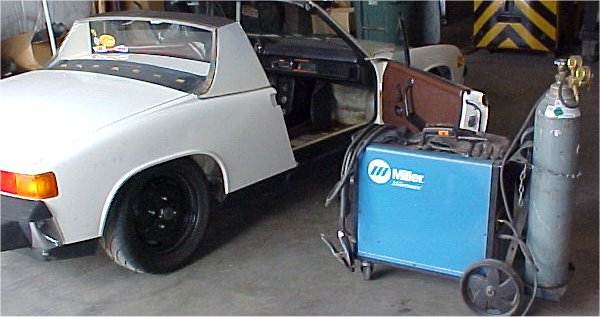
|
|
|
|
| Trekkor |
Jul 19 2004, 05:32 PM
Post
#36
|
|
I do things... Group: Members Posts: 7,809 Joined: 2-December 03 From: Napa, Ca Member No.: 1,413 Region Association: Northern California |
The secret to good welds on thin material is low voltage and fast wire speed. (IMG:style_emoticons/default/welder.gif)
Here's the settings I used. Attached image(s) 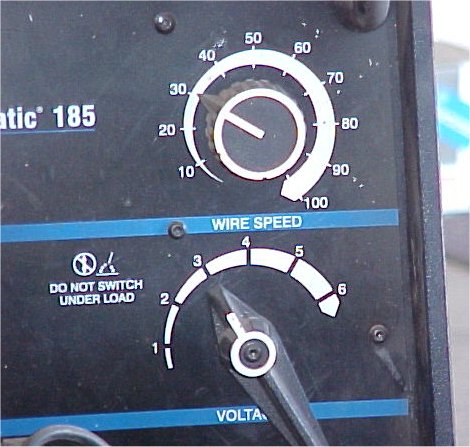
|
|
|
|
| seanery |
Jul 19 2004, 05:35 PM
Post
#37
|
|
waiting to rebuild whitey! Group: Retired Admin Posts: 15,857 Joined: 7-January 03 From: Indy Member No.: 100 Region Association: None |
Does that have clickstops at each # for power? Mine has an infinite adjustment rheostat.
|
|
|
|
| Trekkor |
Jul 19 2004, 05:45 PM
Post
#38
|
|
I do things... Group: Members Posts: 7,809 Joined: 2-December 03 From: Napa, Ca Member No.: 1,413 Region Association: Northern California |
I know it clicks at each interval. I've never tried it between 'em. Not my machine.
Trek |
|
|
|
| Qarl |
Jul 19 2004, 05:46 PM
Post
#39
|
|
Shriveled member Group: Benefactors Posts: 5,233 Joined: 8-February 03 From: Florida Member No.: 271 Region Association: None |
I have a question...
Is there a reason why you didn't weld all edges of the stiffening piece? It appears from the photos that you welded the holes, and then only did a stitch weld around the outside perimieter of the stiffening kit. |
|
|
|
| Trekkor |
Jul 19 2004, 06:11 PM
Post
#40
|
|
I do things... Group: Members Posts: 7,809 Joined: 2-December 03 From: Napa, Ca Member No.: 1,413 Region Association: Northern California |
Good question. (IMG:style_emoticons/default/idea.gif)
My understanding is that a deep spot weld every 3 inches and perimeter stiches are enough. I don't know if full beads around the edges would do anything but add time...and weight! (IMG:style_emoticons/default/lol2.gif) \ KT |
|
|
|
|
1 User(s) are reading this topic (1 Guests and 0 Anonymous Users)
0 Members:

|
Lo-Fi Version | Time is now: 30th May 2026 - 06:34 PM |
Invision Power Board
v9.1.4 © 2026 IPS, Inc.