|
|
|
Porsche, and the Porsche crest are registered trademarks of Dr. Ing. h.c. F. Porsche AG.
This site is not affiliated with Porsche in any way. Its only purpose is to provide an online forum for car enthusiasts. All other trademarks are property of their respective owners. |
|
|

  |

| JOEPROPER |
 May 17 2020, 04:40 PM May 17 2020, 04:40 PM
Post
#13001
|
|
The answer is "no" unless you ask...  Group: Members Posts: 1,209 Joined: 21-November 15 From: White Plains New York Member No.: 19,387 Region Association: North East States |
QUOTE(cassmcentee @ May 17 2020, 06:35 PM)  Rear Brake Cleanup Those look nice! (IMG:style_emoticons/default/wub.gif) |
   |

 
|
| cassmcentee |
May 17 2020, 05:10 PM
Post
#13002
|
|
Member Group: Members Posts: 243 Joined: 12-July 18 From: Squaw Valley, CA Member No.: 22,304 Region Association: Central California |
Thanks!
I'm learning the Porsche Engineer's mindset and am diggin' it... Shoutout to the Pelican Parts Tech Articles! Still going to Media Blast the piston "tops", sides are polished. need to polish the interiors... One more for "Brake Porn" 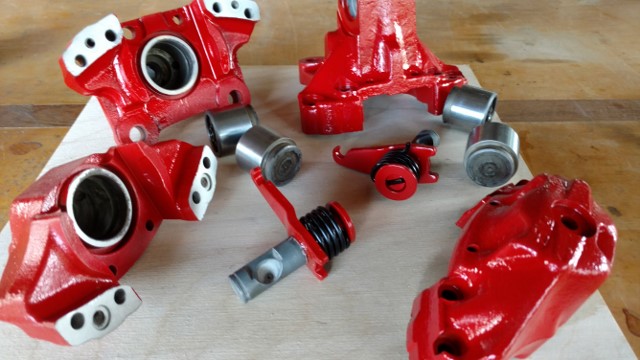 |
|
|
|
| DRPHIL914 |
May 17 2020, 07:32 PM
Post
#13003
|
|
Dr. Phil Group: Members Posts: 5,920 Joined: 9-December 09 From: Kennesaw, GA Member No.: 11,106 Region Association: South East States |
very busy on the 914 past few days, i guess i have t posted for a while here, been posting more on instagram, easier lol!
well, i needed chase the oil leak, and change out the transmission fluid so i did all that and while at it i did my 914rubber.com speedometer drive thing, while at it i found the oil cooler /filter adapter was loose, very loose! but easy fix! now tight and no more leak! i was worried i had a pushrod tube leak or worse, now no leak. should have thought of checking this sooner. and also re adjusted and balanced the front and rear suspension. cleaned up pretty good. but here is a top tech tip: the transmission fluid comes out really fast when hot, it’s pretty thin and it overshot the pan, half of it on the cardboard not in the drip pan, sorry no pics of the mess . so be ready, have a big pan, properly placed. Attached thumbnail(s) 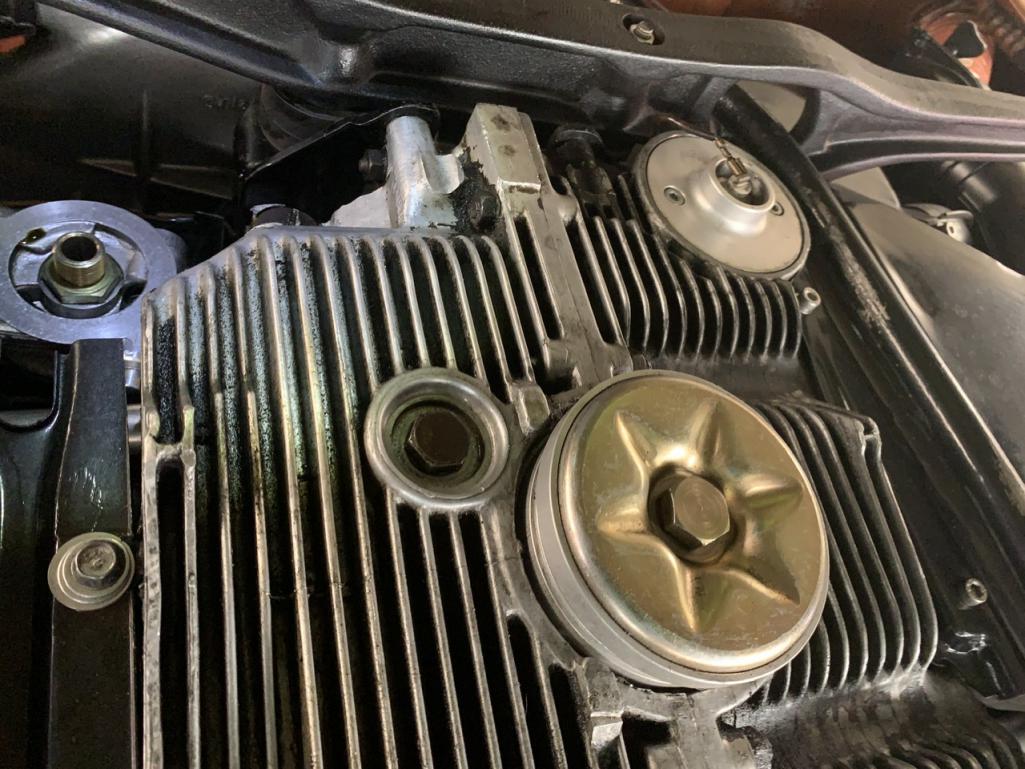
|
|
|
|
| Mueller |
May 17 2020, 07:32 PM
Post
#13004
|
|
914 Freak! Group: Members Posts: 17,155 Joined: 4-January 03 From: Antioch, CA Member No.: 87 Region Association: None |
^nice calipers and ^^ great looking covers there Oscar. (IMG:style_emoticons/default/smash.gif)
Ended up redoing the front harness as I misread the wiring matrix and made a mistake. Not even close to being Mil-spec or something you'd find from a pro shop. I just needed to start and make progress without breaking the bank. Ran out of shrink tubing so once I get that I will finish up front and move the rear, then the cabin/dash wires go in. Couldn't find my black tie wraps so had to use what I could find. Anyone know where to get a quality headlight socket for the 3 terminals? I've read bad things about the Dorman parts. 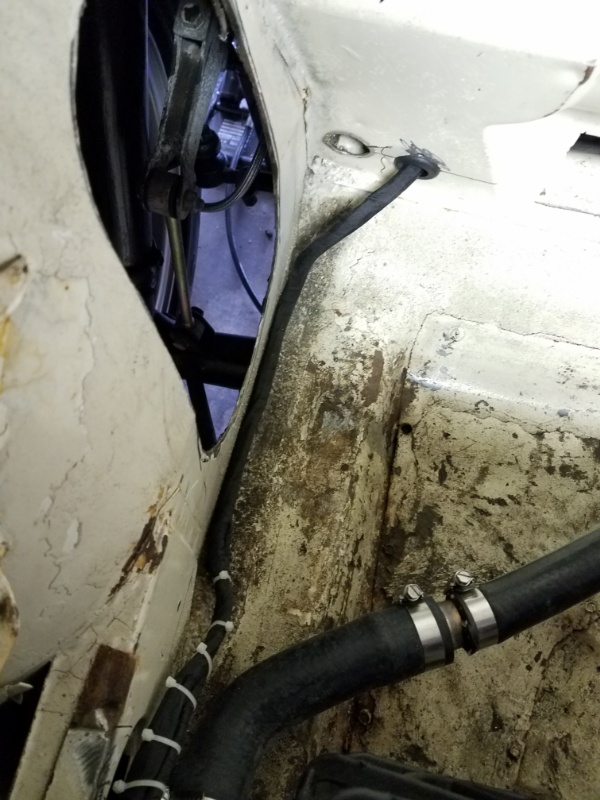 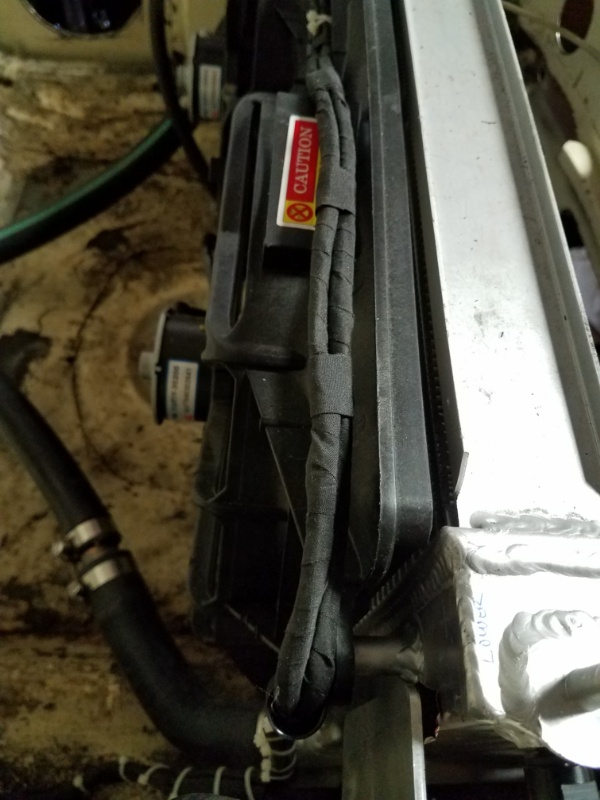 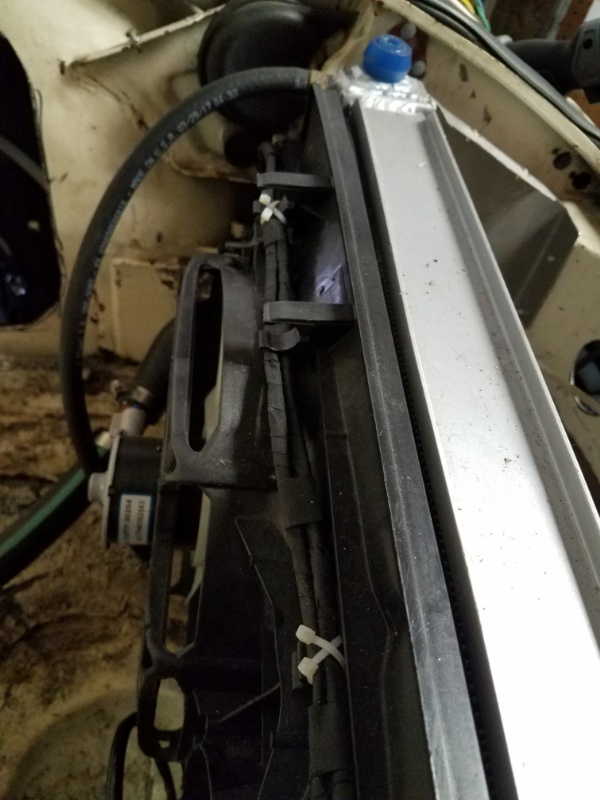 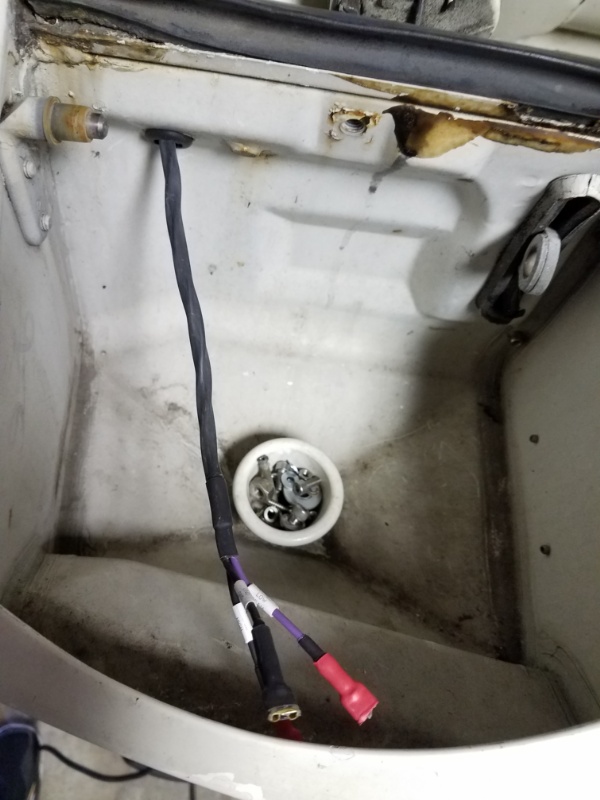 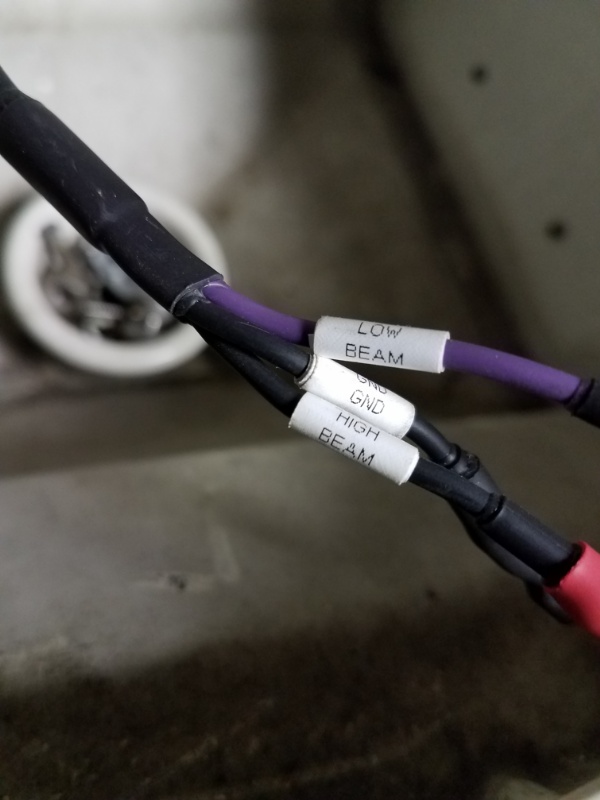 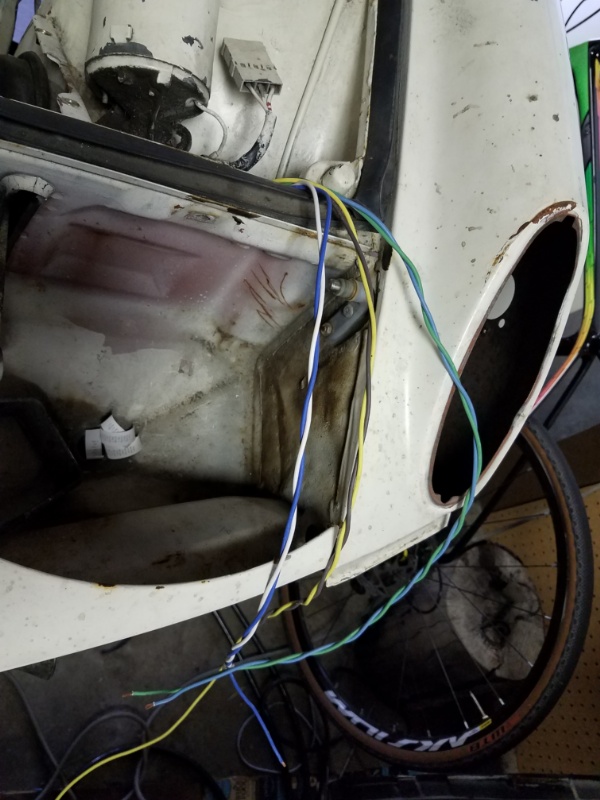 |
|
|
|
| simonjb |
May 17 2020, 08:20 PM
Post
#13005
|
|
KiwiMan Group: Members Posts: 574 Joined: 18-October 16 From: Stamford, Connecticut Member No.: 20,505 Region Association: North East States |
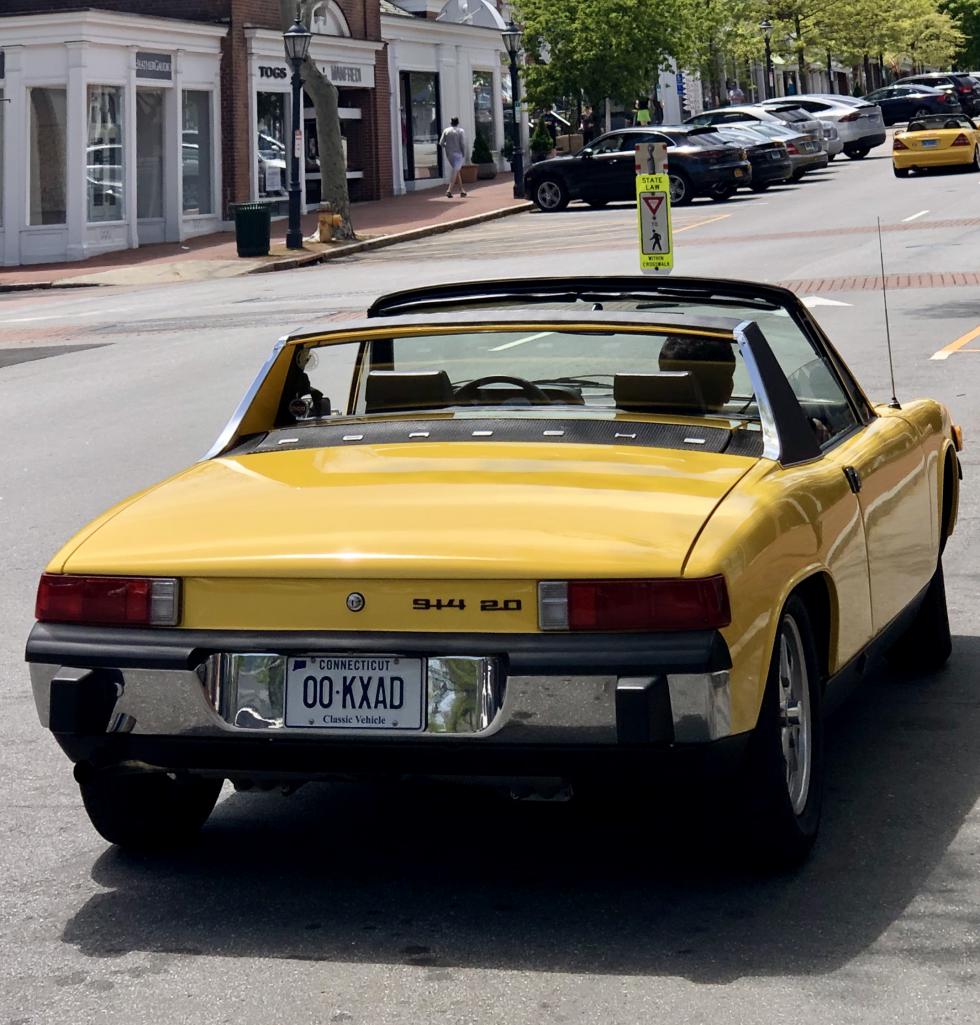
Went for coffee in New Canaan CT today...
 |
|
|
|
| dereknlee |
May 17 2020, 09:42 PM
Post
#13006
|
|
Member Group: Members Posts: 73 Joined: 16-March 12 From: Shoreline, WA Member No.: 14,259 Region Association: Pacific Northwest |
Found some instructions online for DIY zinc plating on the cheap. I am a recovering cheap, and have a pile of parts that need plating. Figured why not?
Ordered zinc sulfate off ebay, cut up a boat zinc anode that I got for free, used an old 12V 1.5A transformer, and the rest came from the hardware or grocery store. To soon to tell how well it holds up, but the results look surprisingly good - and it's fun. First up are the spring perches for my Koni shocks. The shocks are probably due for replacement, but who knows when this car will be on the road and it will be easy to swap them out then, so for now they'll just get a clean up. Before:  After: 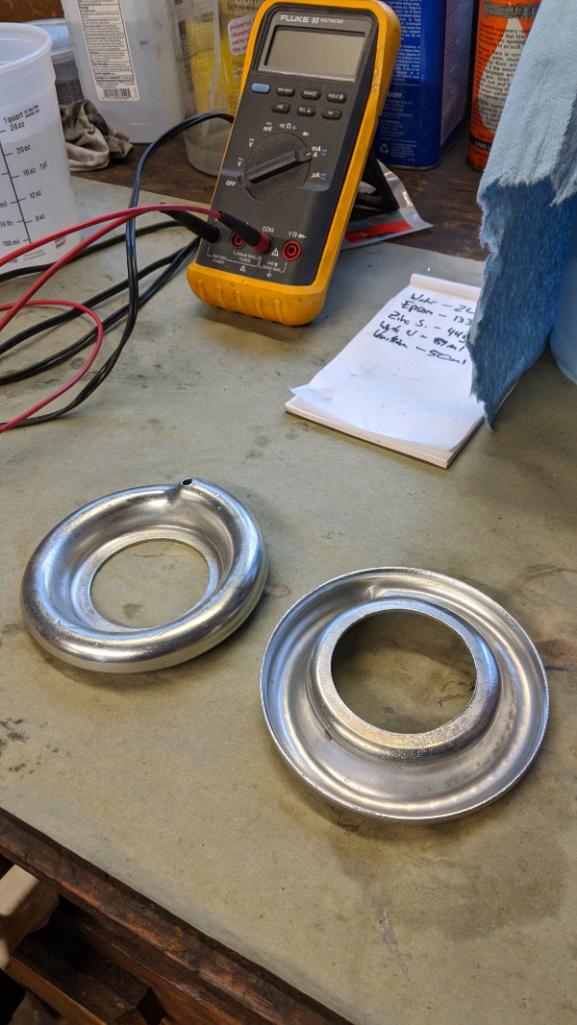 Turn signal clamps are in getting plated now. Perches are in the oven to mitigate hydrogen embrittlement. ...looks around for other plain zinc plated hardware to restore. -Derek |
|
|
|
| cassmcentee |
May 18 2020, 06:00 AM
Post
#13007
|
|
Member Group: Members Posts: 243 Joined: 12-July 18 From: Squaw Valley, CA Member No.: 22,304 Region Association: Central California |
That's great Derek! Looking Good
It's called "Adding to your Talent Stack" Cheers |
|
|
|
| eric9144 |
May 18 2020, 09:12 AM
Post
#13008
|
|
Advanced Member Group: Members Posts: 2,795 Joined: 30-March 11 From: San Diego, CA Member No.: 12,876 Region Association: Southern California |
Made the long trip back from PHX to San Diego with the 914/6...
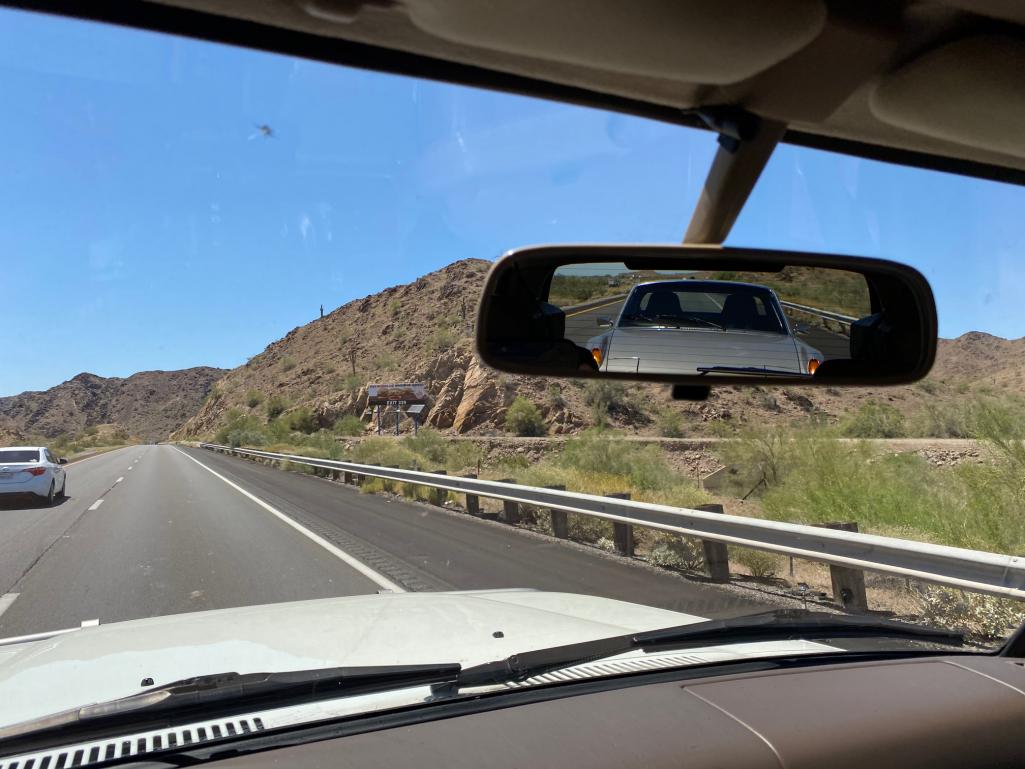 Only to get home and have the fuel pump take a $Hit (IMG:style_emoticons/default/bs.gif) 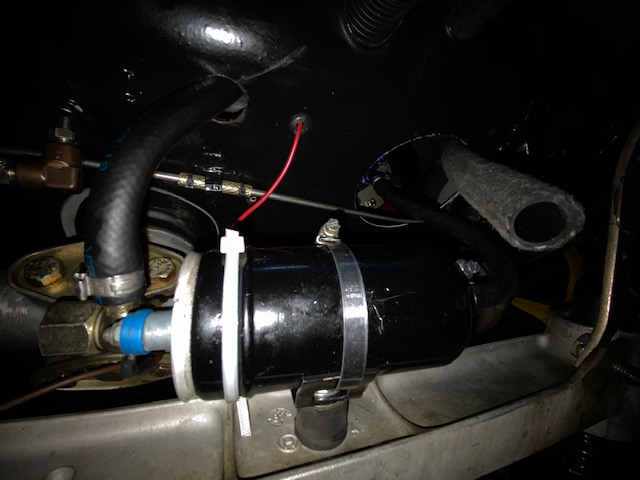 No pressure @ the fuel rail  IMG_4914.MOV ( 1.68mb )
Number of downloads: 143
IMG_4914.MOV ( 1.68mb )
Number of downloads: 143 |
|
|
|
| rjames |
May 18 2020, 11:03 AM
Post
#13009
|
|
I'm made of metal Group: Members Posts: 4,450 Joined: 24-July 05 From: Shoreline, WA Member No.: 4,467 Region Association: Pacific Northwest |
Since I can't get the car to run, I thought I'd move on to another project, installing a 3rd brake light, which also operates with the running lights.
Before: 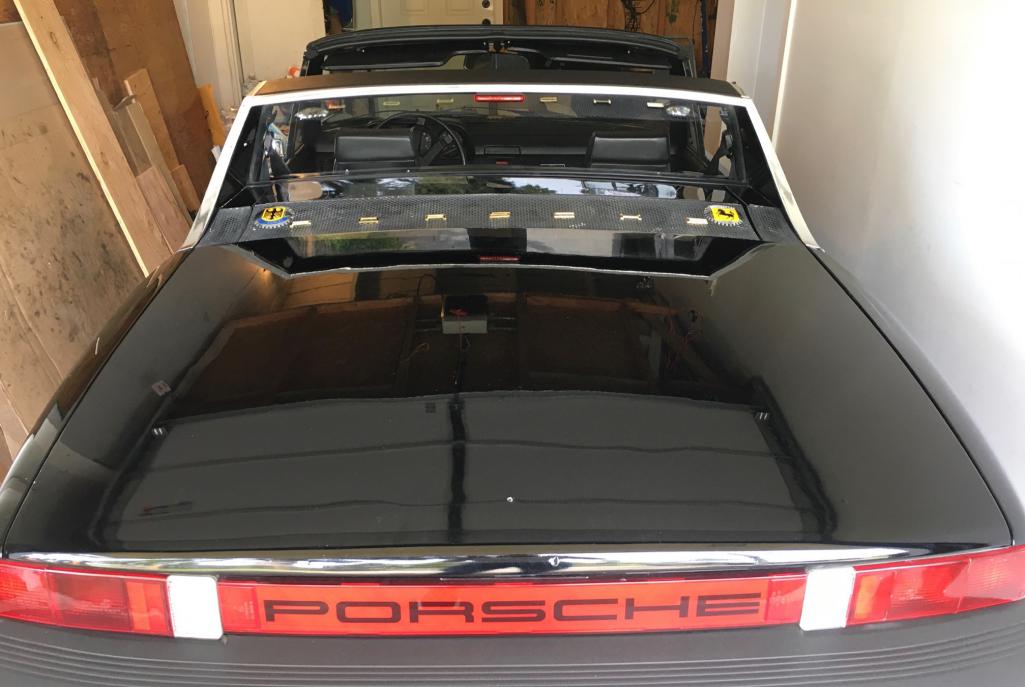 After: 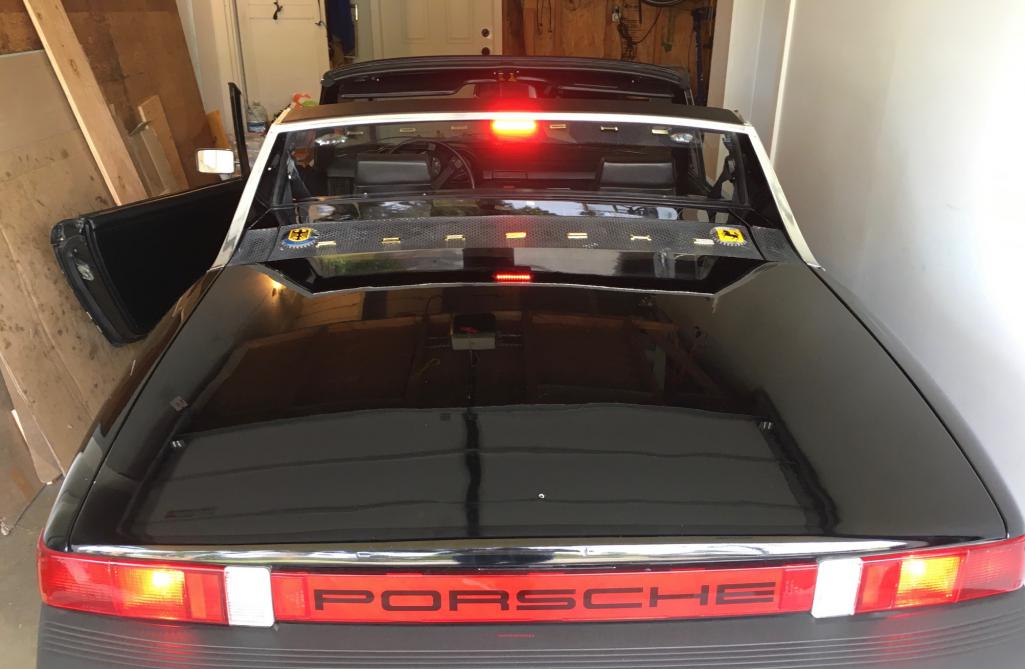 |
|
|
|
| Gatornapper |
May 18 2020, 07:38 PM
Post
#13010
|
|
Senior Member Group: Members Posts: 1,290 Joined: 22-September 17 From: Woods west of Richmond, VA Member No.: 21,449 Region Association: South East States |
Update on dropped engine: cleaned it last week.
Today: Bead blasted heater valves & one valve cover - ready for paint. Adjusting valves is SO EASY with engine down, got 1 and 2 done, but cannot rotate engine to get it in position for 3 & 4 - hits just before high point on cam and I cannot rotate the impeller even with leverage - like it hits a brick wall…….yes, plugs are out so no compression issues. Intake on 1 was correct, 2 was too tight at 5 thou. Exhaust was way too tight on both at 7 or less, but now all 4 are correct. Guess I’ll have to bump the engine over with the battery tomorrow to get 3 & 4. Unless someone has a tip on how to rotate the engine manually while it is out. I tried strap wrench and then a large lever on mounting flanges on impeller, being very careful to not touch a blade...... Cranked engine for 5 seconds with starter, which freed everything up to where impeller again rotated easily by hand again......guess sitting for several weeks all the oil had drained off the cam and the friction between lifter & cam was too much until it had oil....all valves now adjusted, couple intakes way off.....so now will have to dial carbs in again but engine should run even better - can't wait. GN |
|
|
|
| eric9144 |
May 19 2020, 11:16 AM
Post
#13011
|
|
Advanced Member Group: Members Posts: 2,795 Joined: 30-March 11 From: San Diego, CA Member No.: 12,876 Region Association: Southern California |
Have 2 spare DME relays and a new fuel pump inbound (IMG:style_emoticons/default/dry.gif)
|
|
|
|
| Steve |
May 19 2020, 11:19 AM
Post
#13012
|
|
914 Guru Group: Members Posts: 6,037 Joined: 14-June 03 From: Laguna Niguel, CA Member No.: 822 Region Association: Southern California |
QUOTE(eric9144 @ May 18 2020, 08:12 AM) Made the long trip back from PHX to San Diego with the 914/6... Only to get home and have the fuel pump take a $Hit (IMG:style_emoticons/default/bs.gif) No pressure @ the fuel rail
IMG_4914.MOV ( 1.68mb )
Number of downloads: 143Is the pump running? Check for 12v while starting motor. DME relay? I always keep a spare in the glove compartment. |
|
|
|
| ndfrigi |
May 19 2020, 01:06 PM
Post
#13013
|
|
Advanced Member Group: Members Posts: 2,980 Joined: 21-August 11 From: Orange County Member No.: 13,474 Region Association: Southern California |
QUOTE(Gatornapper @ May 18 2020, 06:38 PM) Update on dropped engine: cleaned it last week. Today: Bead blasted heater valves & one valve cover - ready for paint. Adjusting valves is SO EASY with engine down, got 1 and 2 done, but cannot rotate engine to get it in position for 3 & 4 - hits just before high point on cam and I cannot rotate the impeller even with leverage - like it hits a brick wall…….yes, plugs are out so no compression issues. Intake on 1 was correct, 2 was too tight at 5 thou. Exhaust was way too tight on both at 7 or less, but now all 4 are correct. Guess I’ll have to bump the engine over with the battery tomorrow to get 3 & 4. Unless someone has a tip on how to rotate the engine manually while it is out. I tried strap wrench and then a large lever on mounting flanges on impeller, being very careful to not touch a blade...... GN not sure if you tried using the alternator to rotate the engine (assuming belt is installed). I think 17 wrench to rotate it from the alternator nut. |
 |
|
| Gatornapper |
May 19 2020, 04:46 PM
Post
#13014
|
|
Senior Member Group: Members Posts: 1,290 Joined: 22-September 17 From: Woods west of Richmond, VA Member No.: 21,449 Region Association: South East States |
Thanks for the tip - but alternator is off, have new one to install. See my update to my post - cranking engine with starter loosened everything up to where I could again rotate the impeller easily by hand.
GN QUOTE(ndfrigi @ May 19 2020, 01:06 PM) QUOTE(Gatornapper @ May 18 2020, 06:38 PM) Update on dropped engine: cleaned it last week. Today: Bead blasted heater valves & one valve cover - ready for paint. Adjusting valves is SO EASY with engine down, got 1 and 2 done, but cannot rotate engine to get it in position for 3 & 4 - hits just before high point on cam and I cannot rotate the impeller even with leverage - like it hits a brick wall…….yes, plugs are out so no compression issues. Intake on 1 was correct, 2 was too tight at 5 thou. Exhaust was way too tight on both at 7 or less, but now all 4 are correct. Guess I’ll have to bump the engine over with the battery tomorrow to get 3 & 4. Unless someone has a tip on how to rotate the engine manually while it is out. I tried strap wrench and then a large lever on mounting flanges on impeller, being very careful to not touch a blade...... GN not sure if you tried using the alternator to rotate the engine (assuming belt is installed). I think 17 wrench to rotate it from the alternator nut. |
|
|
|
| Gatornapper |
May 19 2020, 04:49 PM
Post
#13015
|
|
Senior Member Group: Members Posts: 1,290 Joined: 22-September 17 From: Woods west of Richmond, VA Member No.: 21,449 Region Association: South East States |
Got all valves adjusted today, also sand-blasted valve covers and heat flow valves then painted them. My paint work on engine parts is not worthy of posting......IMHO......
Just glad to be making progress...... GN |
|
|
|
| Craigers17 |
May 19 2020, 05:08 PM
Post
#13016
|
|
Senior Member Group: Members Posts: 883 Joined: 5-August 17 From: Rome, GA Member No.: 21,317 Region Association: South East States |
Taped up the mold for the front oil cooler shroud, and started applying the fiberglass. I only got about 3/4 across the top before my rookie error of mixing up too much resin & hardener in advance bit me in the ass. It started gelling up and I had to stop as I had created a tennis ball-sized, seething blob of chemical heated excess resin.
Yah....I'm an idiot. (IMG:style_emoticons/default/chair.gif) Also removed the front trunk access plugs to provide an exit for the warm air coming off the cooler. 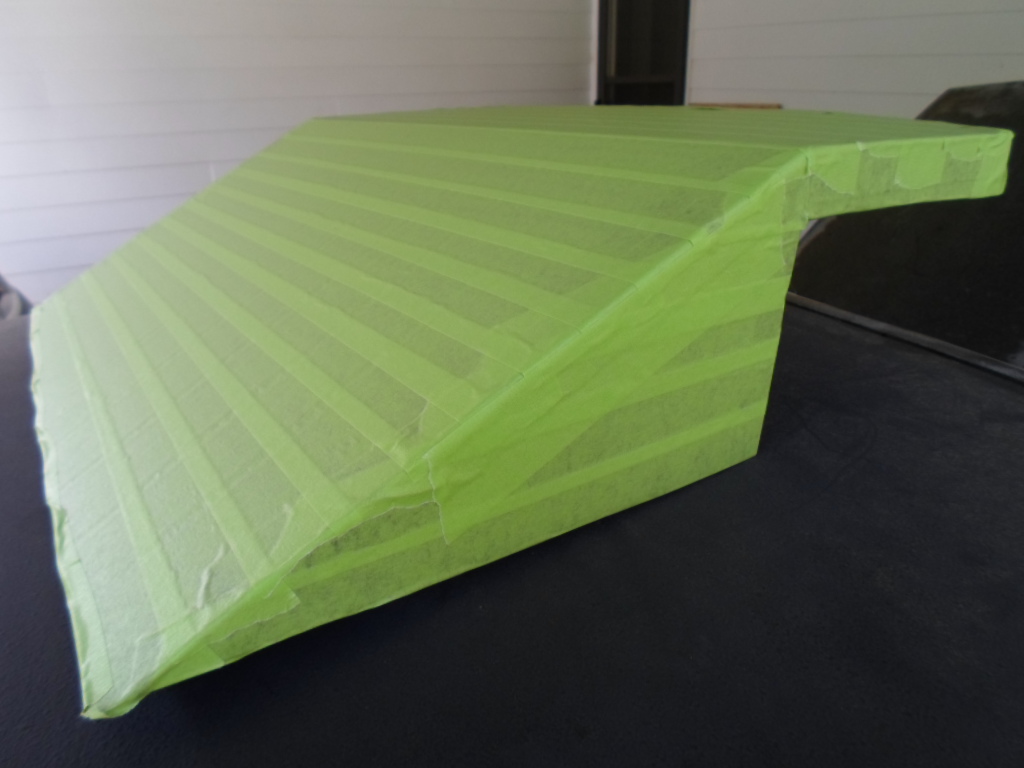 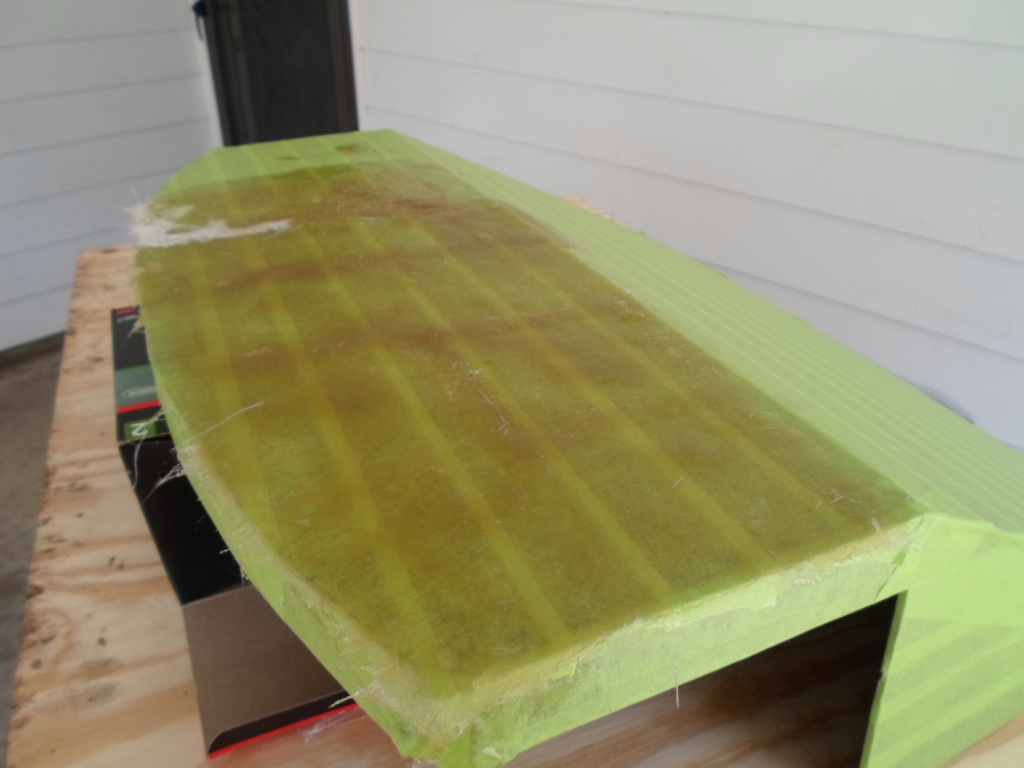 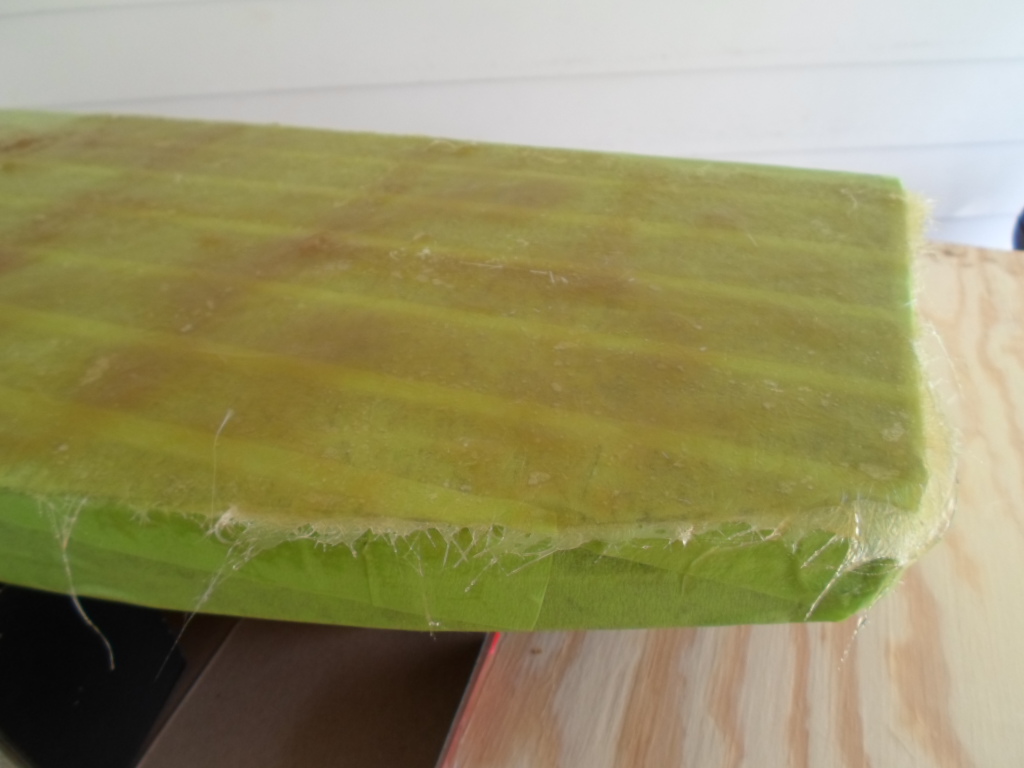 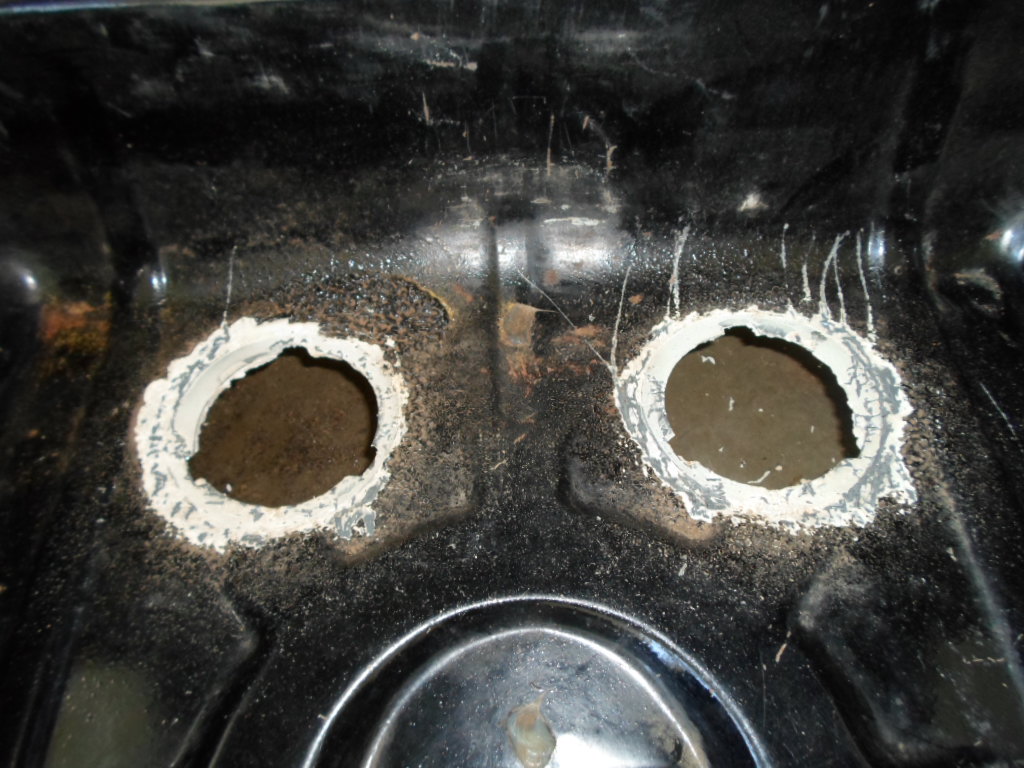 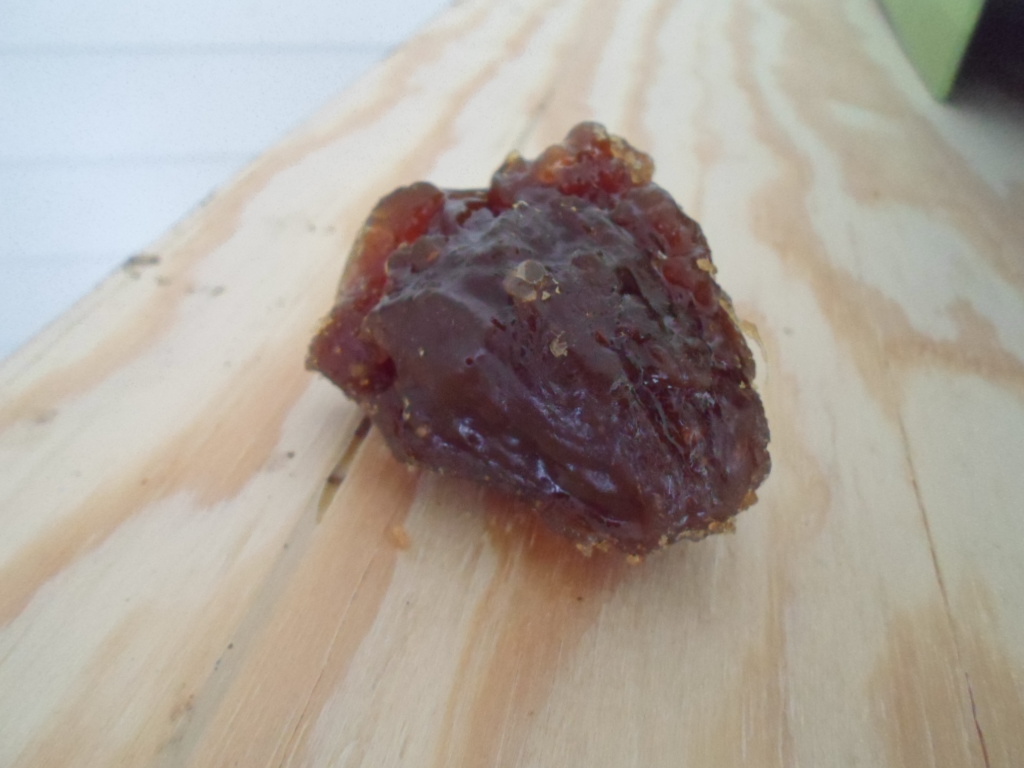 |
|
|
|
| Jett |
May 19 2020, 07:31 PM
Post
#13017
|
|
Senior Member Group: Members Posts: 1,699 Joined: 27-July 14 From: Seattle Member No.: 17,686 Region Association: Pacific Northwest |
Took the car for a spin with my wife, on the weekend (IMG:style_emoticons/default/smile.gif)
Attached image(s) 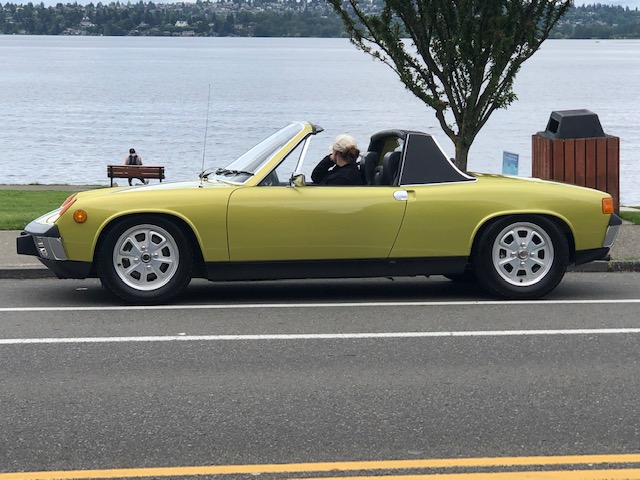
|
|
|
|
| bkrantz |
May 19 2020, 09:26 PM
Post
#13018
|
|
914 Guru Group: Members Posts: 8,667 Joined: 3-August 19 From: SW Colorado Member No.: 23,343 Region Association: Rocky Mountains |
QUOTE(simonjb @ May 17 2020, 08:20 PM) Went for coffee in New Canaan CT today... What yellow is that? |
|
|
|
| 9fourteen14 |
May 20 2020, 07:44 AM
Post
#13019
|
|
PORSCHE LUVA Group: Members Posts: 135 Joined: 5-July 15 From: boston Member No.: 18,920 Region Association: North East States |
QUOTE(yellowporky @ Apr 16 2020, 08:20 PM) Front of car all done. Now to focus on drive train. what did you use to paint the inner wheel body section? i have my teener home now and need to do a few things |
|
|
|
| eric9144 |
May 20 2020, 10:57 AM
Post
#13020
|
|
Advanced Member Group: Members Posts: 2,795 Joined: 30-March 11 From: San Diego, CA Member No.: 12,876 Region Association: Southern California |
QUOTE(Steve @ May 19 2020, 10:19 AM) Is the pump running? Check for 12v while starting motor. DME relay? I always keep a spare in the glove compartment. Pump seems to jerk when energized but not actually kick off, tried to persuade it with some taps from a hammer and still no pressure @ the fuel rail (IMG:style_emoticons/default/dry.gif) Ordered 2 DME relays and a fuel pump, all of which arrive today. Super frustrating but (hopefully) an easy fix. I knew there'd be some issues as the car basically was "stored" for the better part of 6 years prior to me getting it. |
|
|
|
|
8 User(s) are reading this topic (8 Guests and 0 Anonymous Users)
0 Members:

|
Lo-Fi Version | Time is now: 24th April 2026 - 02:15 AM |
Invision Power Board
v9.1.4 © 2026 IPS, Inc.