|
|
|
Porsche, and the Porsche crest are registered trademarks of Dr. Ing. h.c. F. Porsche AG.
This site is not affiliated with Porsche in any way. Its only purpose is to provide an online forum for car enthusiasts. All other trademarks are property of their respective owners. |
|
|

  |

| Mike Bellis |
 Mar 4 2012, 09:45 PM Mar 4 2012, 09:45 PM
Post
#1
|
|
Resident Electrician  Group: Members Posts: 8,348 Joined: 22-June 09 From: Midlothian TX Member No.: 10,496 Region Association: None |
I started a new thread for the re build of the Turbo wankel project.
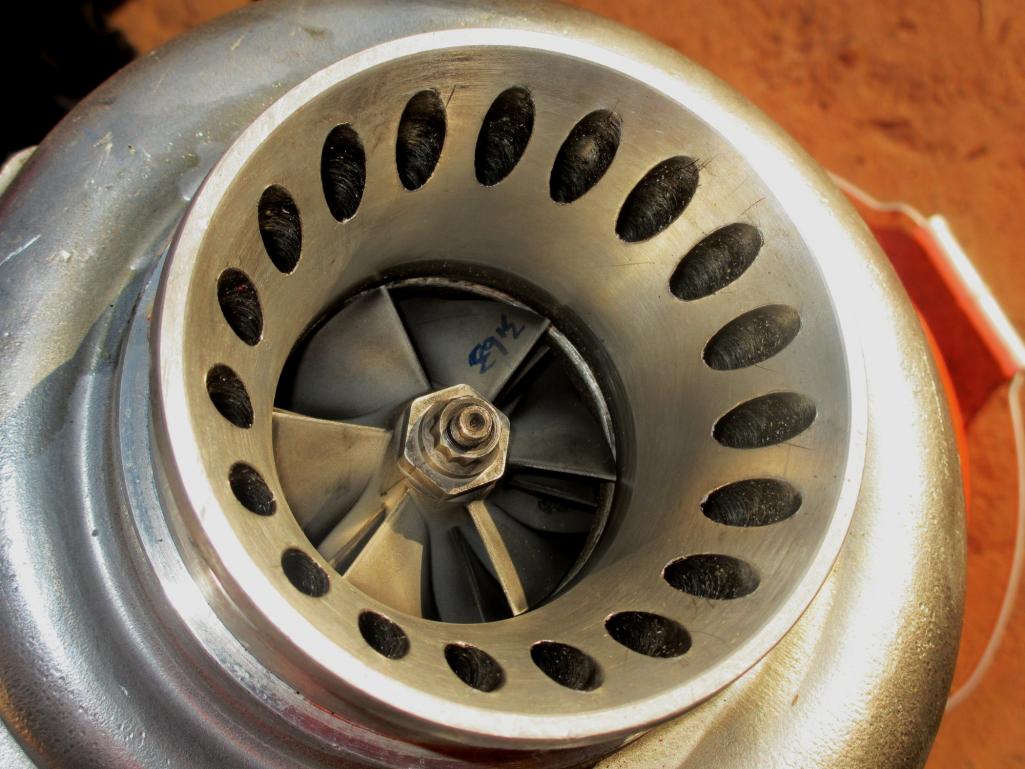
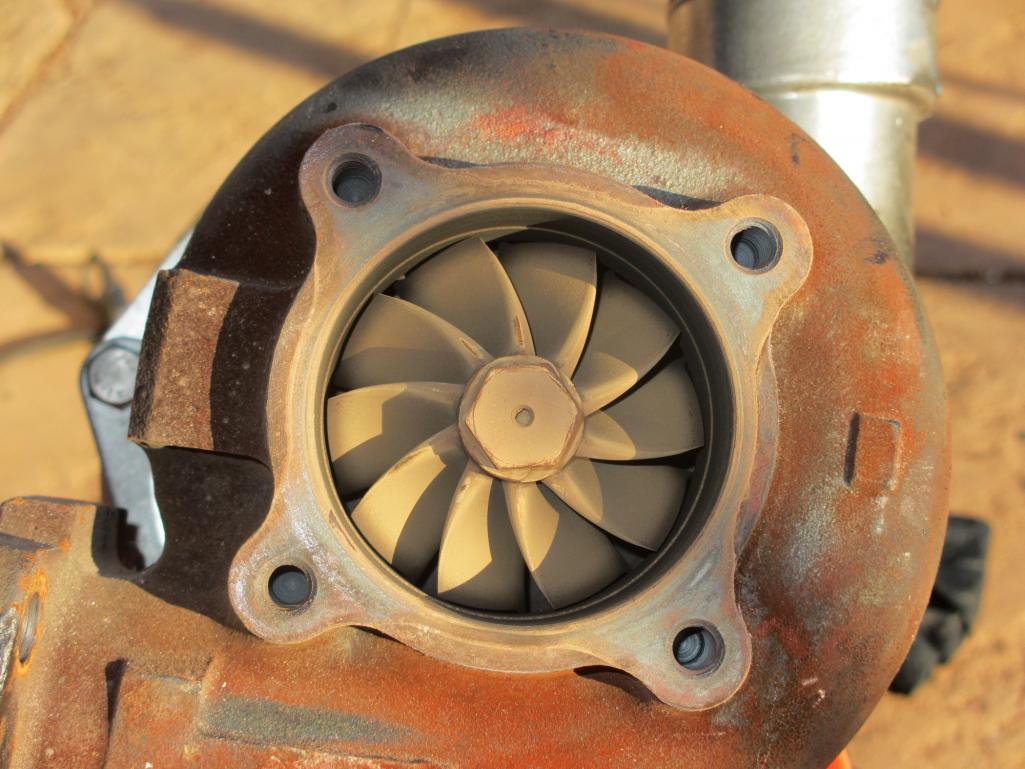
Here is a link to the begining. http://www.914world.com/bbs2/index.php?showtopic=113156 With a little help from my Brother and Son, we got the car into the garage and I tore the engine out. It took a little over an hour to pull. 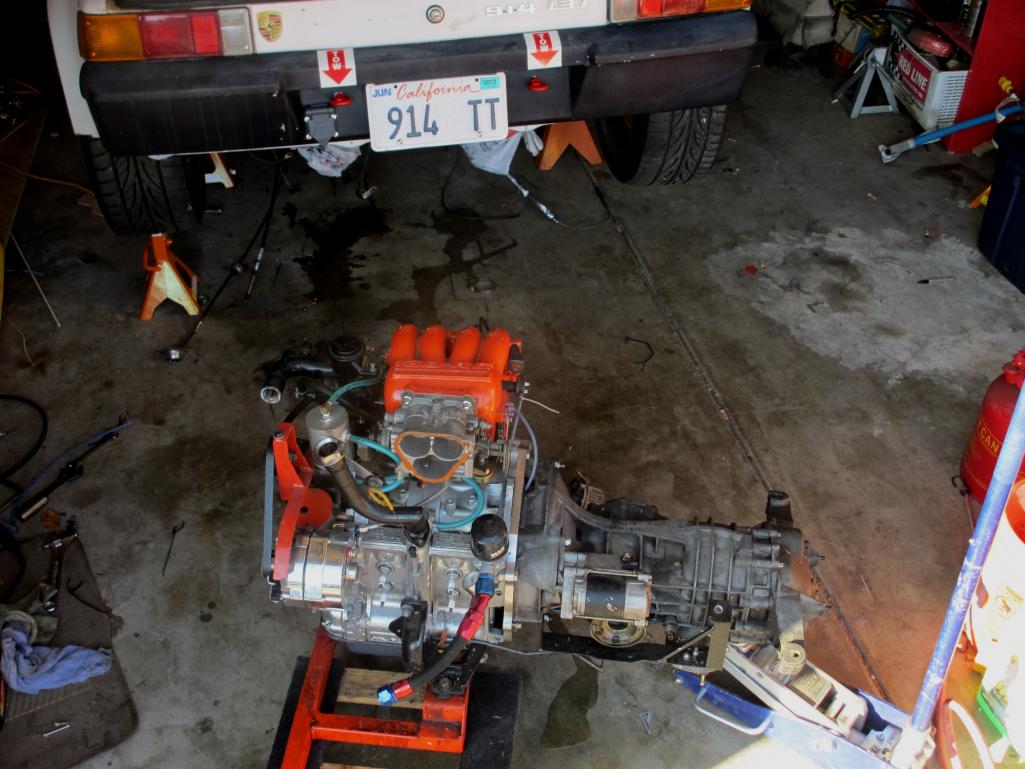 The turbo looks ok. It's a little dirty but I can't see any knicks in any blades. Shaft play is minimal and it spins wirh air without drag or noise. I will have to take it apart to find any further signs of damage. 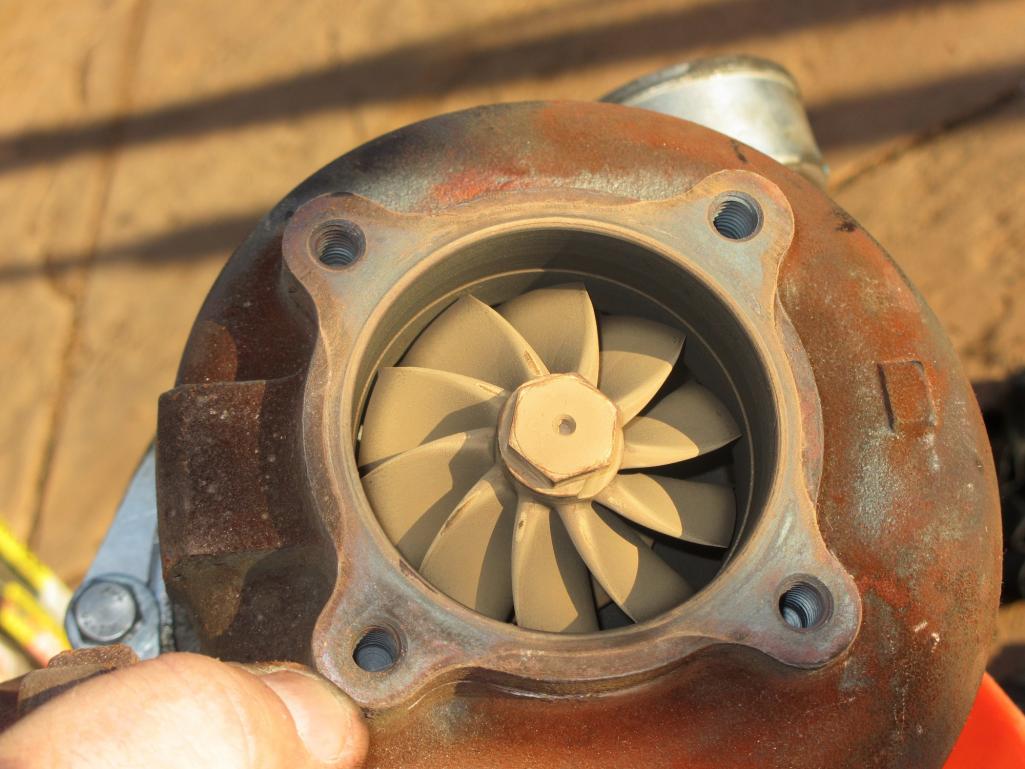 As expected, I blew the apex seal of rotor 2. The white specks in the picture is where the seal should be. There is very fine grit in the exhaust port. Rotor 1 looks fine. Time for a rebuild or JDM crap motor. I will have to look at my budget, A rebuild is 2-3 times the cost of a JDM motor. Either way, all the components will bolt on. There is a chance if I go JDM, that I will have to modify the engine brace for different motor mounts. 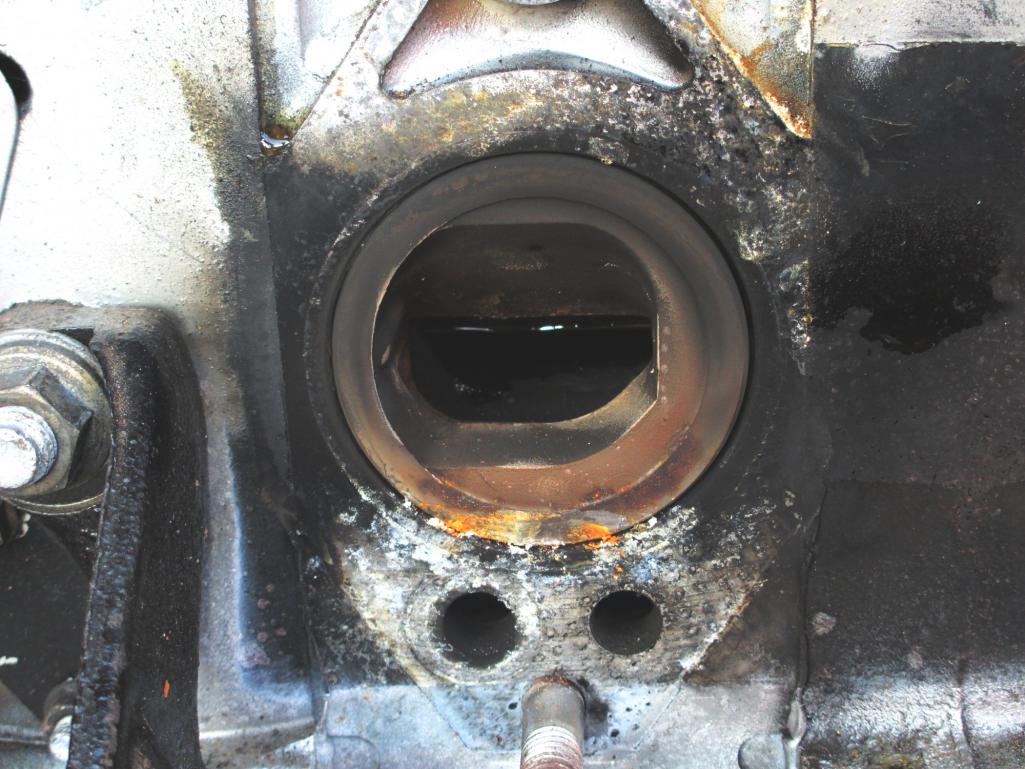 Here's some pics of the package... 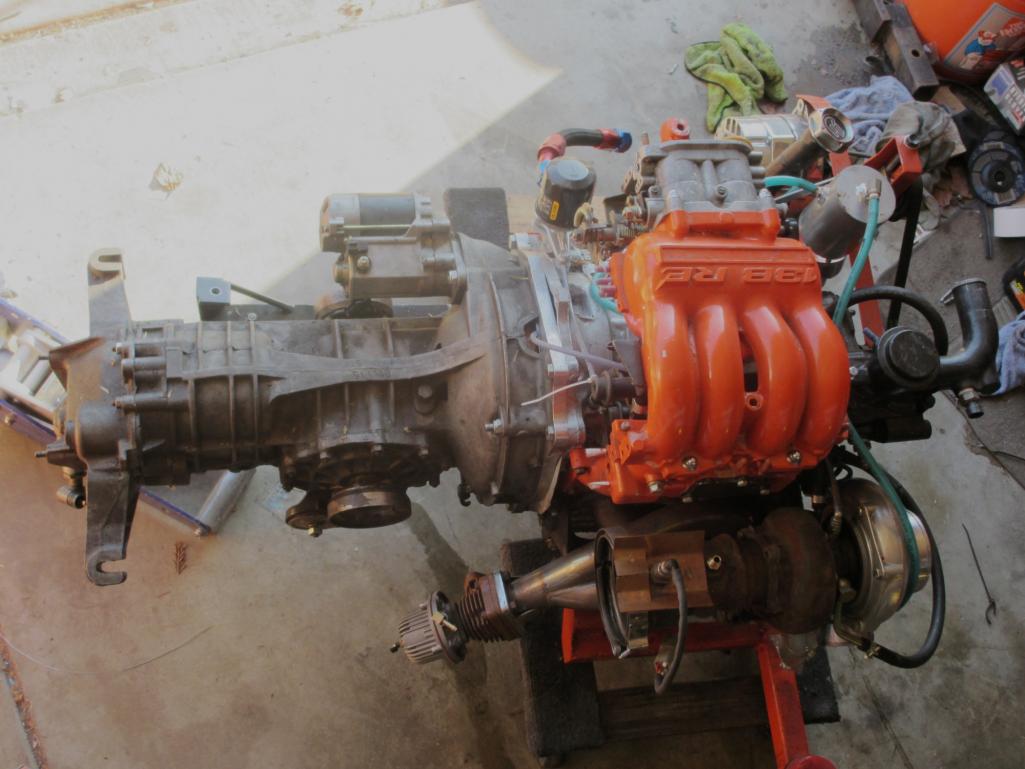 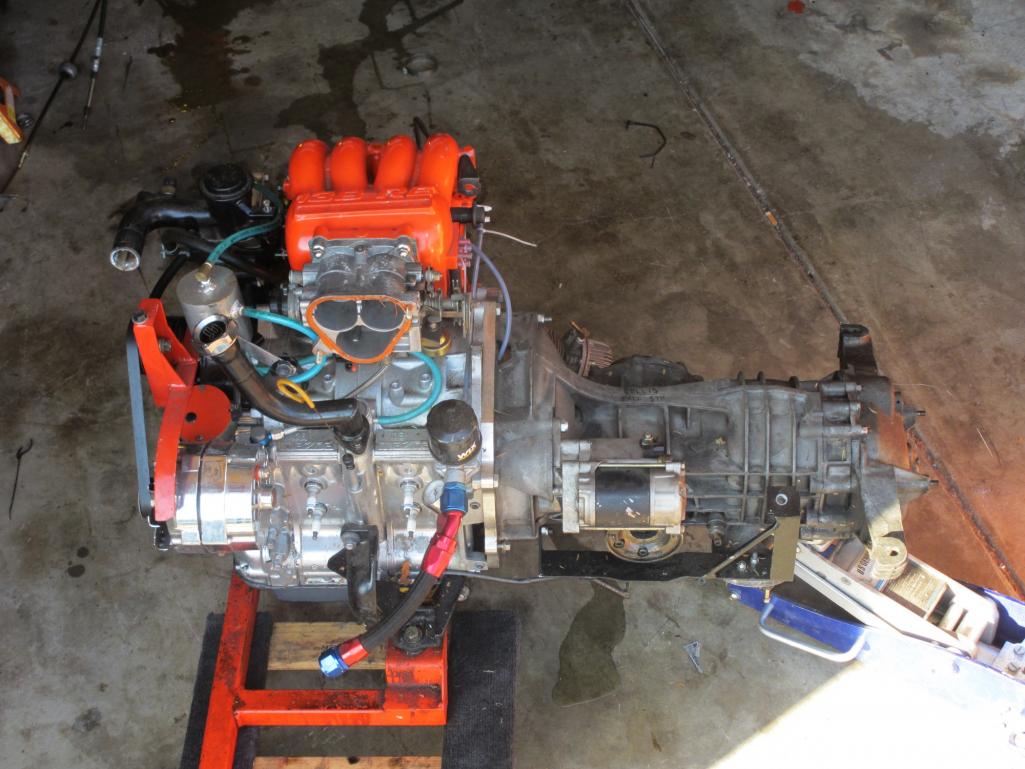 |
   |

 
|
| Andyrew |
Mar 4 2012, 11:02 PM
Post
#2
|
|
Spooling.... Please wait Group: Members Posts: 13,380 Joined: 20-January 03 From: Riverbank, Ca Member No.: 172 Region Association: Northern California |
Aaaand subscribed (IMG:style_emoticons/default/smile.gif)
|
|
|
|
| Mike Bellis |
Mar 4 2012, 11:19 PM
Post
#3
|
|
Resident Electrician Group: Members Posts: 8,348 Joined: 22-June 09 From: Midlothian TX Member No.: 10,496 Region Association: None |
It will be a miracle if I get it going by WCR. Butt I'll try!
  |
|
|
|
| Mike Bellis |
Mar 12 2012, 08:31 PM
Post
#4
|
|
Resident Electrician Group: Members Posts: 8,348 Joined: 22-June 09 From: Midlothian TX Member No.: 10,496 Region Association: None |
Progress!
I found an out of work guy that just totaled his Rx7, 2000 miles after he rebuilt it. His Loss, my gain. (IMG:style_emoticons/default/shades.gif)  The motor mounts are different, so some fab time this weekend will ge it fitted. Most every thing else will bolt right on without massaging. I need to find a 54mm socket so I can swap the flywheel and counterweight. I may have it running by the end of the weekend. (IMG:style_emoticons/default/aktion035.gif) 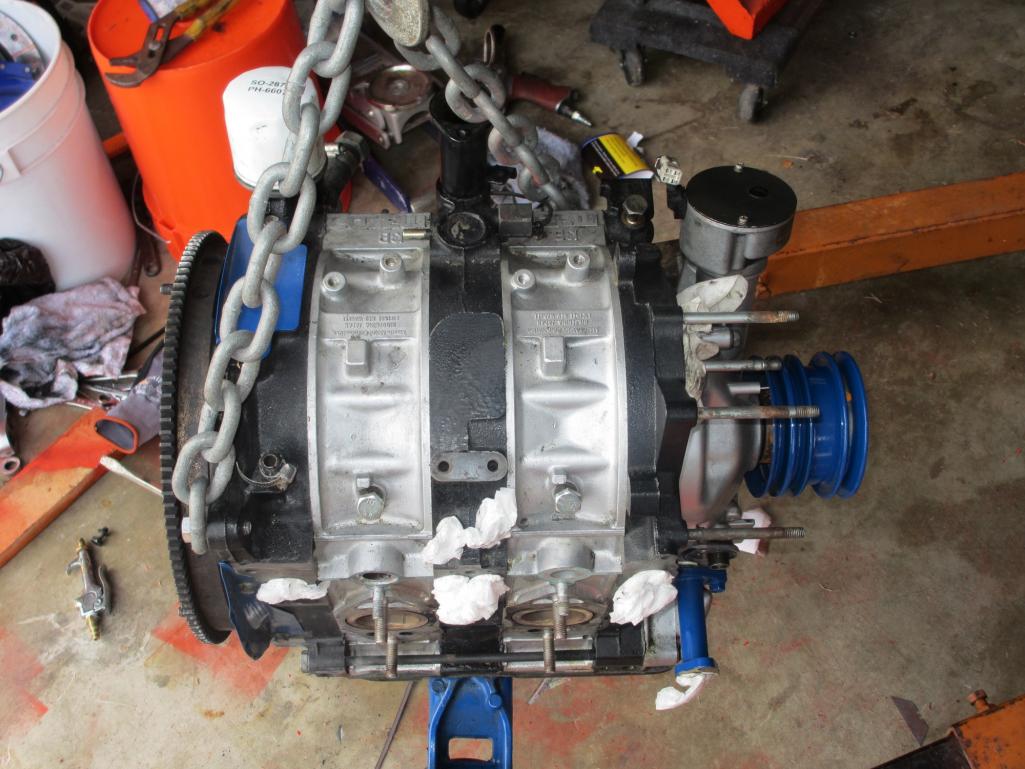 The motor has a mild port and was assembled with early (better) rotor housings. Note the early NSU Wankel License. I also swapped the crank angle sensor since the plug matches my EFI and I know it works. I do need to slightly grind down a tab on the old water pump housing to clear on this engine. 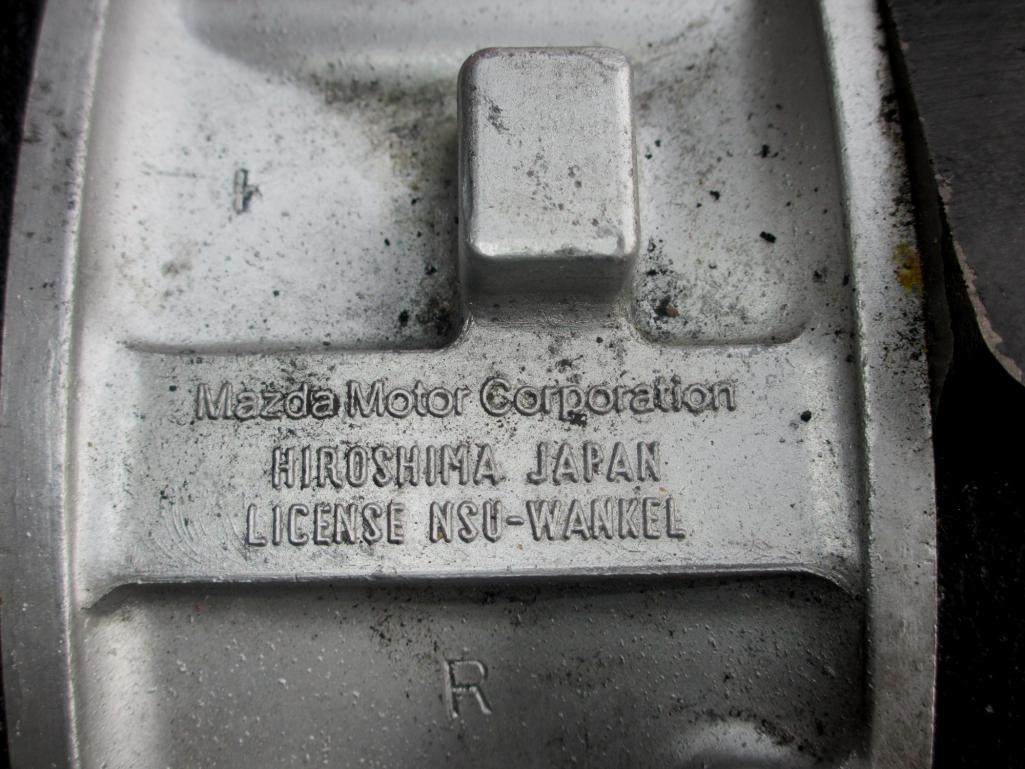 The main difference on this engine is the oil injection pump. The old one was an electronically controlled stepper motor. The new one works via a cable connected to the throttle body. My TB has a connection point for cruise control, so I will fab up a custom bike cable to operate it. Should be simple in theory (IMG:style_emoticons/default/idea.gif) Look like I will have a running 914 for WCR 2012!!! (IMG:style_emoticons/default/smilie_pokal.gif) |
|
|
|
| Rand |
Mar 12 2012, 08:41 PM
Post
#5
|
|
Cross Member Group: Members Posts: 7,415 Joined: 8-February 05 From: OR Member No.: 3,573 Region Association: None |
I'm stoked for you. I've been anxiously anticipating you getting this beast back on the road. Can't wait to hear more.
(IMG:style_emoticons/default/beerchug.gif) |
|
|
|
| Andyrew |
Mar 13 2012, 08:54 AM
Post
#6
|
|
Spooling.... Please wait Group: Members Posts: 13,380 Joined: 20-January 03 From: Riverbank, Ca Member No.: 172 Region Association: Northern California |
Wooot!!
|
|
|
|
| matthepcat |
Mar 13 2012, 09:12 AM
Post
#7
|
|
Meat Popsicle Group: Members Posts: 1,462 Joined: 13-December 09 From: Saratoga CA Member No.: 11,125 Region Association: Northern California |
Congrats Mike. Good Karma kickin in for all the help you have provided other folks on the board.
|
|
|
|
| Lennies914 |
Mar 13 2012, 05:41 PM
Post
#8
|
|
Slacker Group: Members Posts: 828 Joined: 9-January 10 From: NorCal Member No.: 11,216 Region Association: Northern California |
Great news Mike.
Are you saying that the apex seal passed through the turbo without causing any damage? If so, not as bad as you anticipated. |
|
|
|
| Mike Bellis |
Mar 13 2012, 09:00 PM
Post
#9
|
|
Resident Electrician Group: Members Posts: 8,348 Joined: 22-June 09 From: Midlothian TX Member No.: 10,496 Region Association: None |
QUOTE(Lennies914 @ Mar 13 2012, 03:41 PM)  Great news Mike. Are you saying that the apex seal passed through the turbo without causing any damage? If so, not as bad as you anticipated. It looks like the carbon apex seals exploded into dusty grit. Anyway, got the adapter,flywheel,clutch on the new motor. Mounted the freshly sealed and painted tranny. Yes, painted... So what... (IMG:style_emoticons/default/biggrin.gif) I plan to get it dry fitted into the car and look at the cross bar mods. I hope to keep both engine mounts on the same cross bar. Looks like it will work and will allow the reuse of the blown motor once it gets rebuilt. Ordered some gaskets and still need a new banjo fitting. I love progress! |
|
|
|
| Jeffs9146 |
Mar 13 2012, 09:24 PM
Post
#10
|
|
Ski Bum Group: Members Posts: 4,062 Joined: 10-January 03 From: Discovery Bay, Ca Member No.: 128 |
Wow you got motivation!
It looks like you and Lennies914 might pull this off and be driving again soon! Lennie drove his car to my house today so he can convert his garage back into a spray booth!!! All that is left is the hoods, door and engine cover! It is nice to have two nice teeners in the garage again! Attached thumbnail(s) 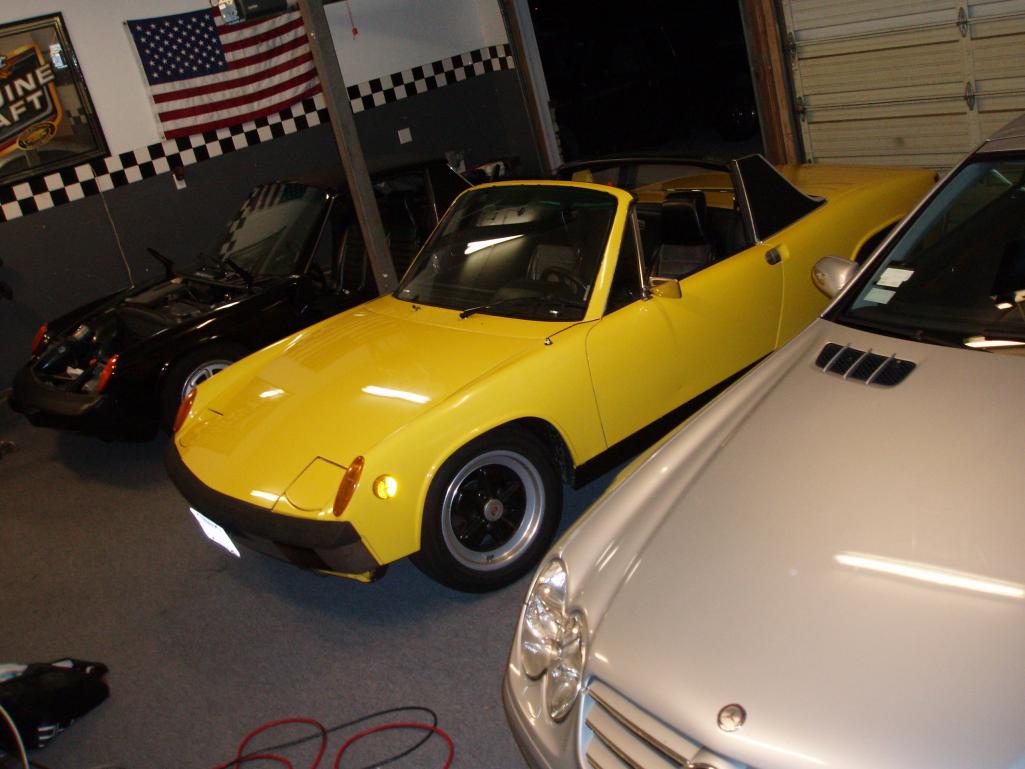
|
|
|
|
| Mike Bellis |
Mar 13 2012, 09:47 PM
Post
#11
|
|
Resident Electrician Group: Members Posts: 8,348 Joined: 22-June 09 From: Midlothian TX Member No.: 10,496 Region Association: None |
Here is the engine mated to the tranny... I only had to pull off the upper intake manifold to remove the engine. And, that was only due to the lack of a proper lift. All accessories will bolt on before reinstallation.
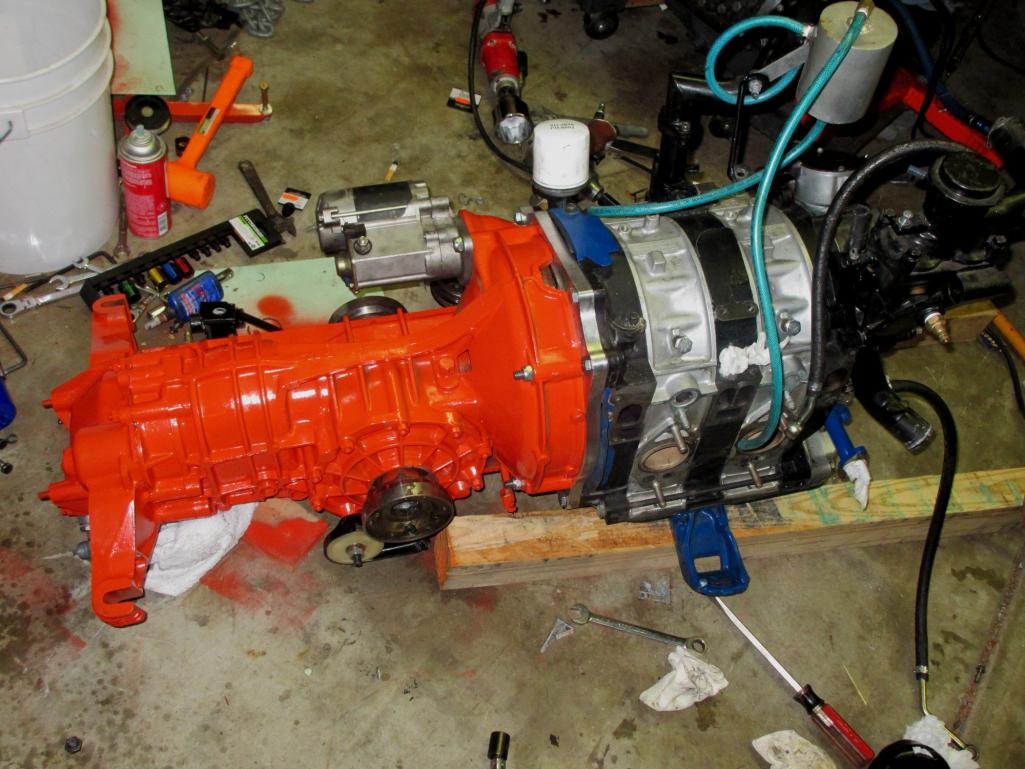 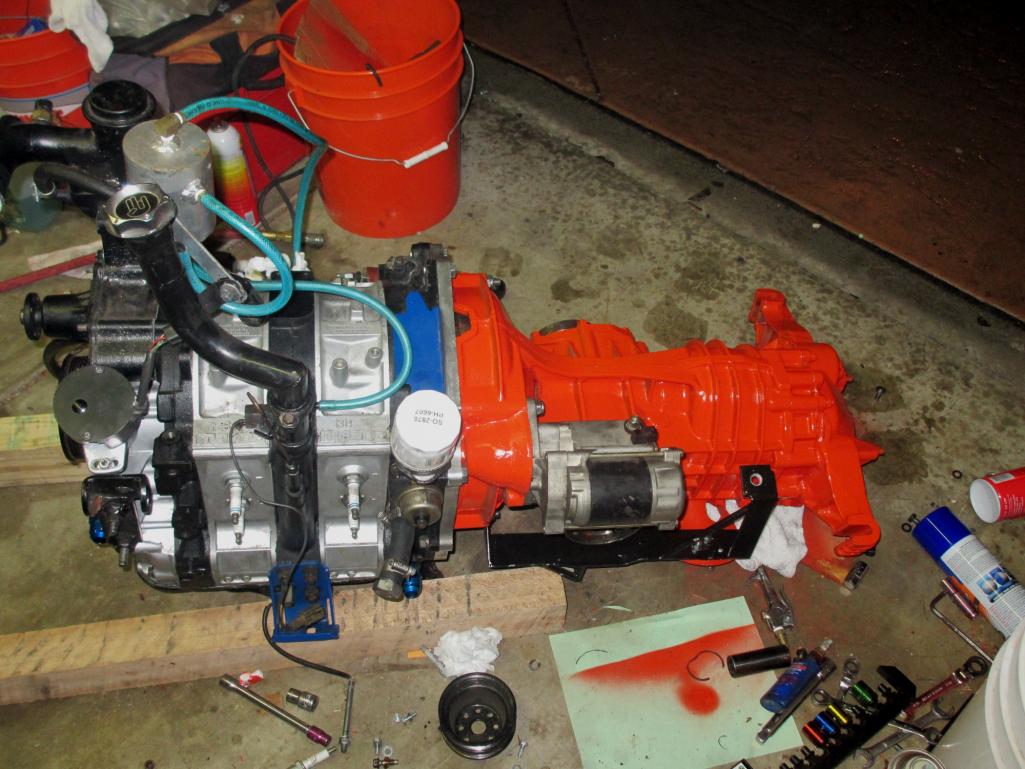 Here you can just see the tab on the black water pump housing I had to grind for clearance. The later oil pump cover has a divot to clear this tab. This is a common mod when using this setup. The main advantage is the mechanical control of the oil meetering pump. The electronic control I was using is a POS. The guy that sells it is too hard to get hold of in Austrailia. So the simple cable setup will work every time. 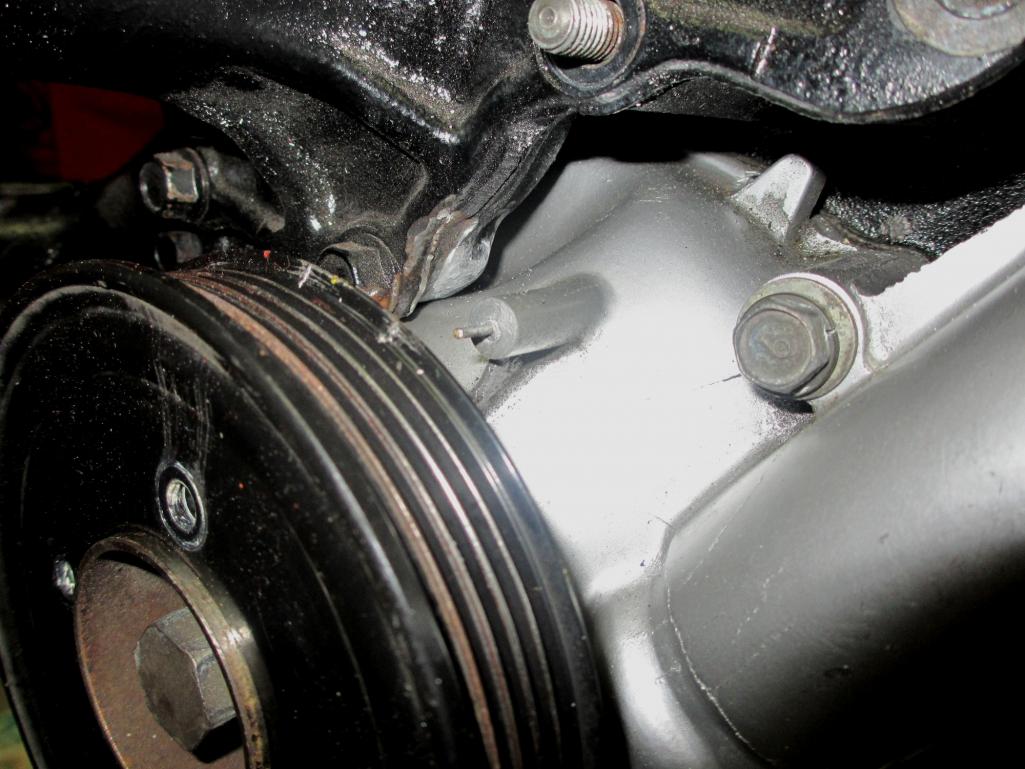 |
|
|
|
| Lennies914 |
Mar 13 2012, 10:03 PM
Post
#12
|
|
Slacker Group: Members Posts: 828 Joined: 9-January 10 From: NorCal Member No.: 11,216 Region Association: Northern California |
Was it the controller you are unhappy with, or the stepper motor itself? I have some good quality stepper motors if you need one.
|
|
|
|
| strawman |
Mar 13 2012, 10:34 PM
Post
#13
|
|
Senior Member Group: Members Posts: 891 Joined: 25-January 08 From: Los Osos, CA Member No.: 8,624 Region Association: Central California |
QUOTE(kg6dxn @ Mar 12 2012, 07:31 PM) The main difference on this engine is the oil injection pump. The old one was an electronically controlled stepper motor. The new one works via a cable connected to the throttle body. My TB has a connection point for cruise control, so I will fab up a custom bike cable to operate it. Should be simple in theory (IMG:style_emoticons/default/idea.gif) Why not just pre-mix like a two-stroke engine? That way you know you're getting lubrication no matter what. Or would that gum up the spark plugs? Either way, I'm subscribed! |
|
|
|
| Mike Bellis |
Mar 13 2012, 10:45 PM
Post
#14
|
|
Resident Electrician Group: Members Posts: 8,348 Joined: 22-June 09 From: Midlothian TX Member No.: 10,496 Region Association: None |
QUOTE(strawman @ Mar 13 2012, 08:34 PM) QUOTE(kg6dxn @ Mar 12 2012, 07:31 PM) The main difference on this engine is the oil injection pump. The old one was an electronically controlled stepper motor. The new one works via a cable connected to the throttle body. My TB has a connection point for cruise control, so I will fab up a custom bike cable to operate it. Should be simple in theory (IMG:style_emoticons/default/idea.gif) Why not just pre-mix like a two-stroke engine? That way you know you're getting lubrication no matter what. Or would that gum up the spark plugs? Either way, I'm subscribed! The problem with premix is when you forget to mix. Also, at low rpm you get too much oil. At idle, they tend to smoke too much. Eventually, I will draw injection oil from a seporate tank. This will allow the use of "smokeless" 2 stroke oil and not engine oil. I will premix a little unilt I'm satified the system works correctly. Just ordered remaining parts from Summit. I think I have everything I need to get it running this weekend. It all depends on what needs to be re-engineered first. |
|
|
|
| Mike Bellis |
Mar 13 2012, 10:47 PM
Post
#15
|
|
Resident Electrician Group: Members Posts: 8,348 Joined: 22-June 09 From: Midlothian TX Member No.: 10,496 Region Association: None |
QUOTE(Lennies914 @ Mar 13 2012, 08:03 PM) Was it the controller you are unhappy with, or the stepper motor itself? I have some good quality stepper motors if you need one. The controller never worked correctly. It was either wide open or closed. I could not get any customer support from the guy that makes them 10 at a time. |
|
|
|
| Mike Bellis |
Mar 16 2012, 11:30 PM
Post
#16
|
|
Resident Electrician Group: Members Posts: 8,348 Joined: 22-June 09 From: Midlothian TX Member No.: 10,496 Region Association: None |
Well the engine will be in this weekend but it wont be running. The primaty fuel rail will not work. Time for a custom fuel rail. I have the rail stock (3 feet), but drilling and tapping is a PITA on aluminum. I might send the tapping out to a maching shop. That will prevent me from having to build the rail multiple times. (IMG:style_emoticons/default/dry.gif) This fiasco will allow me to finally install my 1000cc primary injectors. right now I'm still running the stock 550cc primary with my 2000cc secondary injectors. This will require some fine EFI tuning but nothing too bad.
Here is the fuel map. The primary injectors function like a normal injector up to 1.7psi. At that point, they maintain a steady pulse width up to 30psi. At 1.7psi, the secondary injectors start to pulse and increase pulse width with pressure and rpm. This is normal for a rotary to use this injection staggering. I will reduce the pulse width below 1.7psi by 40-60% across the map to start tuning. 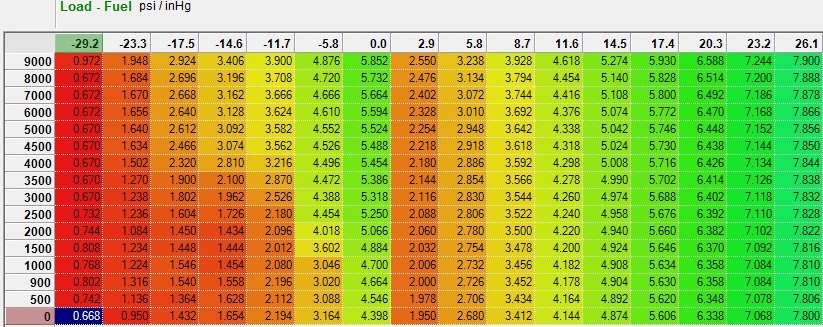 Here is the map in 3D... 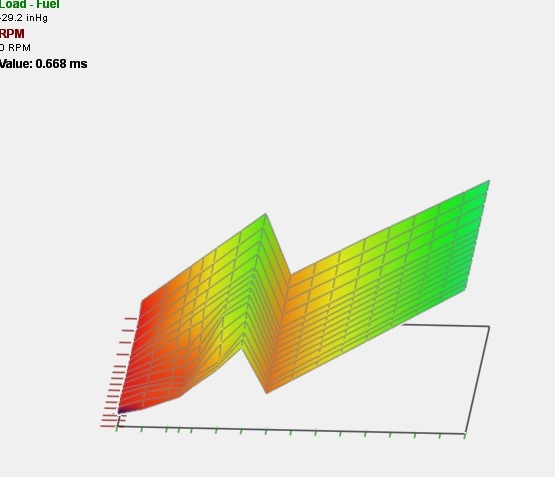 The original engine I have is from a JDM car called a Enus Cosmo. This engine has a better plenumn and intake for torque than a standard Rx7. The new engine is from a USDM 89 Rx7. I have noticed that Mazda made these engines with 10 different versions of every part. maybe that is why they are so expensive. No consistency= $$$$ tooling costs. Bottom line... It will fit with little mods. So far just a new fuel rail and rework the motor mount locations. I will be able to add braketry to the existing engine bar to accept these engine mounts with little effort. And the old mounts will remain for the other engine if needed. Compared to all the fab I've done, this seems minor. I will drill and tap the plenumn to accept 2 meth injectors. Not sure if I'll have the meth working by WCR. Have to watch my car budget. But It will be set up for it and I'll add components as funds allow. If the meth is not functional, I will dial down the boost for a while. I will still have a 400% hp increase over stock... (IMG:style_emoticons/default/evilgrin.gif) |
|
|
|
| JRust |
Mar 17 2012, 01:36 PM
Post
#17
|
|
914 Guru Group: Members Posts: 6,317 Joined: 10-January 03 From: Albany Oregon Member No.: 129 Region Association: Pacific Northwest |
Nice Mike. Glad to see you flying on your car again. Lookin good my friend (IMG:style_emoticons/default/beer.gif)
|
|
|
|
| Mike Bellis |
Mar 17 2012, 10:42 PM
Post
#18
|
|
Resident Electrician Group: Members Posts: 8,348 Joined: 22-June 09 From: Midlothian TX Member No.: 10,496 Region Association: None |
Got the engine and tranny mocked up. I use aircraft stripper on the bar. Found some 1/4" stock and 5/8" DOM to fab the mounts. The original mounting point on the passenger side had to be trimmed to fit around the new one. Got it all welded up and it fits both engines. (IMG:style_emoticons/default/piratenanner.gif)
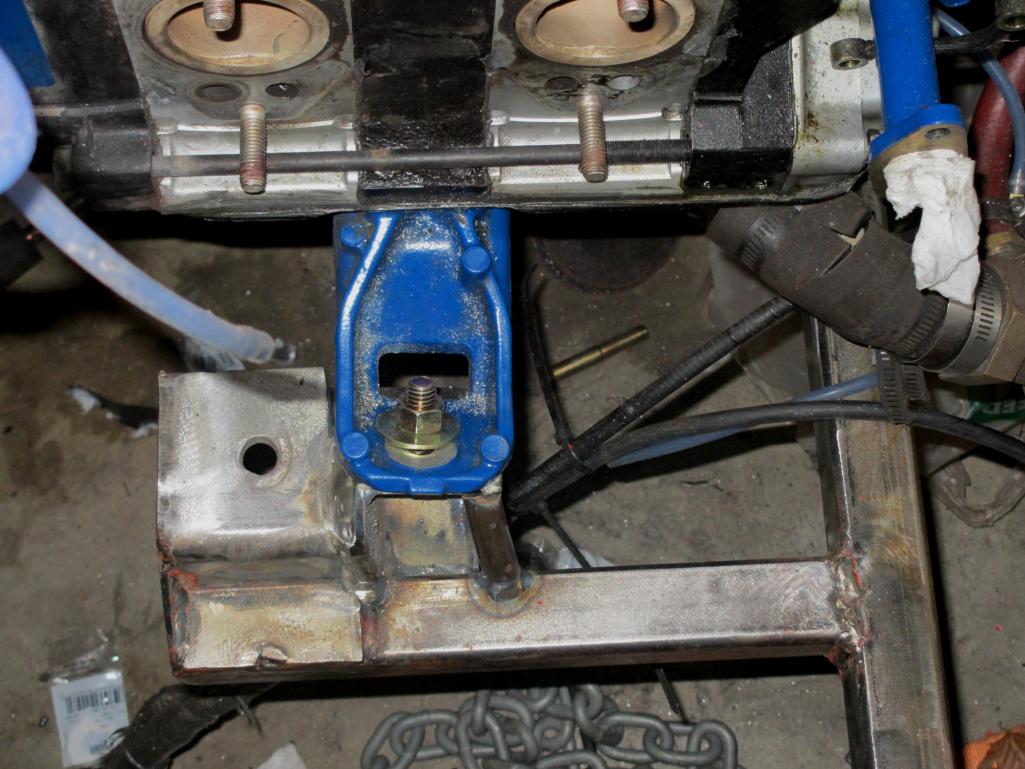 From the rear you can see how asymetrical the new mounts are. I think in the Rx7 this is done on the passenger side for turbo clearance. 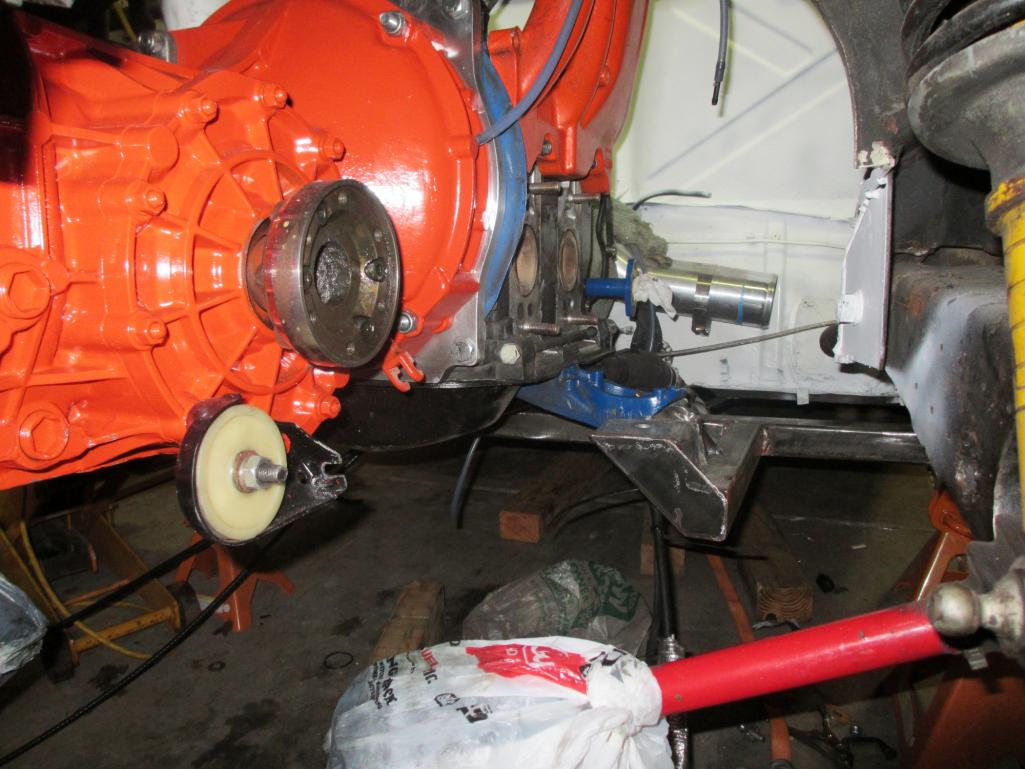 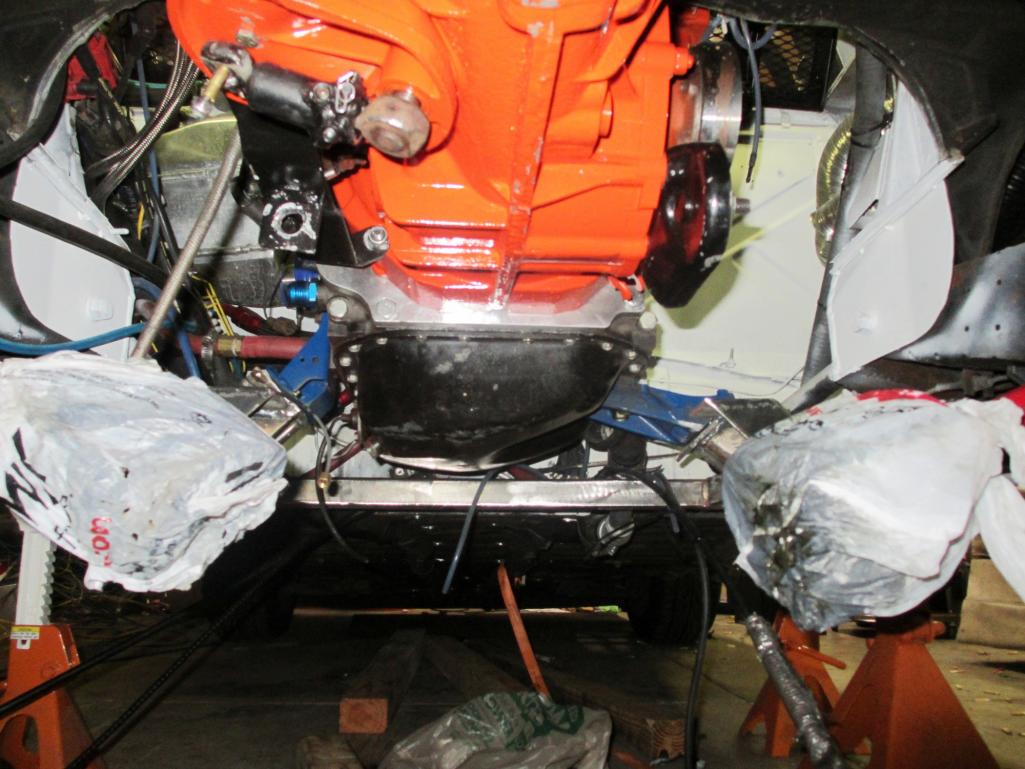 Anyone can fab up a cross bar since the transmission locates the assembly. I hope this inspires some new unusual conversions. Rotors are rusty from sitting for almost a year... (IMG:style_emoticons/default/sad.gif) 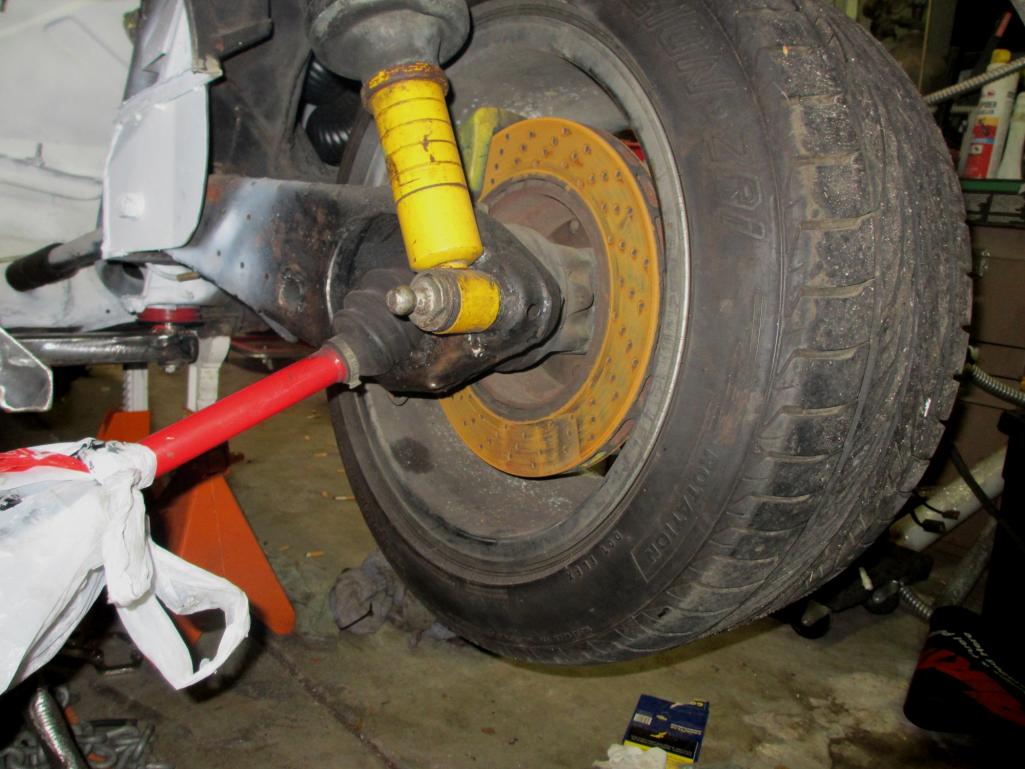 |
|
|
|
| Mike Bellis |
Mar 17 2012, 10:44 PM
Post
#19
|
|
Resident Electrician Group: Members Posts: 8,348 Joined: 22-June 09 From: Midlothian TX Member No.: 10,496 Region Association: None |
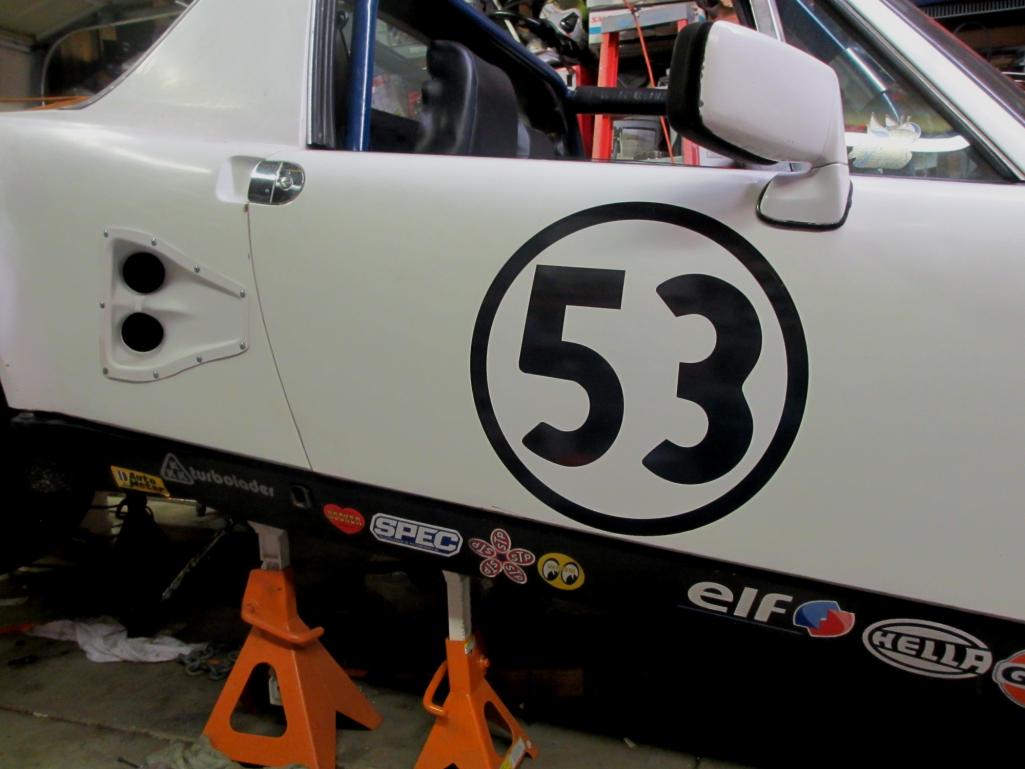
Glamour shots...
  |
|
|
|
| wingnut86 |
Mar 17 2012, 10:46 PM
Post
#20
|
|
...boola la boo boola boo... Group: Members Posts: 1,054 Joined: 22-April 10 From: South Carolina Member No.: 11,645 Region Association: South East States |
That might be the 1st RUST I've seen on a Cali car... (IMG:style_emoticons/default/happy11.gif)
|
|
|
|
|
1 User(s) are reading this topic (1 Guests and 0 Anonymous Users)
0 Members:

|
Lo-Fi Version | Time is now: 8th July 2026 - 06:06 AM |
Invision Power Board
v9.1.4 © 2026 IPS, Inc.