|
|
|
Porsche, and the Porsche crest are registered trademarks of Dr. Ing. h.c. F. Porsche AG.
This site is not affiliated with Porsche in any way. Its only purpose is to provide an online forum for car enthusiasts. All other trademarks are property of their respective owners. |
|
|

  |

| 9fourteen |
 Mar 25 2012, 06:09 PM Mar 25 2012, 06:09 PM
Post
#1
|
|
Newbie  Group: Members Posts: 42 Joined: 20-November 06 From: Cincinnati, OH Member No.: 7,239 Region Association: Upper MidWest |
I have finally started to rebuild my 74 914. I got my garage setup, tools ready, just need to find the time now. I figured I would start a thread to keep track of progress. I bounce around between many projects and usually busy on other things so I expect this to take many years.
Paid $900 for it and drove it home. I drove it a few times before it developed a serious oil leak and has been sitting in the garage ever since. I am finding a lot of hidden rust on this car. Typical spots but a lot that has been hidden by previous repaints and repairs. Hell hole is shot, outer longs in bad shape, floor pan needs repair, etc. Like I said, typical 914 rot. I am a complete beginner at this so it will be a learning experience all the way. I plan on doing it all myself and getting in way over my head. Here is a picture of the car as it was bought about 10 years ago. Attached image(s) 
|
   |

 
|
| 9fourteen |
Mar 25 2012, 06:13 PM
Post
#2
|
|
Newbie Group: Members Posts: 42 Joined: 20-November 06 From: Cincinnati, OH Member No.: 7,239 Region Association: Upper MidWest |
The first repair I attempted was to rebuild the front bumper mount that was rusted out. I started by cutting out all the rusted area.
Attached image(s) 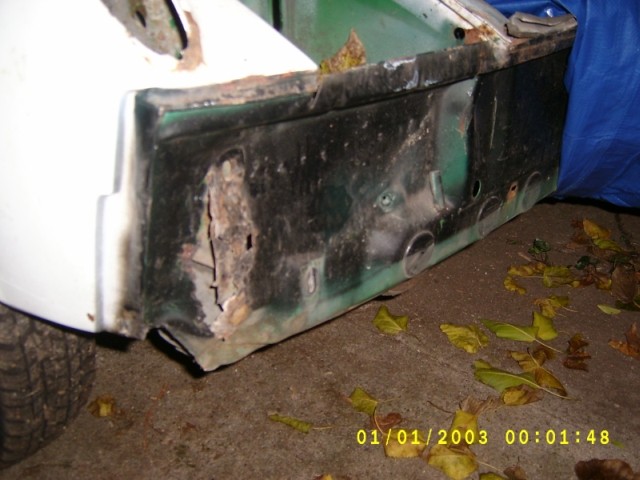 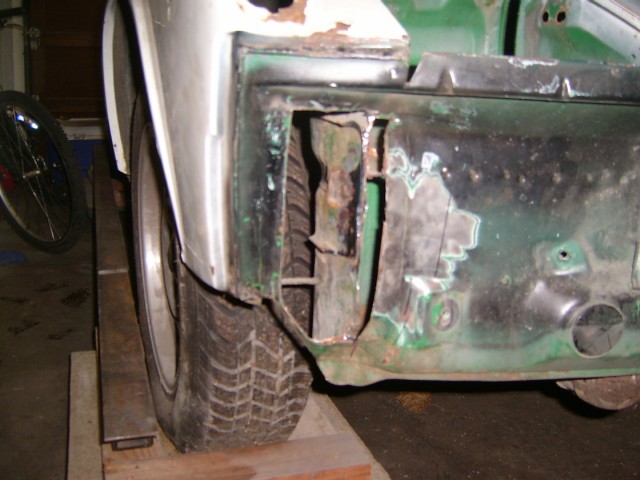
|
|
|
|
| 9fourteen |
Mar 25 2012, 06:17 PM
Post
#3
|
|
Newbie Group: Members Posts: 42 Joined: 20-November 06 From: Cincinnati, OH Member No.: 7,239 Region Association: Upper MidWest |
hammered out a patch piece with a new support bracket.
Attached image(s) 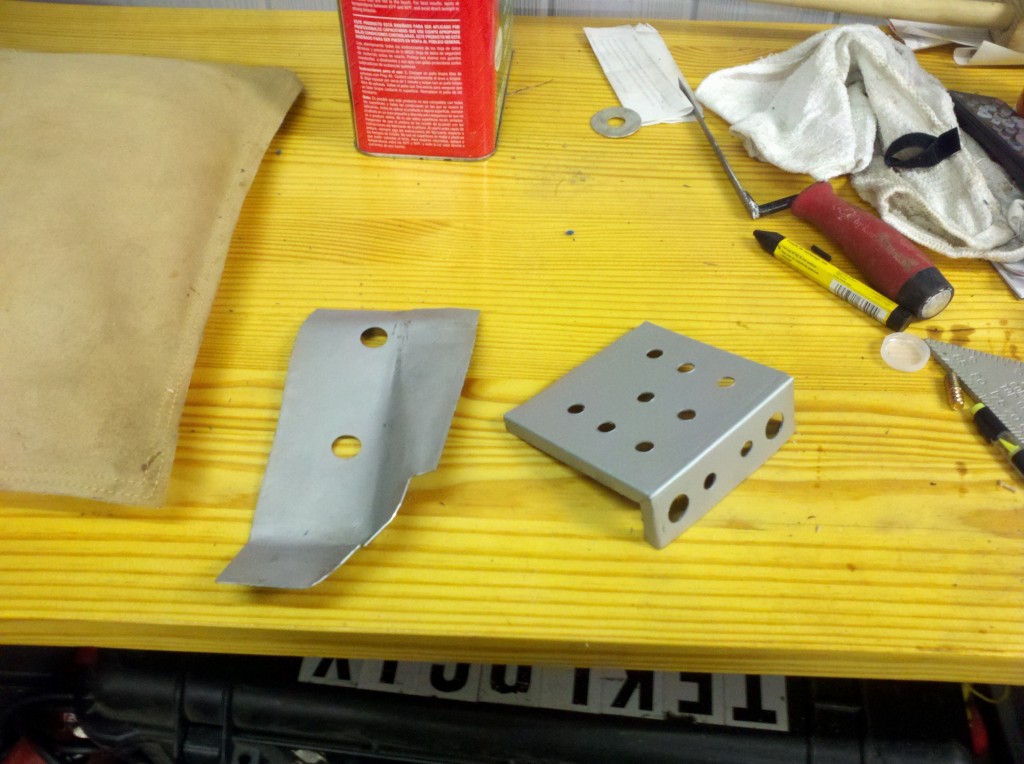 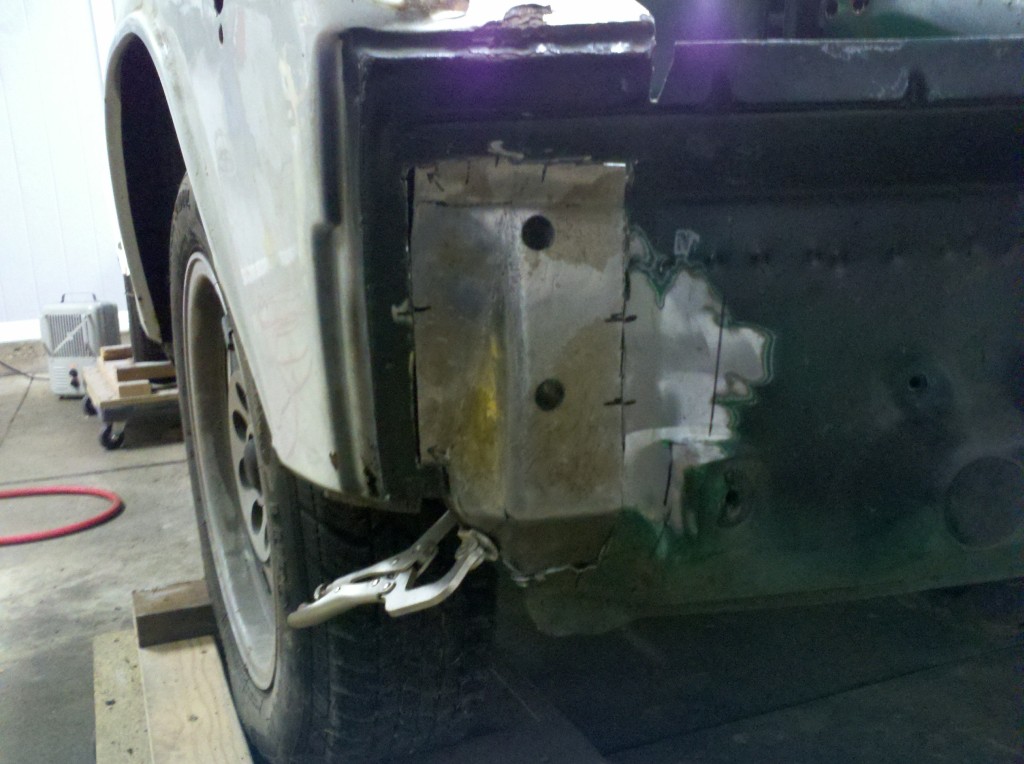
|
|
|
|
| 9fourteen |
Mar 25 2012, 06:35 PM
Post
#4
|
|
Newbie Group: Members Posts: 42 Joined: 20-November 06 From: Cincinnati, OH Member No.: 7,239 Region Association: Upper MidWest |
I got it welded in. Not a perfect job but it works. Took forever to figure out how to weld that thin metal. blew a lot of holes. had to make some additional patch pieces, etc. After several hours of welding, grinding, rewelding, grinding some more I go it looking pretty good. I figured this was the best place to start since it will be covered with the bumper so if I made some mistakes learning it wouldn't matter so much.
The biggest thing I learned on the welding was to be patient. If you try to weld too much too fast you will blow a hole. Skip, tack welds was the trick. Also I was welding with too thick of wire. I was using .030 wire and switched to .023. that made a huge improvement. I also manually adjusted my Miller welder instead of using the auto set settings. That got me better results. I was very frustrated at first but once I got the welder dialed in, right wire, right technique I started to really enjoy it. Attached image(s) 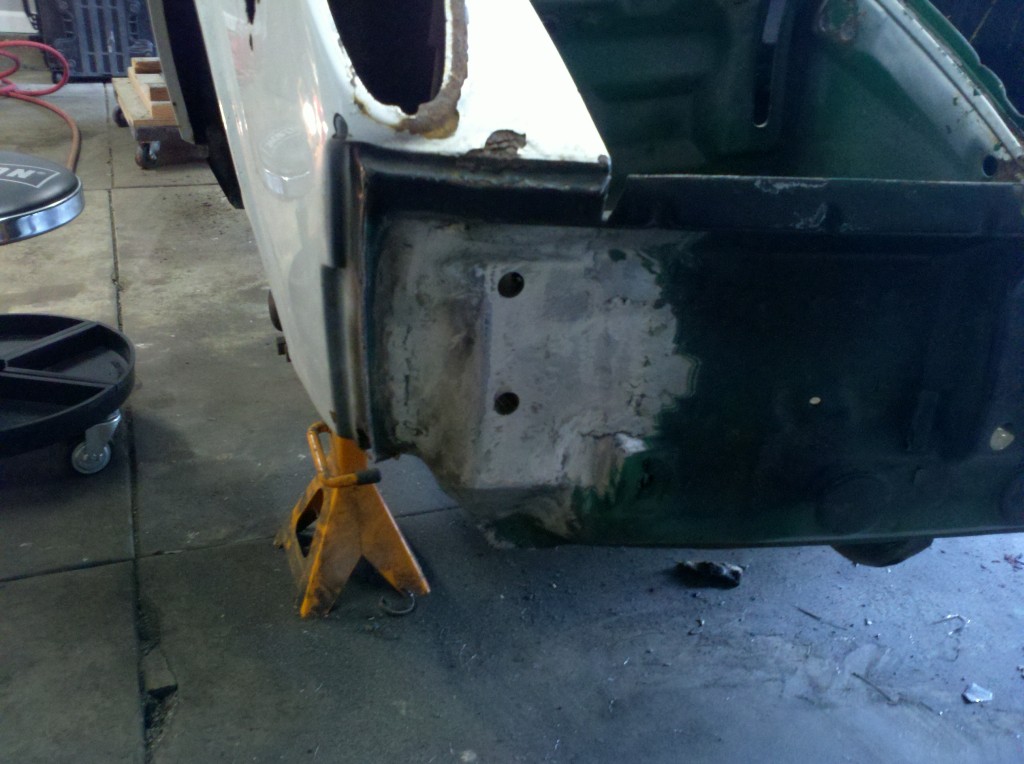 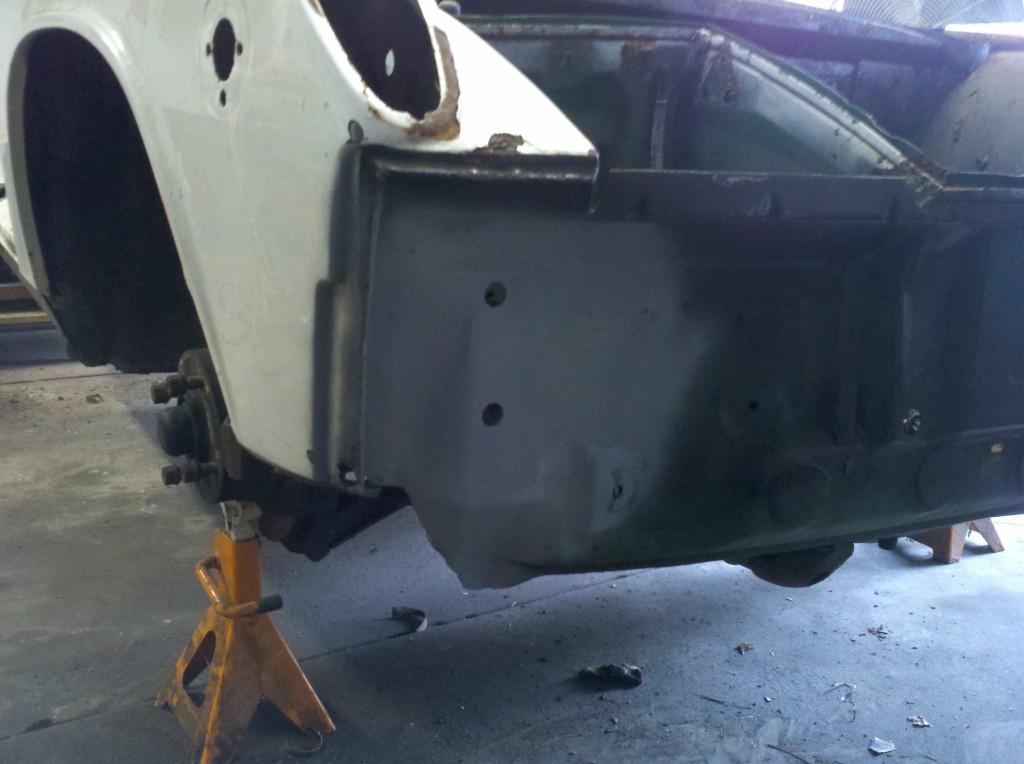
|
|
|
|
| 9fourteen |
Mar 25 2012, 06:52 PM
Post
#5
|
|
Newbie Group: Members Posts: 42 Joined: 20-November 06 From: Cincinnati, OH Member No.: 7,239 Region Association: Upper MidWest |
With my first repair under my belt I am starting on the hell hole and passenger long repair. It's ugly. I figure if I can fix this the rest of the car will be easy. The battery shelf is gone and everything under it is rotted out. It's rusted through the firewall and all the way out through the outer body panel and longs.
The PO did some sort of clam shell type repair where they pop riveted on a support piece over the longs and sandwiched it in with the rear suspension. I don't think it is even welded in. You can kindof see it in the picture. I will be removing it and welding on new outer longs. The inner longs surprisingly look good with only some minor surface rust. The door sill literally had newspaper stuffed in it with body filler in over top of it. It will be replaced properly as well. Attached image(s) 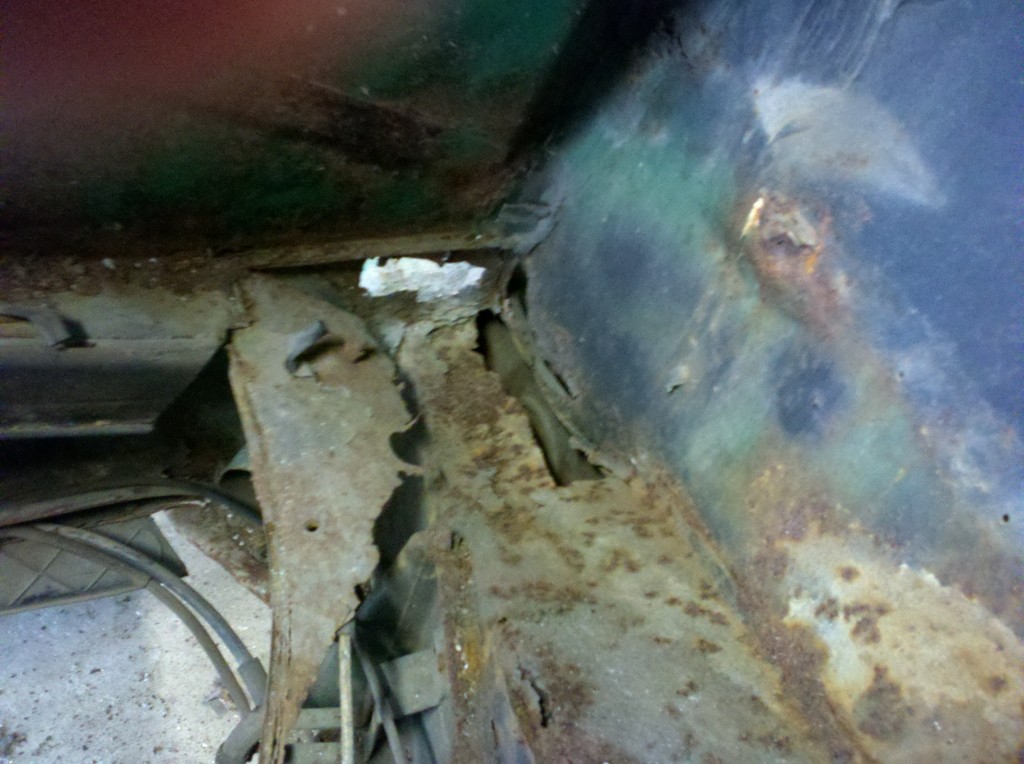 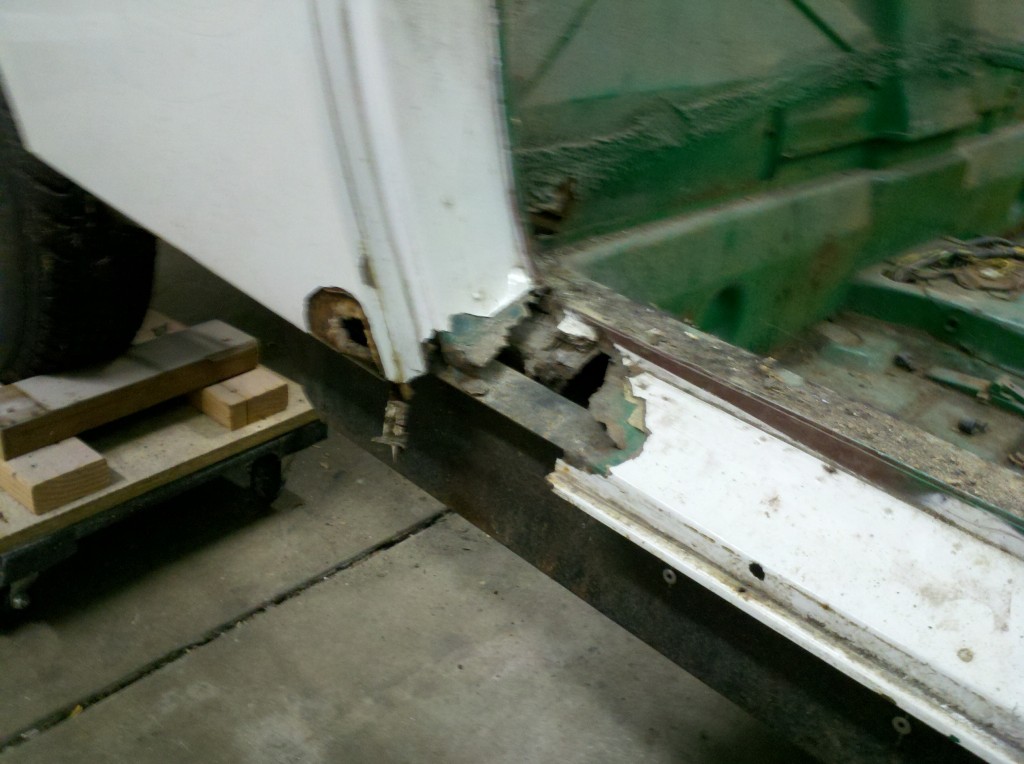
|
|
|
|
| dlo914 |
Mar 25 2012, 07:10 PM
Post
#6
|
|
Whatchu' lookin' at?!?! Group: Members Posts: 3,433 Joined: 6-September 04 From: San Gabriel, CA Member No.: 2,697 |
(IMG:style_emoticons/default/welcome.png) Off to a good start! GL on the rest of the repairs (IMG:style_emoticons/default/thumb3d.gif)
|
|
|
|
| 9fourteen |
Mar 25 2012, 07:11 PM
Post
#7
|
|
Newbie Group: Members Posts: 42 Joined: 20-November 06 From: Cincinnati, OH Member No.: 7,239 Region Association: Upper MidWest |
I decided to cut the quarter panel off all the way up into the sail to get get access to the HH and longs. Got it cut and all the spot welds drilled out and loose. The whole panel is loose except where that tube goes from the door jamb to the inner sail. I assume that is a vent tube. The tube is welded in so only solution I see to getting around that is to cut it around that tube. I need to get into that area because the strike plate and upper part of the finder is rotted out. I need to rebuild the whole area.
That is as far as I got this weekend. A week out of town for work and then hopefully back on it next weekend. Attached image(s) 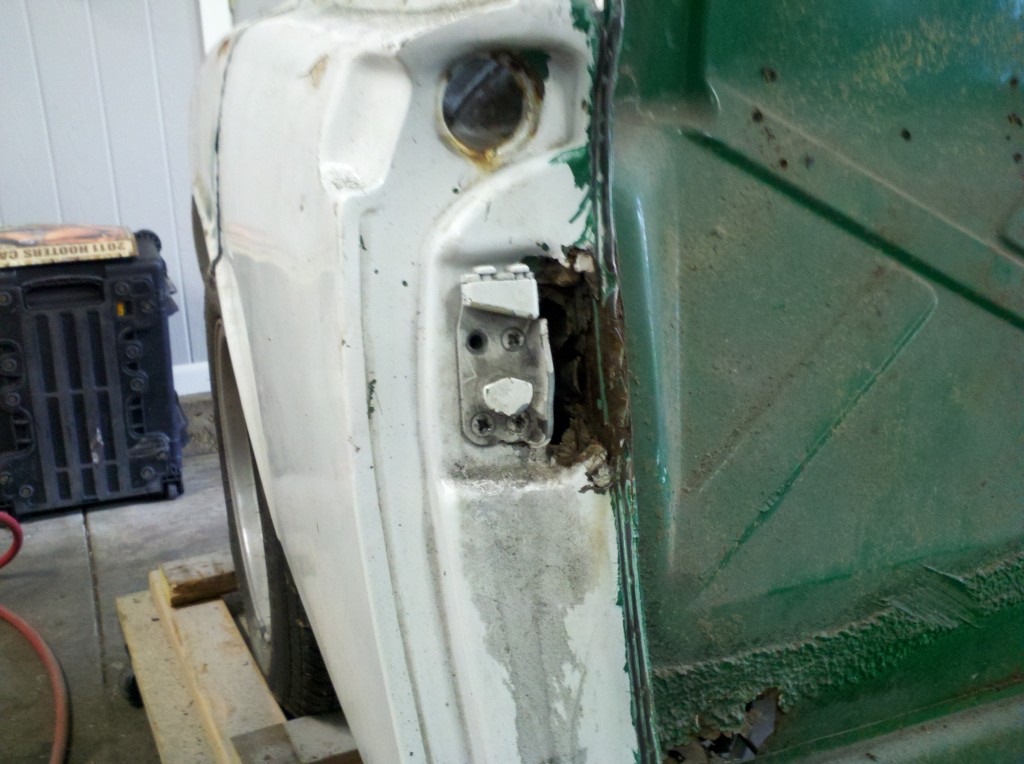 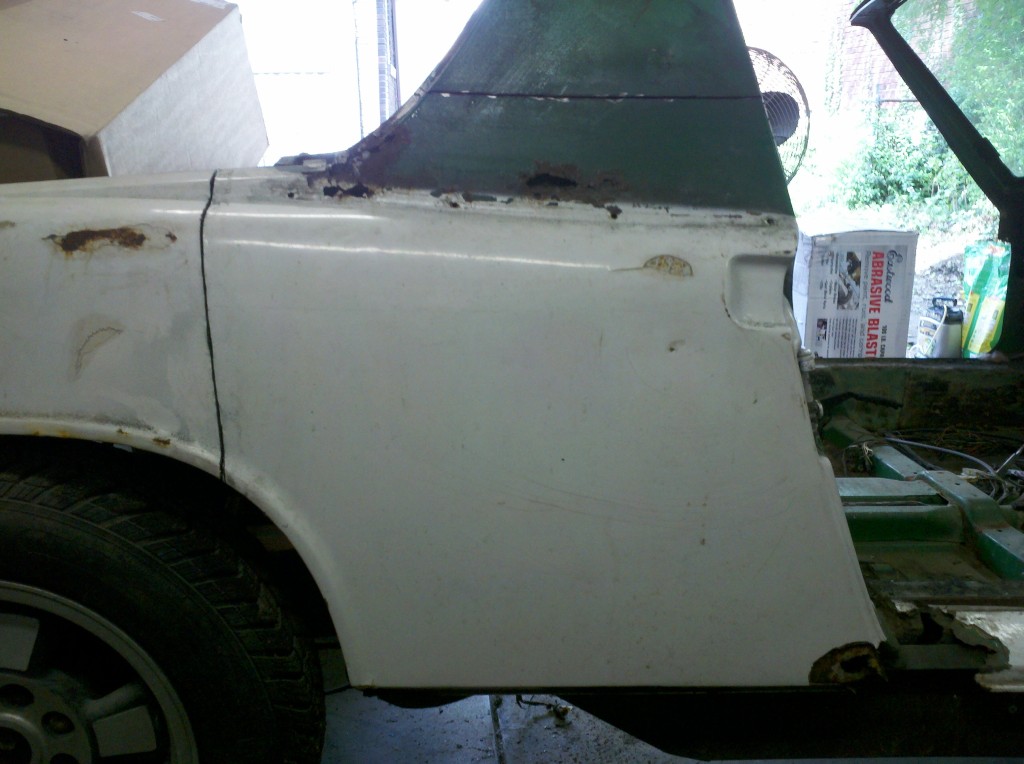
|
|
|
|
| 9fourteen |
May 23 2012, 09:42 AM
Post
#8
|
|
Newbie Group: Members Posts: 42 Joined: 20-November 06 From: Cincinnati, OH Member No.: 7,239 Region Association: Upper MidWest |
Do I have enough support?
I am getting ready to start cutting out the rot in my longs and hell hole area. I built a base to set the tub on and ran supports from the door hinge mounts to, i think the latch mounts for the top. I thought about putting on a second support to the seat belt mount. My plan is to remove the outer rocker and replace it. The hell hole is all the way through, top bottom and side so I will be chopping out a lot of metal. The last time I measured everything was still straight. I want to make sure the chassis doesn't sag, twist or move any way when I am cutting and welding. I am thinking of building a support to put under the rear trunk just to take some of the load off. What do you guys think? 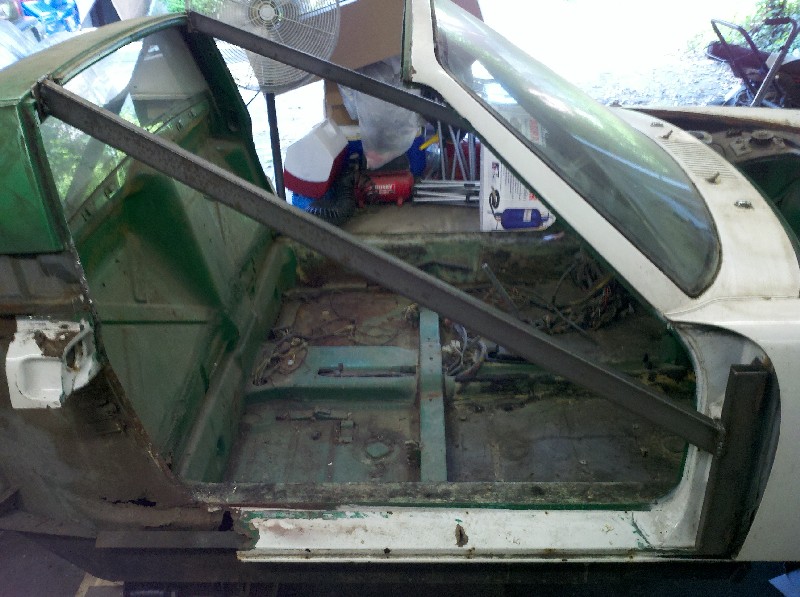 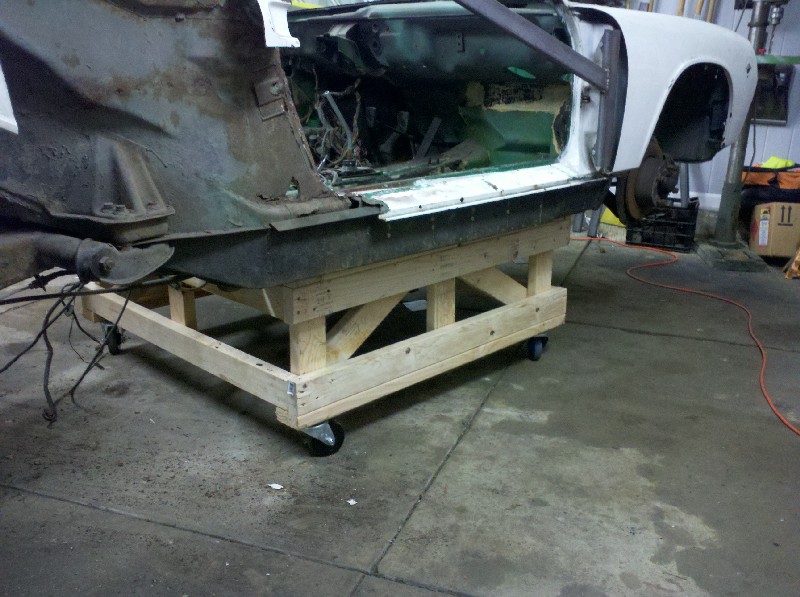 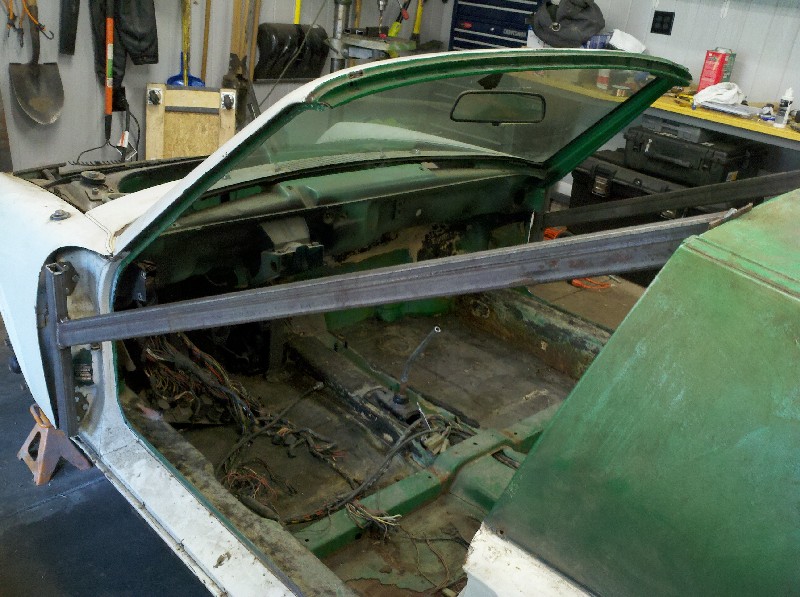 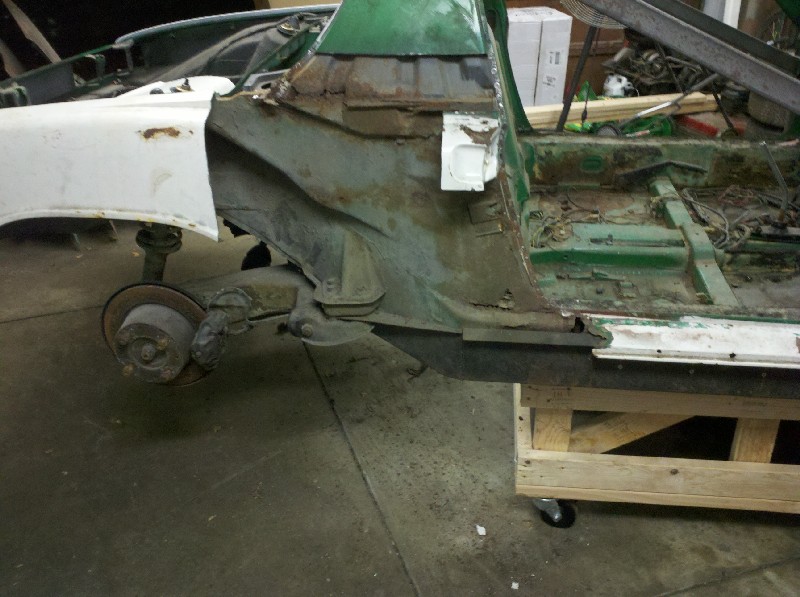 nothing like using liquidnails (or some other type of adhesive) to attach the scab repair done by a PO. It did have a couple pop rivets in it to hold it while the glue dried so I have to give him some props. I surprised it stayed on as long as it did. It was still stuck pretty good. 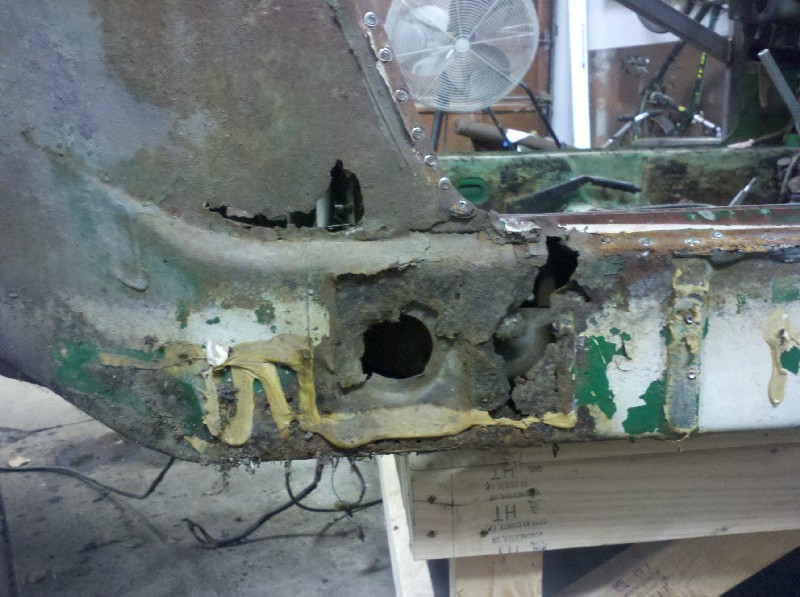 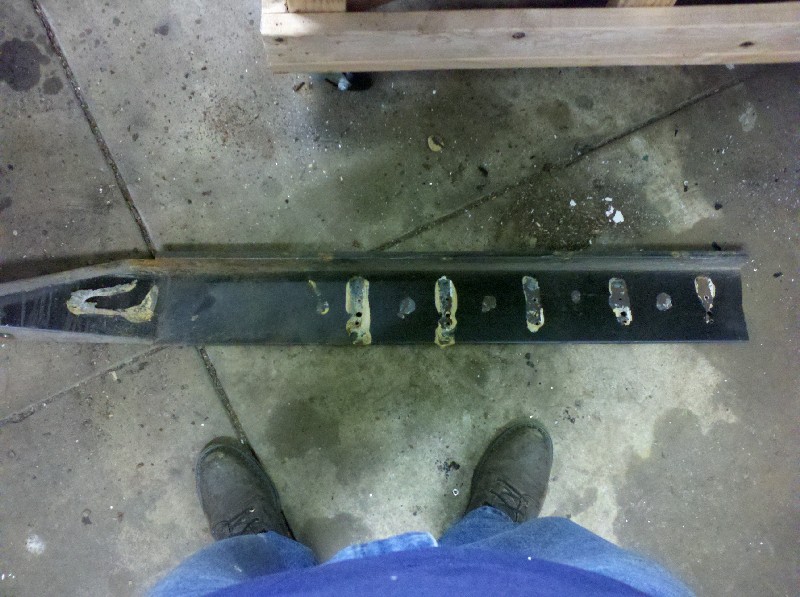 Overall it is not as bad as I thought it was going to be behind that scab. The inner rocker is still about 80% intact. 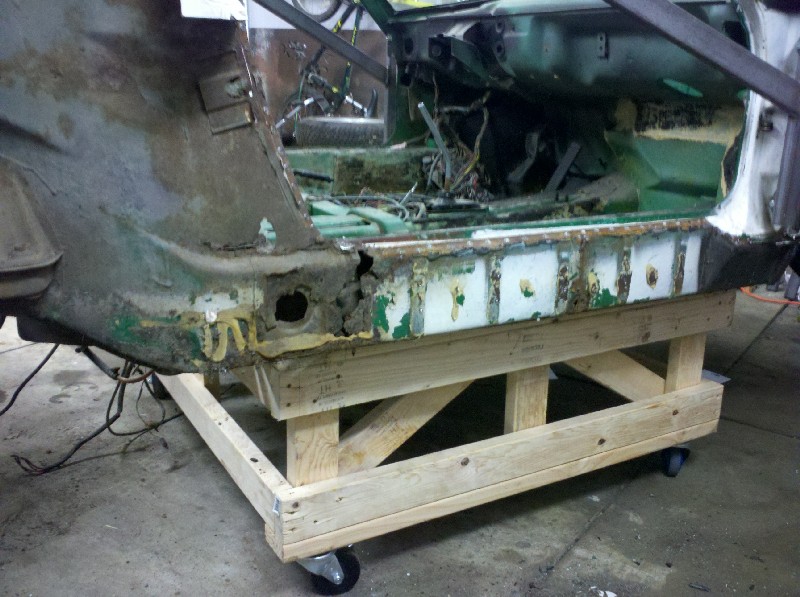 |
|
|
|
|
1 User(s) are reading this topic (1 Guests and 0 Anonymous Users)
0 Members:

|
Lo-Fi Version | Time is now: 13th June 2026 - 09:17 PM |
Invision Power Board
v9.1.4 © 2026 IPS, Inc.