

 Fix a six, Like Neil Young says...rust is an insomniac Fix a six, Like Neil Young says...rust is an insomniac |
|
|

|
Porsche, and the Porsche crest are registered trademarks of Dr. Ing. h.c. F. Porsche AG.
This site is not affiliated with Porsche in any way. Its only purpose is to provide an online forum for car enthusiasts. All other trademarks are property of their respective owners. |
|
|
  |
| Speedo |
 Jun 6 2026, 05:49 PM Jun 6 2026, 05:49 PM
Post
#741
|
|
Senior Member  Group: Members Posts: 666 Joined: 7-November 06 From: Boulder Member No.: 7,170 Region Association: Rocky Mountains 
 |
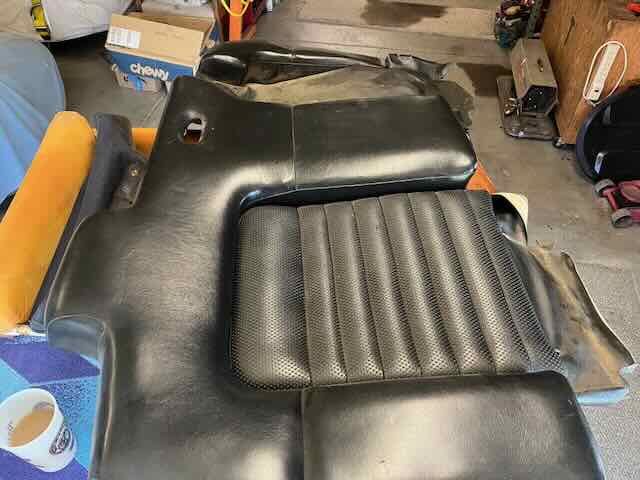
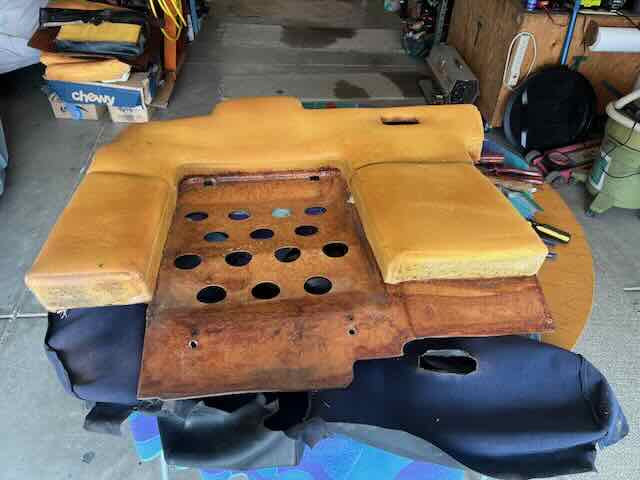
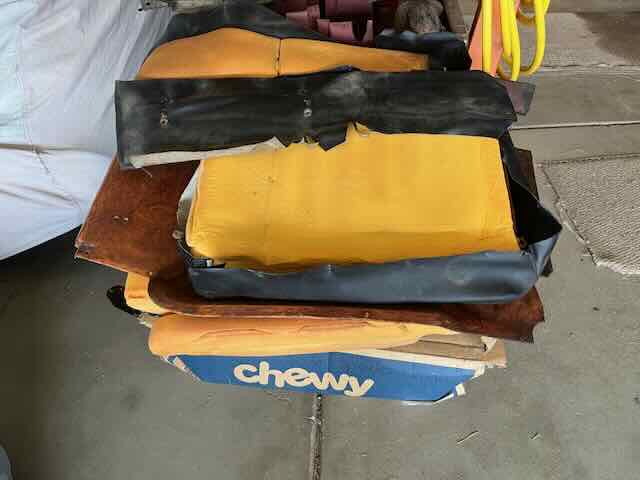
As the car is on the lift, and the lift limits the door being opened fully...interior will be completed before doors go on. I wasn't afraid to attack the seats, I have upholstered seats before. But I guess I had forgotten how many fricken staples were used. I have the early seat setup where only the drivers seat is adjustable. I'm not sure whether this is the easier setup to reupholster...so I just dove in. Did I say lots of staples? Fortunately the cardboard/particle board is in pretty good shape as is the foam. I will attack this first and the drivers seat second. I anticipate needing some extra "stuffing" for the drivers seat, but the foam on this is pretty firm and not degraded requiring extra padding. All disassembled and ready for me to buy either an electric stapler or pneumatic...as I am not using a hand trigger operated squeeze stapler on this. BTW, the seats look to be in decent shape, but there were rips scuffs and tears all over...this needed to be done.
   |
   |

 
|
| mepstein |
Jun 6 2026, 06:28 PM
Post
#742
|
|
914-6 GT in waiting Group: Members Posts: 20,919 Joined: 19-September 09 From: Landenberg, PA/Wilmington, DE Member No.: 10,825 Region Association: MidAtlantic Region
|
If you have Milwaukee tools, their m12 stapler is awesome.
|
 |
|
| Speedo |
Jun 8 2026, 03:26 PM
Post
#743
|
|
Senior Member Group: Members Posts: 666 Joined: 7-November 06 From: Boulder Member No.: 7,170 Region Association: Rocky Mountains
|
Pretty sure this question goes into the "fools" forum. Please school me.
http://www.914world.com/bbs2/index.php?showtopic=378334 |
|
|
|
| Speedo |
Jun 8 2026, 05:41 PM
Post
#744
|
|
Senior Member Group: Members Posts: 666 Joined: 7-November 06 From: Boulder Member No.: 7,170 Region Association: Rocky Mountains
|
Got it figured out.
|
|
|
|
| Speedo |
Jun 11 2026, 06:34 PM
Post
#745
|
|
Senior Member Group: Members Posts: 666 Joined: 7-November 06 From: Boulder Member No.: 7,170 Region Association: Rocky Mountains
|
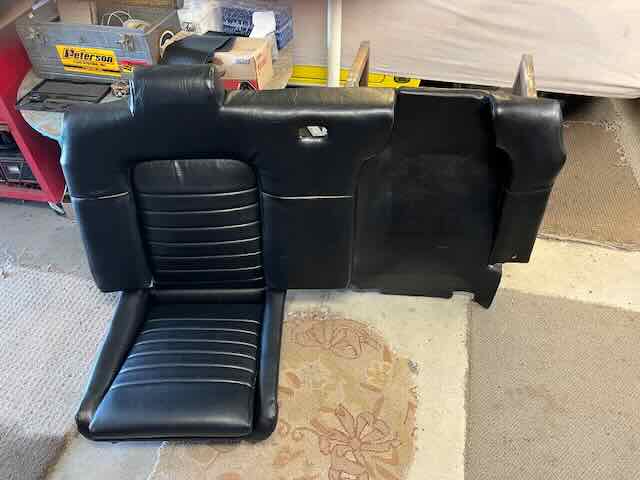
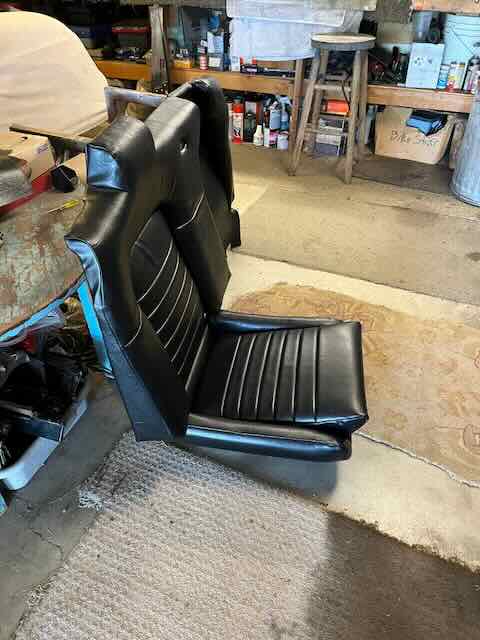
Progress...on the backboard on the passengers side and center console.
  |
|
|
|
| Speedo |
Jun 11 2026, 06:46 PM
Post
#746
|
|
Senior Member Group: Members Posts: 666 Joined: 7-November 06 From: Boulder Member No.: 7,170 Region Association: Rocky Mountains
|
Drivers seat is last...but it has some issues that are too deep to fix with gluing in replacement foam.
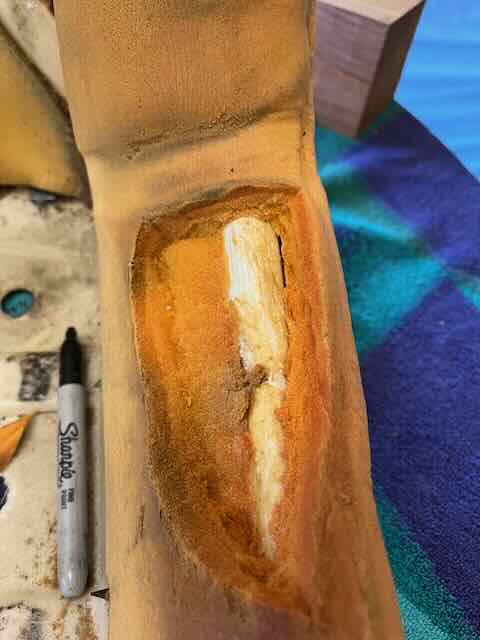 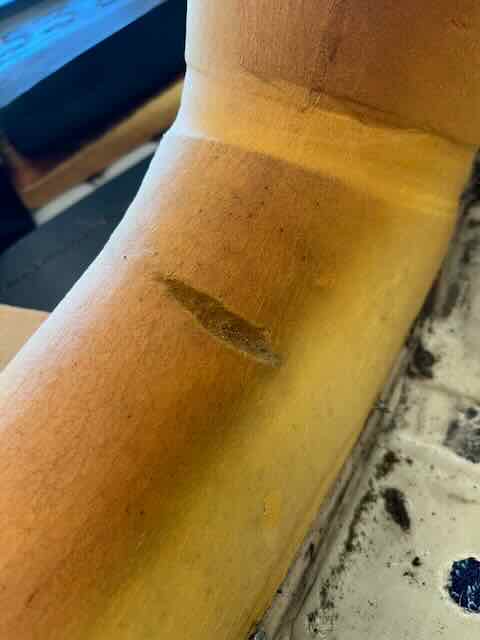 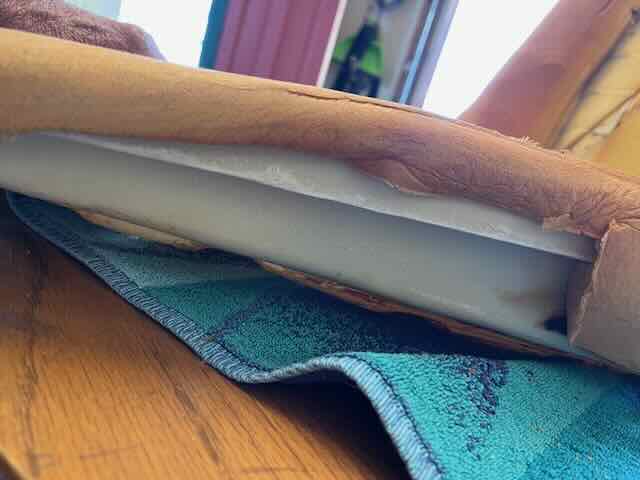 But some time ago I ended up with a replacement worn out passenger side seat. The bolster foam on my drivers seat is the most buggered up. I pulled out the passenger extra and fortunately the drivers bolster vinyl was trash, but he the foam underneath was in great shape. I just needed to remove the left bolster foam on my driver and carefully remove the same foam on my spare seat and glue it to my driver seat. Came out great. Black mark on lower bolster is a black dye stain from extra seat where the vinyl tore and PO tried to die the foam to hide the tear. Repair completed, vinyl tomorrow. 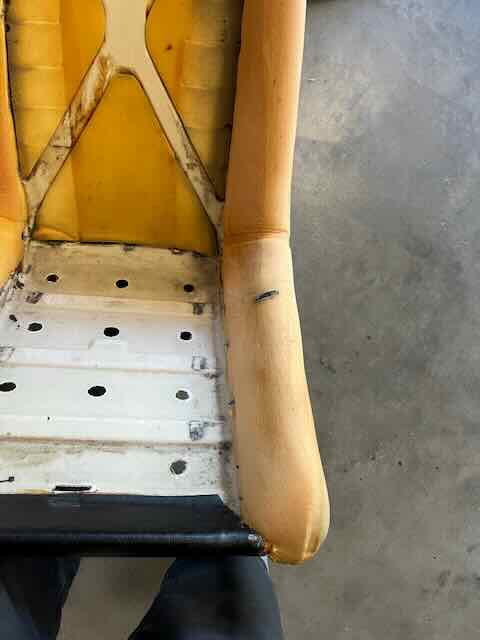 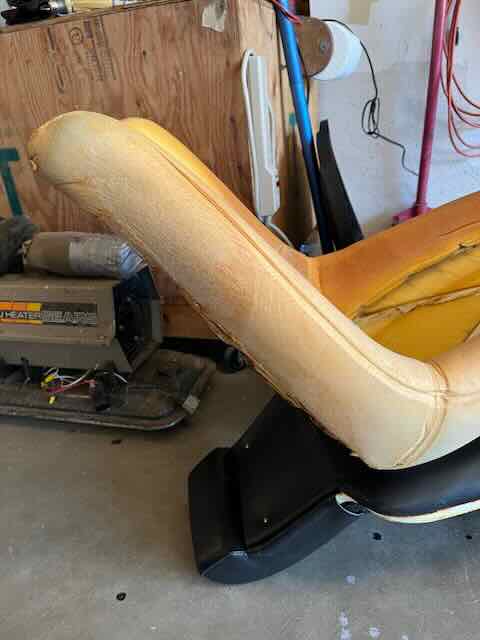 |
|
|
|
| brant |
Jun 11 2026, 07:52 PM
Post
#747
|
|
914 Wizard Group: Members Posts: 12,277 Joined: 30-December 02 From: Colorado Member No.: 47 Region Association: Rocky Mountains 
|
Looking great!
|
|
|
|
| Montreal914 |
Jun 11 2026, 08:48 PM
Post
#748
|
|
Advanced Member Group: Members Posts: 2,199 Joined: 8-August 10 From: Claremont, CA Member No.: 12,023 Region Association: Southern California
|
You replaced the entire section and bonded it to the back seat bolster (beveled joint) ?
WOW! That is a very clean job! (IMG:style_emoticons/default/smilie_pokal.gif) Contact cement? (IMG:style_emoticons/default/confused24.gif) Are you planning on replacing the triangular foam pieces on the back rest? I've had issues feeling that cross structure through the back cushion on longer rides. (IMG:style_emoticons/default/dry.gif) |
|
|
|
| Speedo |
Jun 12 2026, 06:31 AM
Post
#749
|
|
Senior Member Group: Members Posts: 666 Joined: 7-November 06 From: Boulder Member No.: 7,170 Region Association: Rocky Mountains
|
QUOTE(Montreal914 @ Jun 11 2026, 06:48 PM)  You replaced the entire section and bonded it to the back seat bolster (beveled joint) ? WOW! That is a very clean job! (IMG:style_emoticons/default/smilie_pokal.gif) Contact cement? (IMG:style_emoticons/default/confused24.gif) Are you planning on replacing the triangular foam pieces on the back rest? I've had issues feeling that cross structure through the back cushion on longer rides. (IMG:style_emoticons/default/dry.gif) Fortunately the entire "donor" left bolster was in good shape. The strength of the foam allowed me to peel it back off the donor with no issues. I'm using Gorilla spray adhesive as it will clear the nozzle when done, whereas I've not had that luxury with the 3M product. The triangular foam pieces on the back rest are old, but still firm. My replacement foam cover laid over the rectangular piece on the back should be sufficient on top of the triangular pieces. Interesting...my drivers seat was still original materials, but the donor seat had already been restored and was not original. Some PO had added a lot of extra material to the lumbar area of the seat. I'm going to do a straight recover without anticipating additional problems. |
|
|
|
| Speedo |
Jun 13 2026, 07:47 AM
Post
#750
|
|
Senior Member Group: Members Posts: 666 Joined: 7-November 06 From: Boulder Member No.: 7,170 Region Association: Rocky Mountains
|
So I just purchased the vinyl kit to lay down before the carpet goes down. I could use some help as to where the individual pieces belong. I have an idea on a few of the items, but I want to confirm orientation. Be nice. Here is the kit.
https://914rubber.com/8-piece-floor-vinyl-k...for-porsche-914 |
|
|
|
| Speedo |
Jun 13 2026, 11:20 AM
Post
#751
|
|
Senior Member Group: Members Posts: 666 Joined: 7-November 06 From: Boulder Member No.: 7,170 Region Association: Rocky Mountains
|
Got it figured out....thanks Luke!
|
|
|
|
| Luke M |
Jun 13 2026, 02:51 PM
Post
#752
|
|
Senior Member Group: Members Posts: 1,602 Joined: 8-February 05 From: WNY Member No.: 3,574 Region Association: North East States
|
QUOTE(Speedo @ Jun 13 2026, 10:20 AM) Got it figured out....thanks Luke! (IMG:style_emoticons/default/beerchug.gif) |
|
|
|
| East coaster |
Jun 13 2026, 04:48 PM
Post
#753
|
|
Senior Member Group: Members Posts: 1,976 Joined: 28-March 03 From: Millville, NJ Member No.: 487 Region Association: None
|
I had two pieces I never figured out
|
|
|
|
| Speedo |
Jun 14 2026, 02:06 PM
Post
#754
|
|
Senior Member Group: Members Posts: 666 Joined: 7-November 06 From: Boulder Member No.: 7,170 Region Association: Rocky Mountains
|
QUOTE(East coaster @ Jun 13 2026, 02:48 PM) I had two pieces I never figured out I lied...the two rectangular pieces that go near the firewall? Where exactly are they positioned? |
|
|
|
| DennisV |
Jun 15 2026, 10:15 AM
Post
#755
|
|
Senior Member Group: Members Posts: 1,030 Joined: 8-August 20 From: Santa Rosa, CA Member No.: 24,575 Region Association: Northern California
|
QUOTE(Speedo @ Jun 13 2026, 06:47 AM) So I just purchased the vinyl kit to lay down before the carpet goes down. I could use some help as to where the individual pieces belong. I have an idea on a few of the items, but I want to confirm orientation. Be nice. Here is the kit. https://914rubber.com/8-piece-floor-vinyl-k...for-porsche-914 I just went through this exercise. I didn't install yet, but am pretty confident this is correct for 6 piece set. 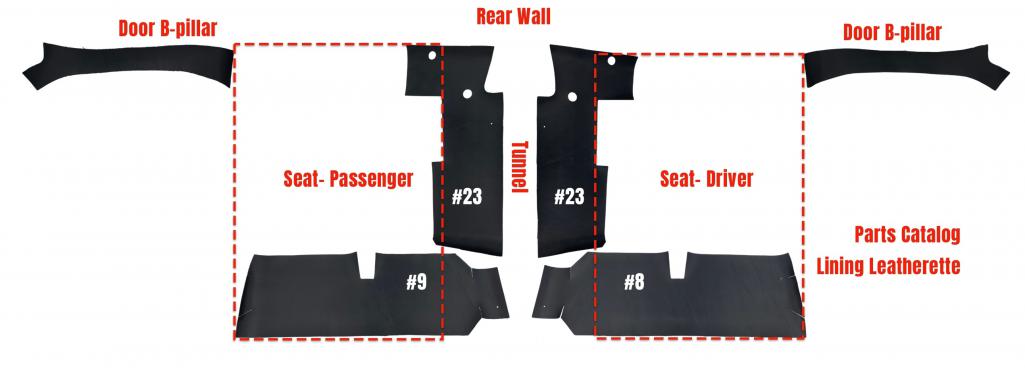 There are 2 other small rectangle pieces in the 8 piece set that I think go below the rear window near the b-pillar. |
|
|
|
| Speedo |
Jun 15 2026, 05:39 PM
Post
#756
|
|
Senior Member Group: Members Posts: 666 Joined: 7-November 06 From: Boulder Member No.: 7,170 Region Association: Rocky Mountains
|
I heard from 914Rubber. They do go below the rear window behind the drivers left and passengers right shoulders. My thinking is they are used to complete the "black" of the firewall where the seats allow the body color to show through. Kinda silly...but ok.
I have completed the recover of the seats with the exception of the driver's seat bottom. This took longer than I anticipated. Maybe because I wasn't looking forward to it. Lots of picture updates tomorrow, but a teaser for today. 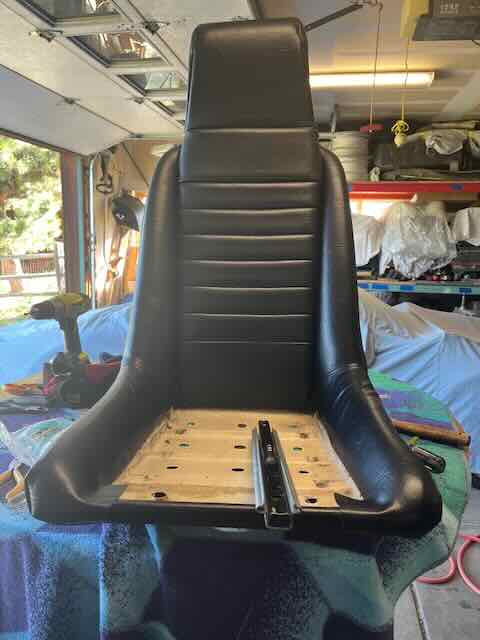 |
|
|
|
| Speedo |
Jun 15 2026, 05:43 PM
Post
#757
|
|
Senior Member Group: Members Posts: 666 Joined: 7-November 06 From: Boulder Member No.: 7,170 Region Association: Rocky Mountains
|
I am offering this up to the Denver 914 community as a freebie with some usable extra vinyl for pickup only. Shell is solid. Lots of good hardware. I harvested the left side bolster.
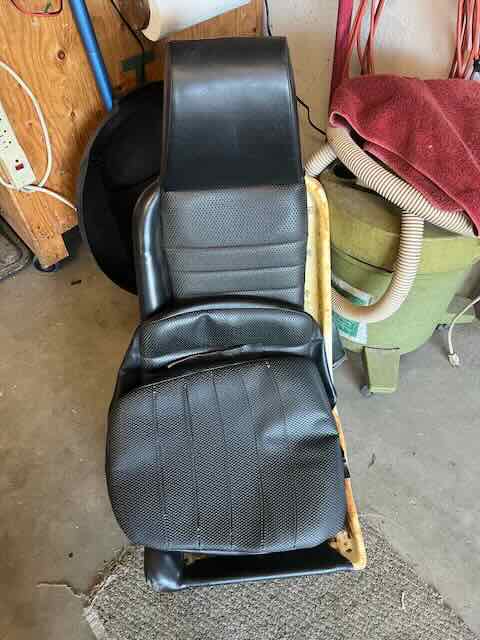 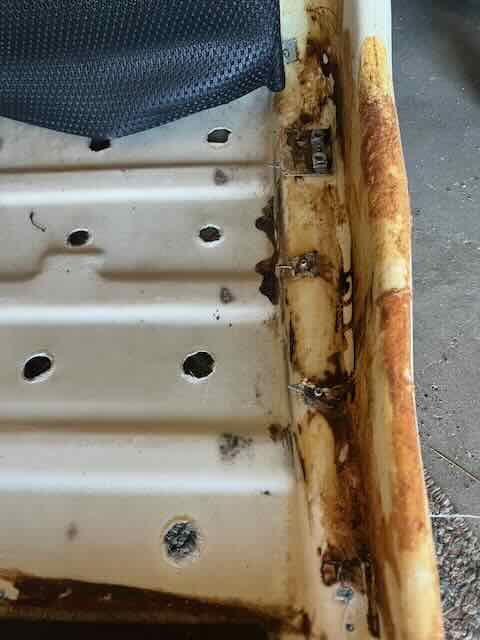 |
|
|
|
| Speedo |
Jun 17 2026, 06:49 PM
Post
#758
|
|
Senior Member Group: Members Posts: 666 Joined: 7-November 06 From: Boulder Member No.: 7,170 Region Association: Rocky Mountains
|
Upholstery is done. Need to refurbish the seat suspension. Disassemble, sandblast and repaint.
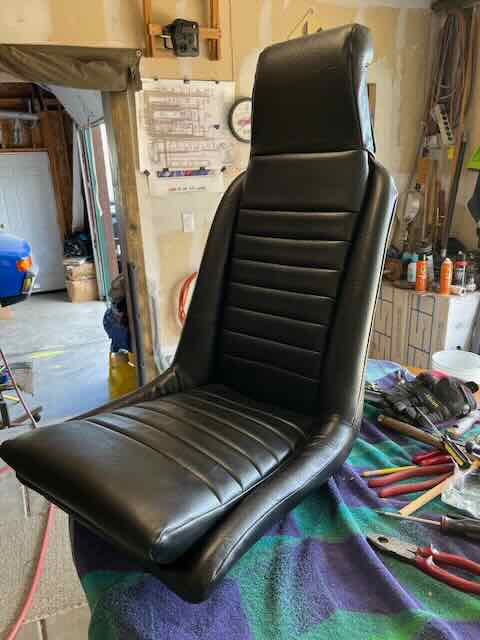 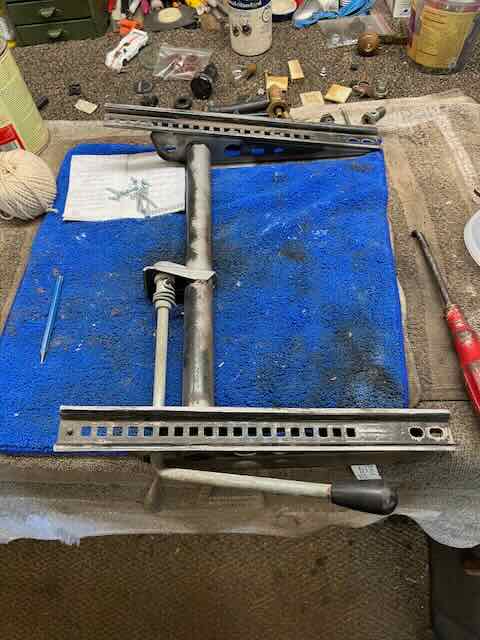 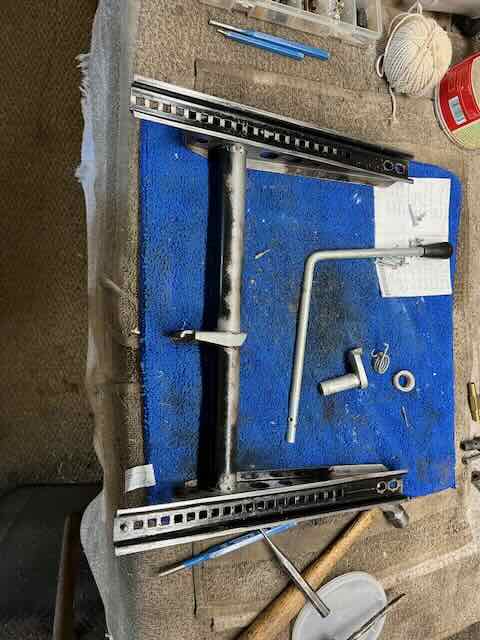 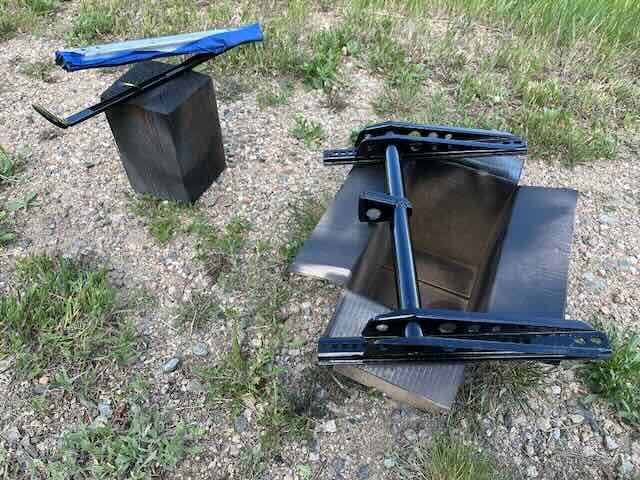 |
|
|
|
| Speedo |
Jun 19 2026, 07:25 AM
Post
#759
|
|
Senior Member Group: Members Posts: 666 Joined: 7-November 06 From: Boulder Member No.: 7,170 Region Association: Rocky Mountains
|
Drivers seat base refinished and reassembled. That tensioner spring is a b*tch to get reconnected. Sliders re-attached. Everything is smooth. Laid down the vinyl except for the pieces on the rear firewall...need to temporarily mount the seats to see exactly where they are supposed to go. Tomorrow carpets.
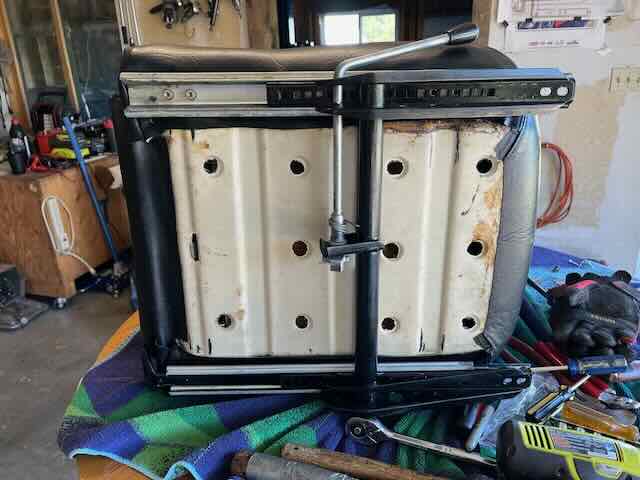 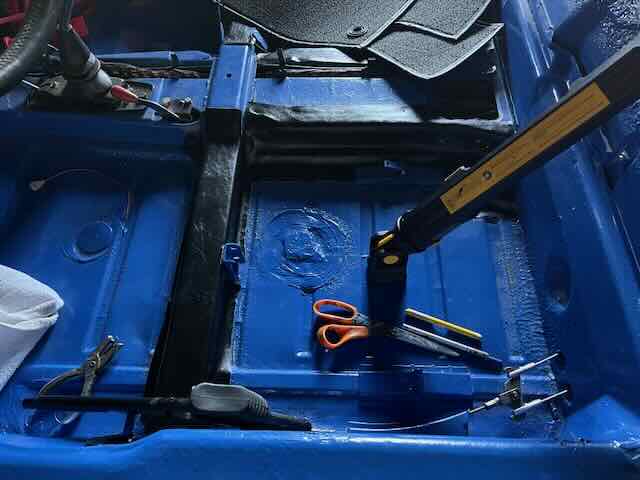 |
|
|
|
| Speedo |
Jun 21 2026, 09:05 AM
Post
#760
|
|
Senior Member Group: Members Posts: 666 Joined: 7-November 06 From: Boulder Member No.: 7,170 Region Association: Rocky Mountains
|
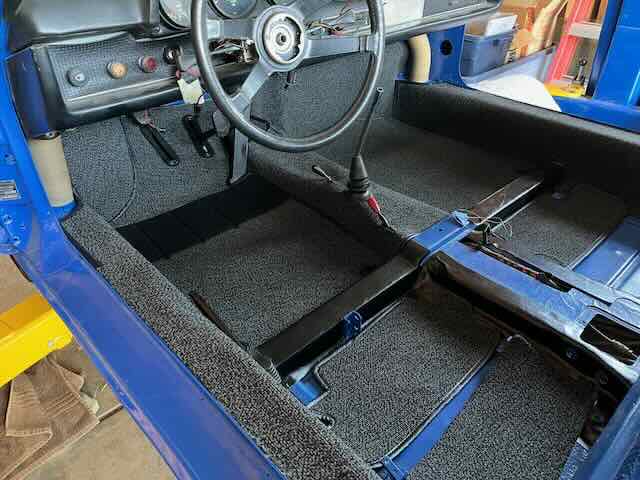
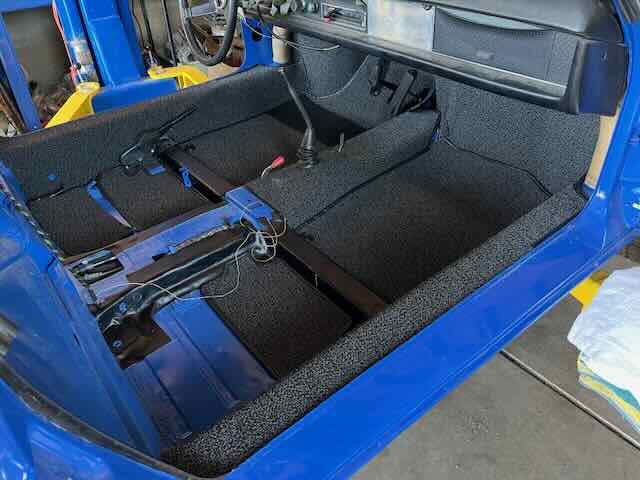
Doors next.
  |
|
|
|
|
2 User(s) are reading this topic (2 Guests and 0 Anonymous Users)
0 Members:

|
Lo-Fi Version | Time is now: 23rd September 2026 - 05:27 PM |
Invision Power Board
v9.1.4 © 2026 IPS, Inc.