|
|
|
Porsche, and the Porsche crest are registered trademarks of Dr. Ing. h.c. F. Porsche AG.
This site is not affiliated with Porsche in any way. Its only purpose is to provide an online forum for car enthusiasts. All other trademarks are property of their respective owners. |
|
|

  |

| moparrob |
 Jul 22 2012, 02:21 PM Jul 22 2012, 02:21 PM
Post
#1
|
|
Senior Member  Group: Members Posts: 646 Joined: 27-April 10 From: Los Angeles Member No.: 11,663 Region Association: None |
Well I took the plunge and decided to install the louvered panel in my front trunk. This is going to allow the hot air to exit from my front oil cooler out of the trunk.
I have encountered several problems however. First, my welding skills are extremely rusty and are proving quite challenging. Second, I cut the hole out a bit too large so that the gaps are a bit more than the expected .040 inches I had hoped for. Here's a picture of the damage: (IMG:http://www.914world.com/bbs2/uploads_offsite/i954.photobucket.com-11663-1342988497.1.jpg) So here's my question. Should I simply start trying to tack the points I can easily tack and then fill in the big gaps with lots of welding wire? Or is there a better way to do this? As usual, all advice is greatly appreciated in advance. Thanks. |
   |

 
|
| ldsgeek |
Jul 22 2012, 03:15 PM
Post
#2
|
|
Member Group: Members Posts: 155 Joined: 27-June 10 From: New Hampshire Member No.: 11,885 Region Association: None |
You can use a copper backer under the gaps and then weld the gaps closed. The weld won't stick to the copper which allows you to bridge the gap. They sell fancy ones at Eastwood or you can cheap out and hammer a piece of copper pipe flat (guess which I did).
|
|
|
|
| rick 918-S |
Jul 22 2012, 05:44 PM
Post
#3
|
|
Hey nice rack! -Celette Group: Members Posts: 20,470 Joined: 30-December 02 From: Now in Superior WI Member No.: 43 Region Association: Northstar Region |
Holy Shit! What did you use to cut that hole, an axe? If I were you I would add a strip of metal all the way around that opening. The you can use it as a lap joint. You will never fill those gaps.
|
 |
|
| moparrob |
Jul 22 2012, 09:02 PM
Post
#4
|
|
Senior Member Group: Members Posts: 646 Joined: 27-April 10 From: Los Angeles Member No.: 11,663 Region Association: None |
Yeah, pretty much an axe. Actually a sawzall and I failed to measure 3 times before I cut. (IMG:style_emoticons/default/headbang.gif)
I'm going to square up the hole and probably get a new (oversized) panel to fill the hole. What a waste of time and money due to impatience.... |
|
|
|
| rick 918-S |
Jul 22 2012, 09:07 PM
Post
#5
|
|
Hey nice rack! -Celette Group: Members Posts: 20,470 Joined: 30-December 02 From: Now in Superior WI Member No.: 43 Region Association: Northstar Region |
QUOTE(moparrob @ Jul 22 2012, 10:02 PM)  Yeah, pretty much an axe. Actually a sawzall and I failed to measure 3 times before I cut. (IMG:style_emoticons/default/headbang.gif) I'm going to square up the hole and probably get a new (oversized) panel to fill the hole. What a waste of time and money due to impatience.... Got to start someplace. (IMG:style_emoticons/default/confused24.gif) You'll get it next time around. I agree, square it up. Get new panels, lay them in the opening and use your new squared opening to mark your panel. Then trim to fit. (IMG:style_emoticons/default/sawzall-smiley.gif) Take your time. They don't call it body WORK for nothing. (IMG:style_emoticons/default/smash.gif) (IMG:style_emoticons/default/smile.gif) |
|
|
|
| PRS914-6 |
Jul 22 2012, 09:13 PM
Post
#6
|
|
Excellence Magazine Project 914 3.6 Group: Retired Members Posts: 1,278 Joined: 20-May 06 From: Central California Member No.: 6,031 Region Association: None |
Why don't you save some grief and just get some 1/16th x 1-1/2 steel or aluminum, overlap the joints and screw or pop rivet it on to both sides. Cheaper, easier and faster. It will most likely be covered anyway.
You can even use some silicone sealant between them. |
|
|
|
| moparrob |
Jul 22 2012, 11:58 PM
Post
#7
|
|
Senior Member Group: Members Posts: 646 Joined: 27-April 10 From: Los Angeles Member No.: 11,663 Region Association: None |
I didn't want to overlap the joints to avoid the possibility of water getting trapped between the layers. Plus I wanted the look of a seamless joint ( not realizing how much work that actually is to accomplish).
|
|
|
|
| 76-914 |
Jul 23 2012, 08:28 AM
Post
#8
|
|
Repeat Offender & Resident Subaru Antagonist Group: Members Posts: 13,505 Joined: 23-January 09 From: Temecula, CA Member No.: 9,964 Region Association: Southern California |
Do what Rick said but scribe it instead of tracing it. Then take your time with the cut out. And it may take 6 or 7 tries but the time spent here is time & $$ saved, later.
|
|
|
|
| r_towle |
Jul 23 2012, 08:39 AM
Post
#9
|
|
Custom Member Group: Members Posts: 24,584 Joined: 9-January 03 From: Taxachusetts Member No.: 124 Region Association: North East States |
I would suggest you remove the panel and add a 2 inch strip on the bottom side of the square hole, all the way around.
Let it hang into the hold about 3/4 inch or more. You can plug weld the strip from above by drilling holes in the upper piece. then you have created a shelf to put your new piece on top of. Weld to that piece, and you could even fill in those gaps at that time. From above, it will be smooth, from below, use undercoating and seam sealer. There are many places in unibody that have double layered metal seams and if you treat it properly, it will survive the rest of the seams that already have started to rust (IMG:style_emoticons/default/smile.gif) Rich |
|
|
|
| PRS914-6 |
Jul 23 2012, 09:04 AM
Post
#10
|
|
Excellence Magazine Project 914 3.6 Group: Retired Members Posts: 1,278 Joined: 20-May 06 From: Central California Member No.: 6,031 Region Association: None |
QUOTE(moparrob @ Jul 22 2012, 09:58 PM) I didn't want to overlap the joints to avoid the possibility of water getting trapped between the layers. Plus I wanted the look of a seamless joint ( not realizing how much work that actually is to accomplish). You asked for help.....If you are determined to weld it, that takes practice. You said your welding skills were rusty. By the time you weld this all the way around and significantly warp the pan and louver, you will wish you hadn't since the time to finish it smooth will be hours and hours. I'm suggesting the same thing as Rich. Build a frame out of thin flat stock, cutting the ends at 45 degrees. (you can weld and finish the ends on the bench). Attach it to the louvers by clamping each side in a vice and roset weld, screw or pop rivet. Then, just set the assembly over the existing hole where it will stay in place on its own and duplicate the attachment process you used previously. They make nice looking short flanged screws that would look nice. You can use seam sealer or silicone to prevent water migration (if you don't use the welder). I think it will look cleaner than welding anyway. My opinion FWIW is to not practice your welding skills on such a difficult job in a hole. I can weld decent but still I used screws and pop rivets.... 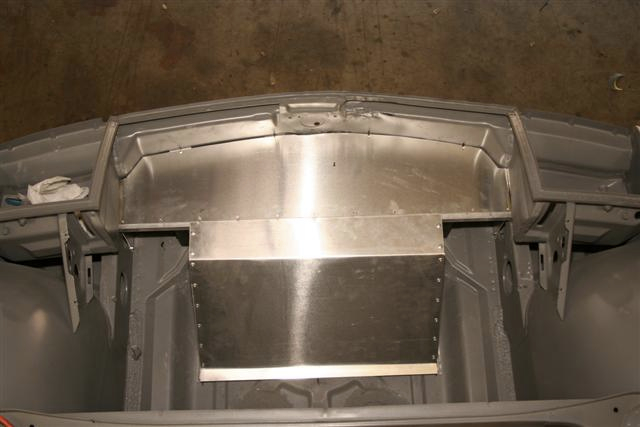  |
|
|
|
| Elliot Cannon |
Jul 23 2012, 09:37 AM
Post
#11
|
|
914 Guru Group: Retired Members Posts: 8,487 Joined: 29-December 06 From: Paso Robles Ca. (Central coast) Member No.: 7,407 Region Association: None |
My welding instrutor taught that one of the most important things in welding is proper "fit-up". Making sure that the pieces of metal you are welding fit together properly before you put an arc or torch to it. Getting everything fitting together right is the hard part and takes some patience. Once that is done the actual welding is easy (IMG:style_emoticons/default/welder.gif) and fun. Especially if you are using MIG. The "glue gun" of welders. (IMG:style_emoticons/default/laugh.gif) I'm not as expert as some but I learn from my mistakes (which have been many and varied) (IMG:style_emoticons/default/lol-2.gif)
Cheers, Elliot |
|
|
|
| worn |
Jul 23 2012, 09:53 AM
Post
#12
|
|
can't remember Group: Members Posts: 3,156 Joined: 3-June 11 From: Madison, WI Member No.: 13,152 Region Association: Upper MidWest |
QUOTE(PRS914-6 @ Jul 23 2012, 07:04 AM) QUOTE(moparrob @ Jul 22 2012, 09:58 PM) I didn't want to overlap the joints to avoid the possibility of water getting trapped between the layers. Plus I wanted the look of a seamless joint ( not realizing how much work that actually is to accomplish). You asked for help.....If you are determined to weld it, that takes practice. You said your welding skills were rusty. By the time you weld this all the way around and significantly warp the pan and louver, you will wish you hadn't since the time to finish it smooth will be hours and hours. I'm suggesting the same thing as Rich. Build a frame out of thin flat stock, cutting the ends at 45 degrees. (you can weld and finish the ends on the bench). Attach it to the louvers by clamping each side in a vice and roset weld, screw or pop rivet. Then, just set the assembly over the existing hole where it will stay in place on its own and duplicate the attachment process you used previously. They make nice looking short flanged screws that would look nice. You can use seam sealer or silicone to prevent water migration (if you don't use the welder). I think it will look cleaner than welding anyway. My opinion FWIW is to not practice your welding skills on such a difficult job in a hole. I can weld decent but still I used screws and pop rivets.... (IMG:style_emoticons/default/agree.gif) I spent all weekend patching the longitudinal in a "rust free - totally solid 914 from Texas" read all about it in past Pano advertisement sections. My advantage is that I am welding to a solid backing and my seams touch all around so the piece stays in place just by fit. On the other hand you are up against two major disadvantages. The first one you pointed out - the gaps are just too wide to fill. The second one is the way a flat panel will warp. I remember trying to weld in a piece on my sons MGB hood. After each weld it would oil can bend in some weird way. The patch kept getting bigger and bigger until I had to admit defeat. There was nothing to maintain the shape of that big open sheet. An alternative that no one yet has mentioned is to start over with a bigger louver. Square up the hole in the trunk and then scribe to the louver and grind down slowly and surely to the scribe line, checking as you go. Then position and tack. Tack, Tack, Tack. Move the welder from side to side and don't let anything but a little spot heat up. Good luck. |
|
|
|
|
1 User(s) are reading this topic (1 Guests and 0 Anonymous Users)
0 Members:

|
Lo-Fi Version | Time is now: 27th May 2024 - 11:30 AM |
Invision Power Board
v9.1.4 © 2024 IPS, Inc.