|
|
|
Porsche, and the Porsche crest are registered trademarks of Dr. Ing. h.c. F. Porsche AG.
This site is not affiliated with Porsche in any way. Its only purpose is to provide an online forum for car enthusiasts. All other trademarks are property of their respective owners. |
|
|

  |

| timothy_nd28 |
 Sep 9 2013, 07:43 PM Sep 9 2013, 07:43 PM
Post
#81
|
|
Advanced Member  Group: Members Posts: 2,299 Joined: 25-September 07 From: IN Member No.: 8,154 Region Association: Upper MidWest |
|
   |

 
|
| dlee6204 |
Oct 21 2013, 10:45 AM
Post
#82
|
|
Howdy Group: Members Posts: 2,162 Joined: 30-April 06 From: Burnsville, NC Member No.: 5,956 |
|
|
|
|
| rsrguy3 |
Mar 1 2014, 05:42 AM
Post
#83
|
|
Member Group: Members Posts: 136 Joined: 4-April 09 From: Utah Member No.: 10,234 Region Association: None |
Aside from selling kits what was the conclusion? Does it keep you totally frosty in the heat? Whats the hottest exterior temp you've run in and did it keep up?-Guy
|
|
|
|
| dlee6204 |
Mar 1 2014, 06:59 AM
Post
#84
|
|
Howdy Group: Members Posts: 2,162 Joined: 30-April 06 From: Burnsville, NC Member No.: 5,956 |
This system will keep you cool even on a hot day. Currently the system I am running is merely a "stock" system with an upgraded compressor and R134. Switching to r134 definitely puts a limit on the system. I'm envious of those that get super cold temps with r12. I'll be working to improve my system this season and do some more research to see what can be done to get temps down even further. I'll probably start by replacing my condenser with an improved version. I'll of course keep keep this thread alive with new developments.
|
|
|
|
| HalfMoon |
Mar 3 2014, 06:01 PM
Post
#85
|
|
Senior Member Group: Members Posts: 828 Joined: 13-November 12 From: Shenandoah Junction, WV Member No.: 15,144 Region Association: MidAtlantic Region |
Terrific and very informative thread. I'm very seriously considering the AC conversion for my v-8 914 from Renegade. I've spoken with them several times about it.
A few things I wonder about the Renegade conversion (that they weren't really able to anwser) Not sure about the condensor they provide but pretty sure it's at least a serpintine type. They really couldn't say if it was a serpentine or a parraelel (optimuim). Also, the bractery they've developed is for a compressor called a "Velero". Sadly they didn't know the model number off hand (but hopefully they will when I call back). Lastly, they have several evap units. Under dash (see pic) with a heater core. Also a new system that mounts in the cowl (no pix availble from me right now but soon as they send it to me, I'll post it). The cowl unit would give an easier ablity to create a defroster which could be very useful where I live as we have high humidity. And of course has the advantage of being hidden away. My main ponder is this "Valero" compressor. Never heard of that and don't know any spec on it... Price-about 2k without hoses or fittings. Addedum-Correction. Compressor is known as a "Valeo" 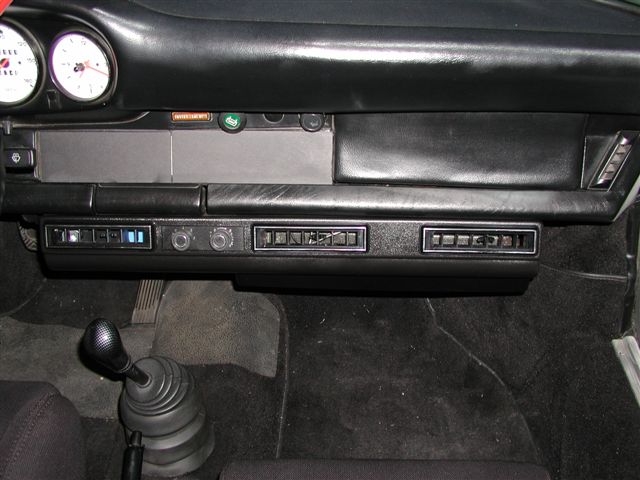 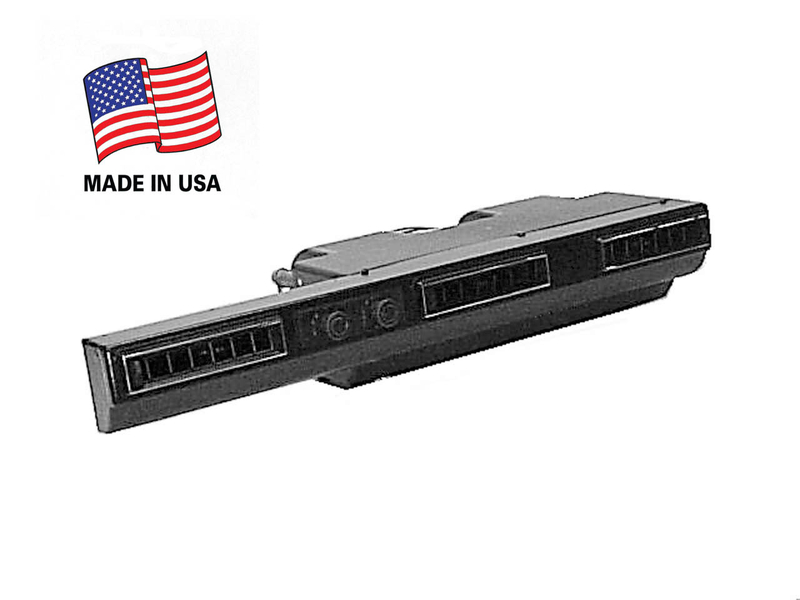 |
|
|
|
| HalfMoon |
Mar 3 2014, 06:59 PM
Post
#86
|
|
Senior Member Group: Members Posts: 828 Joined: 13-November 12 From: Shenandoah Junction, WV Member No.: 15,144 Region Association: MidAtlantic Region |
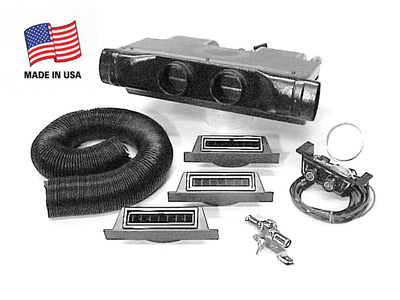
Here's a few images Steve from Renegade just sent me of the under cowl evap (with a heater core) system they now offer and a shot of the Valeo (model still unknown) compressor.
  |
|
|
|
| 3d914 |
Mar 7 2014, 11:54 AM
Post
#87
|
|
Senior Member Group: Members Posts: 1,275 Joined: 24-September 03 From: Benson, AZ Member No.: 1,191 Region Association: Southwest Region |
QUOTE(dlee6204 @ Mar 1 2014, 05:59 AM)  This system will keep you cool even on a hot day. Currently the system I am running is merely a "stock" system with an upgraded compressor and R134. Switching to r134 definitely puts a limit on the system. I'm envious of those that get super cold temps with r12. I'll be working to improve my system this season and do some more research to see what can be done to get temps down even further. I'll probably start by replacing my condenser with an improved version. I'll of course keep keep this thread alive with new developments. Doug, I refurbished the stock system in my 2.0L years back with a Sanden. The schematic you posted was one I created for that system. The biggest aid I found to help the A/C work better in Phoenix was a cockpit cover. Had a custom one made with a cloth-backed vinyl that covered all glass and the engine lid. Made a huge difference in A/C performance since it wasn't an oven to start with and the A/C could keep up. Great job on the thread. Keep us up to date on changes. |
|
|
|
| terryth |
Mar 25 2017, 05:23 PM
Post
#88
|
|
Member Group: Members Posts: 57 Joined: 27-May 13 From: Nebraska Member No.: 15,929 Region Association: Upper MidWest |
Good thread. I am embarking on my own AC install project on my 914 project. AC is about the only way I'll be able to get my wife and daughters to ride in the car in the summer. I have a new left over kit for a 70 Torino that I traded before off getting around to installing it with a sanden 508 compressor and under dash unit. My 74 914 has a 2.0 bus engine in it with a dual carb set up. My idea so far is mounting the compressor on top of the engine on the left drivers side and driving it with a double pulley mounted on the alternator and fabricating the bracket using the mounting base and adjustment mechanism from the ford 351 bracket I already have.
 |
|
|
|
| DRPHIL914 |
Nov 6 2018, 08:11 AM
Post
#89
|
|
Dr. Phil Group: Members Posts: 5,933 Joined: 9-December 09 From: Kennesaw, GA Member No.: 11,106 Region Association: South East States |
just check into this since you have the link on your signature, wondering if you ever got your box hooked up and working ?
|
|
|
|
| Literati914 |
Nov 9 2018, 06:24 PM
Post
#90
|
|
Advanced Member Group: Members Posts: 2,316 Joined: 16-November 06 From: Dallas, TX Member No.: 7,222 Region Association: Southwest Region |
Interested in thoughts on which, (if either) might be more efficient or let's say - which might steal less power from the engine : the pulley adapters attached to the center of the fan OR a two-row Alternator pulley (one used to power the AC compressor) ? The alternator pulley seems easier but (IMG:style_emoticons/default/confused24.gif) . Pros / cons / thoughts ?
|
|
|
|
| Chris914n6 |
Nov 9 2018, 11:53 PM
Post
#91
|
|
Jackstands are my life. Group: Members Posts: 3,535 Joined: 14-March 03 From: Las Vegas, NV Member No.: 431 Region Association: Southwest Region |
QUOTE(Literati914 @ Nov 9 2018, 04:24 PM) Interested in thoughts on which, (if either) might be more efficient or let's say - which might steal less power from the engine : the pulley adapters attached to the center of the fan OR a two-row Alternator pulley (one used to power the AC compressor) ? The alternator pulley seems easier but (IMG:style_emoticons/default/confused24.gif) . Pros / cons / thoughts ? Comp off the Alt pulley will add that load stress to the Alt belt. I've worked on other cars with both -- Comp on a separate belt and pulley, and same belt with the Alt. Also the Serpentine system with it all connected. If it's easier for you to do try it. |
|
|
|
| friethmiller |
Apr 29 2021, 02:48 PM
Post
#92
|
|
Senior Member Group: Members Posts: 1,257 Joined: 10-February 19 From: Austin, TX Member No.: 22,863 Region Association: Southwest Region |
Condenser Install I think I mistakenly placed my previous photos on Doug's other commercial A/C thread. Go there to see my pre-fit photos. So, here we go! Here are my final install pics of my A/C Condenser unit on my '74. I had to make a last minute adjustment to the flipped down portion of the mounting cover (photos 2 and 3). My issue was that it just stuck down too low. If I hit a speed bump or something, the entire condenser would be ripped out of my trunk. I also wanted something to cover up the front portion of the grate. I satisfied both issues by pounding the metal bracket flat and then cutting out an inner rectangle - leaving enough to bend down a much smaller scoop.
Attached thumbnail(s) 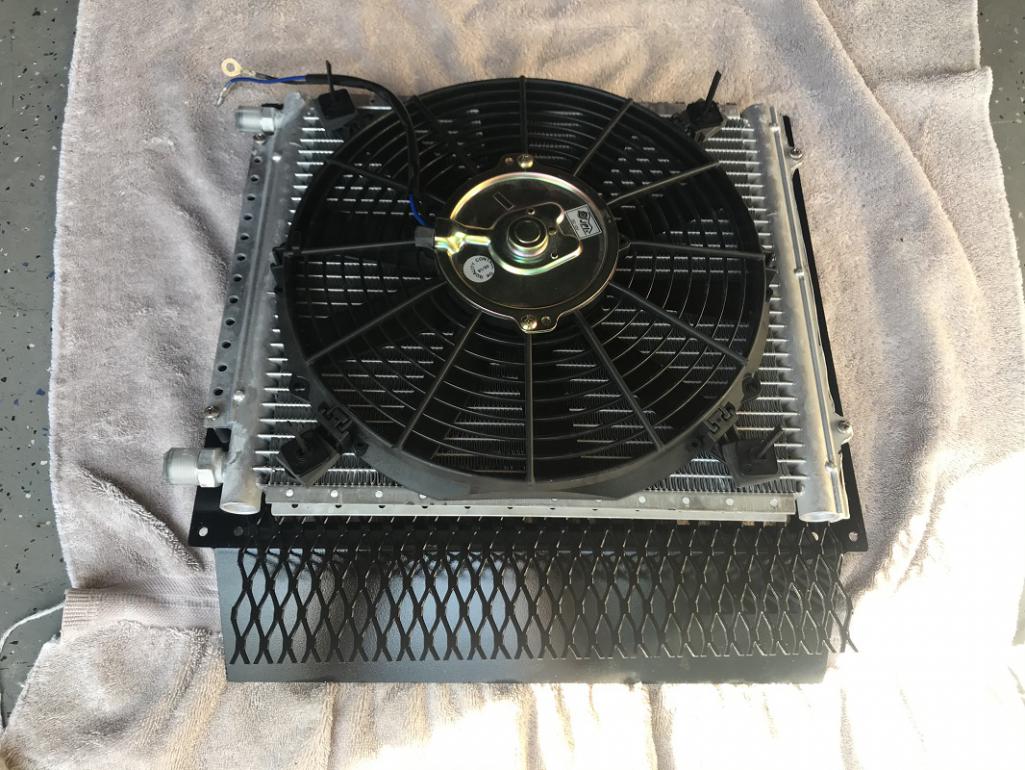 Attached image(s) 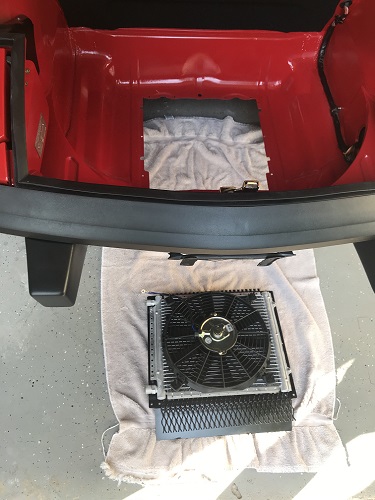 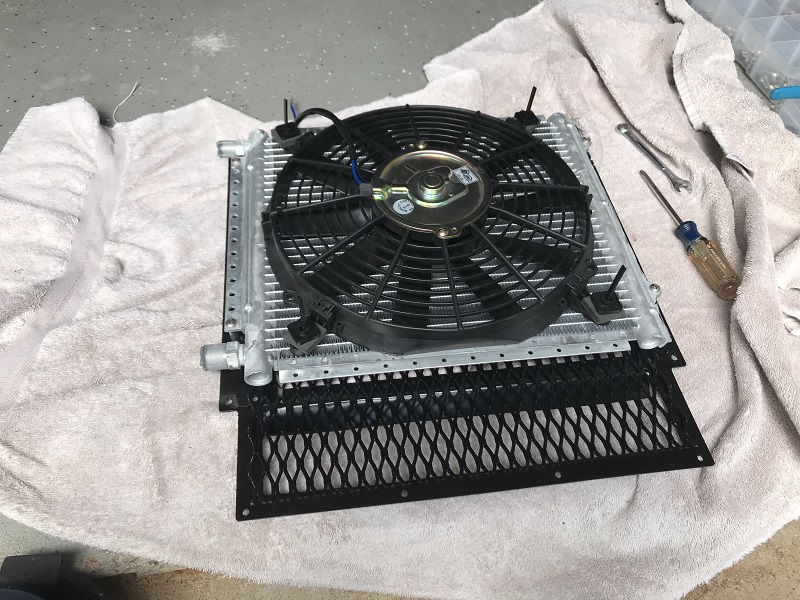 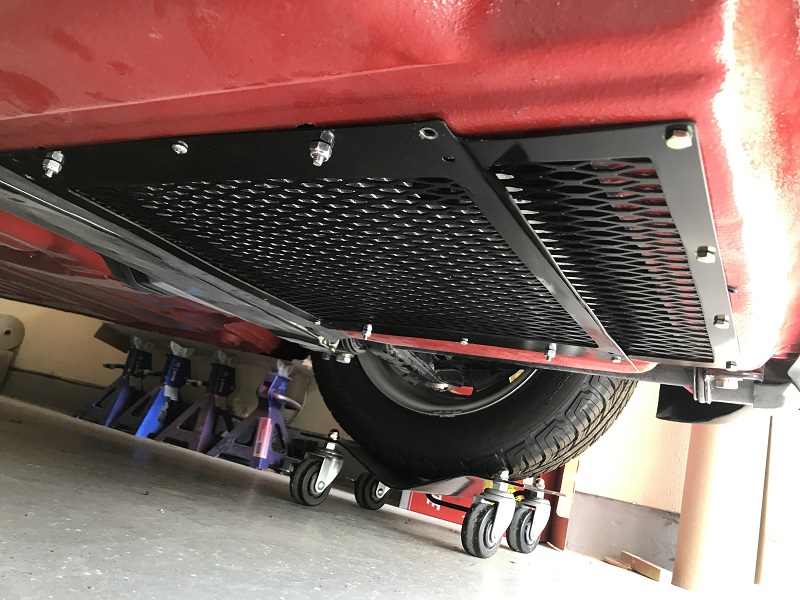 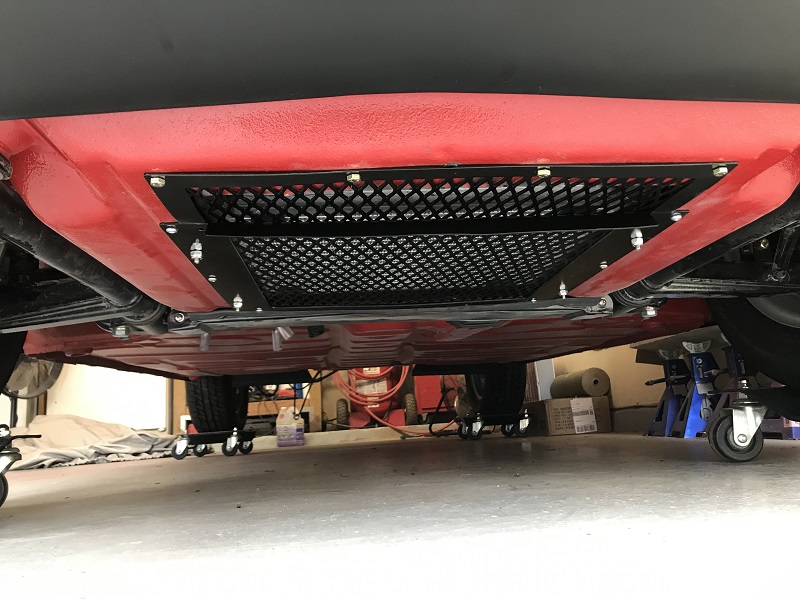 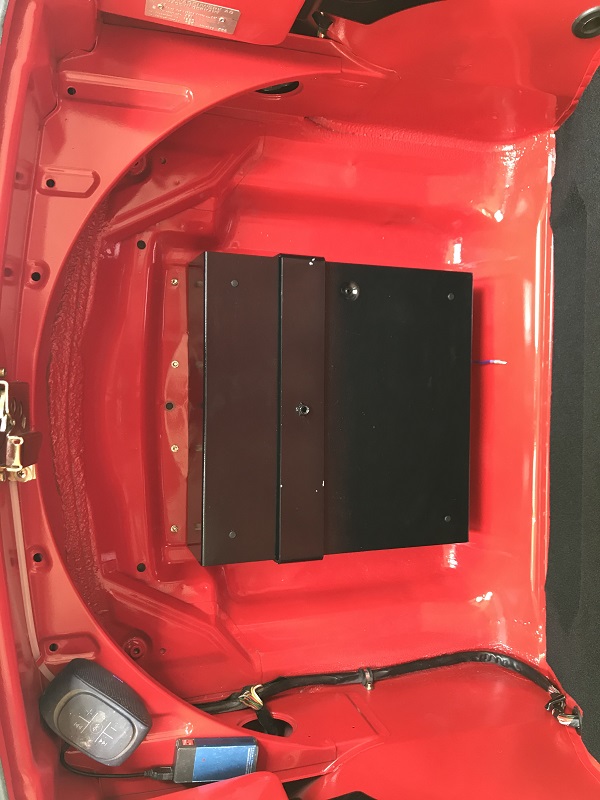
|
 |
|
| DRPHIL914 |
Apr 30 2021, 12:06 PM
Post
#93
|
|
Dr. Phil Group: Members Posts: 5,933 Joined: 9-December 09 From: Kennesaw, GA Member No.: 11,106 Region Association: South East States |
QUOTE(friethmiller @ Apr 29 2021, 04:48 PM) Condenser Install I think I mistakenly placed my previous photos on Doug's other commercial A/C thread. Go there to see my pre-fit photos. So, here we go! Here are my final install pics of my A/C Condenser unit on my '74. I had to make a last minute adjustment to the flipped down portion of the mounting cover (photos 2 and 3). My issue was that it just stuck down too low. If I hit a speed bump or something, the entire condenser would be ripped out of my trunk. I also wanted something to cover up the front portion of the grate. I satisfied both issues by pounding the metal bracket flat and then cutting out an inner rectangle - leaving enough to bend down a much smaller scoop. thats pretty cool, nice clean install. are you using the electric compressor set up? Phil |
|
|
|
| DRPHIL914 |
Apr 30 2021, 12:07 PM
Post
#94
|
|
Dr. Phil Group: Members Posts: 5,933 Joined: 9-December 09 From: Kennesaw, GA Member No.: 11,106 Region Association: South East States |
QUOTE(friethmiller @ Apr 29 2021, 04:48 PM) Condenser Install I think I mistakenly placed my previous photos on Doug's other commercial A/C thread. Go there to see my pre-fit photos. So, here we go! Here are my final install pics of my A/C Condenser unit on my '74. I had to make a last minute adjustment to the flipped down portion of the mounting cover (photos 2 and 3). My issue was that it just stuck down too low. If I hit a speed bump or something, the entire condenser would be ripped out of my trunk. I also wanted something to cover up the front portion of the grate. I satisfied both issues by pounding the metal bracket flat and then cutting out an inner rectangle - leaving enough to bend down a much smaller scoop. thats pretty cool, nice clean install. are you using the electric compressor set up? Phil |
|
|
|
| Chris914n6 |
Apr 30 2021, 03:35 PM
Post
#95
|
|
Jackstands are my life. Group: Members Posts: 3,535 Joined: 14-March 03 From: Las Vegas, NV Member No.: 431 Region Association: Southwest Region |
QUOTE(friethmiller @ Apr 29 2021, 01:48 PM) Condenser Install I think I mistakenly placed my previous photos on Doug's other commercial A/C thread. Go there to see my pre-fit photos. So, here we go! Here are my final install pics of my A/C Condenser unit on my '74. I had to make a last minute adjustment to the flipped down portion of the mounting cover (photos 2 and 3). My issue was that it just stuck down too low. If I hit a speed bump or something, the entire condenser would be ripped out of my trunk. I also wanted something to cover up the front portion of the grate. I satisfied both issues by pounding the metal bracket flat and then cutting out an inner rectangle - leaving enough to bend down a much smaller scoop. I assume you're using a pusher fan. Bend the flap straight down and use it as a lip to attach a flexible rubber/plastic dam (something cheap from HD that can be replaced as needed). That little 1" or so isn't going to do anything but 3-4" will. You need to create high pressure in front and low behind to get good circulation thru. Looks great. |
|
|
|
| friethmiller |
May 3 2021, 08:43 AM
Post
#96
|
|
Senior Member Group: Members Posts: 1,257 Joined: 10-February 19 From: Austin, TX Member No.: 22,863 Region Association: Southwest Region |
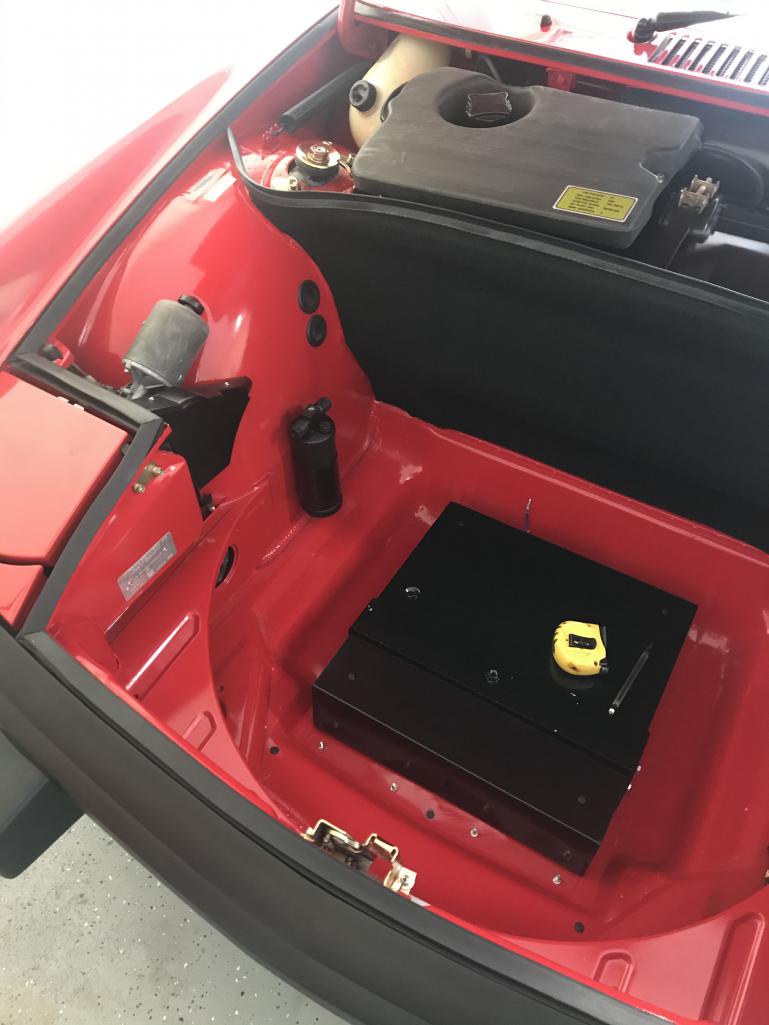
Thanks! Good comments here. I like the idea of extending the scoop with something less rigid. I have a Sanden 508 compressor that will be getting top mounted on the engine in the coming weeks. These parts all come with the A/C kit from Classic Auto Air. Photo of the dryer installed. Had to switch over to install the fuel pump and a few other items to move the engine along. More to come...
 |
|
|
|
| friethmiller |
Jul 27 2021, 10:04 AM
Post
#97
|
|
Senior Member Group: Members Posts: 1,257 Joined: 10-February 19 From: Austin, TX Member No.: 22,863 Region Association: Southwest Region |
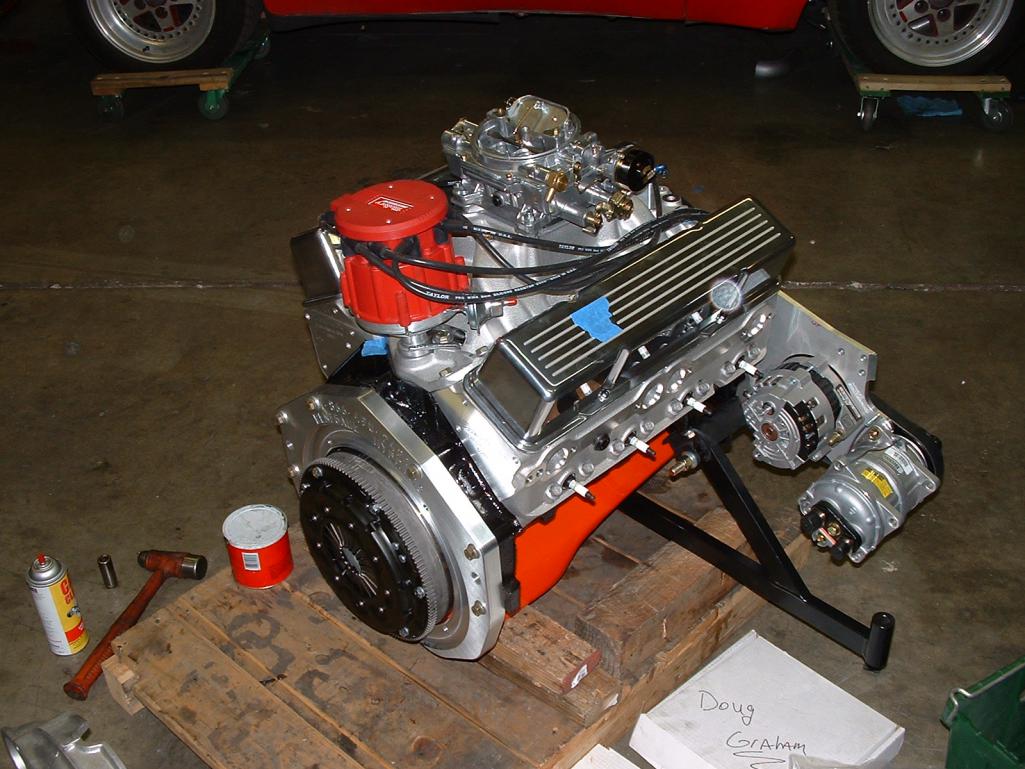
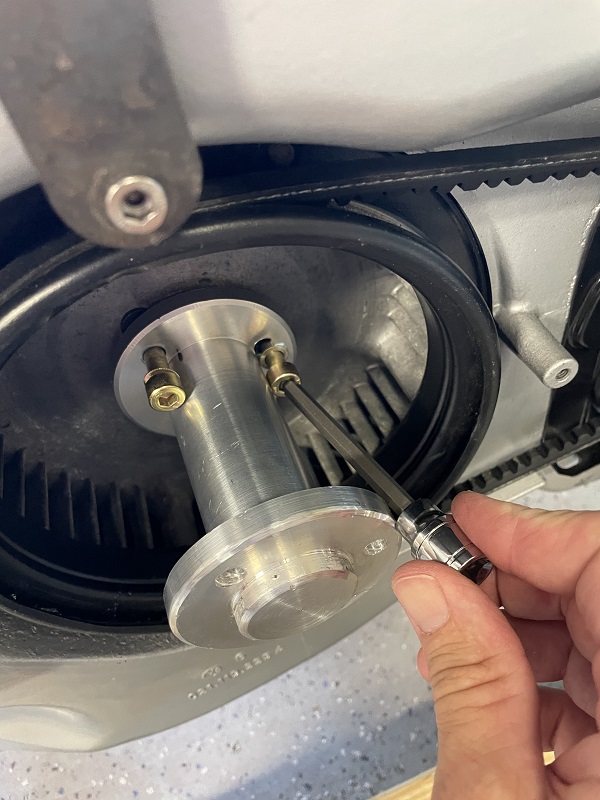
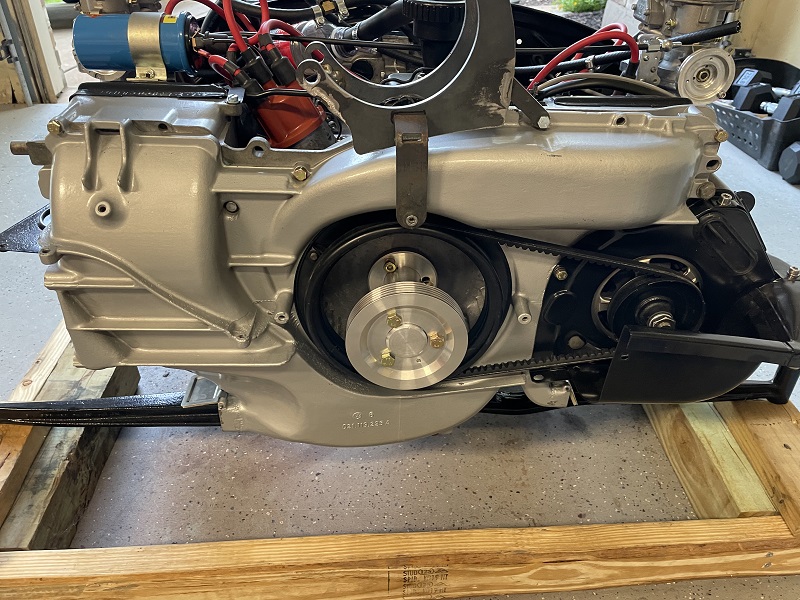
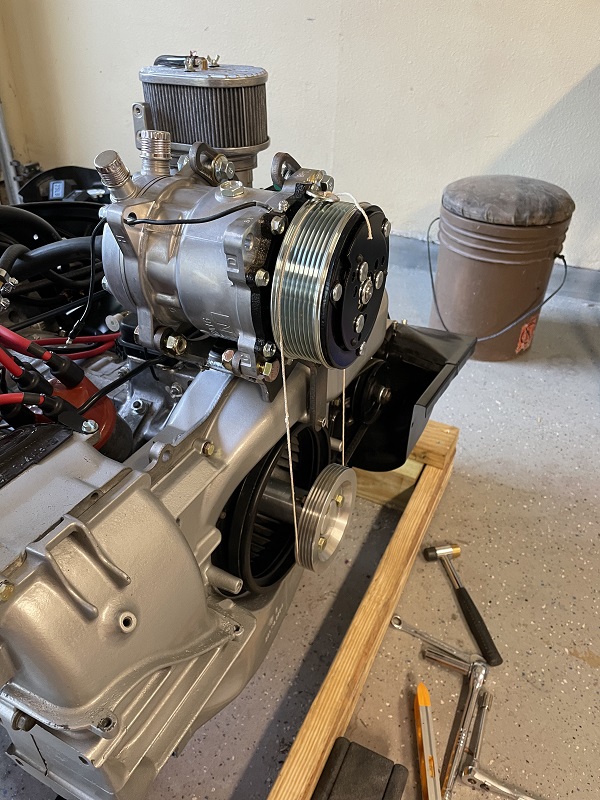
Starting the A/C Compressor Install. Hired a young man with a lathe to machine out a pulley spacer based on Doug's specs. Had to buy 8mm longer Allen head bolts (m8x1.25x50) to reinstall the fan with the spacer. Working on positioning the compressor mount prior to welding the feet in place. I plan on tacking the remaining legs on and then removing for a final welds. My concern right now is the clearance at the top for the compressor with the firewall. Might move the compressor/mount back toward the oil filler a little more. Maybe Doug or others can give their 2 cents before I start welding. I might have that first leg (driver side) mounted on the wrong side of the fan housing. Also, I'm curious as to the best orientation of the compressor. Is it better to have the connections on top? Or, pointing to the passenger side?
   |
|
|
|
| 914sgofast2 |
Jul 27 2021, 11:46 AM
Post
#98
|
|
Senior Member Group: Members Posts: 800 Joined: 10-May 13 From: El Dorado Hills, CA Member No.: 15,855 Region Association: None |
QUOTE(friethmiller @ Jul 27 2021, 09:04 AM) Starting the A/C Compressor Install. Hired a young man with a lathe to machine out a pulley spacer based on Doug's specs. Had to buy 8mm longer Allen head bolts (m8x1.25x50) to reinstall the fan with the spacer. Working on positioning the compressor mount prior to welding the feet in place. I plan on tacking the remaining legs on and then removing for a final welds. My concern right now is the clearance at the top for the compressor with the firewall. Might move the compressor/mount back toward the oil filler a little more. Maybe Doug or others can give their 2 cents before I start welding. I might have that first leg (driver side) mounted on the wrong side of the fan housing. Also, I'm curious as to the best orientation of the compressor. Is it better to have the connections on top? Or, pointing to the passenger side? How will you set or check the engine timing with the AC compressor mounted above the timing port in the fan housing? |
|
|
|
| Shivers |
Jul 27 2021, 11:59 AM
Post
#99
|
|
Senior Member Group: Members Posts: 3,394 Joined: 19-October 20 From: La Quinta, CA Member No.: 24,781 Region Association: Southern California |
Very cool build
|
|
|
|
| dlee6204 |
Jul 27 2021, 02:02 PM
Post
#100
|
|
Howdy Group: Members Posts: 2,162 Joined: 30-April 06 From: Burnsville, NC Member No.: 5,956 |
QUOTE(914sgofast2 @ Jul 27 2021, 01:46 PM) How will you set or check the engine timing with the AC compressor mounted above the timing port in the fan housing? I recommend to transfer your timing marks to the back of the flywheel and you can then use the small access hole on the back of the engine to set your timing. |
|
|
|
|
1 User(s) are reading this topic (1 Guests and 0 Anonymous Users)
0 Members:

|
Lo-Fi Version | Time is now: 17th May 2026 - 05:31 PM |
Invision Power Board
v9.1.4 © 2026 IPS, Inc.