|
|
|
Porsche, and the Porsche crest are registered trademarks of Dr. Ing. h.c. F. Porsche AG.
This site is not affiliated with Porsche in any way. Its only purpose is to provide an online forum for car enthusiasts. All other trademarks are property of their respective owners. |
|
|

  |

| bigkensteele |
 Apr 25 2013, 06:39 PM Apr 25 2013, 06:39 PM
Post
#421
|
|
Major Member  Group: Members Posts: 2,197 Joined: 30-August 04 From: Cincinnati, OH Member No.: 2,660 Region Association: South East States |
Glad you liked the tool!
I used a large screw driver to pry it out with a piece of plastic between the case and the shaft of the screw driver. Be careful not to scratch the crank or the walls of the case where the seal seats. My thread from two years ago asking the exact same question... http://www.914world.com/bbs2/index.php?s=&...t&p=1540919 |
   |

 
|
| 76-914 |
Apr 25 2013, 06:49 PM
Post
#422
|
|
Repeat Offender & Resident Subaru Antagonist Group: Members Posts: 13,495 Joined: 23-January 09 From: Temecula, CA Member No.: 9,964 Region Association: Southern California |
QUOTE(914Eric @ Apr 12 2013, 12:17 PM)  So I'm making progress, Cooling fan and housing is off; Oil cooler is off; and I've got the housing cleaned up and ready to put back on except one thing. One of the little flaps just falls off. One stay on and it looks like there is some tiny piece of something that is holding it on. It's so tiny it's hard to tell if it is just a dab of glue, or a tiny grommet or what it is? I checked the parts fiche and only the flap and post are listed with nothing holding the post on. So...What keeps the little flap from falling out of the fan housing? Just started reading this last page tonite so this may be late in coming but.... be sure the flap swings freely and lands "flush". It's easy to bend those dead soft aluminum hinges to adjust. I remember the hinges being off set a tad bit. (IMG:style_emoticons/default/beerchug.gif) |
|
|
|
| 914Eric |
Apr 25 2013, 09:05 PM
Post
#423
|
|
Member Group: Members Posts: 316 Joined: 7-November 12 From: Northern Idaho Member No.: 15,125 Region Association: Pacific Northwest |
Got the front main seal out and the new one on. Also the O-ring that goes under the impeller hub. Cleaned up the impeller hub and reinstalled.
Took the 4 bolts off of the oil pump housing and tried to get it off to change the seals as well. Seems stuck on solid. Tapped it from many angles; tried to pry gently; still stuck solid. What the secret on getting this off? I don't want to go all gorilla on the oil pump housing and screw something up. |
|
|
|
| nathansnathan |
Apr 25 2013, 09:31 PM
Post
#424
|
|
Senior Member Group: Members Posts: 1,052 Joined: 31-May 10 From: Laguna Beach, CA Member No.: 11,782 Region Association: None |
You have to loosen the case parting bolts around the oil pump. The case halves are squeezing it. Be really careful with the ears that you don't break one off, but you should be able to pry it out gently with those and a bolt protruding or some awkward thing once the bolts around are loose.
|
|
|
|
| bigkensteele |
Apr 25 2013, 11:28 PM
Post
#425
|
|
Major Member Group: Members Posts: 2,197 Joined: 30-August 04 From: Cincinnati, OH Member No.: 2,660 Region Association: South East States |
I chose not to mess with my oil pump. It was clear that it was not leaking, and I did not want to go down the road of loosening case bolts that could cause potential leaks in the future. Not to take away from what Nathan has told you above, but if your pump is not leaking, I would not mess with it.
|
|
|
|
| 914Eric |
Apr 26 2013, 11:36 AM
Post
#426
|
|
Member Group: Members Posts: 316 Joined: 7-November 12 From: Northern Idaho Member No.: 15,125 Region Association: Pacific Northwest |
QUOTE(bigkensteele @ Apr 25 2013, 10:28 PM) I chose not to mess with my oil pump. It was clear that it was not leaking, and I did not want to go down the road of loosening case bolts that could cause potential leaks in the future. Not to take away from what Nathan has told you above, but if your pump is not leaking, I would not mess with it. Yea...if you need to loosen the case bolts to get it off...I'm not really liking that. Leaks, cracks, could have unintended impacts. I think I'll clean and move on. I may rebuild the engine at some point, but I want to get it running right now and see where we are. |
|
|
|
| 914Eric |
Apr 26 2013, 11:38 AM
Post
#427
|
|
Member Group: Members Posts: 316 Joined: 7-November 12 From: Northern Idaho Member No.: 15,125 Region Association: Pacific Northwest |
I also got a new oil filter flange gasket to install. Should it be installed dry...or with some kind of gasket sealer?
|
|
|
|
| A&PGirl |
Apr 26 2013, 12:49 PM
Post
#428
|
|
Senior Member Group: Members Posts: 1,019 Joined: 4-January 06 From: Oklahoma Member No.: 5,367 Region Association: None |
I would make sure it's clean and flat & level. Don't over torque when reinstalling and you should be fine. If you do get your oil pump off, there is a super special trick that needs to be greatly reduce leaking. Also, you'll want to "upgrade" to a type 1 pump as well.
Super Special Trick~ Get a piece of wood 1"-3" thick for your hand size and sized to what you are working on. Get a granite surface plate (woodcraft) flat to .0001" Sandpaper (multiple grits) Instructions: Lay sandpaper on granite grit side up Take your wood piece and lay it on the sandpaper Using even consistent pressure sand the wood till completely flat & level Remove Lightly glue the new sandpaper to the leveled portion of the wood block Use even consistent pressure and sand in one direction only to level out your case surface. Remember you will also need to level your attaching piece (such as the oil pump face) to match or it will leak. Done We did this for the oil pump & the oil filler neck because they were leaking. (Read: I did most of the manual labor (IMG:style_emoticons/default/laugh.gif) ) No more leaks afterword with no sealant or sealer used. Just a tip from an old mechanic (my dad who was the go to guy back in the day). (IMG:style_emoticons/default/smile.gif) |
|
|
|
| 914Eric |
May 1 2013, 09:19 PM
Post
#429
|
|
Member Group: Members Posts: 316 Joined: 7-November 12 From: Northern Idaho Member No.: 15,125 Region Association: Pacific Northwest |
Well it seems like I've finally got it stripped down as far as I need to go for now with the exception of the trans, and I can start reassembly. Got all the bits needed...I think. Gaskets, O-rings, fuel lines, vacuum lines, plugs, coil, etc, etc...
Waiting on my Dr. Evil trans CD to see what I need to do there. 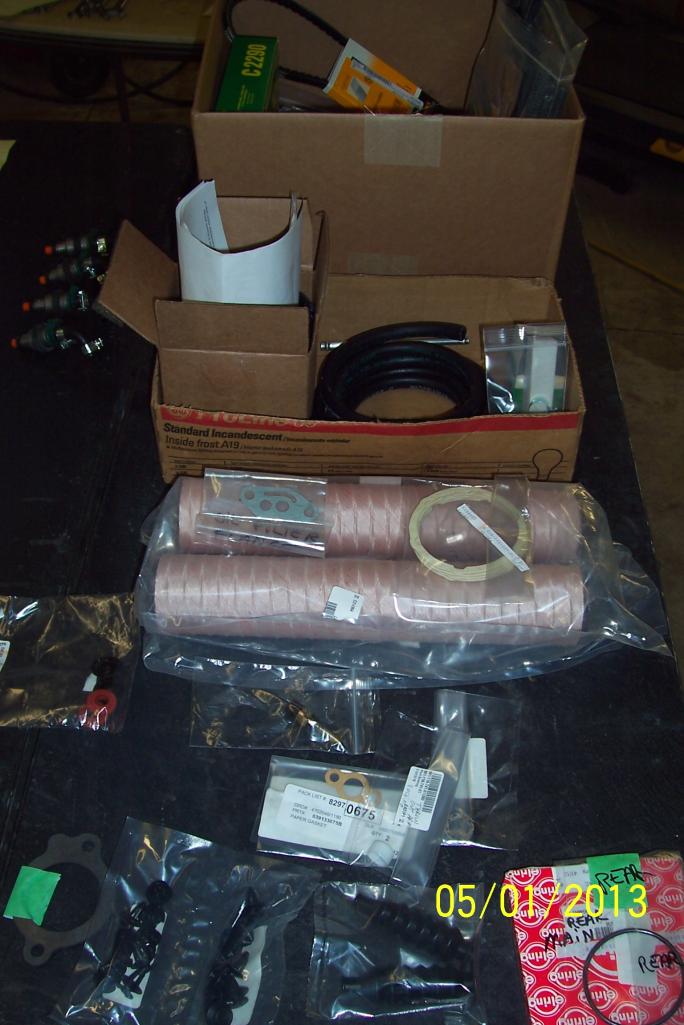 Refurbished my injectors...new seals, elbows and clamps. 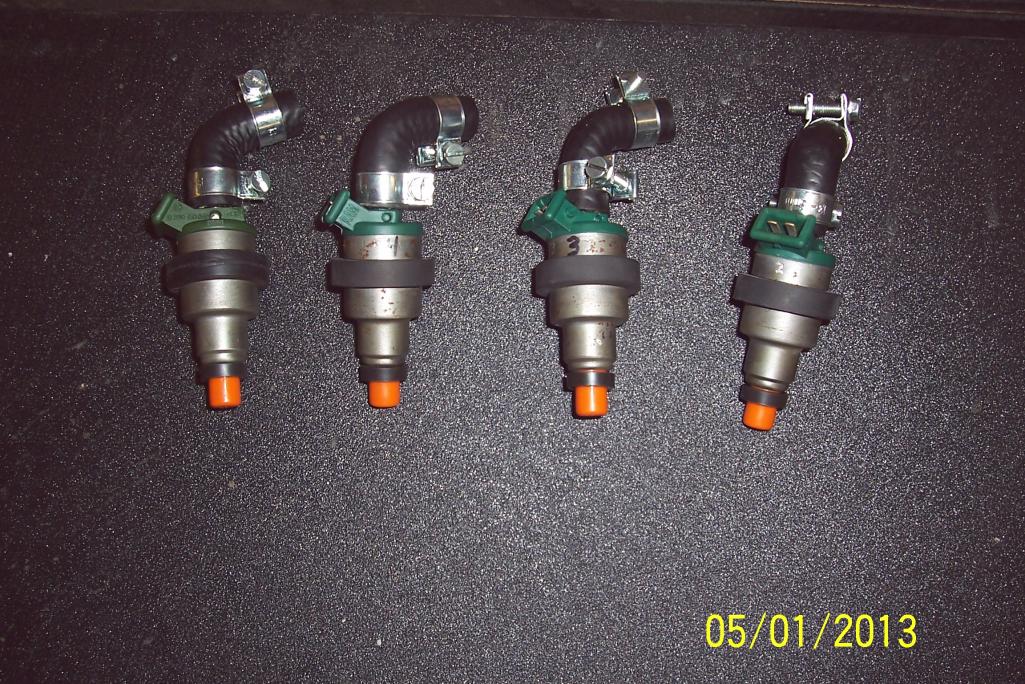 |
|
|
|
| 914Eric |
May 2 2013, 07:02 PM
Post
#430
|
|
Member Group: Members Posts: 316 Joined: 7-November 12 From: Northern Idaho Member No.: 15,125 Region Association: Pacific Northwest |
Got the injectors mounted in the injector manifolds and ready to go. Sandblast, prime, paint. 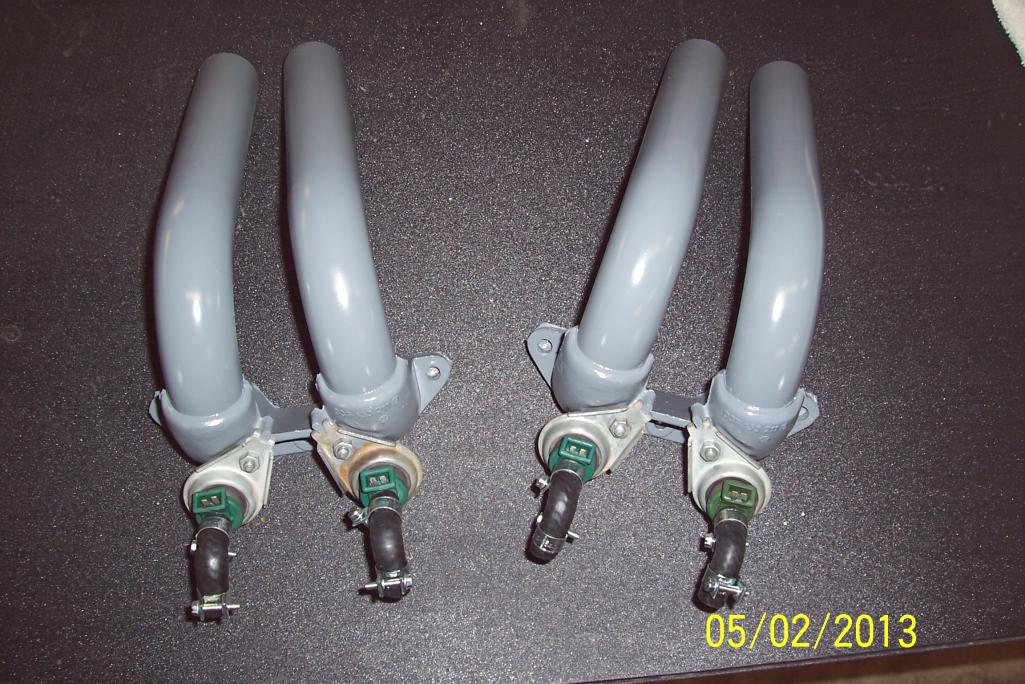 |
|
|
|
| rnellums |
May 2 2013, 08:14 PM
Post
#431
|
|
Professional Enthusiast Group: Members Posts: 1,646 Joined: 26-November 09 From: Littleton, CO Member No.: 11,072 Region Association: Rocky Mountains |
QUOTE(914Eric @ May 2 2013, 09:02 PM) Got the injectors mounted in the injector manifolds and ready to go. Sandblast, prime, paint. Looking good! But i think the elbows go the other way (IMG:style_emoticons/default/poke.gif) (IMG:style_emoticons/default/smile.gif) |
|
|
|
| 914Eric |
May 8 2013, 07:29 PM
Post
#432
|
|
Member Group: Members Posts: 316 Joined: 7-November 12 From: Northern Idaho Member No.: 15,125 Region Association: Pacific Northwest |
Haha...I knew that Rob.
So I'm changing the points and condenser today and of course another hiccup. The condenser that I got as part of my "Tune Up" pack from AA doesn't fit. The wire from the condenser to the hole in the dizzy where you poke the connector thru for the points to attach to is about 3/4" shorter than the 20 year old one that I'm replacing. And if you look at the picture of the one I removed...There isn't 3/4" to spare. Anyone else experienced this? I'm spending more time sourcing all the right parts than actually working on the car. (IMG:style_emoticons/default/headbang.gif) 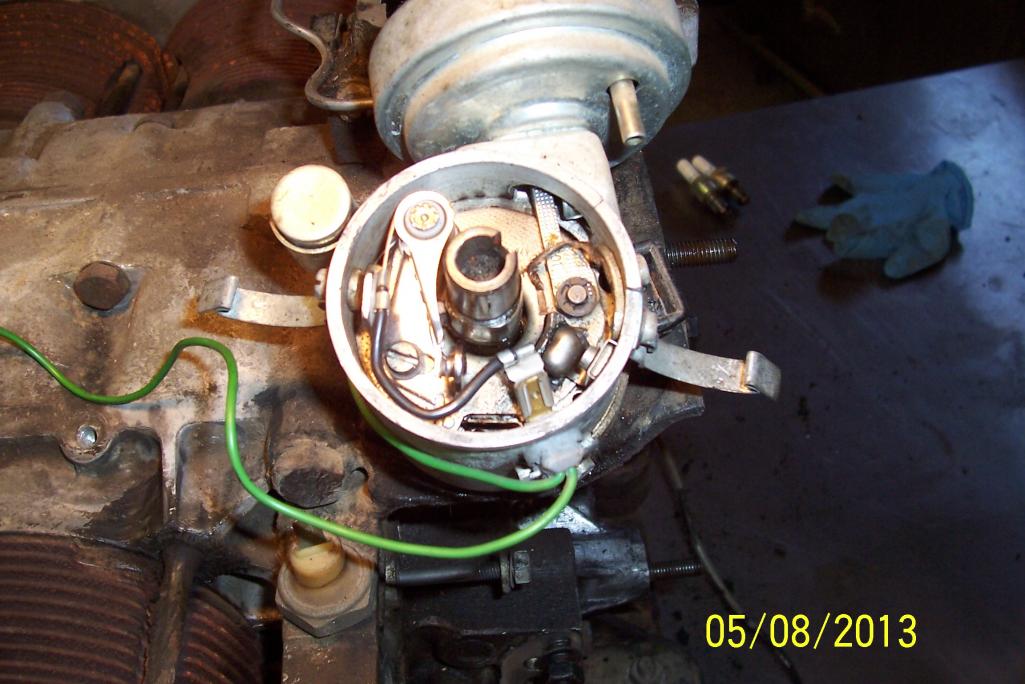 |
|
|
|
| rnellums |
May 9 2013, 12:44 PM
Post
#433
|
|
Professional Enthusiast Group: Members Posts: 1,646 Joined: 26-November 09 From: Littleton, CO Member No.: 11,072 Region Association: Rocky Mountains |
Its not concours correct, but what about mounting here! Is it a possibility?
Attached image(s) 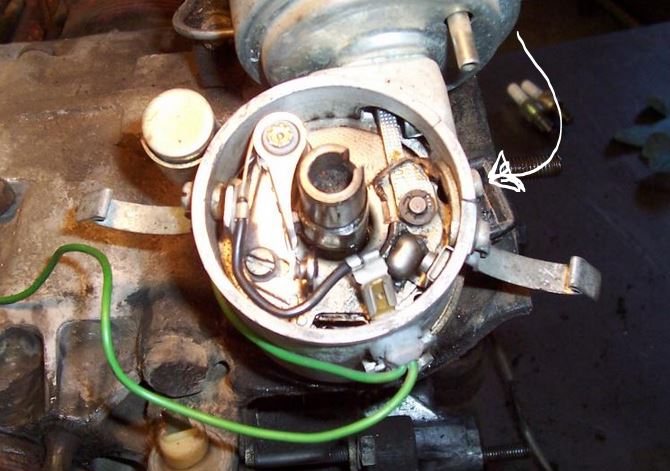
|
|
|
|
| brenz |
May 9 2013, 01:53 PM
Post
#434
|
|
Member Group: Members Posts: 56 Joined: 10-March 10 From: Delaware, USA Member No.: 11,451 Region Association: MidAtlantic Region |
I experienced this on a friend’s car. The condenser and cap clip are now sharing a screw, with no washer. It works, but should replace with a longer screw later.
|
|
|
|
| TheCabinetmaker |
May 9 2013, 02:52 PM
Post
#435
|
|
I drive my car everyday Group: Members Posts: 8,300 Joined: 8-May 03 From: Tulsa, Ok. Member No.: 666 |
Put it on the other side, and you won't be able to plug in the trigger points or set the timing.The one in the pic is the proper one. If the new one is shorter, its the wrong one
|
|
|
|
| 914_teener |
May 9 2013, 08:36 PM
Post
#436
|
|
914 Guru Group: Members Posts: 5,197 Joined: 31-August 08 From: So. Cal Member No.: 9,489 Region Association: Southern California |
QUOTE(The Cabinetmaker @ May 9 2013, 01:52 PM) Put it on the other side, and you won't be able to plug in the trigger points or set the timing.The one in the pic is the proper one. If the new one is shorter, its the wrong one (IMG:style_emoticons/default/agree.gif) (IMG:style_emoticons/default/agree.gif) Yes I have experienced this same thing. You have the wrong condenser. Also....make sure you check your advance and retard cans for vacum...you will save yourself some headaches chasing idle problems later. Also.......make sure the advance plate is clean and lubed. |
|
|
|
| r_towle |
May 9 2013, 08:46 PM
Post
#437
|
|
Custom Member Group: Members Posts: 24,574 Joined: 9-January 03 From: Taxachusetts Member No.: 124 Region Association: North East States |
flip in over on the same screw so its on the other side of the cap clip.
I have not found the "right" condensor anywhere....maybe the Capn has a source. rich |
|
|
|
| Nozzle |
May 10 2013, 03:49 AM
Post
#438
|
|
Member Group: Members Posts: 158 Joined: 6-November 08 From: Lexington Park, Maryland Member No.: 9,725 Region Association: MidAtlantic Region |
I am also having this exact problem. If anyone has a source for the correct part I would love to know!
|
|
|
|
| 914Eric |
May 10 2013, 01:13 PM
Post
#439
|
|
Member Group: Members Posts: 316 Joined: 7-November 12 From: Northern Idaho Member No.: 15,125 Region Association: Pacific Northwest |
Talked to Auto Atlanta this morning and they are sending me another condenser...after they suggested that I try to "Stretch" the wire to see if that might make the one I have fit. |
|
|
|
| 914Eric |
May 10 2013, 02:51 PM
Post
#440
|
|
Member Group: Members Posts: 316 Joined: 7-November 12 From: Northern Idaho Member No.: 15,125 Region Association: Pacific Northwest |
The rotor on the left is the one I took off last week; a rev-limiter rotor.
The one on the right is the one I was sent by AA which I guess is NOT a rev-limiter. At first glance, I like the smaller, simpler, non-limiter model on the right. What was original? What do most people use? 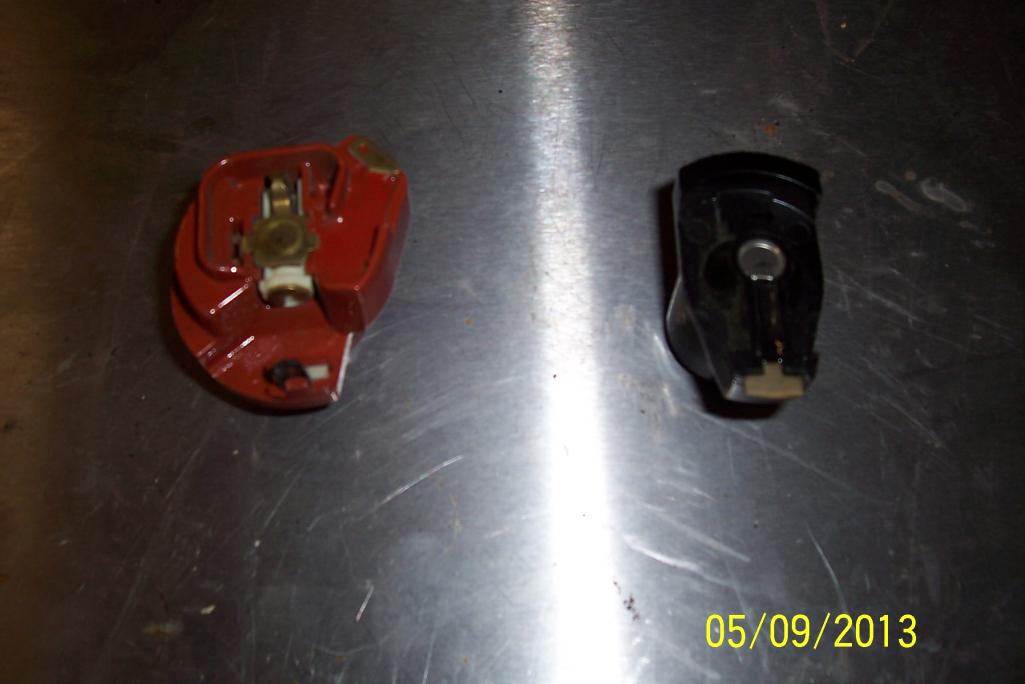 |
|
|
|
|
2 User(s) are reading this topic (2 Guests and 0 Anonymous Users)
0 Members:

|
Lo-Fi Version | Time is now: 8th May 2024 - 05:51 AM |
Invision Power Board
v9.1.4 © 2024 IPS, Inc.