|
|
|
Porsche, and the Porsche crest are registered trademarks of Dr. Ing. h.c. F. Porsche AG.
This site is not affiliated with Porsche in any way. Its only purpose is to provide an online forum for car enthusiasts. All other trademarks are property of their respective owners. |
|
|

  |

| bigkensteele |
 Nov 10 2012, 05:46 PM Nov 10 2012, 05:46 PM
Post
#61
|
|
Major Member  Group: Members Posts: 2,197 Joined: 30-August 04 From: Cincinnati, OH Member No.: 2,660 Region Association: South East States |
QUOTE(914Eric @ Nov 10 2012, 03:19 PM)  Well...I found my first minor problem. The backpad that is on the engine wall and mounted under the seat wells has 2 of the 4 metal tabs torn away from the cardboard. Given that it is metal riveted to cardboard...I sure don't see an easy fix. I'm sure there must be a past thread on this topic? If you do a search, there is a fantastic thread where a guy restored the cardboard of his backpad using fiberglass. If you read that thread, you will see that it's an easy fix. http://www.914world.com/bbs2/index.php?s=&...st&p=662056 |
   |

 
|
| 914Eric |
Nov 11 2012, 10:41 AM
Post
#62
|
|
Member Group: Members Posts: 316 Joined: 7-November 12 From: Northern Idaho Member No.: 15,125 Region Association: Pacific Northwest |
Thanks for the link Ken. That is some quality work. Going to really have to step up my game to be in that league.
Here is a pic of the engine wall after removing the backpad. The second pic is of the hell hole area from the cab side. Still no rust yet. Hope I'm as lucky when I get to the engine side. 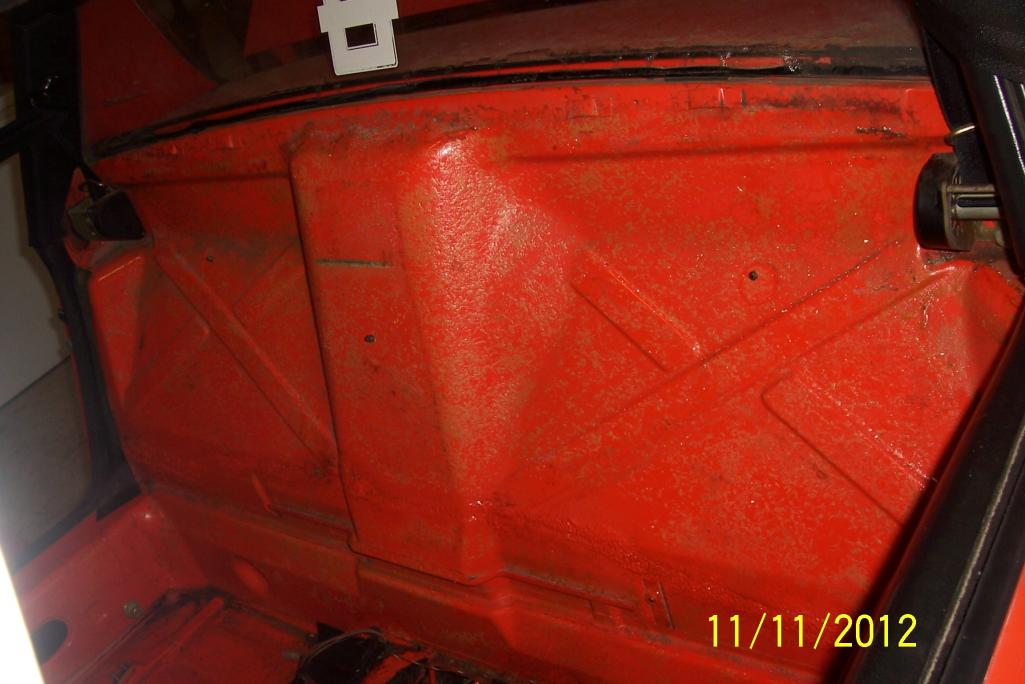 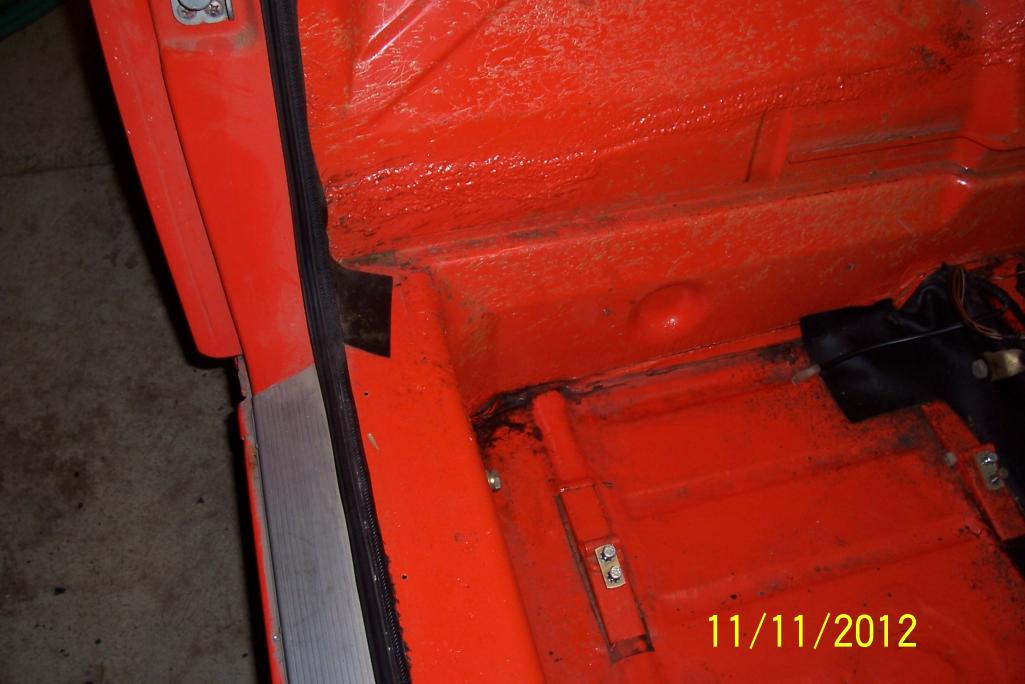 |
|
|
|
| Hammy |
Nov 11 2012, 09:12 PM
Post
#63
|
|
mr. Wonderful Group: Members Posts: 1,826 Joined: 20-October 04 From: Columbia, California Member No.: 2,978 Region Association: Northern California |
Looks like a very solid early 73 2.0!
|
|
|
|
| type47 |
Nov 12 2012, 11:31 AM
Post
#64
|
|
Viermeister Group: Members Posts: 4,254 Joined: 7-August 03 From: Vienna, VA Member No.: 994 Region Association: MidAtlantic Region |
QUOTE(914Eric @ Nov 7 2012, 05:02 PM) [...my VIN is 47329-01147, ... You should add your VIN to the site db. In the upper right margin you should see "914 Info", click on that and go to "members VIN numbers" and add yours... |
|
|
|
| 0396 |
Nov 12 2012, 11:59 AM
Post
#65
|
|
Advanced Member Group: Members Posts: 2,046 Joined: 13-October 03 From: L.A. Calif Member No.: 1,245 Region Association: Southern California |
Good luck with your resto....I'm sure it will bring back great memories
|
|
|
|
| 914Eric |
Nov 12 2012, 02:39 PM
Post
#66
|
|
Member Group: Members Posts: 316 Joined: 7-November 12 From: Northern Idaho Member No.: 15,125 Region Association: Pacific Northwest |
Thanks Zack and 396...Been looking forward to doing this for a long time. Will absolutely bring back memories and be a labor of love. Going to take it slow and steady...refurbishing one mechanical system at a time. Brakes/shocks/suspension, fuel tank and fuel lines, all the electrical, and of course the engine and fuel injection.
Jim...My VIN and other info is now in the 914World database. Eric |
|
|
|
| 914Eric |
Nov 12 2012, 03:57 PM
Post
#67
|
|
Member Group: Members Posts: 316 Joined: 7-November 12 From: Northern Idaho Member No.: 15,125 Region Association: Pacific Northwest |
I tried a simple trick that I found in Dr. 914s Tricks and Tips 700 book. Wash the seat belts, spray with scotchguard, and then full extend them and lube.
Didn’t really work. Might have helped a little, but no more than 25%. I guess those 40 year old springs have just lost their spring. (IMG:style_emoticons/default/sad.gif) |
|
|
|
| biosurfer1 |
Nov 12 2012, 05:10 PM
Post
#68
|
|
Teener fo Life! Group: Members Posts: 3,020 Joined: 3-August 03 From: Roseville, CA Member No.: 977 Region Association: Northern California |
Get a hold of Paul (PRS914-6 on the site)...he rewinds springs for the seat belts.
|
|
|
|
| 914Eric |
Nov 13 2012, 09:22 PM
Post
#69
|
|
Member Group: Members Posts: 316 Joined: 7-November 12 From: Northern Idaho Member No.: 15,125 Region Association: Pacific Northwest |
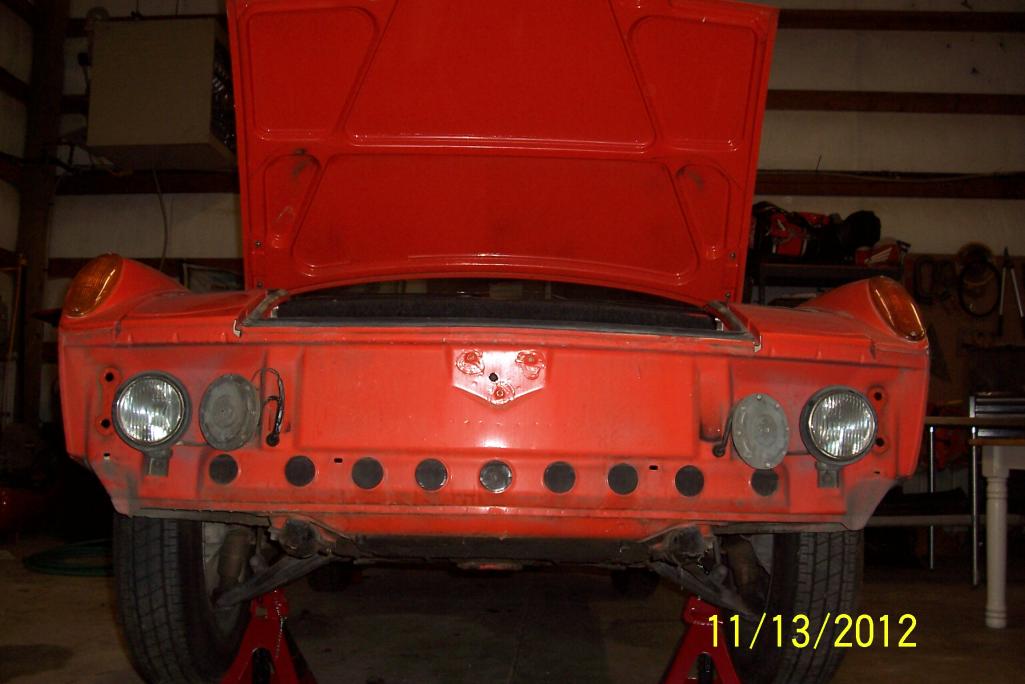
Front bumper and panel removed.
 |
|
|
|
| 76-914 |
Nov 14 2012, 09:41 AM
Post
#70
|
|
Repeat Offender & Resident Subaru Antagonist Group: Members Posts: 13,494 Joined: 23-January 09 From: Temecula, CA Member No.: 9,964 Region Association: Southern California |
Wow, nice car. And thx for those previous posts, Andy. I discovered that one of mine is this early '73. (IMG:style_emoticons/default/beerchug.gif)
|
|
|
|
| 914Eric |
Nov 14 2012, 12:00 PM
Post
#71
|
|
Member Group: Members Posts: 316 Joined: 7-November 12 From: Northern Idaho Member No.: 15,125 Region Association: Pacific Northwest |
QUOTE(76-914 @ Nov 14 2012, 07:41 AM) Nice! The front bumber is in great shape. A little polishing and it should be good as new. The front panel has a few bumps and bruises, but should be able to be straightened up without too much trouble. 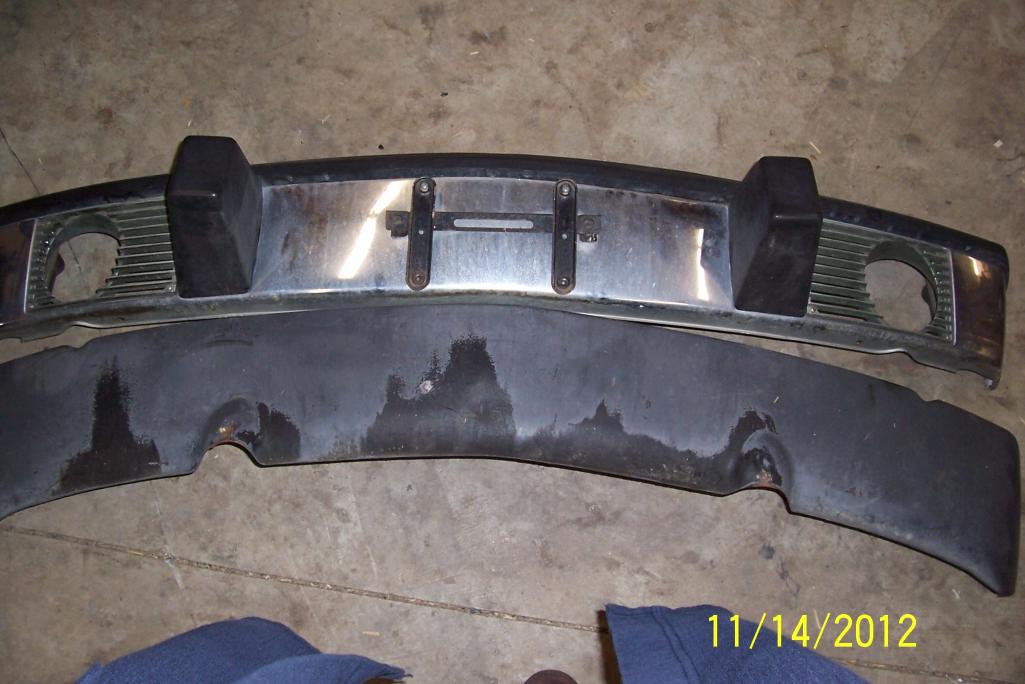 |
|
|
|
| 914Eric |
Nov 15 2012, 01:01 PM
Post
#72
|
|
Member Group: Members Posts: 316 Joined: 7-November 12 From: Northern Idaho Member No.: 15,125 Region Association: Pacific Northwest |
Pulled off the gravel shield so I can drain and pull out the fuel tank.
   |
|
|
|
| McMark |
Nov 15 2012, 01:14 PM
Post
#73
|
|
914 Freak! Group: Retired Admin Posts: 20,179 Joined: 13-March 03 From: Grand Rapids, MI Member No.: 419 Region Association: None |
Awesome! (IMG:style_emoticons/default/shades.gif)
|
|
|
|
| turk22 |
Nov 15 2012, 01:46 PM
Post
#74
|
|
Treetop Flyer Group: Members Posts: 735 Joined: 27-July 12 From: Cincinnati OH Member No.: 14,725 Region Association: Upper MidWest |
There really is no rust on that sucker! pretty amazing
|
|
|
|
| 914Eric |
Nov 15 2012, 03:50 PM
Post
#75
|
|
Member Group: Members Posts: 316 Joined: 7-November 12 From: Northern Idaho Member No.: 15,125 Region Association: Pacific Northwest |
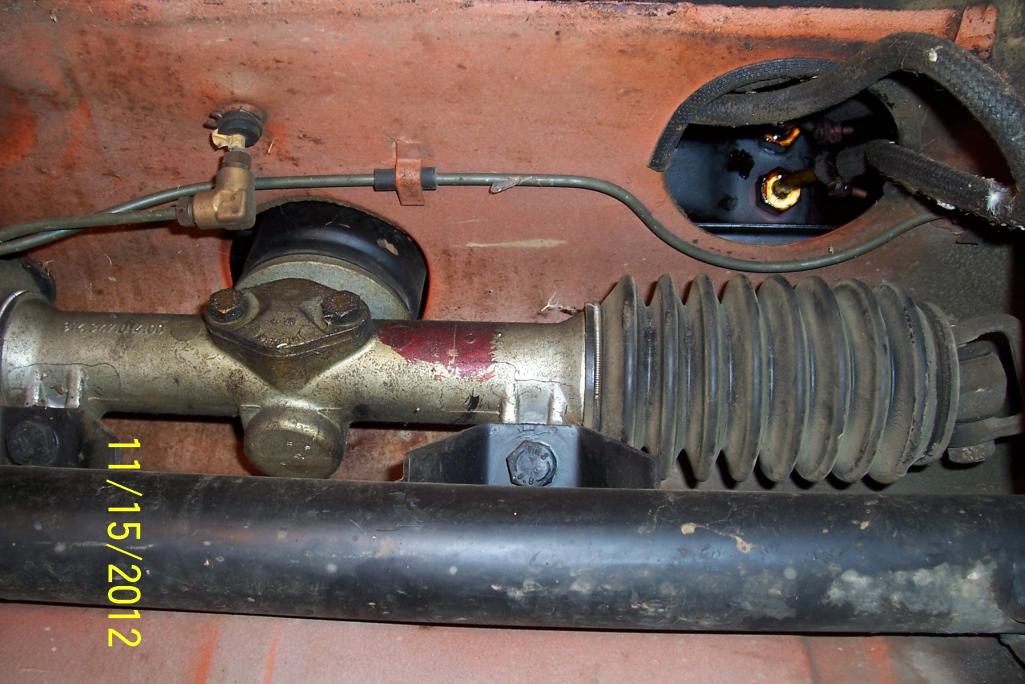
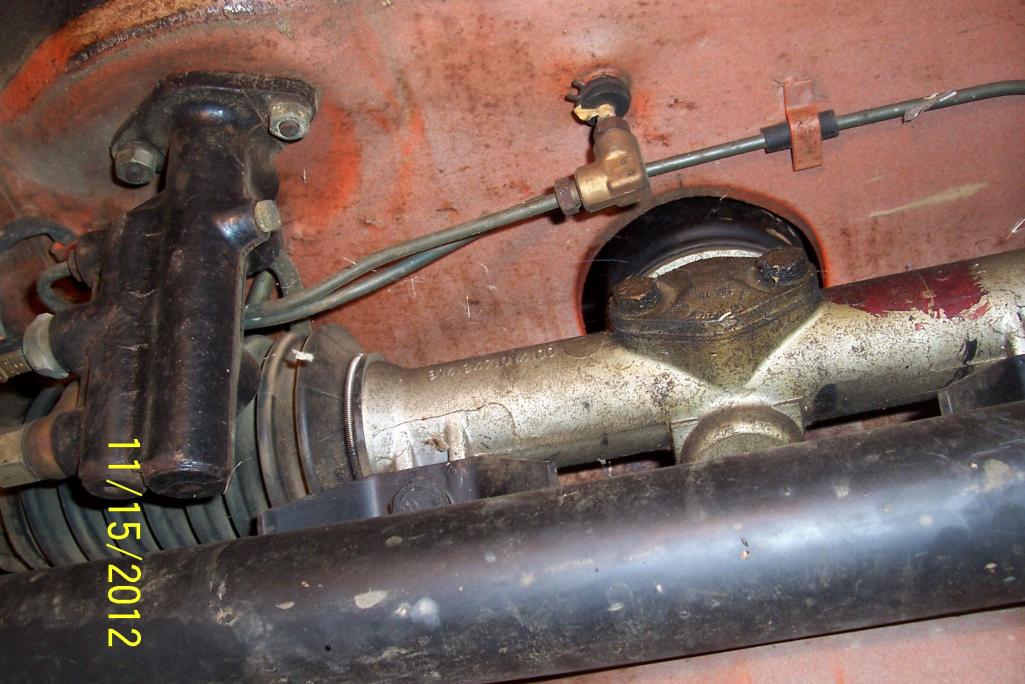
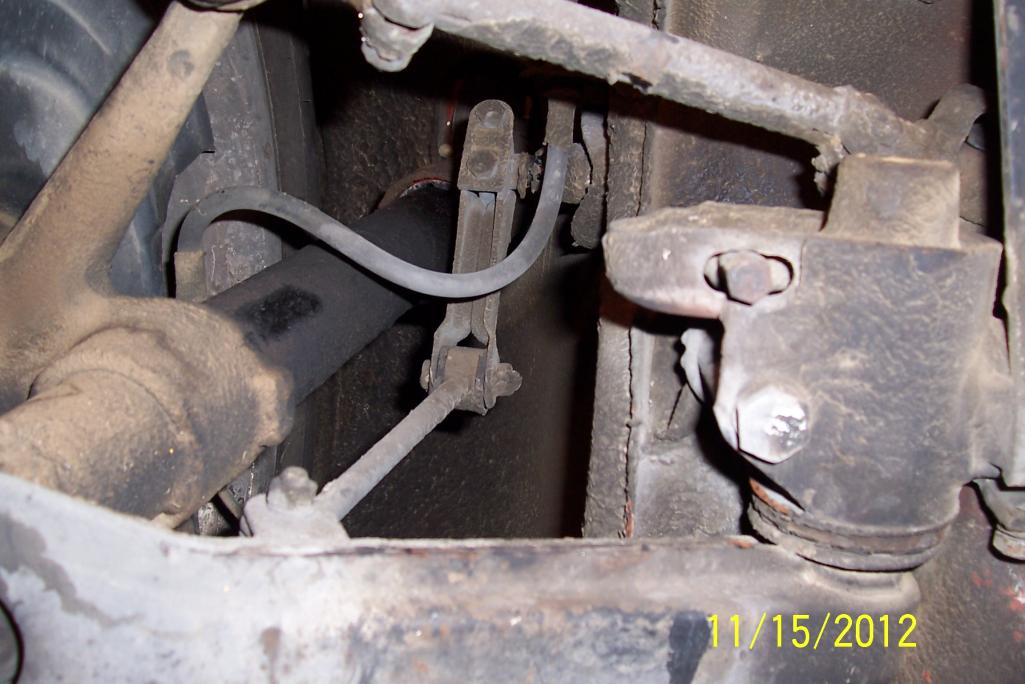
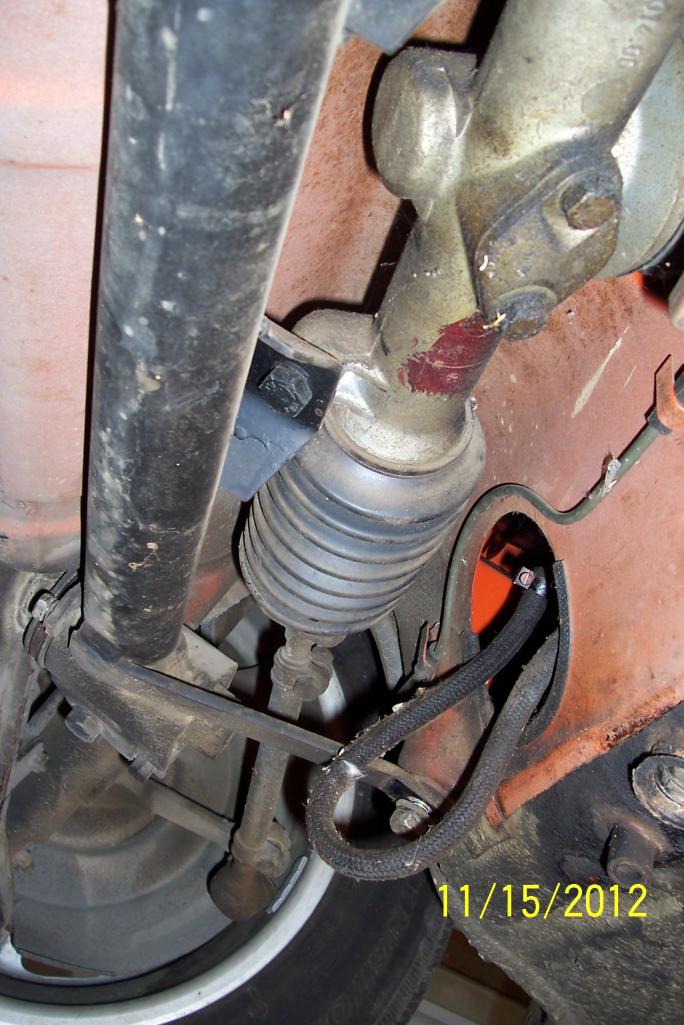
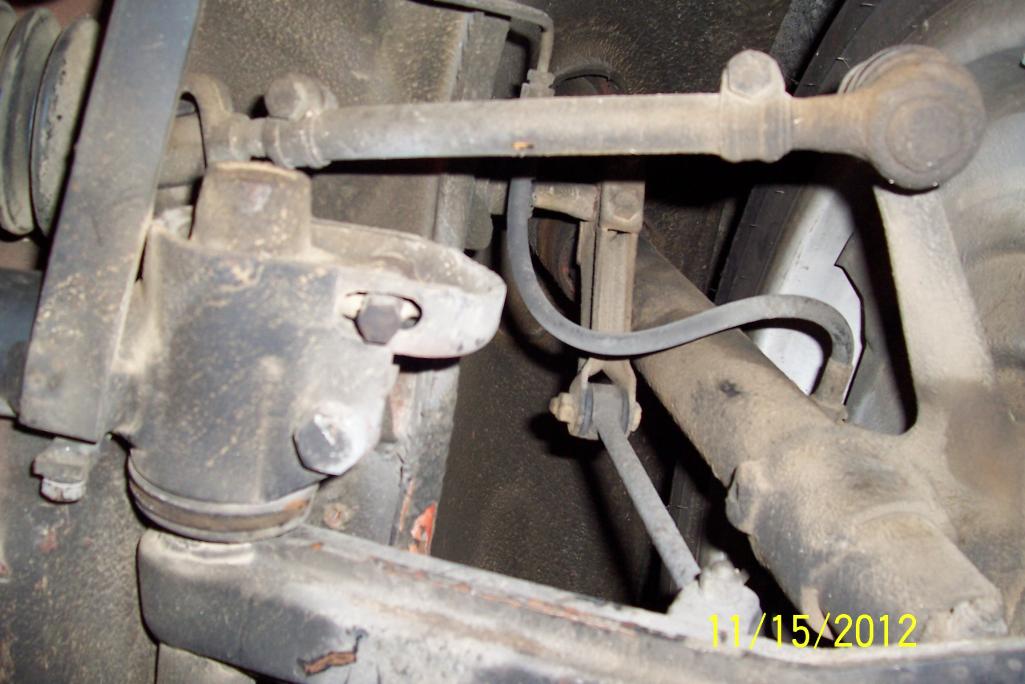
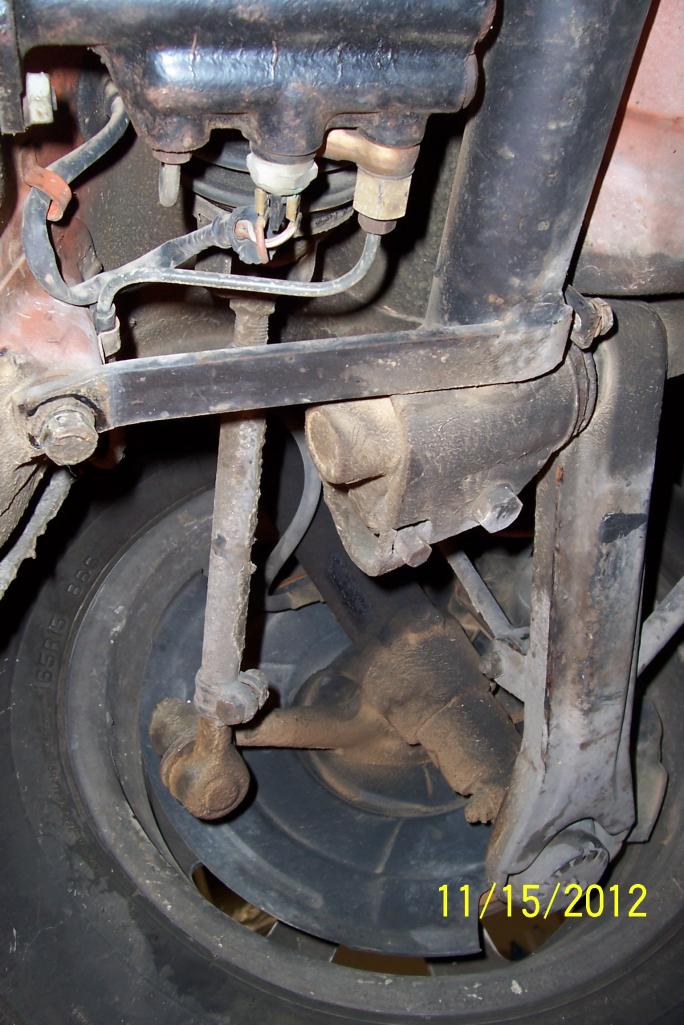
Since I was under there, I snapped a few more.
    |
|
|
|
| 914Eric |
Nov 15 2012, 03:54 PM
Post
#76
|
|
Member Group: Members Posts: 316 Joined: 7-November 12 From: Northern Idaho Member No.: 15,125 Region Association: Pacific Northwest |
Curious what this little (Steering?) access panel is?
Hard to see in the pic, but there is a nut there...so it must come off. 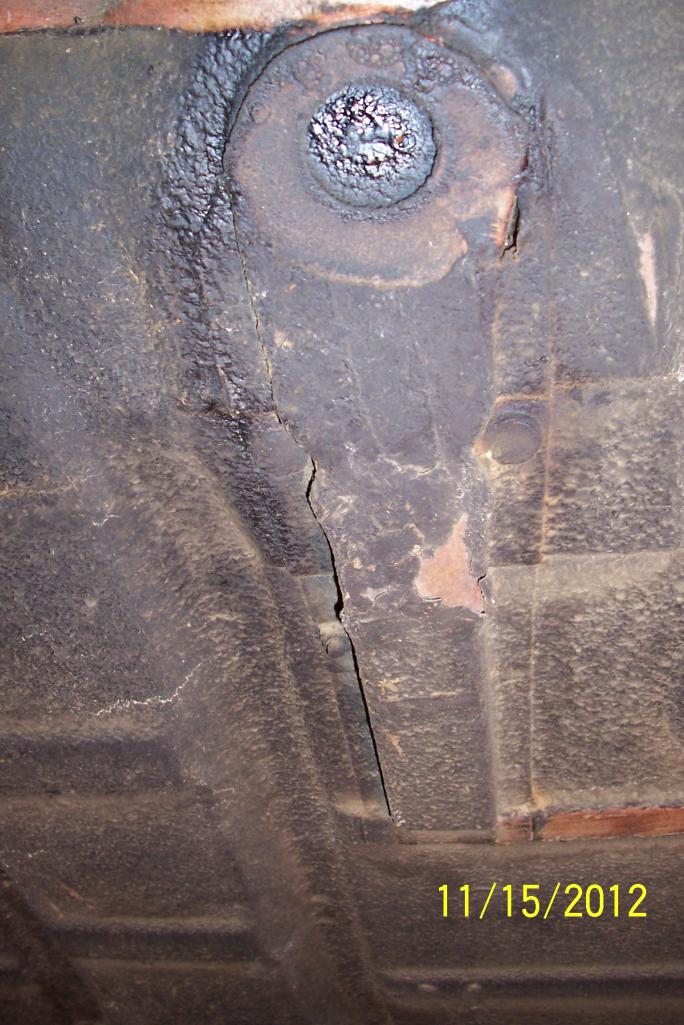 |
|
|
|
| rnellums |
Nov 15 2012, 06:51 PM
Post
#77
|
|
Professional Enthusiast Group: Members Posts: 1,646 Joined: 26-November 09 From: Littleton, CO Member No.: 11,072 Region Association: Rocky Mountains |
That little nut on the lower left is welded to the floor so you can bolt something in from the other side (gas pedal?) Don't try to remove it.
|
|
|
|
| 914Eric |
Nov 16 2012, 12:13 PM
Post
#78
|
|
Member Group: Members Posts: 316 Joined: 7-November 12 From: Northern Idaho Member No.: 15,125 Region Association: Pacific Northwest |
Seems straight and original coating appears in good order. A few spots where there is a little cracking in the coating from age.
 |
|
|
|
| GaroldShaffer |
Nov 16 2012, 08:44 PM
Post
#79
|
|
You bought another 914? Group: Benefactors Posts: 7,620 Joined: 27-June 03 From: Portage, IN Member No.: 865 Region Association: None |
QUOTE(rnellums @ Nov 15 2012, 06:51 PM) That little nut on the lower left is welded to the floor so you can bolt something in from the other side (gas pedal?) Don't try to remove it. Yep, gas pedal mount. |
|
|
|
| 914Eric |
Nov 16 2012, 10:24 PM
Post
#80
|
|
Member Group: Members Posts: 316 Joined: 7-November 12 From: Northern Idaho Member No.: 15,125 Region Association: Pacific Northwest |
QUOTE(Garold Shaffer @ Nov 16 2012, 06:44 PM) Yep, gas pedal mount. Thanks Garold...and nellums. Still haven't got the tank out yet. Dad must of just fueled up last time he drove. Sounds like there is 10-15 gallons of fuel in the tank, and I haven't figured out an easy way to drain it yet. I could do a couple of gallons at a time...But that really sounds messy. (IMG:style_emoticons/default/idea.gif) |
|
|
|
|
1 User(s) are reading this topic (1 Guests and 0 Anonymous Users)
0 Members:

|
Lo-Fi Version | Time is now: 3rd May 2024 - 05:38 AM |
Invision Power Board
v9.1.4 © 2024 IPS, Inc.