|
|
|
Porsche, and the Porsche crest are registered trademarks of Dr. Ing. h.c. F. Porsche AG.
This site is not affiliated with Porsche in any way. Its only purpose is to provide an online forum for car enthusiasts. All other trademarks are property of their respective owners. |
|
|

  |

| qa1142 |
 Nov 14 2004, 06:19 PM Nov 14 2004, 06:19 PM
Post
#41
|
|
Whiplash  Group: Members Posts: 1,514 Joined: 1-June 04 From: Lake Zurich, Illinois Member No.: 2,140 |
I have wesminster (Spelling) 19 mm from classifides and new bushings for it from PP. (IMG:style_emoticons/default/smilie_pokal.gif)
Ball joints and turbo tier rods are ordered. Need to get new front shocks.. Steering rack has little leak, is this an issue? Attached image(s) 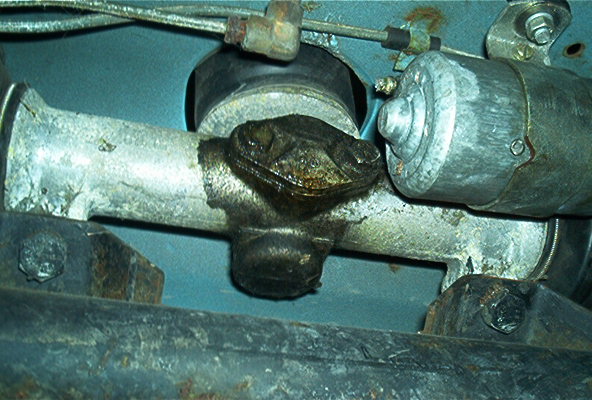
|
   |

 
|
| qa1142 |
Nov 14 2004, 06:22 PM
Post
#42
|
|
Whiplash Group: Members Posts: 1,514 Joined: 1-June 04 From: Lake Zurich, Illinois Member No.: 2,140 |
little rust here to clean up
Attached image(s) 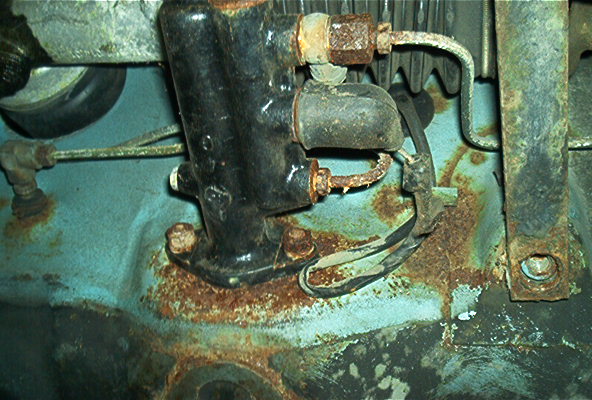
|
|
|
|
| qa1142 |
Nov 14 2004, 06:25 PM
Post
#43
|
|
Whiplash Group: Members Posts: 1,514 Joined: 1-June 04 From: Lake Zurich, Illinois Member No.: 2,140 |
anyone use this template?
Attached image(s) 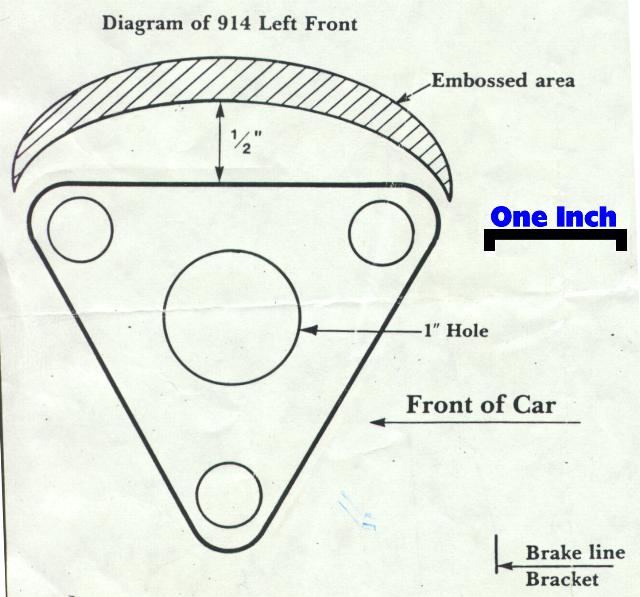
|
|
|
|
| Aaron Cox |
Nov 14 2004, 06:33 PM
Post
#44
|
|
Professional Lawn Dart Group: Retired Admin Posts: 24,541 Joined: 1-February 03 From: OC Member No.: 219 Region Association: Southern California |
thats the one i used....
worked well. i have a 23 mm bar, had to move it down a few mm to clear the gas tank |
|
|
|
| qa1142 |
Nov 14 2004, 06:43 PM
Post
#45
|
|
Whiplash Group: Members Posts: 1,514 Joined: 1-June 04 From: Lake Zurich, Illinois Member No.: 2,140 |
Template looks a little too simple "1/2" from stamping lip.
Is there no better way to locate this? (IMG:style_emoticons/default/blink.gif) Sorry when I industrial pump mechanic we worked in 1/10,000's |
|
|
|
| qa1142 |
Nov 14 2004, 06:53 PM
Post
#46
|
|
Whiplash Group: Members Posts: 1,514 Joined: 1-June 04 From: Lake Zurich, Illinois Member No.: 2,140 |
just measure down 1/2"
Gotta be a better way Attached image(s) 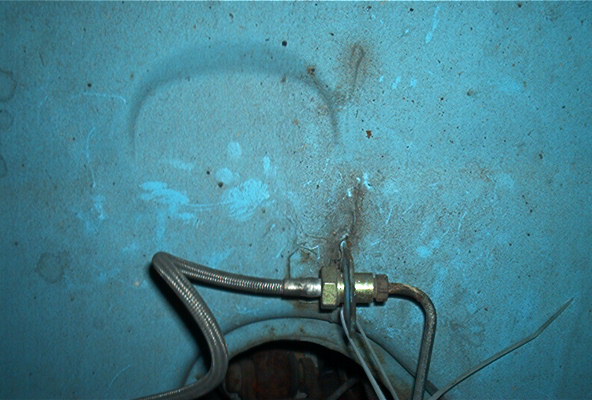
|
|
|
|
| seanery |
Nov 14 2004, 07:31 PM
Post
#47
|
|
waiting to rebuild whitey! Group: Retired Admin Posts: 15,852 Joined: 7-January 03 From: Indy Member No.: 100 Region Association: None |
I drilled pass side twice.
|
|
|
|
| type47fan |
Nov 14 2004, 07:36 PM
Post
#48
|
|
It Looks Better In Person. . . Group: Members Posts: 860 Joined: 17-September 03 From: Carlsbad, CA Member No.: 1,170 Region Association: Southern California |
Anybody got a project with the swaybar removed that might be able to get Will a more exact measurement and possible picture/template?
Wayne (type47fan) |
|
|
|
| seanery |
Nov 14 2004, 07:46 PM
Post
#49
|
|
waiting to rebuild whitey! Group: Retired Admin Posts: 15,852 Joined: 7-January 03 From: Indy Member No.: 100 Region Association: None |
the important thing (I think) is to make sure they are the same on both sides. Make yourself a little template and it's easy...I mean something that fits in the recess...I know I'm not clear, just keep both sides the same. If you don't adjustable droplinks should clear up the problem if it's not too bad. right?
|
|
|
|
| IronHillRestorations |
Nov 14 2004, 08:12 PM
Post
#50
|
|
I. I. R. C. Group: Members Posts: 6,719 Joined: 18-March 03 From: West TN Member No.: 439 Region Association: None |
If you are going to do anything to the master cylinder, I'd suggest that you hit the brake line fittings with a wire brush and some PB Rustblaster or Liquid wrench. Give it a few days and hit it again.
What sort of tool are you using to remove the surface rust, a hard wheel? It looks too coarse to me, and it also looks like you've overheated the metal (the blue parts) when you ground it, which can cause problems in the future. Get a 3M Roloc holder and some 3M Bristle discs, they won't burn the metal and do a great job. Overall, you seem to have a fine chassis, that most salt belt 914'ers would love to have. I used to live in Elgin, IL and actually drove a 914 in the winter, back in '78 that is. Great handling car for snowy/icy roads, but I cringe when I think about all that salt (IMG:style_emoticons/default/barf.gif) |
 |
|
| xsboost90 |
Nov 14 2004, 08:34 PM
Post
#51
|
|
Senior Member Group: Members Posts: 1,393 Joined: 2-August 04 From: cincinnati Member No.: 2,432 |
looks similar to what im doing to my car, but mine is the rear floor against the firewall....
Attached image(s) 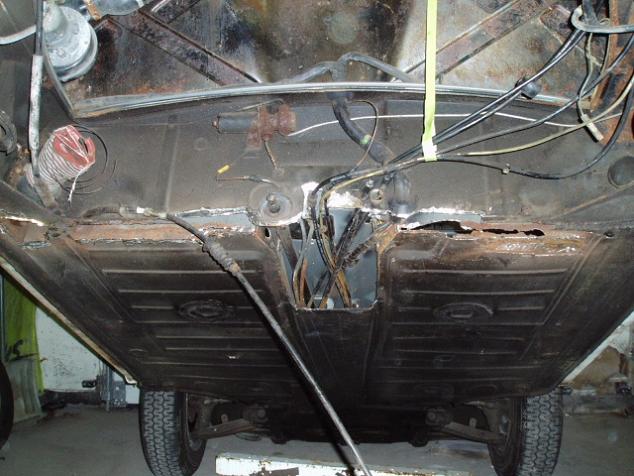
|
|
|
|
| qa1142 |
Nov 16 2004, 09:44 PM
Post
#52
|
|
Whiplash Group: Members Posts: 1,514 Joined: 1-June 04 From: Lake Zurich, Illinois Member No.: 2,140 |
(IMG:style_emoticons/default/sawzall-smiley.gif) (IMG:style_emoticons/default/smash.gif) Started restoration on the front arms (with sway bar tabs (IMG:style_emoticons/default/smilie_pokal.gif) ) that I got off Evel-Bay for $10 (Shipping was $28 (IMG:style_emoticons/default/laugh.gif) )
The heat and twist trick took the bushings off in like 15 seconds each (picked up tanks for may accetiline torch last week) (IMG:style_emoticons/default/welder.gif) I could not break loose the ball joint nuts (didn't want to F the arms up so I didn't try real hard yet) (IMG:style_emoticons/default/smash.gif) No pictures yet. More to come |
|
|
|
| qa1142 |
Nov 22 2004, 02:24 PM
Post
#53
|
|
Whiplash Group: Members Posts: 1,514 Joined: 1-June 04 From: Lake Zurich, Illinois Member No.: 2,140 |
Ok, I split the ball joint nuts and just cleaned up the arms.
Pulled Boge inserts out of front struts, cleaned them and torqued in the Bilstiens Quick coat of paint on A arms and I'll install ball joints. then drill for grease fittings. |
|
|
|
| Root_Werks |
Nov 22 2004, 03:04 PM
Post
#54
|
|
Village Idiot Group: Members Posts: 8,319 Joined: 25-May 04 From: About 5NM from Canada Member No.: 2,105 Region Association: Pacific Northwest |
(IMG:style_emoticons/default/smilie_pokal.gif) Looking great Will, keep the pics coming! (IMG:style_emoticons/default/boldblue.gif)
|
|
|
|
| qa1142 |
Nov 23 2004, 11:27 AM
Post
#55
|
|
Whiplash Group: Members Posts: 1,514 Joined: 1-June 04 From: Lake Zurich, Illinois Member No.: 2,140 |
Attached image(s) 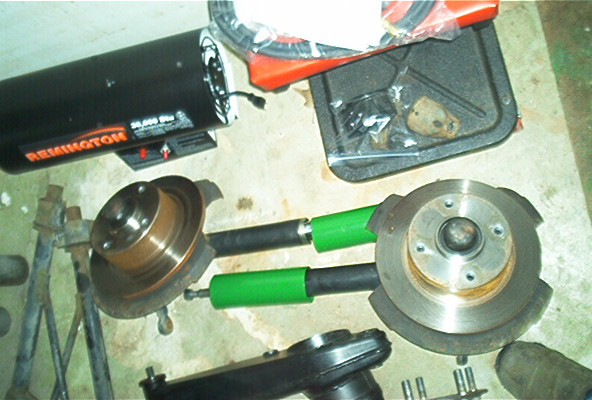
|
|
|
|
| qa1142 |
Nov 23 2004, 11:29 AM
Post
#56
|
|
Whiplash Group: Members Posts: 1,514 Joined: 1-June 04 From: Lake Zurich, Illinois Member No.: 2,140 |
Front bushings
|
|
|
|
| qa1142 |
Nov 23 2004, 11:34 AM
Post
#57
|
|
Whiplash Group: Members Posts: 1,514 Joined: 1-June 04 From: Lake Zurich, Illinois Member No.: 2,140 |
Attached image(s) 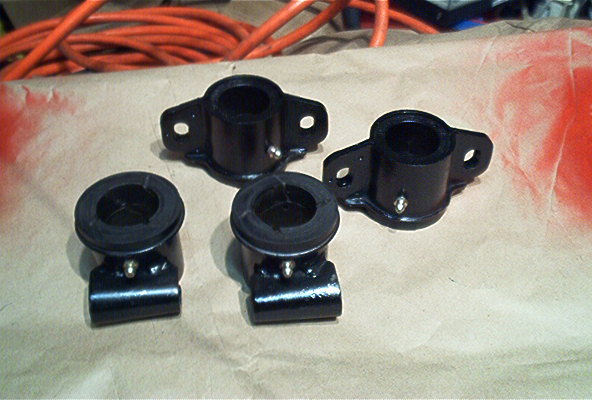
|
|
|
|
| qa1142 |
Nov 23 2004, 11:37 AM
Post
#58
|
|
Whiplash Group: Members Posts: 1,514 Joined: 1-June 04 From: Lake Zurich, Illinois Member No.: 2,140 |
Attached image(s) 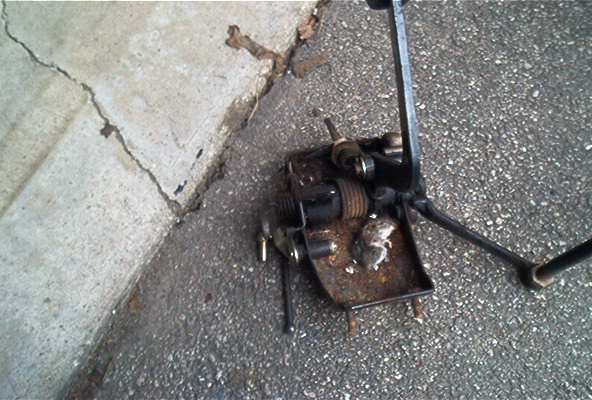
|
|
|
|
| qa1142 |
Nov 23 2004, 11:41 AM
Post
#59
|
|
Whiplash Group: Members Posts: 1,514 Joined: 1-June 04 From: Lake Zurich, Illinois Member No.: 2,140 |
This is just surface rust, but, where does the moisture come from???
Attached image(s) 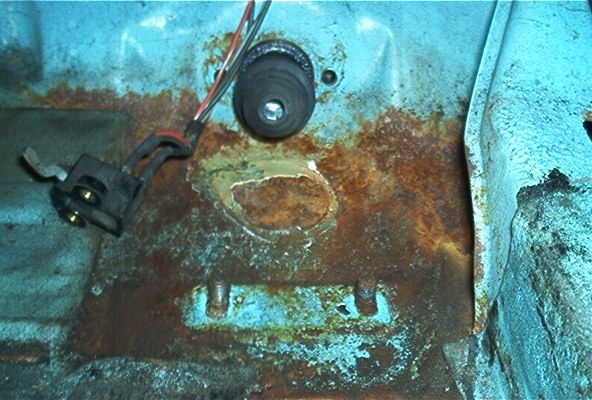
|
|
|
|
| qa1142 |
Nov 23 2004, 11:44 AM
Post
#60
|
|
Whiplash Group: Members Posts: 1,514 Joined: 1-June 04 From: Lake Zurich, Illinois Member No.: 2,140 |
rebuilt cluster
(IMG:style_emoticons/default/wub.gif) Attached image(s) 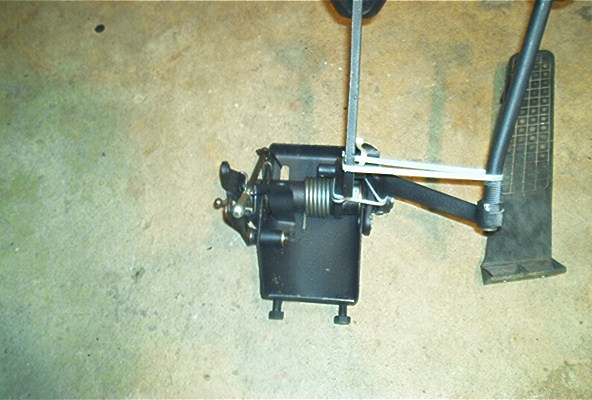
|
|
|
|
|
1 User(s) are reading this topic (1 Guests and 0 Anonymous Users)
0 Members:

|
Lo-Fi Version | Time is now: 16th May 2024 - 11:40 AM |
Invision Power Board
v9.1.4 © 2024 IPS, Inc.