|
|
|
Porsche, and the Porsche crest are registered trademarks of Dr. Ing. h.c. F. Porsche AG.
This site is not affiliated with Porsche in any way. Its only purpose is to provide an online forum for car enthusiasts. All other trademarks are property of their respective owners. |
|
|

  |

| 76-914 |
 Sep 3 2015, 08:59 AM Sep 3 2015, 08:59 AM
Post
#621
|
|
Repeat Offender & Resident Subaru Antagonist  Group: Members Posts: 13,836 Joined: 23-January 09 From: Temecula, CA Member No.: 9,964 Region Association: Southern California |
QUOTE(mgp4591 @ Sep 2 2015, 11:20 PM)  I looked at the link you provided and at the bottom it looked like they advertised it as a Vintage Air unit- same controls, same price at $345. That's the one or is it a different manufacturer? Looks pretty slick! If you keep the heater valve closed, you shouldn't have any hot water running through your system so unless I'm figuring wrong, you should be able to tap into your hot side radiator plumbing without unnecessary hot water heating up your cabin. You'd eliminate a lot of extra tubing and work if you could, but then you knew that... just trying to help because I'm looking at a similar setup and your work is an inspiration- nice to be able to pick anothers' brain via the Interweb! It is a Vintage Air unit. They will sell direct at the same list price but you pay shipping. Most of their retail reps sell at list but pay shipping. Maybe I'm confused here but you don't mention a return line either. It does flow THRU it and not TO it, correct? And FWIW, my supply and return lines run in the longs. I would need to T into each line behind the speaker pods then run the drivers side (return in my case) line behind/under the dash. Who knows how it will end up in the end. I guess this is all conjecture until I have a working system in play. |
   |

 
|
| crawler |
Sep 3 2015, 09:30 AM
Post
#622
|
|
Newbie Group: Members Posts: 20 Joined: 25-July 08 From: mesa, Arizona Member No.: 9,356 Region Association: None |
Did you ever think about using hard lines? You would need a tig welder, but it would be a cleaner looking job. You would lose that ugly big rubber hose,and have nice steel lines.
Lots of A.C. shops can weld the ends on,if you do not own a tig welder. |
|
|
|
| 76-914 |
Sep 3 2015, 02:45 PM
Post
#623
|
|
Repeat Offender & Resident Subaru Antagonist Group: Members Posts: 13,836 Joined: 23-January 09 From: Temecula, CA Member No.: 9,964 Region Association: Southern California |
QUOTE(crawler @ Sep 3 2015, 08:30 AM) Did you ever think about using hard lines? You would need a tig welder, but it would be a cleaner looking job. You would lose that ugly big rubber hose,and have nice steel lines. Lots of A.C. shops can weld the ends on,if you do not own a tig welder. Another good point and yes, I did. I can't TIG and didn't trust a Silver Solder joint to hold up long term. And, I'm too lazy to make x trips to a AC shop. In the end I decided that running the rubber lines was the prudent action as the $$ saved allowed me to purchase a bead lock tool. Not to mention the elimination of 4 extra connection points if metal lines were used. I do agree that it would have looked sharp w/ metal lines running down the side but ultimately that area is covered by the valance. (IMG:style_emoticons/default/beerchug.gif) |
|
|
|
| mepstein |
Sep 3 2015, 03:16 PM
Post
#624
|
|
914-6 GT in waiting Group: Members Posts: 20,325 Joined: 19-September 09 From: Landenberg, PA/Wilmington, DE Member No.: 10,825 Region Association: MidAtlantic Region |
I'll buy you a beer if you keep a list of the different fittings and hose sizes, ect. It would be nice to have a paper "kit" saved so just an order or two would have everything ready to start assembly. My shop has the tools but your example would save many hours and dollars. thanks
|
 |
|
| 76-914 |
Sep 3 2015, 09:12 PM
Post
#625
|
|
Repeat Offender & Resident Subaru Antagonist Group: Members Posts: 13,836 Joined: 23-January 09 From: Temecula, CA Member No.: 9,964 Region Association: Southern California |
QUOTE(mepstein @ Sep 3 2015, 02:16 PM) I'll buy you a beer if you keep a list of the different fittings and hose sizes, ect. It would be nice to have a paper "kit" saved so just an order or two would have everything ready to start assembly. My shop has the tools but your example would save many hours and dollars. thanks Sure. I received the remainder of the fittings tonite. 1st, I need to correct a screw up. I installed the condenser upside down. A 5 min flip was no problem except I need to make another #6 short hose, so additional fittings were ordered. Also busted my old heater box removing it but salvaged 2 important parts that will allow the tie-in of the dash vents and defrost vents to new A/C & Heat. (IMG:style_emoticons/default/biggrin.gif) |
|
|
|
| mgp4591 |
Sep 3 2015, 09:30 PM
Post
#626
|
|
914 Guru Group: Members Posts: 5,851 Joined: 1-August 12 From: Salt Lake City Ut Member No.: 14,748 Region Association: Intermountain Region |
QUOTE(76-914 @ Sep 3 2015, 08:59 AM) QUOTE(mgp4591 @ Sep 2 2015, 11:20 PM) I looked at the link you provided and at the bottom it looked like they advertised it as a Vintage Air unit- same controls, same price at $345. That's the one or is it a different manufacturer? Looks pretty slick! If you keep the heater valve closed, you shouldn't have any hot water running through your system so unless I'm figuring wrong, you should be able to tap into your hot side radiator plumbing without unnecessary hot water heating up your cabin. You'd eliminate a lot of extra tubing and work if you could, but then you knew that... just trying to help because I'm looking at a similar setup and your work is an inspiration- nice to be able to pick anothers' brain via the Interweb! It is a Vintage Air unit. They will sell direct at the same list price but you pay shipping. Most of their retail reps sell at list but pay shipping. Maybe I'm confused here but you don't mention a return line either. It does flow THRU it and not TO it, correct? And FWIW, my supply and return lines run in the longs. I would need to T into each line behind the speaker pods then run the drivers side (return in my case) line behind/under the dash. Who knows how it will end up in the end. I guess this is all conjecture until I have a working system in play. True, it does flow through it when the heater valve is open. So 1 tee on the hot side for incoming and another tee to the cool side for out of the core. At least it would keep it all up front rather than heating up your center console which I've heard from others can be, well, overheating in the cabin. Just putting ideas out there- loving your progress so far! |
|
|
|
| Andyrew |
Sep 3 2015, 10:25 PM
Post
#627
|
|
Spooling.... Please wait Group: Members Posts: 13,380 Joined: 20-January 03 From: Riverbank, Ca Member No.: 172 Region Association: Northern California |
Where do you get your supplies from?
|
|
|
|
| 76-914 |
Sep 4 2015, 08:47 AM
Post
#628
|
|
Repeat Offender & Resident Subaru Antagonist Group: Members Posts: 13,836 Joined: 23-January 09 From: Temecula, CA Member No.: 9,964 Region Association: Southern California |
QUOTE(Andyrew @ Sep 3 2015, 09:25 PM) Where do you get your supplies from? The evap unit was purchased from Summit. Vintage Air has a list of retailers on their website. I chose Summit because I already had an account with them and all of their retailers are the same price anyway. 95% of the Bead Lock fittings and all of the hose came from EBay seller Johnsjoysl. I may have that misspelled but I'll check later. The guys name is John Kusak. A great seller. Although EBay shows a separate shipping charge for each item, John will credit your CC account with the overcharge shipping that occurs on ebay. The Adel clamps were purchased on ebay as well. |
|
|
|
| Andyrew |
Sep 4 2015, 09:02 AM
Post
#629
|
|
Spooling.... Please wait Group: Members Posts: 13,380 Joined: 20-January 03 From: Riverbank, Ca Member No.: 172 Region Association: Northern California |
Can not find his account. Can you link to a product?
|
|
|
|
| 76-914 |
Sep 4 2015, 09:26 AM
Post
#630
|
|
Repeat Offender & Resident Subaru Antagonist Group: Members Posts: 13,836 Joined: 23-January 09 From: Temecula, CA Member No.: 9,964 Region Association: Southern California |
http://www.ebay.com/itm/311324606669?_trks...K%3AMEBIDX%3AIT
This is "one" of his items but it has the link to his store. (IMG:style_emoticons/default/beerchug.gif) |
|
|
|
| Andyrew |
Sep 4 2015, 10:37 AM
Post
#631
|
|
Spooling.... Please wait Group: Members Posts: 13,380 Joined: 20-January 03 From: Riverbank, Ca Member No.: 172 Region Association: Northern California |
Prices look pretty good! I have been looking at coldhose.com and your guys pricing is nicely cheaper!
|
|
|
|
| 76-914 |
Sep 5 2015, 08:50 PM
Post
#632
|
|
Repeat Offender & Resident Subaru Antagonist Group: Members Posts: 13,836 Joined: 23-January 09 From: Temecula, CA Member No.: 9,964 Region Association: Southern California |
Well, today was a full day. With the heater box out that dark recessed area was now an eye sore. I wiped down an area to the left
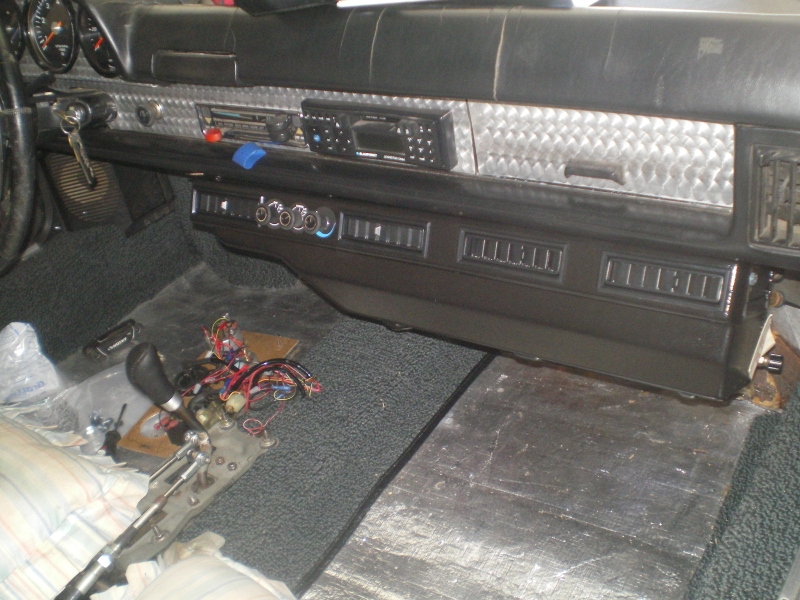
  Then it got good to me so I scrubbed and waxed the old paint 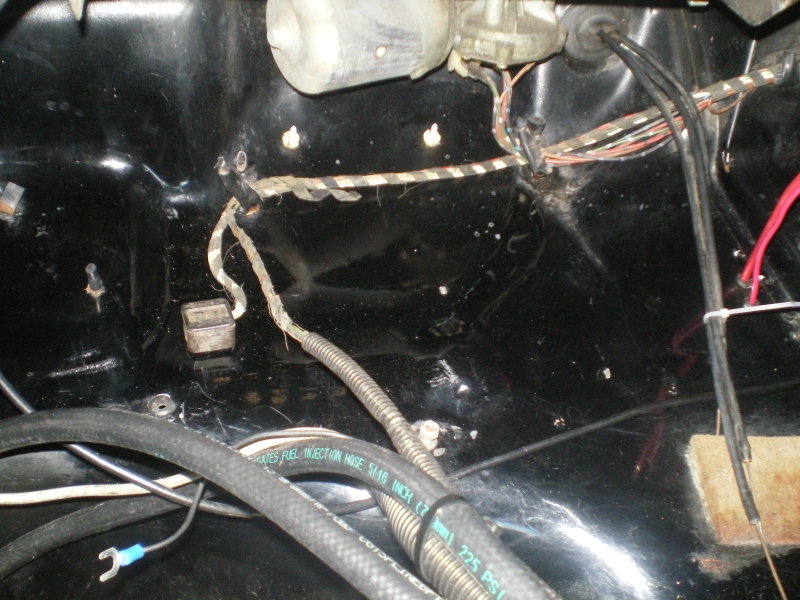 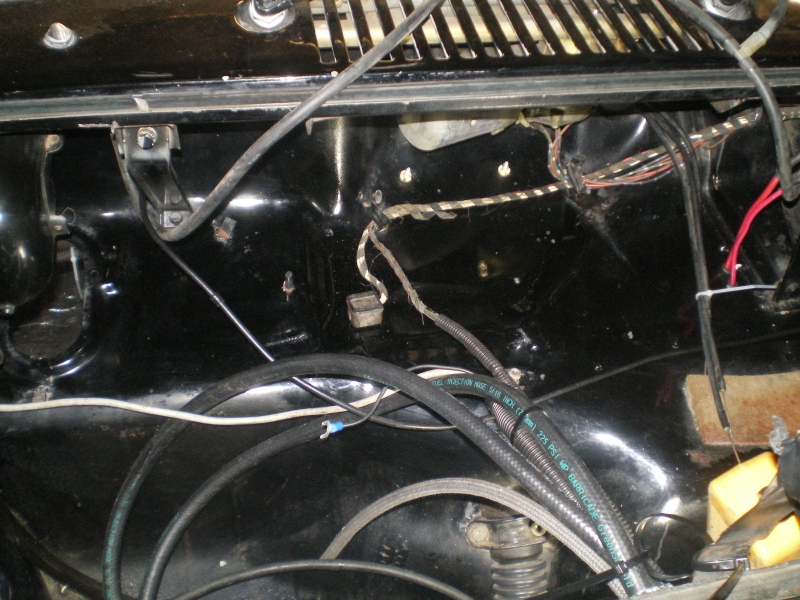 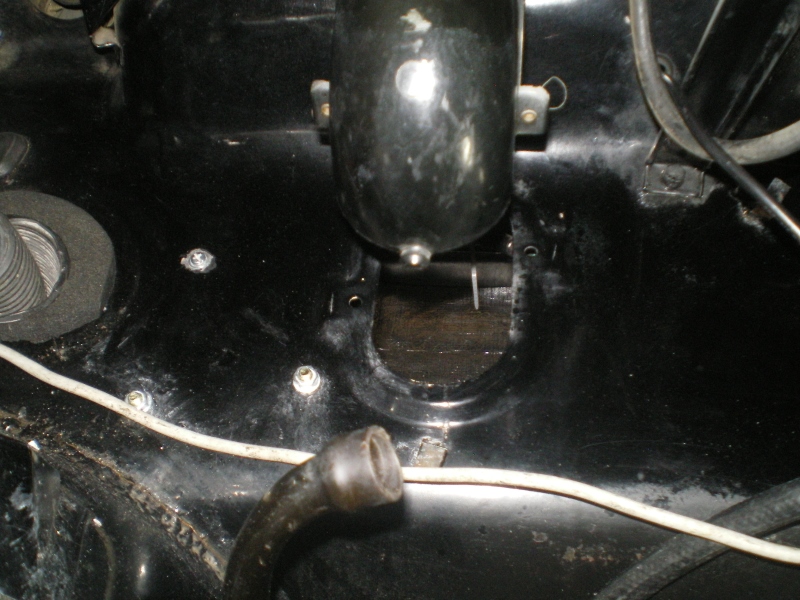 With that out of the way I moved on to finish the piping portion. As it turned out I was short one 90 and 2' of #10 hose. (IMG:style_emoticons/default/headbang.gif) I'll just post some pic's as they speak for themselves. 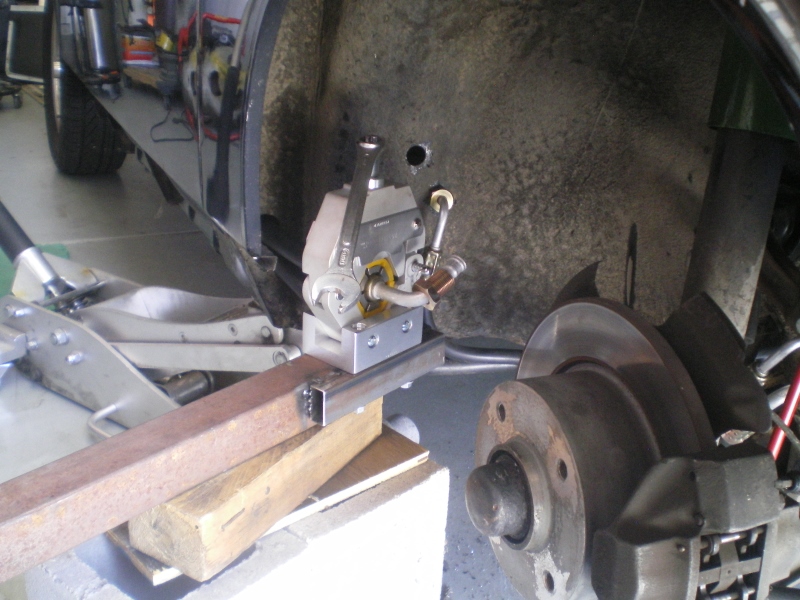 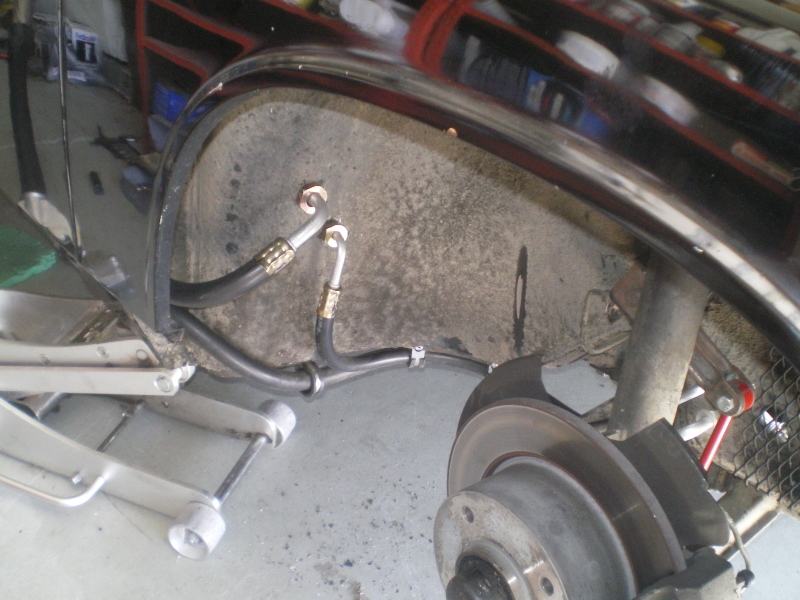 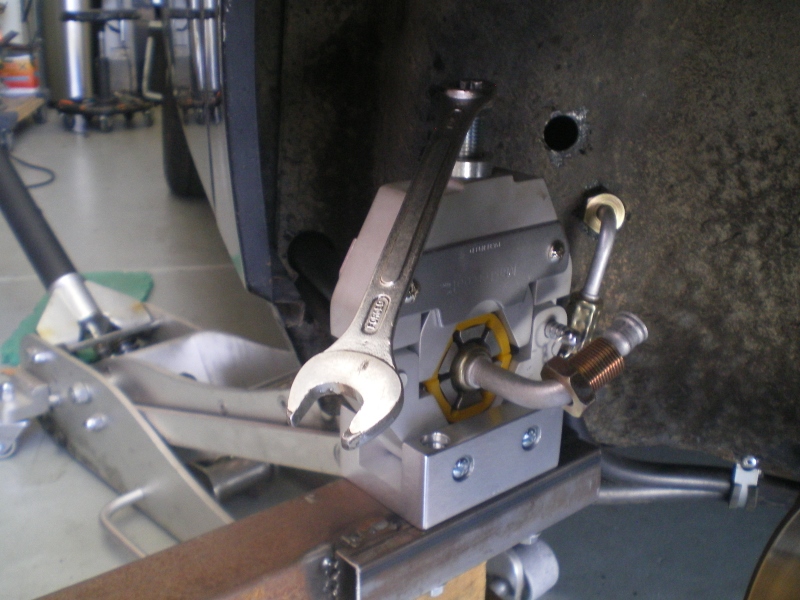 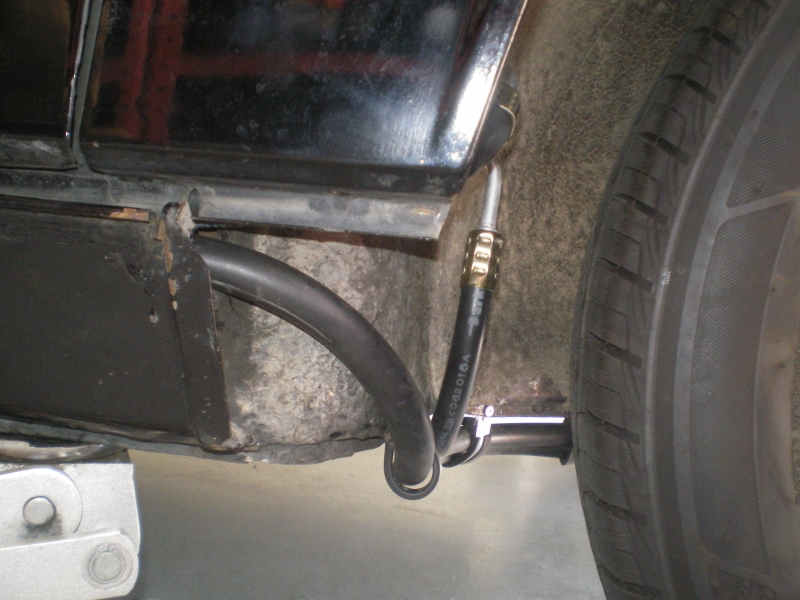 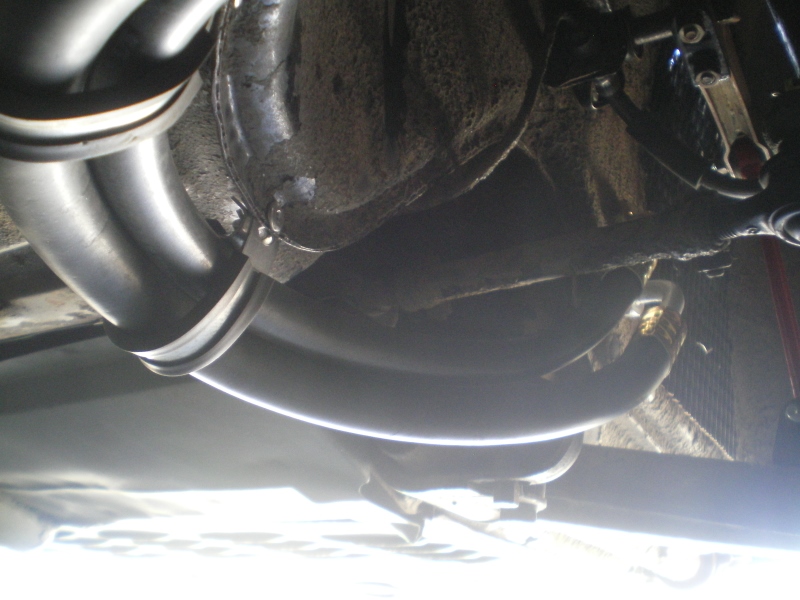 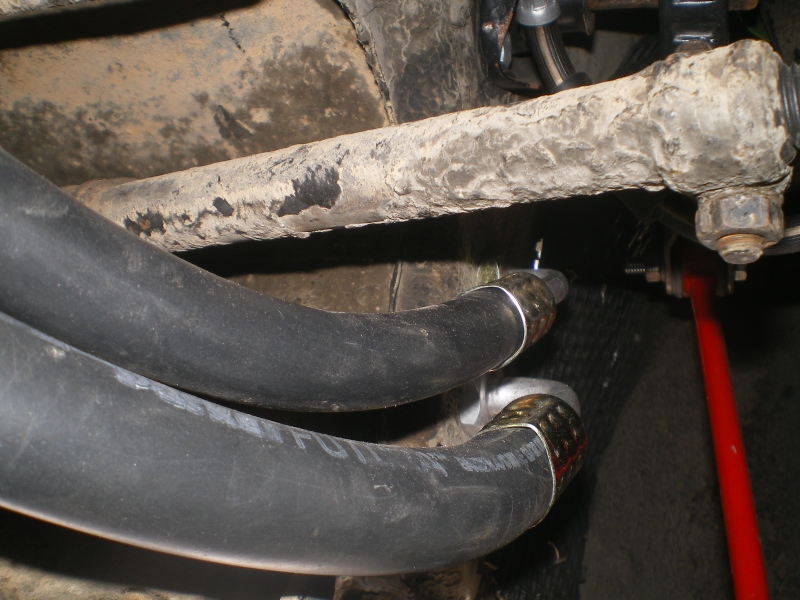 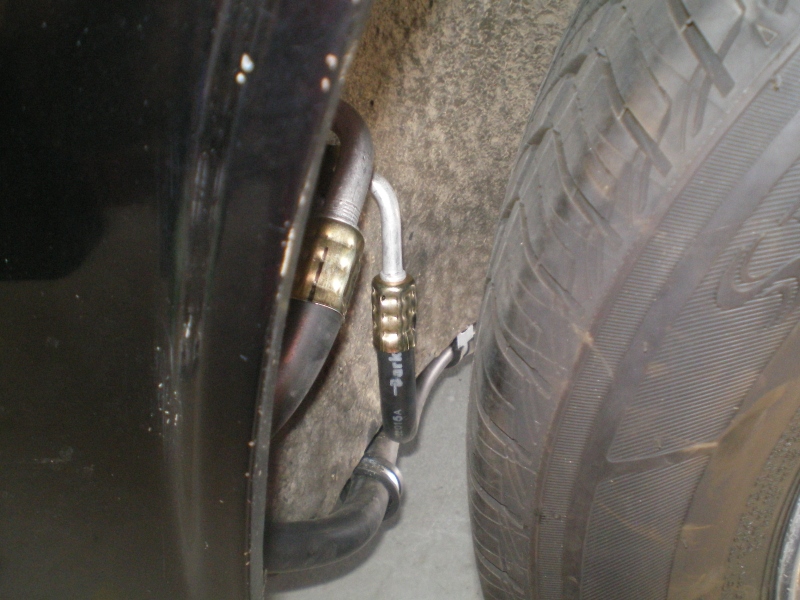 Before these last 2 hoses could be located and punched out the evap unit needed to be located and hung in place and only then can you locate those final firewall or bulkhead fittings. Since it was shipped in a urethane clam shell w/ a flat side (IMG:style_emoticons/default/biggrin.gif) I used the bottom piece as a support then just shimmed beneath that until I was close enough to begin positioning it. 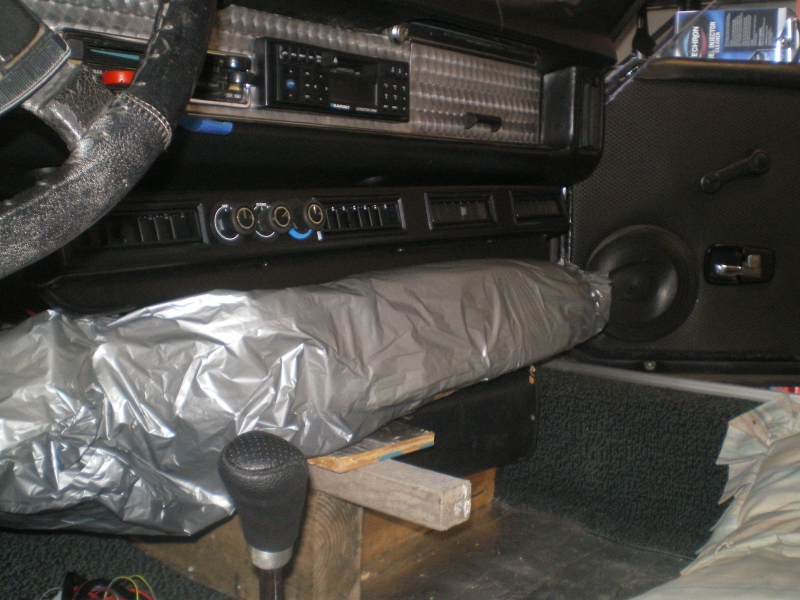 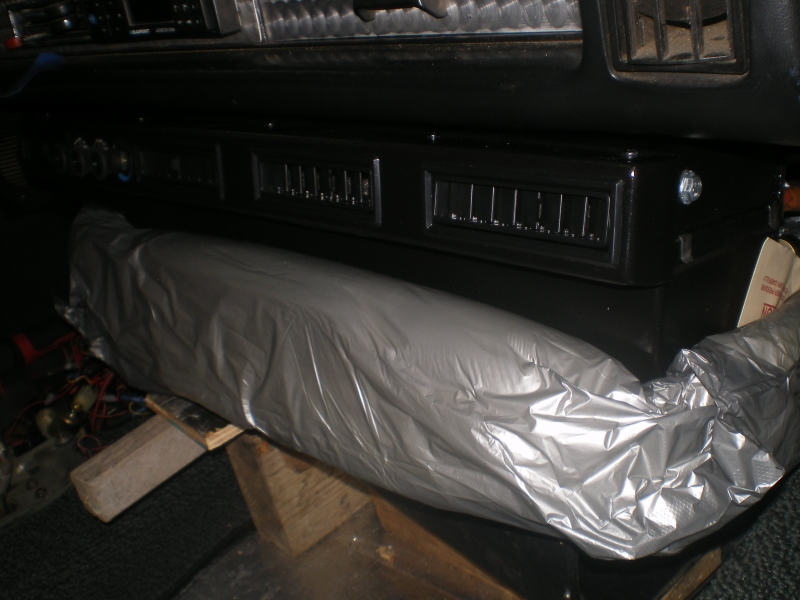 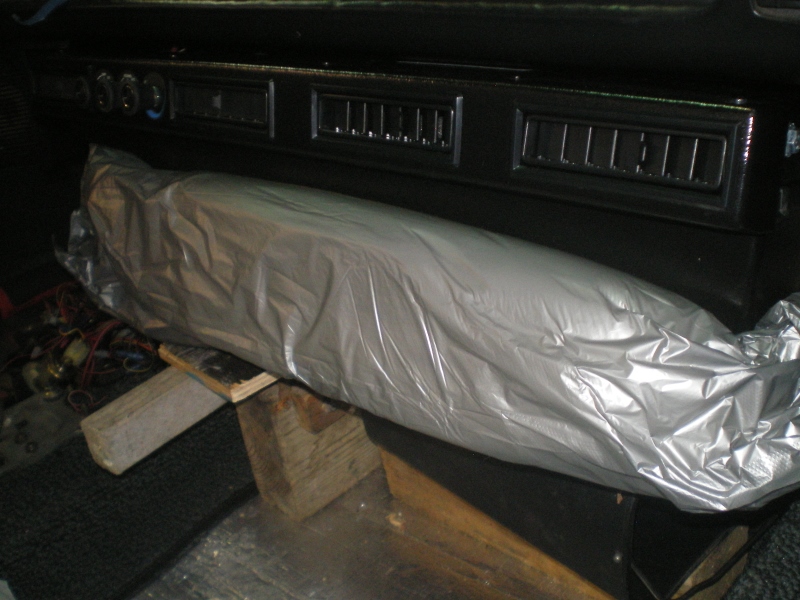 |
|
|
|
| 76-914 |
Sep 5 2015, 09:31 PM
Post
#633
|
|
Repeat Offender & Resident Subaru Antagonist Group: Members Posts: 13,836 Joined: 23-January 09 From: Temecula, CA Member No.: 9,964 Region Association: Southern California |
And here it is in place. What'da think?
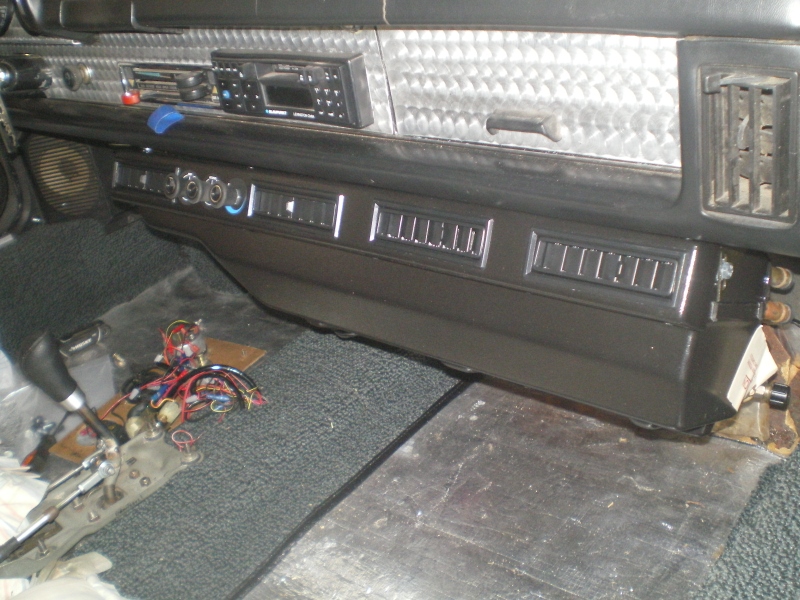  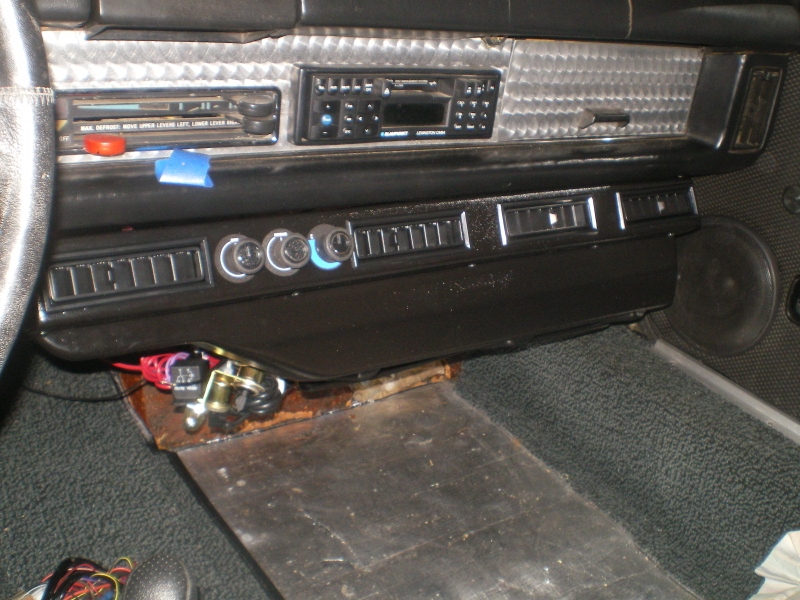 I almost shit in my shoes when I first began searching for a way to attach the evaporator. I was sure it was Fab time and I didn't want to cut my Cherry lower dash so I pulled out an old cracked one to fiddle with when I saw it. NO (IMG:style_emoticons/default/sheeplove.gif) cutting or drilling that would ruin a good dash piece. Two of the screws that hold that piece in place lined up with the units support brackets. I just needed to R&R the OEM screws w/ ones 35mm in length and place some steel stand offs beneath the bracket so it could not be tightened against the vinyl. (IMG:style_emoticons/default/piratenanner.gif) (IMG:style_emoticons/default/piratenanner.gif) (IMG:style_emoticons/default/piratenanner.gif) This is the hole on the far right psg side 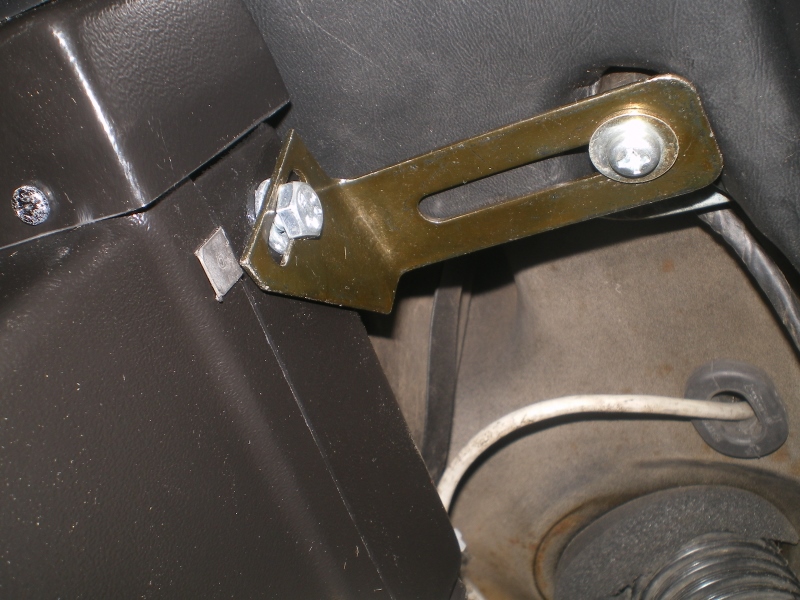 And this one is 2 holes down to the drivers side. The 2 brackets supplied are not symmetrical and I'm quite sure I have them inverted from their intended orientation but who gives a (IMG:style_emoticons/default/stromberg.gif) The bracket on the drivers side needed to have a hole drilled 1" off center from the supplied hole but other than that it fits and I'm 6 hr's ahead of the game. 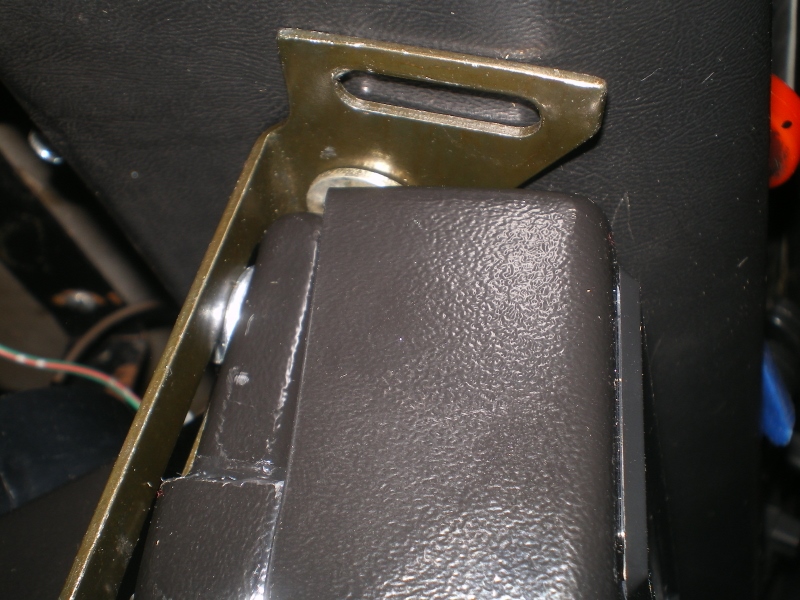 Some piping from the rear 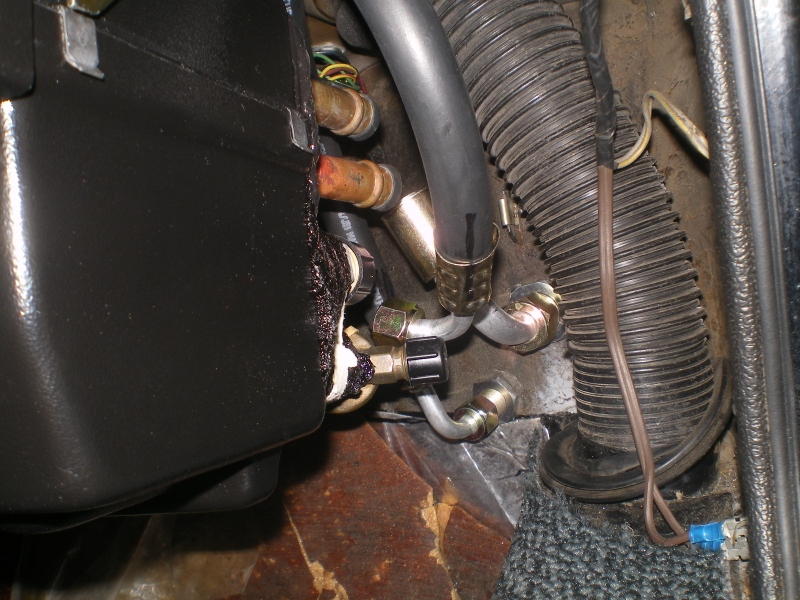 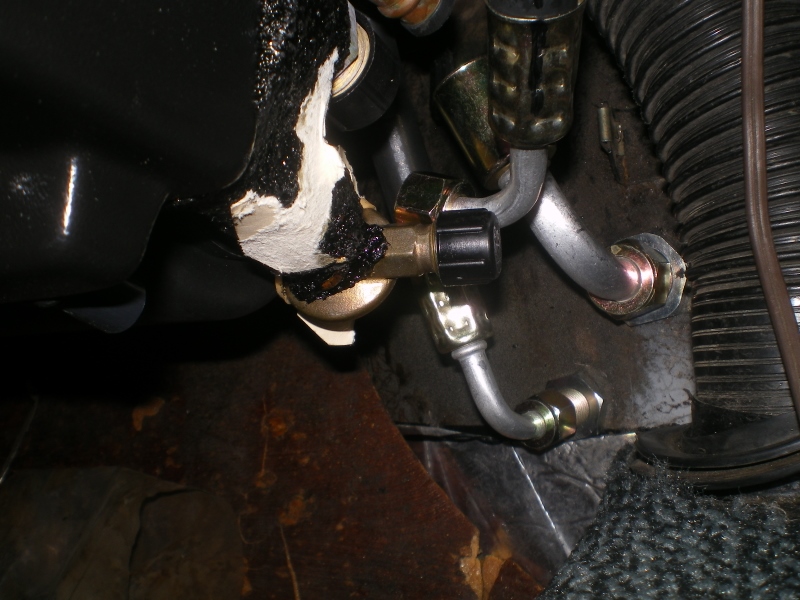 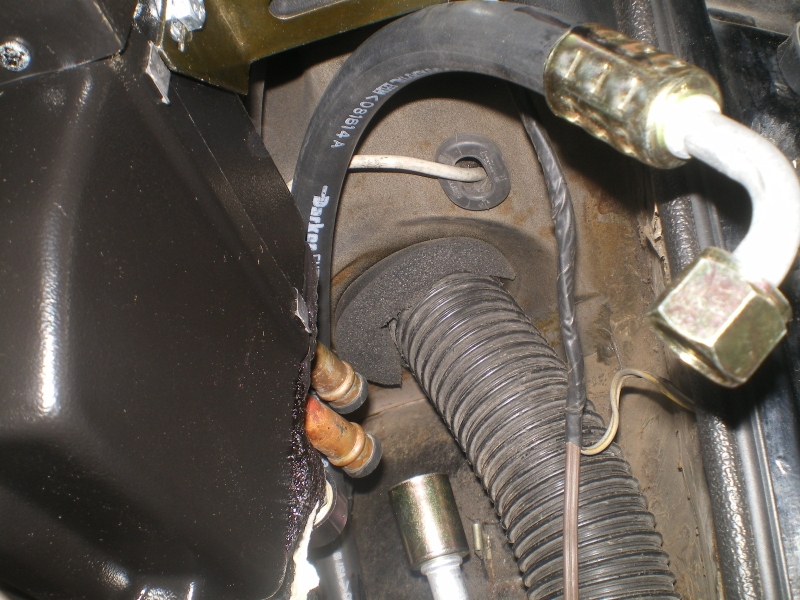 I always wondered why my control cable wouldn't slide all the way over (IMG:style_emoticons/default/shades.gif) No wonder these pieces didn't want to separate. From inside the Drivers side.  and the psg side gate pressure bowed this one over time  The Electric Kool Aid Assed Test. My big ass fits comfortably. My wife has a ton of leg room but she is only 5'. The red post (between my feet)will be removed when I attach the rear supports. 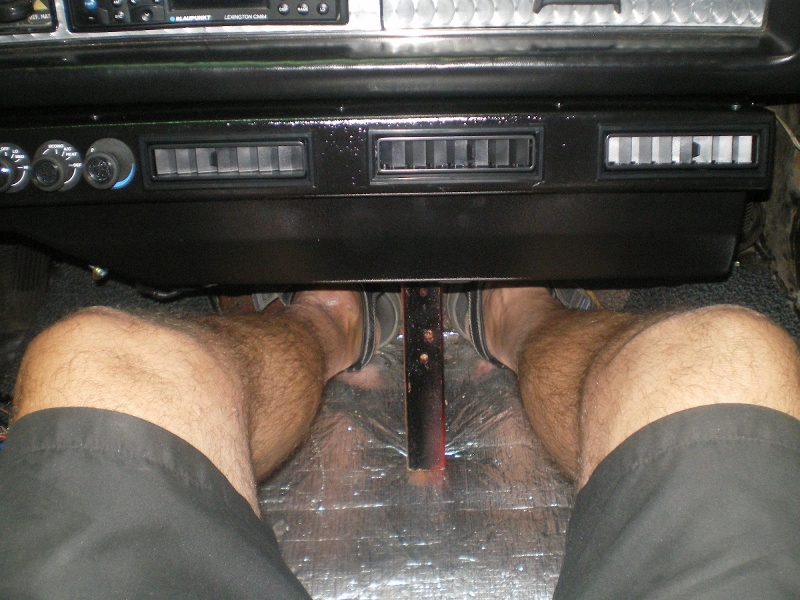 |
|
|
|
| 76-914 |
Sep 20 2015, 09:23 PM
Post
#634
|
|
Repeat Offender & Resident Subaru Antagonist Group: Members Posts: 13,836 Joined: 23-January 09 From: Temecula, CA Member No.: 9,964 Region Association: Southern California |
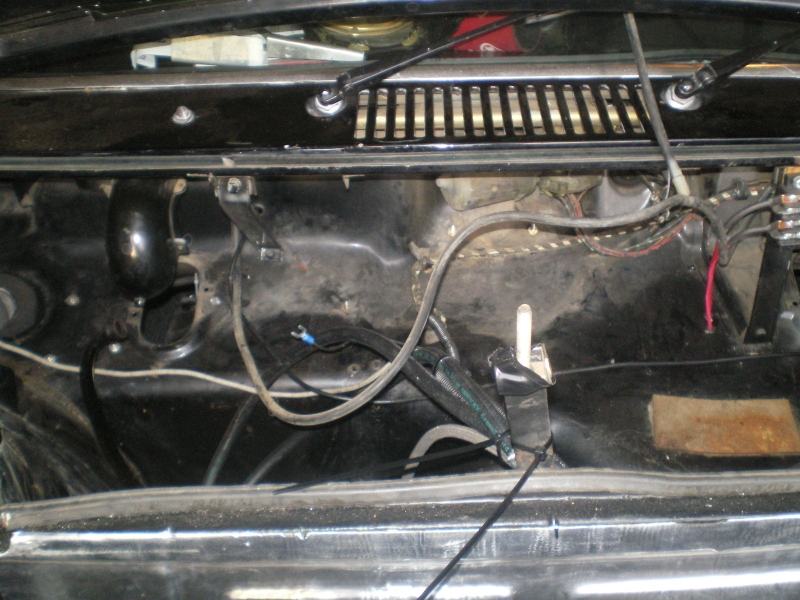
Wow, 2 weeks since I posted. I usually can't keep my mouth shut that long. I've been moving at a snails pace but it picked up this weekend after I received more materials. One of the things I went back on was to add support to the AC and water lines. Most of the sleeved areas aren't visible.
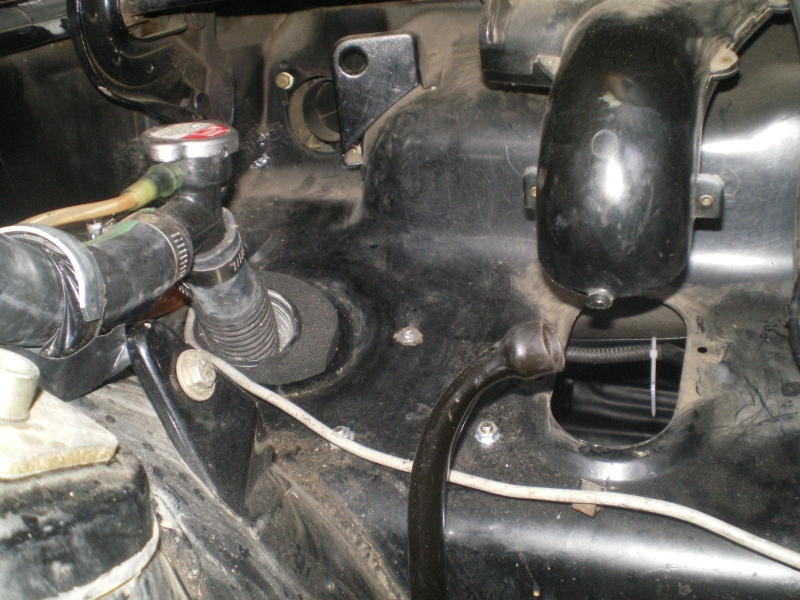
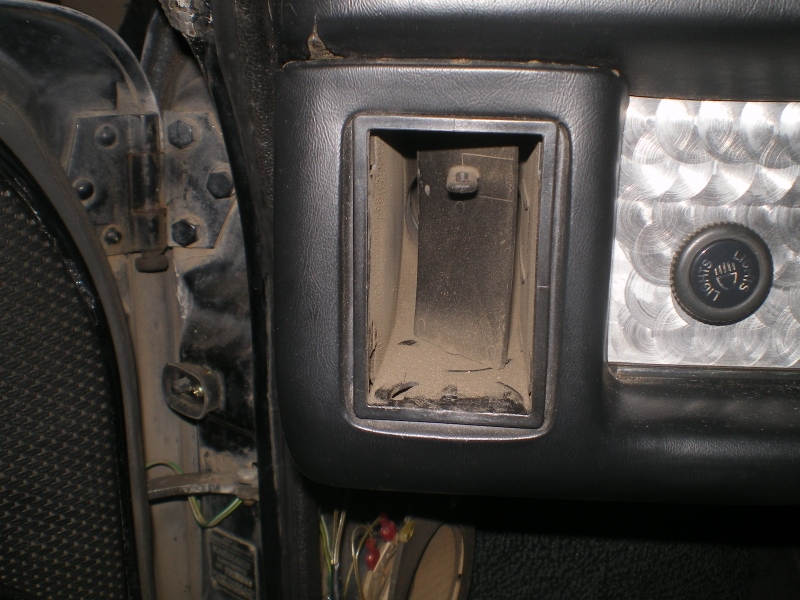
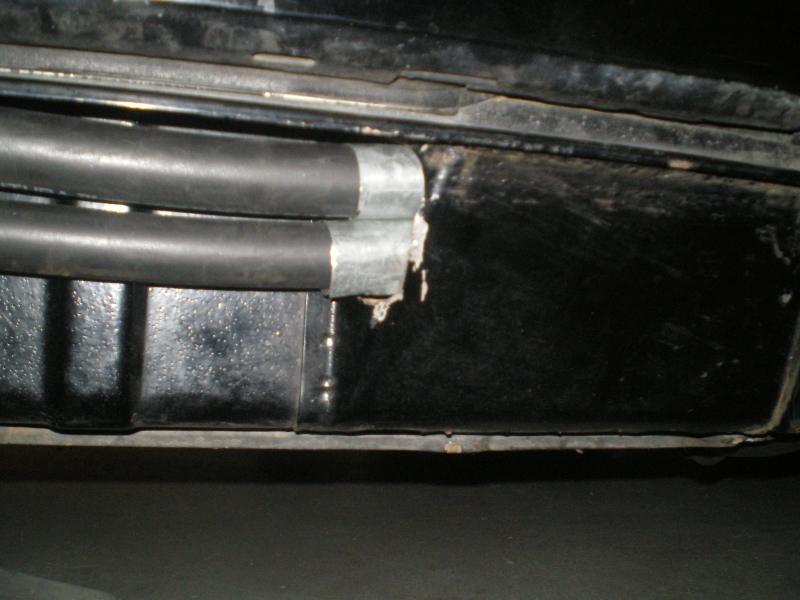 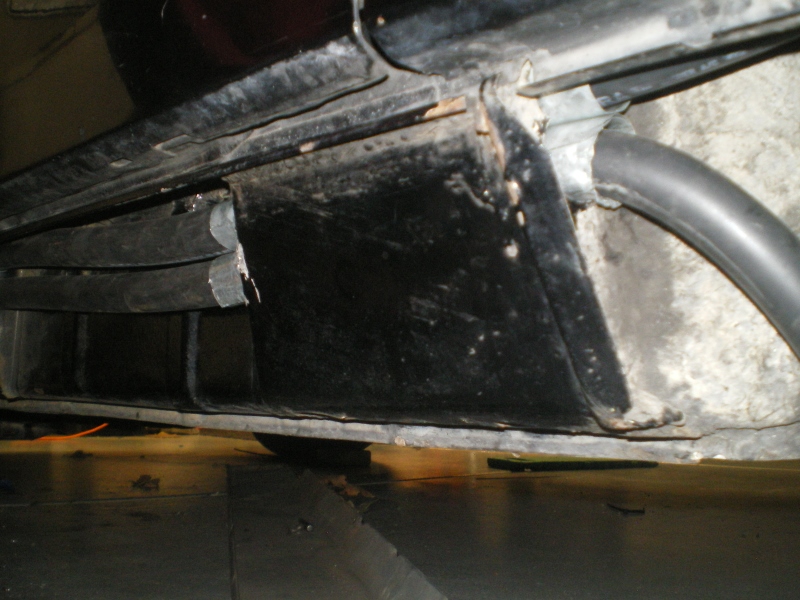 The heater section is pretty straight forward. The Subaru engine has a separate heater loop that I am using so I won't be tying into the in/out radiator lines. FYI, it allows for a faster warm up in the cabin and a few other engine items as well. I had the 5/8" water lines looped together previously but now that I need that circuit I'm using this GM vacuum actuated 4 port bypass valve. Only one moving part. (IMG:style_emoticons/default/evilgrin.gif) 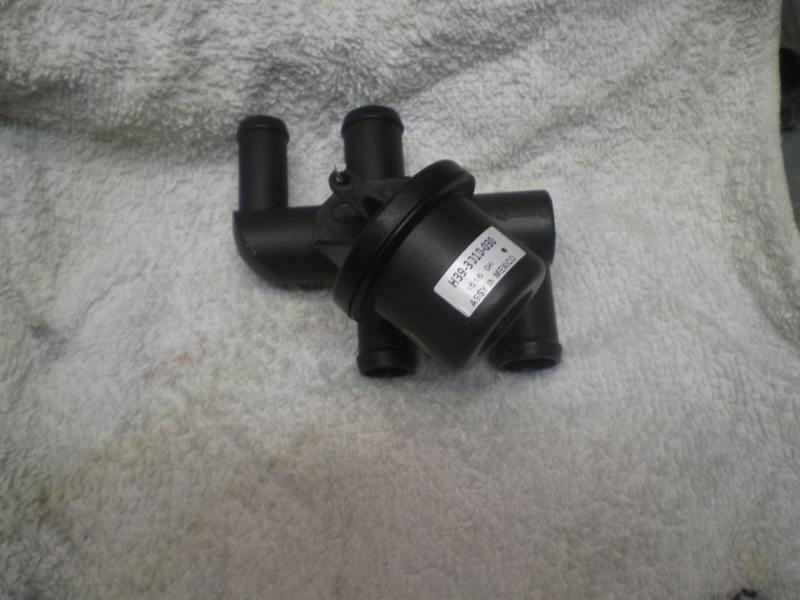 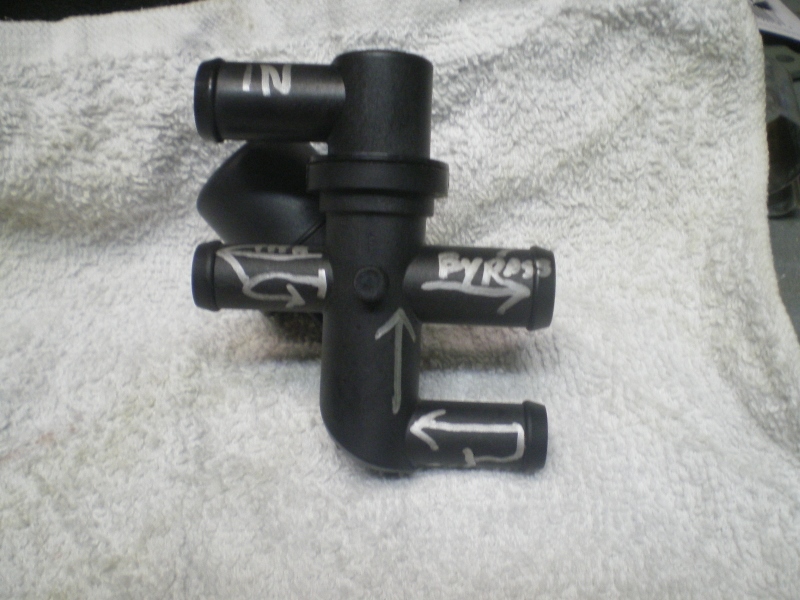 I added this Dorman Vacuum Reservoir that fits in the support arm's groove perfectly. 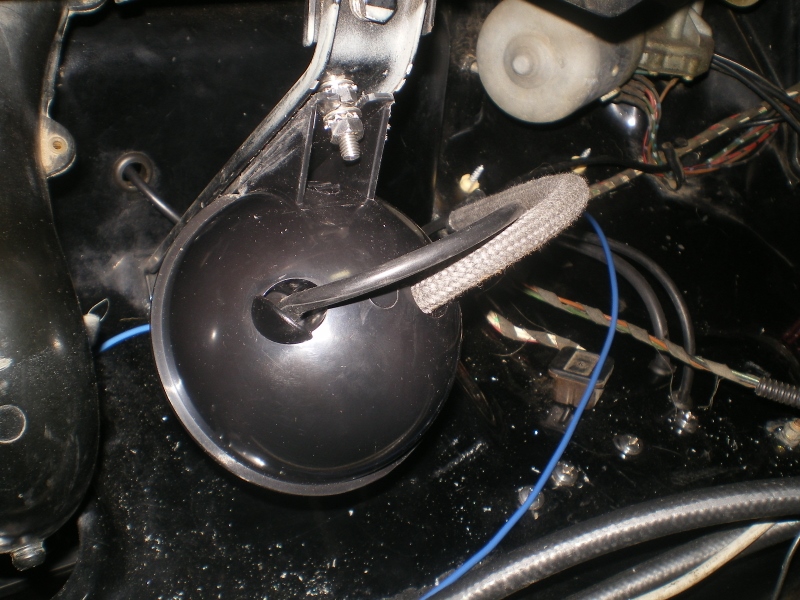 Then there was the matter of getting the water lines down the tunnel. And there is also a couple of vacuum lines threaded thru that jungle. I changed religion 3 different times during this course of the install but finally found the trick. Both lines run from heater to bypass valve w/o any splices. In this pic you see where the lines pop back out of the tunnel. When all is working and in it's final spot I will cut channels in the urethane foot rest so that surface remains flat and the carpet lays evenly.  I had to clearance the access cover at the front of the tunnel to allow passage of the hoses. 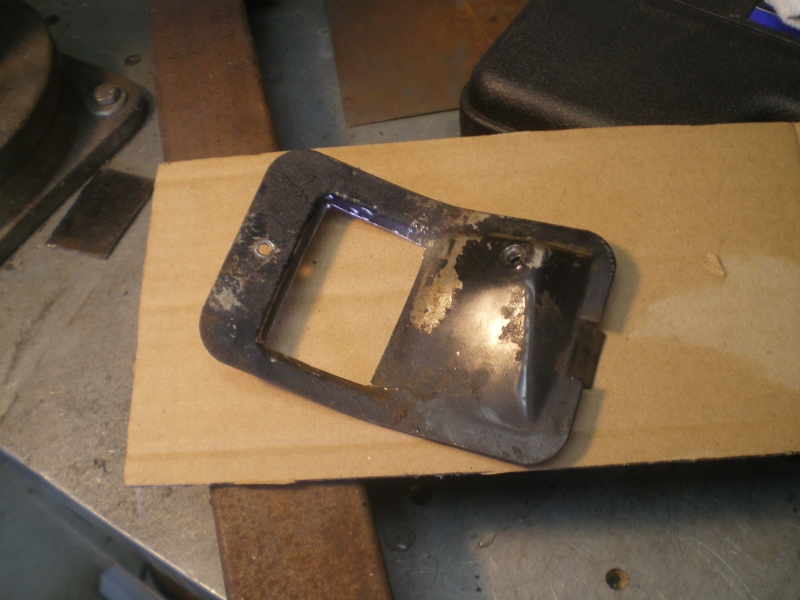 A peek at the lines as the pass beneath the rear access cover. 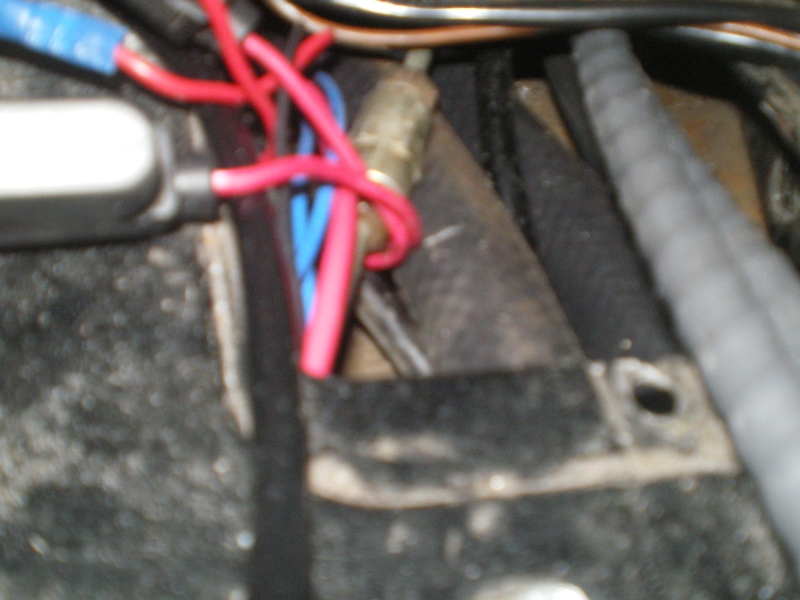 Exiting out the firewall. These still need metal sleeves where they pass thru. 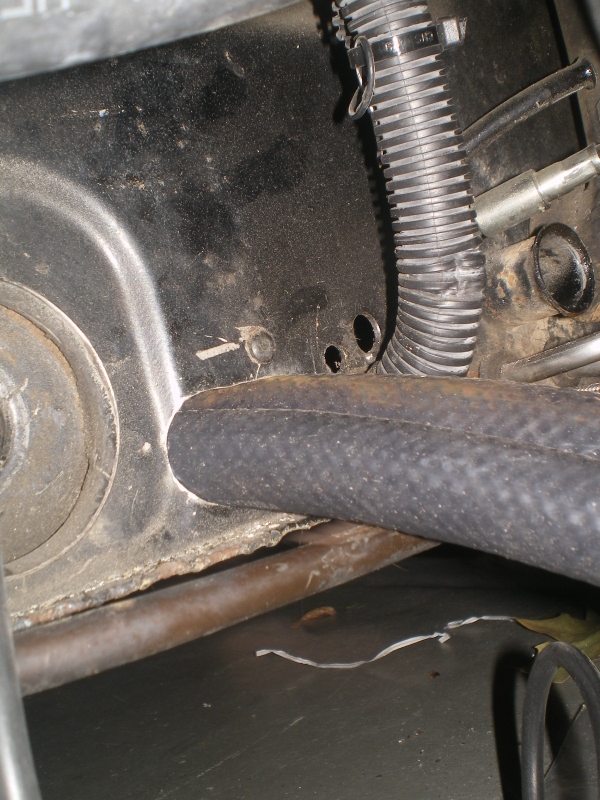 This is one of the best aspects of this under dash unit that I'm using. It has a separate defrost circuit that I'm going to use. But I needed to use a little Out House Engineering. A little aluminum crudely shaped with a 2" flange riveted in place. Then this piece is pop riveted to the OEM supply elbow which is cannibalized from the OEM air box. So, when I select AC or Heat it will blow from the vents of the under dash unit. And when I select defrost the air will divert to these little units and flow out the defrost vent and/or the OEM fresh air vent. The OEM vents can always be closed to boost the defrost or opened to defrost the door glass. (IMG:style_emoticons/default/rolleyes.gif) 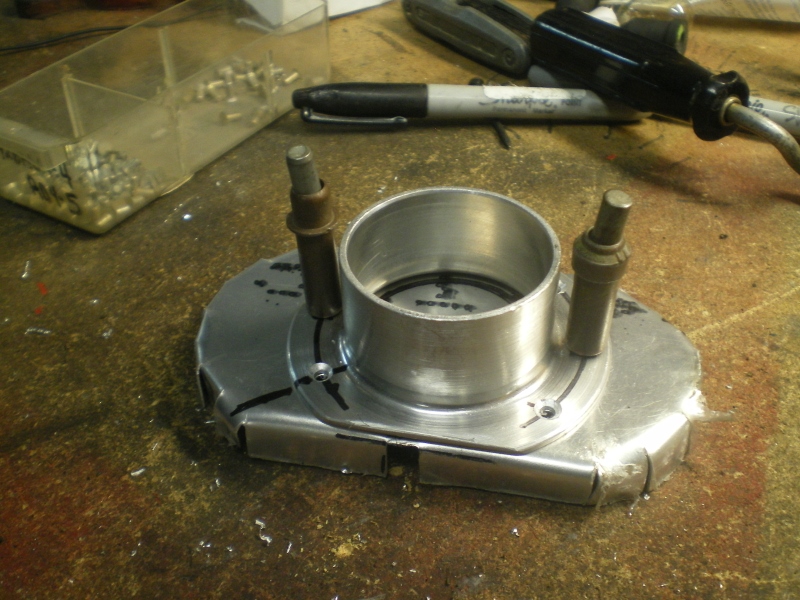 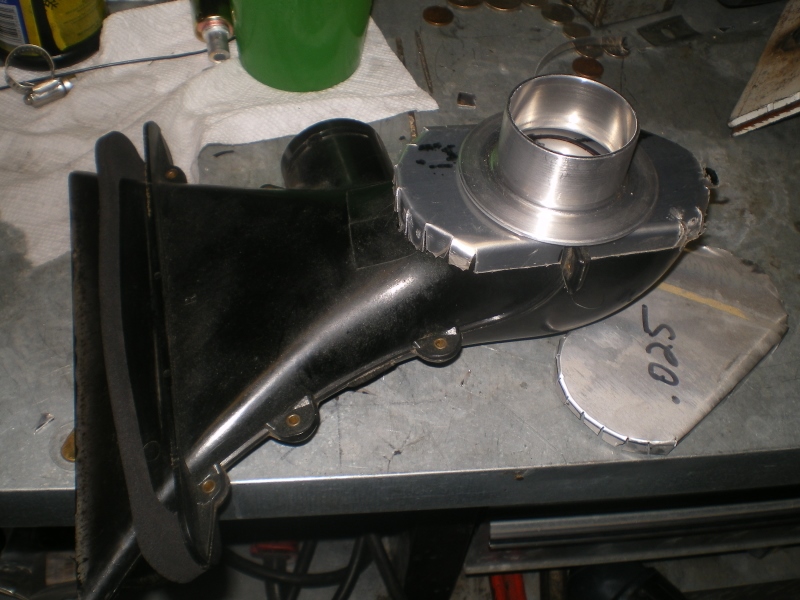 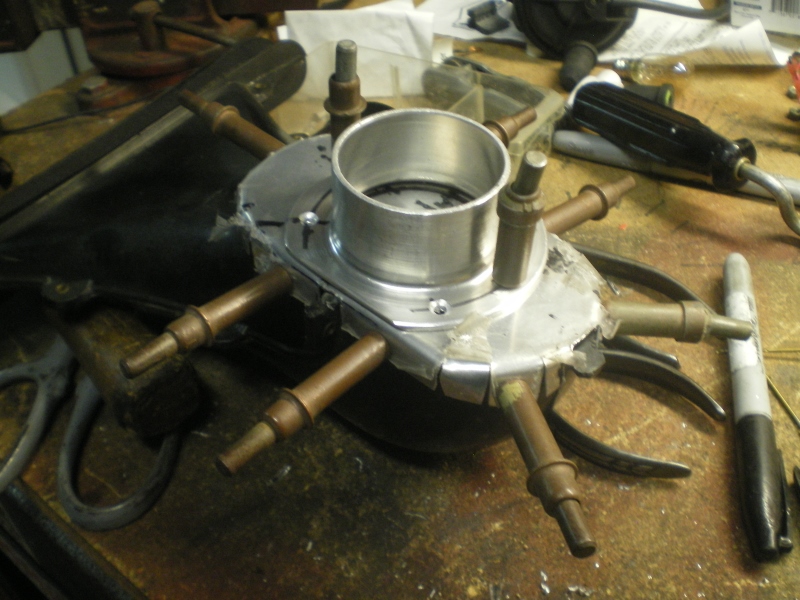  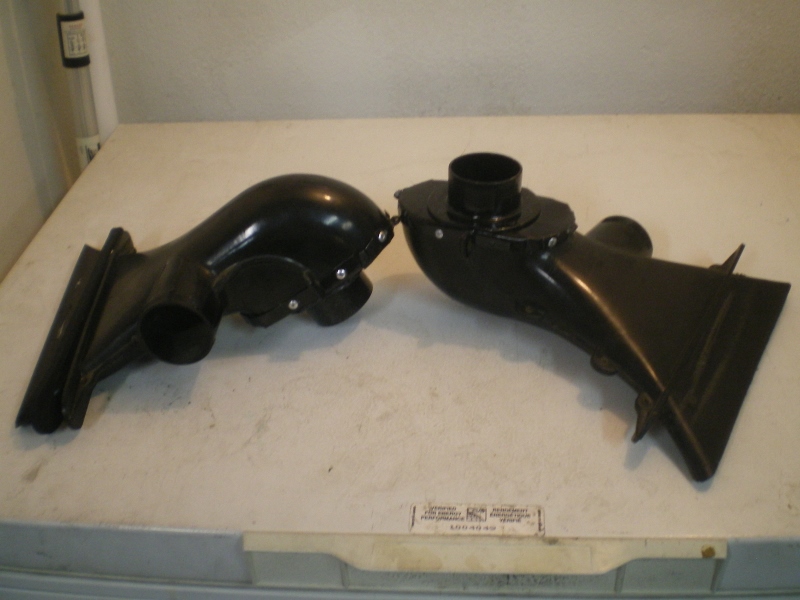 The heater lines connected. Wait till you see how the speaker cover even goes back into place, slightly trimmed. It's going to be tight! 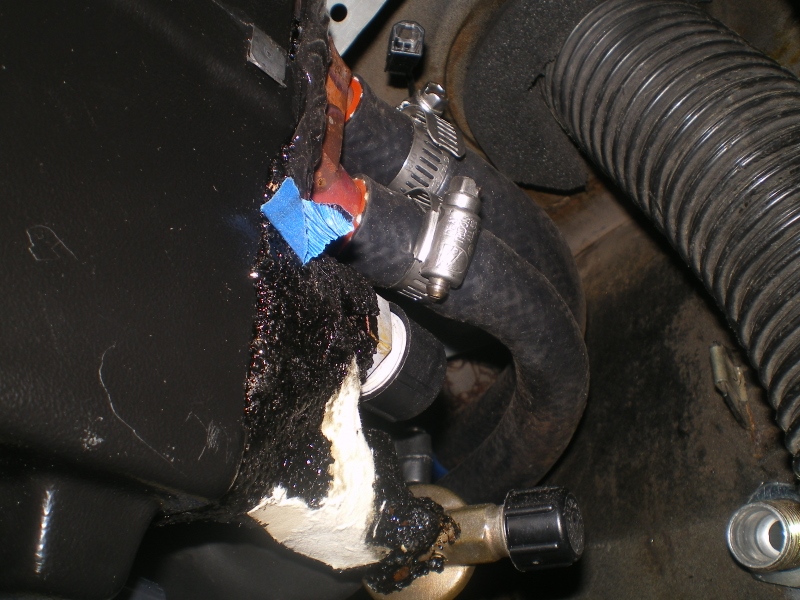 |
|
|
|
| 76-914 |
Sep 21 2015, 08:44 AM
Post
#635
|
|
Repeat Offender & Resident Subaru Antagonist Group: Members Posts: 13,836 Joined: 23-January 09 From: Temecula, CA Member No.: 9,964 Region Association: Southern California |
After I cleaned the elbows that the aluminum adapters connect with I decided to take a look at the other side. the inside. Before (IMG:style_emoticons/default/barf.gif)
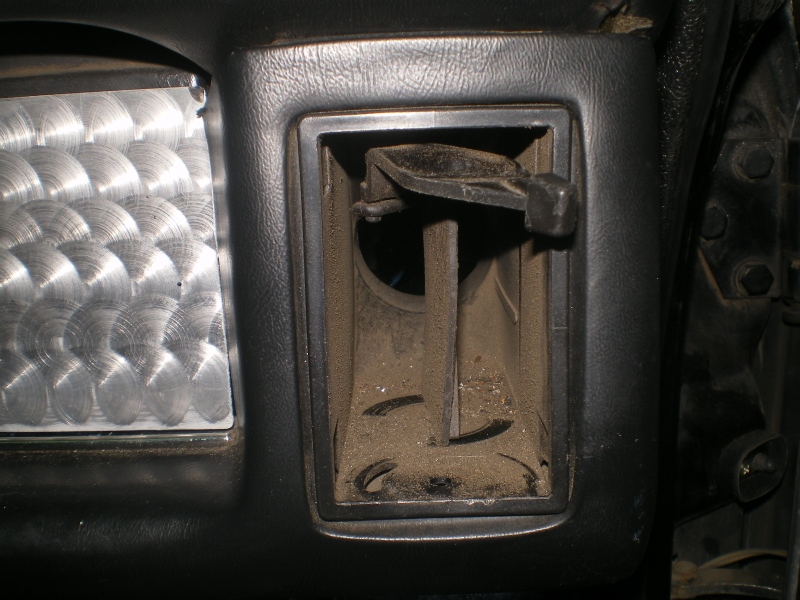 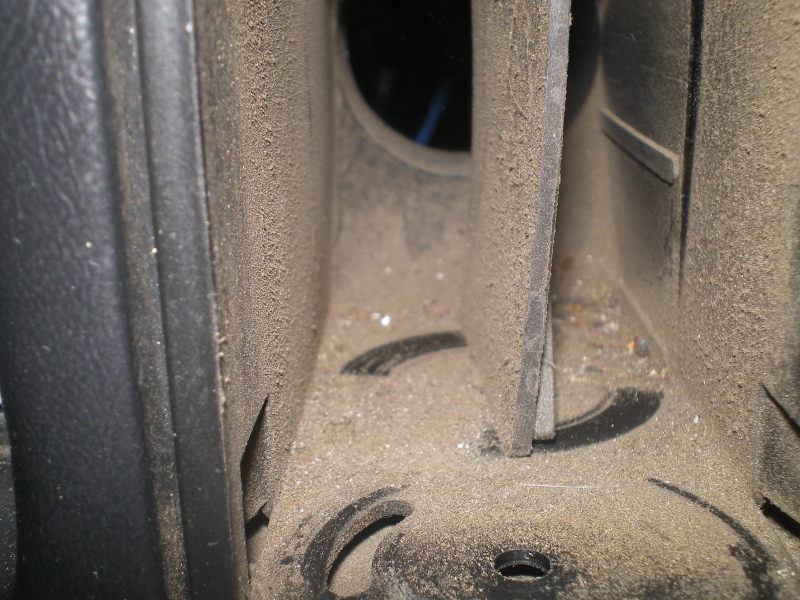  And after 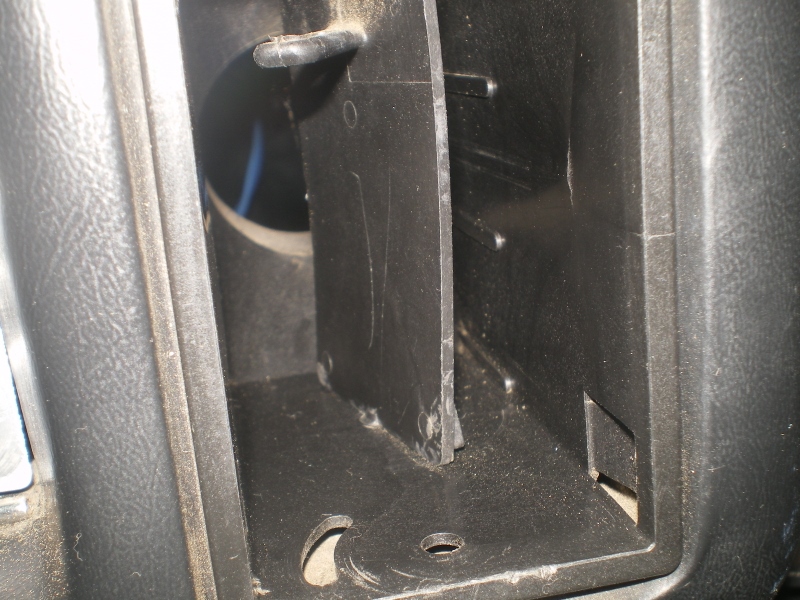 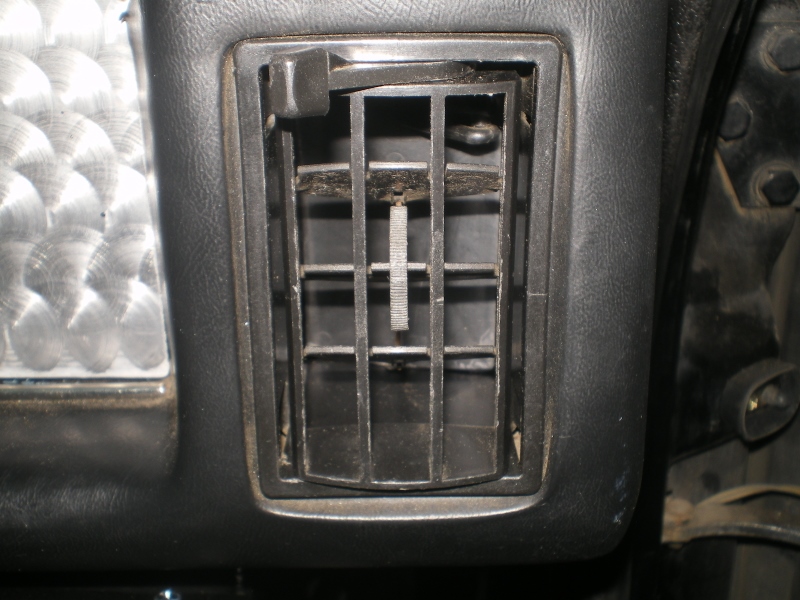 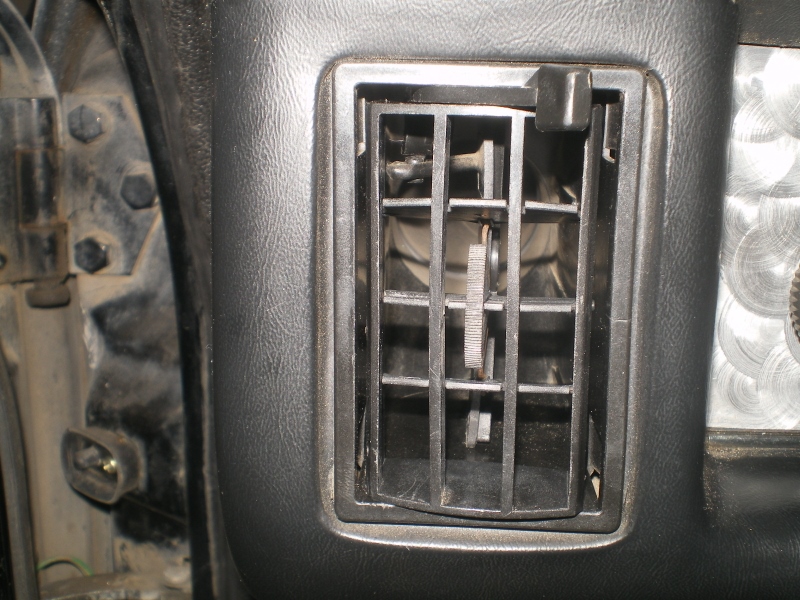 |
|
|
|
| Andyrew |
Sep 21 2015, 02:01 PM
Post
#636
|
|
Spooling.... Please wait Group: Members Posts: 13,380 Joined: 20-January 03 From: Riverbank, Ca Member No.: 172 Region Association: Northern California |
Great work!! Really impressed with some of the fab you did. Like your solution for the defrosters, I was considering cutting them back to the first hole and just using that hole for my setup. I was thinking of using ABS plastic for the cap and plastic welding it then finishing it up with silicone and paint like you did.
|
|
|
|
| 914forme |
Sep 22 2015, 05:28 PM
Post
#637
|
|
Times a wastin', get wrenchin'! Group: Members Posts: 3,896 Joined: 24-July 04 From: Dayton, Ohio Member No.: 2,388 Region Association: None |
Kent not sure you answered this but I think Andrew asked also.
Where did you get your condenser at? Attached thumbnail(s) 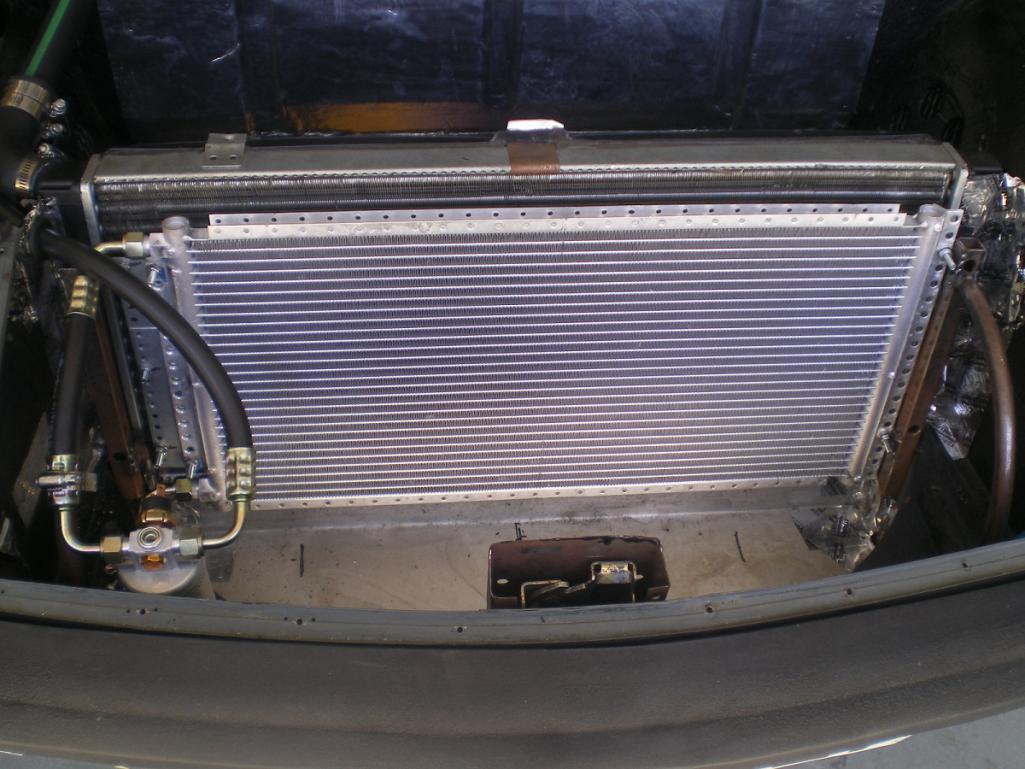
|
|
|
|
| 76-914 |
Sep 22 2015, 06:26 PM
Post
#638
|
|
Repeat Offender & Resident Subaru Antagonist Group: Members Posts: 13,836 Joined: 23-January 09 From: Temecula, CA Member No.: 9,964 Region Association: Southern California |
Thx Andy but not AC grade work. Then again I don't have to find a landing spot to fix screw ups. (IMG:style_emoticons/default/av-943.gif) Your skills are showing thru as well. And to all the other guys going this route, I'll have some AC/Heat items to sell cheaply after I'm finished!
Stephan, here is that link http://www.ebay.com/itm/351173823661?_trks...K%3AMEBIDX%3AIT I thought I posted this last nite but it ain't here today sooooooooooo otra vez. I made this rail cap ( .025 2024 T-3) 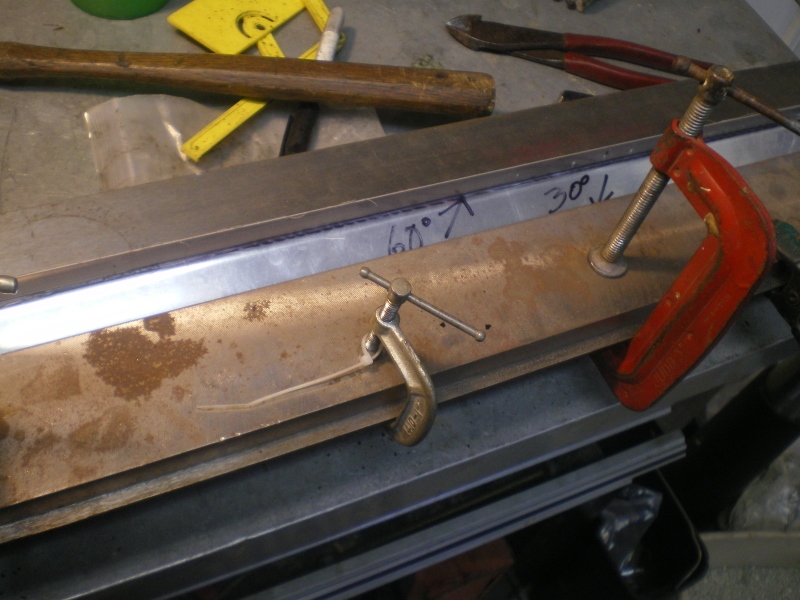 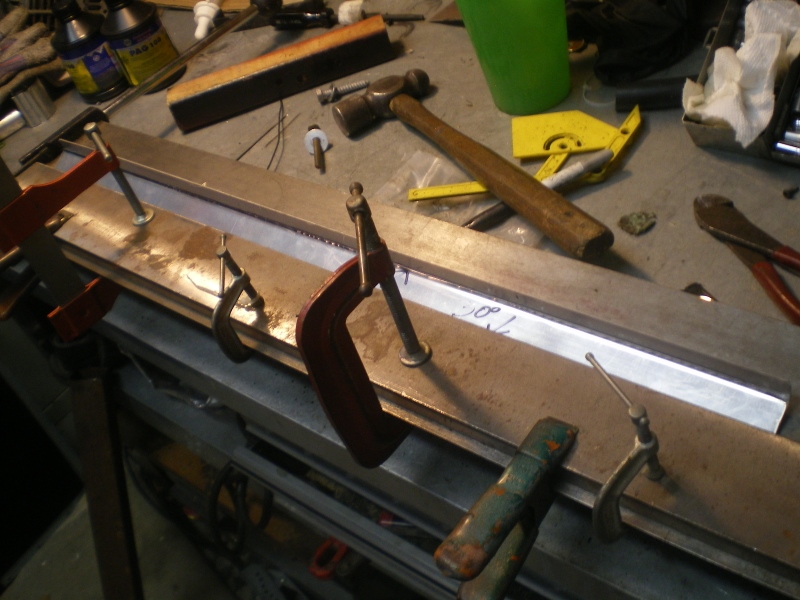 To seal this gap on top  Attaching 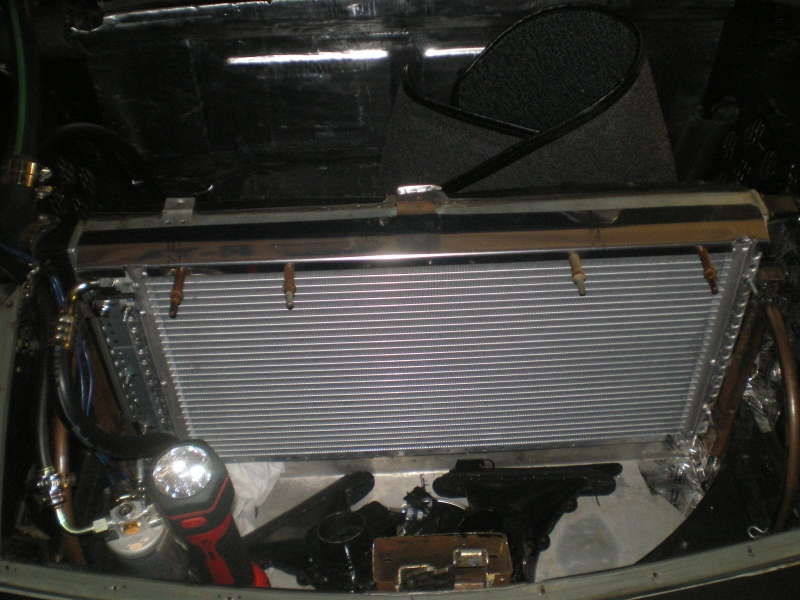 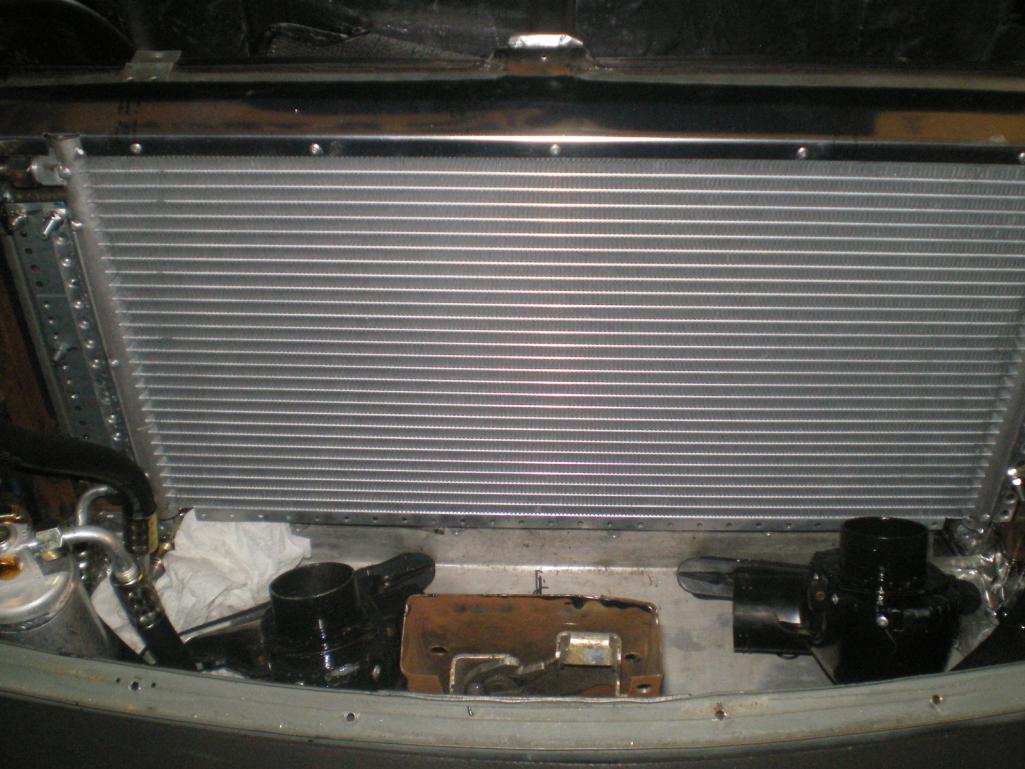 |
|
|
|
| 76-914 |
Oct 1 2015, 08:20 PM
Post
#639
|
|
Repeat Offender & Resident Subaru Antagonist Group: Members Posts: 13,836 Joined: 23-January 09 From: Temecula, CA Member No.: 9,964 Region Association: Southern California |
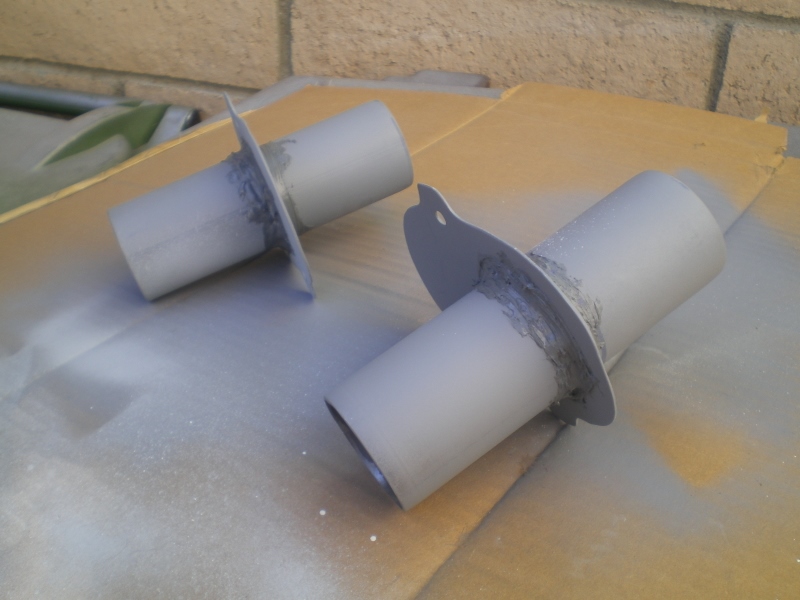
Well that was fun. Just spent an hour loading and lost it all. God Damnned Explorer. And fucking Firefox likes to stop receiving text input about every 20 seconds so I'm typing away while the cursor just sits there. FUCK< FUCK< FUCK. These next post will be truncated and not more than 5 fucking minutes each. So now I'll get back to how I ran duct to the OEM dash vents from the new AC/Heat system that the God Damned fucking internet has tried to fuck up for me.
The original openings will be used to run the duct from the new unit. 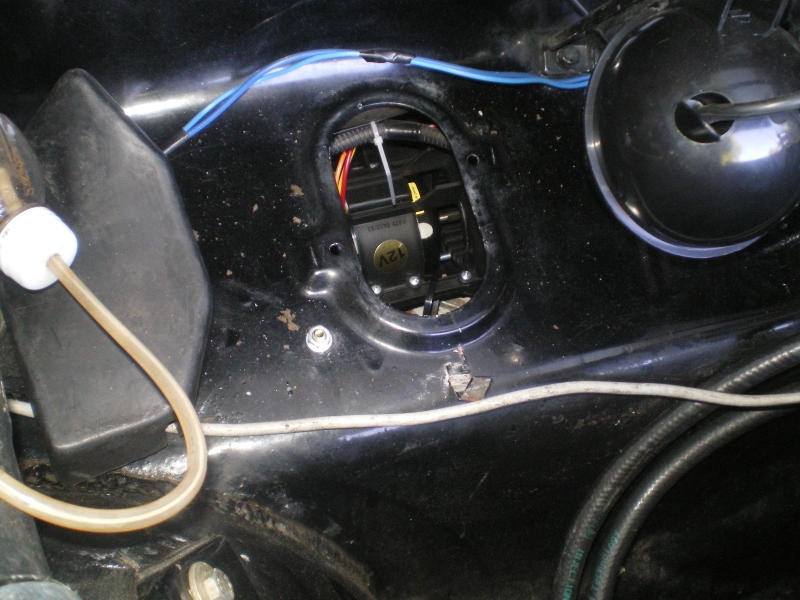 The template used for the base plate and base plate gasket. 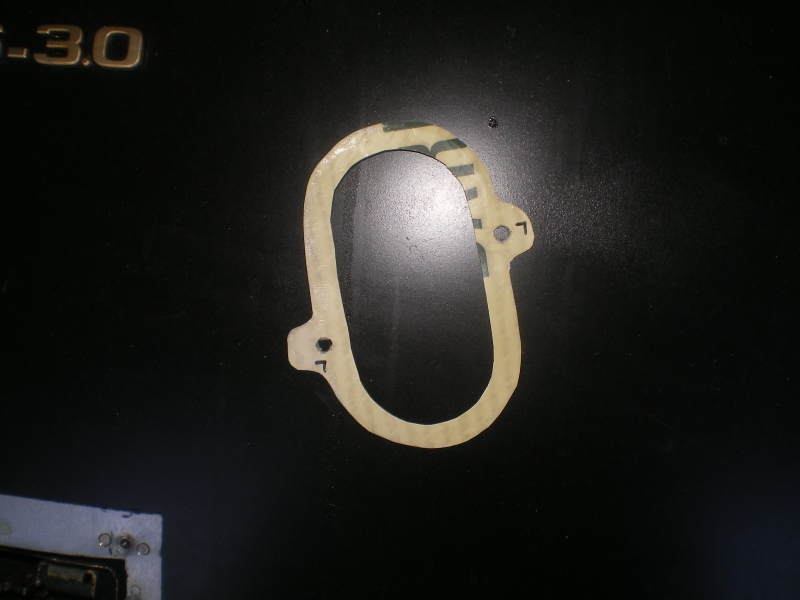 Test fit of the base plates before drilling 2" holes in them 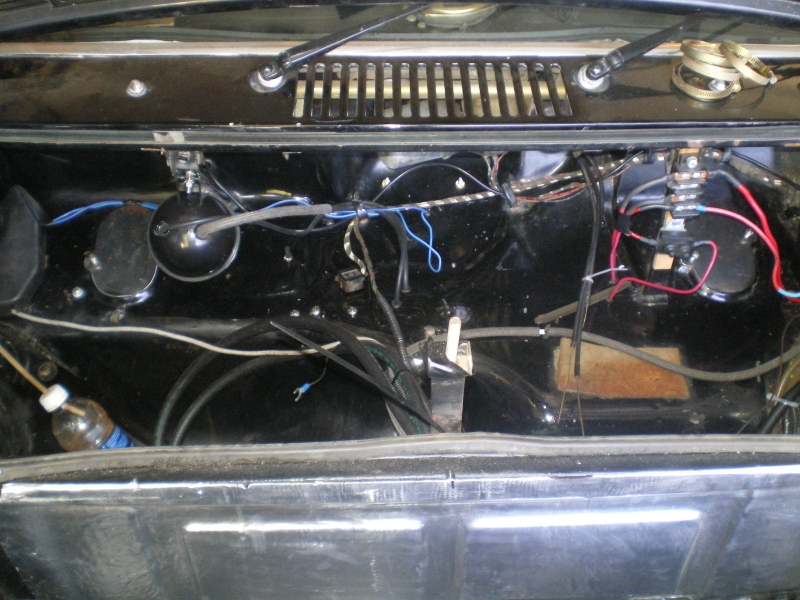 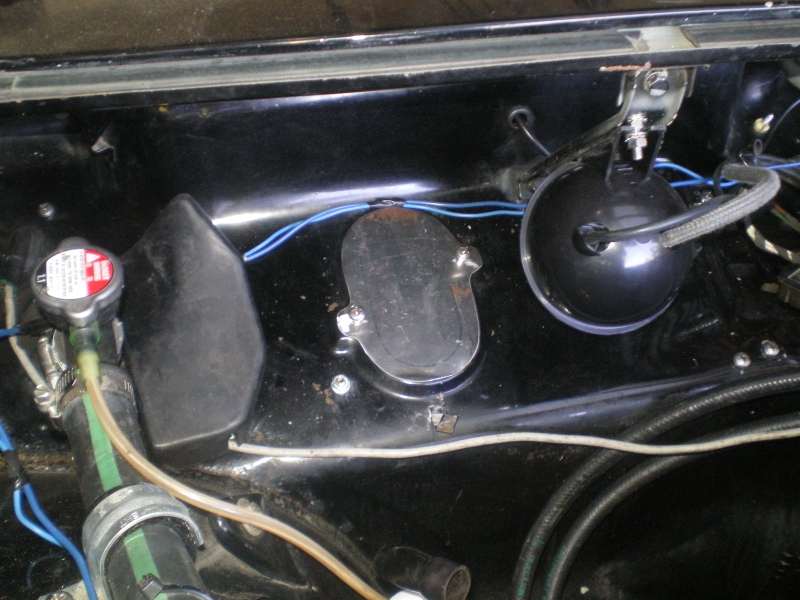 Welded up. Joints were sealed with Wurth's before paint 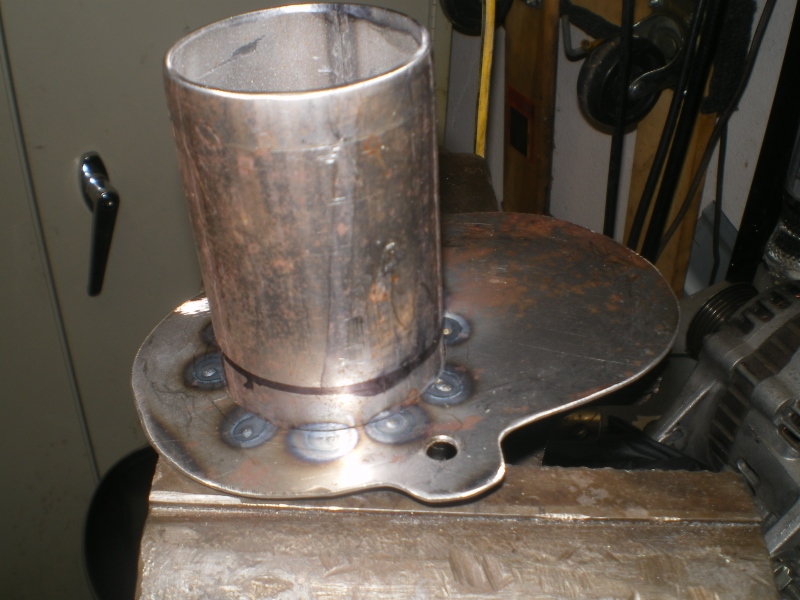 A quick test fit 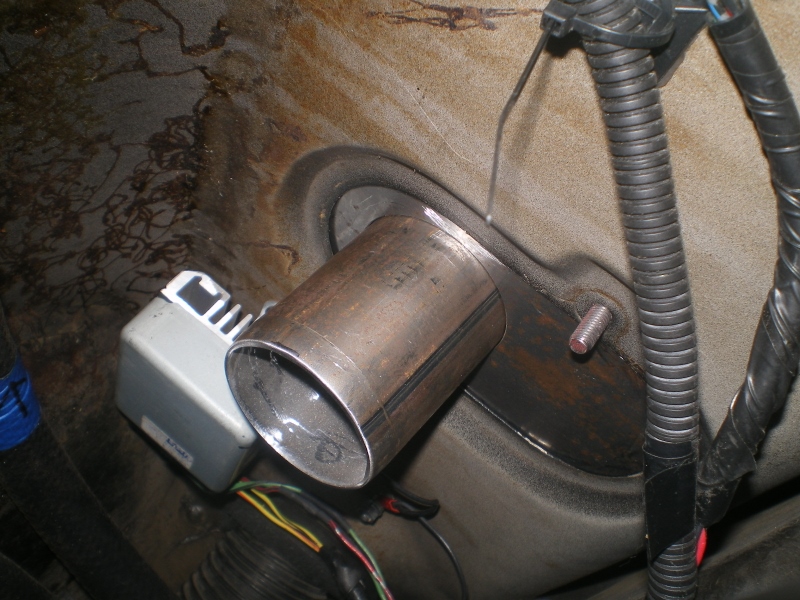 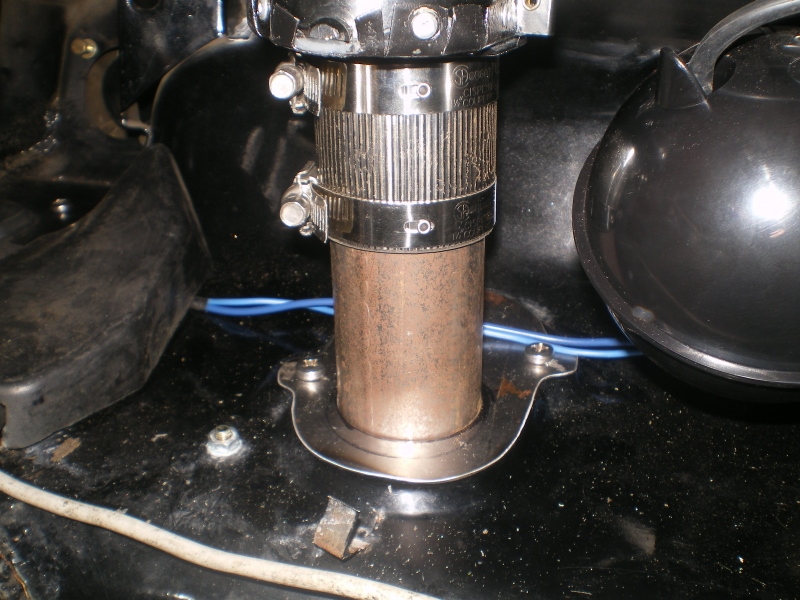 |
|
|
|
| 76-914 |
Oct 1 2015, 08:30 PM
Post
#640
|
|
Repeat Offender & Resident Subaru Antagonist Group: Members Posts: 13,836 Joined: 23-January 09 From: Temecula, CA Member No.: 9,964 Region Association: Southern California |
Primed
 Cut a couple of gaskets 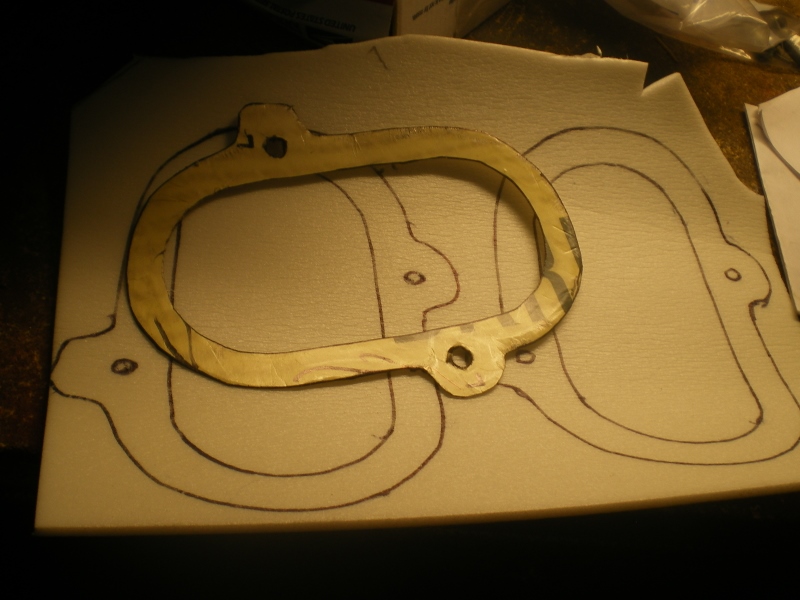 Quick couple of coats 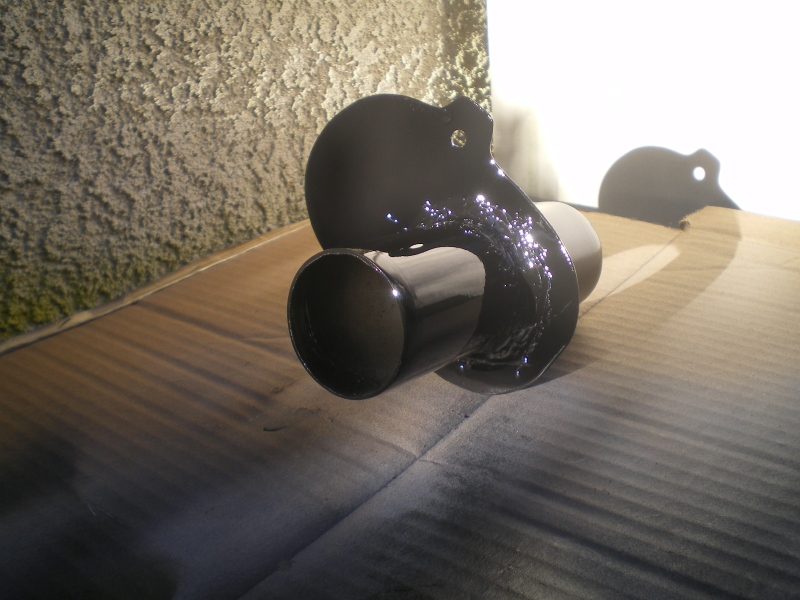 Painted piece fitted in place 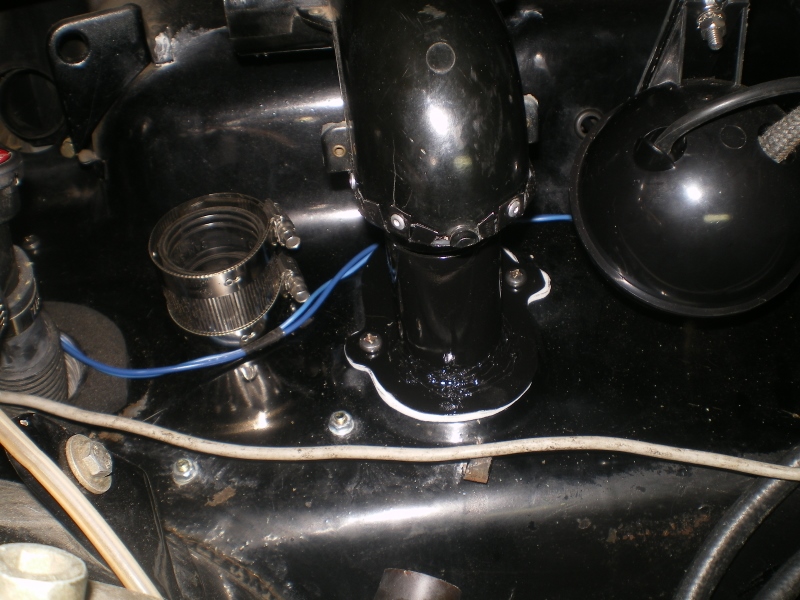 Cleaned up the old rain tray and repurposed it. 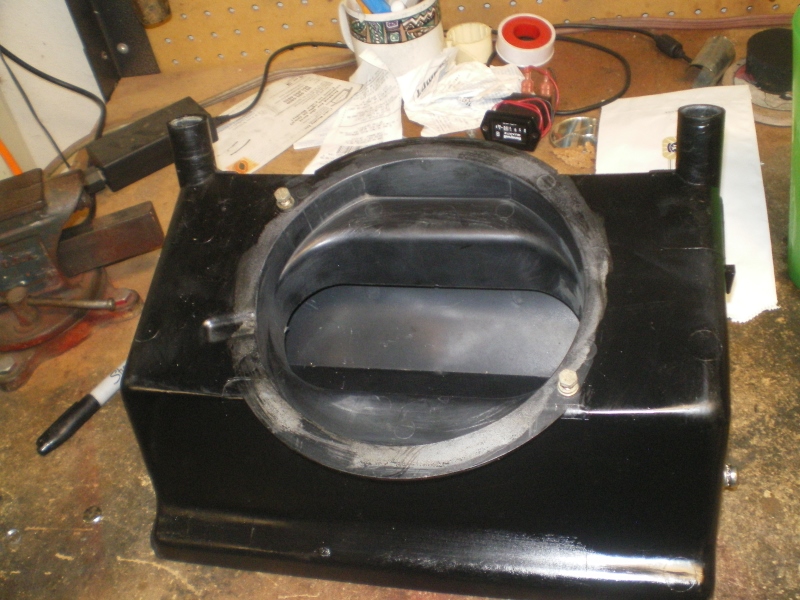   |
|
|
|
|
1 User(s) are reading this topic (1 Guests and 0 Anonymous Users)
0 Members:

|
Lo-Fi Version | Time is now: 10th January 2026 - 05:53 PM |
Invision Power Board
v9.1.4 © 2026 IPS, Inc.