|
|
|
Porsche, and the Porsche crest are registered trademarks of Dr. Ing. h.c. F. Porsche AG.
This site is not affiliated with Porsche in any way. Its only purpose is to provide an online forum for car enthusiasts. All other trademarks are property of their respective owners. |
|
|

  |

| 914forme |
 Oct 1 2015, 08:37 PM Oct 1 2015, 08:37 PM
Post
#641
|
|
Times a wastin', get wrenchin'!  Group: Members Posts: 3,896 Joined: 24-July 04 From: Dayton, Ohio Member No.: 2,388 Region Association: None |
Looks like a great solution. "Cleaned up the old rain tray and repurposed it." For (IMG:style_emoticons/default/confused24.gif) (IMG:style_emoticons/default/poke.gif) (IMG:style_emoticons/default/popcorn[1].gif)
|
   |

 
|
| 76-914 |
Oct 1 2015, 08:51 PM
Post
#642
|
|
Repeat Offender & Resident Subaru Antagonist Group: Members Posts: 13,836 Joined: 23-January 09 From: Temecula, CA Member No.: 9,964 Region Association: Southern California |
Right side fitted up and installed in place
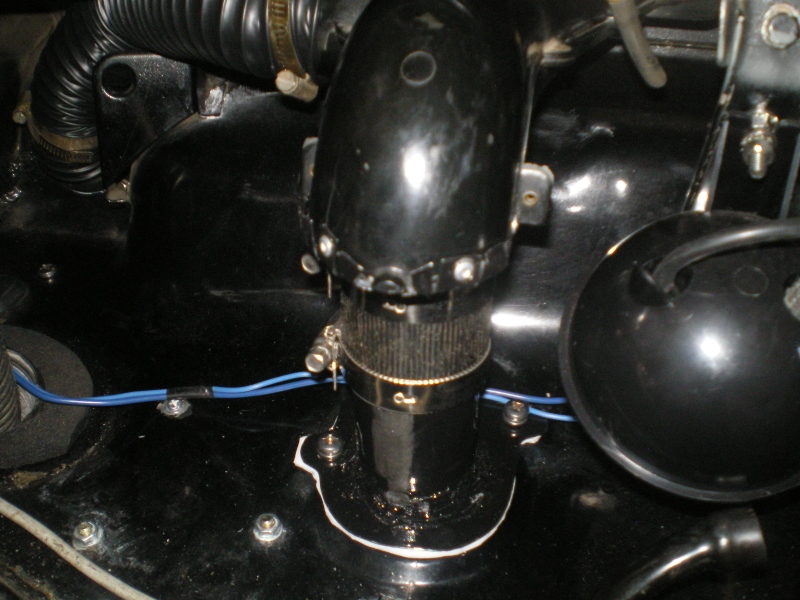 A pic before the tank goes back in  Driver's side ducting from below 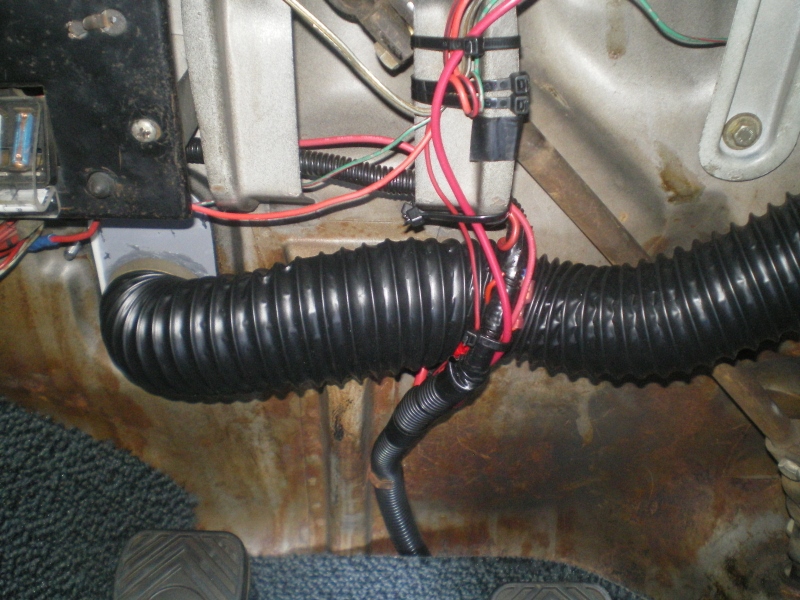 This is where the duct's connect on the unit. Very close to the metal but it clears. 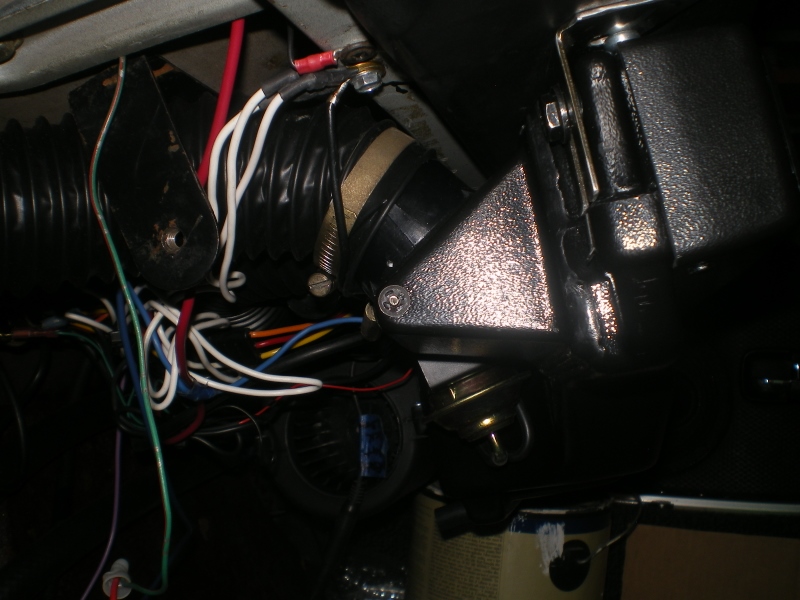 You ever have a good idea that really wasn't? I decided to fit the hose to this elbow prior to re-connecting the elbow to the dash panel. I wasted an hour trying to start the upper left nut. The next day I removed the vent which gave me a bit more room to start the nut. Took a few minutes to reconnect the duct to the elbow but much easier this way. The drivers side is a snap. 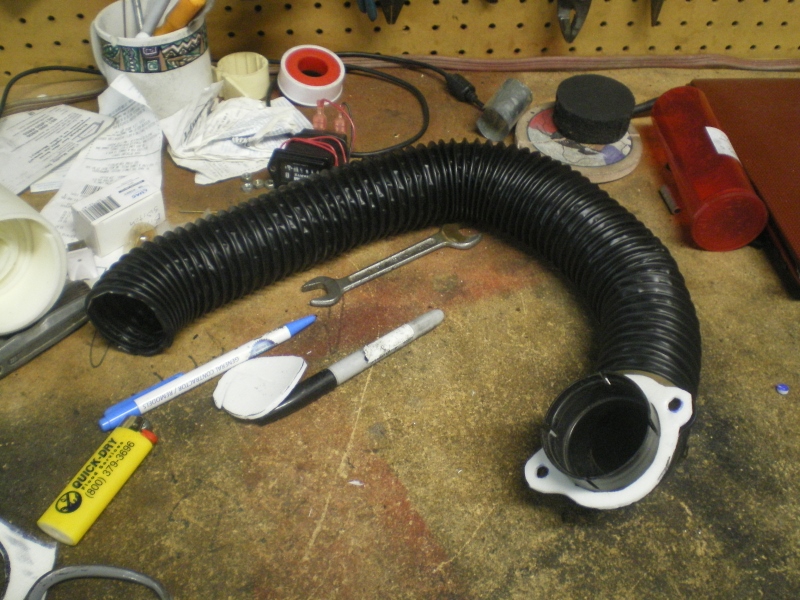 Center shot all buttoned up. One of these pic's somewhere shows the ugly blue wires cleaned up. 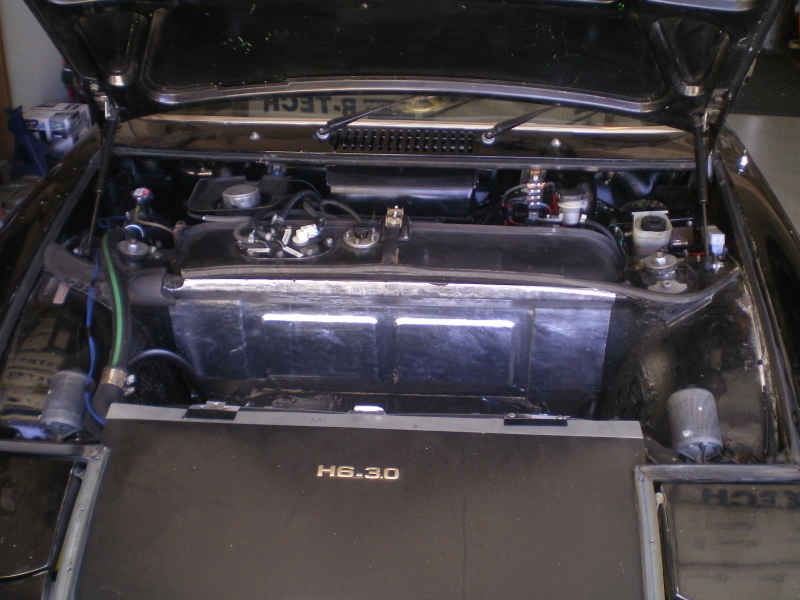 Right side 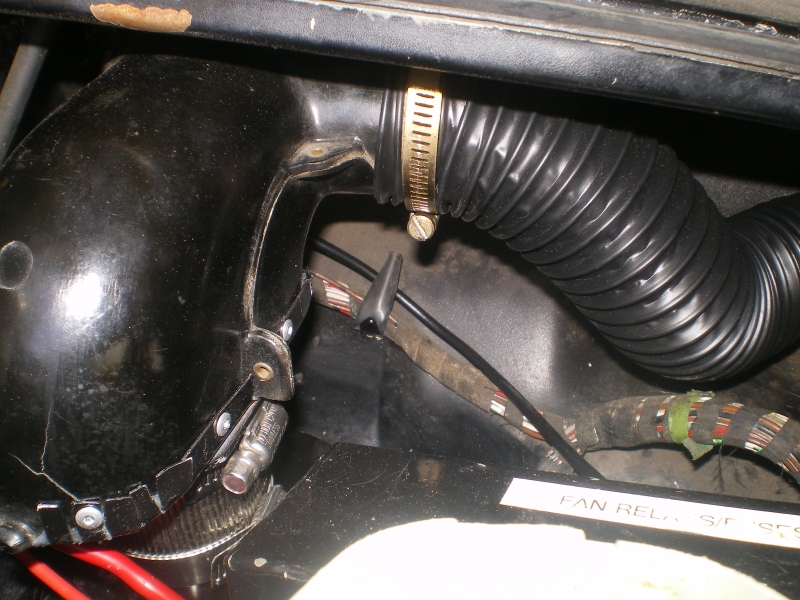 The renewed rain tray 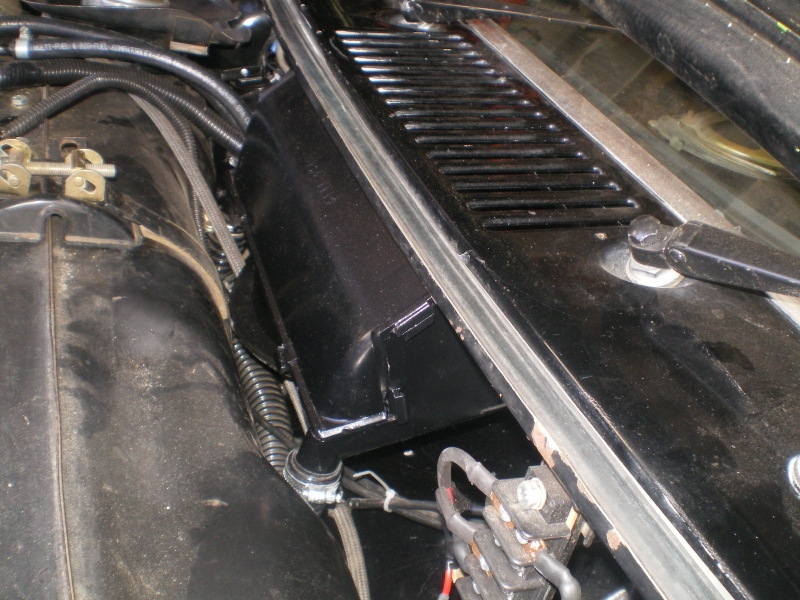 Left side 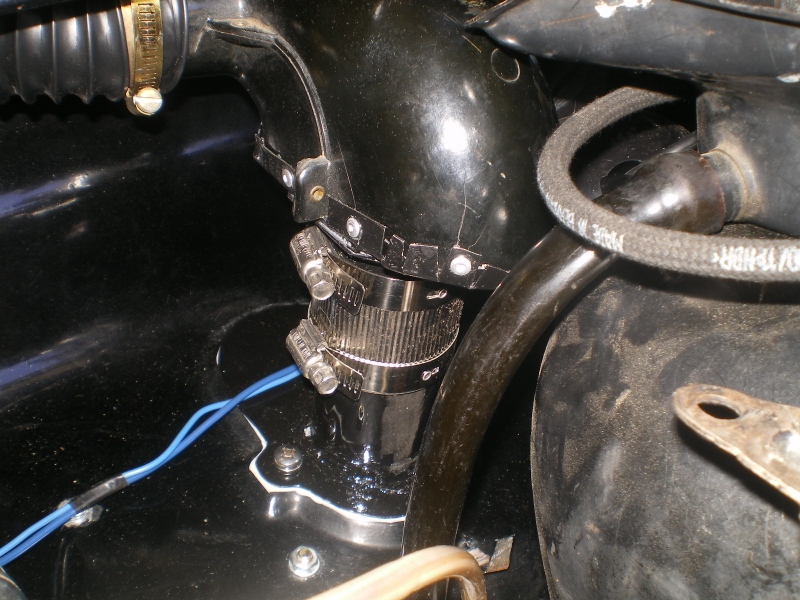 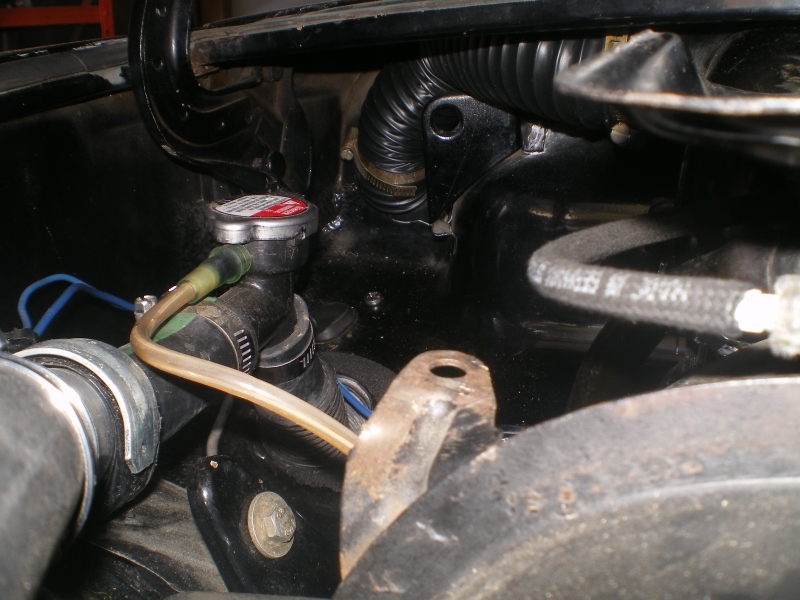 |
|
|
|
| 76-914 |
Oct 1 2015, 08:56 PM
Post
#643
|
|
Repeat Offender & Resident Subaru Antagonist Group: Members Posts: 13,836 Joined: 23-January 09 From: Temecula, CA Member No.: 9,964 Region Association: Southern California |
The ugly blue wires concealed in 1/4" loom
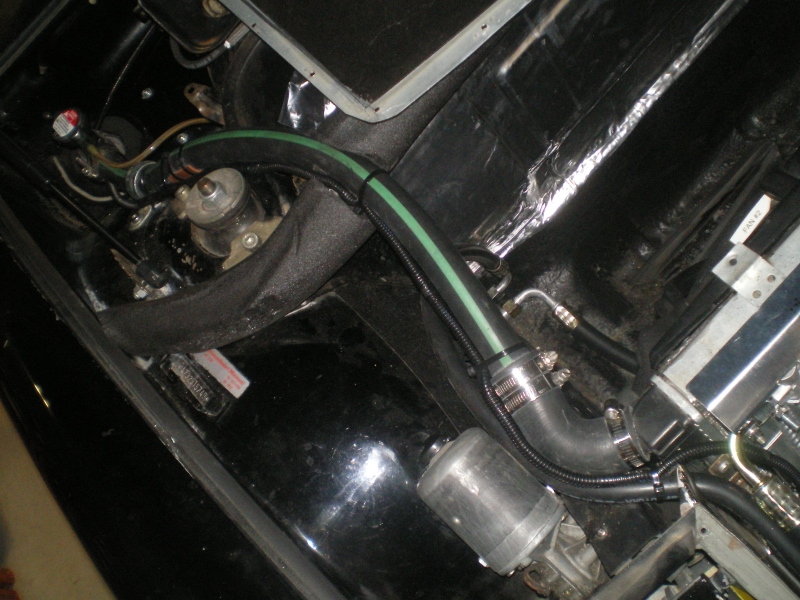 Hopefully the front trunk area is now complete.  And only 8 items left on my checklist. (IMG:style_emoticons/default/piratenanner.gif)  |
|
|
|
| Andyrew |
Oct 1 2015, 09:06 PM
Post
#644
|
|
Spooling.... Please wait Group: Members Posts: 13,380 Joined: 20-January 03 From: Riverbank, Ca Member No.: 172 Region Association: Northern California |
Fantastic progress! Love the fab work. Great creativity as usual!
|
|
|
|
| 914forme |
Oct 2 2015, 05:34 AM
Post
#645
|
|
Times a wastin', get wrenchin'! Group: Members Posts: 3,896 Joined: 24-July 04 From: Dayton, Ohio Member No.: 2,388 Region Association: None |
Oh so I get it, just your rain water collector system.
|
|
|
|
| 76-914 |
Oct 2 2015, 09:40 AM
Post
#646
|
|
Repeat Offender & Resident Subaru Antagonist Group: Members Posts: 13,836 Joined: 23-January 09 From: Temecula, CA Member No.: 9,964 Region Association: Southern California |
QUOTE(Andyrew @ Oct 1 2015, 08:06 PM)  Fantastic progress! Love the fab work. Great creativity as usual! Hey, Thx Andy. BTW, You've got a custom dash, right? If so, I have some defrost vents left over from this. If interested I'll post pic's and dimensions. Actually there is less fab work if re-using some of these items albeit, modified a tad. Besides, I really like the look of the 914 and will try to keep it looking like a 914. (IMG:style_emoticons/default/wub.gif) QUOTE(914forme @ Oct 2 2015, 04:34 AM) Oh so I get it, just your rain water collector system. Yes and no, Stephan. That aluminum cover (.050") on the bottom is thick enough to accept a shutter. Another place to exhaust hot air from the radiator if I need the extra cooling capacity when the AC is running. If needed I'll cut one in. Since it was cannibalized it removes quite easily. 2 screws and it's out. (IMG:style_emoticons/default/beerchug.gif) |
|
|
|
| mepstein |
Oct 2 2015, 09:47 AM
Post
#647
|
|
914-6 GT in waiting Group: Members Posts: 20,322 Joined: 19-September 09 From: Landenberg, PA/Wilmington, DE Member No.: 10,825 Region Association: MidAtlantic Region |
Heat and.A/C in a 914-6. Perfect.
|
|
|
|
| FourBlades |
Oct 2 2015, 01:36 PM
Post
#648
|
|
From Wreck to Rockin Group: Members Posts: 2,056 Joined: 3-December 07 From: Brevard, FL Member No.: 8,414 Region Association: South East States |
|
|
|
|
| 914forme |
Oct 2 2015, 01:50 PM
Post
#649
|
|
Times a wastin', get wrenchin'! Group: Members Posts: 3,896 Joined: 24-July 04 From: Dayton, Ohio Member No.: 2,388 Region Association: None |
QUOTE(76-914 @ Oct 2 2015, 11:40 AM) Yes and no, Stephan. That aluminum cover (.050") on the bottom is thick enough to accept a shutter. Another place to exhaust hot air from the radiator if I need the extra cooling capacity when the AC is running. If needed I'll cut one in. Since it was cannibalized it removes quite easily. 2 screws and it's out. (IMG:style_emoticons/default/beerchug.gif) (IMG:style_emoticons/default/dry.gif) hi pressure zone, might not work like you expect. But Kent at times I think you are crazier than I am, so i'll sit back and let you work ahead. (IMG:style_emoticons/default/popcorn[1].gif) after all you and Chris are like my R&D department. |
|
|
|
| 76-914 |
Oct 3 2015, 09:48 PM
Post
#650
|
|
Repeat Offender & Resident Subaru Antagonist Group: Members Posts: 13,836 Joined: 23-January 09 From: Temecula, CA Member No.: 9,964 Region Association: Southern California |
QUOTE(mepstein @ Oct 2 2015, 08:47 AM) Heat and.A/C in a 914-6. Perfect. My goal is a "Gentleman's 914" (IMG:style_emoticons/default/biggrin.gif) QUOTE(FourBlades @ Oct 2 2015, 12:36 PM) Wow, thanks John. Means a lot coming from you. I followed your amazing build which was much more complicated than mine. So moving along I started on the new console gage panel. I'm down to 2 gage's and an acc plug so the cut out for the AC won't affect me.  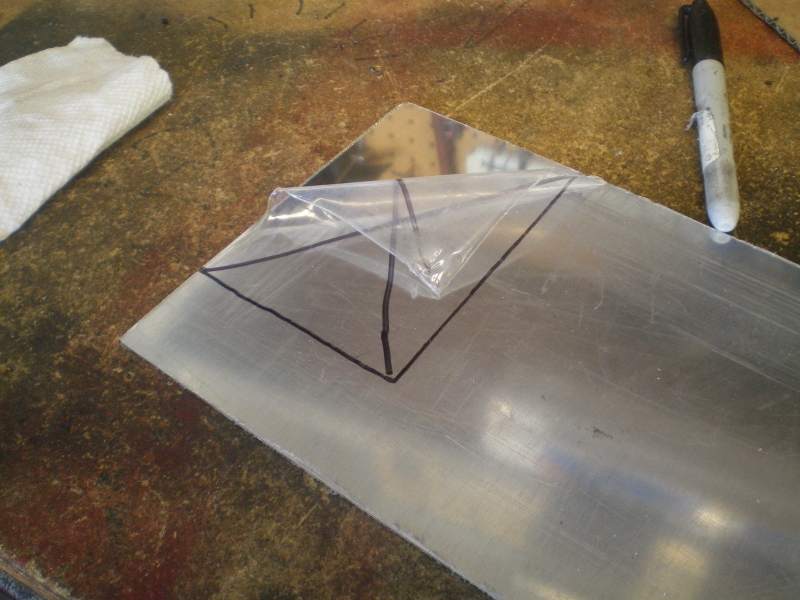 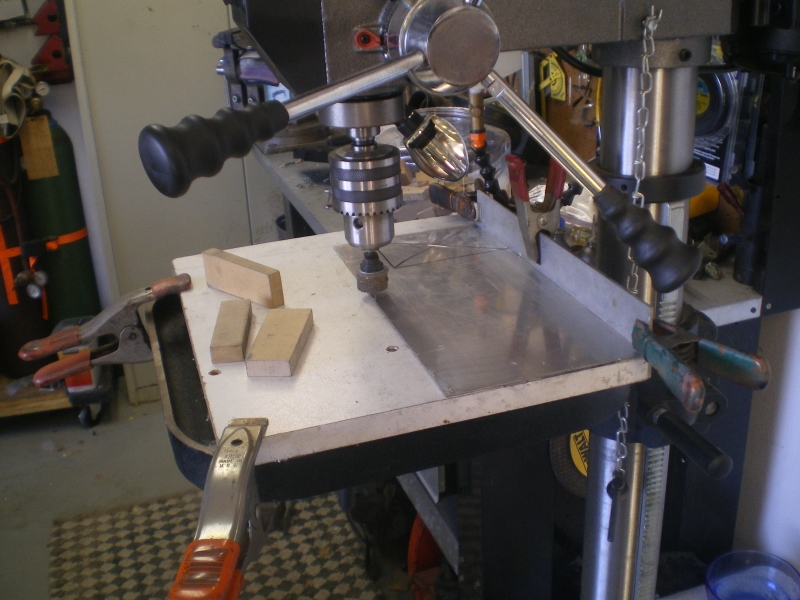 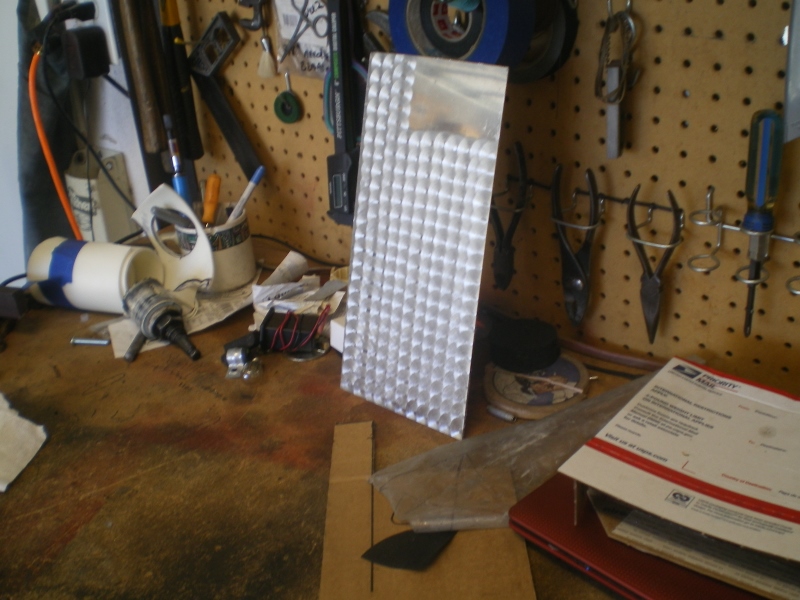 And then these came in. Thanks Dustin and thanks Uncle Dave for the referral. 8 days turn around including shipping! Stellar service! Now I can tie in the evap. I didn't want to lose the nitrogen charge (as it was shipped) by taking the caps off unless I could connect everything to avoid moisture. 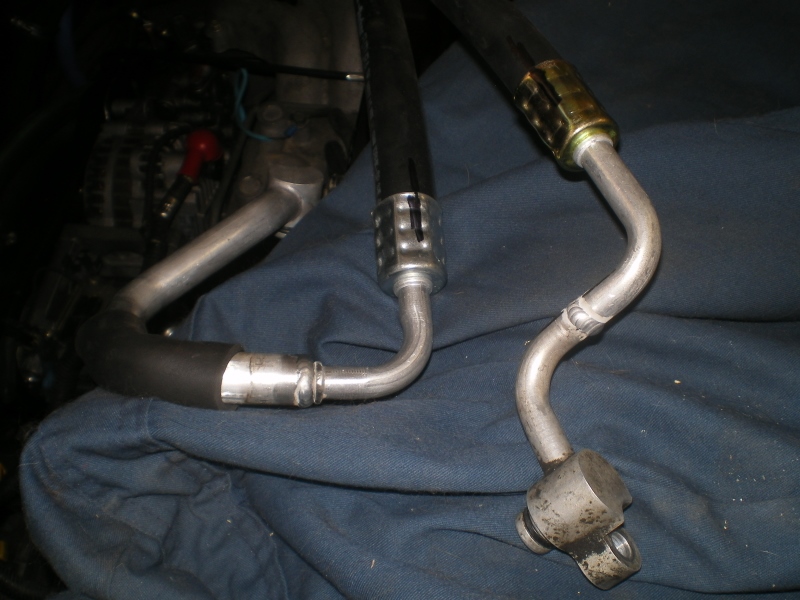 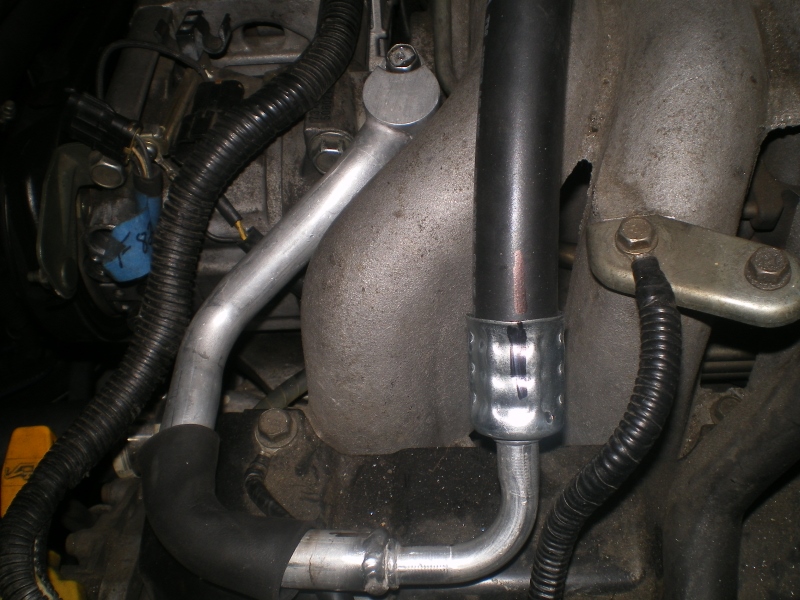 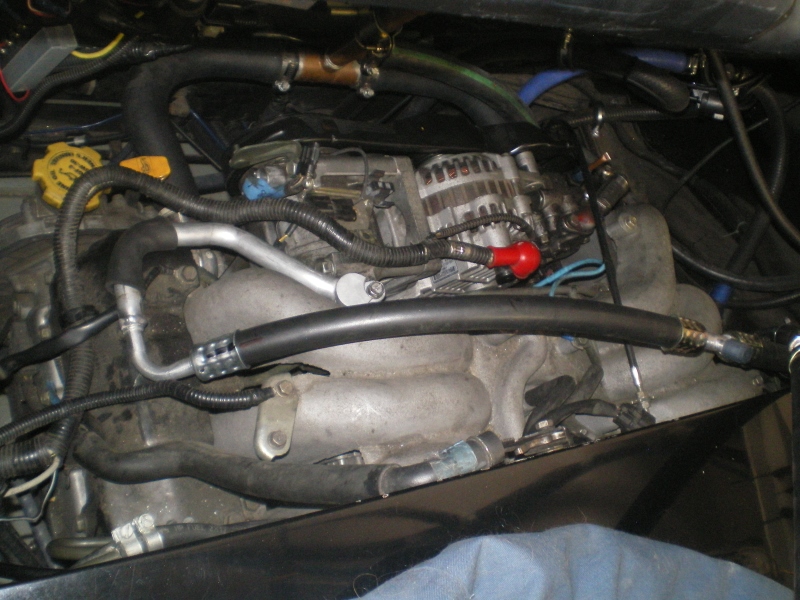 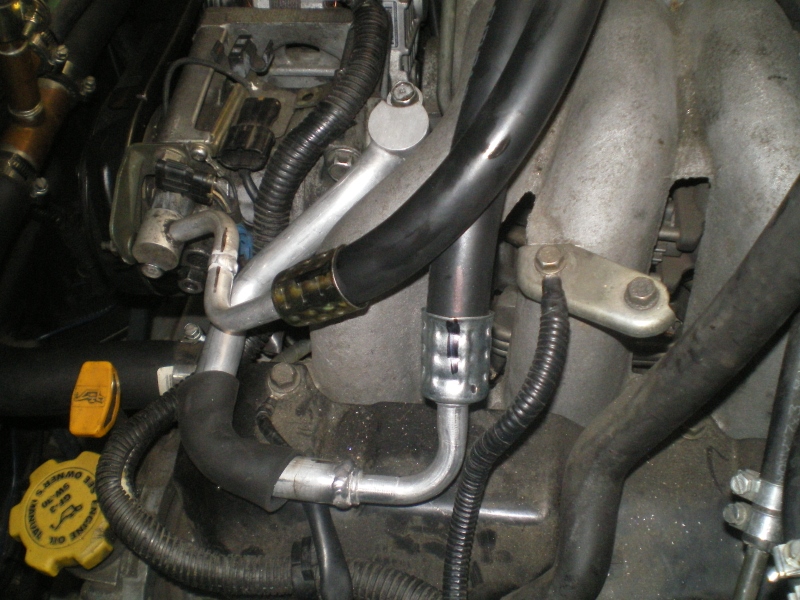 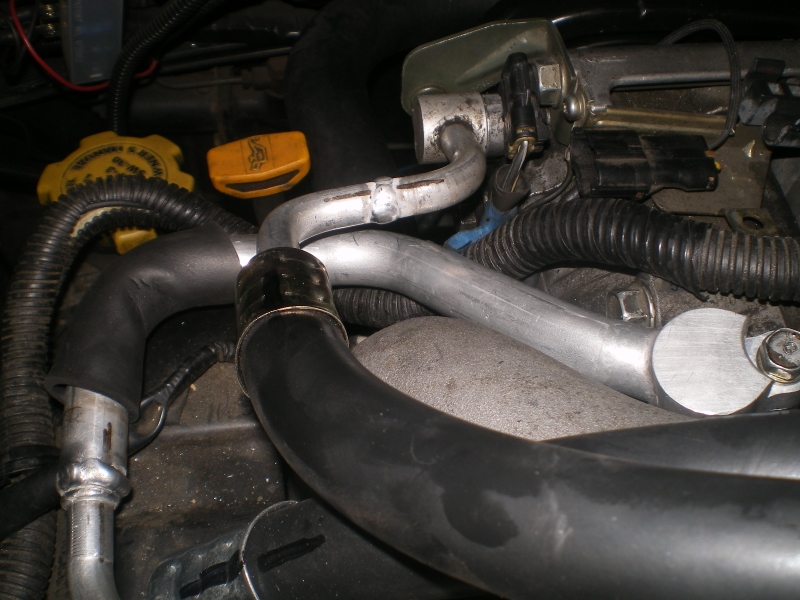 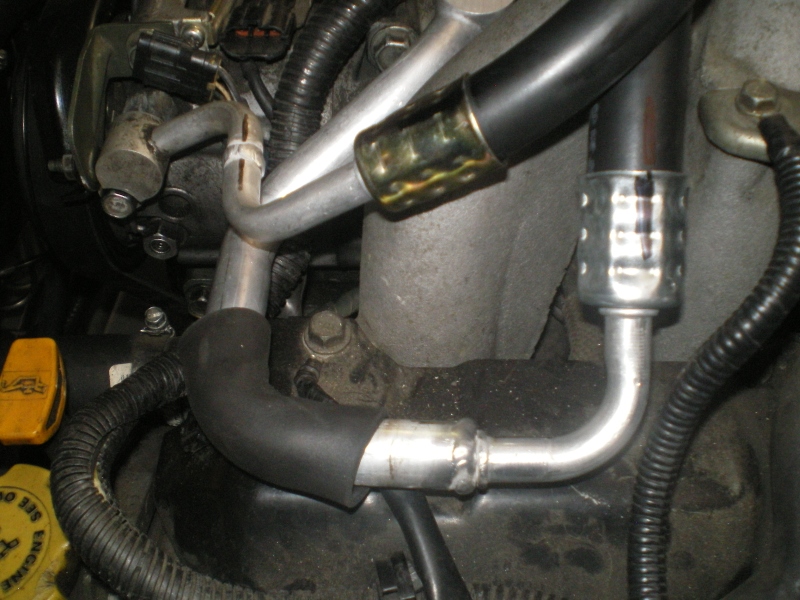 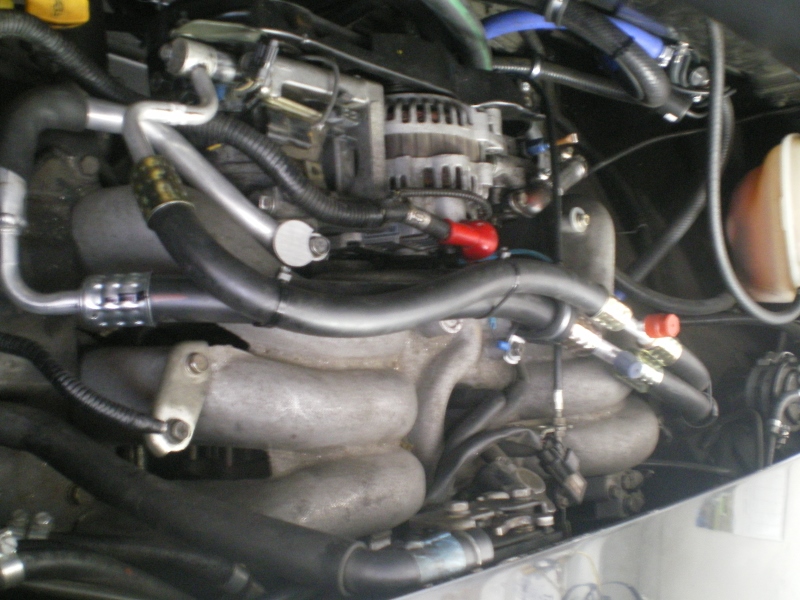 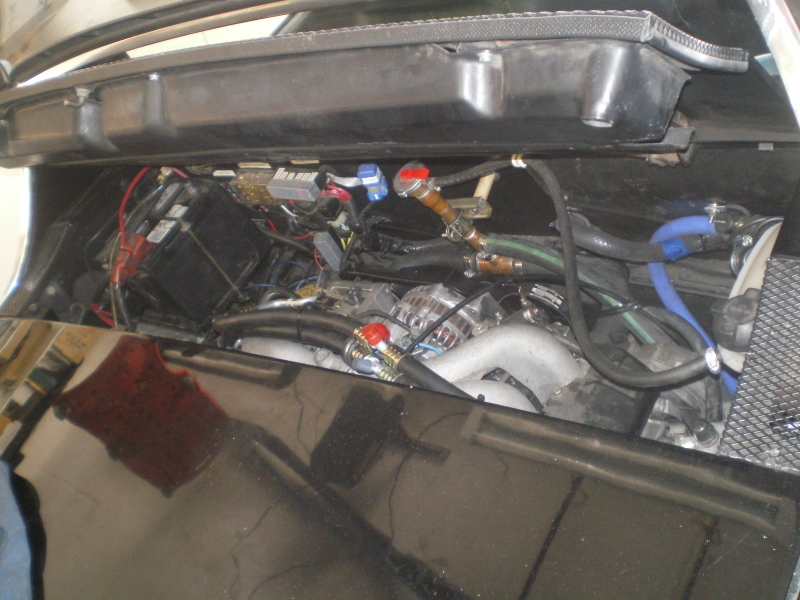 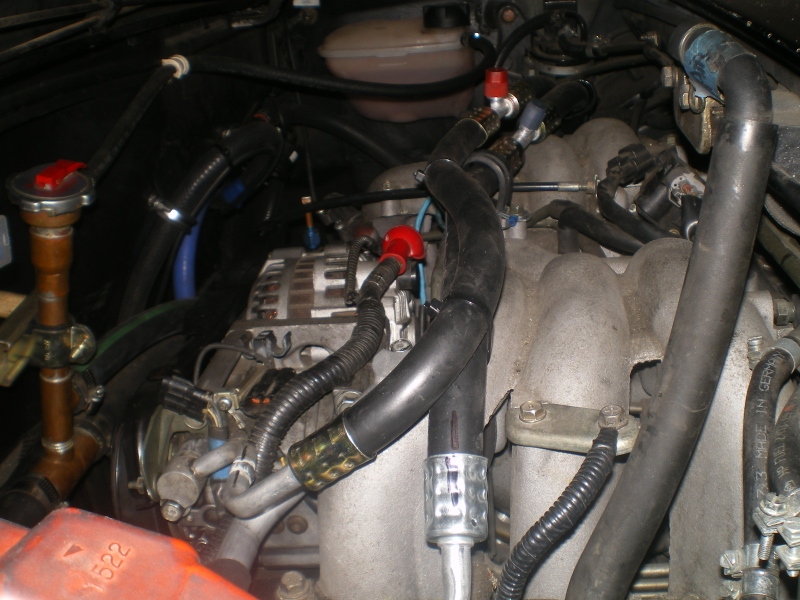 Almost forgot to install this relay (IMG:style_emoticons/default/headbang.gif) 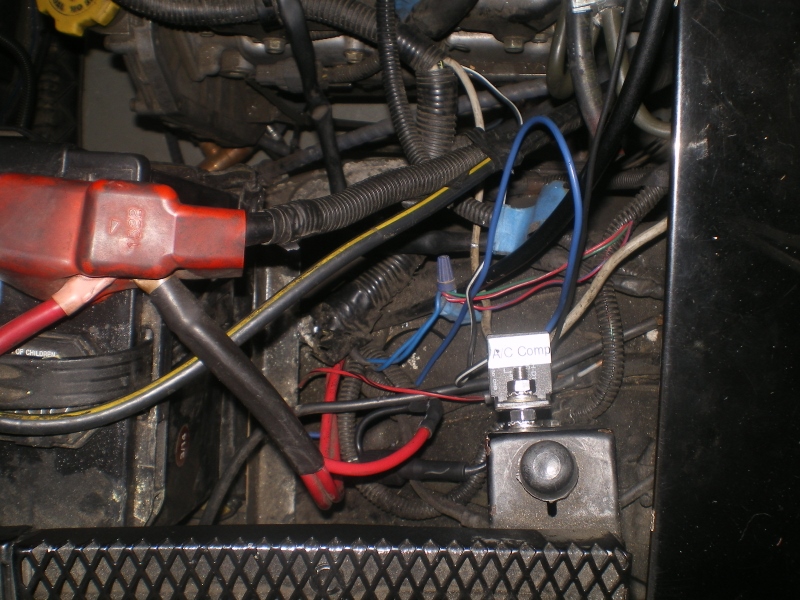 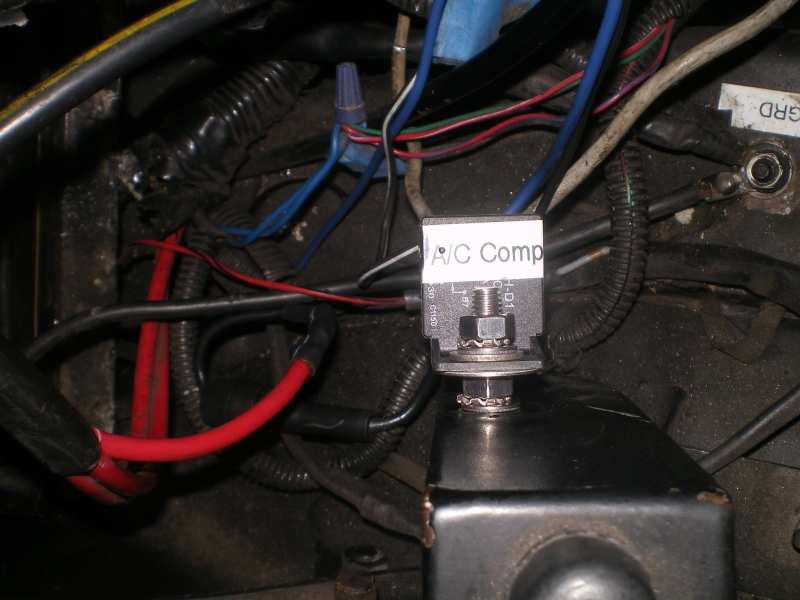 |
|
|
|
| 76-914 |
Oct 3 2015, 09:56 PM
Post
#651
|
|
Repeat Offender & Resident Subaru Antagonist Group: Members Posts: 13,836 Joined: 23-January 09 From: Temecula, CA Member No.: 9,964 Region Association: Southern California |
All the hoses are tied in and it got a little crowded. The red circles are ends of the same hose that loops up/down to make connection. Same with the blue except it loops down/up. Look at the 3rd circle in the shadow and you see it. The urethane foot rest will be channeled to bed the hoses flush, I hope. (IMG:style_emoticons/default/biggrin.gif)
 After the AC is working I need to wrap some more of that sticky black rubber around the exposed metal of the pressure (small) line. 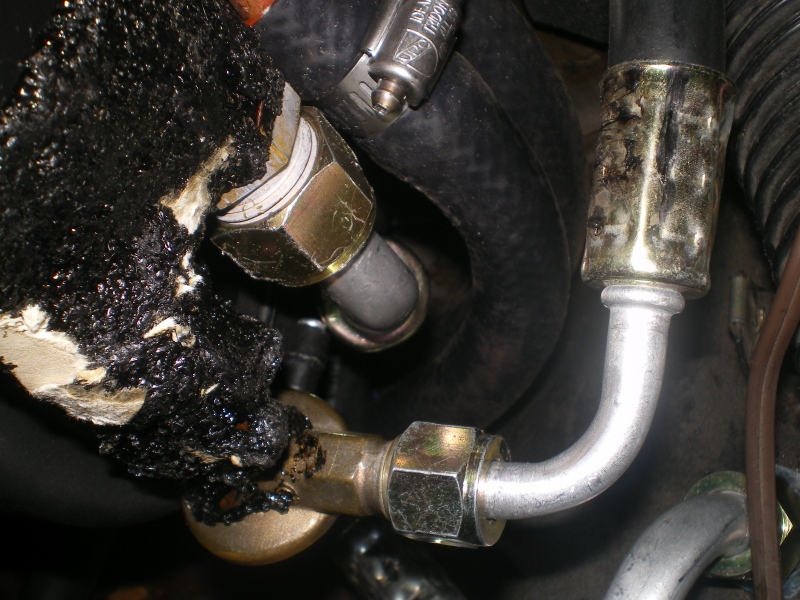 And the two heater lines on top of the AC ports. 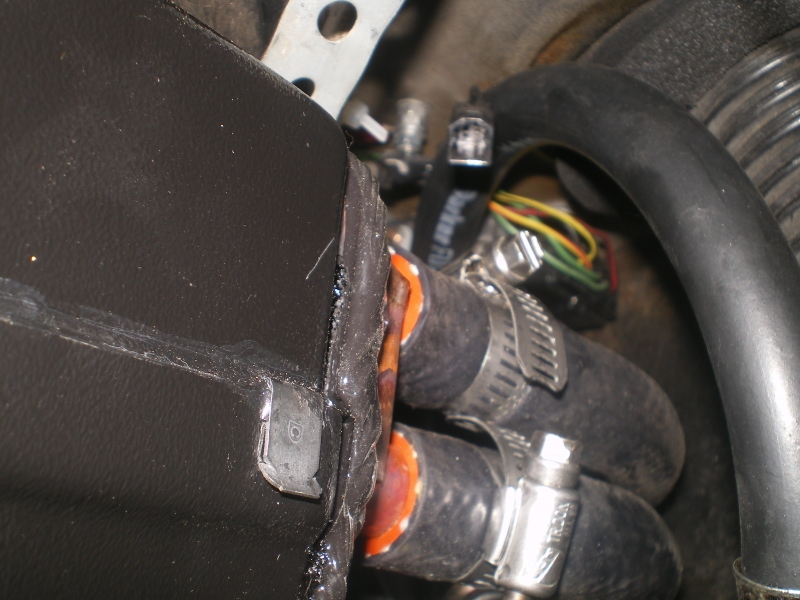 Freon later this week. I test the heater and defrosters tomorrow. (IMG:style_emoticons/default/beerchug.gif) Kent |
|
|
|
| 76-914 |
Oct 10 2015, 05:47 PM
Post
#652
|
|
Repeat Offender & Resident Subaru Antagonist Group: Members Posts: 13,836 Joined: 23-January 09 From: Temecula, CA Member No.: 9,964 Region Association: Southern California |
I was able to button it up this week; several times. (IMG:style_emoticons/default/mad.gif) Sorting out gremlins and making things fit. (IMG:style_emoticons/default/smash.gif) (IMG:style_emoticons/default/sawzall-smiley.gif) The defroster actually blows. I thought it was pretty good then noticed it was on low. Yeah, it works. I did manage to (IMG:style_emoticons/default/sheeplove.gif) a few hours away chasing what I presumed was a vacuum leak only to discover that I needed to turn the blower on before it would energize the vacuum solenoid to the heater valve. (IMG:style_emoticons/default/headbang.gif) I found that I have the lines to the heater crossed at the by pass valve but it will just have to stay that way until after the G&R meet manana. (IMG:style_emoticons/default/evilgrin.gif)
Here's a pic of the footrest after a little grooving for the hose. Since I completed the freon connections at the condenser I was able to finally run the condensate drain. Previously I wasn't sure what would end up where and yadi, yadi. It exits almost in the corner. Off 'bout 1". 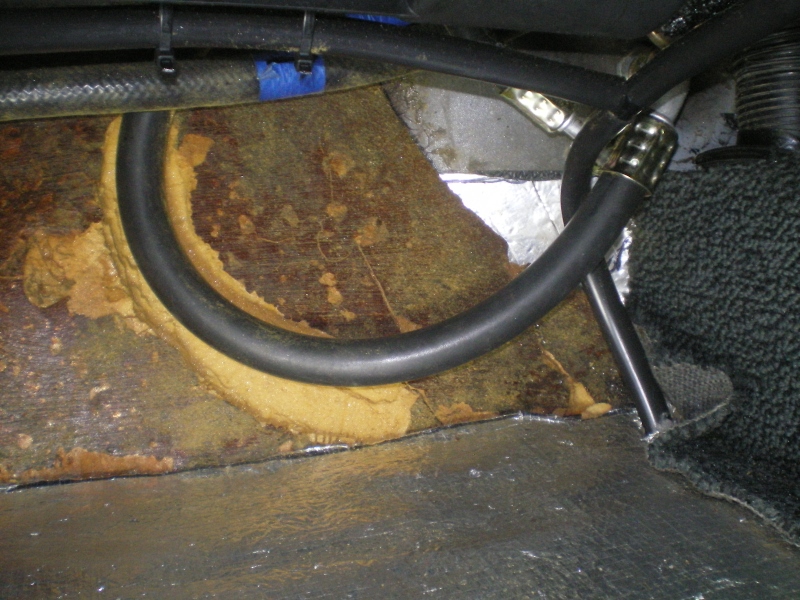 Here is why. I wanted to place it exactly in the corner but found the jack point piece would be compromised. To miss drilling thru the meat of that piece meant moving appx 1.5" further away from the corner or................drilling the hole dead center of the cone. The piece will push up when the jack point is used too. 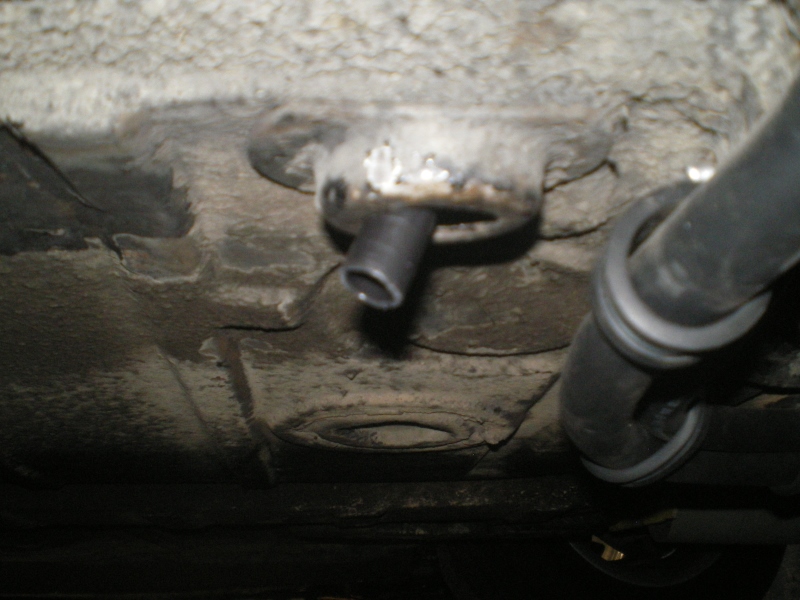 Trimmed the speaker pod to fit. It wasn't primo before and it damn sure ain't now but it tidies the area up once in place. 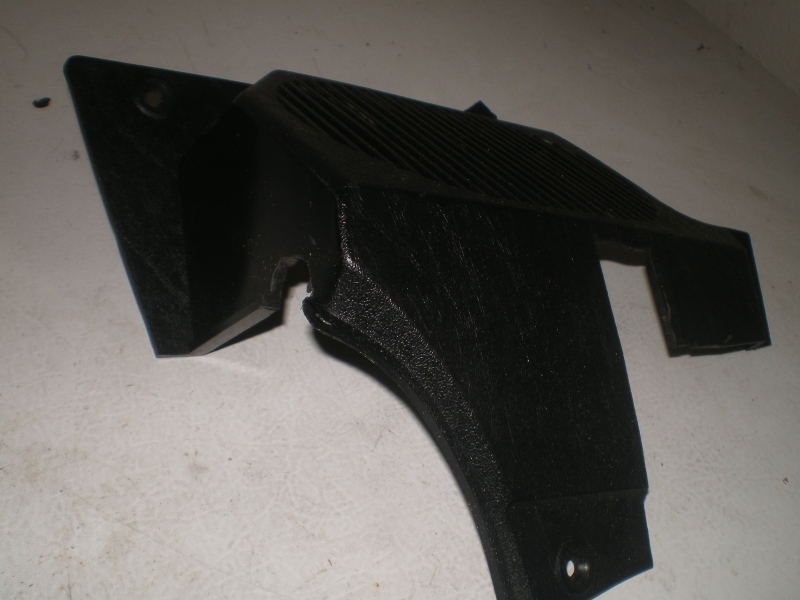 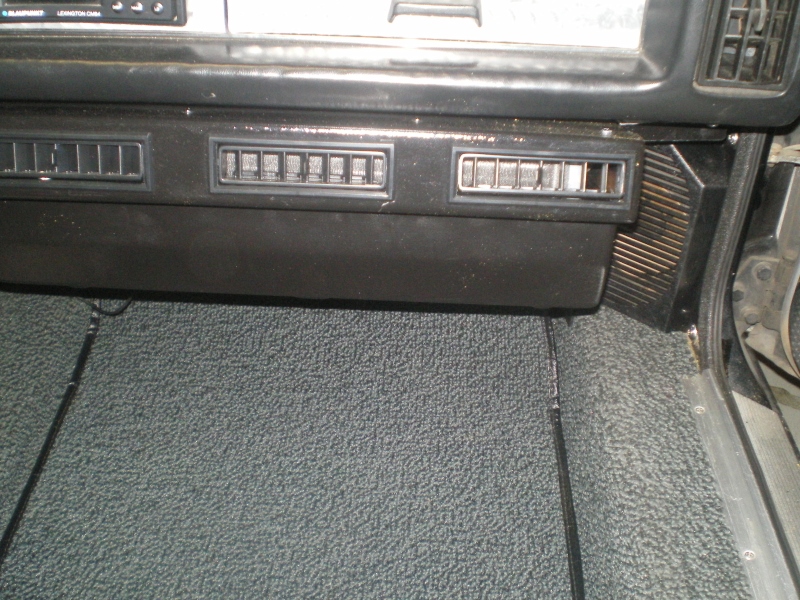 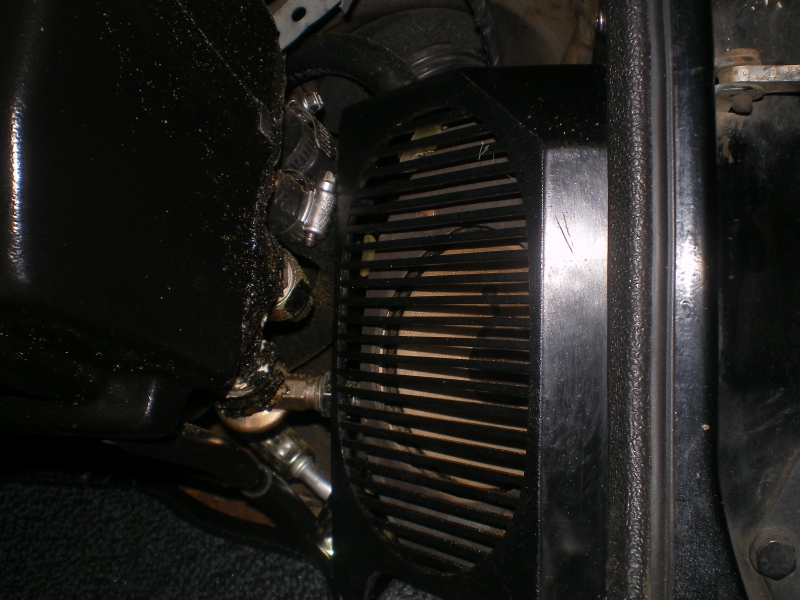 I punched a hole in my new carpet (thx Mikey) for the condensate drain. (IMG:style_emoticons/default/sad.gif) Sacrifices were inevitable. 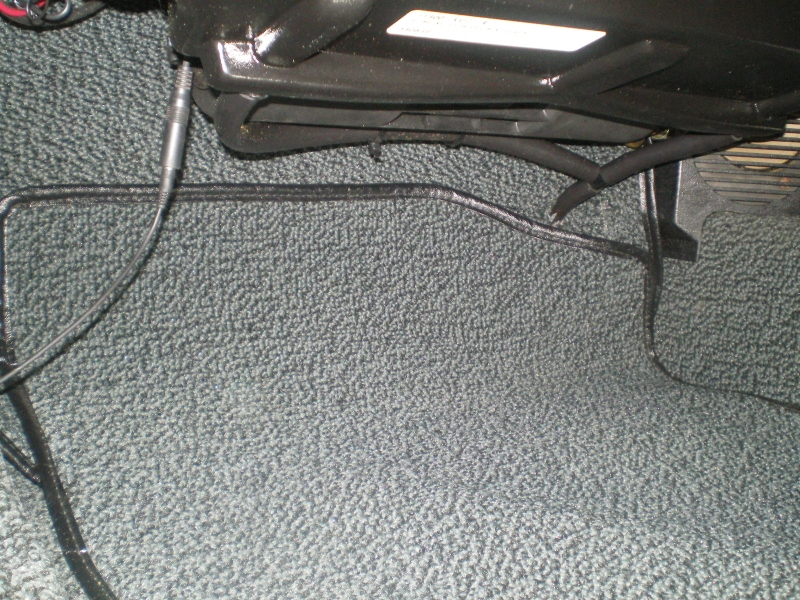 Just a few pics of the inside after everything was back together. This coming week I should be able to charge and freeze. I hope, I hope, I hope. So many things to go wrong. (IMG:style_emoticons/default/wacko.gif) I can see the light at the end of the tunnel getting brighter. (IMG:style_emoticons/default/beerchug.gif) 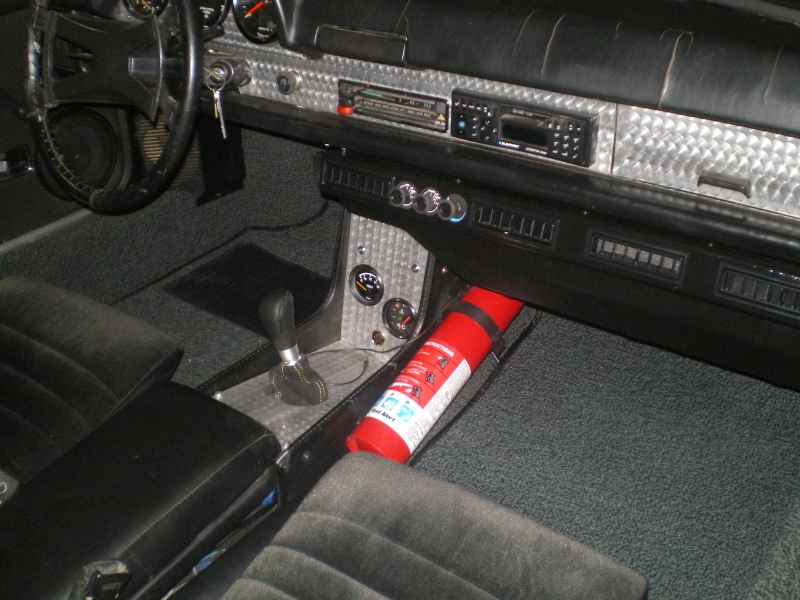 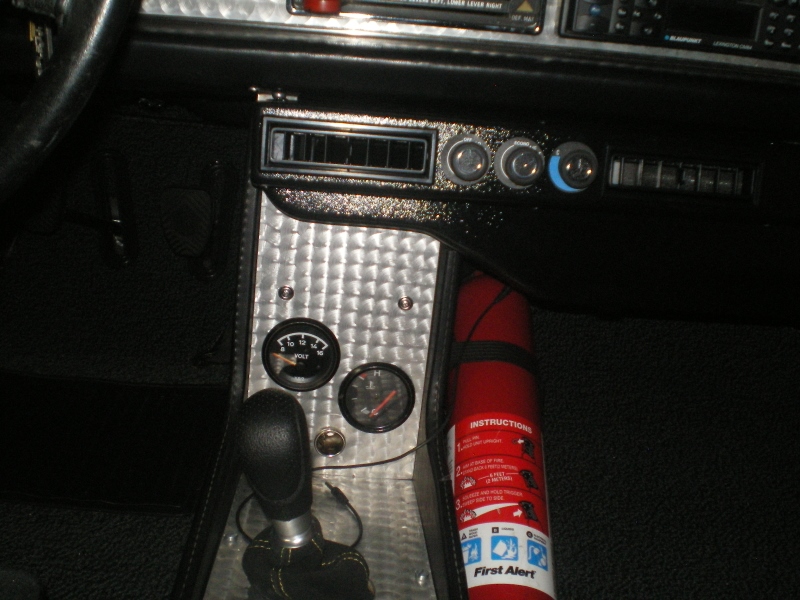 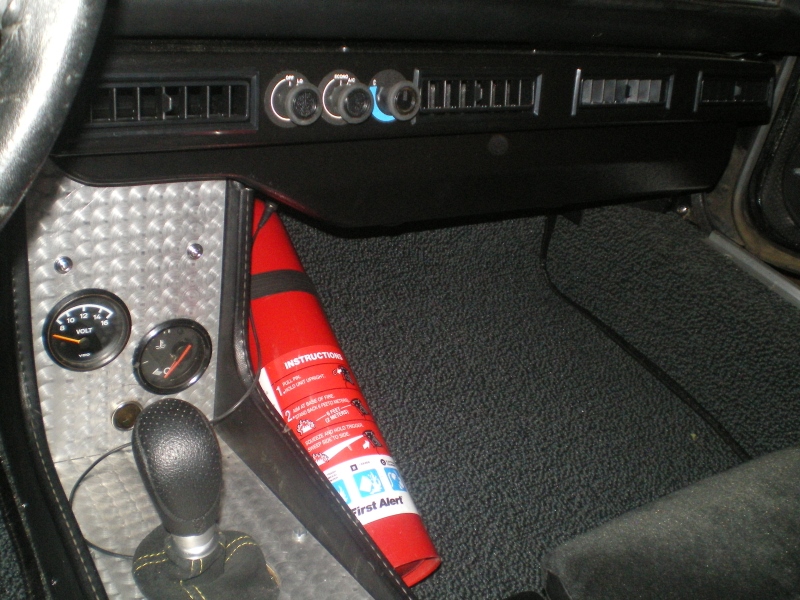 The left panel ended up getting a trim where the new duct crosses over. 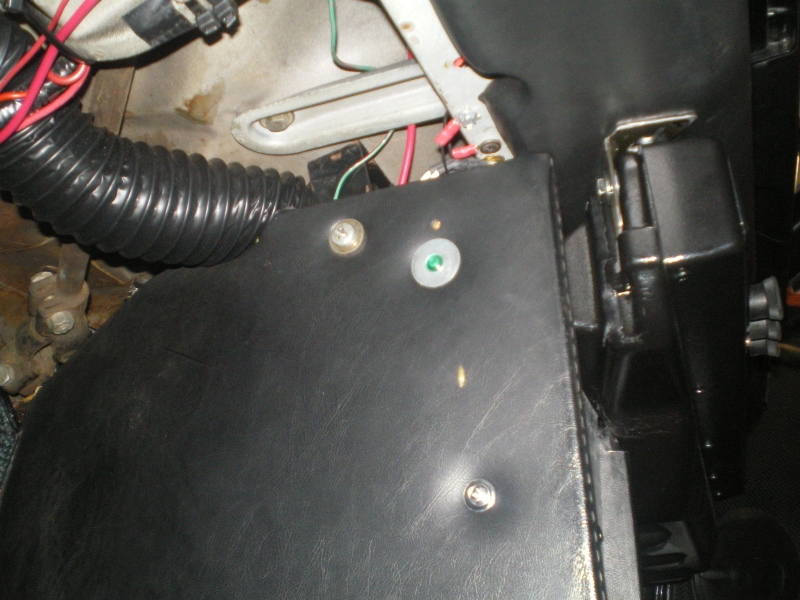 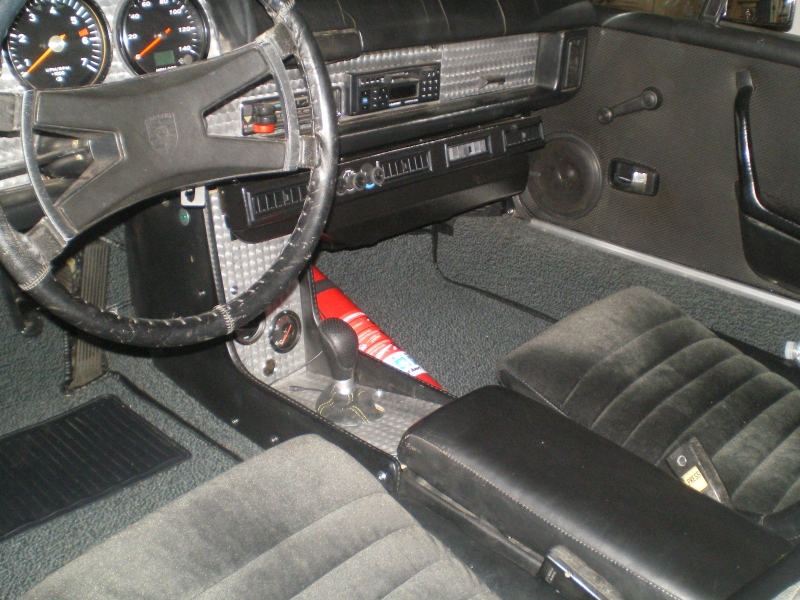 Attached image(s) 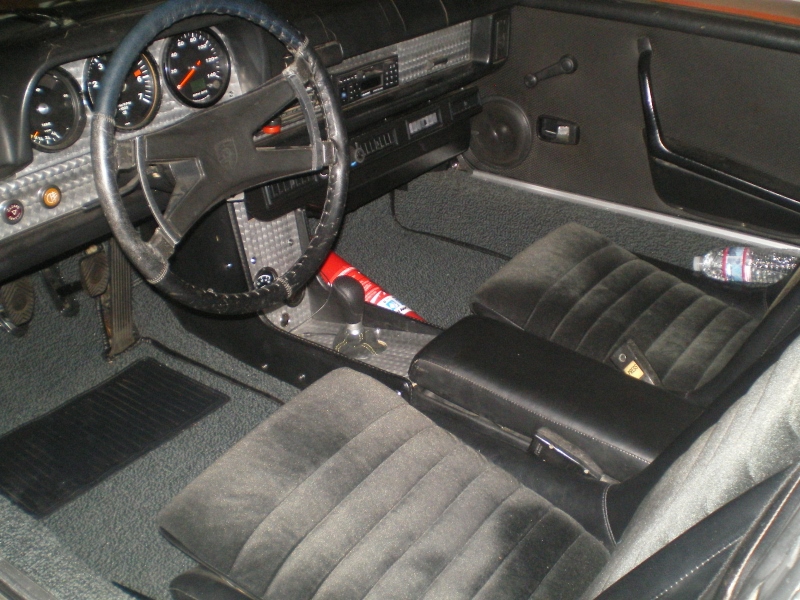
|
|
|
|
| 76-914 |
Oct 16 2015, 10:02 AM
Post
#653
|
|
Repeat Offender & Resident Subaru Antagonist Group: Members Posts: 13,836 Joined: 23-January 09 From: Temecula, CA Member No.: 9,964 Region Association: Southern California |
I hit a little hitch with my AC so I decided to jump into installing my new dash. It took a bit of "self persuasion" before I could begin to remove everything I had installed in the previous week but "asi es la vida". I used the thread in the Lapuwali Forum and found it quite useful, however I believe that the removal of the glove box and the related "dreaded door spring" wasn't necessary and will confirm once the new dash top is installed tomorrow. The only nut that was difficult was the one on the far right side facing the front. It can be removed with a 13mm crows foot or heat up and bend a cheap HF wrench to fit. I'll shoot a pic of this for the re-installation.
Out with the old 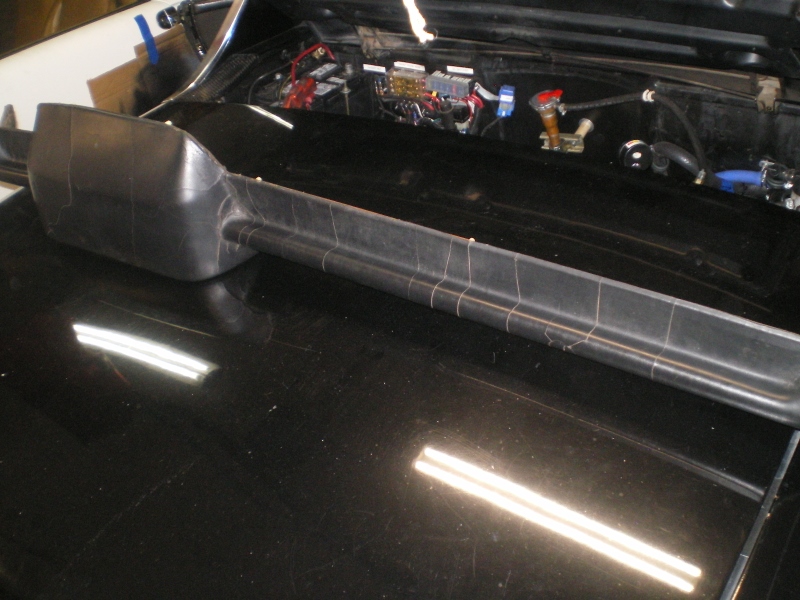 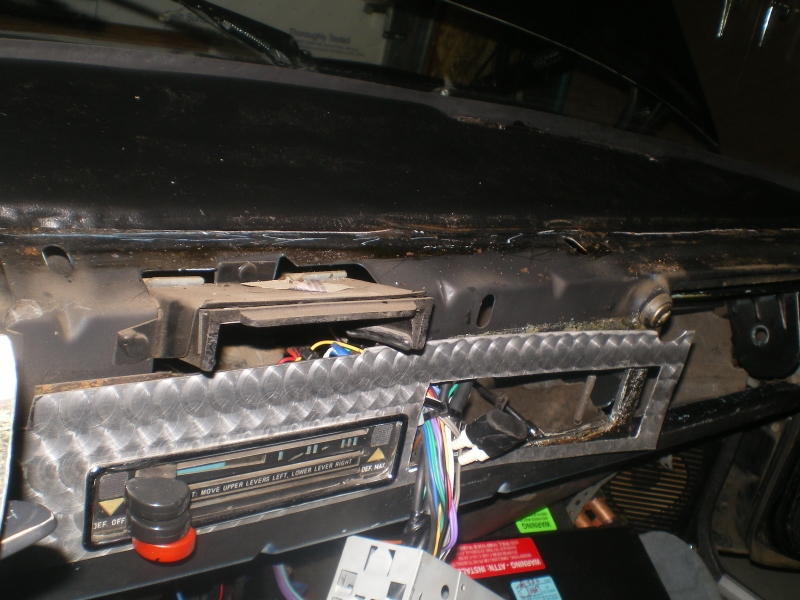 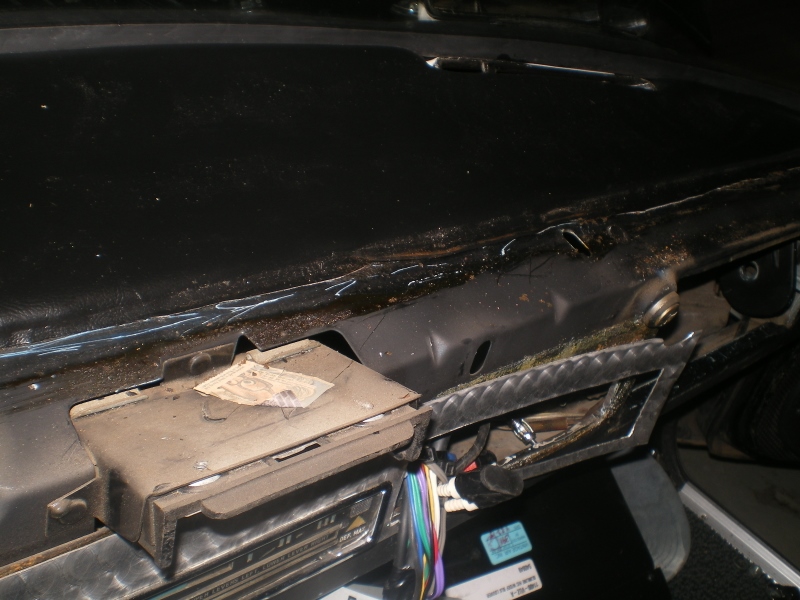  As I was fidgeting with the installation one of the plastic studs pop out. Got me to cussing a bit but in hind site I'm glad it happened. It was easy enough to thread the stud back into the metal threaded piece inside the dash. I decided to check how well the plastic nut would thread on incase I had boogered the threads. (IMG:style_emoticons/default/blink.gif) I couldn't get ANY of the plastic studs to accept the OEM plastic nuts. (IMG:style_emoticons/default/confused24.gif) OK. I then tried a 13mm metal nut. Same thing. (IMG:style_emoticons/default/WTF.gif) Since I have the patience of a charging Rhinoceros I decided to try this instead. I used a piece of threaded rod I had setting around and cut 9- 7/8" long pieces then set them 5/16" deep into a bit of silicone to lock. Don't set them any deeper than 5/16". This leaves 9/16" exposed. Same as the OEM. Don't throw away the old plastic studs. You might need one like I did. On mine, the far left stud would not thread in. I found the metal threaded piece was "hammered" (IMG:style_emoticons/default/confused24.gif) . I felt the metal tab might dislodge if I tried to tap it so I simply re-installed (read jammed) one plastic stud. Granted it was and is cross threaded into the dash but I don't see removing it in the near future. BTW, don't forget to run the plastic stud thru an 8mm die several times to resize to accept the plastic OEM nut. I want to point out that the quality of this piece is very good and I expected some "teething issues" as mine is one of the first produced. Hope this helps some of you guys. (IMG:style_emoticons/default/beerchug.gif) 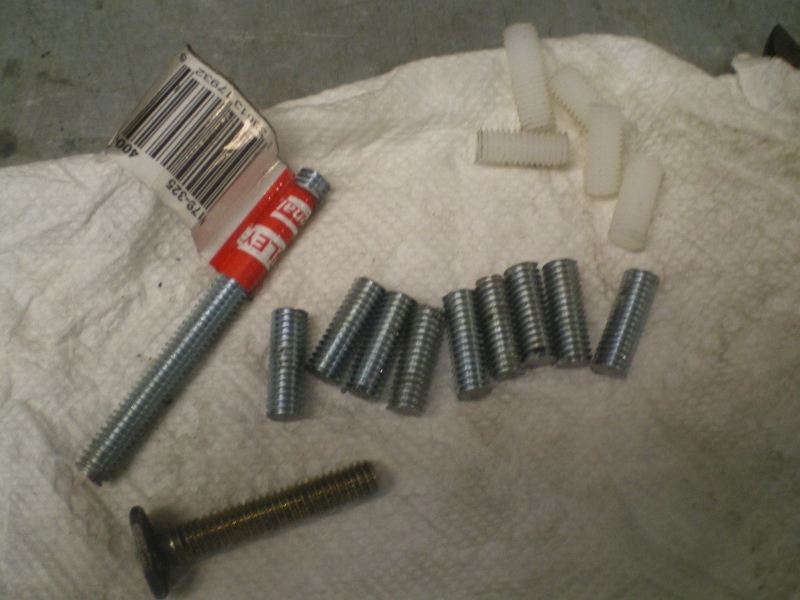 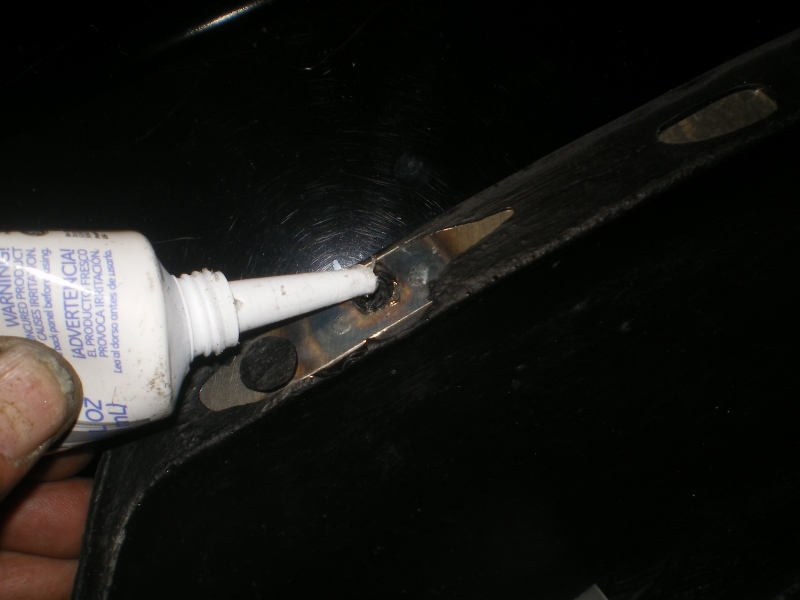  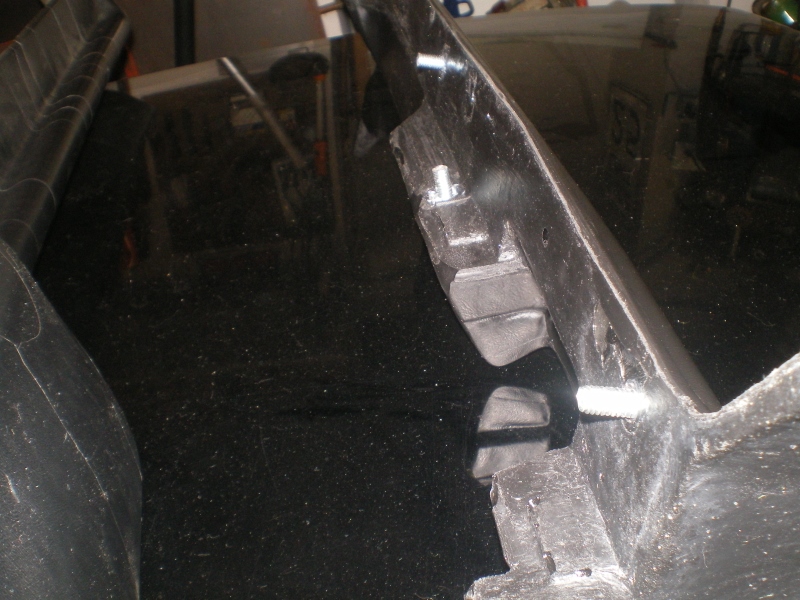 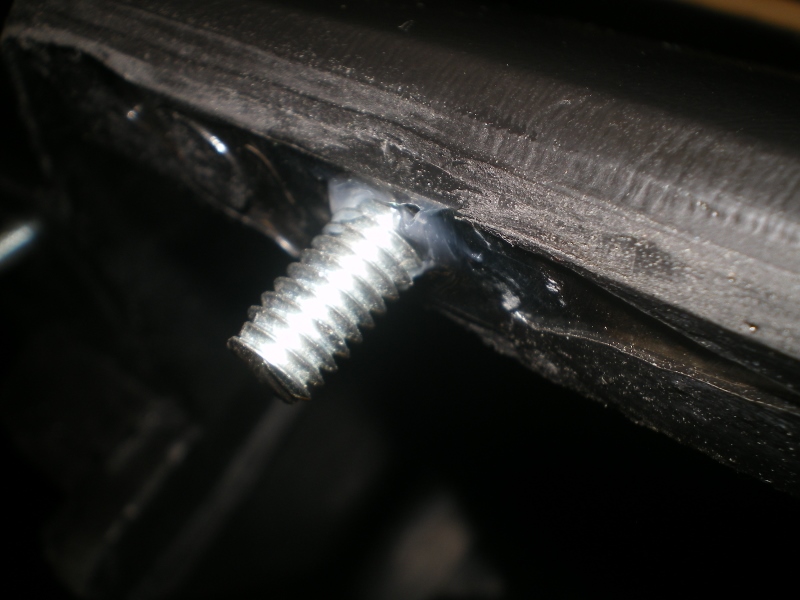 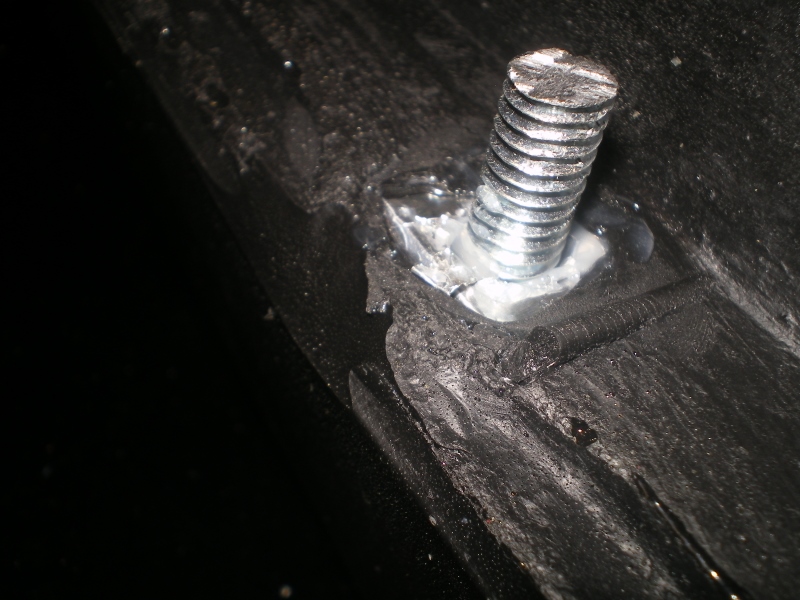 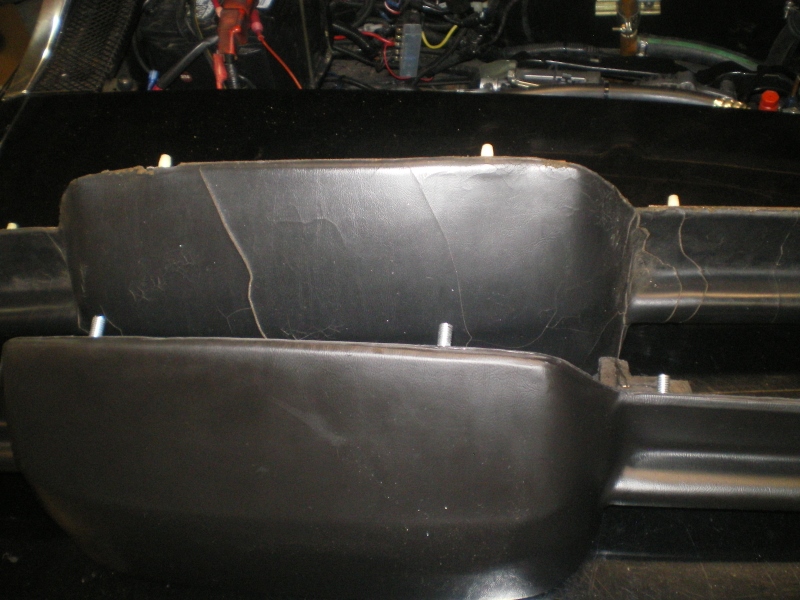 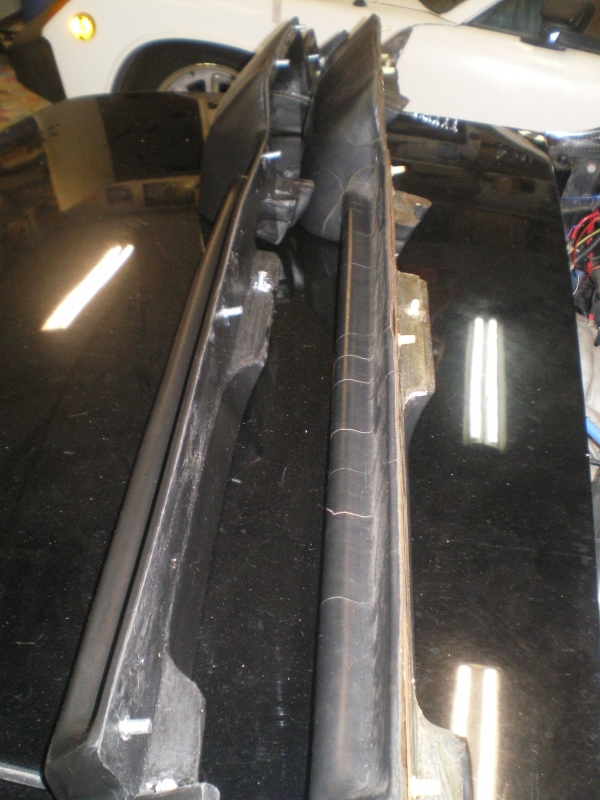 Attached image(s) 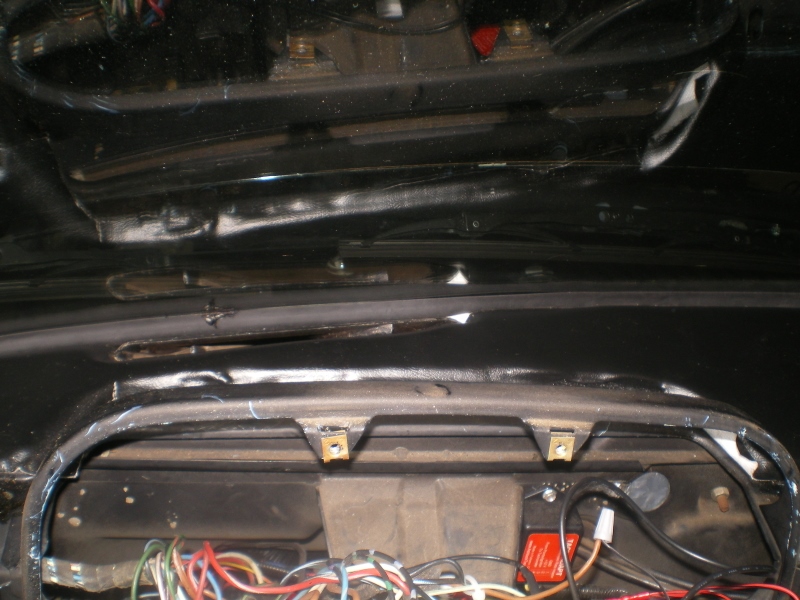
|
|
|
|
| Chris H. |
Oct 16 2015, 10:51 AM
Post
#654
|
|
Senior Member Group: Members Posts: 4,071 Joined: 2-January 03 From: Chicago 'burbs Member No.: 73 Region Association: Upper MidWest |
Nice work! (IMG:style_emoticons/default/beerchug.gif) Dang your old dash was CRACKED!
|
|
|
|
| euro911 |
Oct 16 2015, 11:40 AM
Post
#655
|
|
Retired & living the dream. God help me if I wake up! Group: Members Posts: 8,937 Joined: 2-December 06 From: So.Cal. & No.AZ (USA) Member No.: 7,300 Region Association: Southern California |
Let me see if I've got this right - the new dash came with new studs? ... just the wrong size/pitch? (IMG:style_emoticons/default/confused24.gif)
|
|
|
|
| 76-914 |
Oct 16 2015, 05:35 PM
Post
#656
|
|
Repeat Offender & Resident Subaru Antagonist Group: Members Posts: 13,836 Joined: 23-January 09 From: Temecula, CA Member No.: 9,964 Region Association: Southern California |
Yeah Chris, It looked like hammered dog (IMG:style_emoticons/default/stromberg.gif) but thanks to Mark W. it will look a lot nicer now. The one in my white car is perfect; go figure. (IMG:style_emoticons/default/confused24.gif)
Mark, they are pieces cut from an 8mm plastic thd rod, I believe. I say that because the length of each varies slightly. Most likely some Chinese product that got out of spec somewhere in production. I checked to see if they were 5/16" but they aren't. I did however use 5/16" because it "locked" into the shallow threaded receptacle a little tighter than 8mm did. ps, one can also use 5/16" brass closet bolts cut to length if you go 5/16". Brass is easier to cut! |
|
|
|
| euro911 |
Oct 16 2015, 06:06 PM
Post
#657
|
|
Retired & living the dream. God help me if I wake up! Group: Members Posts: 8,937 Joined: 2-December 06 From: So.Cal. & No.AZ (USA) Member No.: 7,300 Region Association: Southern California |
... or just get some cheeeeep Chinese M8 nuts (IMG:style_emoticons/default/confused24.gif)
(IMG:style_emoticons/default/laugh.gif) |
|
|
|
| 76-914 |
Oct 17 2015, 05:26 PM
Post
#658
|
|
Repeat Offender & Resident Subaru Antagonist Group: Members Posts: 13,836 Joined: 23-January 09 From: Temecula, CA Member No.: 9,964 Region Association: Southern California |
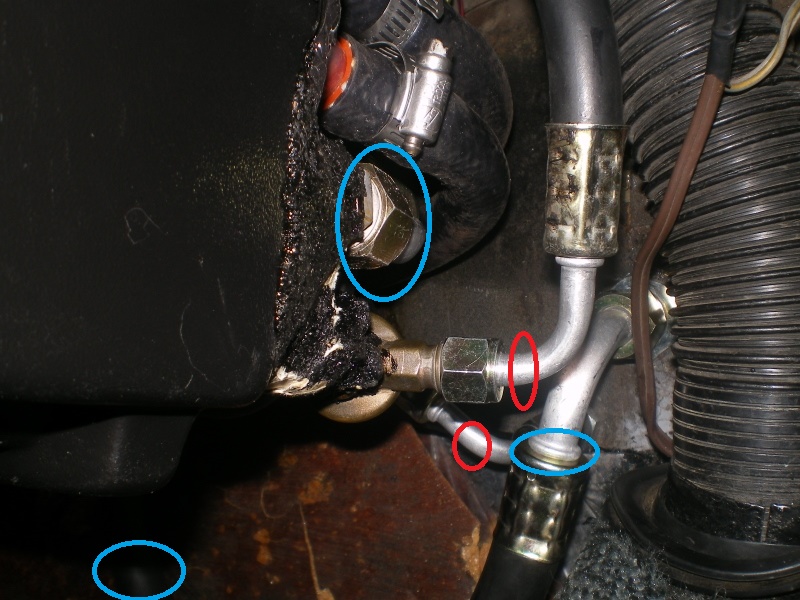
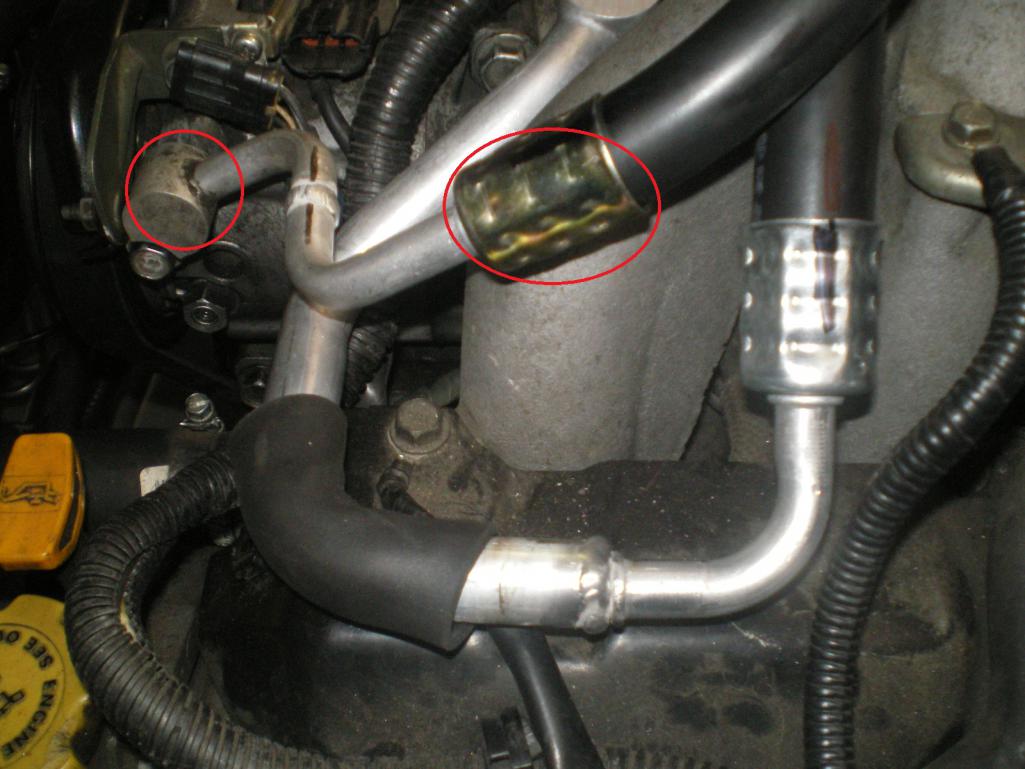
Hardly noteworthy but glad it is holding. As I mentioned earlier; I don't know (IMG:style_emoticons/default/stromberg.gif) from Apple Butter about AC but I'm learning. I could pull it down but it would leak down almost immediately. I put some dye down the hose before tapping into the Freon can and there it was staring me in the face. The O-ring on the OEM fitting (circled in red) at the compressor was hard as a rock. Missed that (IMG:style_emoticons/default/slap.gif) . The other leak was on the "New" crimp fitting (circled in red as well). Do you see the error? I didn't either until now. Look at the ferrule. Notice the indentations from the crimp aren't as pronounced as the fitting to the right of it? Yep, I crimped a #8 fitting with #10 dies. (IMG:style_emoticons/default/headbang.gif)
 |
|
|
|
| Mikey914 |
Oct 17 2015, 07:56 PM
Post
#659
|
|
The rubber man Group: Members Posts: 12,772 Joined: 27-December 04 From: Hillsboro, OR Member No.: 3,348 Region Association: None |
I tried to match the thread pitch with the OEM. We will now include matched nuts with these.
|
|
|
|
| euro911 |
Oct 17 2015, 09:31 PM
Post
#660
|
|
Retired & living the dream. God help me if I wake up! Group: Members Posts: 8,937 Joined: 2-December 06 From: So.Cal. & No.AZ (USA) Member No.: 7,300 Region Association: Southern California |
I had a feeling that waiting to ship would have some benefits (IMG:style_emoticons/default/happy11.gif)
|
|
|
|
|
3 User(s) are reading this topic (3 Guests and 0 Anonymous Users)
0 Members:

|
Lo-Fi Version | Time is now: 10th January 2026 - 03:37 AM |
Invision Power Board
v9.1.4 © 2026 IPS, Inc.