|
|
|
Porsche, and the Porsche crest are registered trademarks of Dr. Ing. h.c. F. Porsche AG.
This site is not affiliated with Porsche in any way. Its only purpose is to provide an online forum for car enthusiasts. All other trademarks are property of their respective owners. |
|
|

  |

| 76-914 |
 Jul 10 2013, 07:53 AM Jul 10 2013, 07:53 AM
Post
#92
|
|
Repeat Offender & Resident Subaru Antagonist  Group: Members Posts: 13,502 Joined: 23-January 09 From: Temecula, CA Member No.: 9,964 Region Association: Southern California |
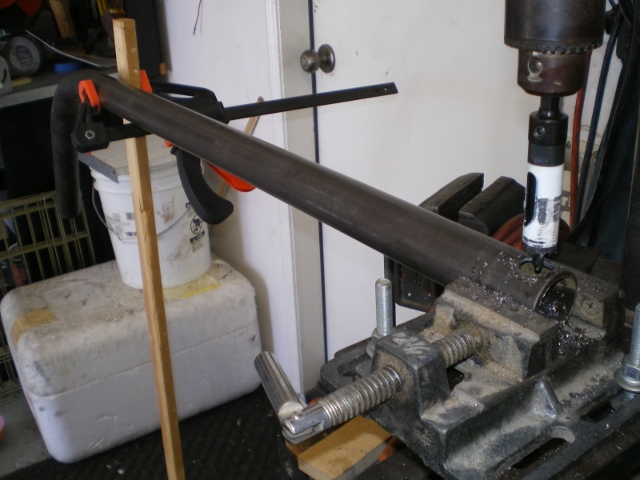
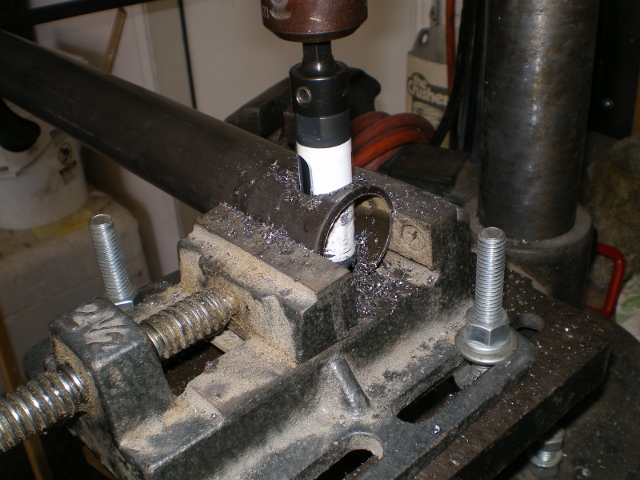
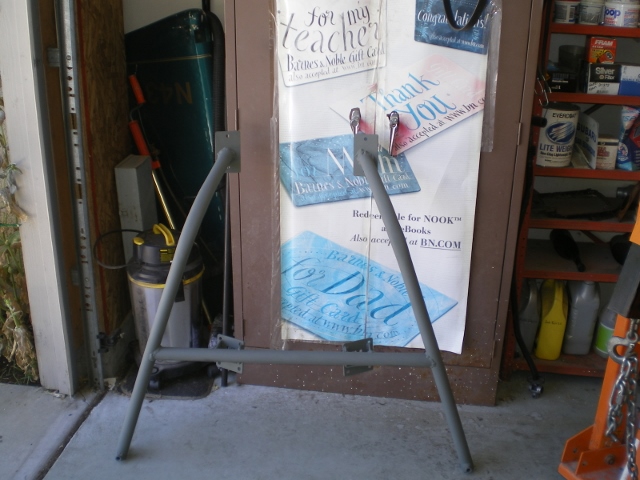
The 4130 tube arrived so it was time to get Blackie up and start with the mount. Besides I need the room to weld in the new trunk hinge when it arrives. I bought a 4x4 and ran a dado cut down it to accept the flange on the bottom of the longs. Flame on.
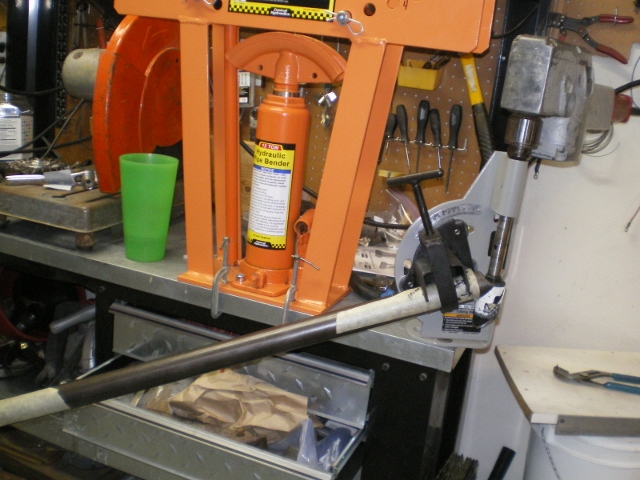
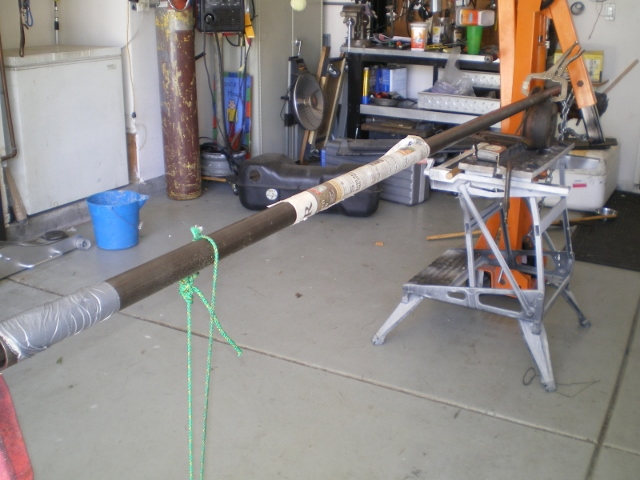    No, I am not making the cradle from wood. (IMG:style_emoticons/default/chair.gif) Just trying to visualize. 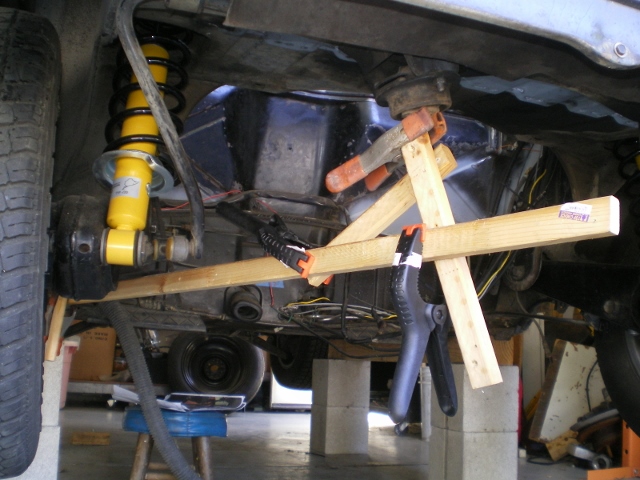 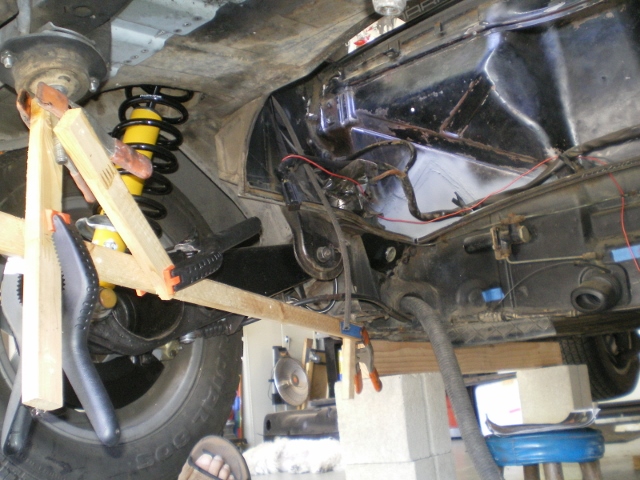 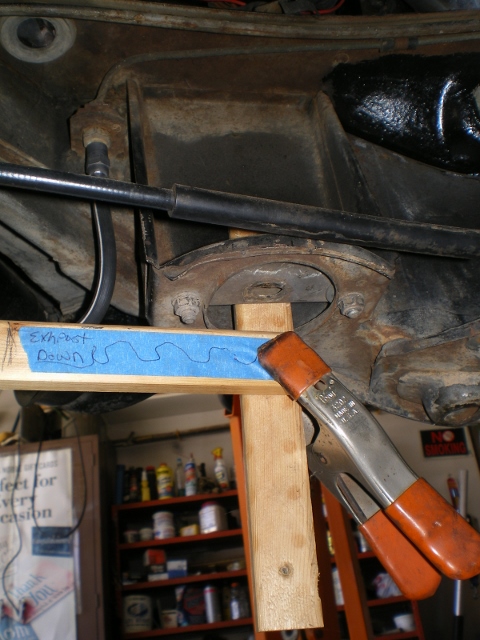 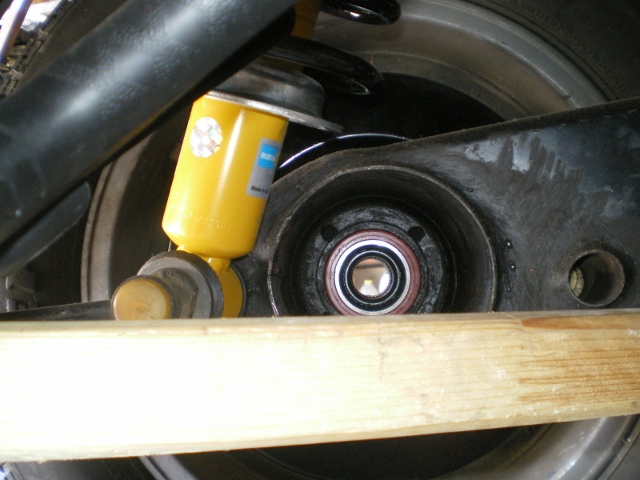 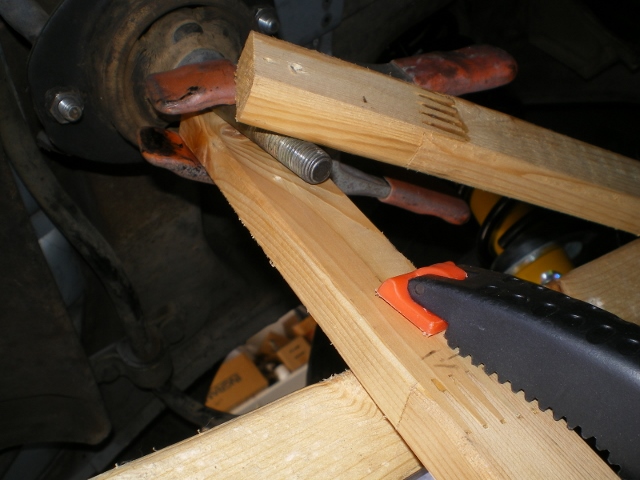 I had planned to heat bend the tube but proved to be a PIA. Too tricky to keep below 1500F and I don't have any means to heat treat so it was off to HF. With my coupon I walked out with this for $79. Out of the dark ages now.  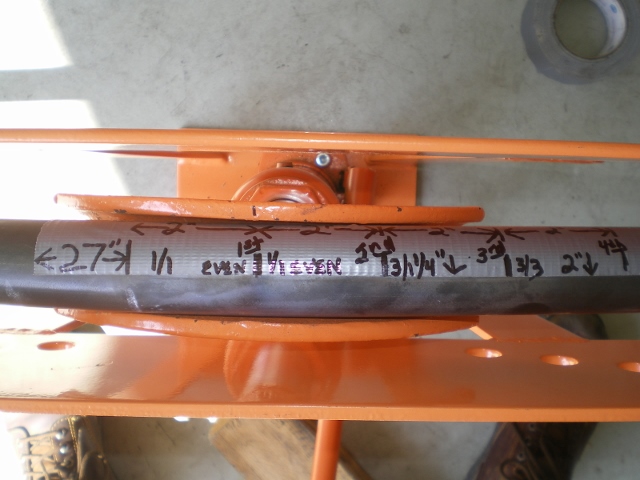 The first pieces. Next is to locate some bushing stock or some 5/16 weld tabs (if they make such a thing). 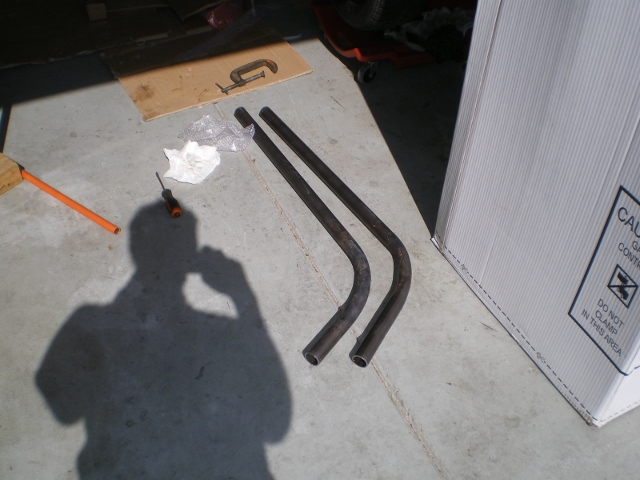 PS, Blackie is getting a new name. Just discovered that name is already in use. His new name is Frank. |
   |

 
|
| Chris H. |
Jul 10 2013, 01:28 PM
Post
#93
|
|
Senior Member Group: Members Posts: 4,030 Joined: 2-January 03 From: Chicago 'burbs Member No.: 73 Region Association: Upper MidWest |
Not sure about the 3.0 but the stock 3.3 manifolds were way too long. I got headers from Bob that sit very close to the engine underneath. Perfect fit, but I might have to cut one of the braces on my Ian mount for that reason. Might want to make sure you don't weld any bracing in that area.
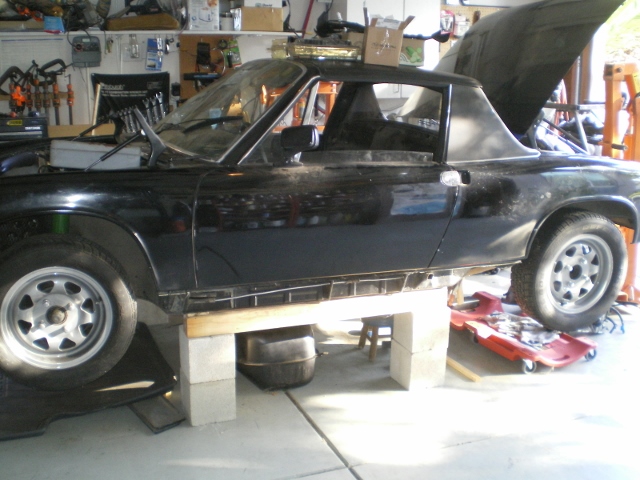
Put some jack stands under that car brotha! (IMG:style_emoticons/default/poke.gif) Just for backup! |
|
|
|
| 76-914 |
Jul 11 2013, 09:58 AM
Post
#94
|
|
Repeat Offender & Resident Subaru Antagonist Group: Members Posts: 13,502 Joined: 23-January 09 From: Temecula, CA Member No.: 9,964 Region Association: Southern California |
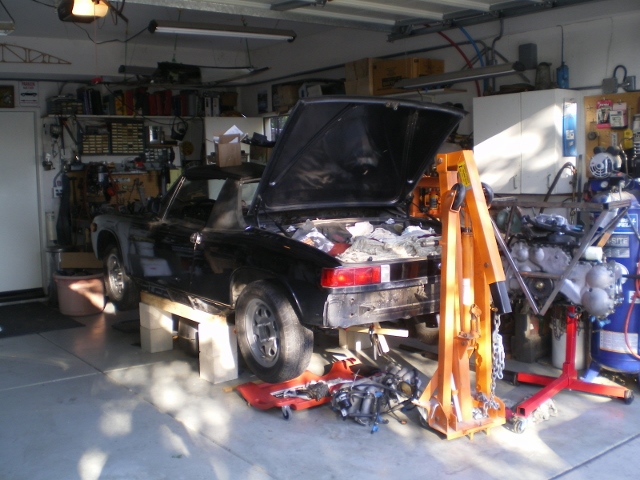
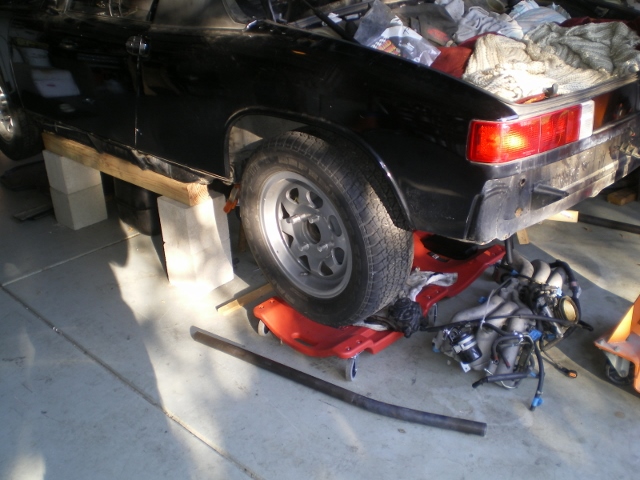
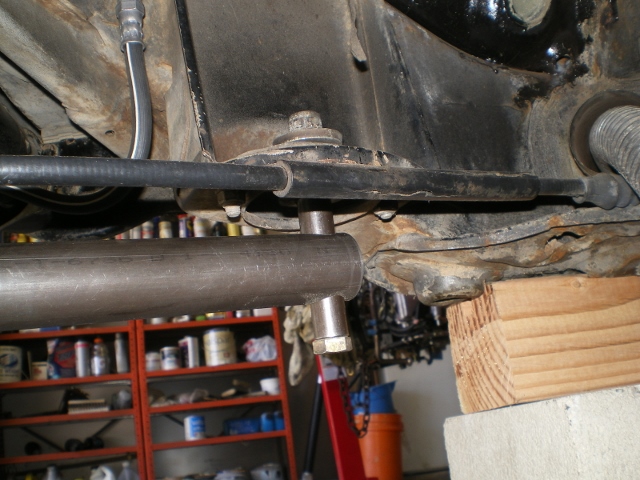
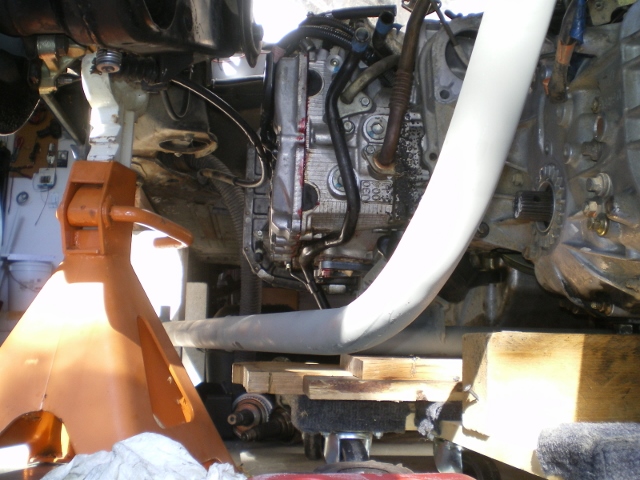
Hey Chris (IMG:style_emoticons/default/bye1.gif) , I thought about that so I will pick up the collector from Outfront and fit it to the engine before fabbing that part. I also need to check the cradle for clearance of the 1/2 shafts as well as ground clearance of the exhaust. The jack stands get in the way with what I am doing just now. It is very stable as it sits now. I had a crazy idea last nite. I think I will look at modifying the cradle to accept casters that would drop in/out. It would be nice to slap on the casters, lower the cradle onto the floor and roll in/out. How's your project coming along?
|
|
|
|
| 76-914 |
Jul 11 2013, 10:22 AM
Post
#95
|
|
Repeat Offender & Resident Subaru Antagonist Group: Members Posts: 13,502 Joined: 23-January 09 From: Temecula, CA Member No.: 9,964 Region Association: Southern California |
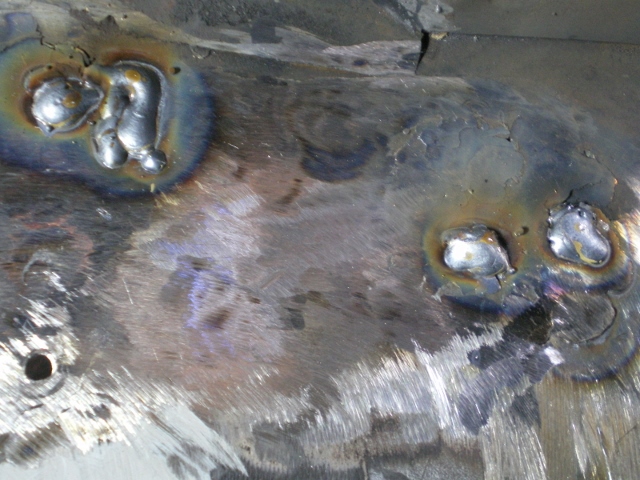
I received the trunk hinge from Restoration Design (IMG:style_emoticons/default/first.gif) so I took a break from the engine cradle to attack this.
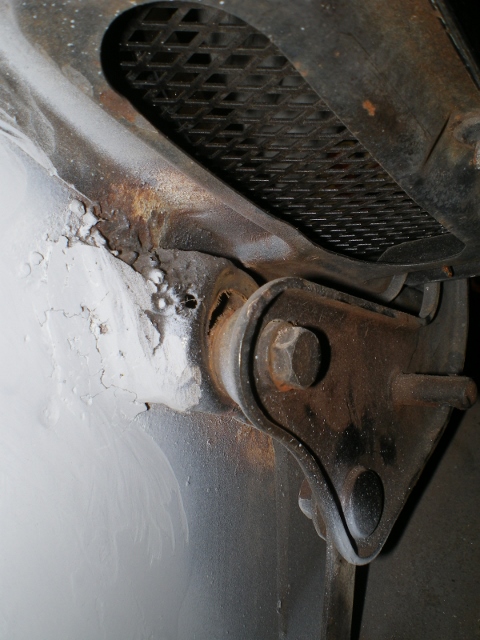 I had noticed the mud dauber welds earlier and then found that the hinge had rusted thru also. After grinding down the old welds and removing the old hinge it looked like this 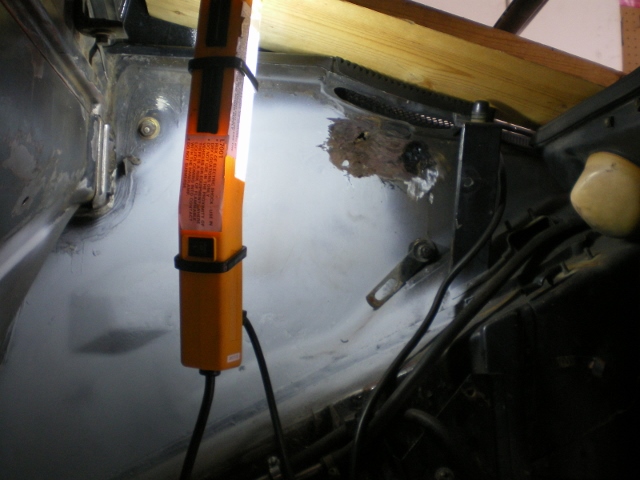 But a close up reveals a crappy previous repair as well as brazing........... 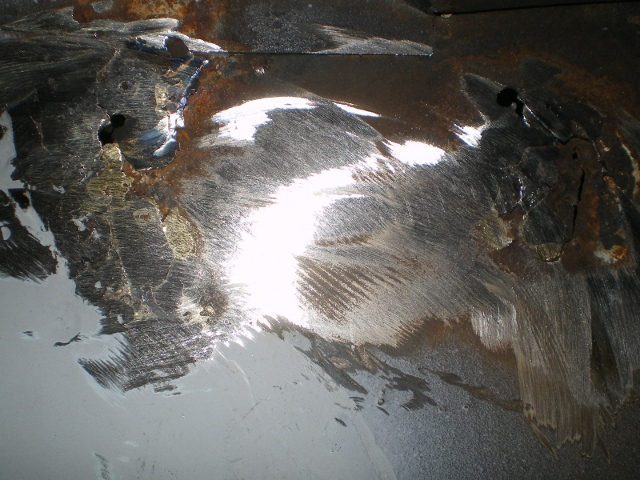 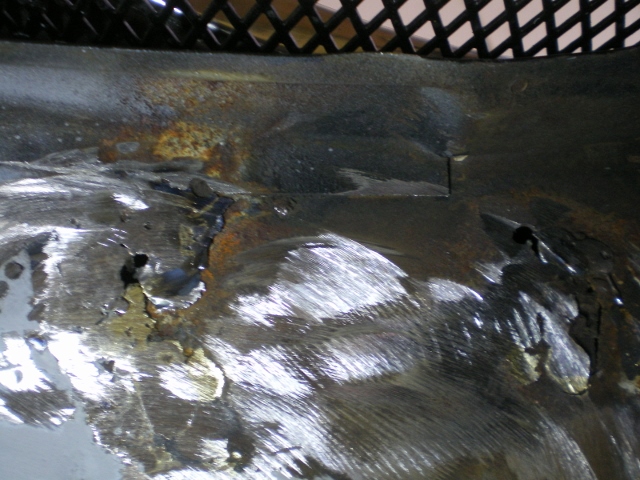 I'll need to get this area cleaned up and I'll beef up this area before welding in the replacement piece. Check out the Key Chain I received from Restoration Design. Coooooooooool. 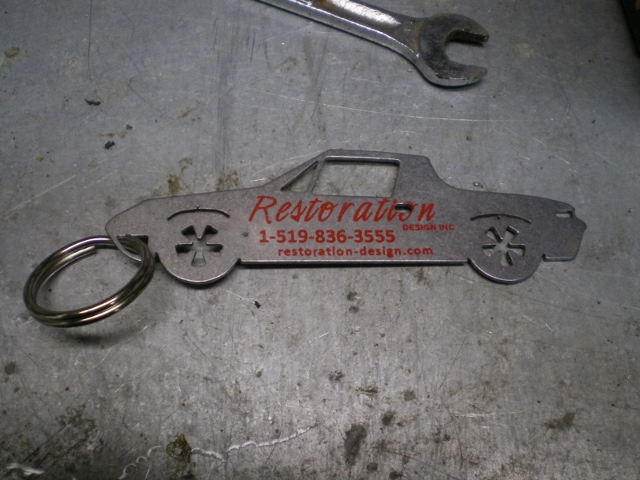 |
|
|
|
| Chris H. |
Jul 11 2013, 05:25 PM
Post
#96
|
|
Senior Member Group: Members Posts: 4,030 Joined: 2-January 03 From: Chicago 'burbs Member No.: 73 Region Association: Upper MidWest |
QUOTE(76-914 @ Jul 11 2013, 10:58 AM)  Hey Chris (IMG:style_emoticons/default/bye1.gif) , I thought about that so I will pick up the collector from Outfront and fit it to the engine before fabbing that part. I also need to check the cradle for clearance of the 1/2 shafts as well as ground clearance of the exhaust. The jack stands get in the way with what I am doing just now. It is very stable as it sits now. I had a crazy idea last nite. I think I will look at modifying the cradle to accept casters that would drop in/out. It would be nice to slap on the casters, lower the cradle onto the floor and roll in/out. How's your project coming along? Bob did a nice job on the exhaust I bought from him. Check out his blog. It also has pics of his mount. Great idea on the casters. That way you won't dread dropping the engine. Seems like it would be easy to do. My gut is telling me there is NO WAY I did everything right so far, so I expect to drop the engine and trans at least a couple of times. On my project I've been working on the 5 lug conversion. Should be done this weekend. Then I have to decide if I drop the engine and trans and start the install or keep it as is and take it to Garold's before the swap. Great work! Keep it up! (IMG:style_emoticons/default/smilie_pokal.gif) |
|
|
|
| 76-914 |
Jul 11 2013, 07:44 PM
Post
#97
|
|
Repeat Offender & Resident Subaru Antagonist Group: Members Posts: 13,502 Joined: 23-January 09 From: Temecula, CA Member No.: 9,964 Region Association: Southern California |
QUOTE(Chris H. @ Jul 11 2013, 04:25 PM) QUOTE(76-914 @ Jul 11 2013, 10:58 AM) Hey Chris (IMG:style_emoticons/default/bye1.gif) , I thought about that so I will pick up the collector from Outfront and fit it to the engine before fabbing that part. I also need to check the cradle for clearance of the 1/2 shafts as well as ground clearance of the exhaust. The jack stands get in the way with what I am doing just now. It is very stable as it sits now. I had a crazy idea last nite. I think I will look at modifying the cradle to accept casters that would drop in/out. It would be nice to slap on the casters, lower the cradle onto the floor and roll in/out. How's your project coming along? Bob did a nice job on the exhaust I bought from him. Check out his blog. It also has pics of his mount. Great idea on the casters. That way you won't dread dropping the engine. Seems like it would be easy to do. My gut is telling me there is NO WAY I did everything right so far, so I expect to drop the engine and trans at least a couple of times. On my project I've been working on the 5 lug conversion. Should be done this weekend. Then I have to decide if I drop the engine and trans and start the install or keep it as is and take it to Garold's before the swap. Great work! Keep it up! (IMG:style_emoticons/default/smilie_pokal.gif) I think I finally discovered Bob's build at NARP. I was reading the ScoobyDo forum and saw that Blue car and realized BK was Bob. Damn he does nice work. He also said something about changing that exhaust setup so I've been (IMG:style_emoticons/default/popcorn[1].gif) . We need to send a reporter to document his next build. (IMG:style_emoticons/default/lol-2.gif) |
|
|
|
| mepstein |
Jul 11 2013, 08:18 PM
Post
#98
|
|
914-6 GT in waiting Group: Members Posts: 19,272 Joined: 19-September 09 From: Landenberg, PA/Wilmington, DE Member No.: 10,825 Region Association: MidAtlantic Region |
Your "jack stands" scare me.
|
 |
|
| 76-914 |
Jul 13 2013, 06:43 PM
Post
#99
|
|
Repeat Offender & Resident Subaru Antagonist Group: Members Posts: 13,502 Joined: 23-January 09 From: Temecula, CA Member No.: 9,964 Region Association: Southern California |
I ground out all the brazing from a previous repair then filled holes and ground them down. This is the last of the welded holes.
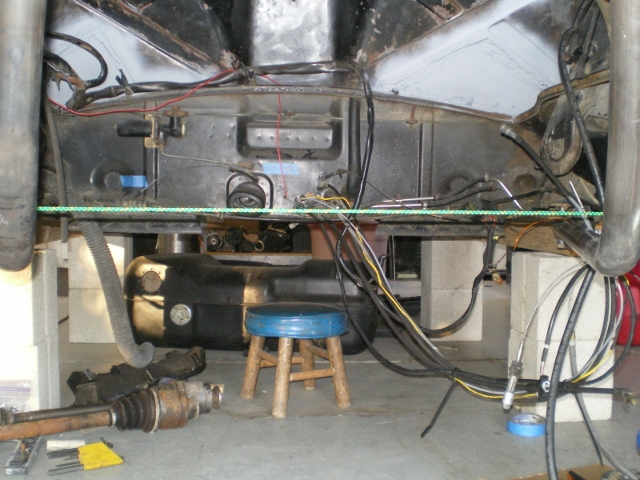
 Ready for weld thru primer. 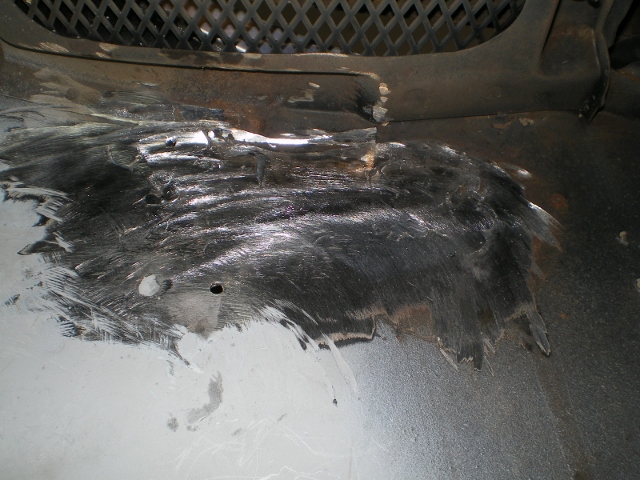 Reinforcement piece 18ga. 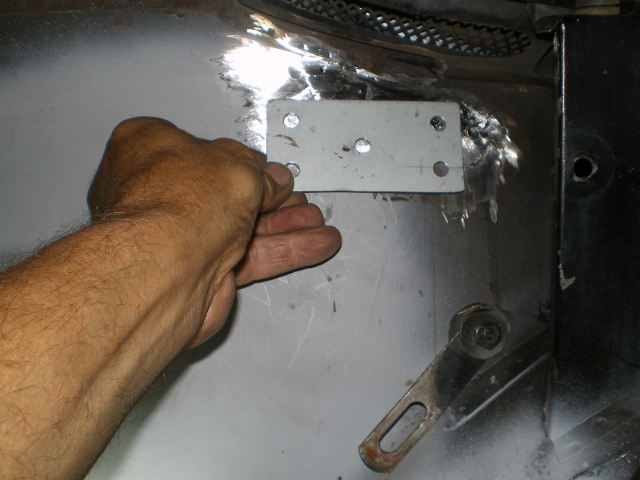 Reinforcement piece welded in 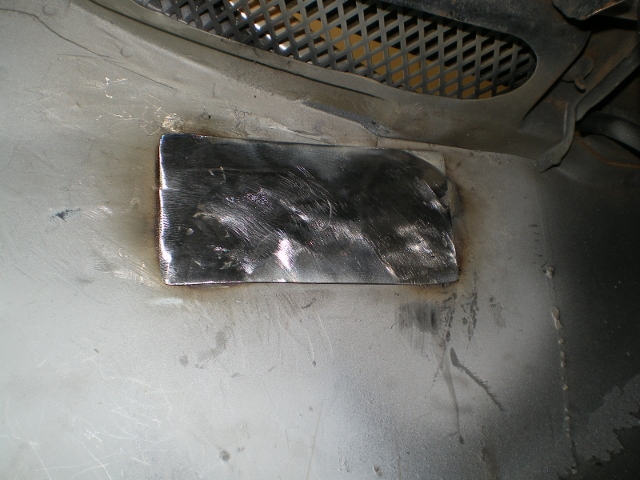 Primed with weld thru. Ready for the hinge piece to be welded to it now. 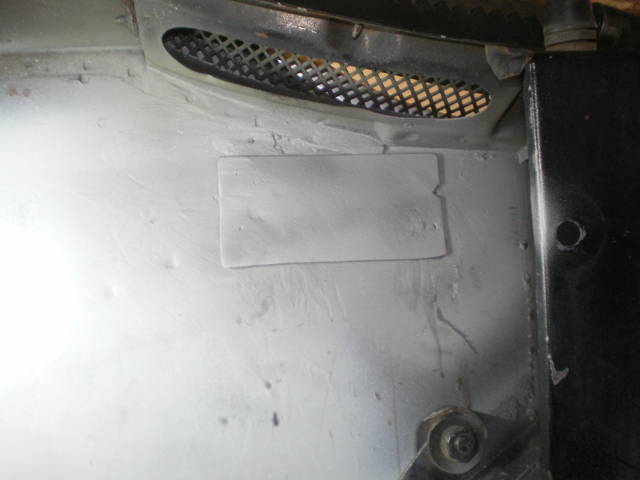 Here's the new one. Thanks Restoration Design. 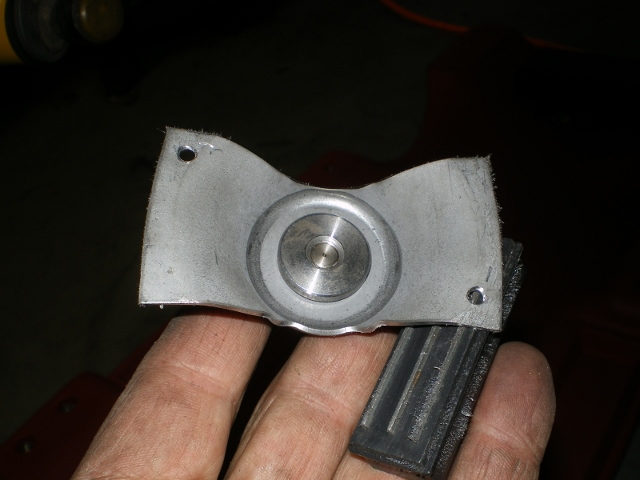 Primed and ready to have the nut from the back side welded in  Welded in place. It's ugly but substantial. It's a bitch to get that tip in there. (IMG:style_emoticons/default/huh.gif) 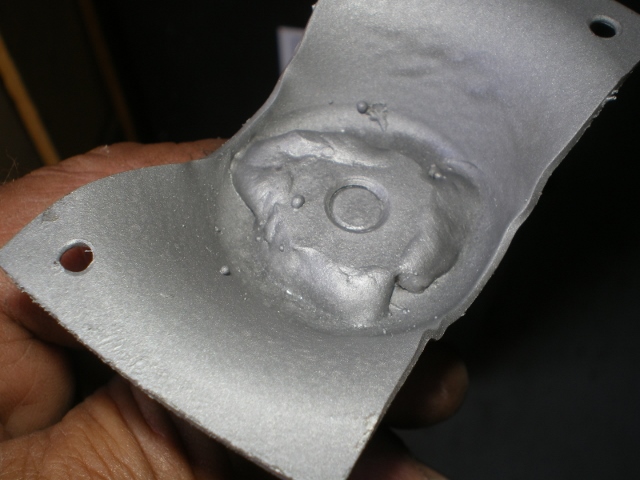 And everything welded/primed and ready for the lid to be mounted, shocks slipped on make any adjustments necessary. The motion of the trunk lid is now smooth as a baby's (IMG:style_emoticons/default/bootyshake.gif) .  With that out of the way it's time to get back to the motor mount. (IMG:style_emoticons/default/dry.gif) This thing is going to have it's way with me but eventually (aka more $$) I'll get it. It's a start stop scenario so bear with me. I took some 1/4"x 4" sq plates and used the Subaru piece as a guide. After I made the slots in each piece I realized that it wasn't necessary. A solitary hole would have been fine but now I have a little more wiggle room.  A quick test fit 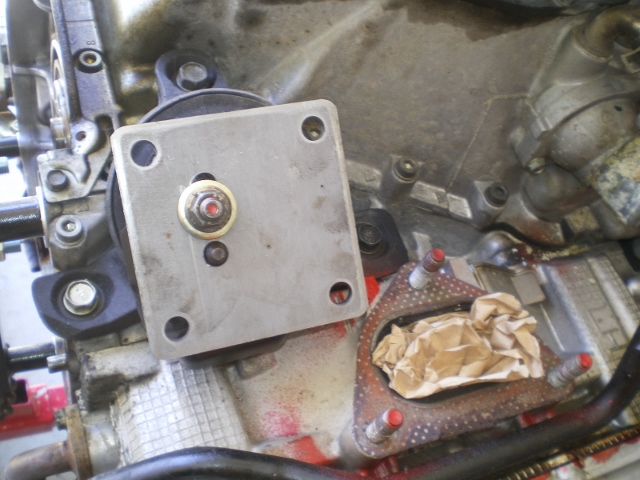 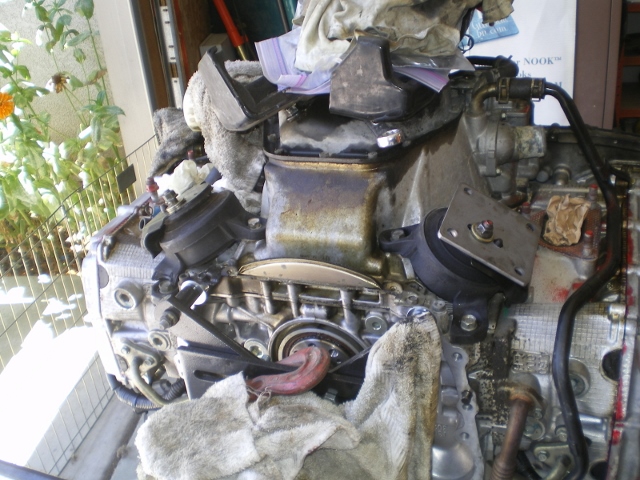 One is the mirror image of the other so using 2 of the 4 bolt holes the plates are bolted together and the 1st piece is the template for the other. 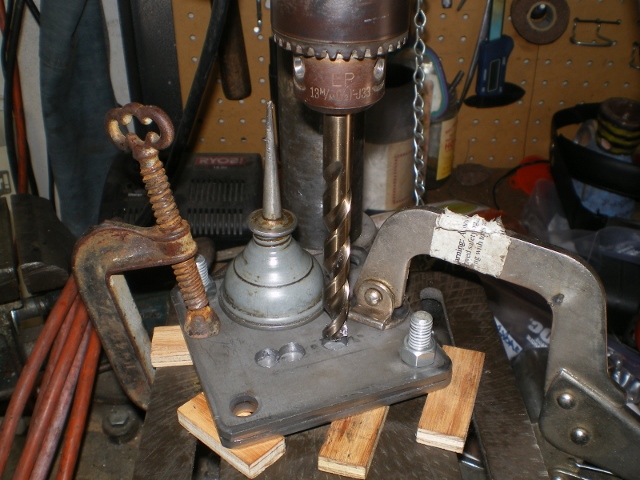 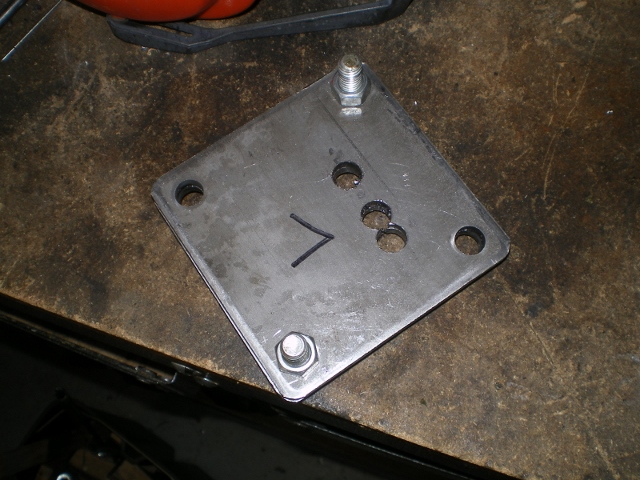 The plates in place 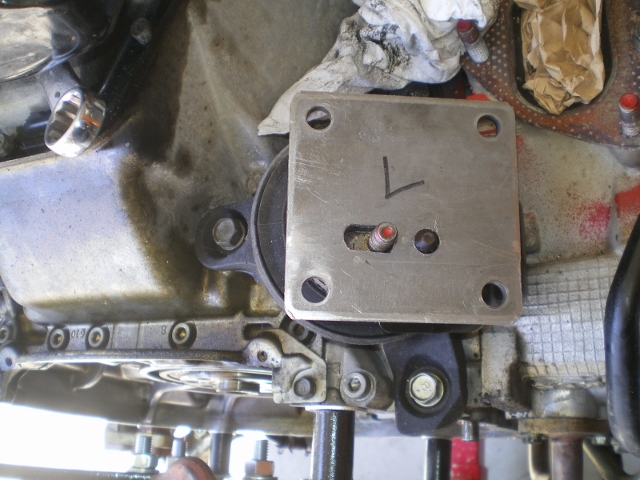 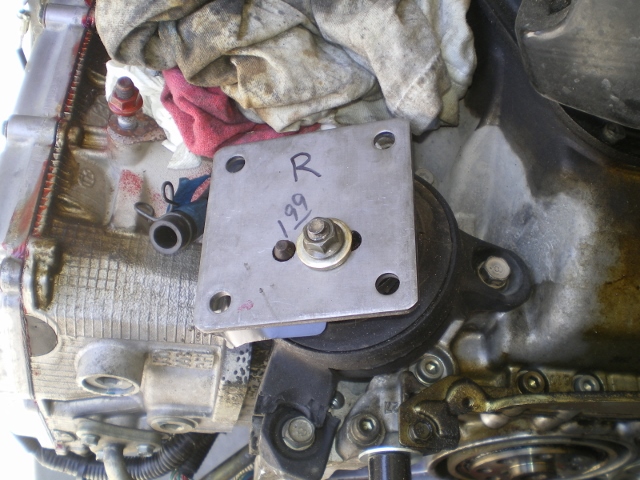 I need the engine level to get these next measurements. 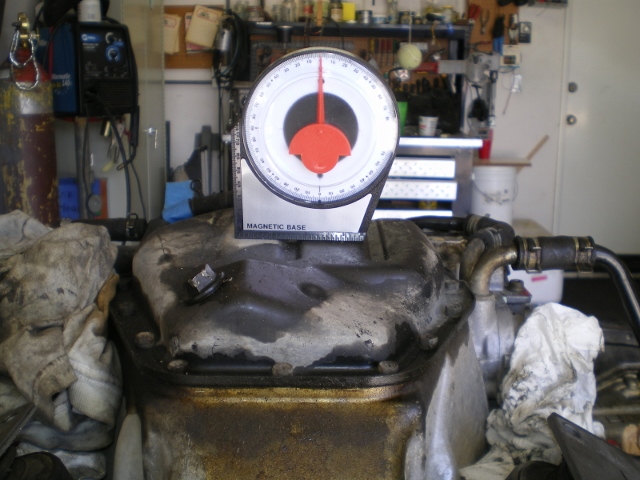 Right & left motor mounts are at 32 degrees. 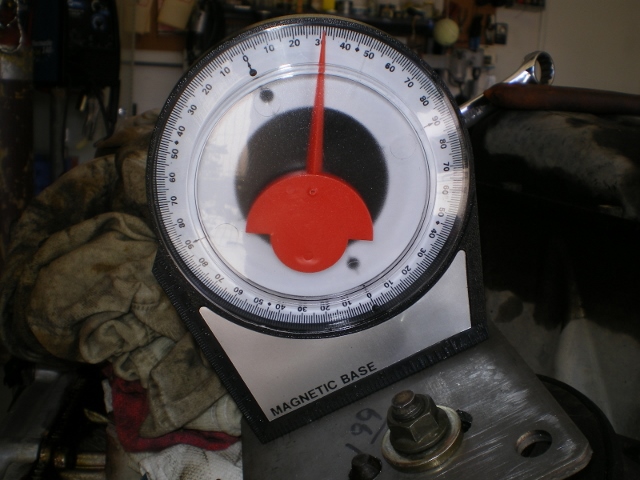 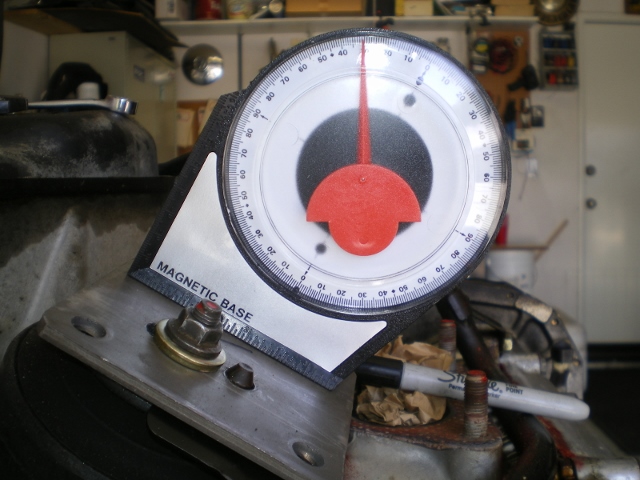 Well I'm at the stopping point again (IMG:style_emoticons/default/headbang.gif) . I need the exhaust flanges before I can go any further with the cradle so I stuck some pieces up just for shits n grins. (IMG:style_emoticons/default/hissyfit.gif) 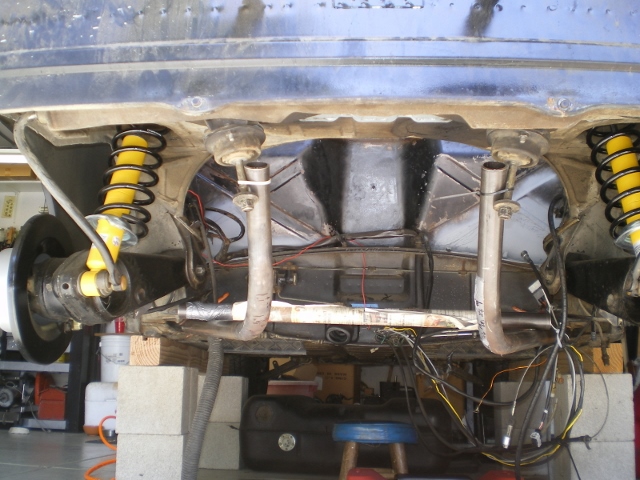 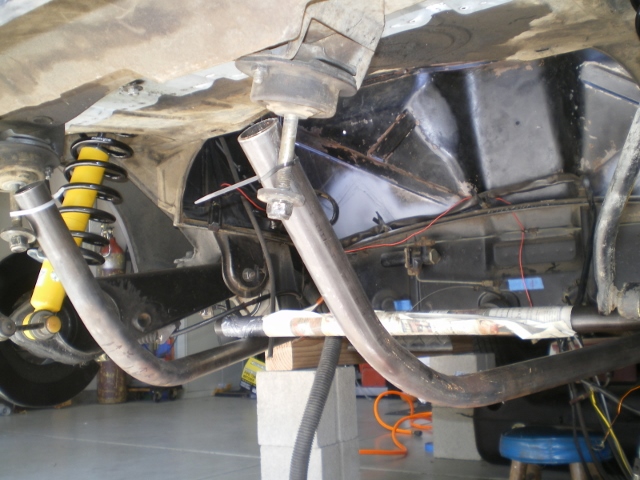 |
|
|
|
| 76-914 |
Jul 20 2013, 09:38 PM
Post
#100
|
|
Repeat Offender & Resident Subaru Antagonist Group: Members Posts: 13,502 Joined: 23-January 09 From: Temecula, CA Member No.: 9,964 Region Association: Southern California |
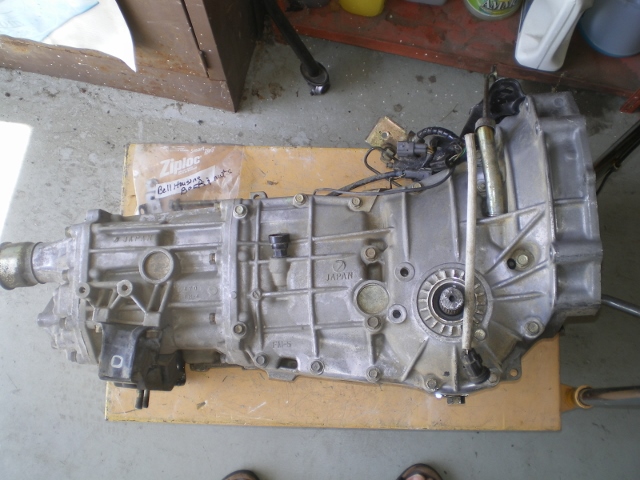
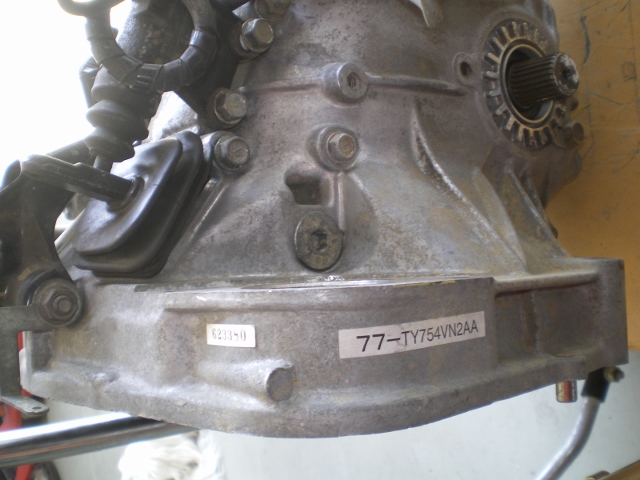
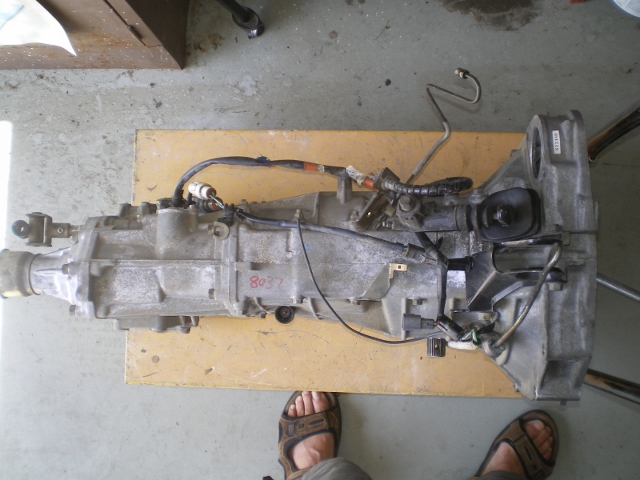
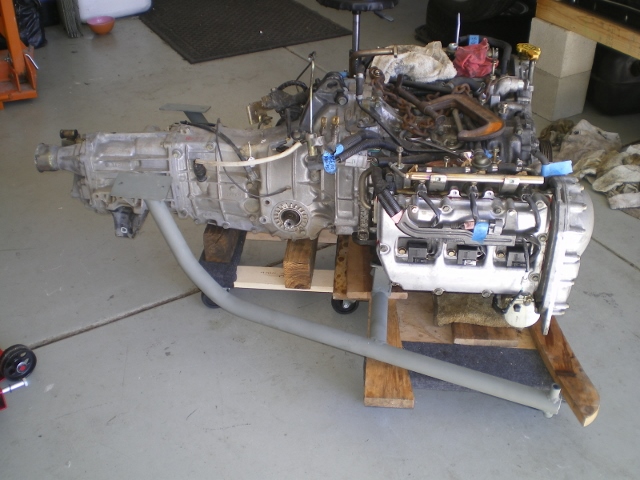
Yippie (IMG:style_emoticons/default/piratenanner.gif) Picked up a tranny from an 03 WRX 2.0T, 74K miles., pressure plate, throw out bearing, some 1/2 shafts he threw in (away). (IMG:style_emoticons/default/biggrin.gif) This will help answer my cradle questions. Bottom line is that the center line off the 1/2 shafts is roughly at the bottom of the heads. Porcharu is sending me some majic flanges in a few weeks, too. (IMG:style_emoticons/default/biggrin.gif) Only one pair left!!!
      |
|
|
|
| 76-914 |
Jul 25 2013, 06:32 PM
Post
#101
|
|
Repeat Offender & Resident Subaru Antagonist Group: Members Posts: 13,502 Joined: 23-January 09 From: Temecula, CA Member No.: 9,964 Region Association: Southern California |
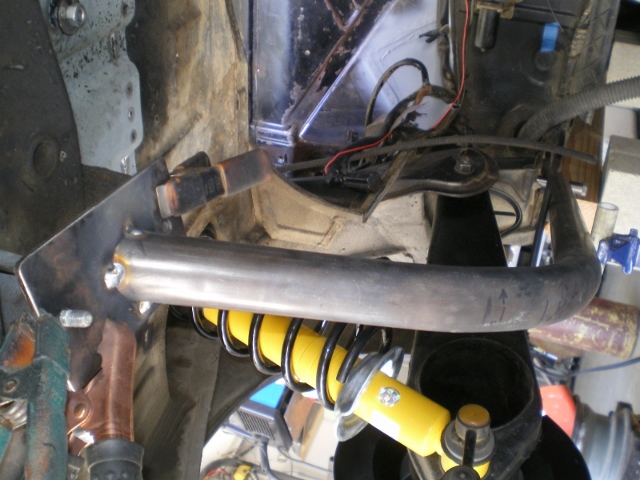
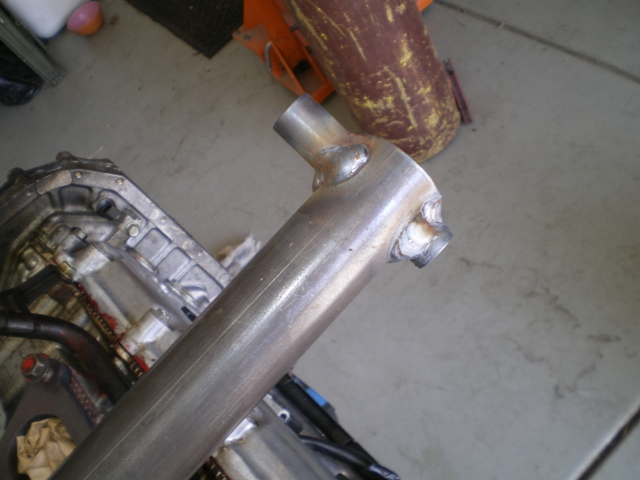
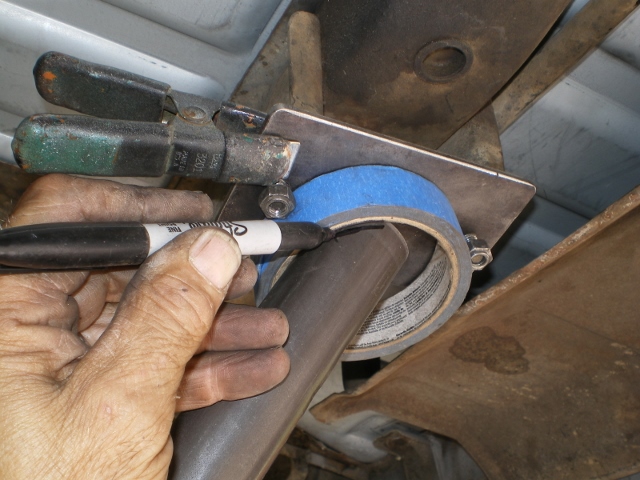
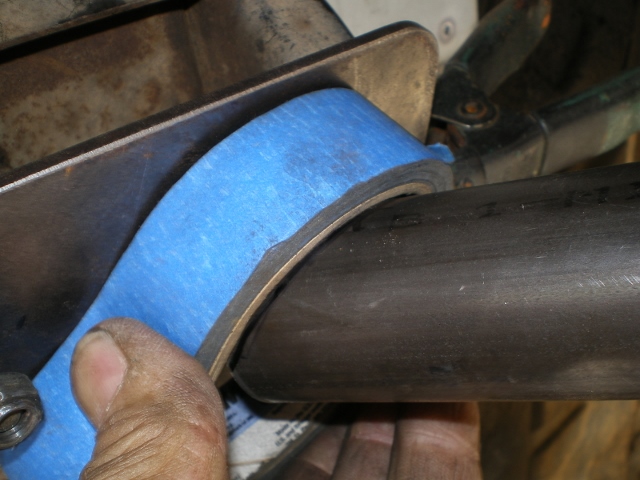
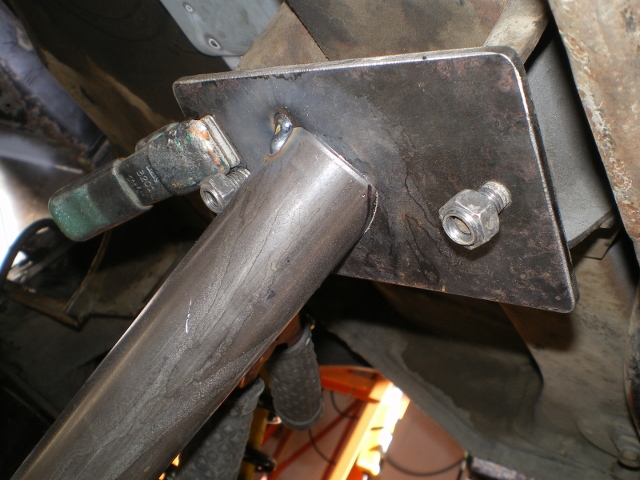
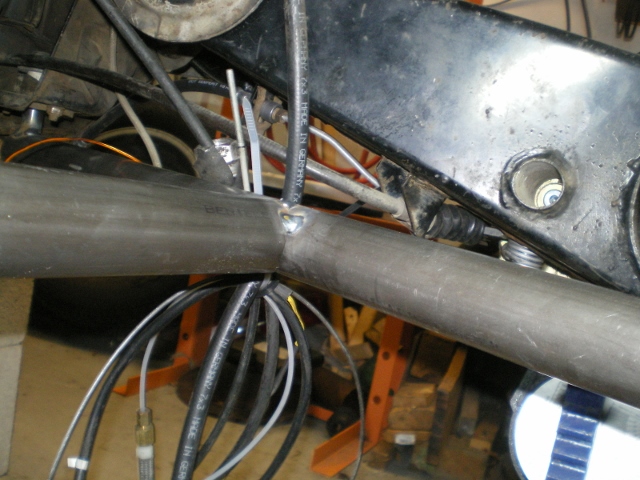
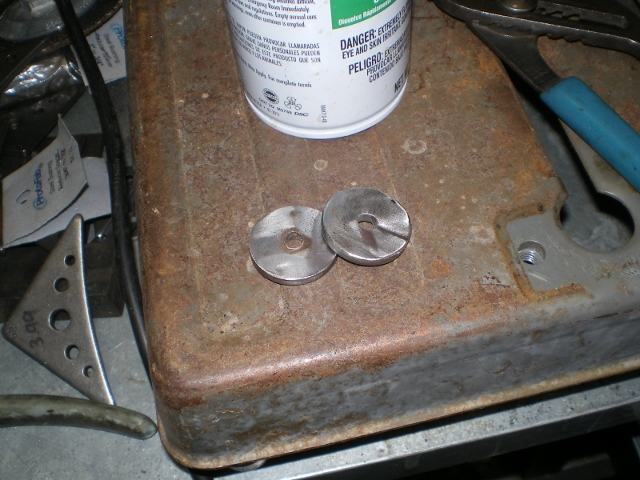
So back to the motor mount. I used some .25" 4" prefab plates ( $1.99ea) as the base plates and drilled them to match the factory mounts. For the stand offs I used some Proto Fab tabs ($3.99ea x 4) radius 1.5" to match the tube. All I had to do was shorten them a bit. I had already tacked the shorter tabs in place before I started with the pics. (IMG:style_emoticons/default/dry.gif) . They were out of the short rectangular tab so I used the ones with slanted sides which is covered a few pics down. Here the plates are back on the mounts with both short and long tabs tacked in place. The tube is slipped back in place to check flush and square from time to time.
The right bank 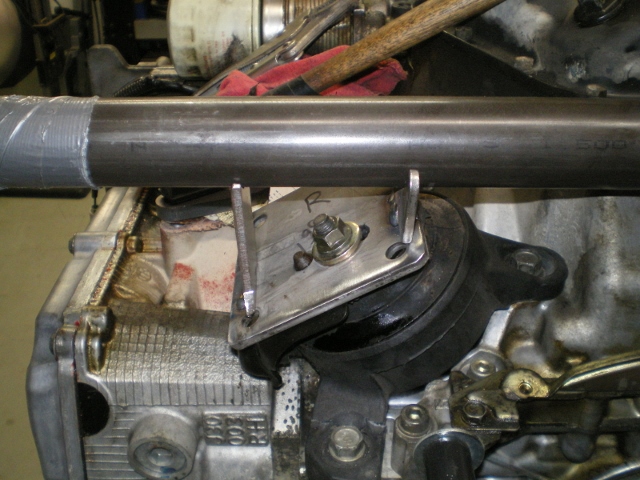 Left bank 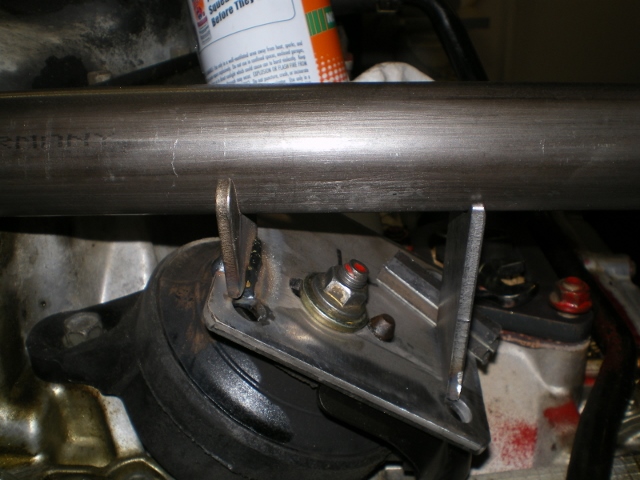 Another angle of the Left bank 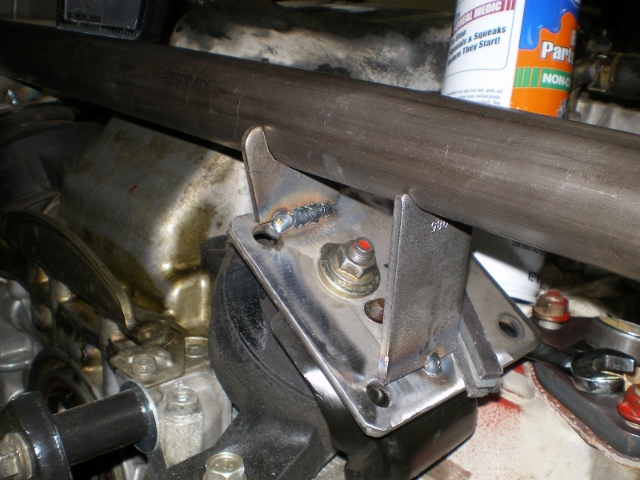 Ditto on the right bank 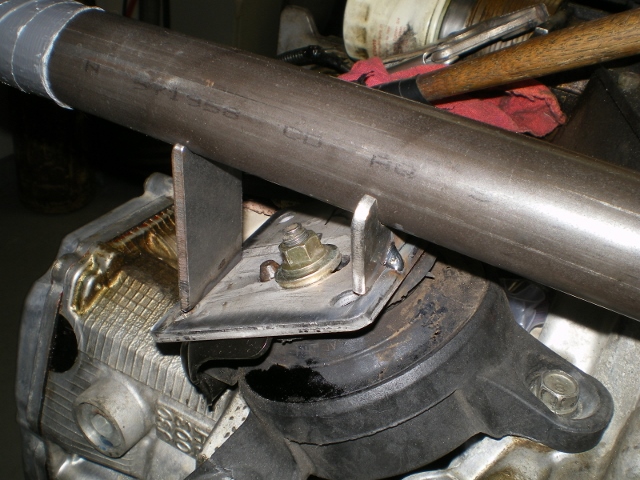 Front view 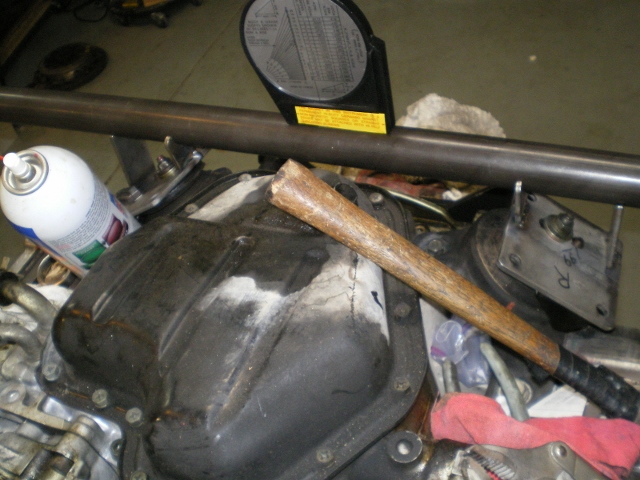 A quick double check of the angle 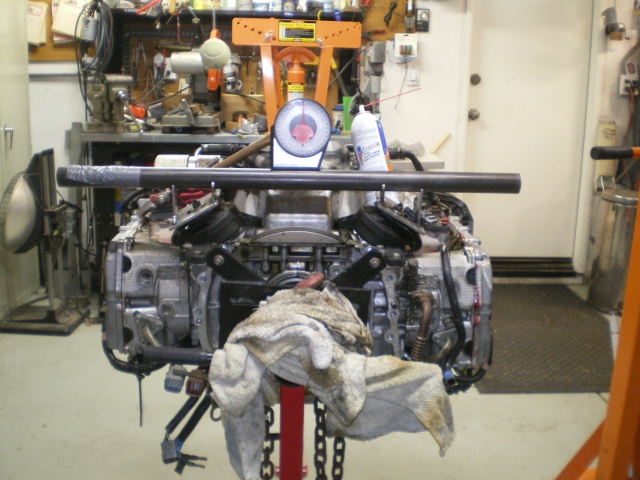 LJYYCM(%VF 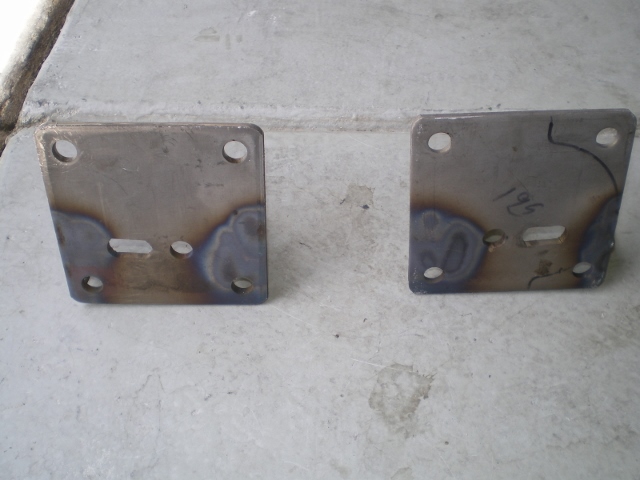 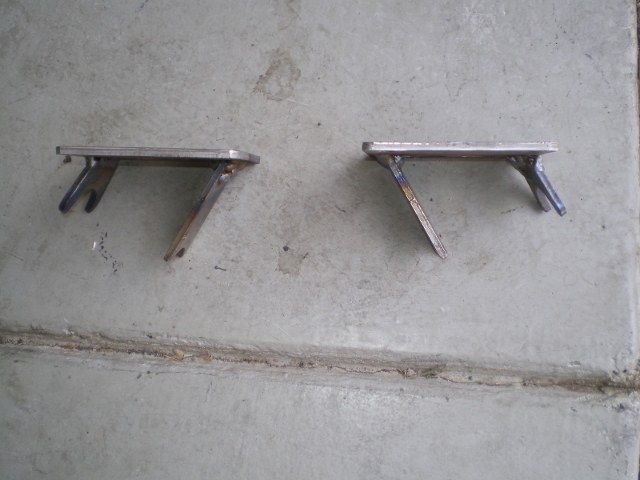 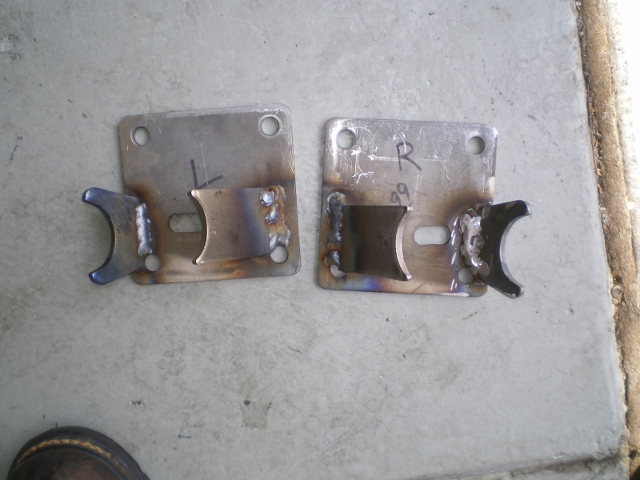 I wanted to add a piece to tie in the stand offs so I cut some off this 3/16" piece 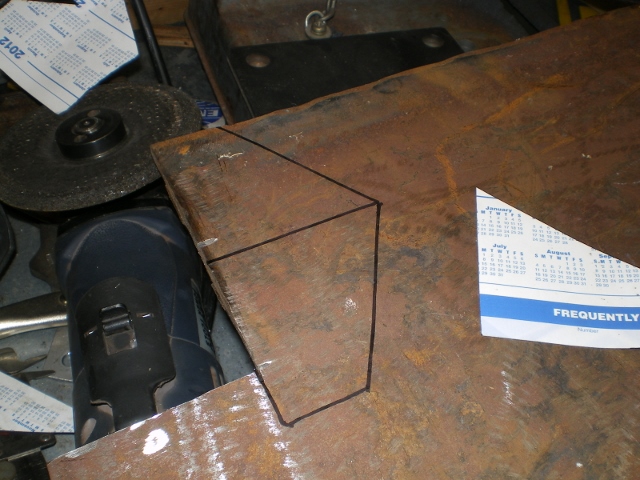 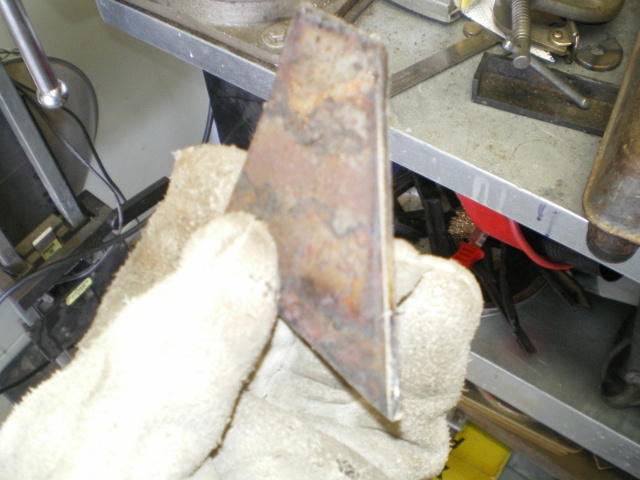 But........because I had used the tabs with the angled sides I needed to tweek the end to match. With the piece firmly clamped in the vise a cheater bar clamped to it and........... 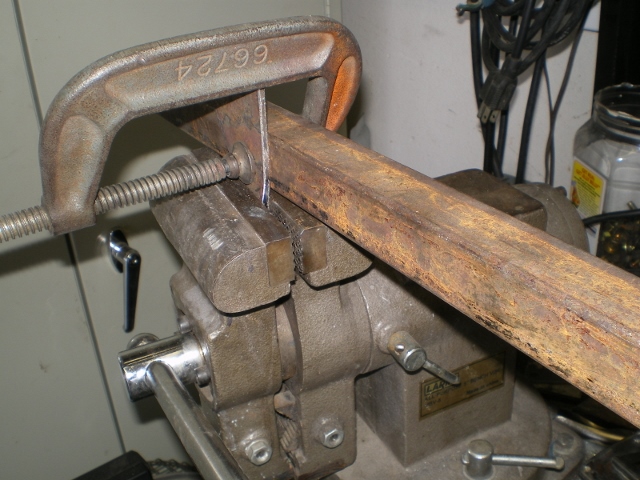 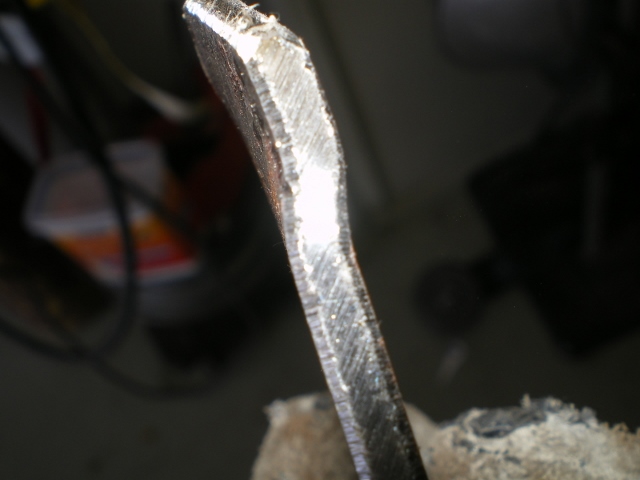 These two pic's show that angle beater than I can say it. 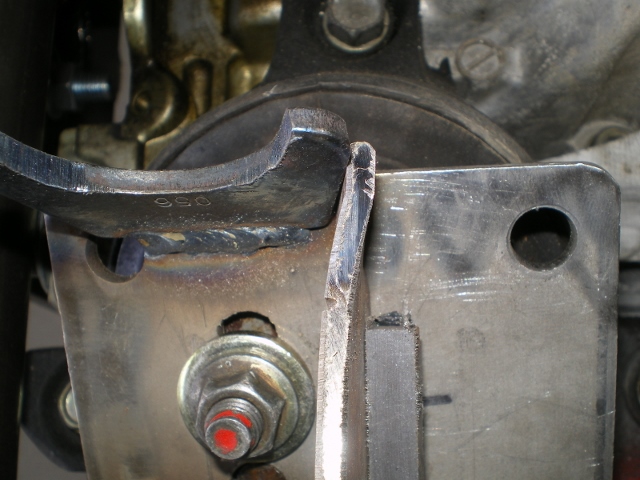  The pieces seem to fit well enough 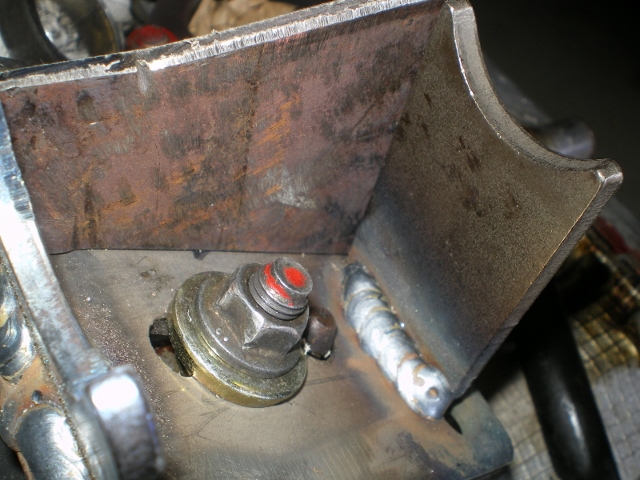  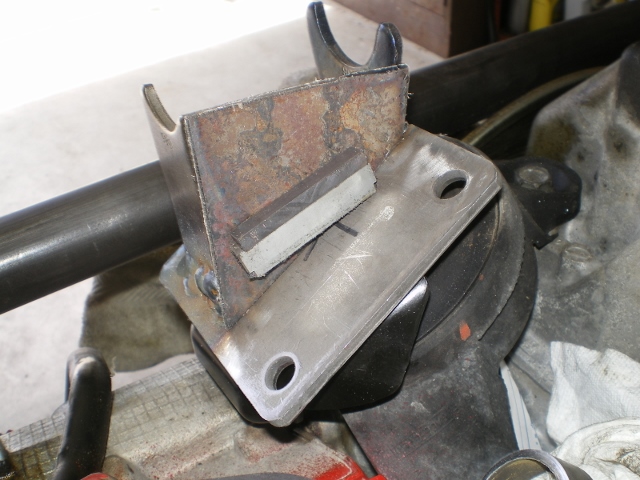  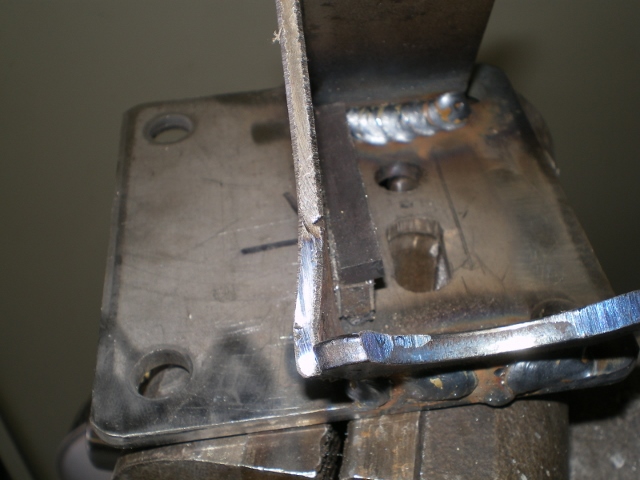 And after a few minutes of welding in the vise 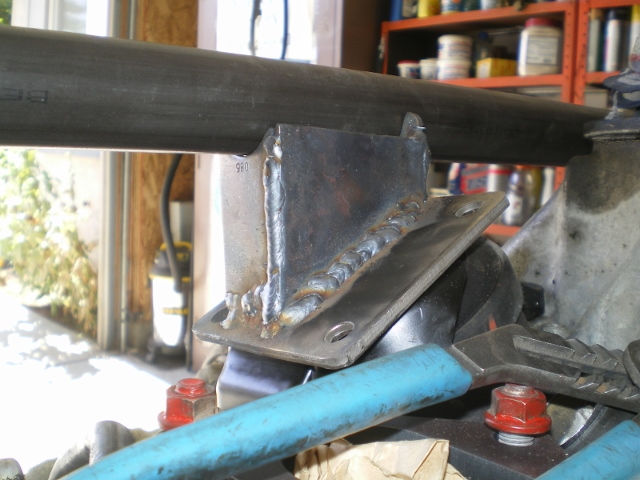 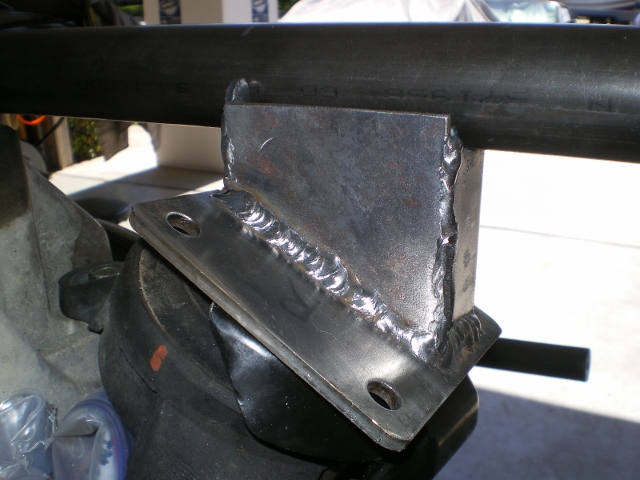 One more quick check and it still level. The cross bar will not get welded in place yet. It is my variable if I've missed something. At least that is what I am telling myself. (IMG:style_emoticons/default/sheeplove.gif) Next thing is to position the long side rails and weld the bolt collars in so I can hang them off the car. Then the cross member will be cut/radiused to length (and possibly bent to offset any height issues and/or exhaust issues) and welded in place. Stay tuned as I stumble and bumble my way thru this with an emphasis on embarrassing myself. (IMG:style_emoticons/default/bootyshake.gif) (IMG:style_emoticons/default/smash.gif) (IMG:style_emoticons/default/headbang.gif) (IMG:style_emoticons/default/welder.gif) (IMG:style_emoticons/default/idea.gif) (IMG:style_emoticons/default/sawzall-smiley.gif) 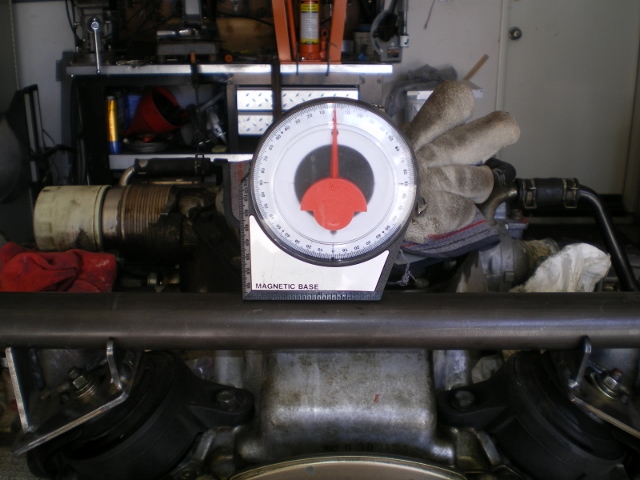 |
|
|
|
| 76-914 |
Jul 28 2013, 08:43 PM
Post
#102
|
|
Repeat Offender & Resident Subaru Antagonist Group: Members Posts: 13,502 Joined: 23-January 09 From: Temecula, CA Member No.: 9,964 Region Association: Southern California |
some more
                      |
|
|
|
| BIGKAT_83 |
Jul 28 2013, 08:46 PM
Post
#103
|
|
Senior Member Group: Members Posts: 1,798 Joined: 25-January 03 From: Way down south Bogart,GA Member No.: 194 Region Association: South East States |
Nice job on the mount.
Bob |
|
|
|
| 76-914 |
Jul 28 2013, 08:47 PM
Post
#104
|
|
Repeat Offender & Resident Subaru Antagonist Group: Members Posts: 13,502 Joined: 23-January 09 From: Temecula, CA Member No.: 9,964 Region Association: Southern California |
           |
|
|
|
| David J |
Jul 29 2013, 07:00 AM
Post
#105
|
|
Newbie Group: Members Posts: 29 Joined: 18-June 12 From: Dallas Member No.: 14,577 Region Association: Southwest Region |
Nicely done. Do you plan to bolt the trans to the cradle or mount it independently ?
|
|
|
|
| 76-914 |
Jul 29 2013, 09:20 AM
Post
#106
|
|
Repeat Offender & Resident Subaru Antagonist Group: Members Posts: 13,502 Joined: 23-January 09 From: Temecula, CA Member No.: 9,964 Region Association: Southern California |
Thx, Bob. I was very careful to not take any pic's with the "really bad" weld joints. (IMG:style_emoticons/default/lol-2.gif)
David, I'll have to figure that out. My original plan was to use the factory mount on the bottom rear of the tranny but...........that part of the tranny is removed because it isn't needed. (IMG:style_emoticons/default/headbang.gif) That being said, who knows. DB Coopers cradle design might be the way to go but I haven't finalized that yet. Once that part is worked out some gussets and additional bracing/re-inforcement will be added. It's pretty much a skeleton at this point. |
|
|
|
| Chris H. |
Jul 29 2013, 10:03 AM
Post
#107
|
|
Senior Member Group: Members Posts: 4,030 Joined: 2-January 03 From: Chicago 'burbs Member No.: 73 Region Association: Upper MidWest |
Looks really good Kent! I like the way you incorporated the front mount attachment points. For the trans you can just fab up a couple of hangers similar to the coldwater.com setup.
Got my engine out...I'll try to update the thread soon. |
|
|
|
| 76-914 |
Aug 3 2013, 08:21 AM
Post
#108
|
|
Repeat Offender & Resident Subaru Antagonist Group: Members Posts: 13,502 Joined: 23-January 09 From: Temecula, CA Member No.: 9,964 Region Association: Southern California |
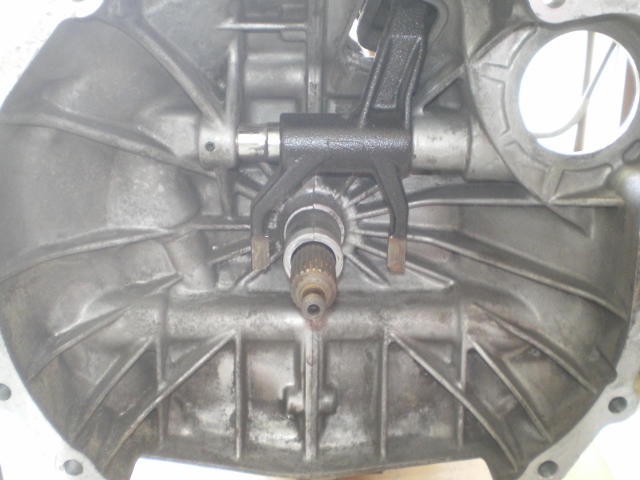
Thx Chris. As you can see in the following pic's, I did the same on the tranny pick up points except that I welded those pieces to the cradle. I understand why Ian did his that way but I felt that if I were to need to drop the tranny that I would just drop the entire assm or just remove the tranny from it's factory mount (4 bolts).
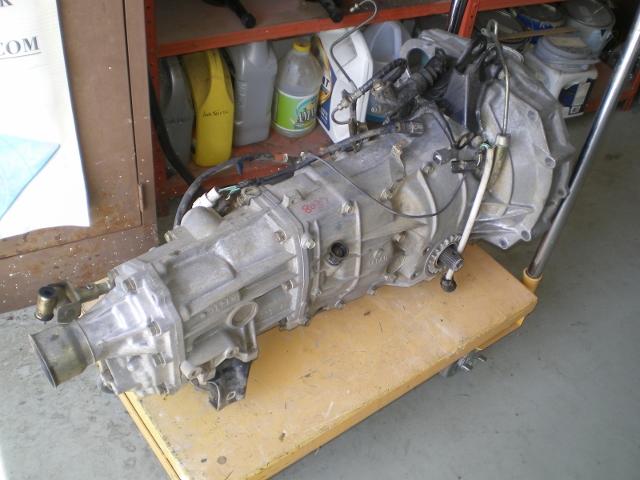
Before going any further with the cradle I replaced this little pest. 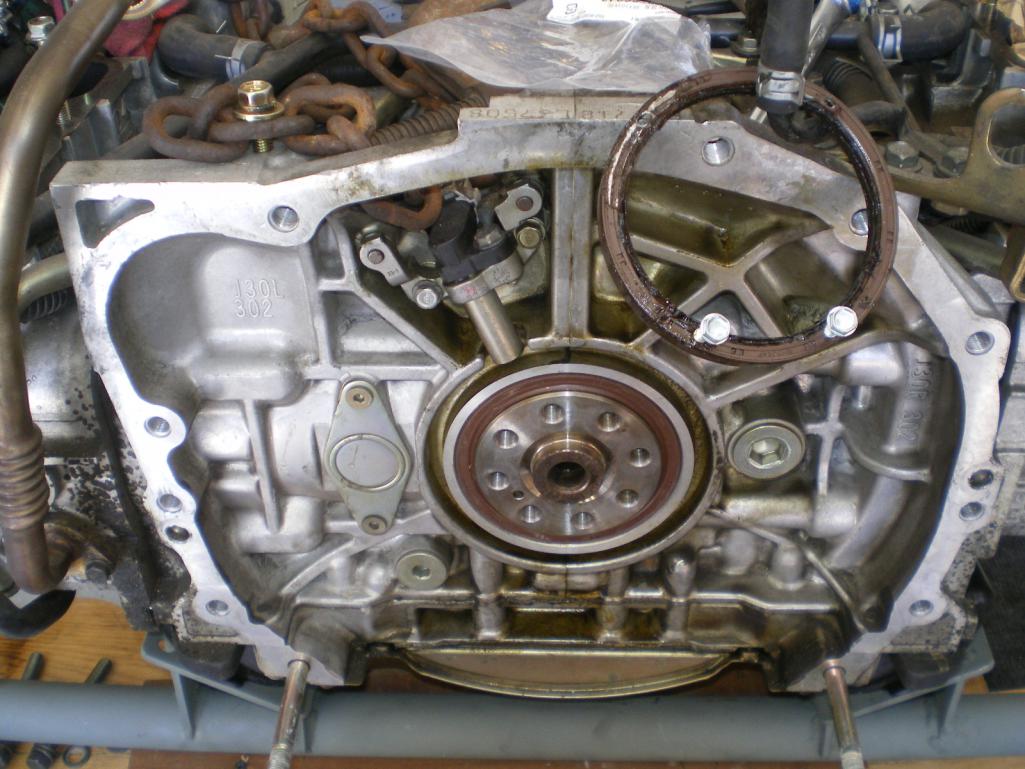 Then on to the tranny to switch it from AWD to FWD. Thx for the link Chris. After draining the lube it is stood on end and the rear cover bolts are removed. 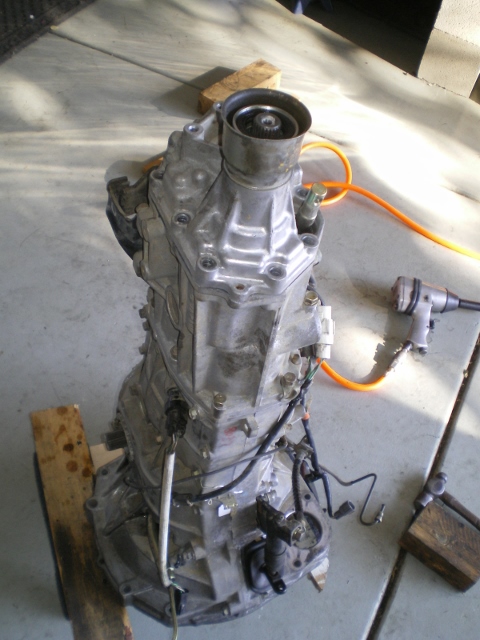 A few taps with a rubber mallet to separate it 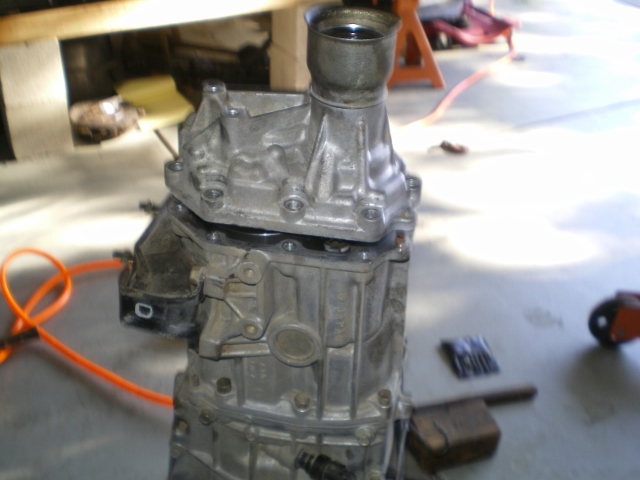 To reveal this 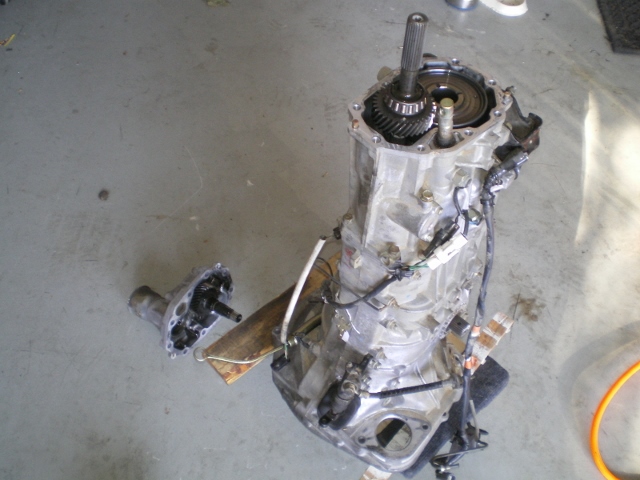 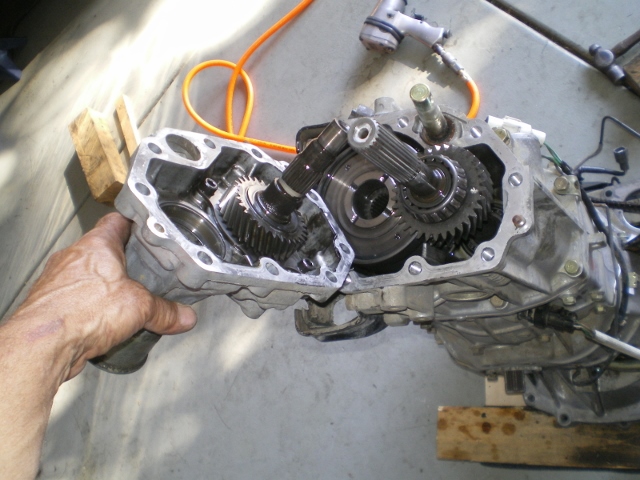 Now it's just a matter of removing a few pieces 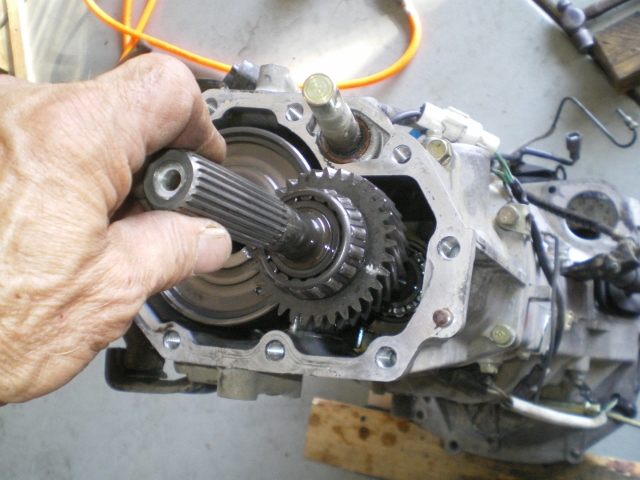 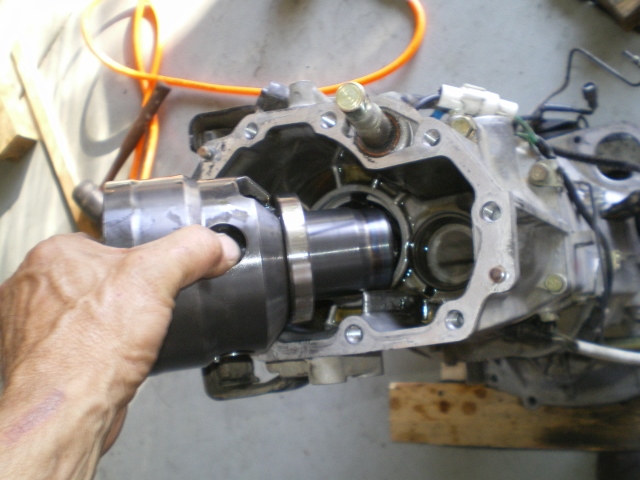 Group photo of the pieces that are removed. 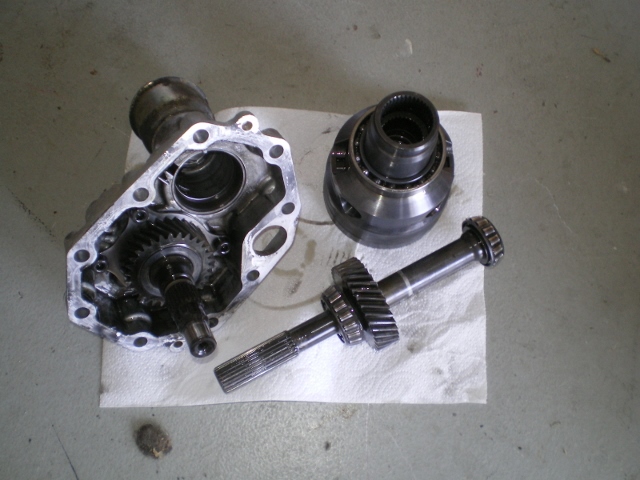 Here the locking nut is being removed. Notice the pipe wrench's affixed to the output shafts. Impact makes short work of this. 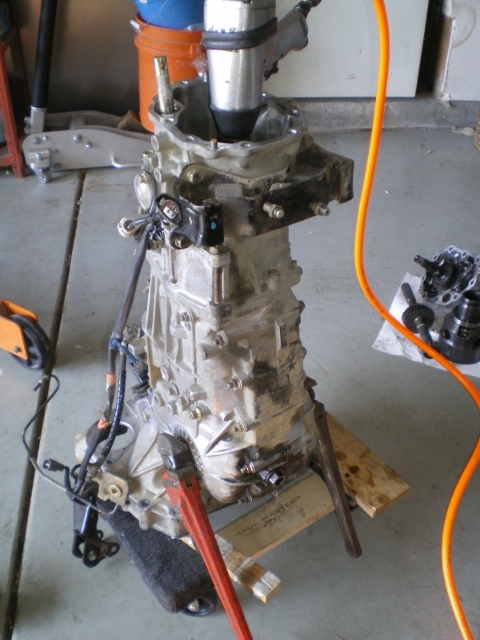 Next I need to make a cover plate for the rear of the tranny. I'll use the old cover as a template but I need to remove this gear first so I remove the 4 allen head screws holding it first. 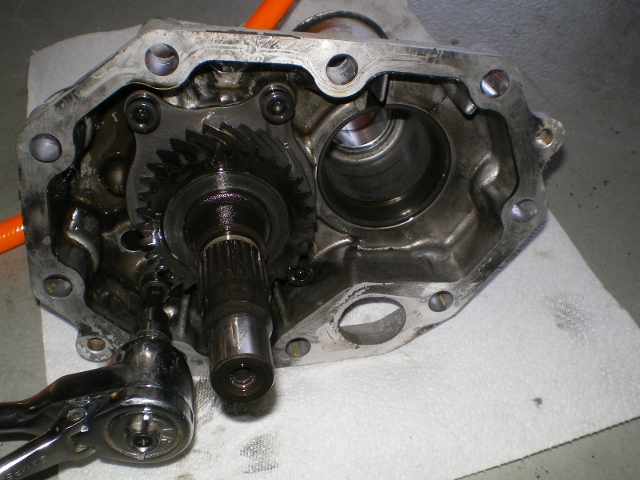 Now I can scribe the outline. 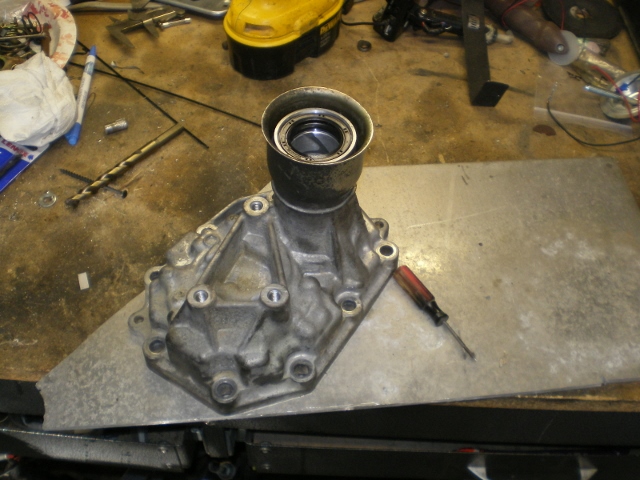 Then a quick ride on the bandsaw. 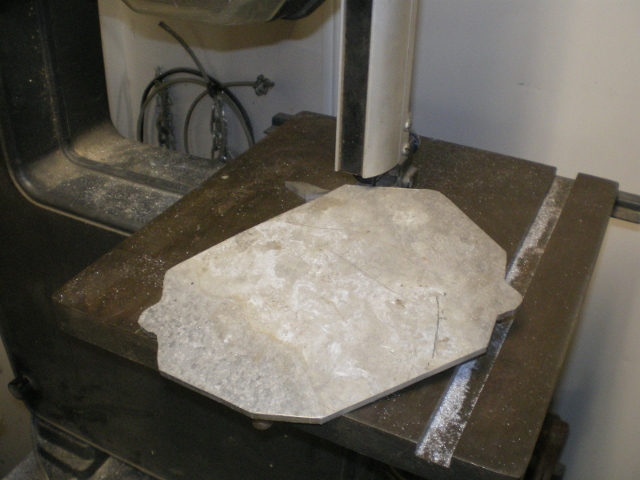 A little shaping on my "washing machine motor turned 12" sander". (IMG:style_emoticons/default/lol-2.gif) 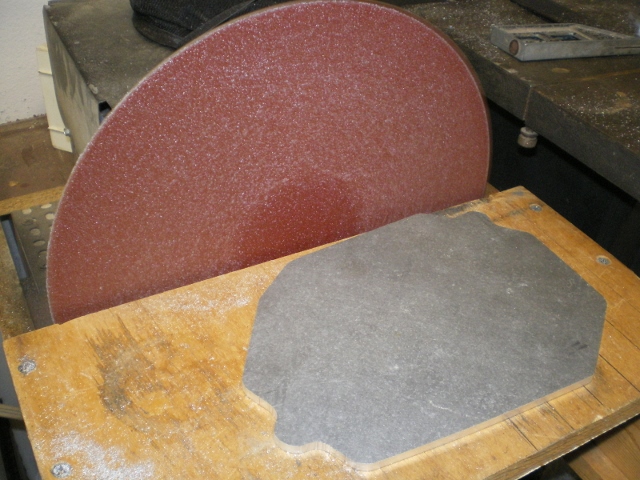 A after 10 min's of polishing the piece of junk yard aluminium, viola! 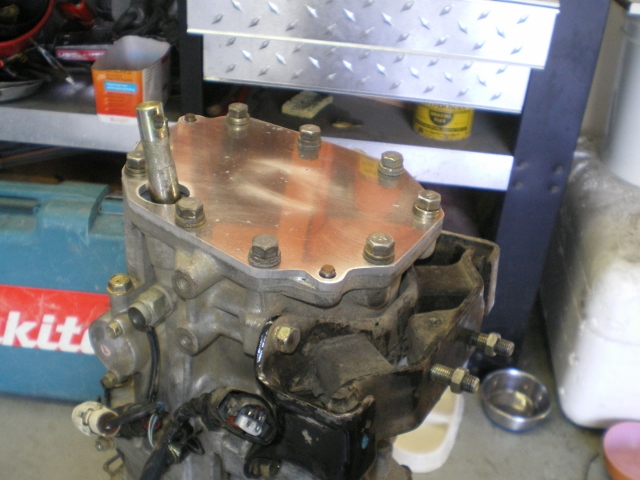 Attached image(s) 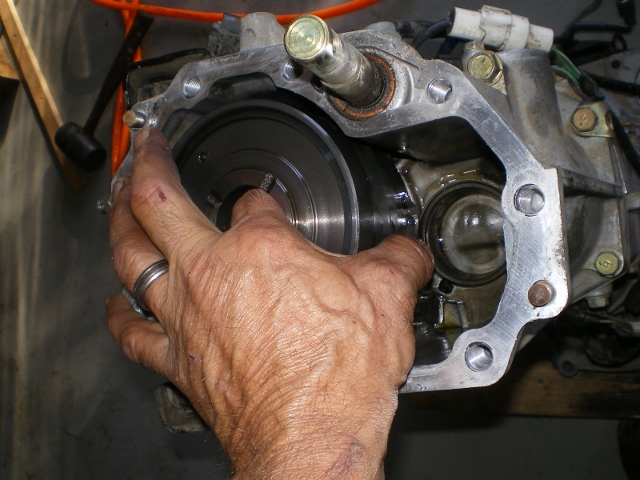  
|
|
|
|
| 76-914 |
Aug 3 2013, 08:39 AM
Post
#109
|
|
Repeat Offender & Resident Subaru Antagonist Group: Members Posts: 13,502 Joined: 23-January 09 From: Temecula, CA Member No.: 9,964 Region Association: Southern California |
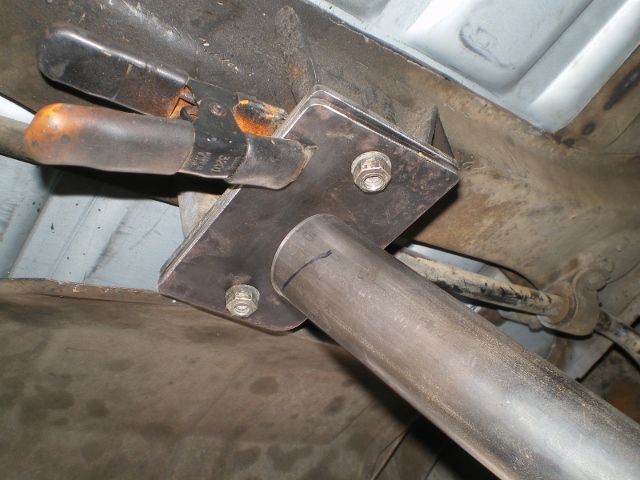
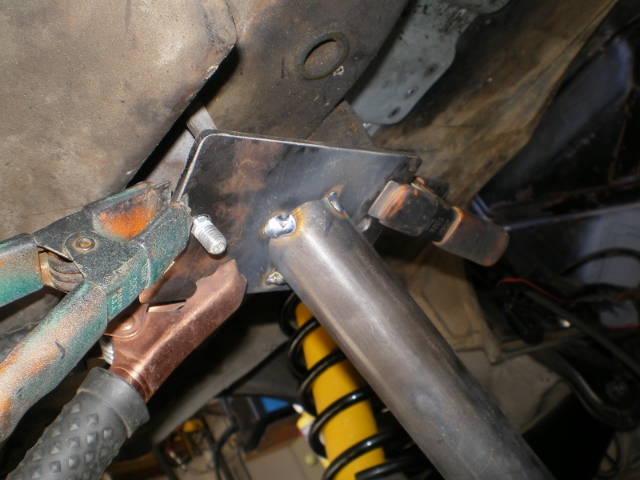
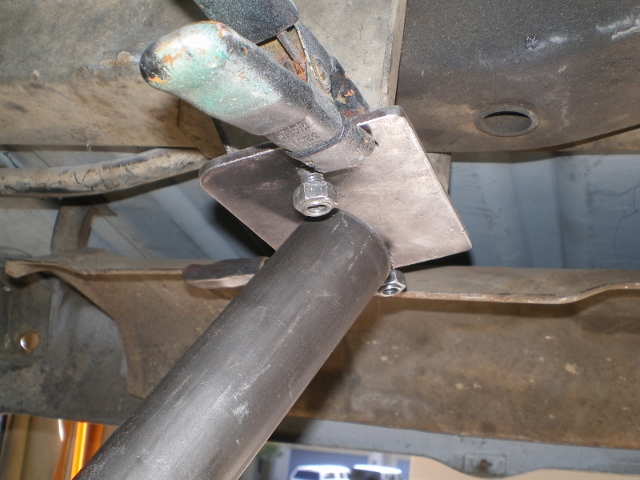
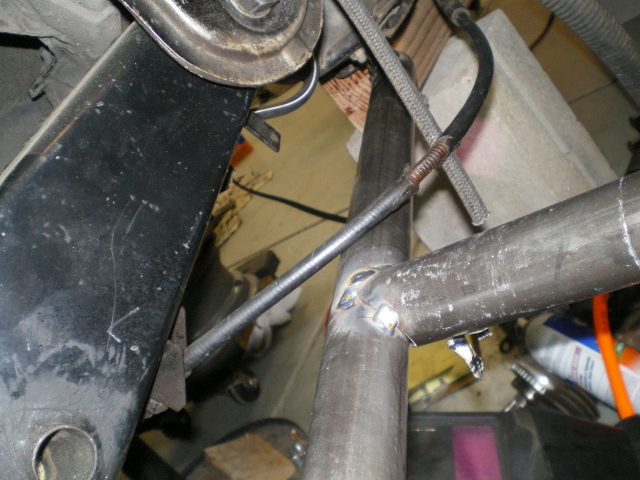
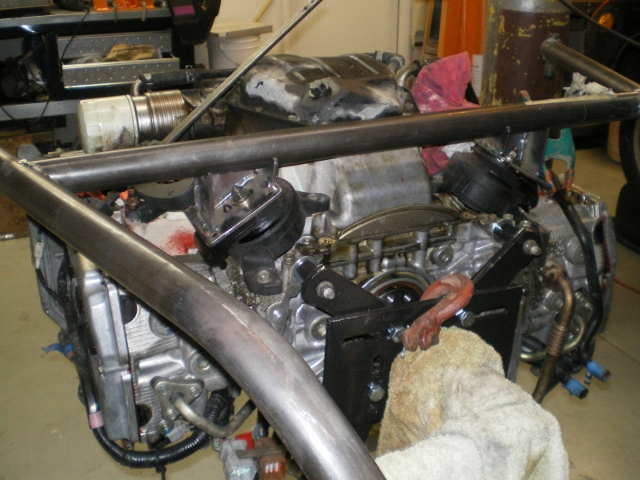
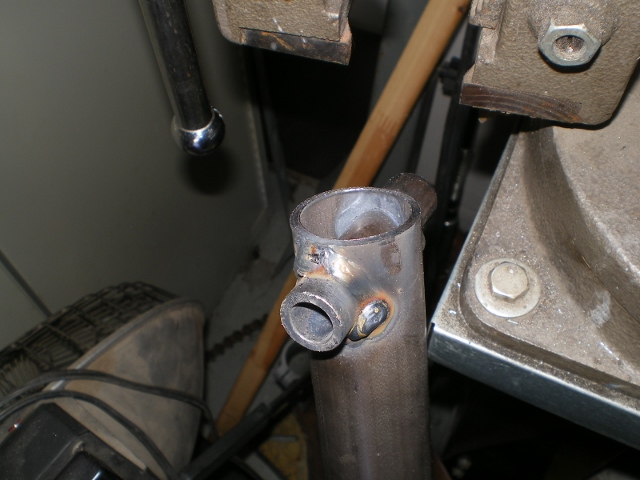
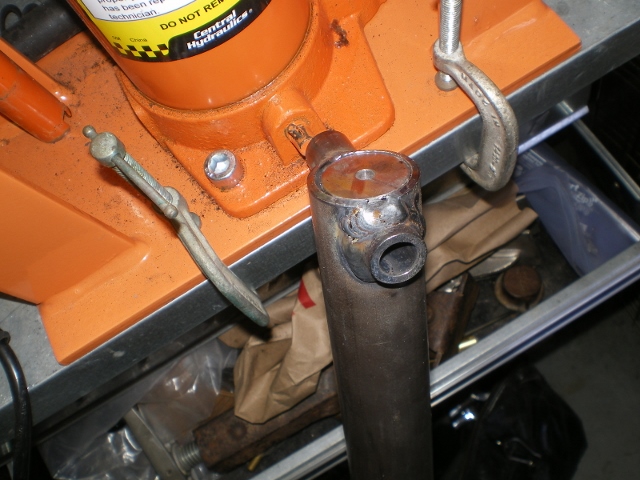
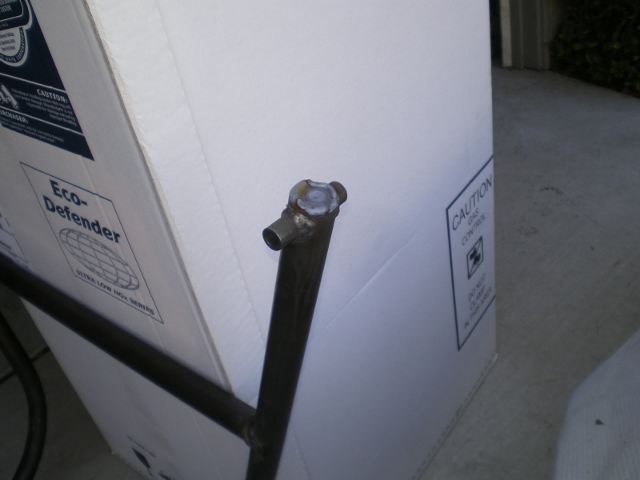
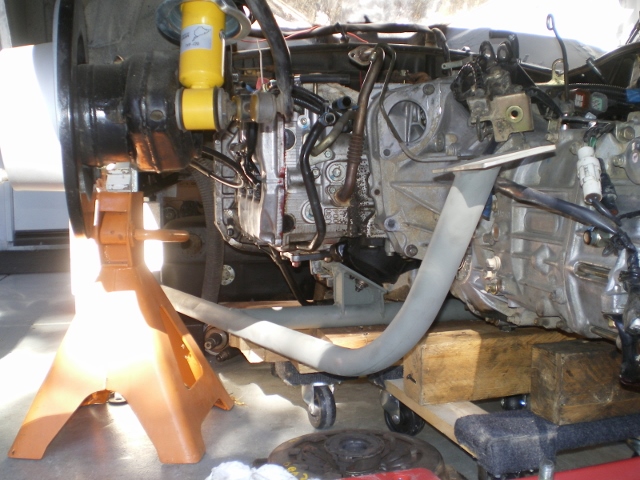
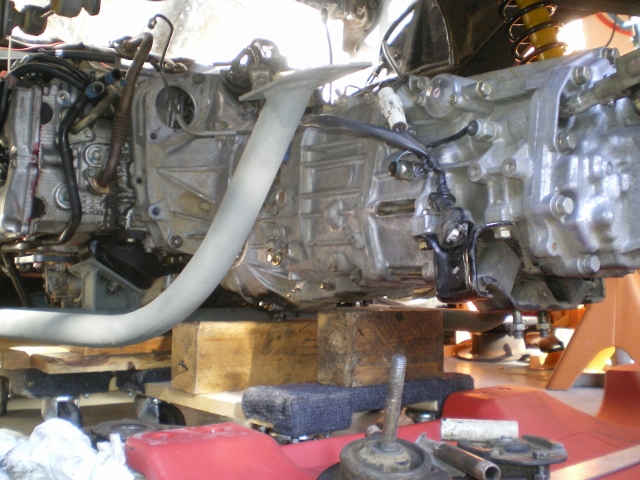
Now, back to the cradle. One piece that ties the tranny support onto the cradle.
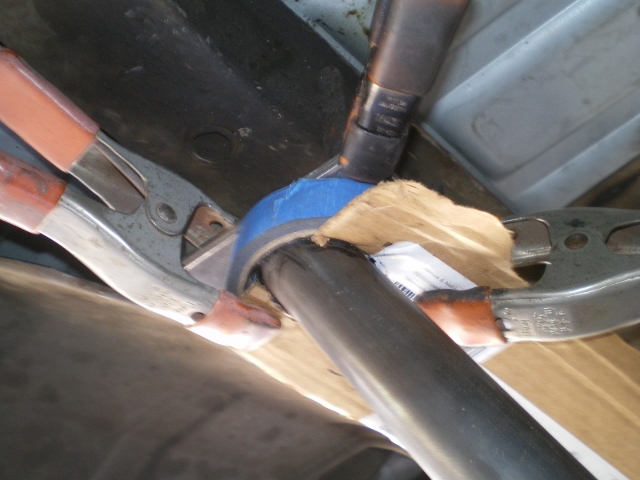
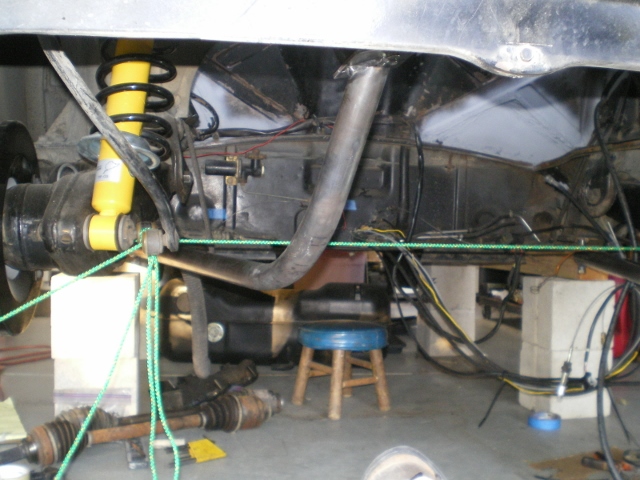
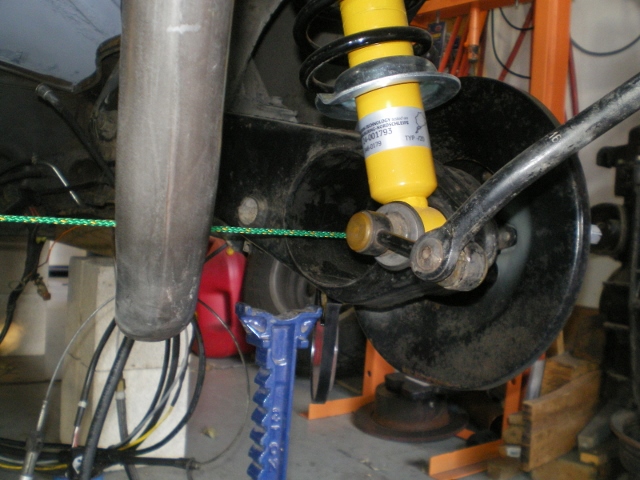
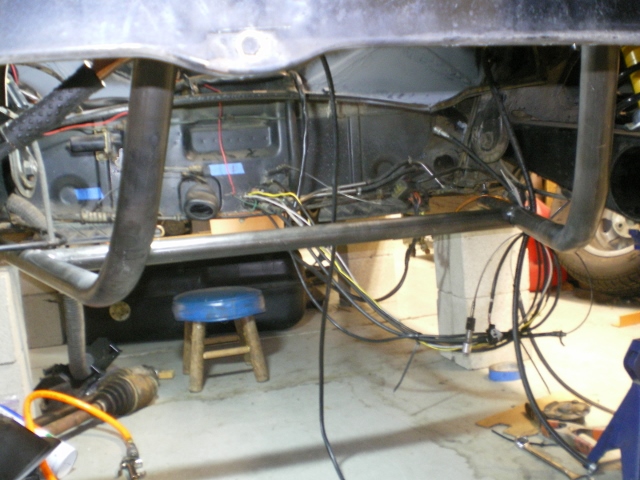
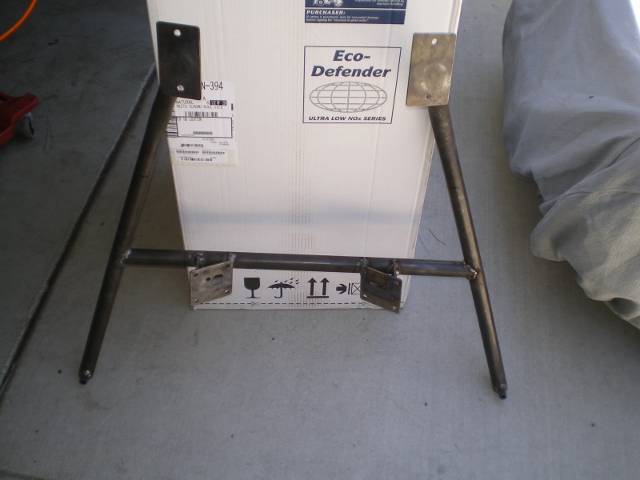
 The other side (right)  And now it's tied in. I used the factory tranny mount after realizing that this section "was not" removed as I believed it would be earlier. (IMG:style_emoticons/default/chair.gif) 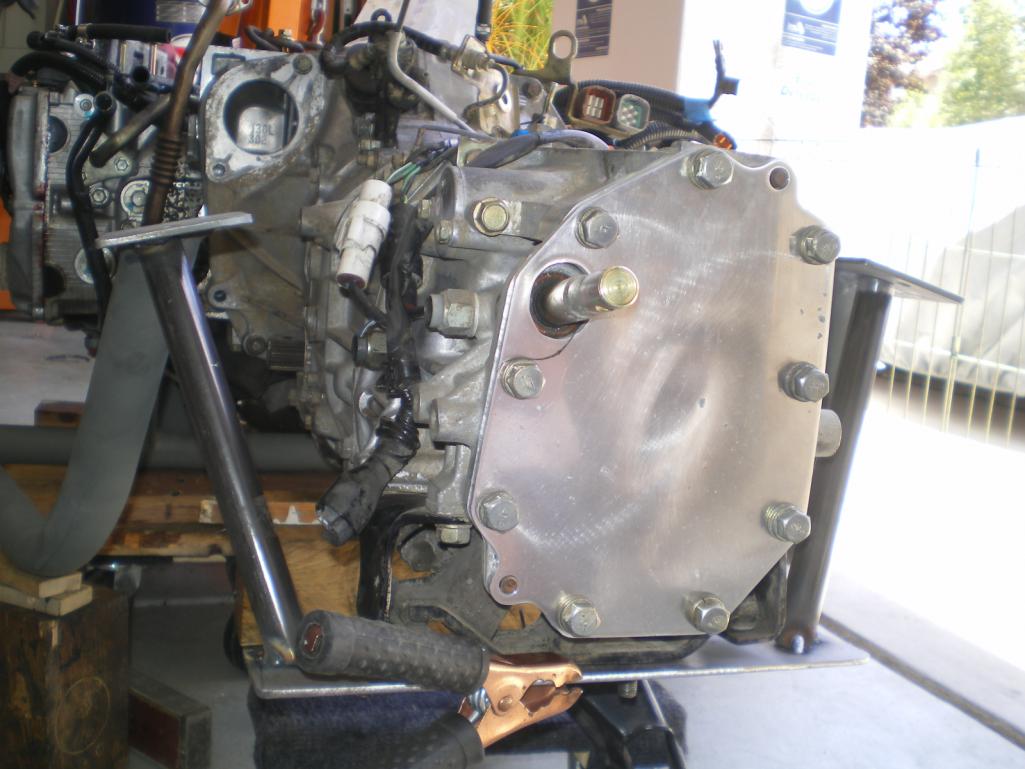 Found my first "gotcha". The clutch fork is contacting the trunk in this pic. It appears that I can trim this piece down. I'll need to drill another hole for the return spring after trimming this. 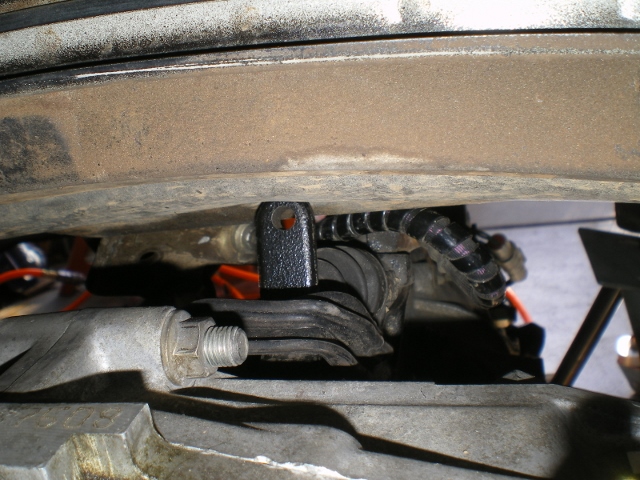 Hanging from the front mounts. 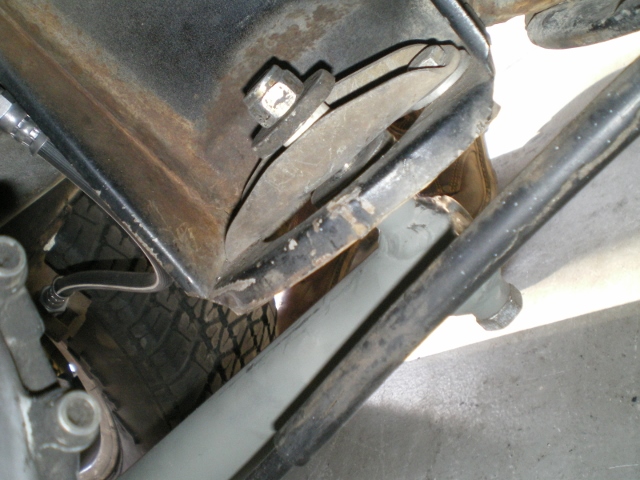 A view from the lid 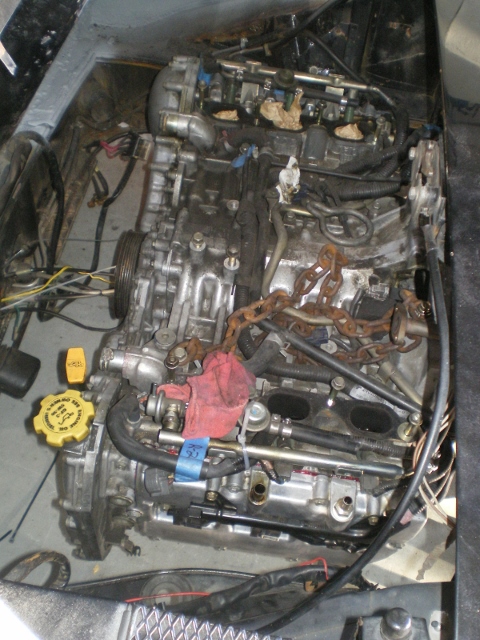 And a shot from the rear. The bottle neck jack is there until I shave the clutch fork down enough to connect the rear attach points on the cradle. 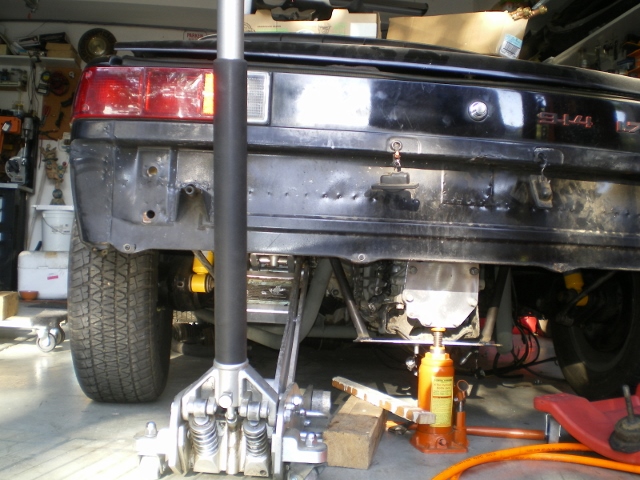 |
|
|
|
| Chris H. |
Aug 3 2013, 08:44 AM
Post
#110
|
|
Senior Member Group: Members Posts: 4,030 Joined: 2-January 03 From: Chicago 'burbs Member No.: 73 Region Association: Upper MidWest |
Awesome!
Now post that center diff on NASIOC! I got $250 for mine no haggling. |
|
|
|
| 76-914 |
Aug 5 2013, 09:26 AM
Post
#111
|
|
Repeat Offender & Resident Subaru Antagonist Group: Members Posts: 13,502 Joined: 23-January 09 From: Temecula, CA Member No.: 9,964 Region Association: Southern California |
Shopping for a clutch and came across this. It appears Exedy is not the way to go.
http://www.rexnet.com.au/forum/index.php?/...8/page__st__150 |
|
|
|
|
1 User(s) are reading this topic (1 Guests and 0 Anonymous Users)
0 Members:

|
Lo-Fi Version | Time is now: 17th May 2024 - 08:09 PM |
Invision Power Board
v9.1.4 © 2024 IPS, Inc.