|
|
|
Porsche, and the Porsche crest are registered trademarks of Dr. Ing. h.c. F. Porsche AG.
This site is not affiliated with Porsche in any way. Its only purpose is to provide an online forum for car enthusiasts. All other trademarks are property of their respective owners. |
|
|

  |

| tumamilhem |
 Feb 6 2013, 07:16 AM Feb 6 2013, 07:16 AM
Post
#1
|
|
LUFTBRIGADE  Group: Members Posts: 1,228 Joined: 29-October 12 From: Jacksonville, FL Member No.: 15,092 Region Association: South East States |
Buy NOS visors.
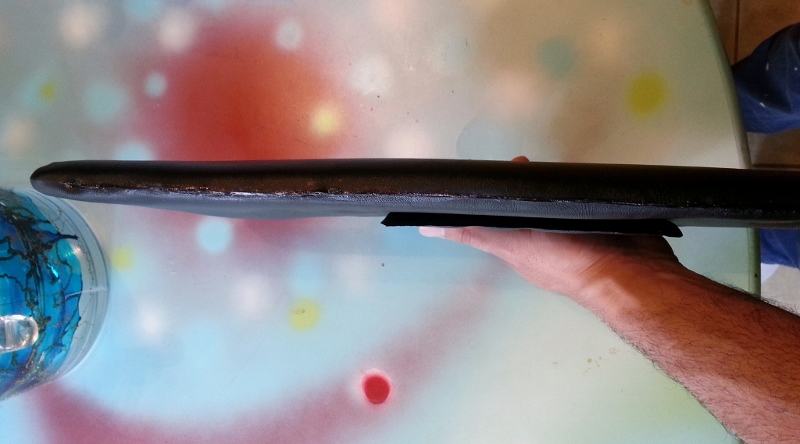
Haha just kidding. (IMG:style_emoticons/default/smile.gif) So I have been trying to figure out exactly how/which way to restore my sun visors after much suggestion consideration. Many send their visors off to get restored and come back with nice leather, fitted tight with stitched seams. But alas, they don't look stock and they don't include the passenger mirror (or driver's paper slot). It seems the restoration places simply make a template sized from the wire frame and cut leather to it and stitch it up. Many of you are happy with these and they do look nice. But I want mine stock. And I want the mirror. And it seemed to me that when they cut the leather, they could cut an opening for the mirror, cut out the secured area for the mirror in the stock visor and glue it to the new cut leather, hence new leather with a mirror opening and the stock mirror housing attached to it so you have a mirror. As far as the outer stitching goes, again it's not stock looking, and last time I checked when you buy a leather jacket, purse, pants, etc, they are stitched together from the inside. I don’t see why this technique is not applied to these refurbished visors. With that said, I needed to fix my visors and I wanted to keep them as original as possible. So I took two stock visors I had that both had pros and cons to them, took them apart and re-assembled the better parts into one. If you have only one visor, the same protocol can be used to repair one. The visor I needed to repair was a passenger visor. I wanted to get an excellent one for my car. And I have two that are both damaged in some regard. One visor I have has a good mirror but missing the mirror flap and the foam inside has completely disintegrated. The other visor has good foam, mirror flap, but broken mirror. So now I needed to merge the best parts of both into one good visor. I decided what would be easiest, is to remove the good mirror from one visor to the visor with the good foam and the visor flap. Removing the good foam would ruin it and I don't want to remove and re-glue the mirror flap. So swapping mirrors seemed to be the easiest way to go. The good mirror I have is good - not excellent. There are a few minor, almost unnoticeable age spots in it, but once clean with Windex, it's not visible. So I was fine reusing the good mirror. However, if yours is not up to par, it is very simple to get a mirror cut of the same size and width. And you can probably even have it done from an existing one you have, be it a handheld mirror or an inexpensive door mirror that you are not using. Otherwise, purchasing one and having it cut to size is very inexpensive. I would probably just go to an auto glass or any glass place and have them cut one for you that is tempered glass. To open the visors, the least visible incision would be the seam along the top of the visor. So with a utility knife (with a fresh razor blade), I cut the seam open along the length of the top of the visor. After opening the visor, you can see the mirror secured in the mirror housing with 8 surrounding plastic tabs holding the mirror in place. To remove mirror, CAREFULLY bend visor and tabs so tabs lift up over the mirror. It's always better to hold the mirror from the edges, as if you hold it from the middle it is more likely to break. 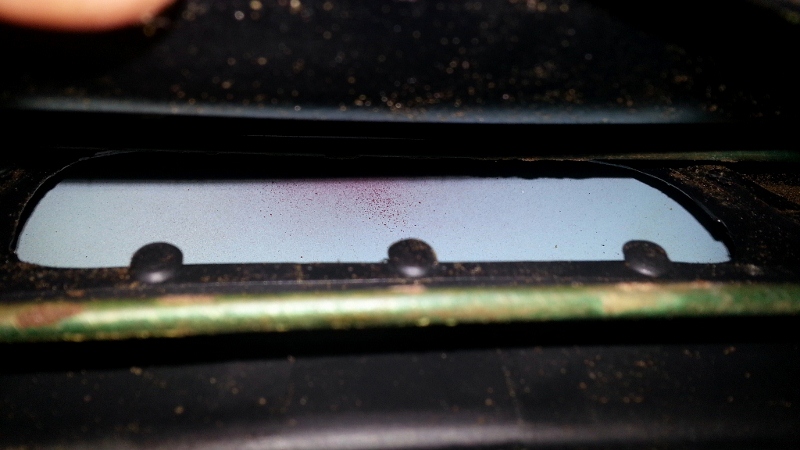 Below is the removed mirror. Tape on the back of it was used to help secure the mirror in place along with the plastic tabs. Remove the tape as bits of foam are likely to get stuck to it and make it unusable again. 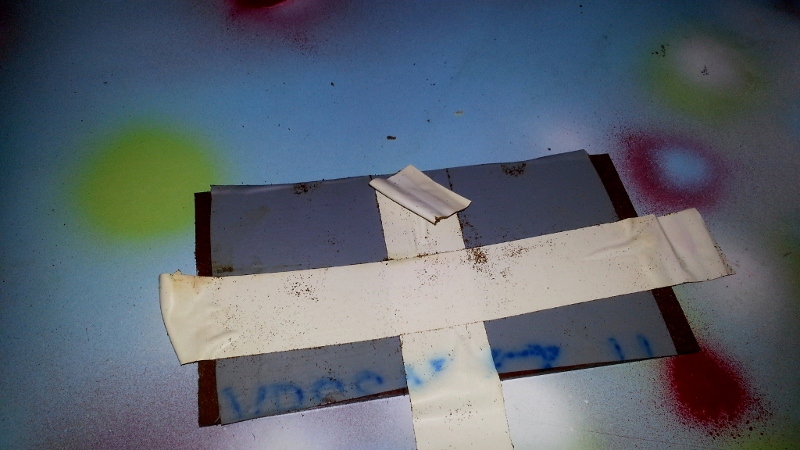 Visor with removed mirror. 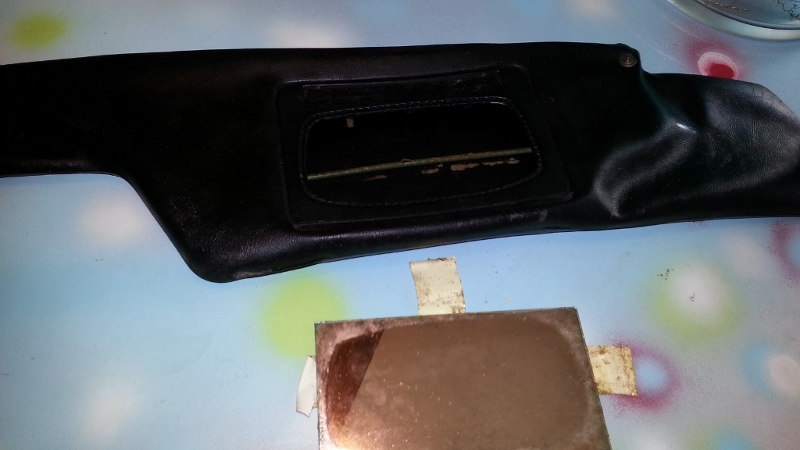 Now after making same incision on the good visor, opening to reveal broken mirror and good foam inside. 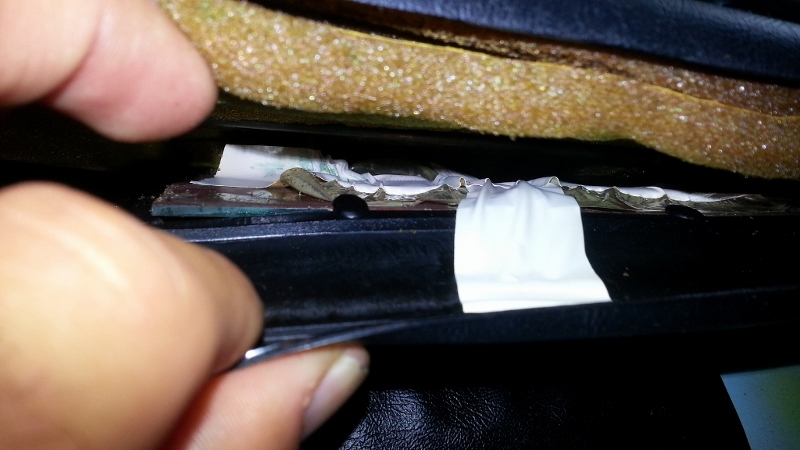 Broken mirror on good visor. 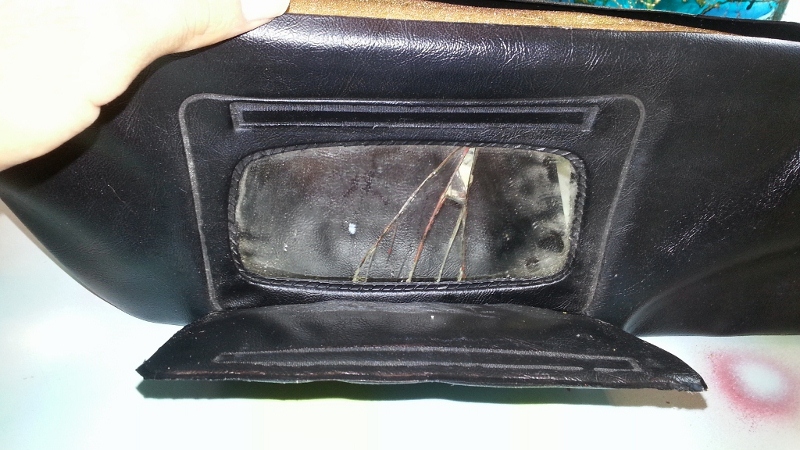 Bending visor back away from mirror edges to remove mirror from securing tabs. 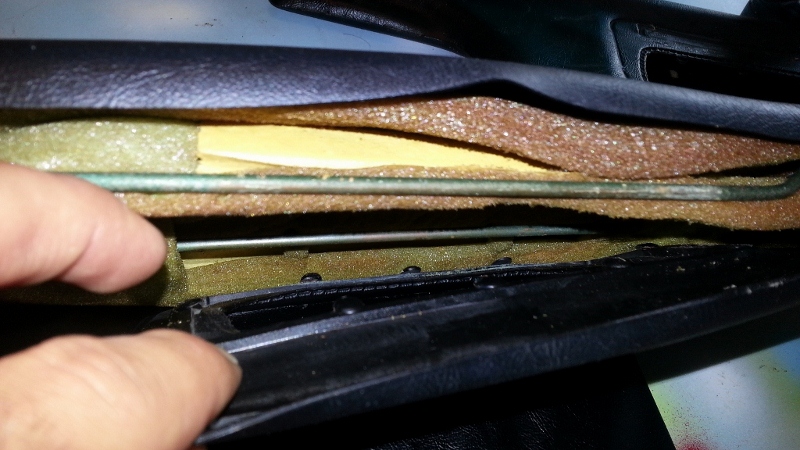 Good visor with good foam, mirror removed. 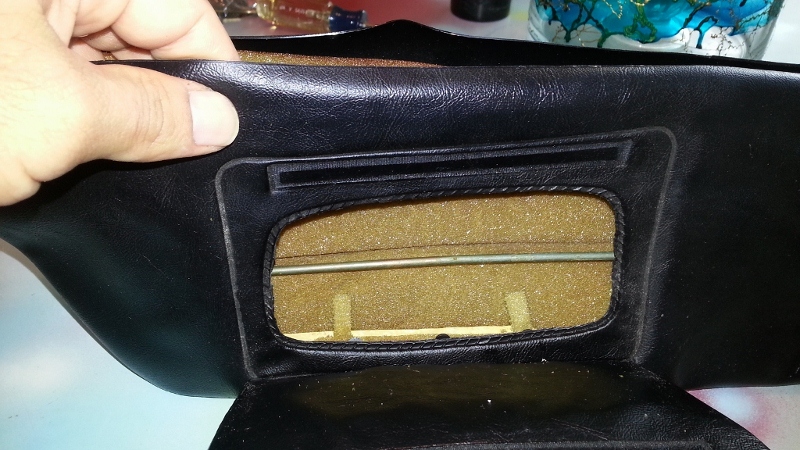 Broken mirror front and back. Back of mirror with material that hold glass together if it should break was all warped. I removed this tape-like material so I could piece the mirror back together and re-secure with new tape. 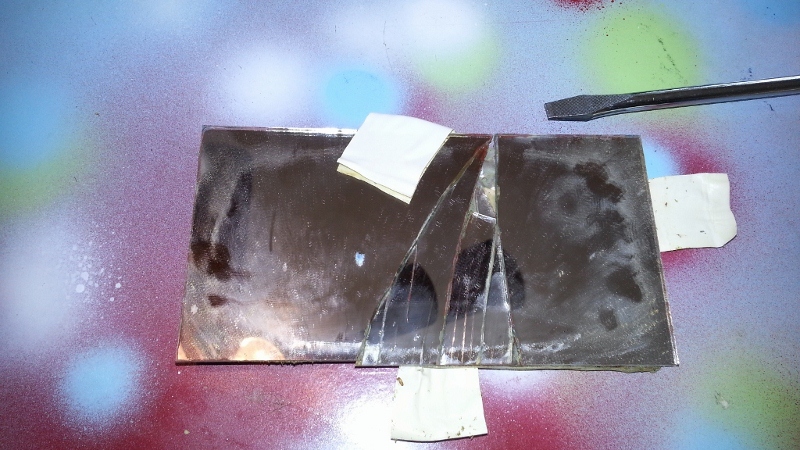  Taking the good mirror and installing it into the good visor. Note - make sure to clean and dry the inside of the visor around the mirror housing of any disintegrated foam/debris first as to have a clean surface to re-tape. Carefully bending back visor so tabs can secure around the mirror edges, putting mirror in place. Note that the mirror fits in a plastic housing, a sunken indentation in the visor. Carefully bend edges of plastic housing at each of mirror's four corners back to fit mirror securely into housing, and fold tabs over glass. 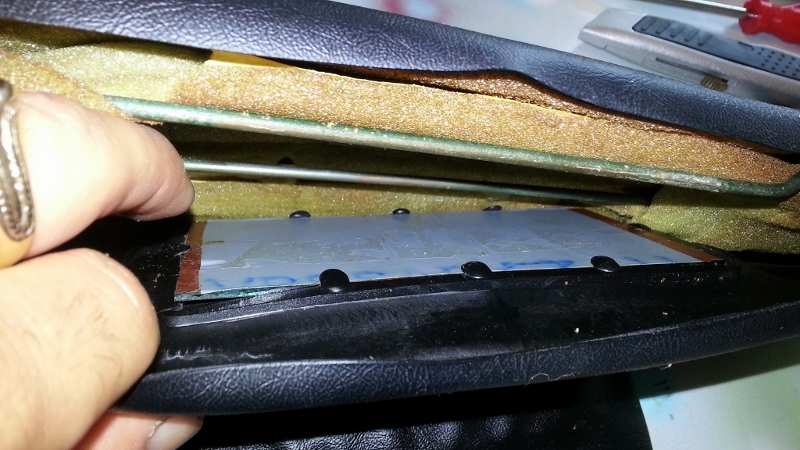 Using Gorilla tape to tape back of mirror to inside of visor as other tape did. Tape secured to mirror well, but just okay to visor. I imagine with a bit of heat, it will stick better to the plastic. The most important thing is to get the mirror stuck into it's fitted housing and secure tabs around edges. 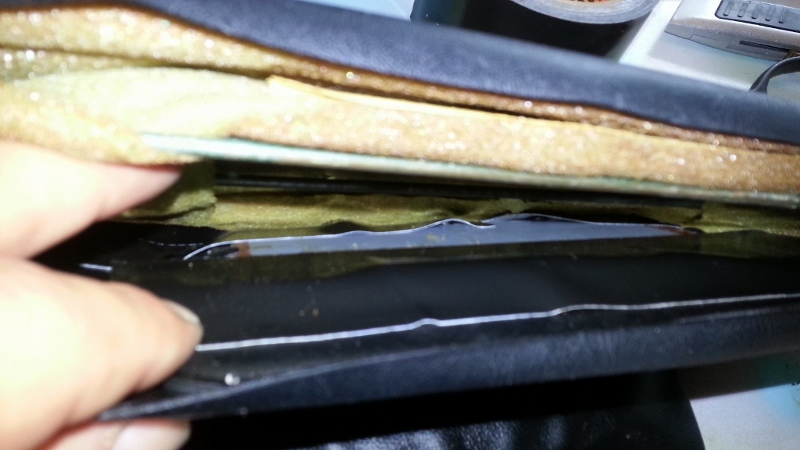 Fortunately, my visor isn't warped. So by propping up bottles around the sides of the visor, carefully adjusting so the seams don't overlap but still go far enough to touch, I used Gorilla glue to glue seam back together. Note that this is very time consuming to get it done right. I glues a few inches at a time and only propped up with bottles along visor as I went along. Otherwise, if you prop up entire visor at once, some areas will overlap and some won't come together. So do a few inches at a time and make adjustments with bottles as you move down the visor. I dabbed the inside of the seam and held together for a bit until i could leave it alone with just the bottles holding it in place. Then I glues a small line on top of the seam, using a piece of paper towel to gently wipe any excess. 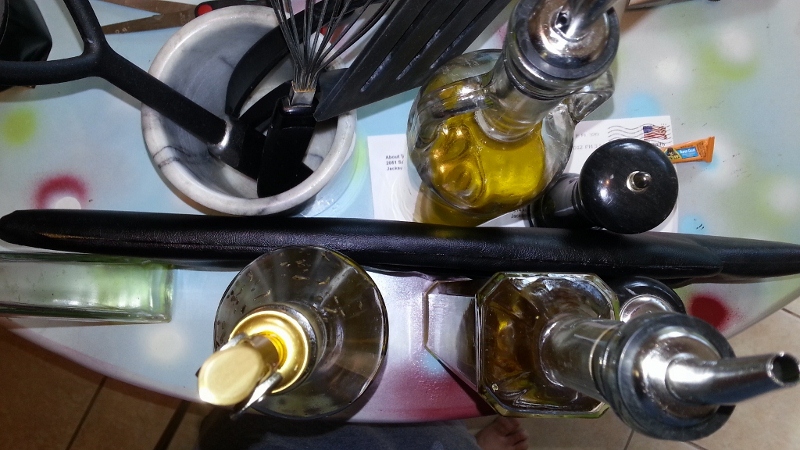 ** By the way, I don't know why the following few "Attached image(s)" pictures are showing up. They are included in the second post I made but not show up in the editing screen for this post. Must be a glitch. So please disregard the remaining pictures in this first post as to not get confused. They appear in my second post in order with description. Attached image(s)  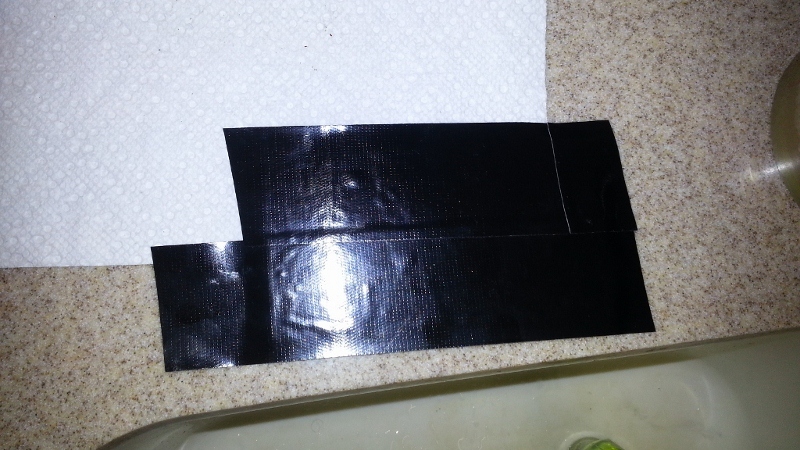 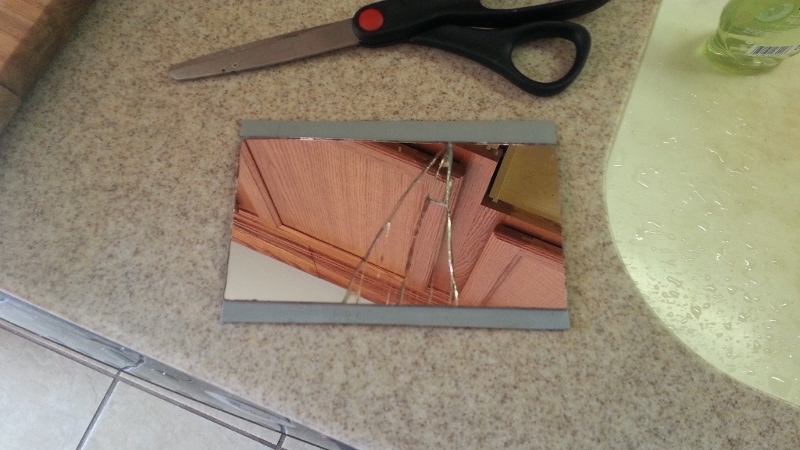 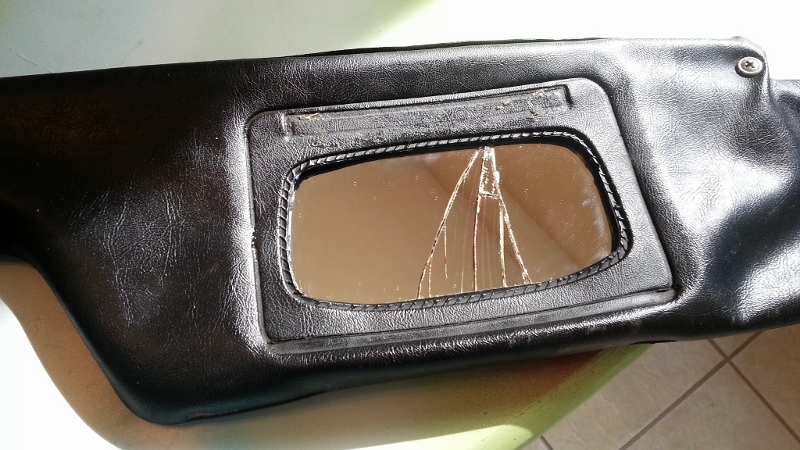 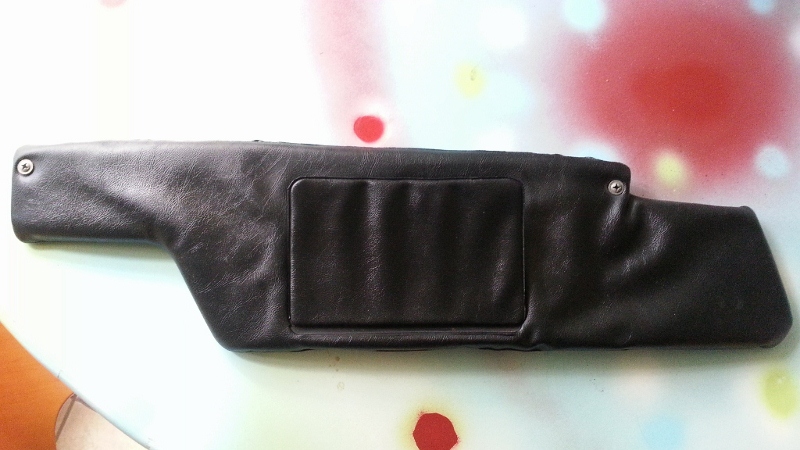
|
   |

 
|
| tumamilhem |
Feb 6 2013, 07:19 AM
Post
#2
|
|
LUFTBRIGADE Group: Members Posts: 1,228 Joined: 29-October 12 From: Jacksonville, FL Member No.: 15,092 Region Association: South East States |
You can see a small bit of the glue on top of the seam after it dries, but that's why I opened it up on the visor's top seam. It is virtually unseen once installed on the car. Gorilla glue doesn't leave so much white hazy residue that Super glue does, so it stayed pretty clear. There were only a couple sopts that looked a bit lighter than black, so I just touched them up with a black Sharpy.
 After much patience and waiting to dry, the final product.  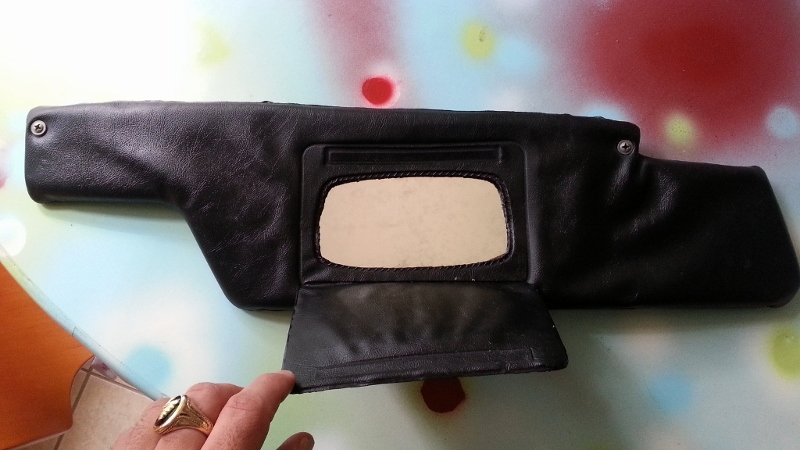 Now to fix the spare visor. I am going to patch up the broken mirror because I do not intend to use this visor. Maybe sell it or keep it as a temporary spare. If I were to use it, I would probably get a new mirror made. But I will remedy it so it is usable and safe. First, place glass upside down on a flat surface. Piece the broken glass together, small pieces and all, until mirror fits as is was unbroken. Fix together so each edge is tight and flush with it's opposing edge. With a straight edge, push opposing ends together to make perfectly flush and straight edges. 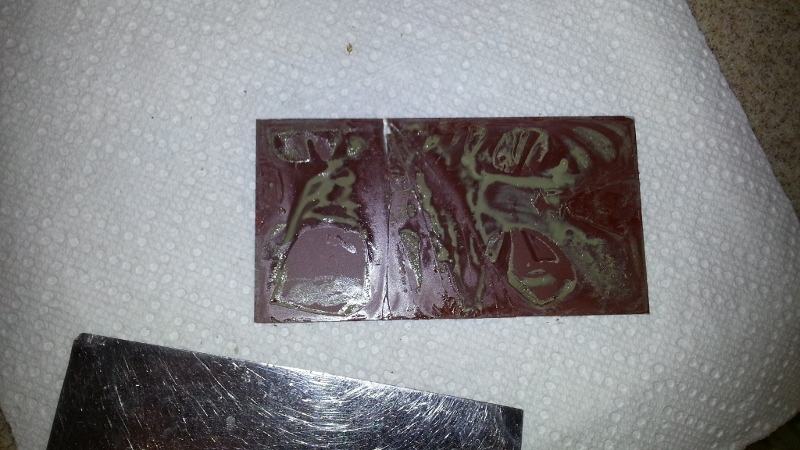 With Gorilla tape (or clear packaging tape will do), gently (as to not move glass) place tape onto back of glass. Press firmly to hold glass together.  Turn mirror over. Cut excess tape from edges. I left a little overlapping on the two sides that have broken glass just to reinforce (maybe 1/4 inch). Remember not to leave too much as you don't want it visible once installed. Wrap overlapping edges over to front of glass and press firmly.  As same procedure explained above, install in reverse. Secure tabs around glass (tape held glass very well. Did not even move or flex when installing) and reseal visor incision. Finished secondary visor.  |
|
|
|
| tumamilhem |
Feb 6 2013, 04:27 PM
Post
#3
|
|
LUFTBRIGADE Group: Members Posts: 1,228 Joined: 29-October 12 From: Jacksonville, FL Member No.: 15,092 Region Association: South East States |
Hope some found this useful. (IMG:style_emoticons/default/smile.gif)
|
|
|
|
| mittelmotor |
Feb 6 2013, 05:46 PM
Post
#4
|
|
Member Group: Members Posts: 334 Joined: 21-May 12 From: SoCal Member No.: 14,464 Region Association: None |
Nice write-up and pics! I'd like to re-skin mine at some point with a stiffer foam core, so they look less like an overweight Shar-pei! (IMG:style_emoticons/default/biggrin.gif)
|
|
|
|
| turk22 |
Feb 6 2013, 06:40 PM
Post
#5
|
|
Treetop Flyer Group: Members Posts: 735 Joined: 27-July 12 From: Cincinnati OH Member No.: 14,725 Region Association: Upper MidWest |
|
|
|
|
| RickS |
Feb 6 2013, 09:20 PM
Post
#6
|
|
Senior Member Group: Members Posts: 1,408 Joined: 17-April 06 From: 'False City', WA Member No.: 5,880 Region Association: None |
Not to be too much of a smart ass, but why not just bend back the tabs holding the mirrors and swap the mirrors from the outside?
Nice job though. |
|
|
|
| tumamilhem |
Feb 6 2013, 11:20 PM
Post
#7
|
|
LUFTBRIGADE Group: Members Posts: 1,228 Joined: 29-October 12 From: Jacksonville, FL Member No.: 15,092 Region Association: South East States |
QUOTE(RickS @ Feb 6 2013, 10:20 PM)  Not to be too much of a smart ass, but why not just bend back the tabs holding the mirrors and swap the mirrors from the outside? Nice job though. Good question. Because the mirror sits in a in indentation in the visor and is larger than the opening in the visor by 1/4" on each side, totaling 1/2" wider length wise and height wise. Therefore, you can't pull the mirror through the opening from the outside. The only way to do that would be to turn the mirror at an angle, but in order to do that, you would have to open up the visor to allow enough room to turn the mirror in a perpendicular direction from its face. Also, the tabs are on the inside so you have to open up the mirror to get to them anyway. |
|
|
|
| Eric_Shea |
Feb 7 2013, 04:16 PM
Post
#8
|
|
PMB Performance Group: Admin Posts: 19,304 Joined: 3-September 03 From: Salt Lake City, UT Member No.: 1,110 Region Association: Rocky Mountains |
Ok... I'll be "that guy". Not trying to be mean spirited (but...) but...
They still look whimpy, wilting, sagging and sad but now with glue on them. The mirrors still broken and... I guess I'm confused. What did this accomplish? (IMG:style_emoticons/default/confused24.gif) Last year I put a call out for good used visors in the classified section and a few days later had some boxes on my porch. Just wondering why not look for a better pair to begin with. Seems like an exercise in futility. (sorry) (IMG:style_emoticons/default/sad.gif) |
|
|
|
| worn |
Feb 7 2013, 04:26 PM
Post
#9
|
|
Winner of the Utah Twisted Joint Award Group: Members Posts: 3,611 Joined: 3-June 11 From: Madison, WI and North Bend WA Member No.: 13,152 Region Association: Upper MidWest |
QUOTE(Eric_Shea @ Feb 7 2013, 02:16 PM) Ok... I'll be "that guy". Not trying to be mean spirited (but...) but... They still look whimpy, wilting, sagging and sad but now with glue on them. The mirrors still broken and... I guess I'm confused. What did this accomplish? (IMG:style_emoticons/default/confused24.gif) Last year I put a call out for good used visors in the classified section and a few days later had some boxes on my porch. Just wondering why not look for a better pair to begin with. Seems like an exercise in futility. (sorry) (IMG:style_emoticons/default/sad.gif) I have given this thought but not effort. People here seem to think there is an endless supply of used 914 parts, but often all of them look sort of the same - so if you are lucky, you are Eric Shea (IMG:style_emoticons/default/smile.gif) , but for me I still have saggy visors for several different cars. There has to be a way to swap in better foam and get them flat with a re-seal. I suspect the right tool for sealing would help. Maybe vacuum and spray glue. Or perhaps squashing the new visors flat with books? Dunno. |
|
|
|
| tumamilhem |
Feb 7 2013, 04:53 PM
Post
#10
|
|
LUFTBRIGADE Group: Members Posts: 1,228 Joined: 29-October 12 From: Jacksonville, FL Member No.: 15,092 Region Association: South East States |
Mine is not saggy. It has double layer original foam in good condition. They are always a slight bit wavy because stock was never tight fitted. Any "wave" you see is exaggerated by the angle of the sunlight coming into the window. They are firm and fitted and how the looked almost new.
The second visor is a spare that I'm not using. I just fixed the broken mirror and installed it just to. May sell for stock visor or not. The second visor serves no purpose. As explained, I took the good mirror out of it to install in the good visor (with flap and foam). Now on my car. |
|
|
|
| Eric_Shea |
Feb 7 2013, 07:00 PM
Post
#11
|
|
PMB Performance Group: Admin Posts: 19,304 Joined: 3-September 03 From: Salt Lake City, UT Member No.: 1,110 Region Association: Rocky Mountains |
OK... didn't read everything but looked at the pictures.
|
|
|
|
| 914GT |
Feb 7 2013, 08:24 PM
Post
#12
|
|
Senior Member Group: Members Posts: 1,101 Joined: 11-October 04 From: Tucson Member No.: 2,923 Region Association: Southwest Region |
I just recently did my sunvisors. Got tired of the lumpy look and I think it was contributing to the old smell inside the car. I slit them along the edge and folded out flat to use as a pattern for new black vinyl. The foam had mostly disintegrated so cut two pieces of 1/4" foam and sandwiched around the metal frames. I sewed the vinyl inside out for the seams, put a plastic bag over the new foam pieces and slid the new cover over from one end. Then stitched the end closed. Came out looking good considering I didn't spend a lot of time on it. Obviously not the way to go if you want to keep the exact original look.
|
|
|
|
| tumamilhem |
Feb 8 2013, 12:01 AM
Post
#13
|
|
LUFTBRIGADE Group: Members Posts: 1,228 Joined: 29-October 12 From: Jacksonville, FL Member No.: 15,092 Region Association: South East States |
Yeah, I wanted to keep mine all stock and look as new as possible. I know a lot of guys like the refurbished ones (I don't really consider them restored or refurbished because it's different material, there's no mirror or flap or pouch, they're stitched, etc.). They look nice but they don't look like stock at all. The only similarity is the shape. I wanted mine stock and clean and new looking.
So the one good one has good foam, isn't saggy, good mirror and flap. Just need to get some velcro for the flap now. |
|
|
|
| tod914 |
Feb 8 2013, 02:14 AM
Post
#14
|
|
Advanced Member Group: Members Posts: 3,755 Joined: 19-January 03 From: Lincoln Park, NJ Member No.: 170 |
I believe it was on my 75 914, I was able to get the mirror out, and install a new one through that opening. No cutting was needed for that. You method is a good way to replace the foam. Can also put cardboard between the foam to firm it up abit.
|
|
|
|
|
1 User(s) are reading this topic (1 Guests and 0 Anonymous Users)
0 Members:

|
Lo-Fi Version | Time is now: 26th June 2026 - 05:45 PM |
Invision Power Board
v9.1.4 © 2026 IPS, Inc.