|
|

|
Porsche, and the Porsche crest are registered trademarks of Dr. Ing. h.c. F. Porsche AG.
This site is not affiliated with Porsche in any way. Its only purpose is to provide an online forum for car enthusiasts. All other trademarks are property of their respective owners. |
|
|
  |
| Curbandgutter |
 Jul 20 2020, 09:14 PM Jul 20 2020, 09:14 PM
Post
#581
|
|
Senior Member    Group: Members Posts: 566 Joined: 8-March 13 From: Murrieta CA Member No.: 15,637 Region Association: Southern California 
|
[quote name='bdstone914' date='Jul 20 2020, 07:29 PM' post='2835664']
I have those parts. I have on on a chunk of cross member and can cut it off. The driver and passenger brackets are different. Is what you pictured the one you need or the one you have? I am not sure they can be swapped. The one I have on the cross member is exactly like what you pictured. I think I cut both from the parts car. Easier to ship unless you like to drive @Curbandgutter hopefully that IIRC guy still has that part. If he's local I can come by and cut it out of the car. [/quote] [/quote] Yes cut out entire cross member and I'll "surgically" remove the part I need. And you're right , the driver and passenger are different. I need the passenger side. PM me with price so we can make arrangements. (IMG:style_emoticons/default/piratenanner.gif) (IMG:style_emoticons/default/piratenanner.gif) (IMG:style_emoticons/default/beerchug.gif) (IMG:style_emoticons/default/beerchug.gif) |
| Curbandgutter |
 Aug 1 2020, 04:25 PM Aug 1 2020, 04:25 PM
Post
#582
|
|
Senior Member    Group: Members Posts: 566 Joined: 8-March 13 From: Murrieta CA Member No.: 15,637 Region Association: Southern California 
|
UPDATE: PEDAL ASSEMBLY AND 911 STYLE DASH
Installed the Numeric shifter. Cut 7/8" solid stock p0lugs and tapped for M6 bolts inserted into tube steel frame by cutting 7/8" hole and inserting tapped round plugs. Used a sacrificial piece to be able to holesaw the offset round plug 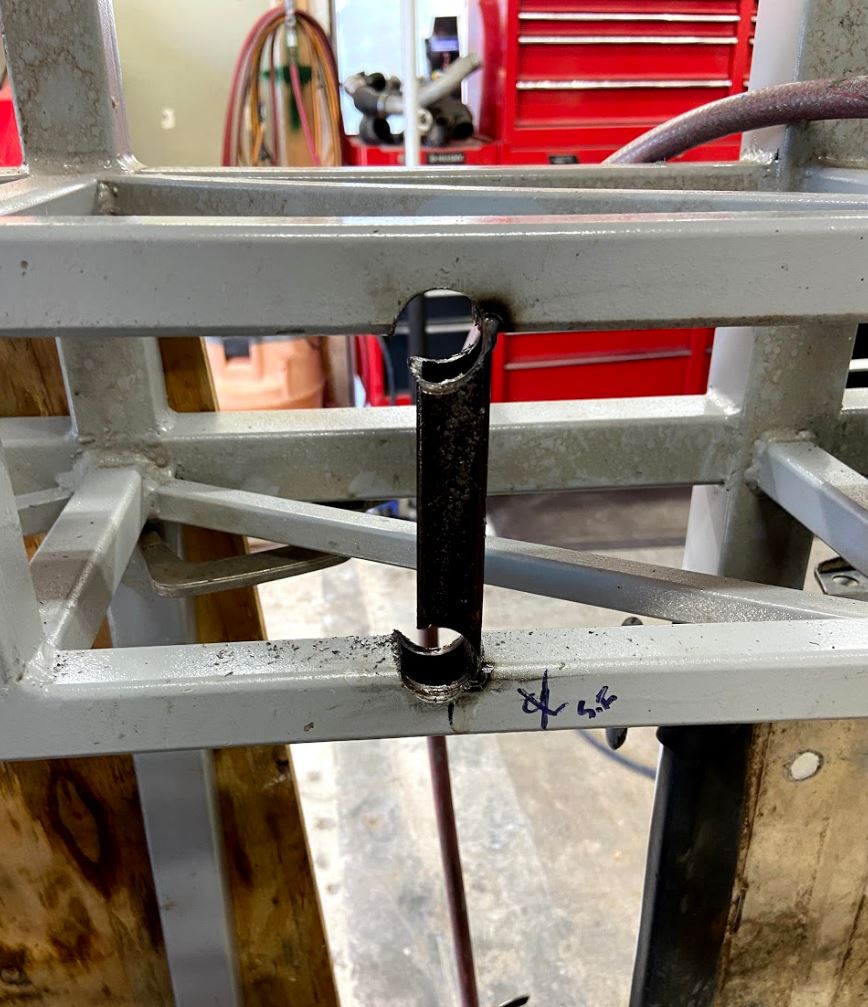 Cut all the way through 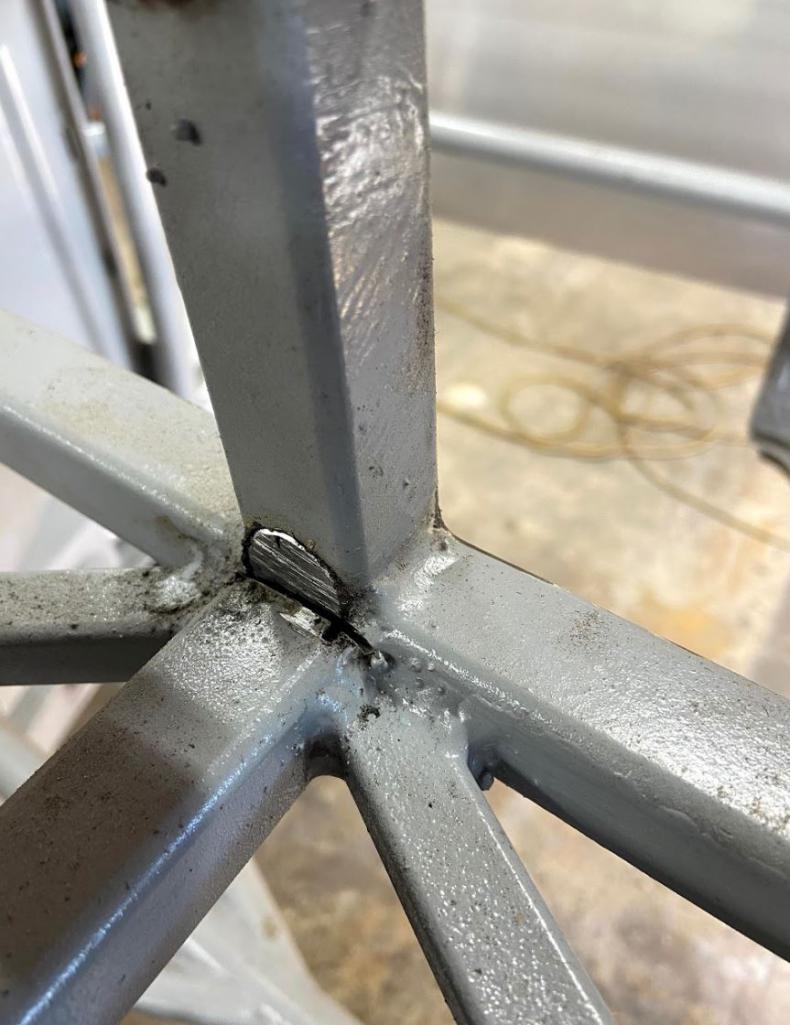 Insert round plugs and weld 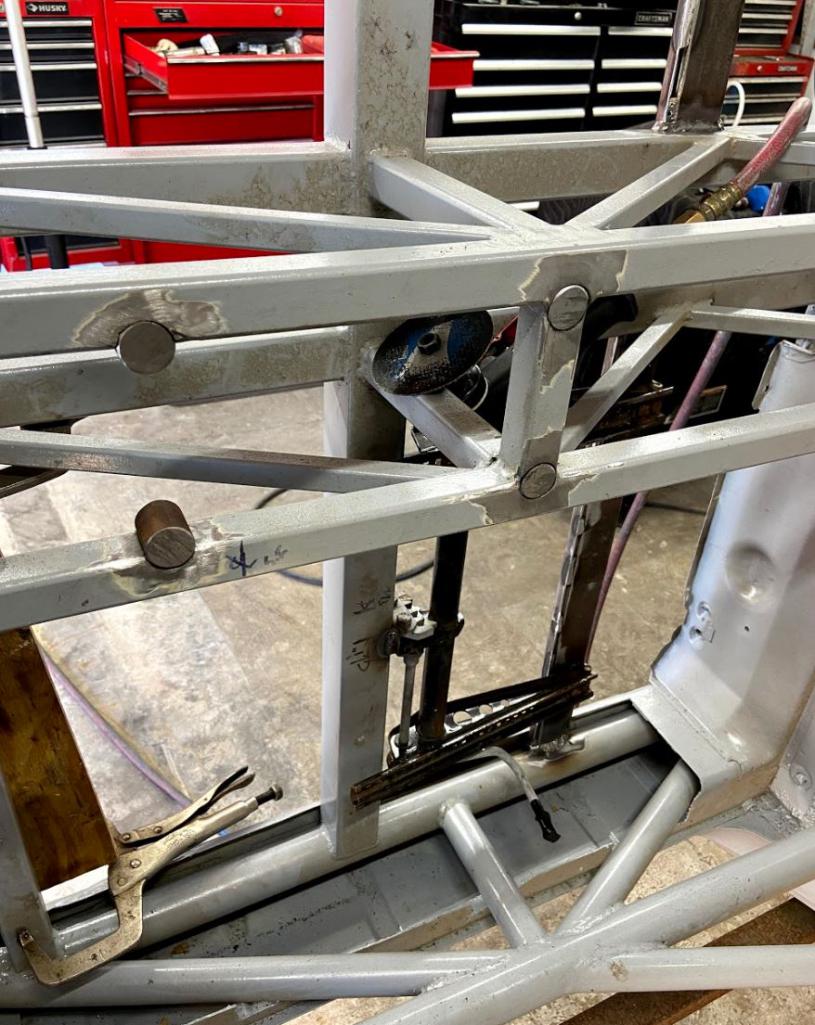 Install Numeric Shifter 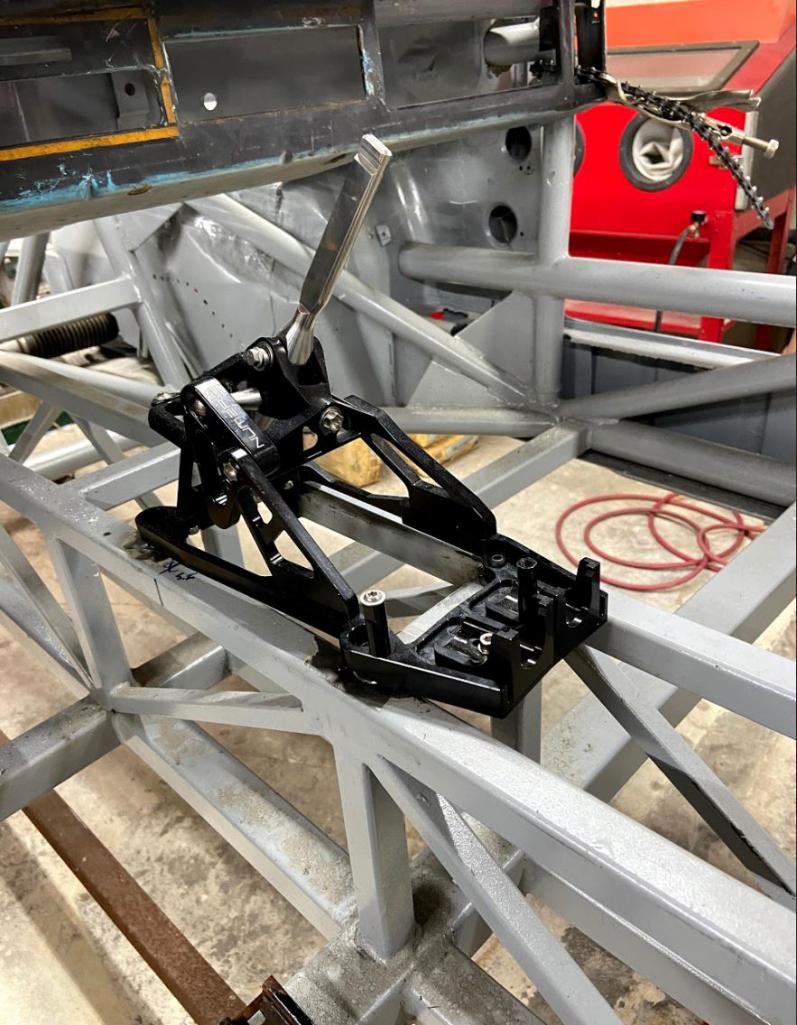 Install foot pedal to frame 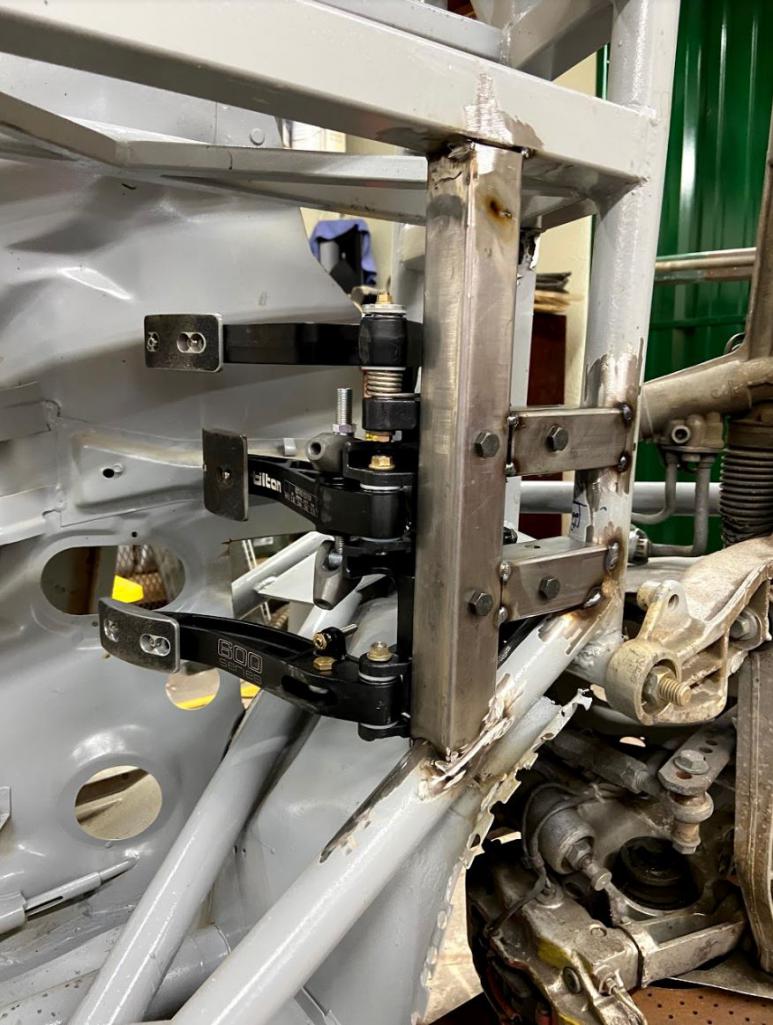 Foot pedal assembly is as close as possible to the center line of the steering wheel 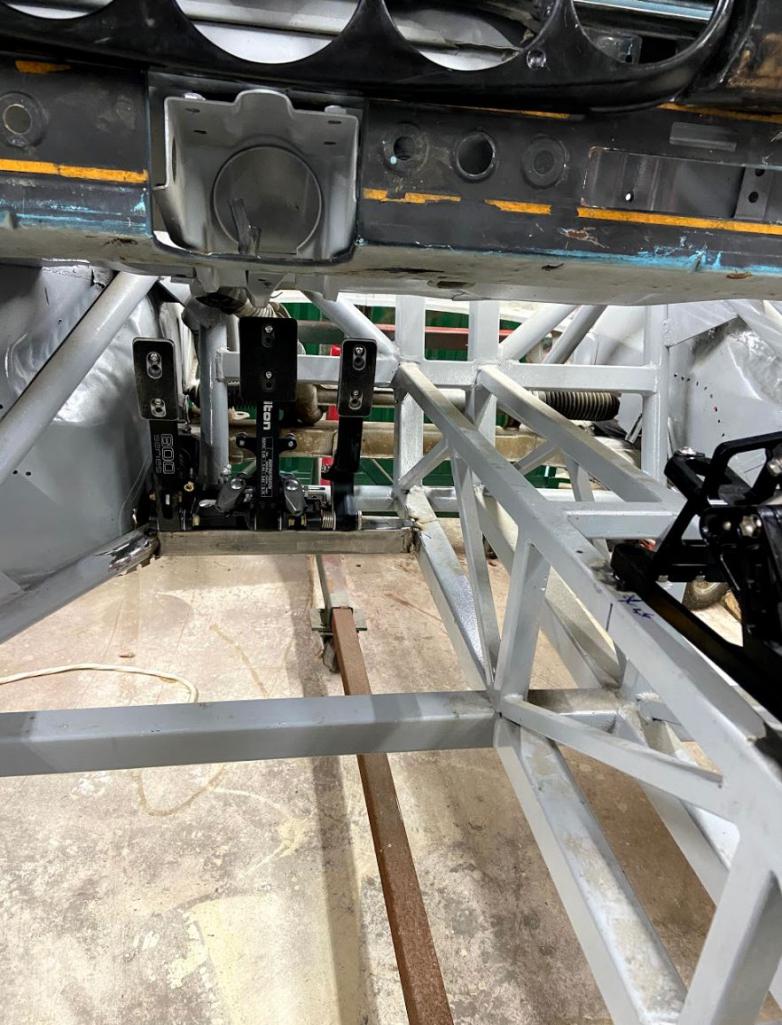 Cut 914 Dash to fit into the tube frame 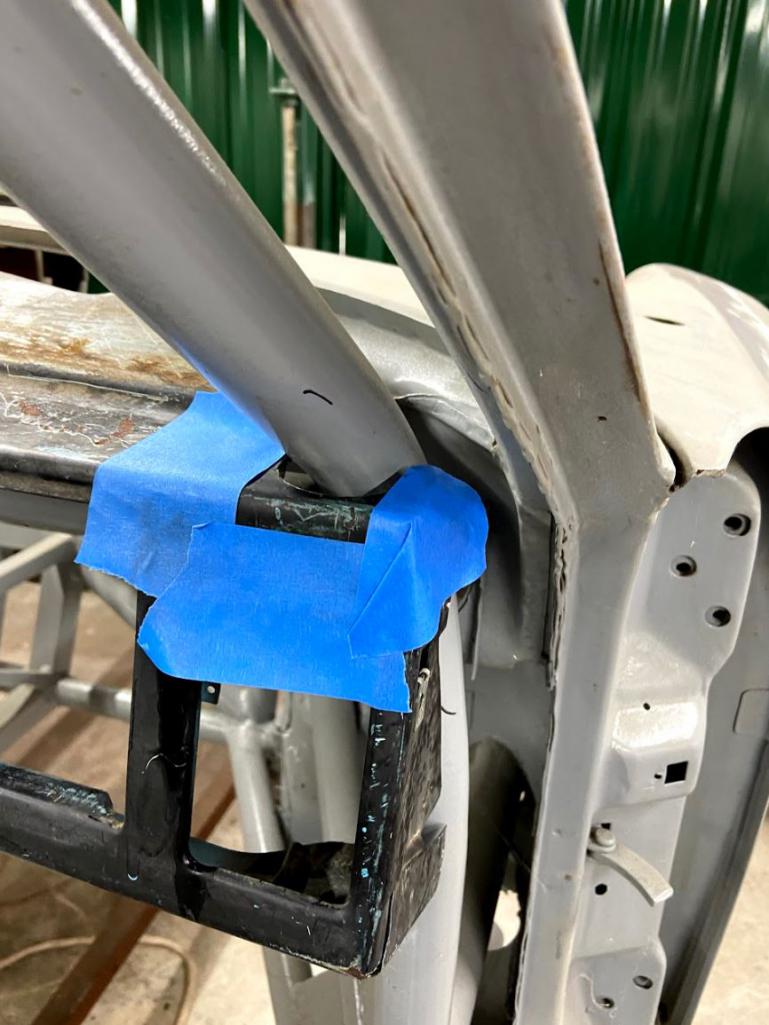 Installed Getty Design 5-Gage Dash. 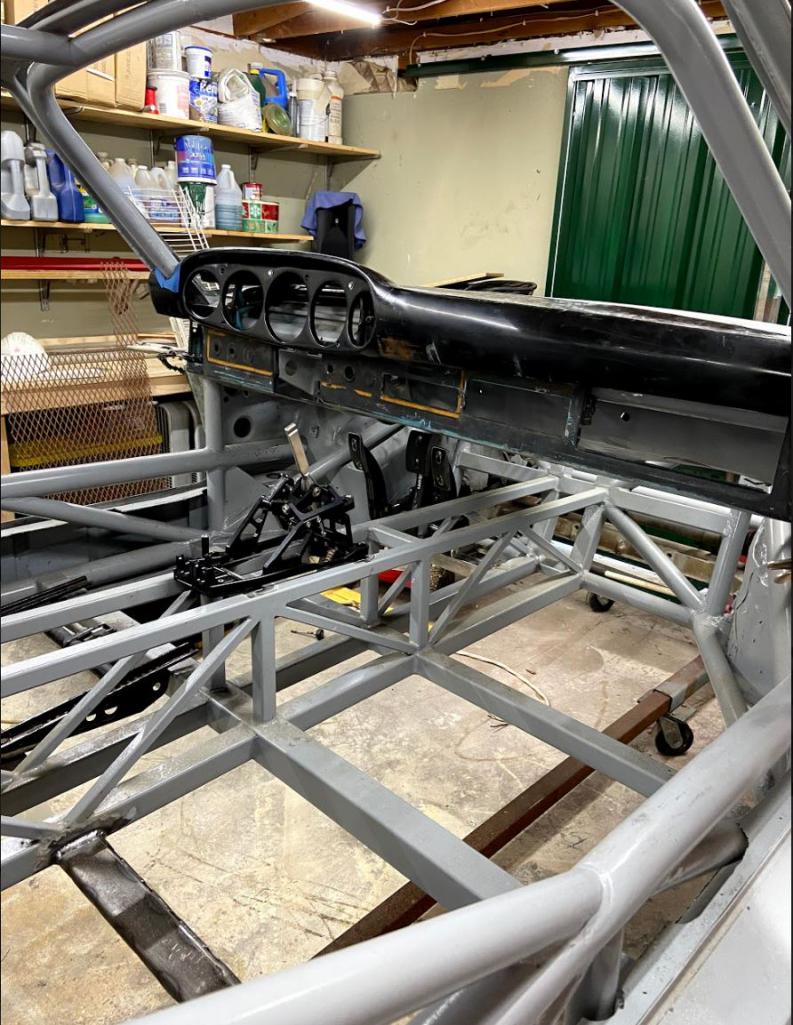 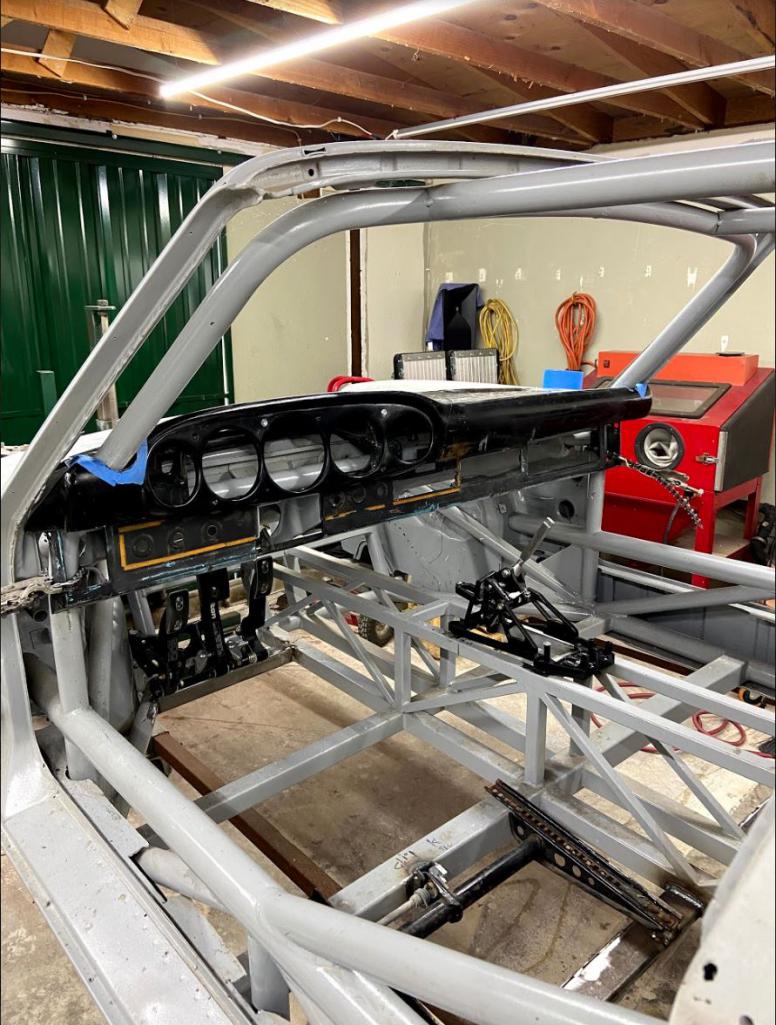 |
| tygaboy |
 Aug 1 2020, 05:40 PM Aug 1 2020, 05:40 PM
Post
#583
|
|
914 Guru      Group: Members Posts: 5,699 Joined: 6-October 15 From: Petaluma, CA Member No.: 19,241 Region Association: Northern California 
|
I love 914 World posts that have virtually zero 914 content. (IMG:style_emoticons/default/happy11.gif)
Great progress, Rudy! |
| sixnotfour |
 Aug 1 2020, 06:30 PM Aug 1 2020, 06:30 PM
Post
#584
|
|
914 Wizard           Group: Members Posts: 11,031 Joined: 12-September 04 From: Life Elevated..planet UT. Member No.: 2,744 Region Association: Rocky Mountains 

|
I Like the
getty 911 topper and 914 lower, when peeps use the whole 911 dash ...Why ?? its a 914 |
| 76-914 |
 Aug 1 2020, 07:22 PM Aug 1 2020, 07:22 PM
Post
#585
|
|
Repeat Offender & Resident Subaru Antagonist           Group: Members Posts: 13,819 Joined: 23-January 09 From: Temecula, CA Member No.: 9,964 Region Association: Southern California 
|
Somebody is having fun. Looks good Rudy. (IMG:style_emoticons/default/beerchug.gif)
|
| Curbandgutter |
 Nov 16 2020, 07:32 PM Nov 16 2020, 07:32 PM
Post
#586
|
|
Senior Member    Group: Members Posts: 566 Joined: 8-March 13 From: Murrieta CA Member No.: 15,637 Region Association: Southern California 
|
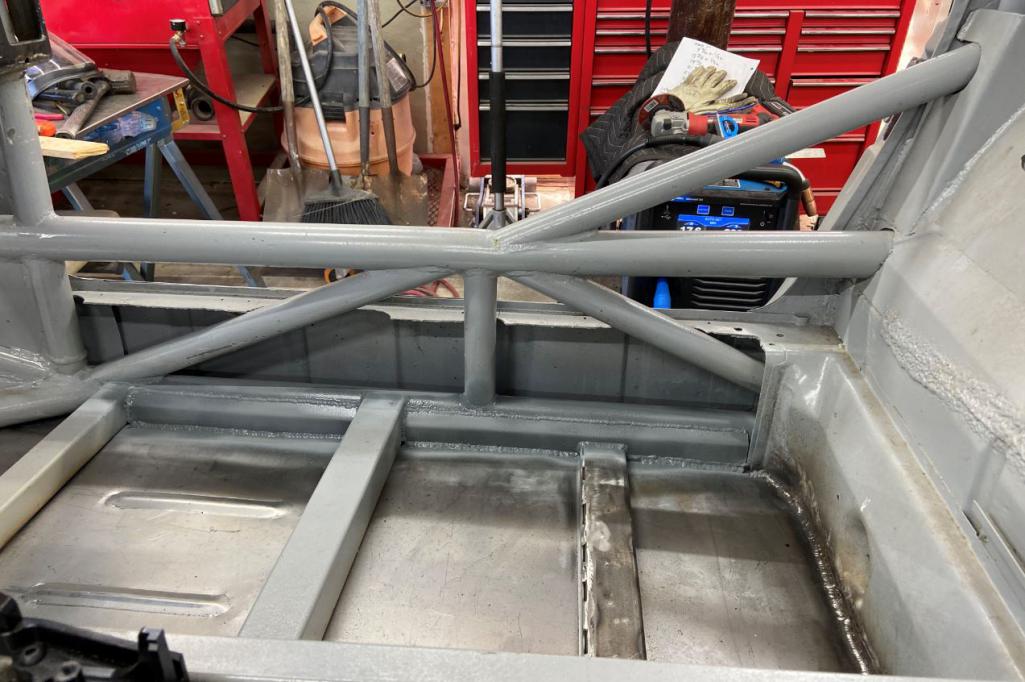
WOW, finished floor. Didn't think it was going to be that much work!!
Attached thumbnail(s) 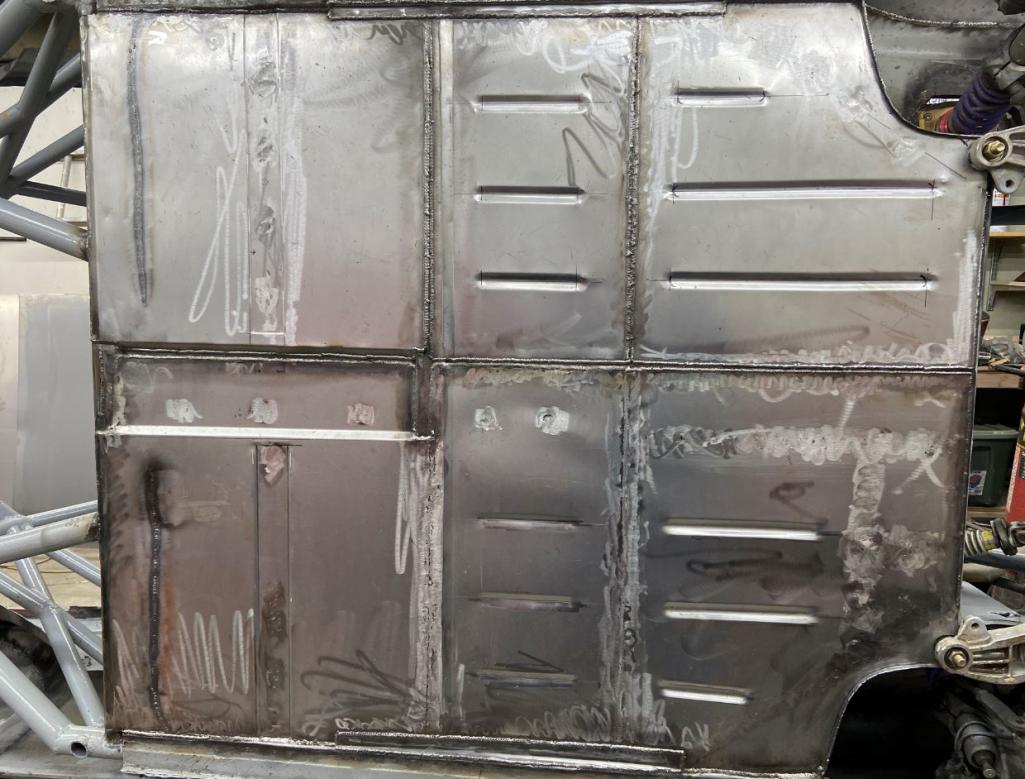 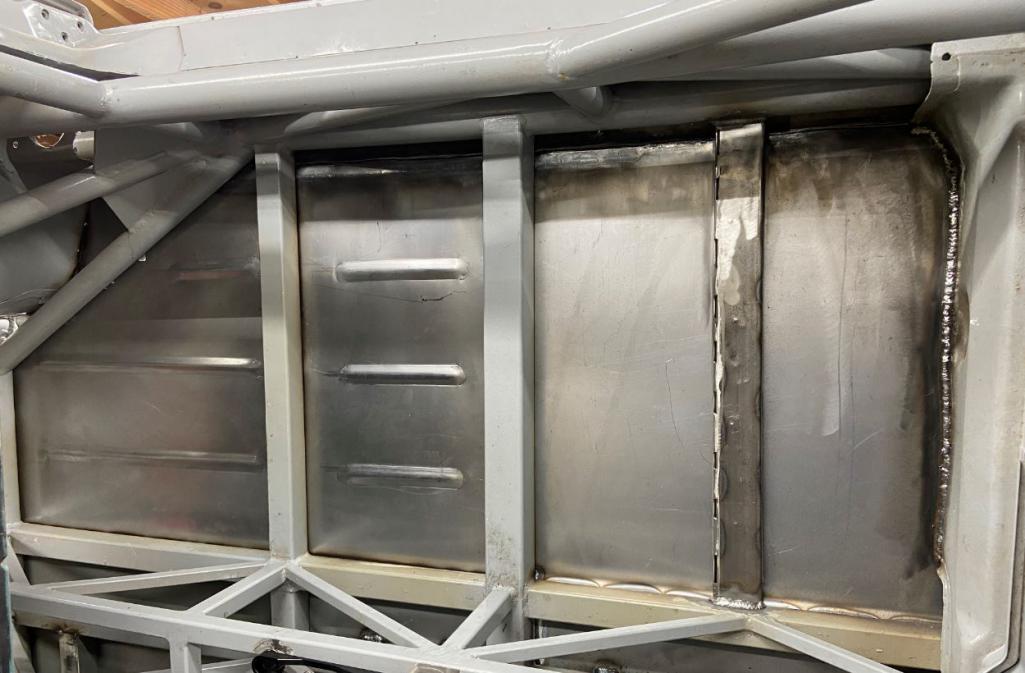 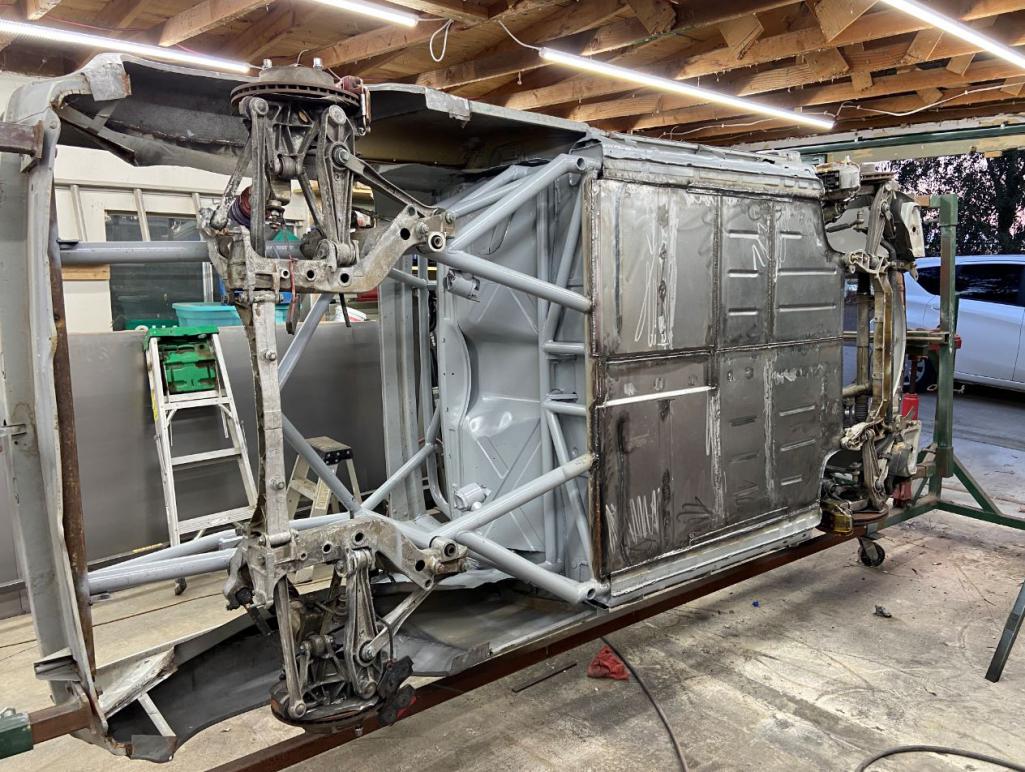 Attached image(s) 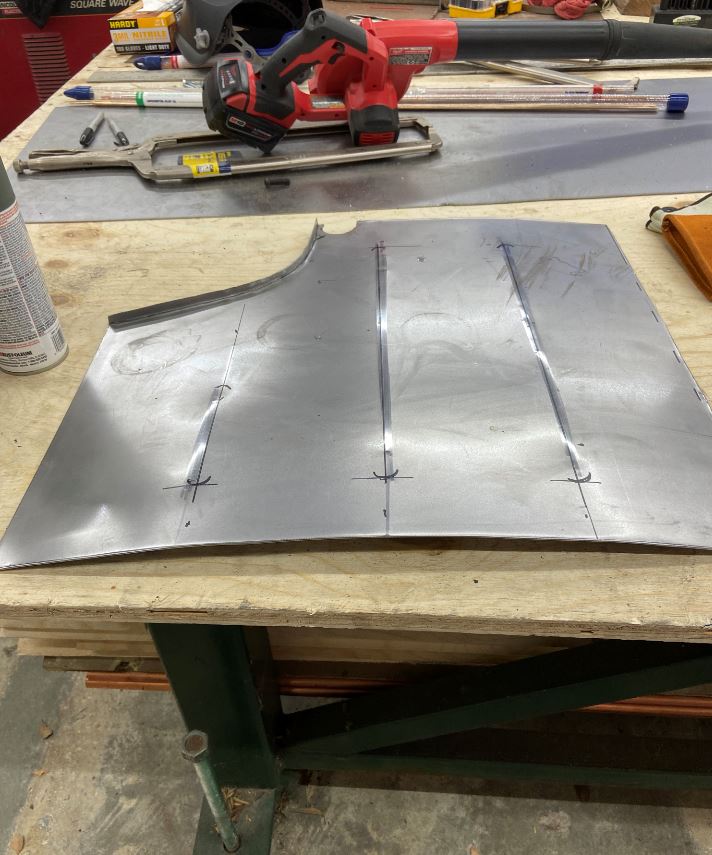 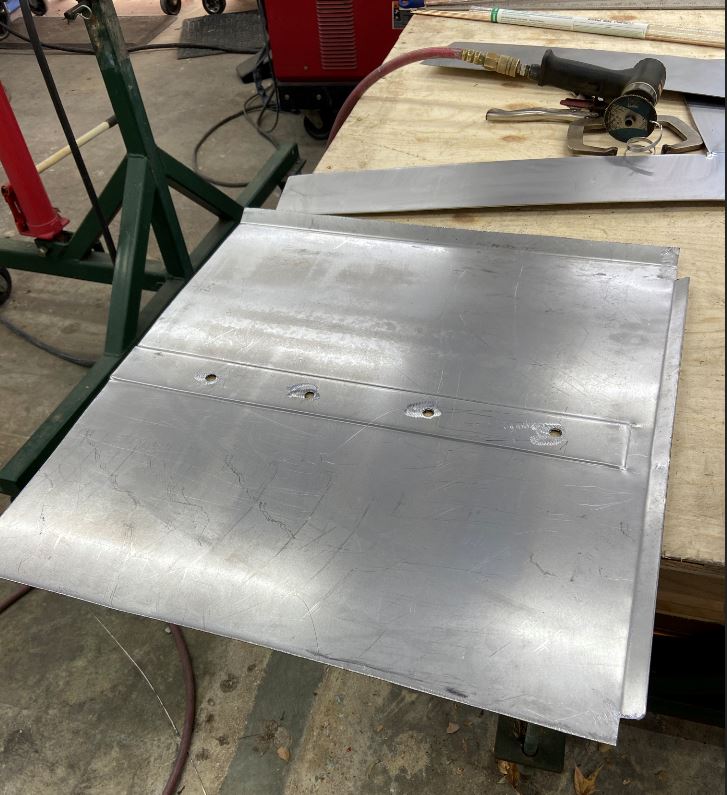 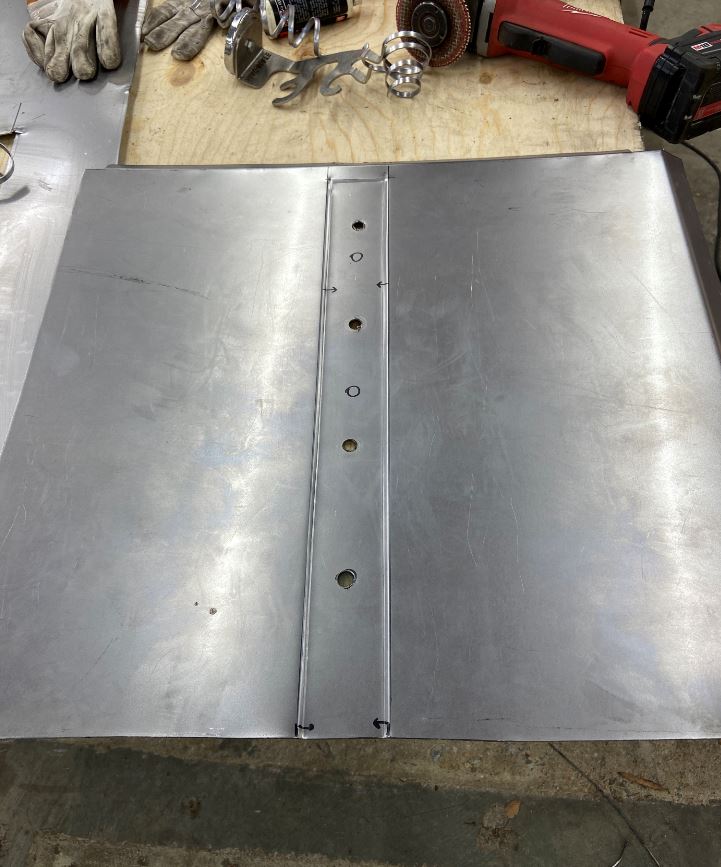 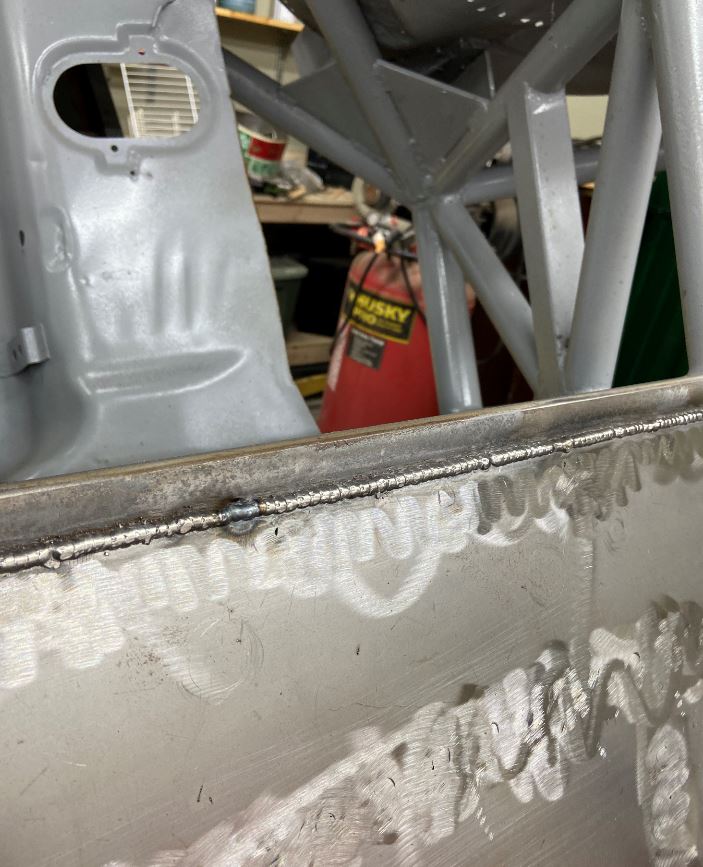 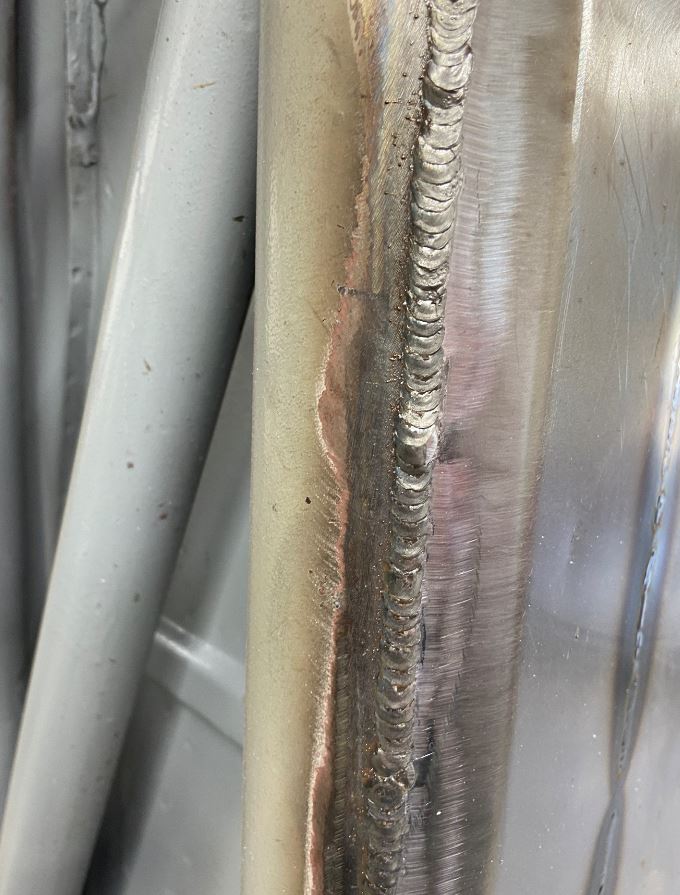 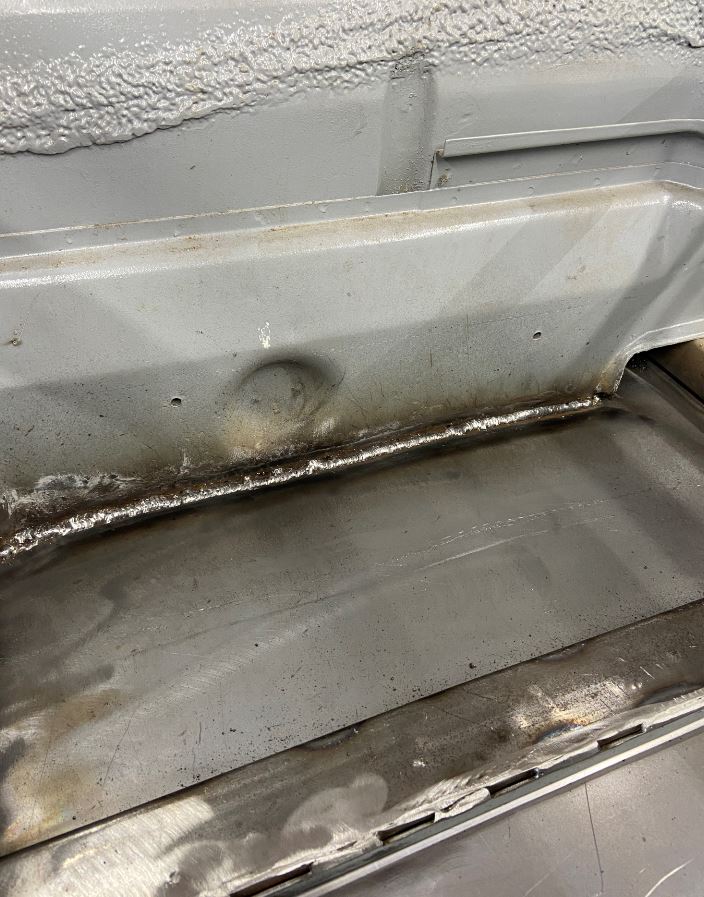
|
| Andyrew |
 Nov 16 2020, 07:41 PM Nov 16 2020, 07:41 PM
Post
#587
|
|
Spooling.... Please wait           Group: Members Posts: 13,380 Joined: 20-January 03 From: Riverbank, Ca Member No.: 172 Region Association: Northern California 
|
Rudy,
I've got to tell you I think about this car often (IMG:style_emoticons/default/smile.gif) Love the progress!! Thats a LOT of welding! |
| Curbandgutter |
 Nov 16 2020, 08:20 PM Nov 16 2020, 08:20 PM
Post
#588
|
|
Senior Member    Group: Members Posts: 566 Joined: 8-March 13 From: Murrieta CA Member No.: 15,637 Region Association: Southern California 
|
Rudy, I've got to tell you I think about this car often (IMG:style_emoticons/default/smile.gif) Love the progress!! Thats a LOT of welding! Andrew thanks man. Yeah this was a big milestone. More welding on that floor than the entire build so far. |
| Maltese Falcon |
 Nov 16 2020, 08:51 PM Nov 16 2020, 08:51 PM
Post
#589
|
|
914 Guru      Group: Members Posts: 5,123 Joined: 14-September 04 From: Mulholland SoCal Member No.: 2,755 Region Association: None  |
Rudy's work... "Checks all the boxes" (IMG:style_emoticons/default/welder.gif) !!!
|
| tygaboy |
 Nov 16 2020, 09:36 PM Nov 16 2020, 09:36 PM
Post
#590
|
|
914 Guru      Group: Members Posts: 5,699 Joined: 6-October 15 From: Petaluma, CA Member No.: 19,241 Region Association: Northern California 
|
(IMG:style_emoticons/default/sawzall-smiley.gif) (IMG:style_emoticons/default/smash.gif) (IMG:style_emoticons/default/welder.gif)
Awesomeness! (IMG:style_emoticons/default/aktion035.gif) Looking REALLY nice, Rudy! |
| PanelBilly |
 Nov 16 2020, 09:49 PM Nov 16 2020, 09:49 PM
Post
#591
|
|
914 Guru      Group: Members Posts: 5,933 Joined: 23-July 06 From: Kent, Wa Member No.: 6,488 Region Association: Pacific Northwest 
|
|
| 76-914 |
 Nov 16 2020, 10:25 PM Nov 16 2020, 10:25 PM
Post
#592
|
|
Repeat Offender & Resident Subaru Antagonist           Group: Members Posts: 13,819 Joined: 23-January 09 From: Temecula, CA Member No.: 9,964 Region Association: Southern California 
|
Looks great Rudy. I need to stop by and see your progress again. (IMG:style_emoticons/default/beerchug.gif)
|
| 914werke |
 Nov 16 2020, 10:55 PM Nov 16 2020, 10:55 PM
Post
#593
|
|
"I got blisters on me fingers"           Group: Members Posts: 11,457 Joined: 22-March 03 From: USofA Member No.: 453 Region Association: Pacific Northwest 
|
Danm how'd I miss this build.. Crazy!!
|
| AZBanks |
 Nov 17 2020, 07:59 AM Nov 17 2020, 07:59 AM
Post
#594
|
|
Senior Member    Group: Members Posts: 1,069 Joined: 7-December 05 From: New River, AZ Member No.: 5,245 Region Association: Southwest Region 
|
That is a lot of dimes. Nice welding.
|
| ValcoOscar |
 Nov 17 2020, 09:34 AM Nov 17 2020, 09:34 AM
Post
#595
|
|
Garage Life     Group: Members Posts: 2,541 Joined: 19-November 13 From: SoCal Member No.: 16,669 Region Association: Southern California 

|
Rudy
So thrilled you're still at it. I seem to remember that awesome BBQ you prepared us several years back. (IMG:style_emoticons/default/chowtime.gif) Hope you and your family are doing well. Keep us updated on your progress (IMG:style_emoticons/default/beer3.gif) |
| Curbandgutter |
 Nov 17 2020, 12:49 PM Nov 17 2020, 12:49 PM
Post
#596
|
|
Senior Member    Group: Members Posts: 566 Joined: 8-March 13 From: Murrieta CA Member No.: 15,637 Region Association: Southern California 
|
THANKS GUYS,
The body work remaining is 1) make a front trunk 2) tie in rear trunk 3) finish interior long cover 4) make interior tunnel cover 5) flare out front and rear fenders and additional 5 or 6 inches. suspension work remaining is 6) my son is currently designing and machining the front control arms to include a 3" front track widening and connections to remove strut and transfer to inboard coil overs. I'm feeling like doing 2,3,4 and 5 first while son does 6. Will leave 1 once I figure out how to vent this thing out. I want to try something different. |
| Curbandgutter |
 Nov 23 2020, 09:08 PM Nov 23 2020, 09:08 PM
Post
#597
|
|
Senior Member    Group: Members Posts: 566 Joined: 8-March 13 From: Murrieta CA Member No.: 15,637 Region Association: Southern California 
|
|
| horizontally-opposed |
 Nov 23 2020, 10:21 PM Nov 23 2020, 10:21 PM
Post
#598
|
|
Advanced Member     Group: Members Posts: 3,456 Joined: 12-May 04 From: San Francisco Member No.: 2,058 Region Association: None 
|
There are some wildly, wildly cool builds going on right now. And this is definitely one of them. Hat's off on the creativity, workmanship, and direction.
Can't wait to see this hit the road, but enjoying the journey... |
| Curbandgutter |
 Jan 3 2021, 06:54 PM Jan 3 2021, 06:54 PM
Post
#599
|
|
Senior Member    Group: Members Posts: 566 Joined: 8-March 13 From: Murrieta CA Member No.: 15,637 Region Association: Southern California 
|
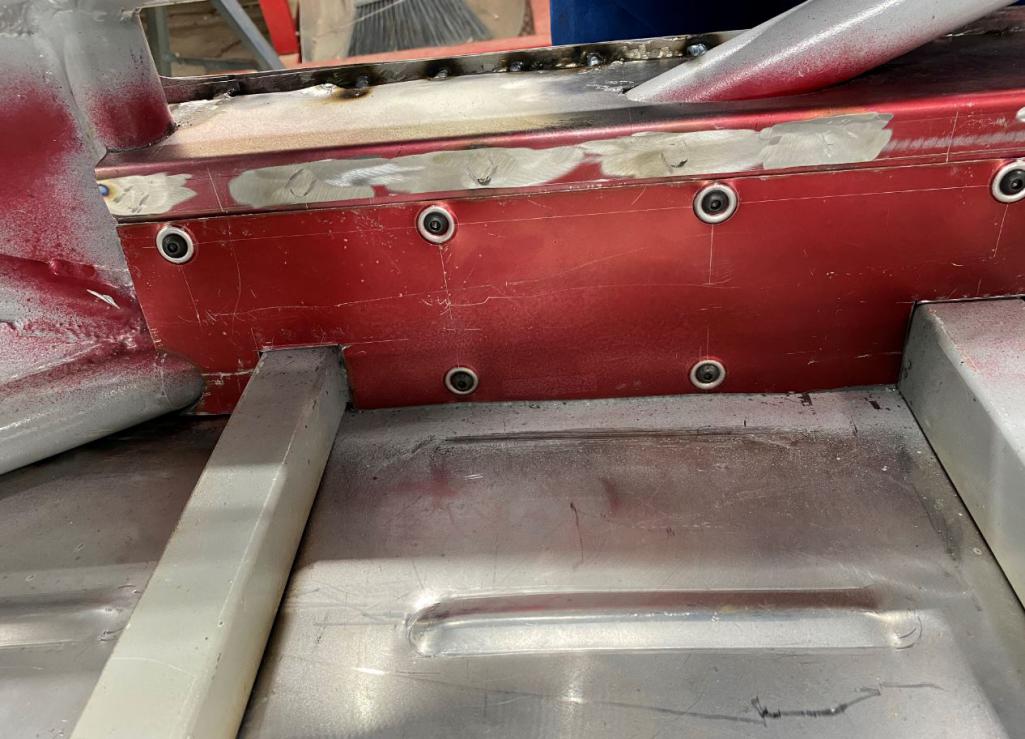
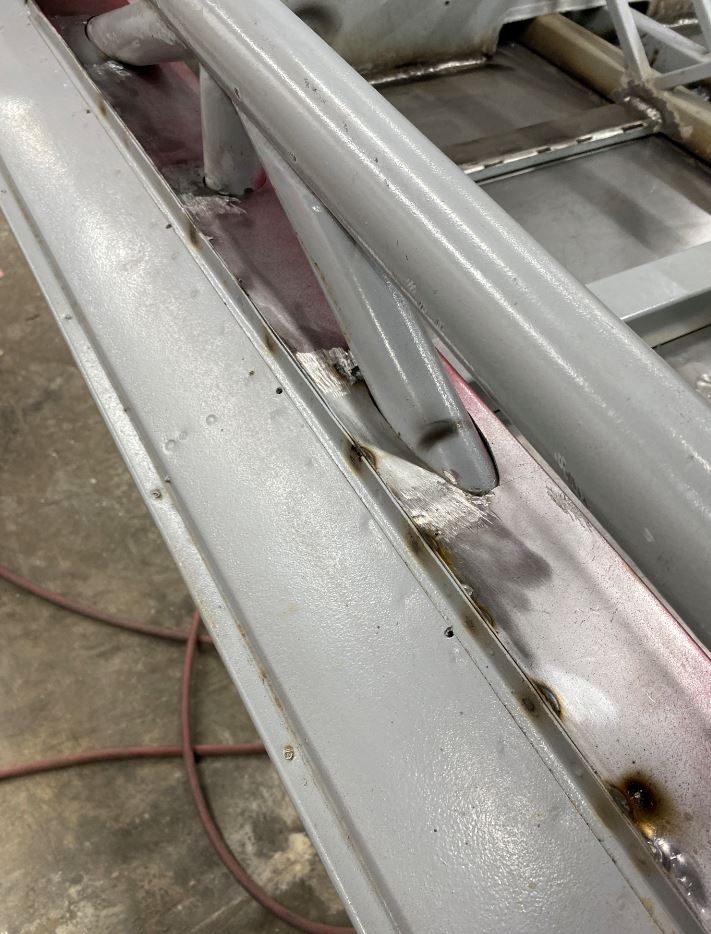
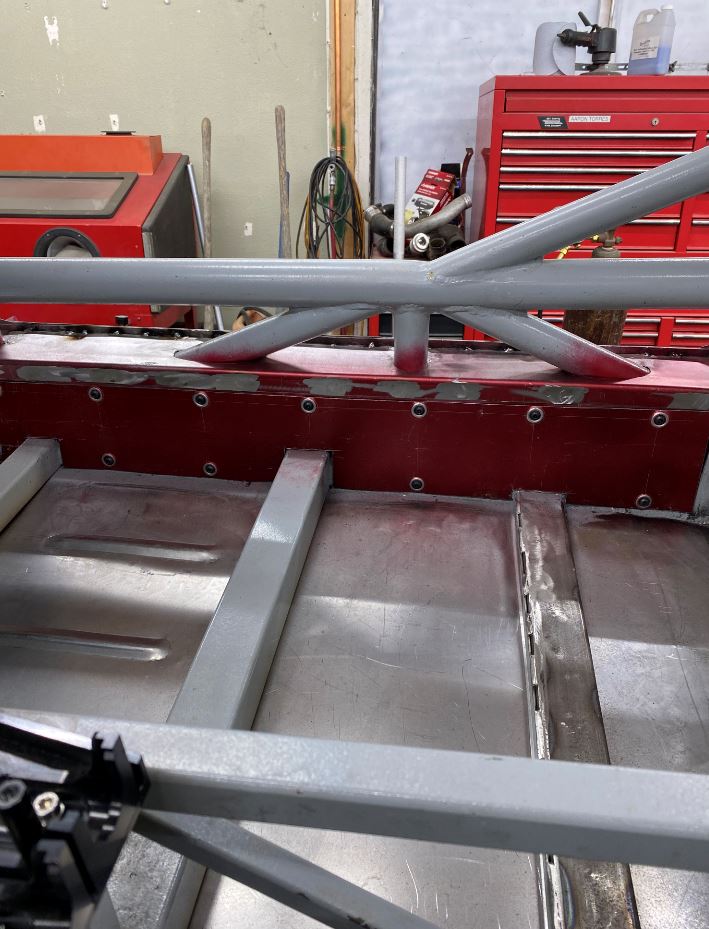
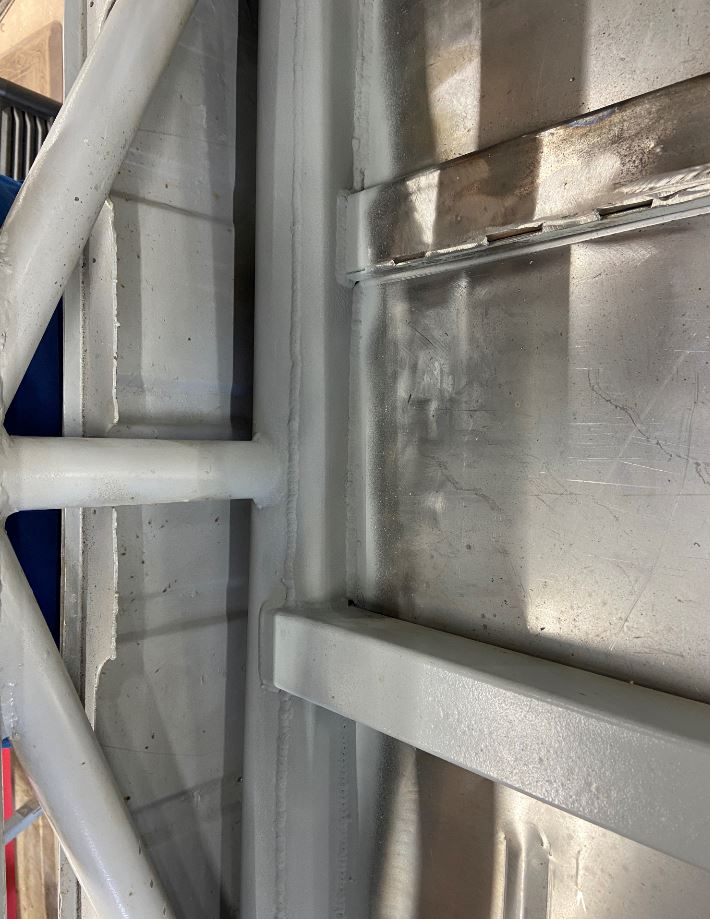
Update: Completed both removable long covers. Did this so that I can run radiator and ac lines inside of the longs.
Using Langmuir Pro Plasa Cutter to cut sheet metal. I fabricated everything on the table that is painted red. Had to modify the table to my liking 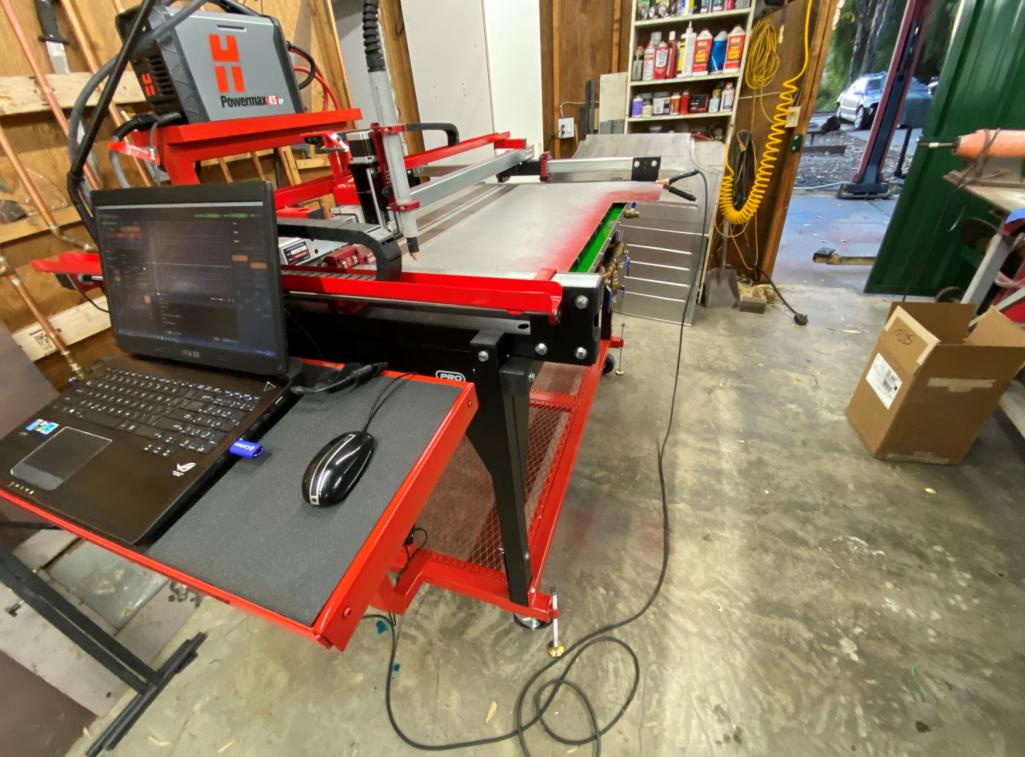 So I cut out the long covers and a bunch of ac/vent holes that I'm closing up. I closed every single opening along the firewall 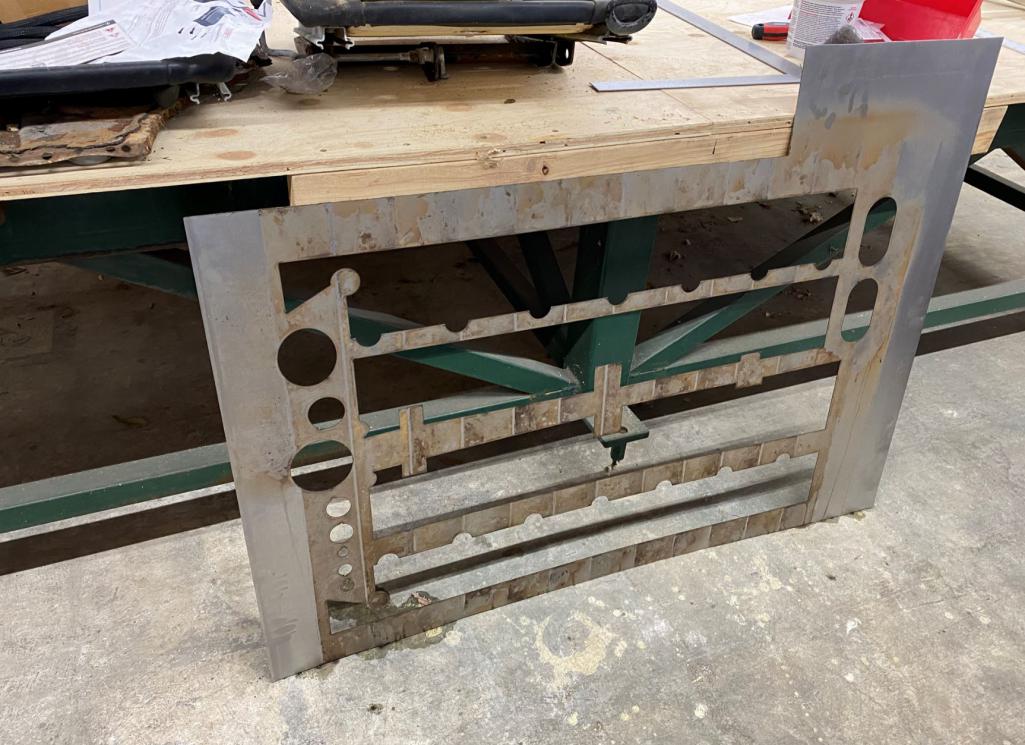 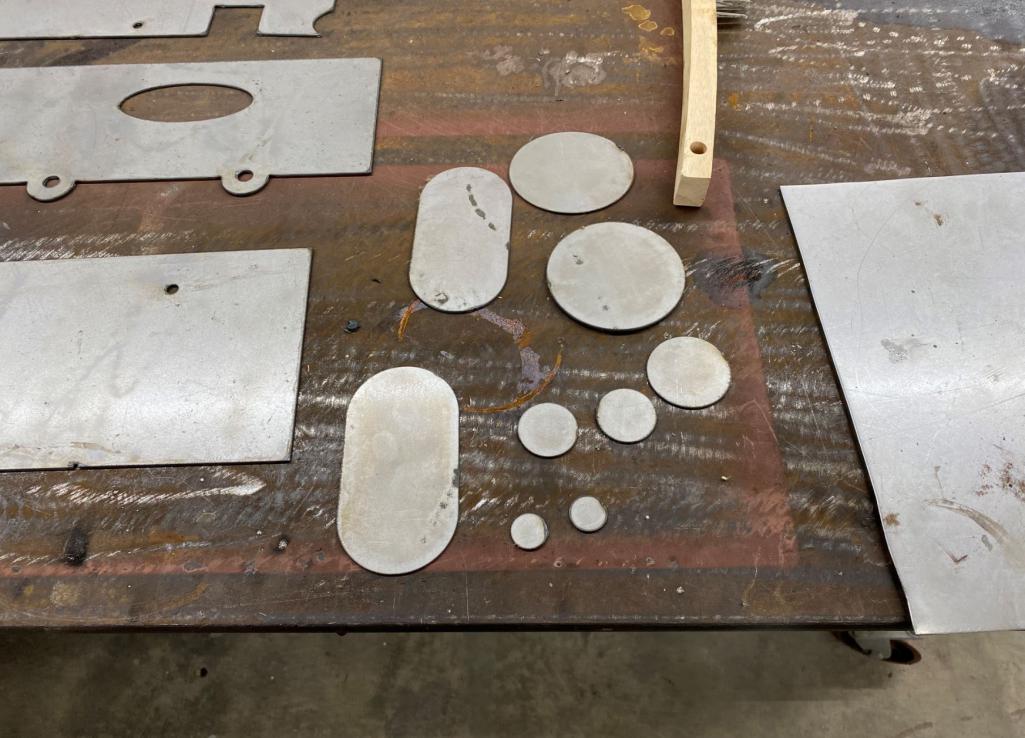 I put an offset in the stationary cover so that the removable cover fits close to flush 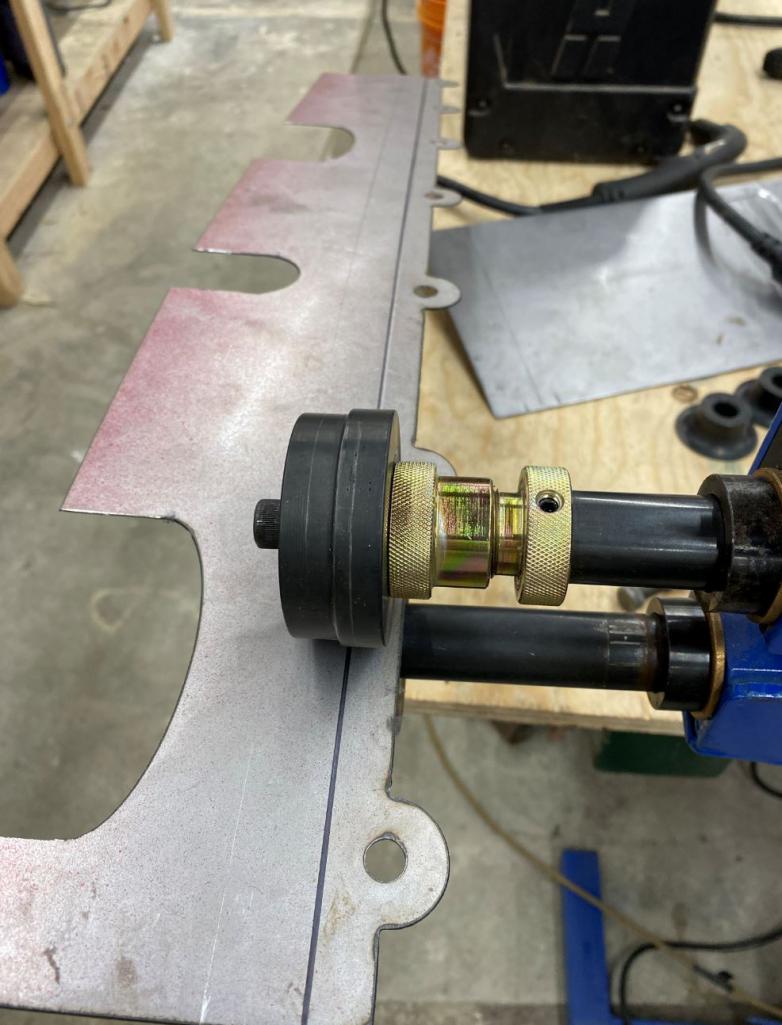 Bending longs on magnetic brake 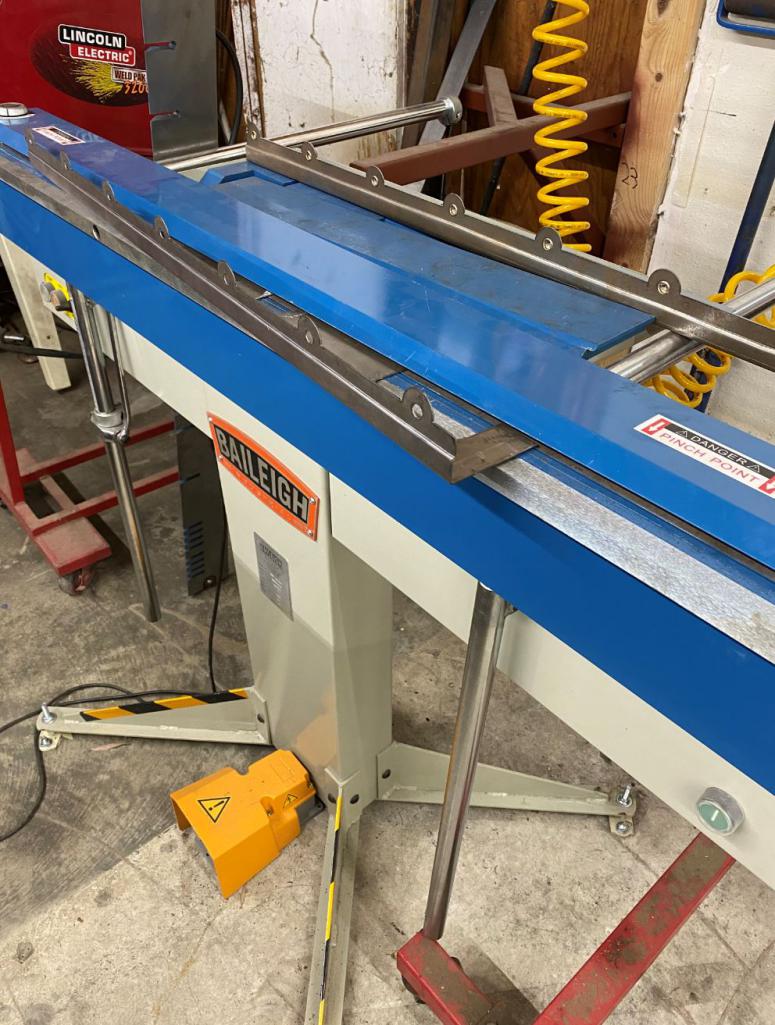 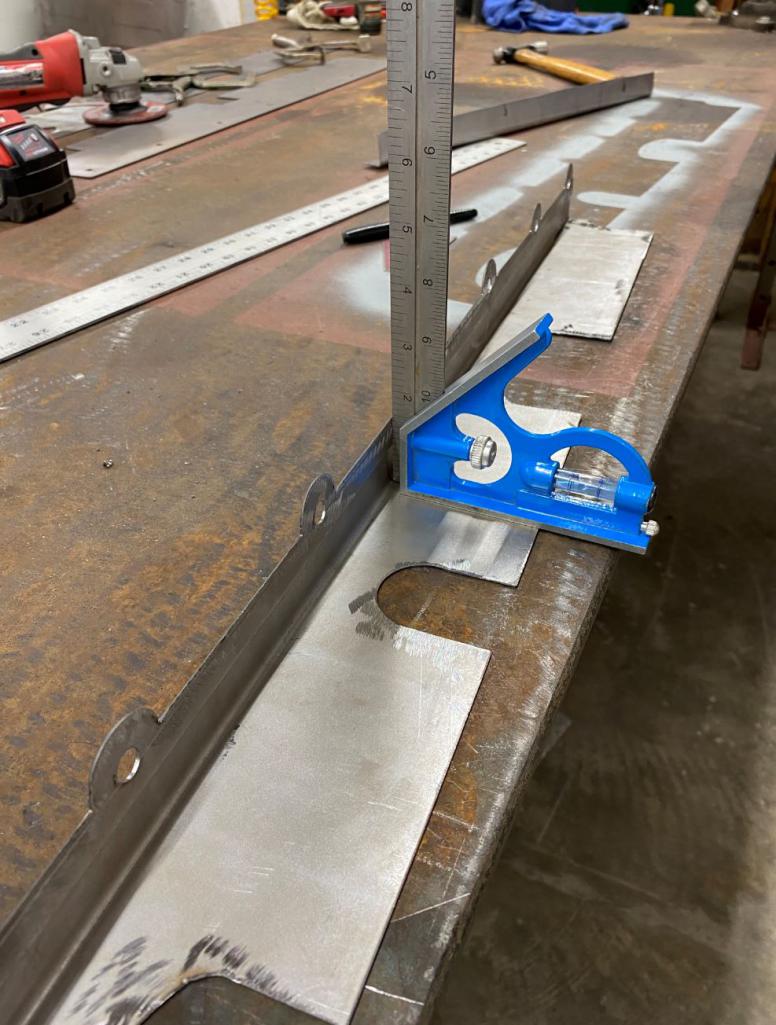 Adding rivnuts to make it all removable 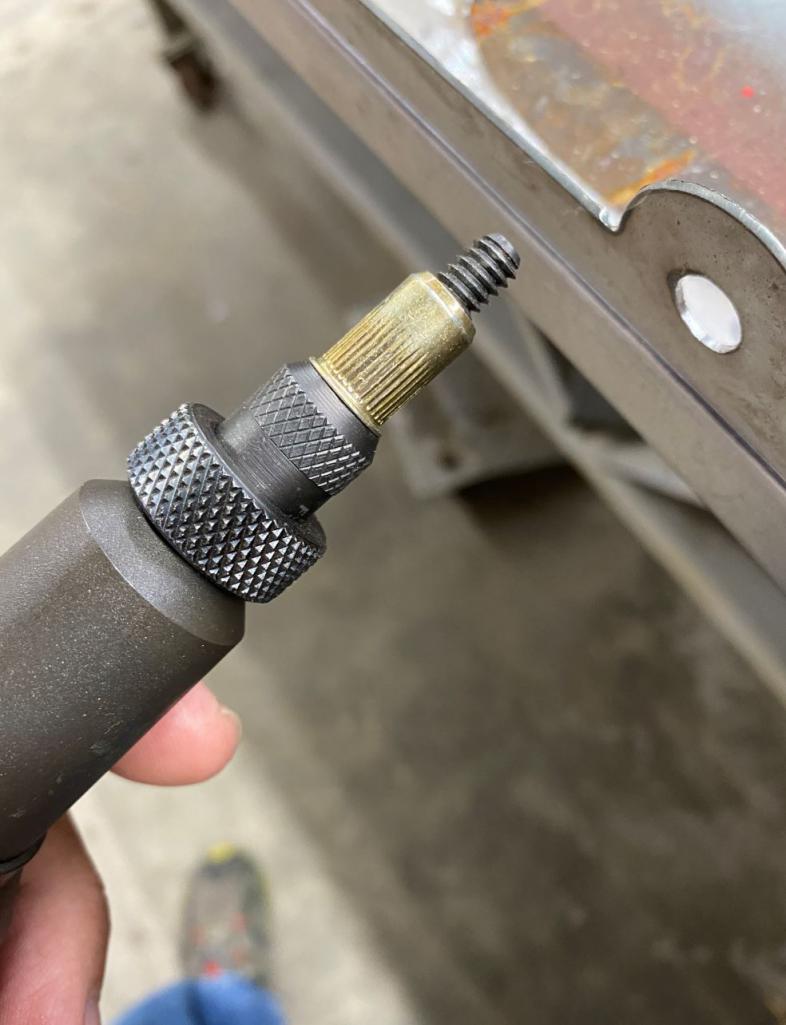 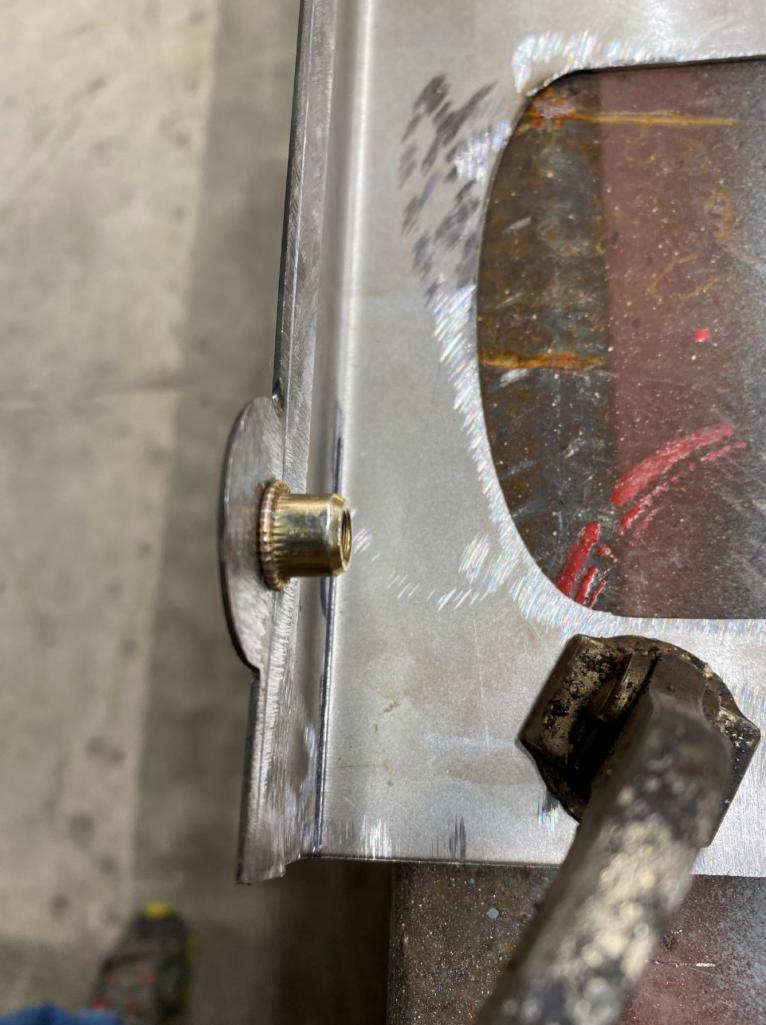 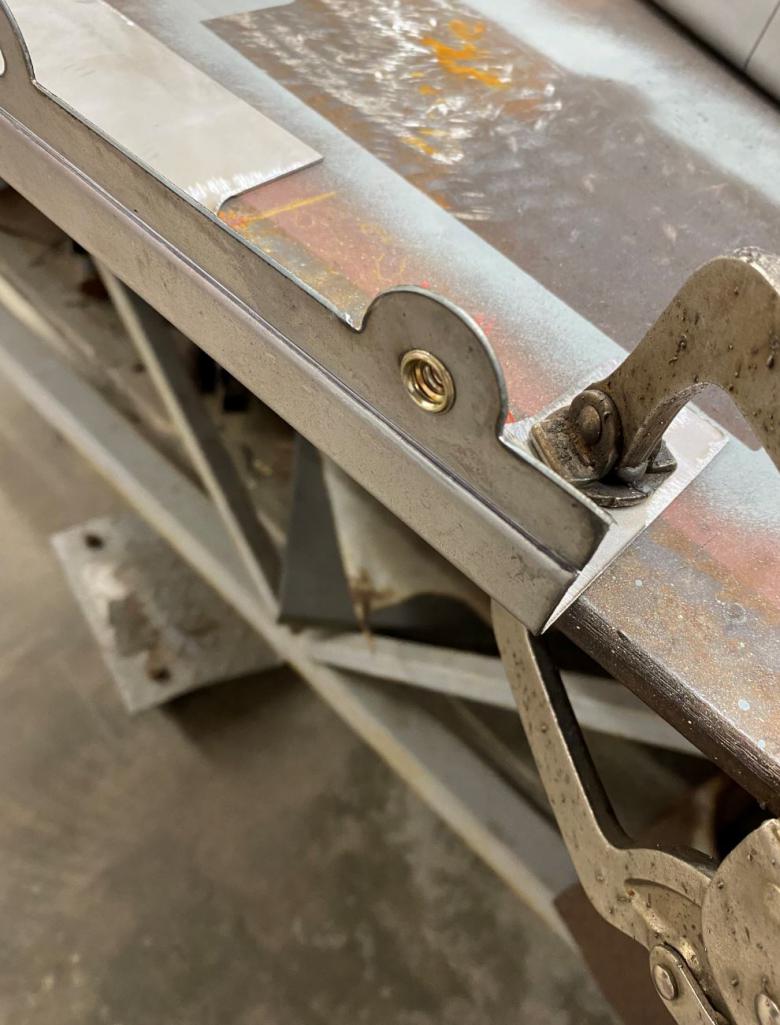 This is what it will look like when open 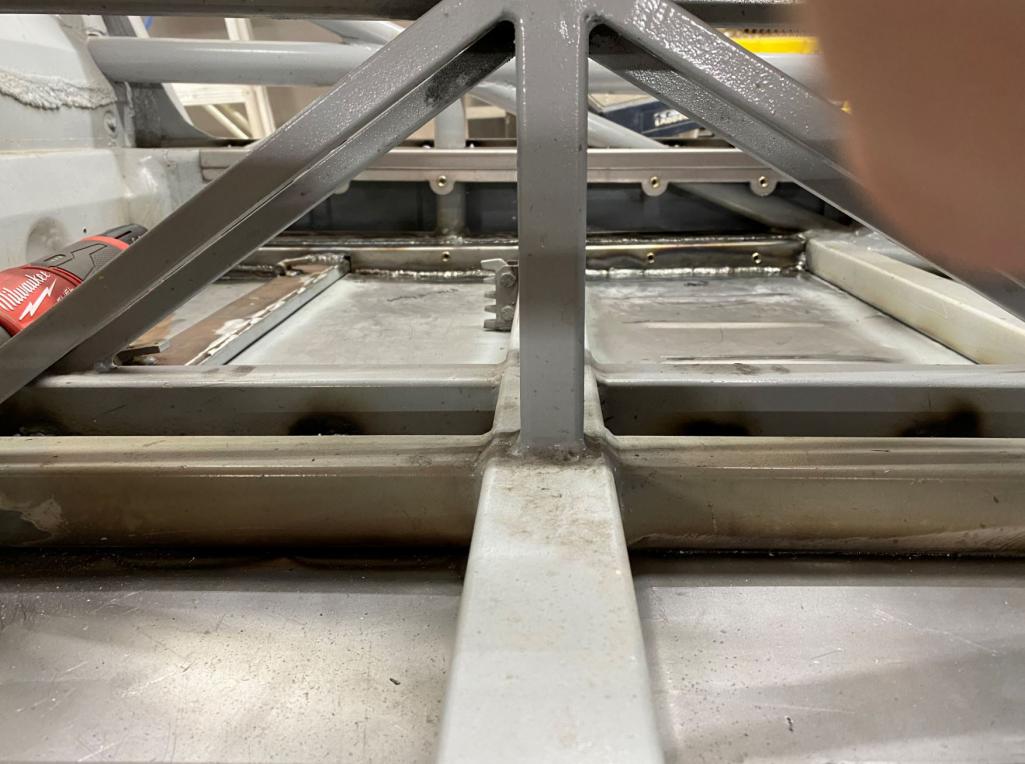 This is closed 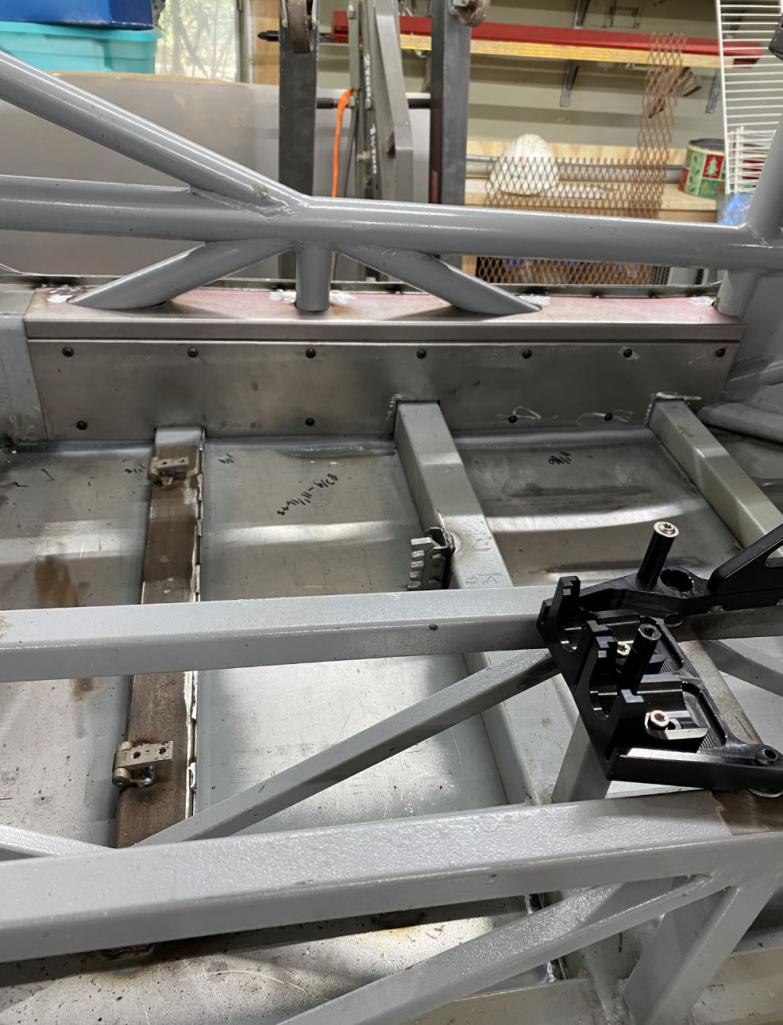 This is top view inside 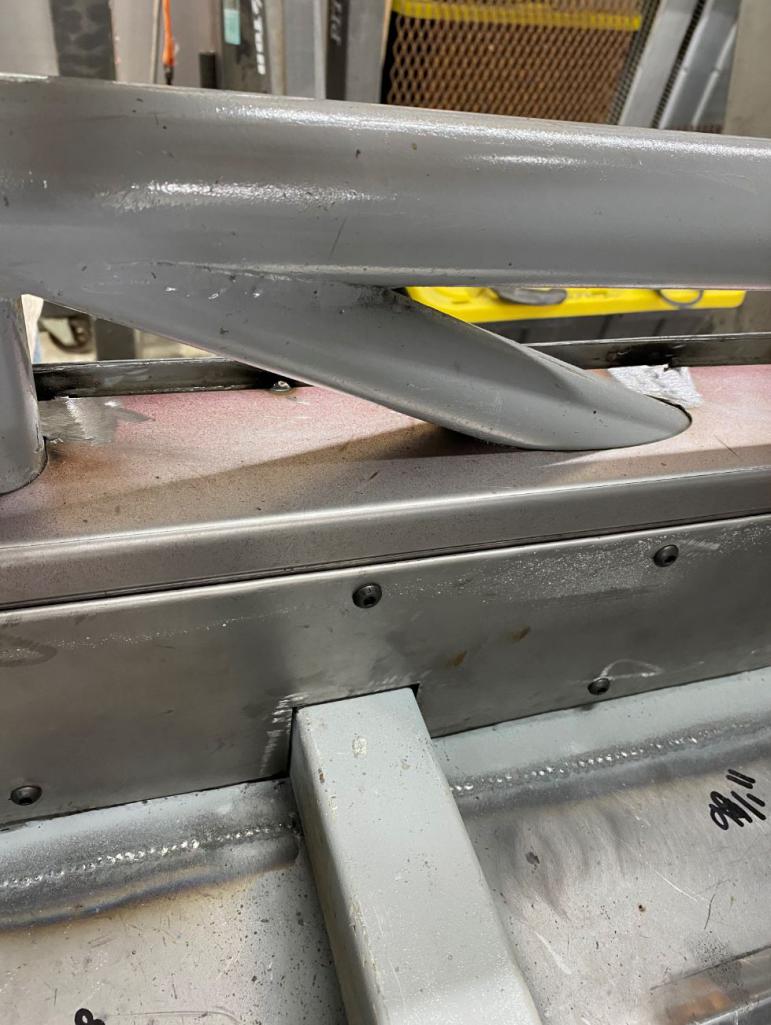 This is top view outside 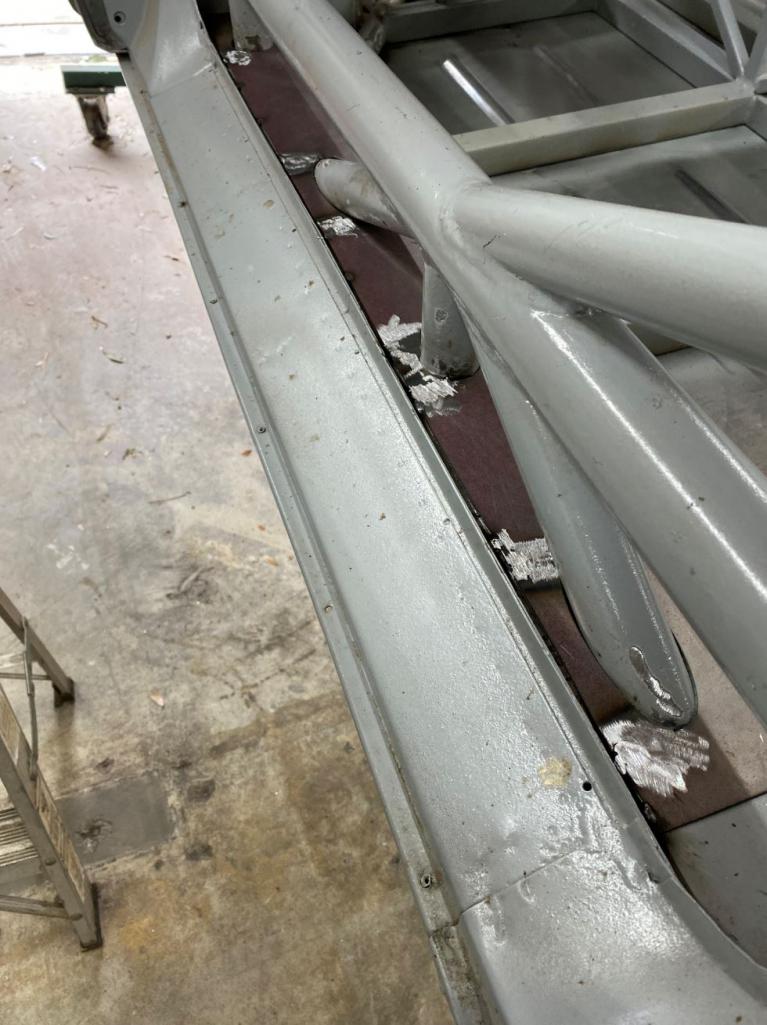 Closing everything up 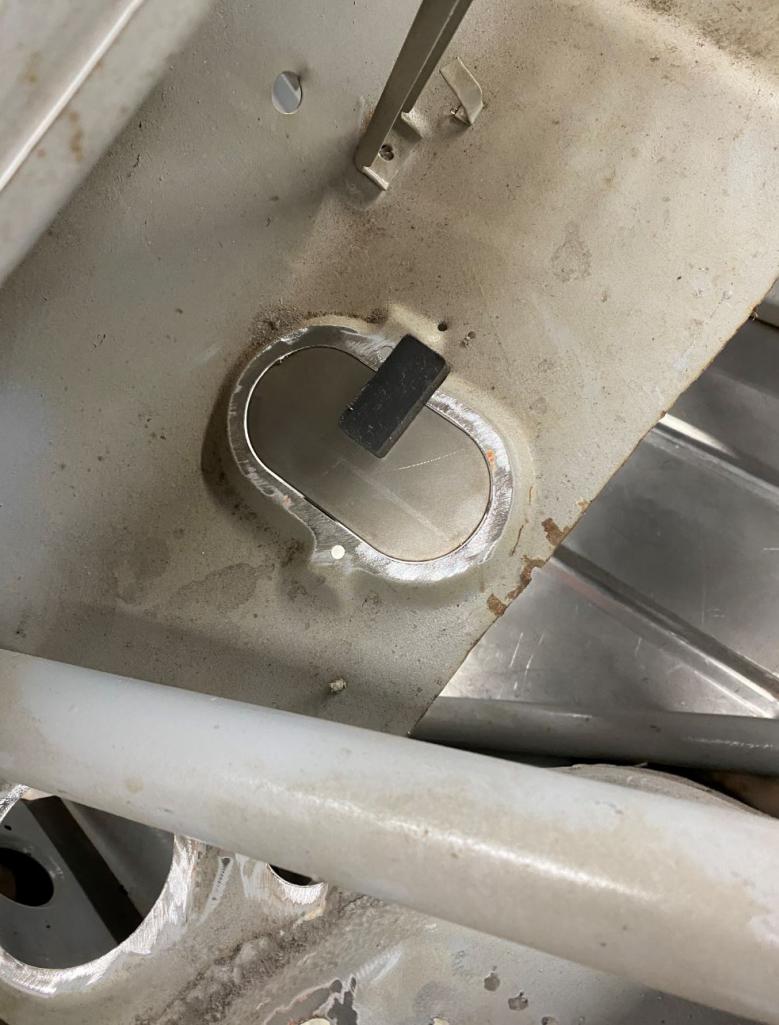 This is what is coming next 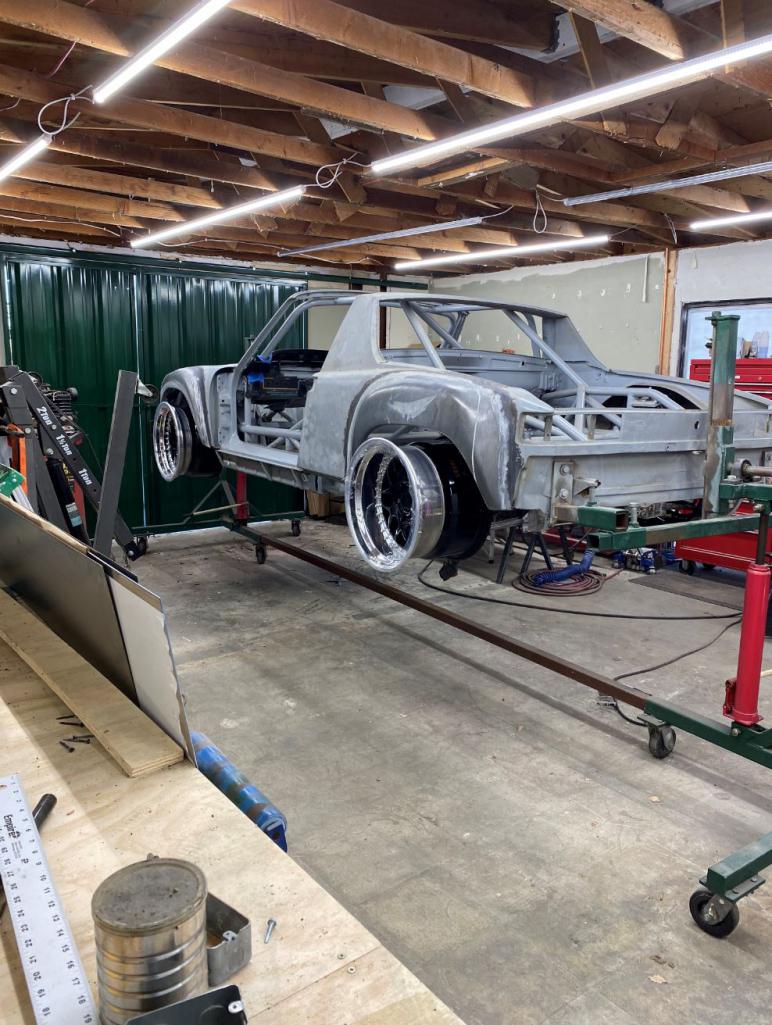 |
| ValcoOscar |
 Jan 3 2021, 07:09 PM Jan 3 2021, 07:09 PM
Post
#600
|
|
Garage Life     Group: Members Posts: 2,541 Joined: 19-November 13 From: SoCal Member No.: 16,669 Region Association: Southern California 

|
Great update Rudy.....
Wishing you and your family a Happy New Year. Oscar |
  |
3 User(s) are reading this topic (3 Guests and 0 Anonymous Users)
0 Members:

|
Lo-Fi Version | Time is now: 17th November 2025 - 01:44 PM |
Invision Power Board
v9.1.4 © 2025 IPS, Inc.


