|
|
|
Porsche, and the Porsche crest are registered trademarks of Dr. Ing. h.c. F. Porsche AG.
This site is not affiliated with Porsche in any way. Its only purpose is to provide an online forum for car enthusiasts. All other trademarks are property of their respective owners. |
|
|


| RON S. |
 Apr 27 2013, 04:23 PM Apr 27 2013, 04:23 PM
Post
#1
|
|
9140430841, FINALLY RUNNING  Group: Members Posts: 1,212 Joined: 22-May 03 From: WALTERBORO,S.C. Member No.: 724 Region Association: South East States |
Today was the day I mustered the energy to swap out my 43 year old rotten snorkel tube with the new one that I had gotten a month or so ago from Mikey.
The job is really a PITA (IMG:style_emoticons/default/headbang.gif) to the max, and then some. Be ready to spend most of the day on it, and have some help if you can get it. You'll really need 4 or 5 extra hands to push and pull and thread the wiring. I did mine alone, and it took me about 7 hours. First thing I noticed was that the Snorkel Tube is about 2- 2-1/2'' to long for my application. No matter, as I cut it in half about 3'' below the end that is the engine shelf grommet. Next was removing the interior, and since my wiring harness was already split in 2 on the shift tunnel, pulling it out was easy. With the wiring pulled up all the way into the engine compartment, I installed the 1st half I cut into the upper engine shelf. Once installed, which was a PITA doing it alone, I then threaded the harness back down through the upper Snork half, down below the engine. I then measured the bottom half of the elbowed end of the Snork tube, and cut about an inch off it. Then I threaded the wiring again through the elbowed piece and back into the car's interior. Once I got the bottom grommet of the snork Tube in place in the chassis, I rolled back the tubing on one end where the 2 halves and unrolled it over the other half. This gave the unit about 1-1/2 to 2'' of overlap on the tube. It sealed up really tight, and it looks pretty good. Re-plugged all the wires in, put the seats back in, and I was done. Time to go back to driving it. All in all, another great Mikey product. Thanks Mikey (IMG:style_emoticons/default/biggrin.gif) (IMG:style_emoticons/default/thumb3d.gif) Attached thumbnail(s) 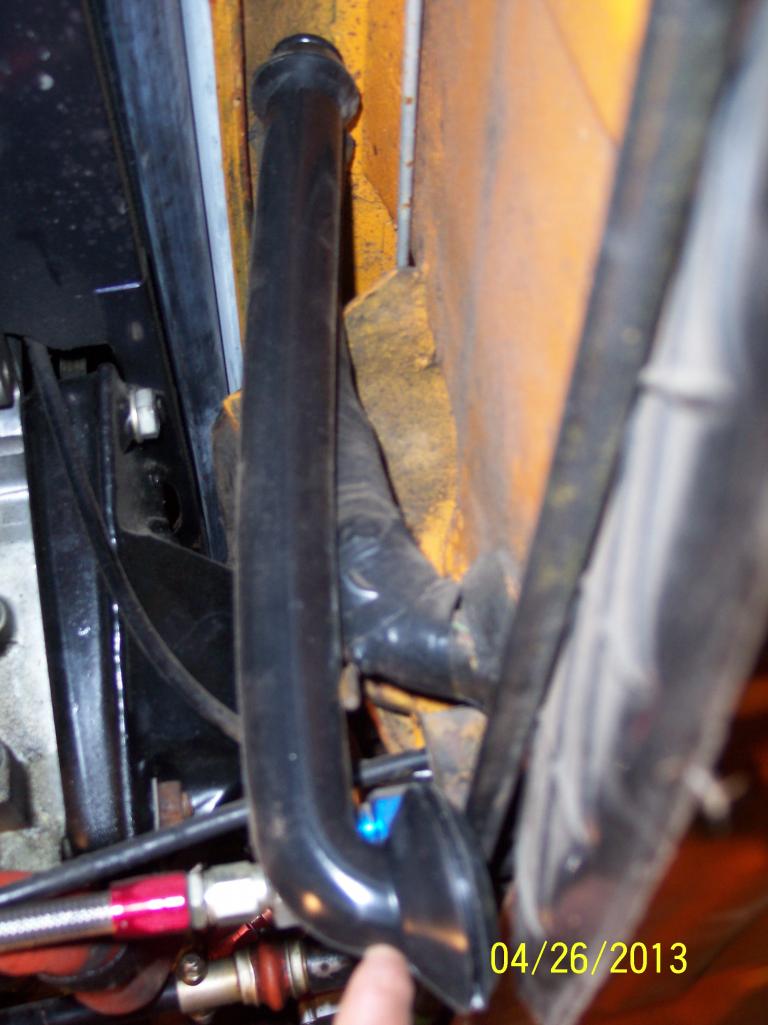 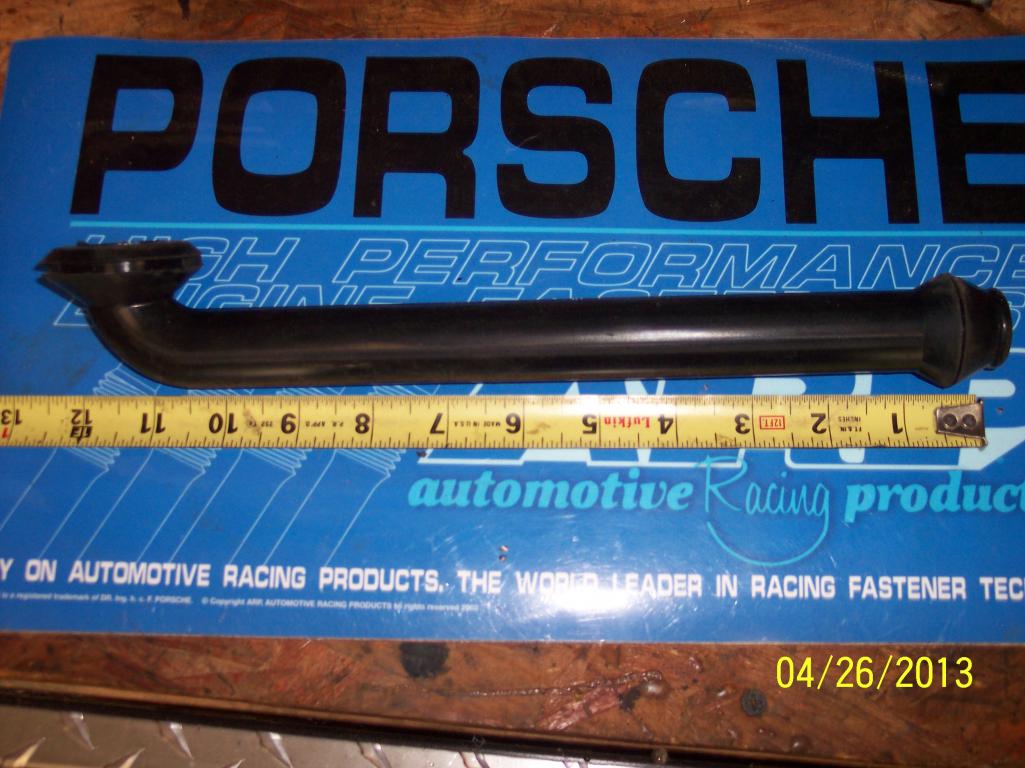 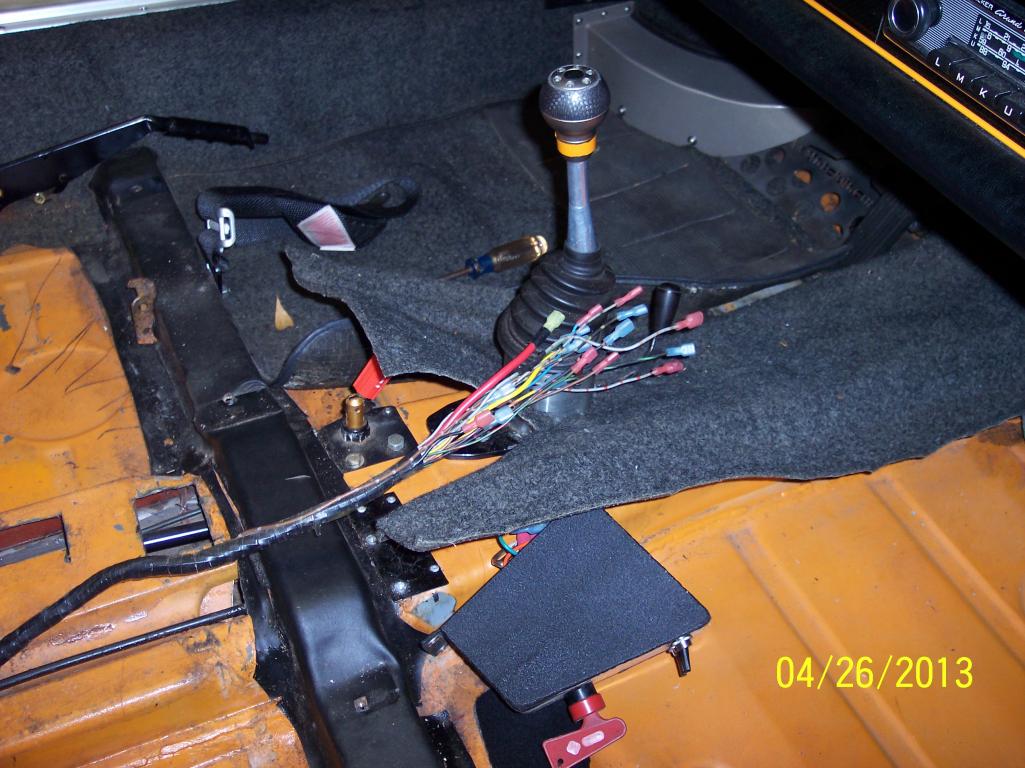 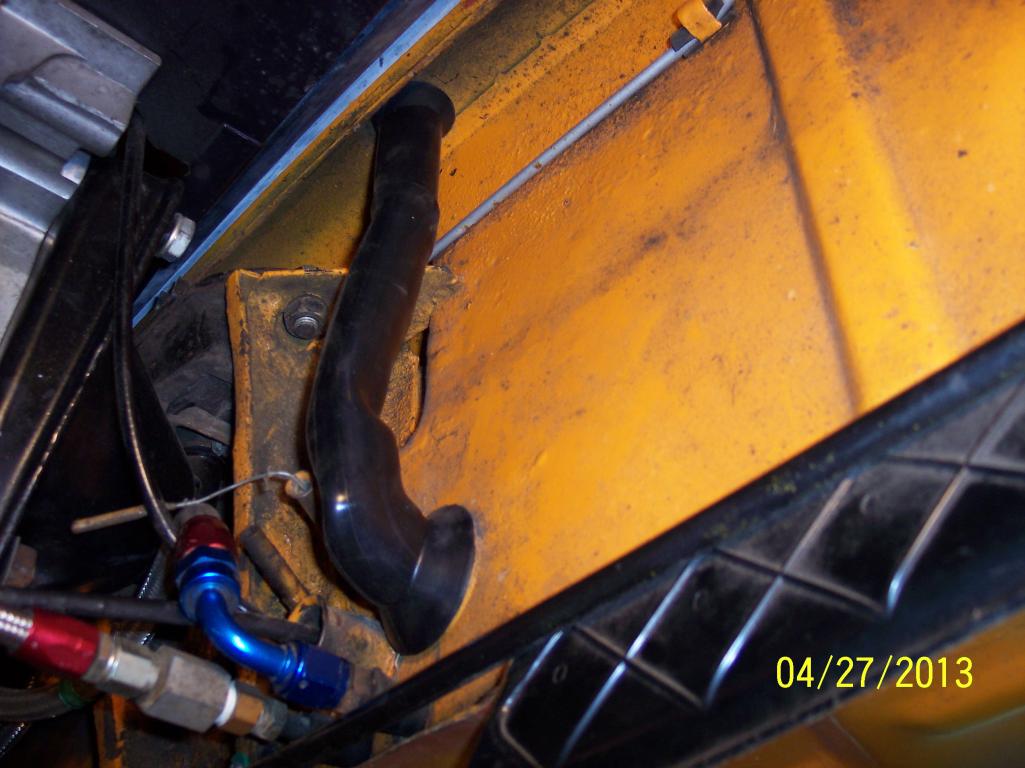
|
   |

 
|
Posts in this topic
 RON S. Finally Got around to Changing the Snorkel Tube Apr 27 2013, 04:23 PM
 gothspeed That looks like a royal pain. Things can and do ta... Apr 28 2013, 09:43 AM Mikey914 One of the issues with production on these was the... Apr 28 2013, 10:24 AM Mikey914 Ron,
Do you think it was any easier to thread thro... Apr 28 2013, 10:27 AM
gothspeed That looks like a royal pain. Things can and do ta... Apr 28 2013, 09:43 AM Mikey914 One of the issues with production on these was the... Apr 28 2013, 10:24 AM Mikey914 Ron,
Do you think it was any easier to thread thro... Apr 28 2013, 10:27 AM
 RON S.
Ron,
Do you think it was any easier to thread thr... Apr 28 2013, 11:57 AM Jeff Bowlsby Most don't have a 2-piece chassis harness. Do... Apr 28 2013, 02:38 PM Mikey914 I'm sure the engine out makes this a much easi... Apr 28 2013, 10:38 PM
RON S.
Ron,
Do you think it was any easier to thread thr... Apr 28 2013, 11:57 AM Jeff Bowlsby Most don't have a 2-piece chassis harness. Do... Apr 28 2013, 02:38 PM Mikey914 I'm sure the engine out makes this a much easi... Apr 28 2013, 10:38 PM  |
1 User(s) are reading this topic (1 Guests and 0 Anonymous Users)
0 Members:

|
Lo-Fi Version | Time is now: 18th May 2024 - 08:58 PM |
Invision Power Board
v9.1.4 © 2024 IPS, Inc.