|
|

|
Porsche, and the Porsche crest are registered trademarks of Dr. Ing. h.c. F. Porsche AG.
This site is not affiliated with Porsche in any way. Its only purpose is to provide an online forum for car enthusiasts. All other trademarks are property of their respective owners. |
|
|
  |
| scotty b |
 May 4 2013, 07:56 PM May 4 2013, 07:56 PM
Post
#41
|
|
rust free you say ?                Group: Members Posts: 16,375 Joined: 7-January 05 From: richmond, Va. Member No.: 3,419 Region Association: None |
that Is orange peel. Wet sand it. If you want to be ballsy, start with 600, then 1000, then 1500. At that point you CAN buff it, but it will take more effort. Idelaly you should go to 2500 or 3000.
If you want to play it safer, start with the 1500. If you do start with 600, just use that to knock the height down a bit, don't try anf get it perfectly flat with the 600. Wait until the 1500 to get it flattened down |
| 914itis |
 May 4 2013, 08:15 PM May 4 2013, 08:15 PM
Post
#42
|
|
Advanced Member     Group: Members Posts: 2,892 Joined: 9-October 10 From: New York City Member No.: 12,256 Region Association: North East States |
Thanks all, will start wet sanding in 24 hours and post results.
|
| 914itis |
 May 4 2013, 08:48 PM May 4 2013, 08:48 PM
Post
#43
|
|
Advanced Member     Group: Members Posts: 2,892 Joined: 9-October 10 From: New York City Member No.: 12,256 Region Association: North East States |
(IMG:style_emoticons/default/FERG.gif) you've got a lot of wet sanding to do (IMG:style_emoticons/default/biggrin.gif) hope you enjoy those new doors (IMG:style_emoticons/default/confused24.gif) Not as bad as it looks in the picture. It wasn't only for the doors. I was not sayiafy with the first paint. I had a few other flaws that needed to be corrected, scratches, peels and nicks. It's all corrected now. If I can get rid of those peels, I can say that I have a decent paint job. After all, I learned a lot. (IMG:style_emoticons/default/beerchug.gif) Hopefully it will be back (IMG:style_emoticons/default/driving.gif) by the weekend. |
| 914itis |
 May 5 2013, 11:02 AM May 5 2013, 11:02 AM
Post
#44
|
|
Advanced Member     Group: Members Posts: 2,892 Joined: 9-October 10 From: New York City Member No.: 12,256 Region Association: North East States |
Scotty, What color code was this? you posted this on my previous painting thread.
This is what my color looks like now. looks like it has a little grey on it Attached image(s) 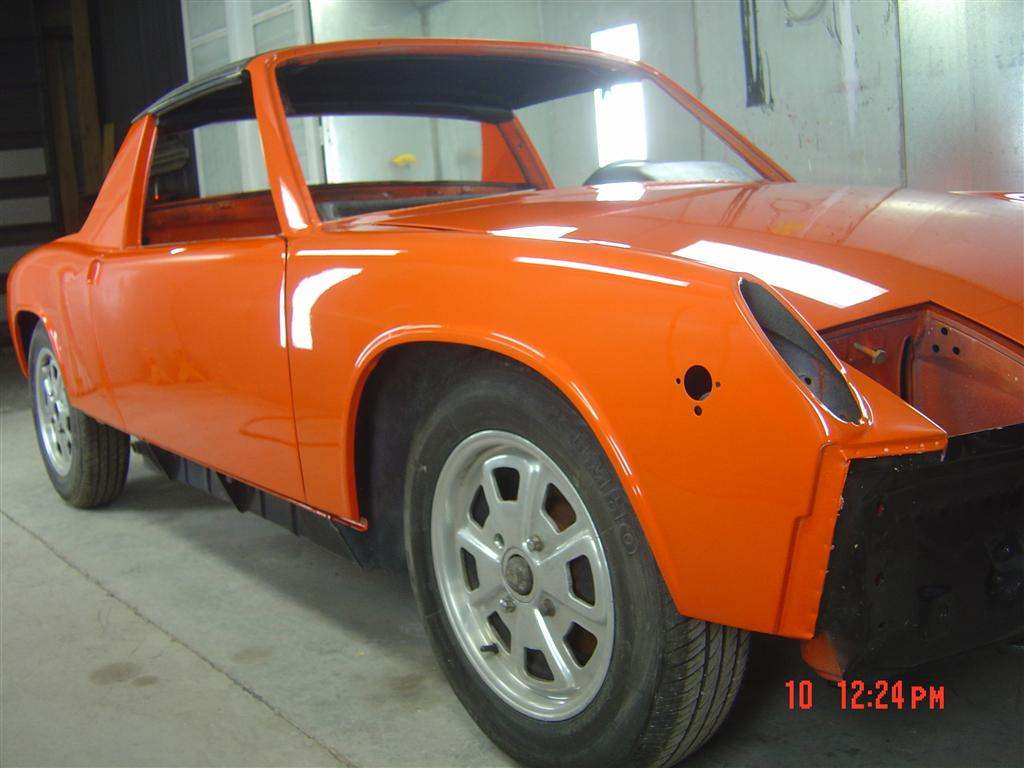
|
| Andyrew |
 May 5 2013, 11:38 AM May 5 2013, 11:38 AM
Post
#45
|
|
Spooling.... Please wait           Group: Members Posts: 13,380 Joined: 20-January 03 From: Riverbank, Ca Member No.: 172 Region Association: Northern California 
|
that Is orange peel. Wet sand it. If you want to be ballsy, start with 600, then 1000, then 1500. At that point you CAN buff it, but it will take more effort. Idelaly you should go to 2500 or 3000. If you want to play it safer, start with the 1500. If you do start with 600, just use that to knock the height down a bit, don't try anf get it perfectly flat with the 600. Wait until the 1500 to get it flattened down This is what I did for my paint. Granted I had 7 coats on it so I wasnt scared of it going through. Went to 2k and then used 3m rubbing compound. http://www.autogeek.net/body-shop-compound...CFYN7QgodbQ8A1w Your local paint store should have it. Get the big bottle (Not the gallon jug). You'll use half of it. If you dont have a buffer Harbor freight has a cheap one, and they have backing plates cheap as well (Velcro), Get a good stage 2 padand you'll be good to go. I've buffed 4 cars with it. You cant put to much load on it for a long time or youll burn the motor up, but it certainly works good. http://www.harborfreight.com/7-inch-variab...nder-92623.html I like it on setting 3. You could try their foam pads (Yellow is for rubbing compound, black is for final polish) |
| scotty b |
 May 5 2013, 02:40 PM May 5 2013, 02:40 PM
Post
#46
|
|
rust free you say ?                Group: Members Posts: 16,375 Joined: 7-January 05 From: richmond, Va. Member No.: 3,419 Region Association: None |
|
| 914itis |
 May 5 2013, 08:06 PM May 5 2013, 08:06 PM
Post
#47
|
|
Advanced Member     Group: Members Posts: 2,892 Joined: 9-October 10 From: New York City Member No.: 12,256 Region Association: North East States |
Scotty, What color code was this? you posted this on my previous painting thread. This is what my color looks like now. looks like it has a little grey on it IIRC that was L32K - Pheonix Red Ok , I think my old paint was more red. This is more on the orange side. After 6 hours of wet sanding, buffing and polishing, It's coming to my satisfaction. I still have some orange a bit of orange peal but I like the texture. |
| 914itis |
 May 6 2013, 08:52 PM May 6 2013, 08:52 PM
Post
#48
|
|
Advanced Member     Group: Members Posts: 2,892 Joined: 9-October 10 From: New York City Member No.: 12,256 Region Association: North East States |
Another 4 Hours of wet sand today. that makes it about 10 hrs. its getting smooth. I think I am ready to buff.
I had two instances where i sanded too deep and go under the paint. How fo I address those? Should I 1- use touch up in those area and wet sand? or 2-Use a detailed gun spray to blend then wet sand? or 3- just live with them? |
| scotty b |
 May 7 2013, 06:00 AM May 7 2013, 06:00 AM
Post
#49
|
|
rust free you say ?                Group: Members Posts: 16,375 Joined: 7-January 05 From: richmond, Va. Member No.: 3,419 Region Association: None |
2
DO NOT buff those spots before doing this. now that you have broken through the clear, you will most likely pull it off if you run the buffer over it. |
| 914itis |
 May 7 2013, 06:05 AM May 7 2013, 06:05 AM
Post
#50
|
|
Advanced Member     Group: Members Posts: 2,892 Joined: 9-October 10 From: New York City Member No.: 12,256 Region Association: North East States |
Thanks, is there a time frame to buff after wetsand?
If there isn't I would buff the entire car after correction. |
| scotty b |
 May 7 2013, 11:51 AM May 7 2013, 11:51 AM
Post
#51
|
|
rust free you say ?                Group: Members Posts: 16,375 Joined: 7-January 05 From: richmond, Va. Member No.: 3,419 Region Association: None |
Thanks, is there a time frame to buff after wetsand? If there isn't I would buff the entire car after correction. I give it 24 hours. you might want to wait 48 if your not used to buffing. It is still soft enough to pull easily if you get it too hot. You can buff indefinitely, but the longer you wait, the harder it will be, flip side to that is it will be less likely get it hot enough to pull on you. |
| 914itis |
 May 14 2013, 09:34 AM May 14 2013, 09:34 AM
Post
#52
|
|
Advanced Member     Group: Members Posts: 2,892 Joined: 9-October 10 From: New York City Member No.: 12,256 Region Association: North East States |
Update
After gathering everyone's professional advice, especially Scotty and Rick, I decided to reprint the whole car, it went well with the exception of one spot where I had a reaction. I took care of it and my paint now looks great! Here is a shot . Attached thumbnail(s) 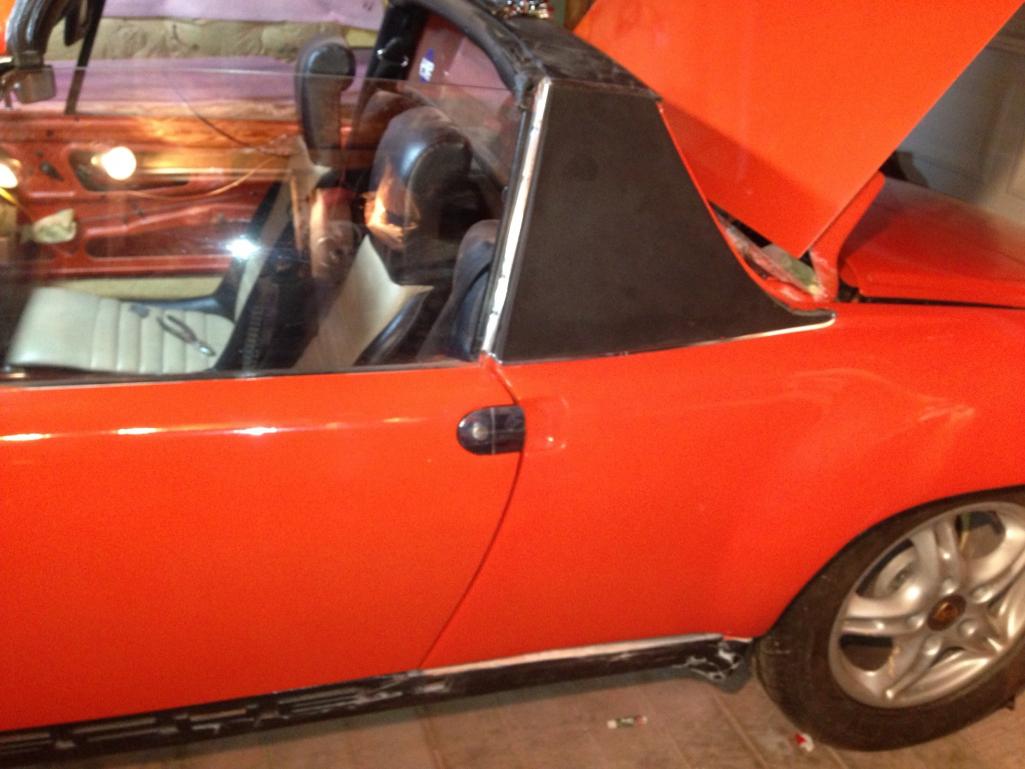
|
| scotty b |
 May 14 2013, 06:13 PM May 14 2013, 06:13 PM
Post
#53
|
|
rust free you say ?                Group: Members Posts: 16,375 Joined: 7-January 05 From: richmond, Va. Member No.: 3,419 Region Association: None |
|
| rick 918-S |
 May 14 2013, 06:17 PM May 14 2013, 06:17 PM
Post
#54
|
|
Hey nice rack! -Celette                Group: Members Posts: 21,014 Joined: 30-December 02 From: Now in Superior WI Member No.: 43 Region Association: Northstar Region 

|
Glad it worked out for you.
|
| 914itis |
 May 21 2013, 06:52 PM May 21 2013, 06:52 PM
Post
#55
|
|
Advanced Member     Group: Members Posts: 2,892 Joined: 9-October 10 From: New York City Member No.: 12,256 Region Association: North East States |
Final product.
Attached image(s) 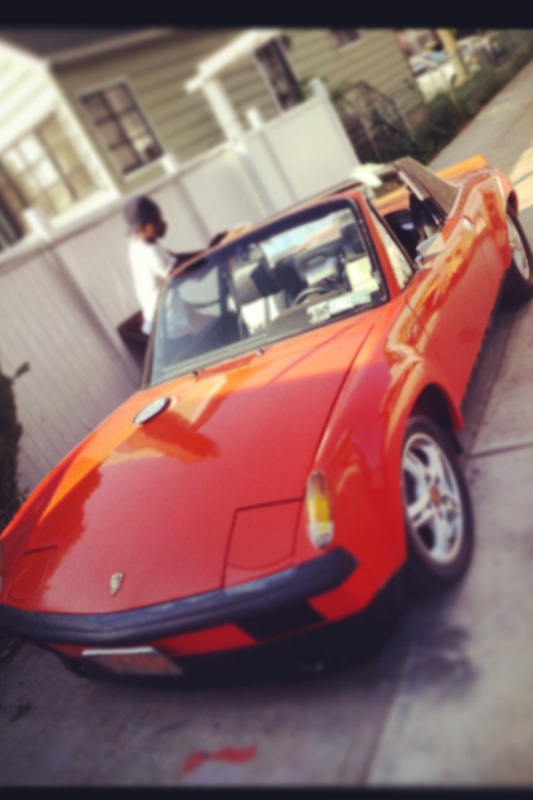 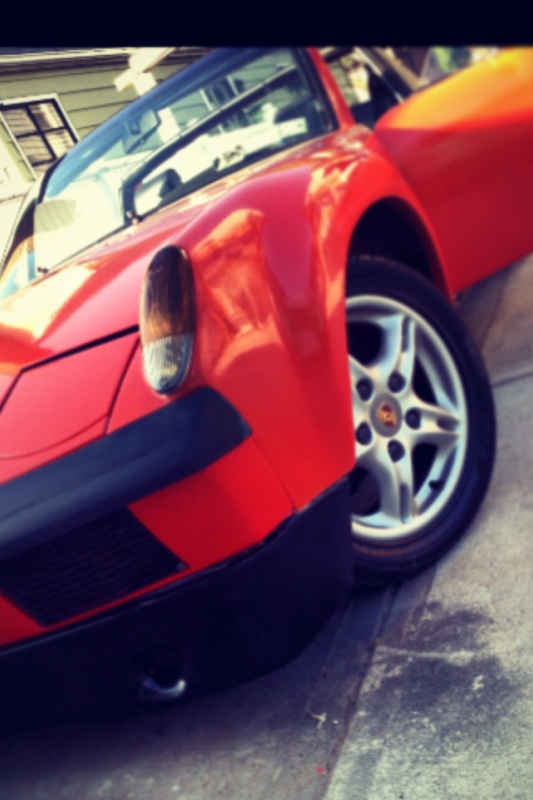 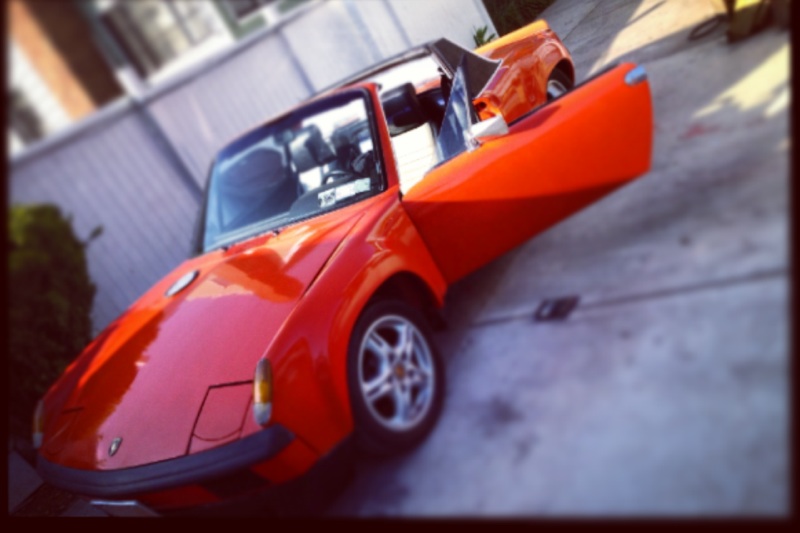 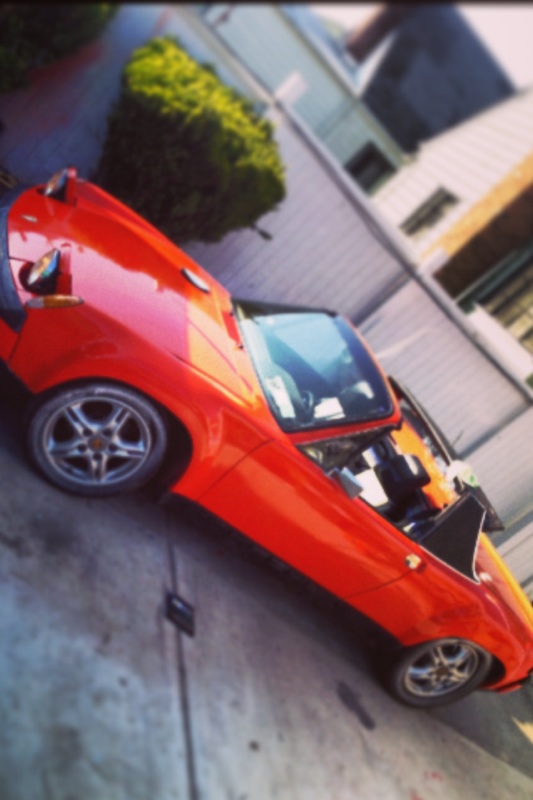 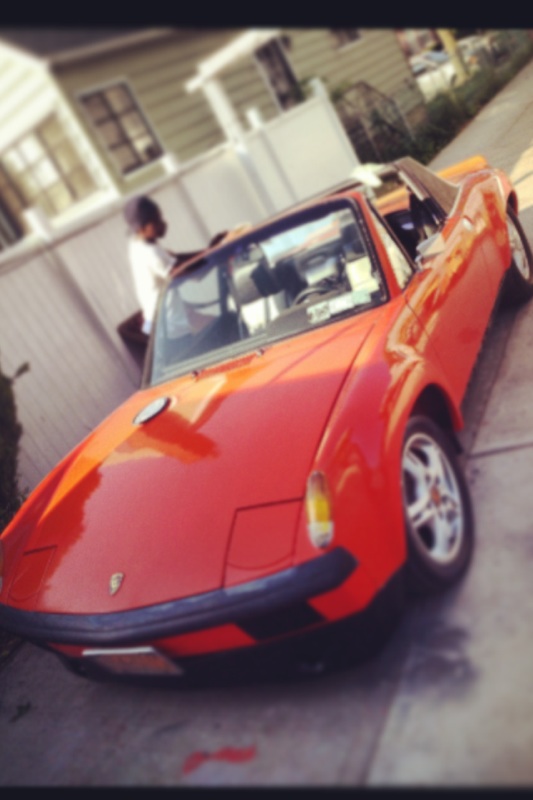
|
| ThePaintedMan |
 May 21 2013, 07:04 PM May 21 2013, 07:04 PM
Post
#56
|
|
Advanced Member     Group: Members Posts: 3,887 Joined: 6-September 11 From: St. Petersburg, FL Member No.: 13,527 Region Association: South East States 
|
Way to go Paul! You did it right by repainting it, and I wager you learned a lot more by doing it several times in a row... unlike myself where I only paint cars sporadically. I'm very impressed - your car looks great.
Did you get any compound on the rubber when cutting/buffing? This is something I still have yet to figure out - I don't know of a good way to get buffing compound "sling" out of rubber without messing up the rubber itself. |
| 914itis |
 May 21 2013, 07:20 PM May 21 2013, 07:20 PM
Post
#57
|
|
Advanced Member     Group: Members Posts: 2,892 Joined: 9-October 10 From: New York City Member No.: 12,256 Region Association: North East States |
Thanks, a bit of patience, and yes I learned a lot , my messing up was a combination air pressure , gun settings and temp. I learned the hard way, but the end results is satisfactory.
All rubber was off with the exception of the front Wimshield. I worked slowly around it. |
| 914itis |
 May 21 2013, 07:33 PM May 21 2013, 07:33 PM
Post
#58
|
|
Advanced Member     Group: Members Posts: 2,892 Joined: 9-October 10 From: New York City Member No.: 12,256 Region Association: North East States |
iPhone and glare from the hot sun today.
Scotty we should meet at that bugger place in brooklyn for lunch sometimes this weekend. |
| 76-914 |
 May 21 2013, 07:54 PM May 21 2013, 07:54 PM
Post
#59
|
|
Repeat Offender & Resident Subaru Antagonist           Group: Members Posts: 13,738 Joined: 23-January 09 From: Temecula, CA Member No.: 9,964 Region Association: Southern California 
|
That really looks good Paul. (IMG:style_emoticons/default/poke.gif) Is your son receiving fair compensation? No wonder you don't hesitate to sand. (IMG:style_emoticons/default/lol-2.gif)
|
| 914itis |
 May 21 2013, 08:41 PM May 21 2013, 08:41 PM
Post
#60
|
|
Advanced Member     Group: Members Posts: 2,892 Joined: 9-October 10 From: New York City Member No.: 12,256 Region Association: North East States |
(IMG:style_emoticons/default/biggrin.gif) I should have the car on the road by Sunday. Sent out the rotors to be milled. There is a Pelican board drive next Saturday in Ct here is a link. Saturday Run I would do it if your car was ready . |
  |
1 User(s) are reading this topic (1 Guests and 0 Anonymous Users)
0 Members:

|
Lo-Fi Version | Time is now: 12th July 2025 - 09:39 AM |
Invision Power Board
v9.1.4 © 2025 IPS, Inc.


