|
|
|
Porsche, and the Porsche crest are registered trademarks of Dr. Ing. h.c. F. Porsche AG.
This site is not affiliated with Porsche in any way. Its only purpose is to provide an online forum for car enthusiasts. All other trademarks are property of their respective owners. |
|
|

  |

| Luke M |
 May 15 2015, 03:09 PM May 15 2015, 03:09 PM
Post
#41
|
|
Senior Member  Group: Members Posts: 1,563 Joined: 8-February 05 From: WNY Member No.: 3,574 Region Association: North East States |
QUOTE(peteyd @ May 15 2015, 01:38 PM)  Looks great Luke! How did the cross member fit in? Its good to see the new parts installed. I rarely get much feedback about the new parts Im making. I will eventually make the other bits that attach to the outer firewall also. Hi Pete, Other then the small problem we talked about on the phone it went in fairly easy. We got all of the replacement metal from RD and so far what we've installed fits well. Most panels needed some minor fitting adjustments other then that the fit was great. Keep up the great work on making us these and more replacement panels. Thanks again for some great products. |
   |

 
|
| 3d914 |
May 15 2015, 05:20 PM
Post
#42
|
|
Senior Member Group: Members Posts: 1,275 Joined: 24-September 03 From: Benson, AZ Member No.: 1,191 Region Association: Southwest Region |
QUOTE(Luke M @ May 15 2015, 02:09 PM) QUOTE(peteyd @ May 15 2015, 01:38 PM) Looks great Luke! How did the cross member fit in? Its good to see the new parts installed. I rarely get much feedback about the new parts Im making. I will eventually make the other bits that attach to the outer firewall also. Hi Pete, Other then the small problem we talked about on the phone it went in fairly easy. We got all of the replacement metal from RD and so far what we've installed fits well. Most panels needed some minor fitting adjustments other then that the fit was great. Keep up the great work on making us these and more replacement panels. Thanks again for some great products. While Pete's watching - do you make a weldin piece for the master cylinder at the pedal cluster? Luke, didn't you repair this area also? My whole front floor is great except for that portion behind the pedal cluster. |
|
|
|
| Luke M |
May 15 2015, 06:59 PM
Post
#43
|
|
Senior Member Group: Members Posts: 1,563 Joined: 8-February 05 From: WNY Member No.: 3,574 Region Association: North East States |
QUOTE(3d914 @ May 15 2015, 04:20 PM) QUOTE(Luke M @ May 15 2015, 02:09 PM) QUOTE(peteyd @ May 15 2015, 01:38 PM) Looks great Luke! How did the cross member fit in? Its good to see the new parts installed. I rarely get much feedback about the new parts Im making. I will eventually make the other bits that attach to the outer firewall also. Hi Pete, Other then the small problem we talked about on the phone it went in fairly easy. We got all of the replacement metal from RD and so far what we've installed fits well. Most panels needed some minor fitting adjustments other then that the fit was great. Keep up the great work on making us these and more replacement panels. Thanks again for some great products. While Pete's watching - do you make a weldin piece for the master cylinder at the pedal cluster? Luke, didn't you repair this area also? My whole front floor is great except for that portion behind the pedal cluster. Yes, I had to fix the pedal area. I got a piece from a parts car that Bruce was cutting up. |
|
|
|
| Luke M |
Jun 4 2015, 09:28 AM
Post
#44
|
|
Senior Member Group: Members Posts: 1,563 Joined: 8-February 05 From: WNY Member No.: 3,574 Region Association: North East States |
Back to it here.. (IMG:style_emoticons/default/smash.gif) (IMG:style_emoticons/default/welder.gif)
We got the engine shelf in on the right side, added a stainless plate over the hell hole area, started to install the RJ engine mount, and welded up a few areas under the fuel tank. After the engine mount install it's time to tackle the rear trunk pan, install the mad dog kit, and outer frame stiffeners from RD. We are hoping to have all of the welding done by the end of July.. (IMG:style_emoticons/default/beerchug.gif) Attached image(s) 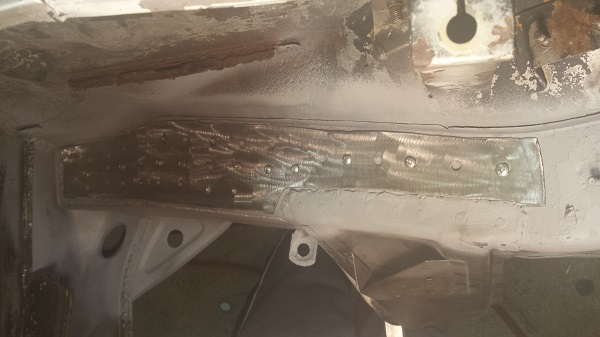 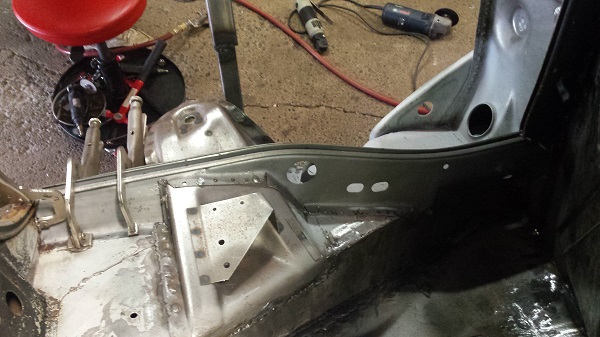 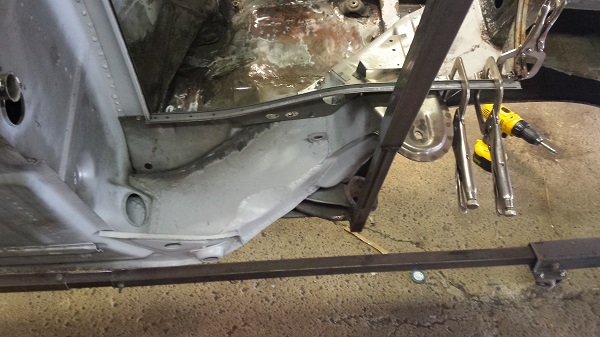 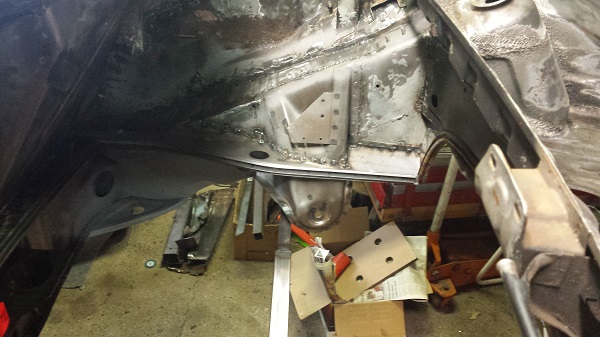 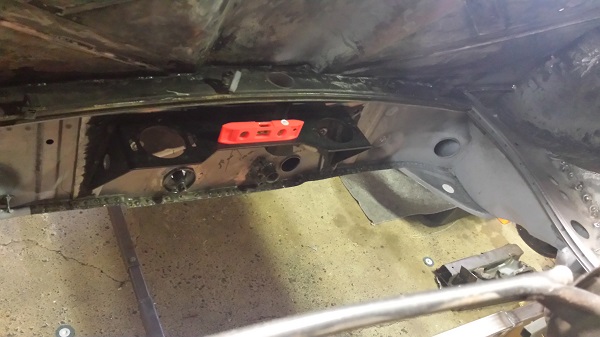 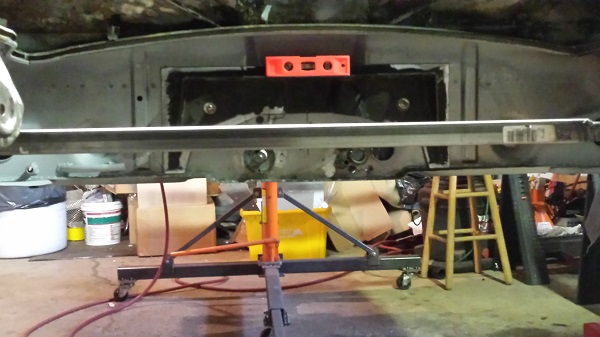
|
|
|
|
| Luke M |
Jun 10 2015, 08:49 AM
Post
#45
|
|
Senior Member Group: Members Posts: 1,563 Joined: 8-February 05 From: WNY Member No.: 3,574 Region Association: North East States |
My brother and I got a few more things done on his 914.
Took the door sill off and lower rusty door jam. We fixed a few spots in the long and test fitted the RD longitudinal frame stiffener overlays. Just an fyi, if you have a GT kit installed and plan to use these they will require some fitting at the rear by the outer suspension mounts. Next we will remove the stiffener, coat the longs, and test fit the door prior to welding them in. (IMG:style_emoticons/default/smash.gif) (IMG:style_emoticons/default/welder.gif) (IMG:style_emoticons/default/drunk.gif) Attached image(s) 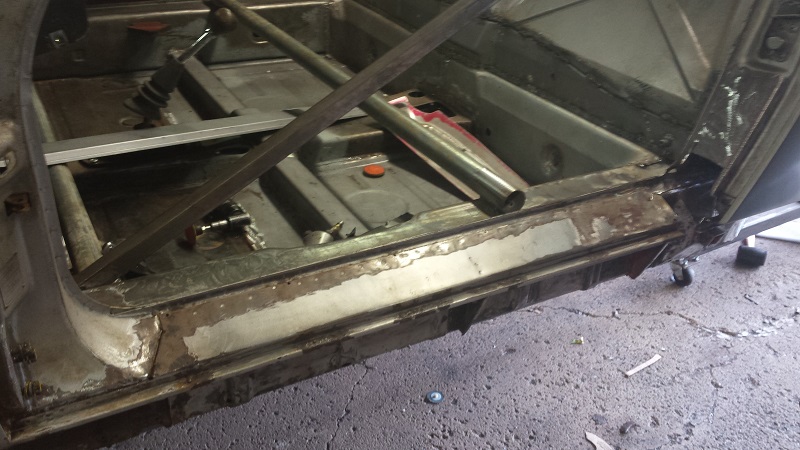  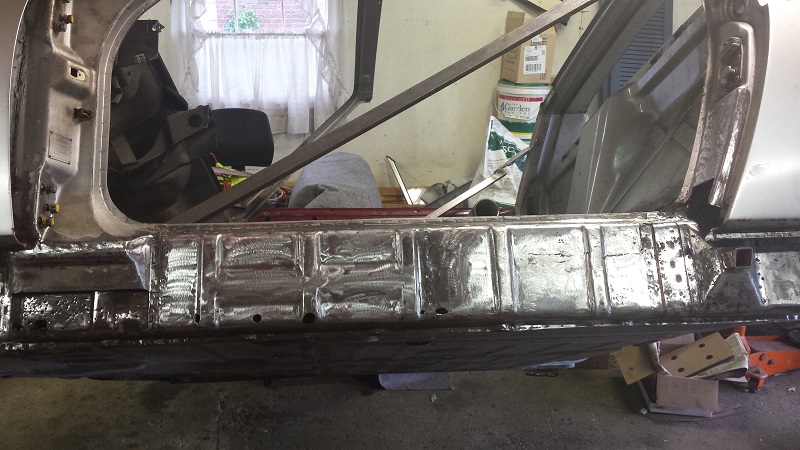 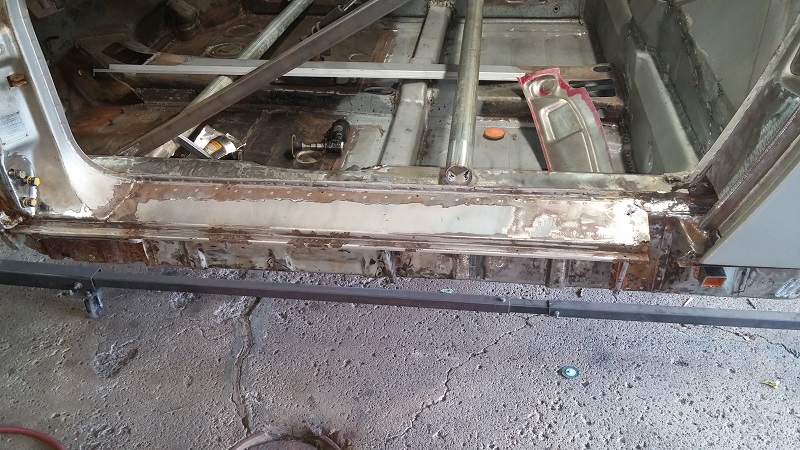 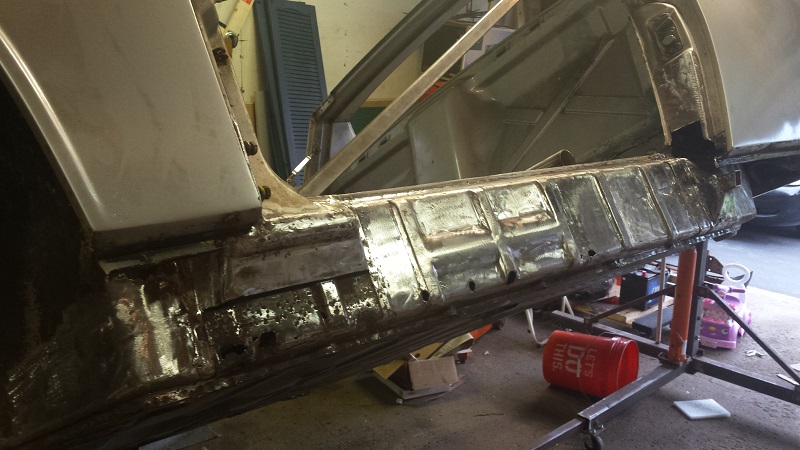 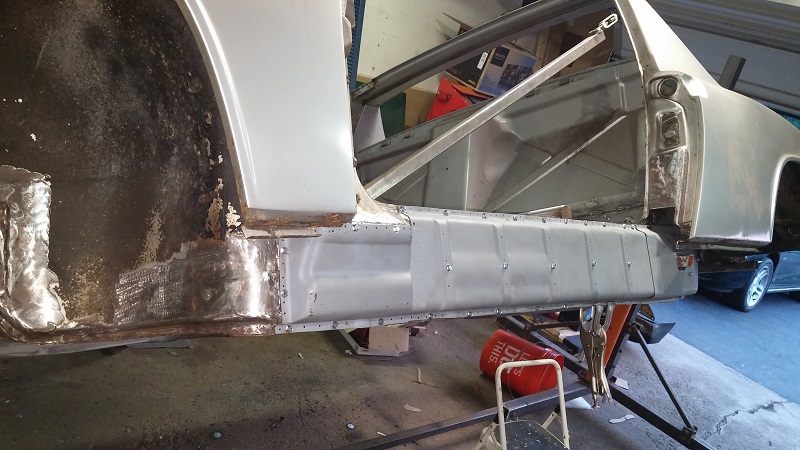 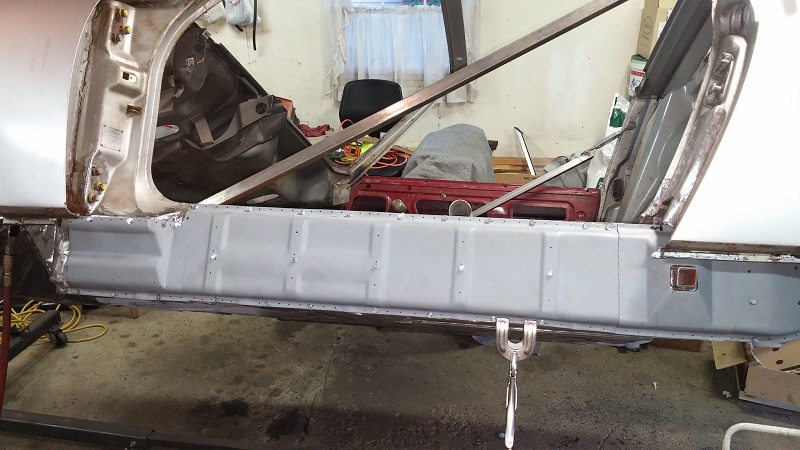 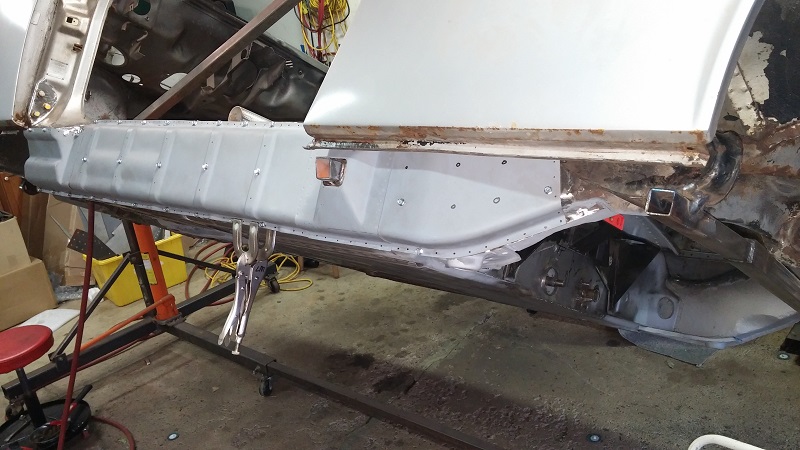 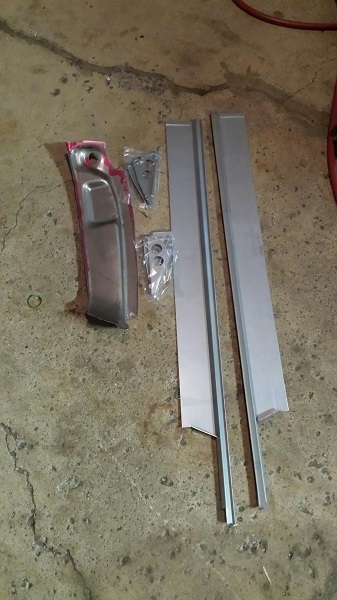 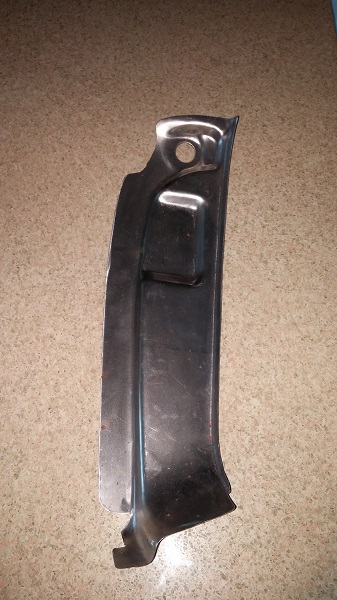 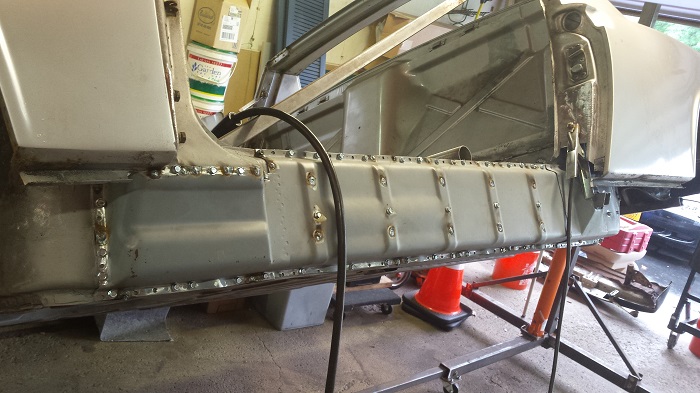
|
|
|
|
| Luke M |
Jul 1 2015, 07:09 AM
Post
#46
|
|
Senior Member Group: Members Posts: 1,563 Joined: 8-February 05 From: WNY Member No.: 3,574 Region Association: North East States |
We got the drivers side chassis stiffener, door sill, and door jam installed.
Test fitted the door and all fits well. Looks like it's time to hit up RD for a few more pieces of sheet metal. Attached image(s) 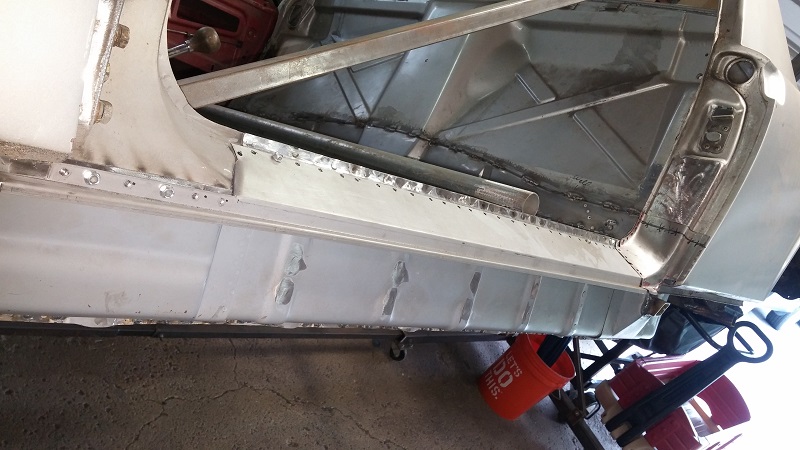 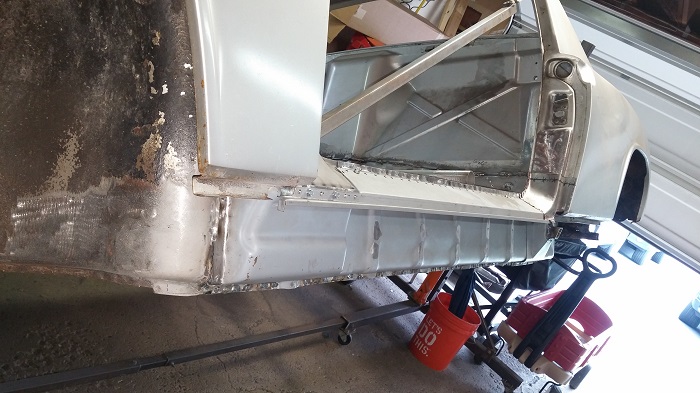   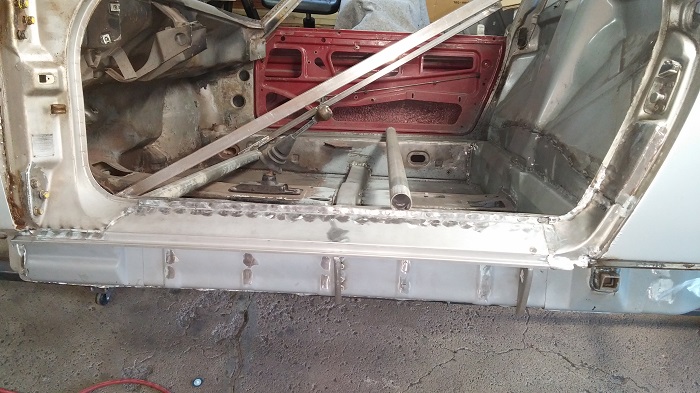 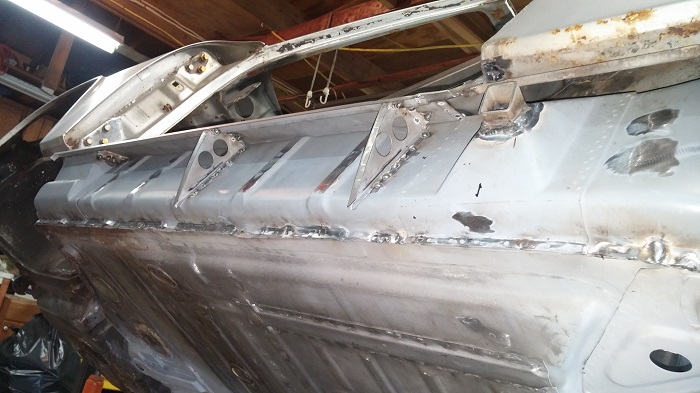 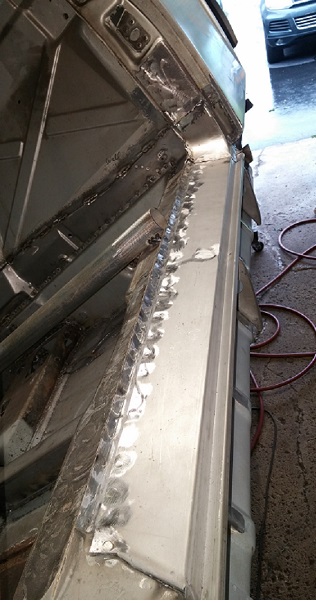 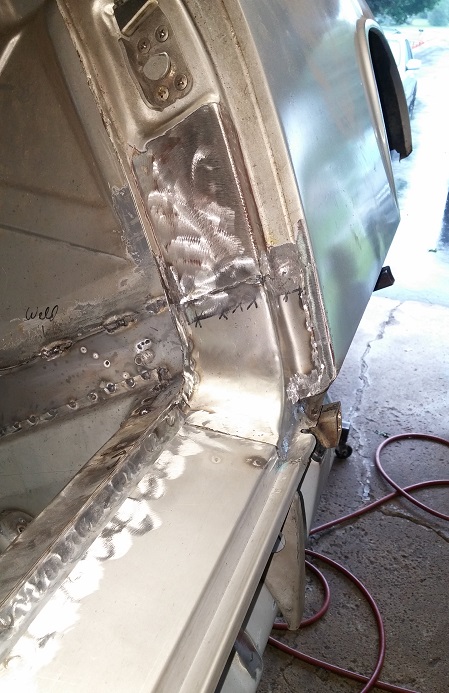 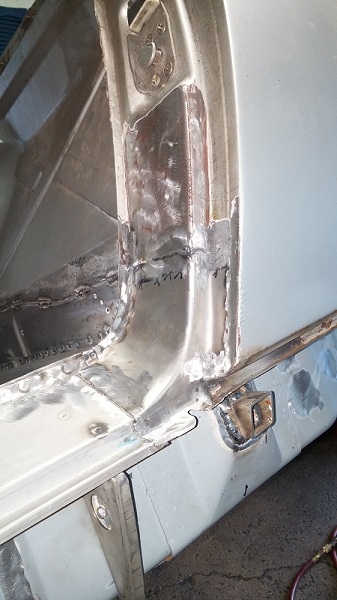 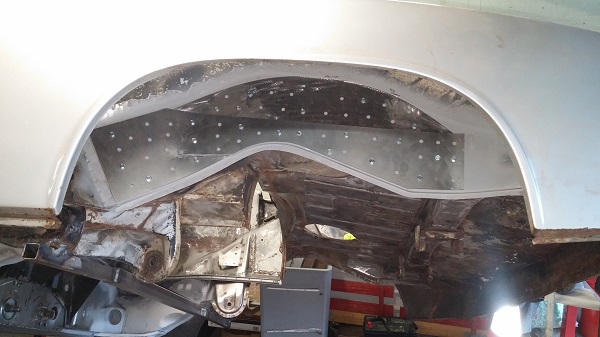 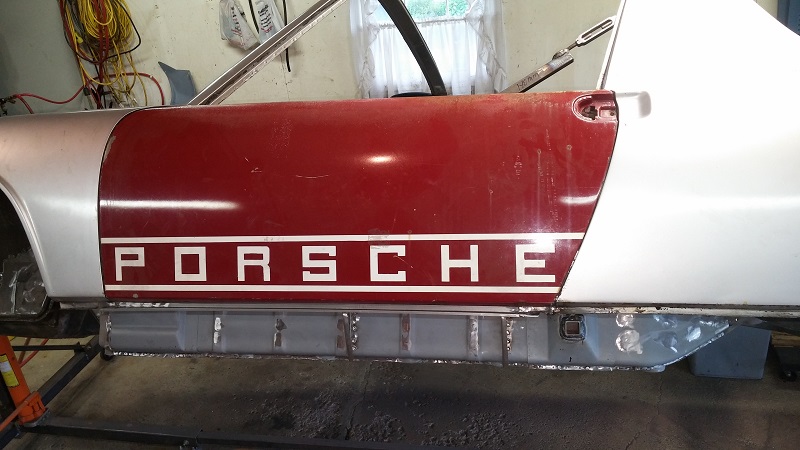
|
|
|
|
| Luke M |
Jul 2 2015, 08:12 PM
Post
#47
|
|
Senior Member Group: Members Posts: 1,563 Joined: 8-February 05 From: WNY Member No.: 3,574 Region Association: North East States |
Wrapped up the drivers side and moved on to the pass side.
(IMG:style_emoticons/default/sawzall-smiley.gif) (IMG:style_emoticons/default/smash.gif) (IMG:style_emoticons/default/welder.gif) (IMG:style_emoticons/default/beer3.gif) Attached image(s) 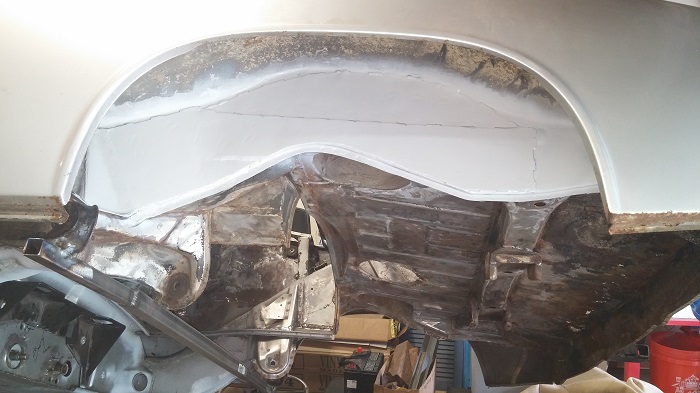 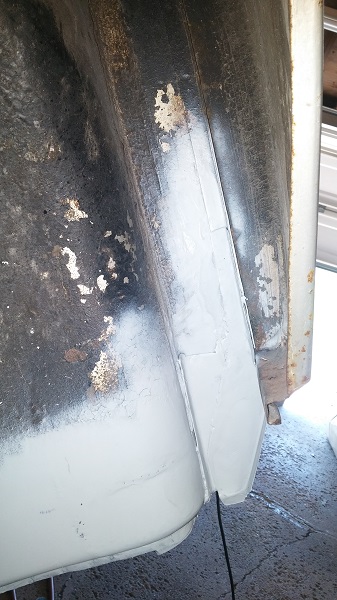 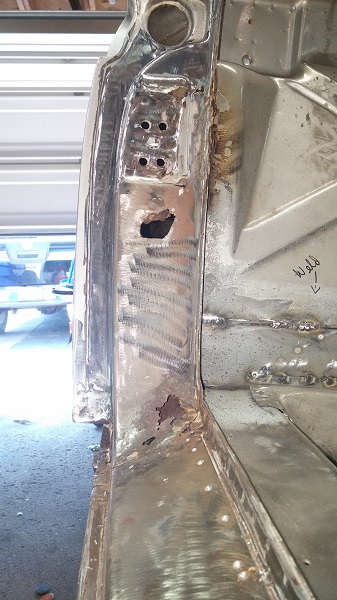 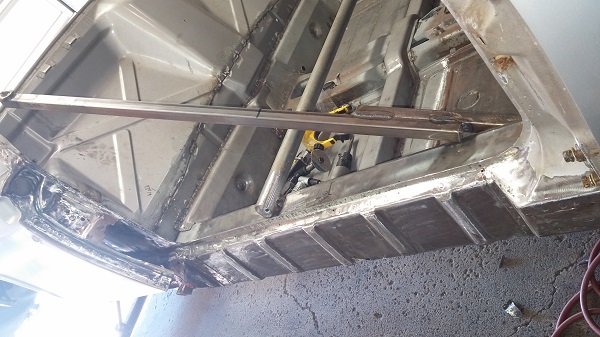 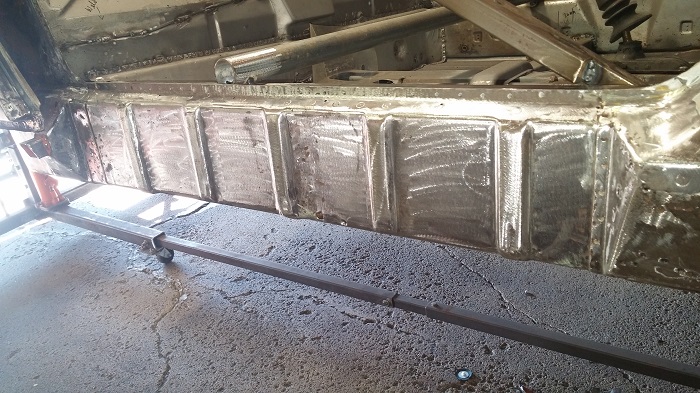 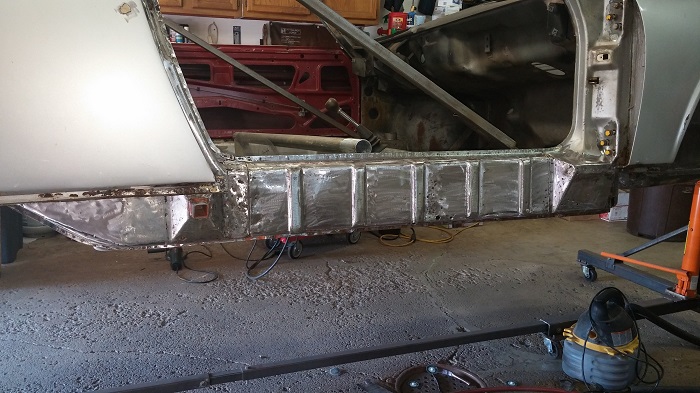 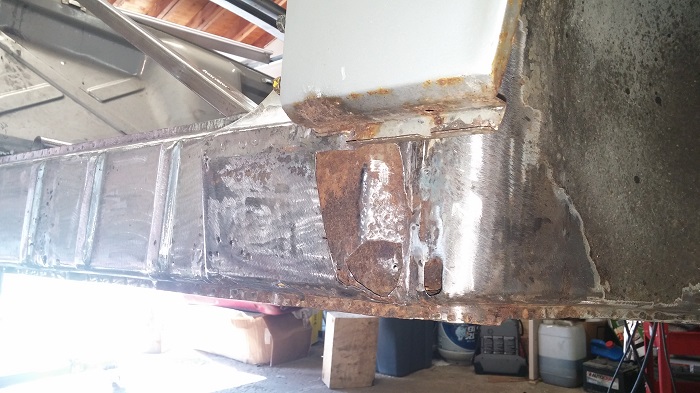
|
|
|
|
| Luke M |
Jul 12 2015, 08:26 PM
Post
#48
|
|
Senior Member Group: Members Posts: 1,563 Joined: 8-February 05 From: WNY Member No.: 3,574 Region Association: North East States |
Moving forward on the pass side. Cut out and replaced the rusty metal with some from a parts car. Installed/prepped the right frame stiffener over the longitudinal.
Next step is to weld it in along with the door sill then the door jam and the roof pillar panel. That should complete the pass side. Attached image(s) 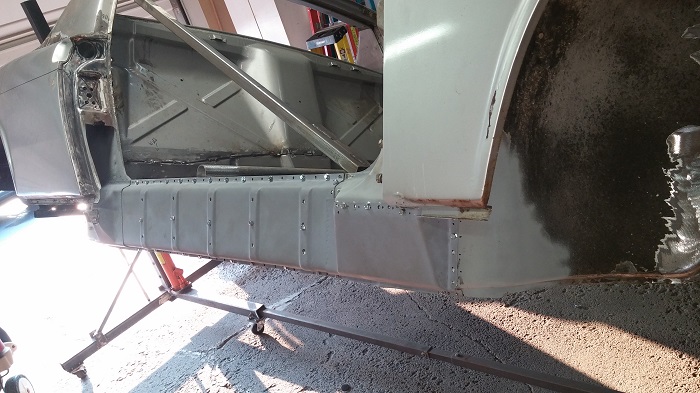 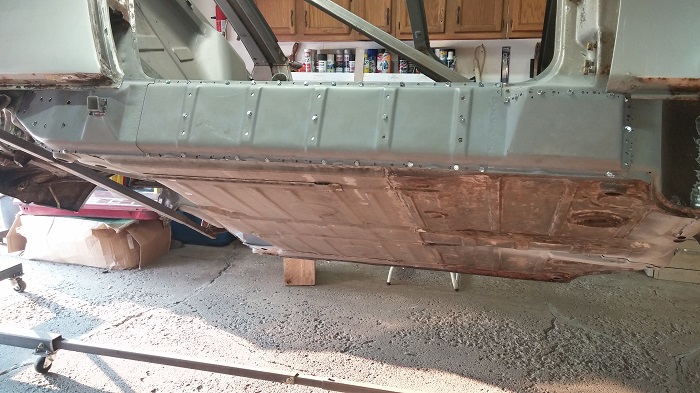 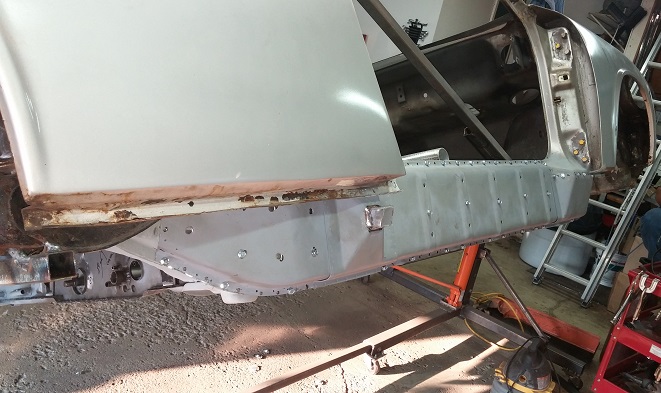 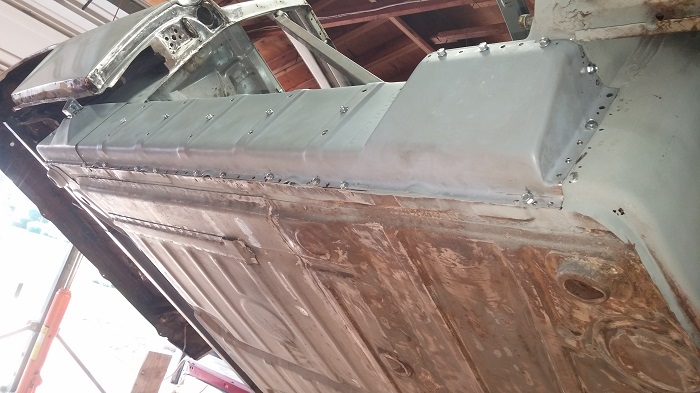
|
|
|
|
| Luke M |
Aug 6 2015, 09:04 AM
Post
#49
|
|
Senior Member Group: Members Posts: 1,563 Joined: 8-February 05 From: WNY Member No.: 3,574 Region Association: North East States |
It's been way too hot and muggy here to do any welding on the car.
Figured why not take a break from that and get the motor prepped. My brother picked up an 83 3.0 a while back from a guy doing a 3.6 upgrade. The shop that was doing the work said it was resealed not long ago and was a good running engine with good leak down numbers. I was looking it over and figured before I get too crazy installing the fan, wiring, flywheel, tins, and cooler to check the cylinder head torque. The 3.0 are known for broken head studs but was advised these are good. I wanted a piece of mind so I checked them anyway. Well guess what, The first lower head stud that I went to check snapped right off. I was like just great , now it's time to tear into this. I got the heads off and could clearly see that the stud had been broken for some time but didn't snap off. I checked all of the lower studs and sure enough three more where ready to let go. I could tell that someone had recently been in the engine at least on the top end by the new seals/sealant. Could the stud issue been know at that time? Guess I'll never know. Based on a sketchy " known " history we decided it was best to take it all down. Good thing we did tear it all apart as the #5 rod bearing looked like it was ready to let go soon too. Guess the " good " motor deal just turned into a major overhaul. Well not really cause my brother did get sweet deal on this motor and good luck finding a core for that price. One of the studs snapped right off too low to get out so I tried to welded a nut on it but it just wouldn't let go. It kept breaking the stud. That was it I said. I just dropped off several parts to the machine shop so now it's time to order up the stuff needed to put this baby back together. Oh and it's getting some upgrades now that it's apart.. Stay tuned. Attached image(s) 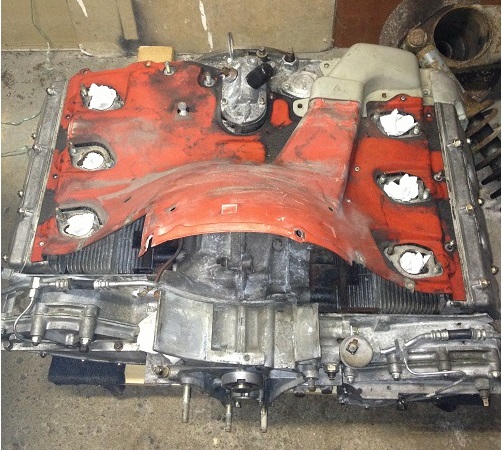 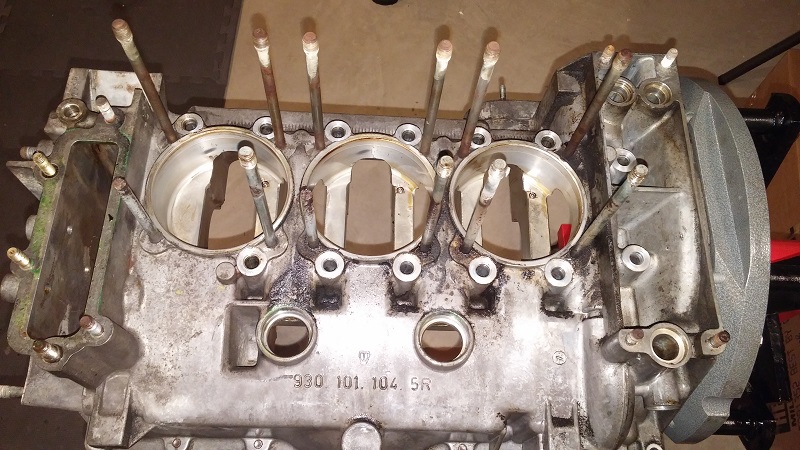 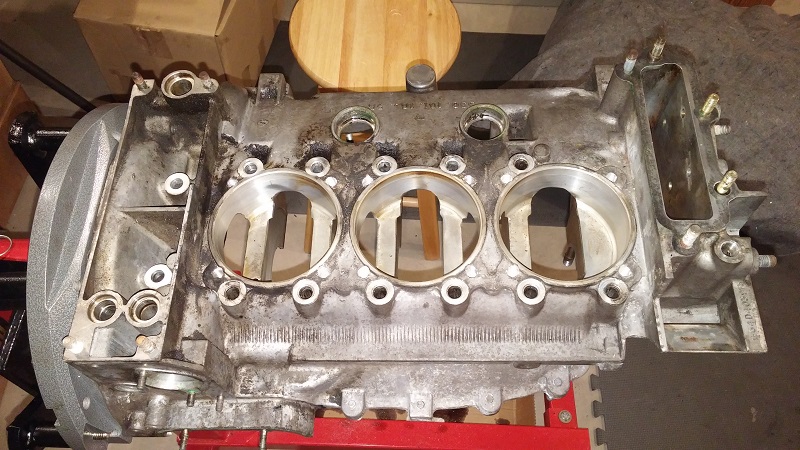 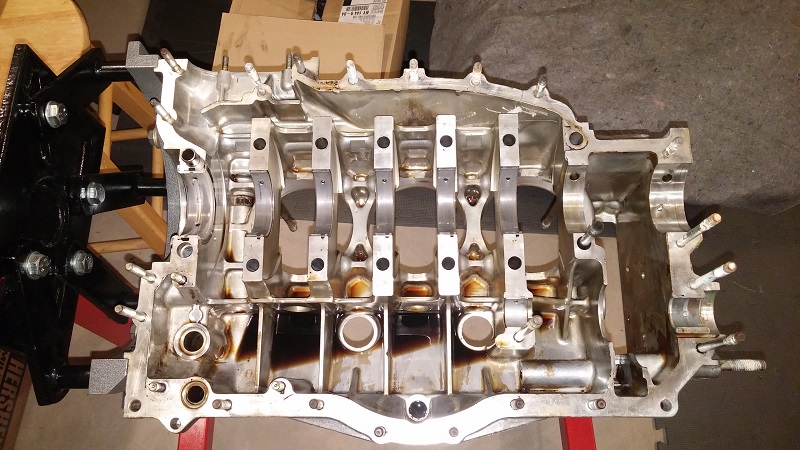 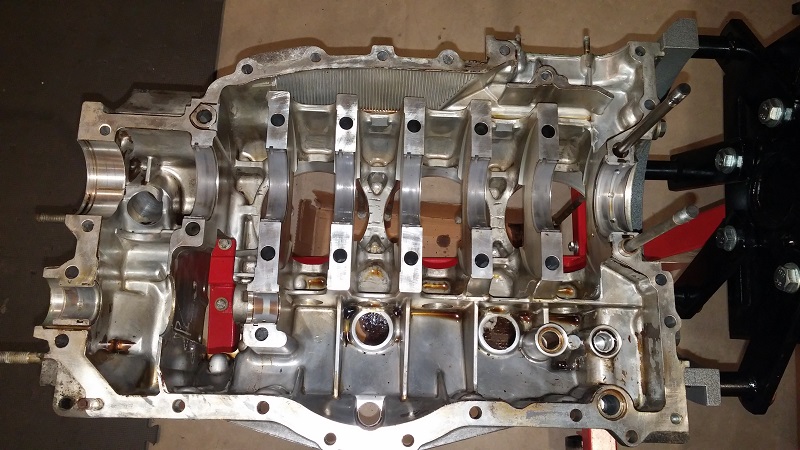 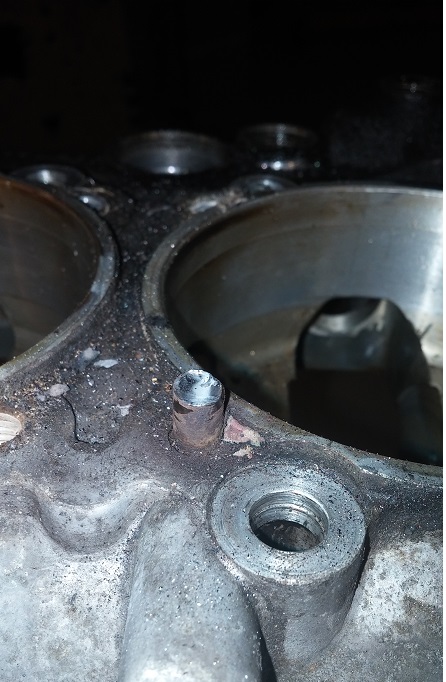 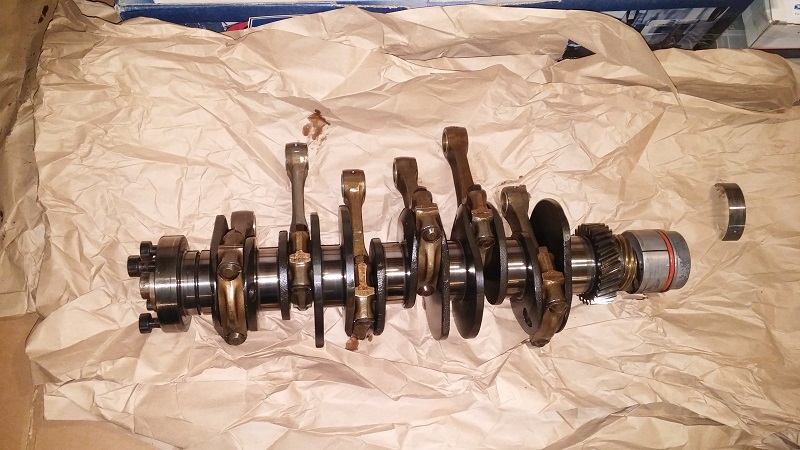 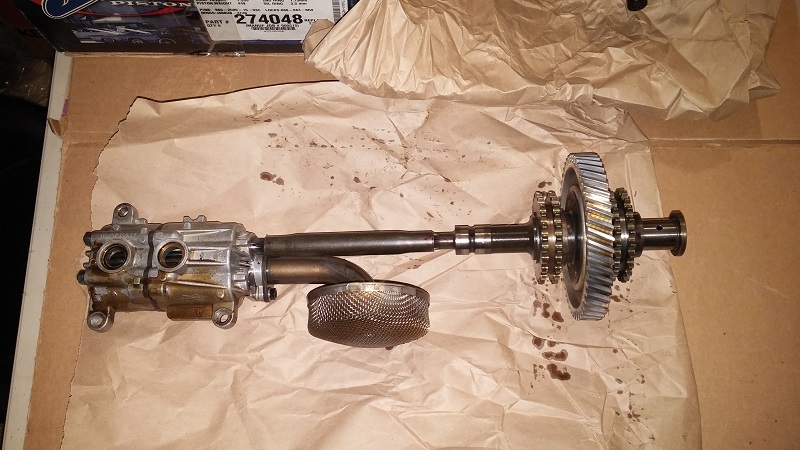 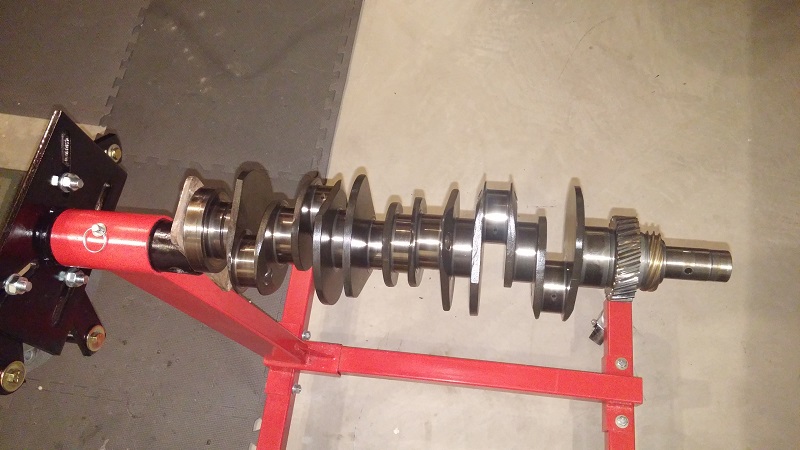 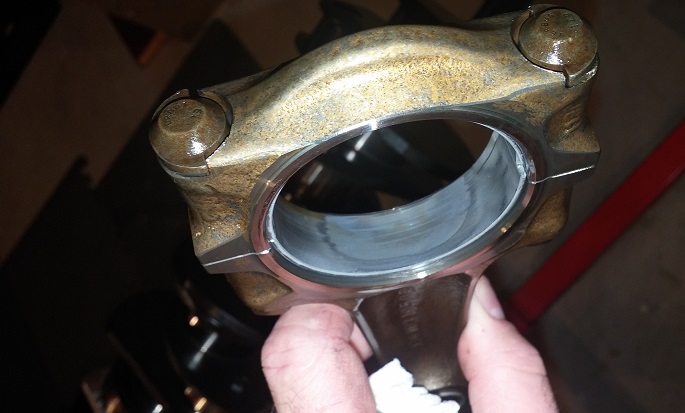
|
|
|
|
| Luke M |
Aug 25 2015, 05:54 AM
Post
#50
|
|
Senior Member Group: Members Posts: 1,563 Joined: 8-February 05 From: WNY Member No.: 3,574 Region Association: North East States |
The case and a few other parts came back from the machine shop at end of last week. I'm waiting on two vendors to send me the rest of my parts order so in the mean time we knocked out some more chassis work. We got the RJ engine mount, right frame stiffener, and sill welded in.
Attached image(s) 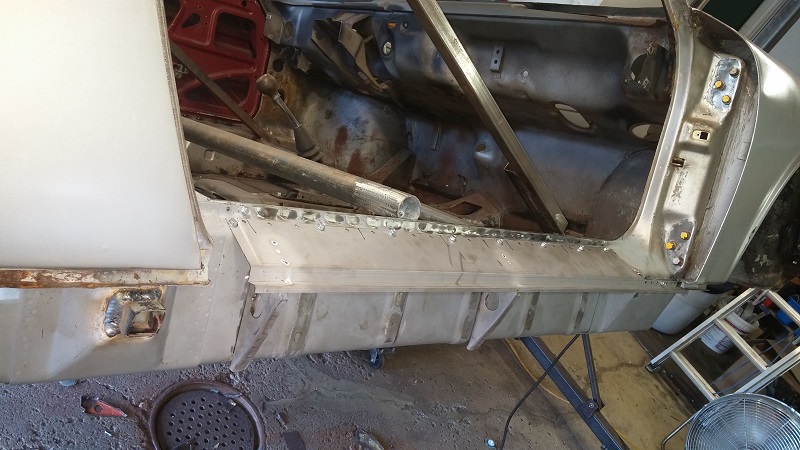 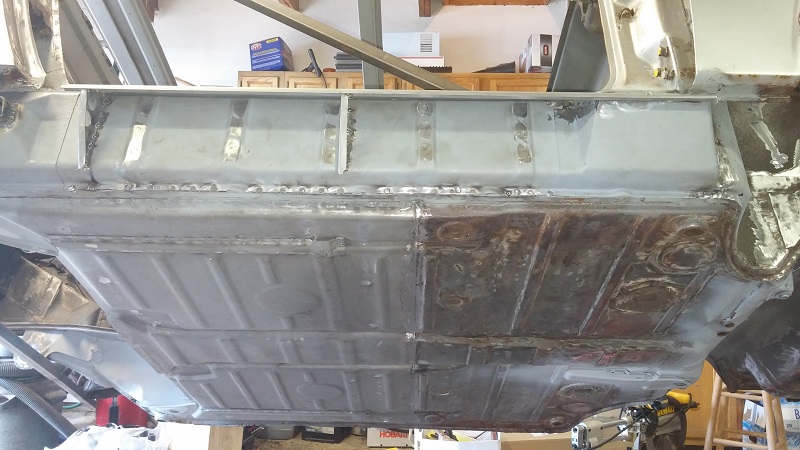 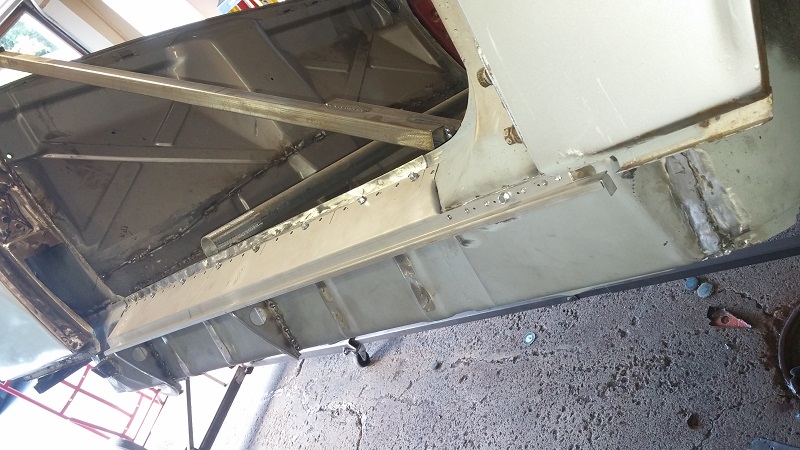 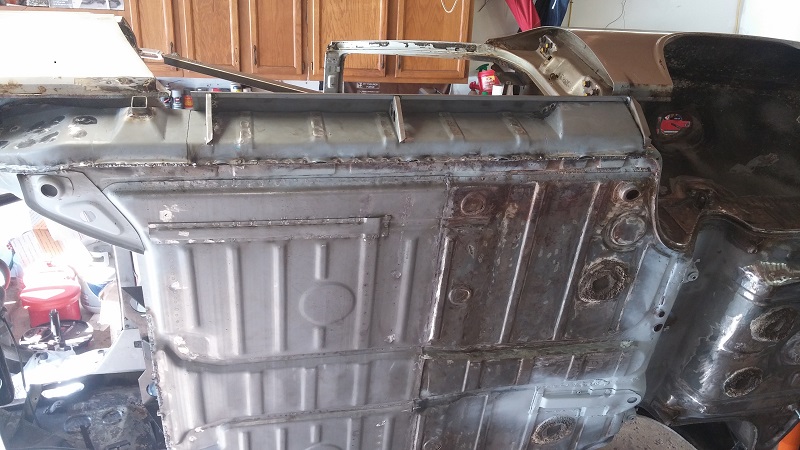 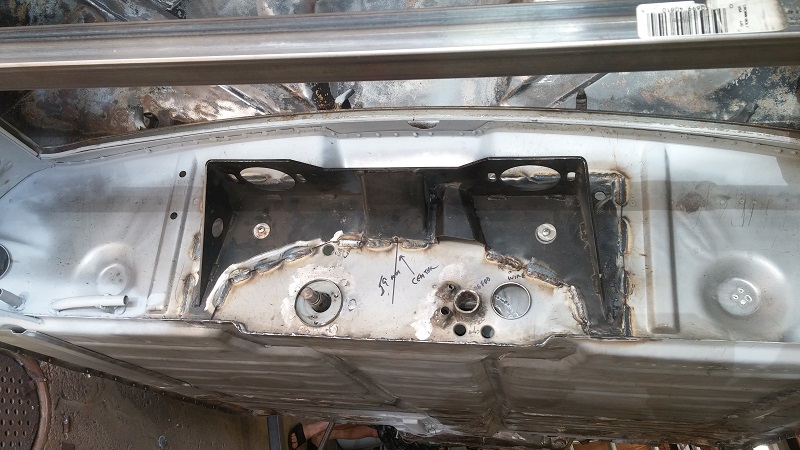 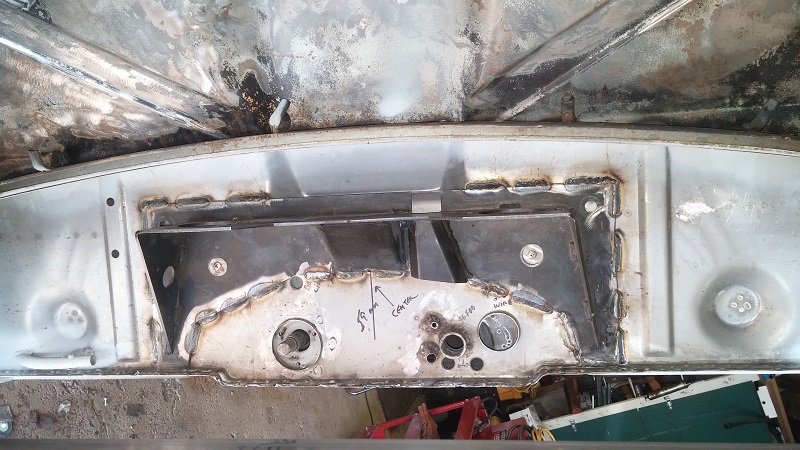
|
|
|
|
| Luke M |
Sep 5 2015, 06:41 AM
Post
#51
|
|
Senior Member Group: Members Posts: 1,563 Joined: 8-February 05 From: WNY Member No.: 3,574 Region Association: North East States |
It's too darn hot 90+ in the garage to do any welding so more engine work was done.
I got the case all cleaned up and JB weld applied to the areas that needed it. I had the machine shop clean the case and it came out looking pretty good. I still gave it a once over before the assembly started. I'm glad that I did as I found a large piece of aluminum stuck in one of the oil pump feed holes. It was stuck in there pretty good but it finally came out. It goes to show to always inspect and clean even after it was done by someone else. Then I got the rods mounted to the crank, oil pump/shaft installed into the case. Time to seal it up. Attached image(s) 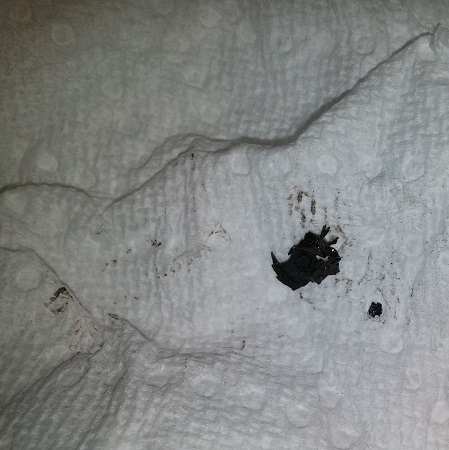 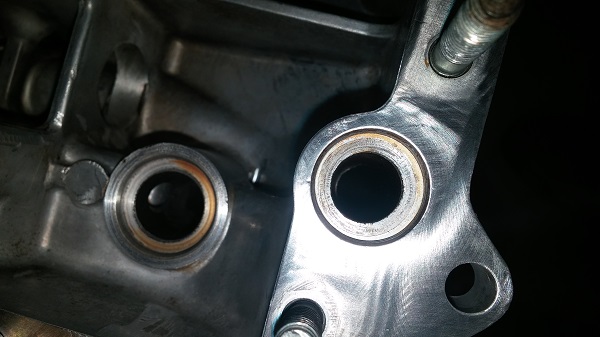 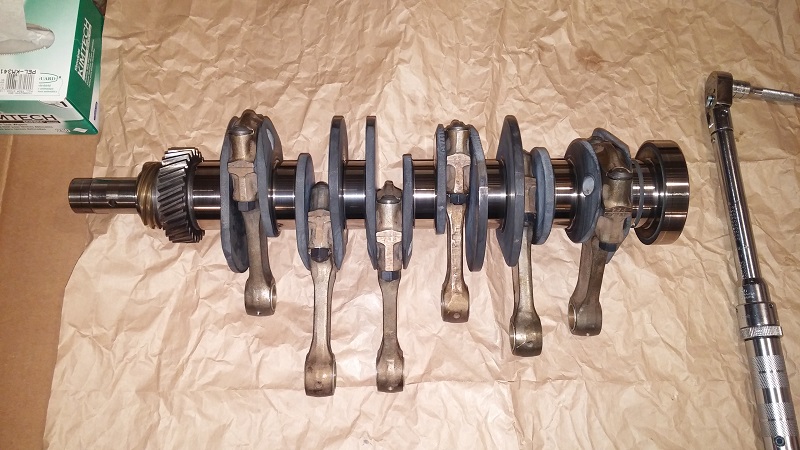 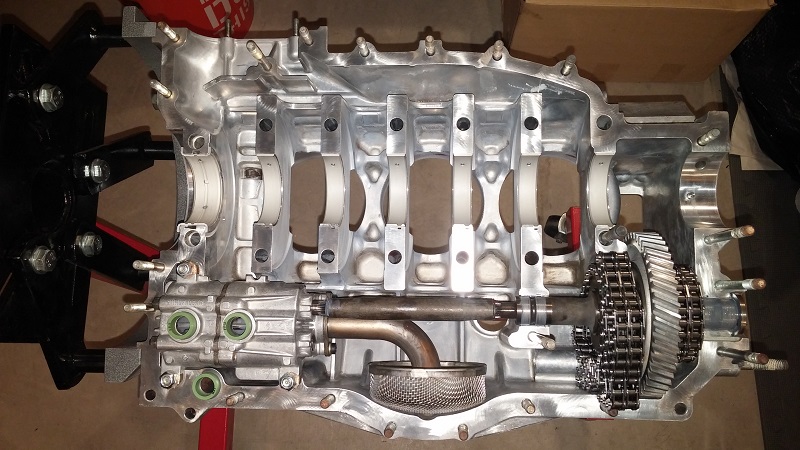 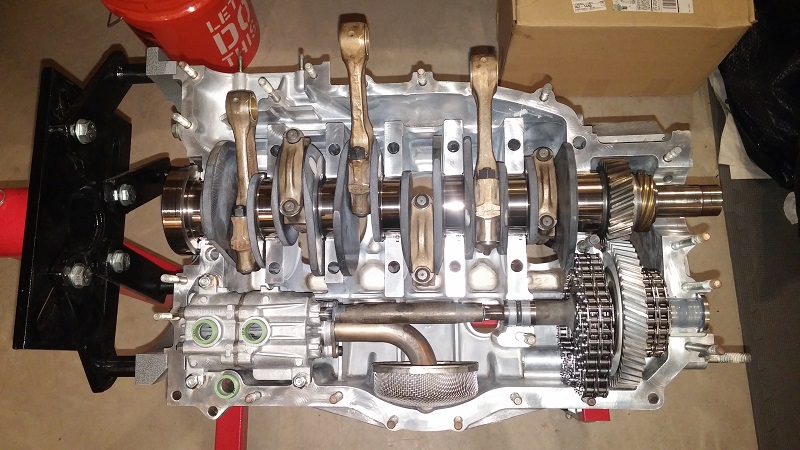 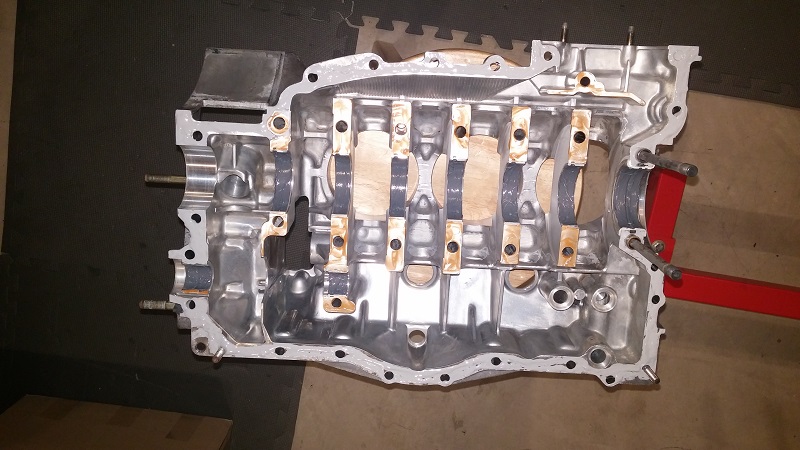 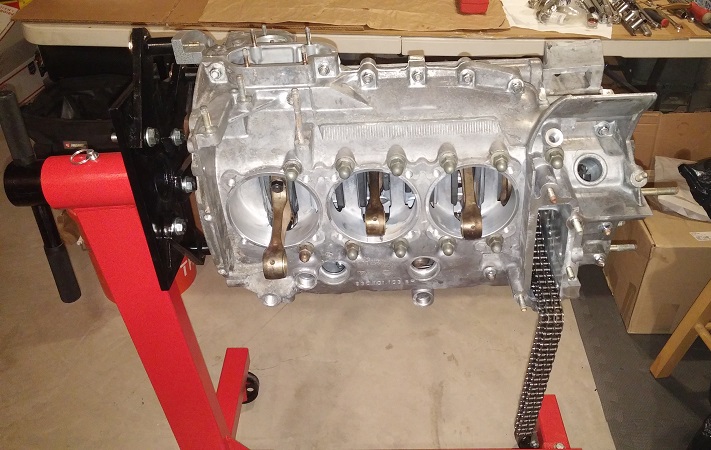 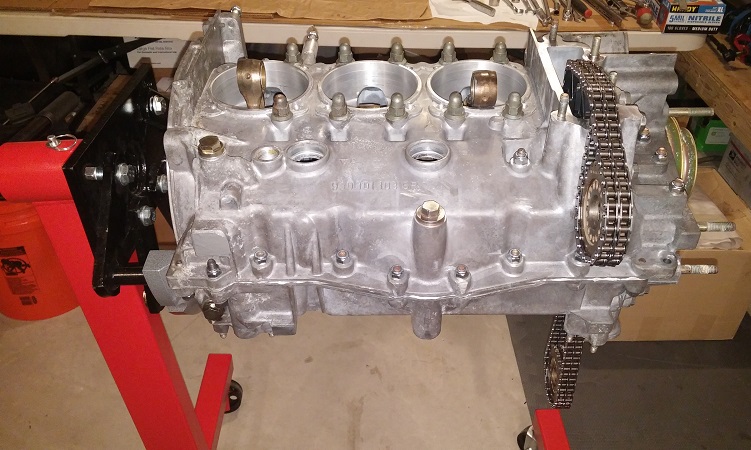 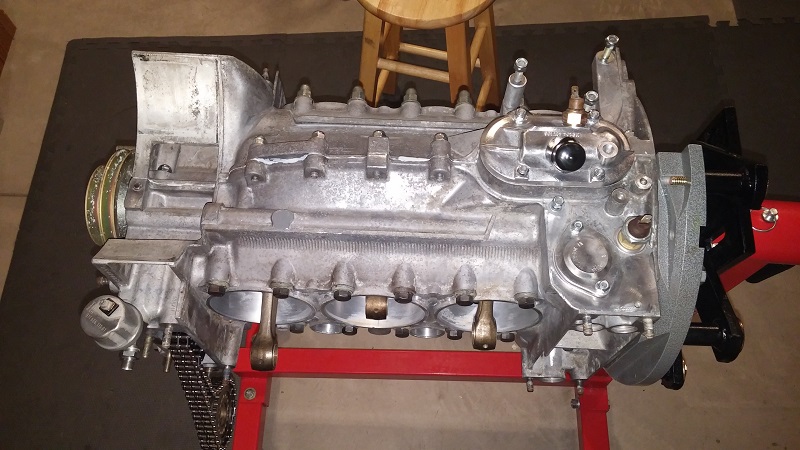 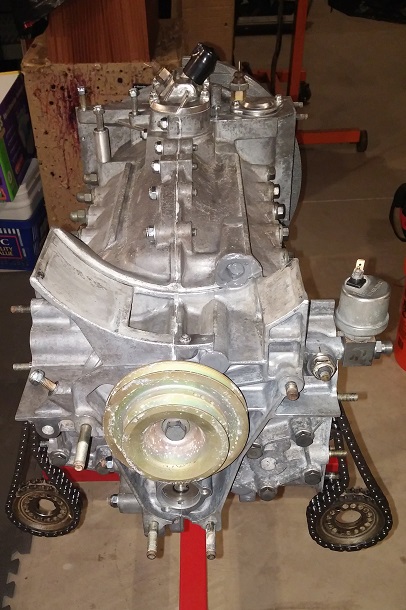
|
|
|
|
| Phoenix914 |
Sep 5 2015, 07:06 AM
Post
#52
|
|
Member Group: Members Posts: 389 Joined: 6-December 06 From: Oviedo, FL Member No.: 7,322 Region Association: South East States |
(IMG:style_emoticons/default/popcorn[1].gif)
Looks like you're making good progress. Keep the pics coming! |
|
|
|
| Luke M |
Sep 5 2015, 06:51 PM
Post
#53
|
|
Senior Member Group: Members Posts: 1,563 Joined: 8-February 05 From: WNY Member No.: 3,574 Region Association: North East States |
I got the head studs installed and set to 135 mm . They are all steel studs with some type of coating on them. Temporarily dropped the dizzy in as well.
This engine is getting some JE pistons with some reconditioned Nikasil cylinders. (IMG:style_emoticons/default/beer3.gif) Attached image(s) 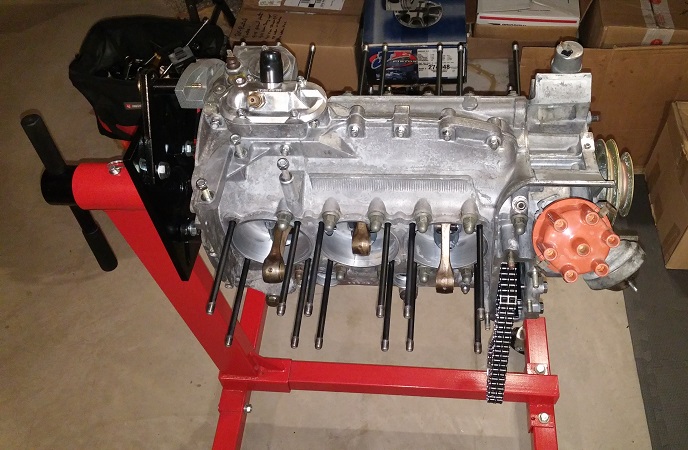 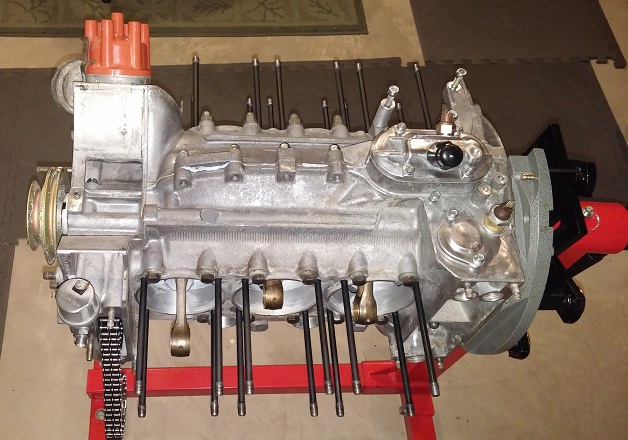  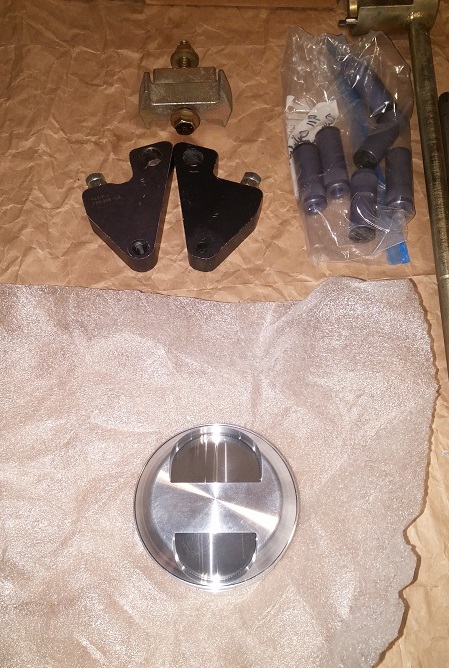 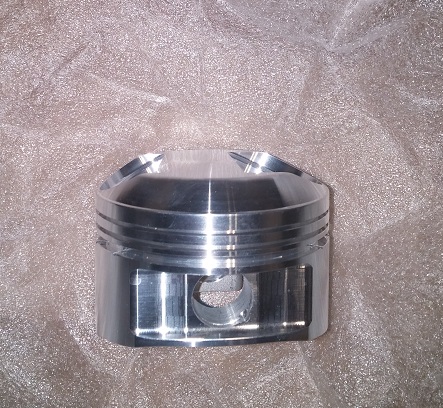
|
|
|
|
| Luke M |
Oct 5 2015, 08:50 AM
Post
#54
|
|
Senior Member Group: Members Posts: 1,563 Joined: 8-February 05 From: WNY Member No.: 3,574 Region Association: North East States |
Got the right rear GT kit installed. Started on the right sail panel. We are going to build a chassis jig to mount to then off the rotisserie it comes. Started on the front portion for now.
Attached image(s) 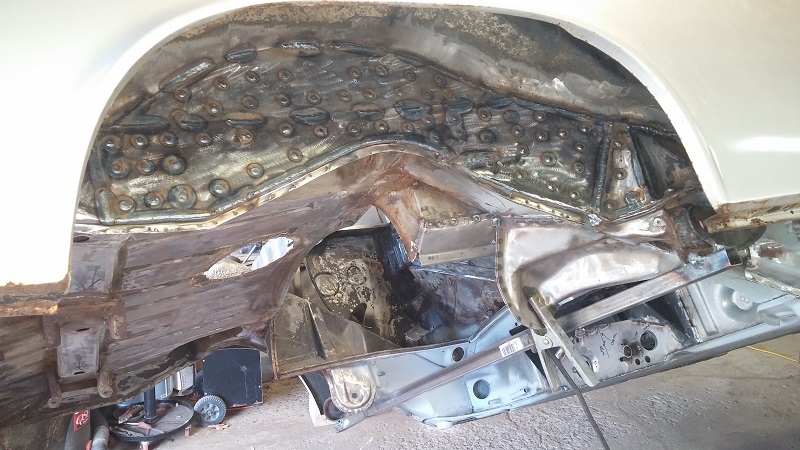 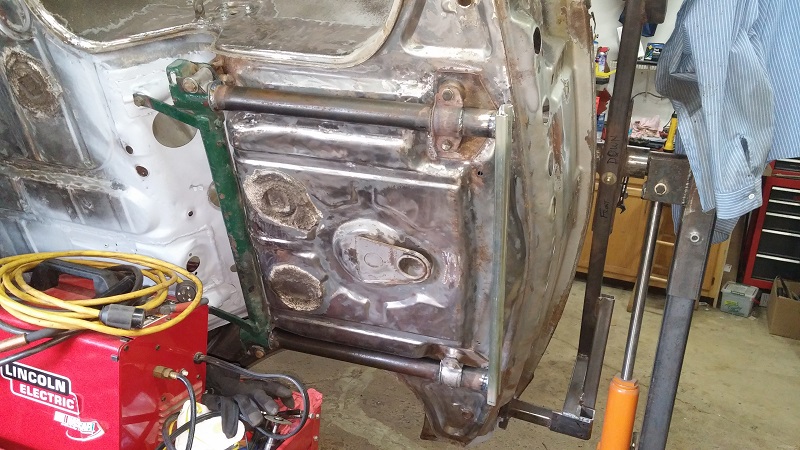 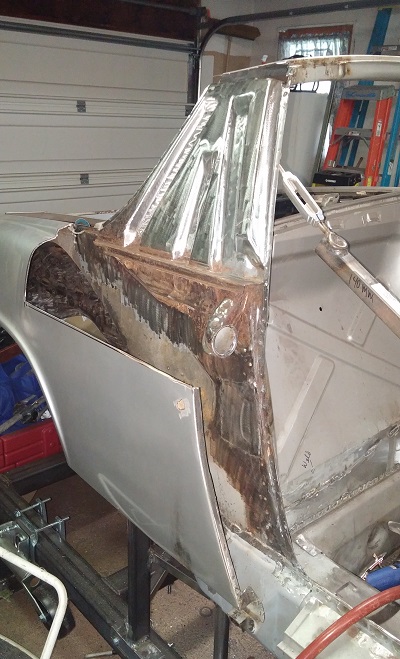 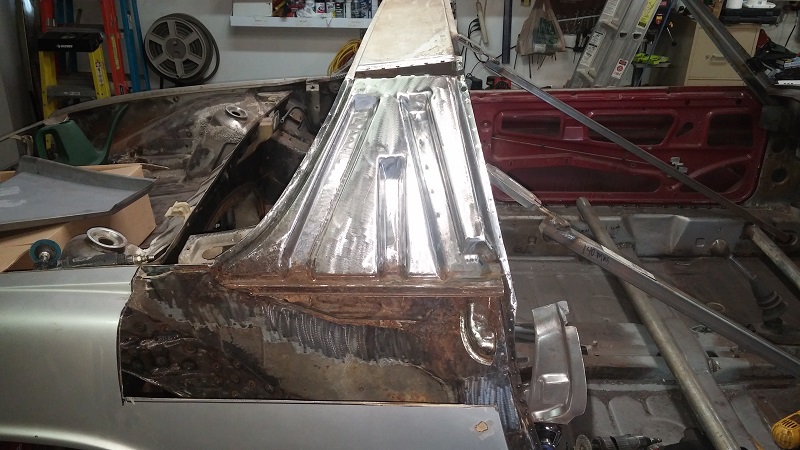    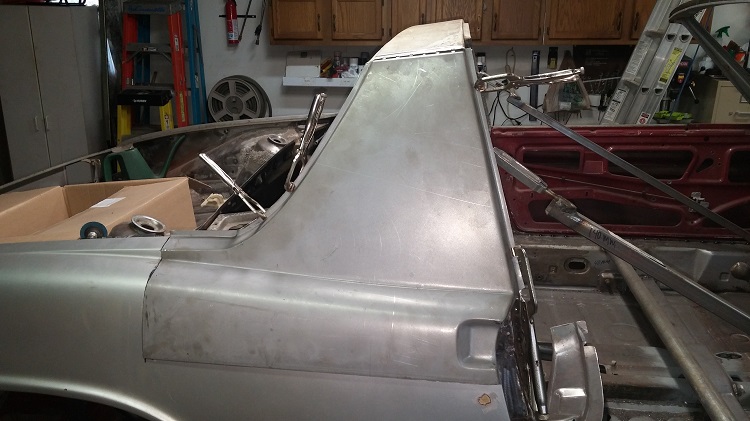 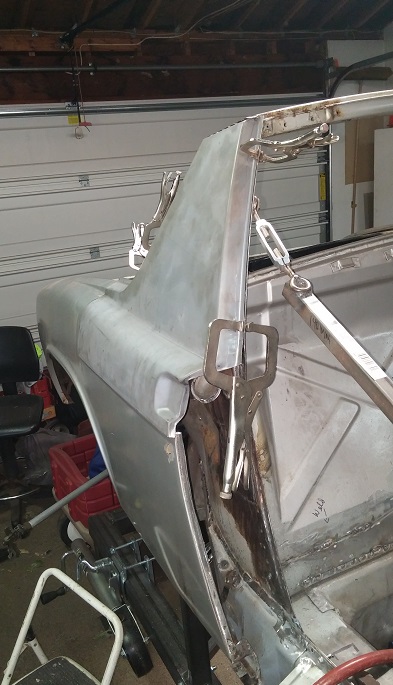  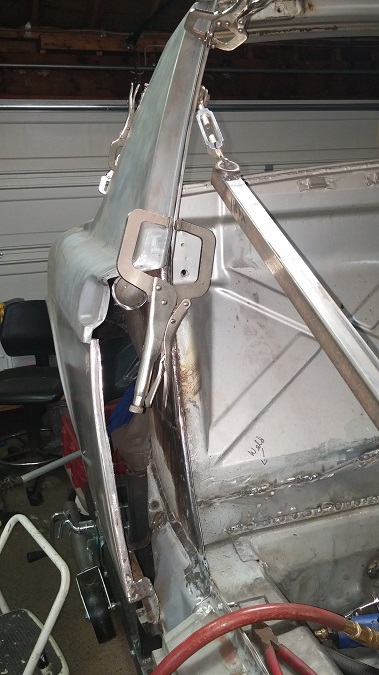
|
|
|
|
| Luke M |
Oct 10 2015, 08:42 AM
Post
#55
|
|
Senior Member Group: Members Posts: 1,563 Joined: 8-February 05 From: WNY Member No.: 3,574 Region Association: North East States |
Started building the chassis jig and the brackets to attach the 914 to it.
Got the jig and 914 leveled out. Started to build the mounting brackets. I should be able to finish making them up today. (IMG:style_emoticons/default/sawzall-smiley.gif) (IMG:style_emoticons/default/welder.gif) Attached image(s) 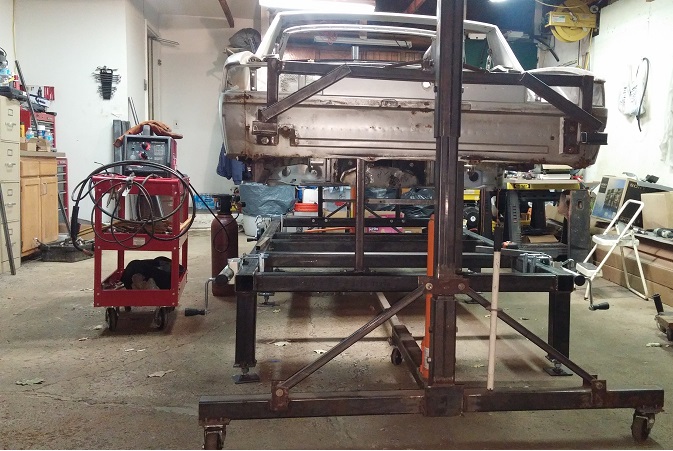 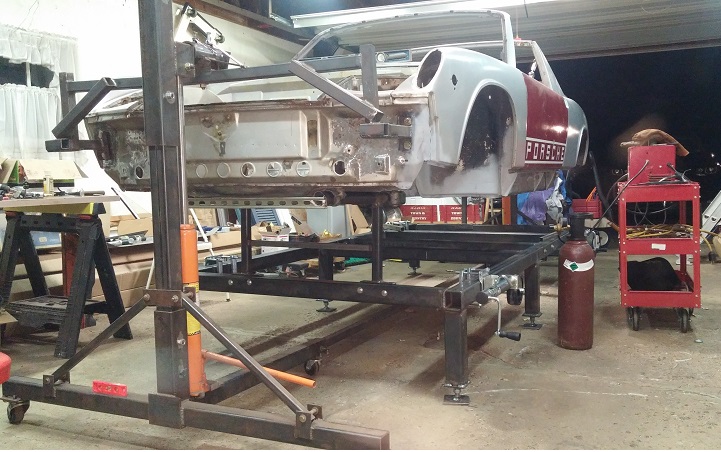 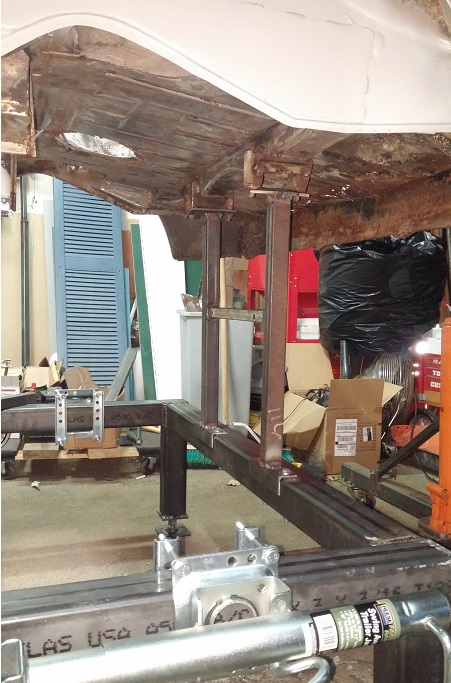 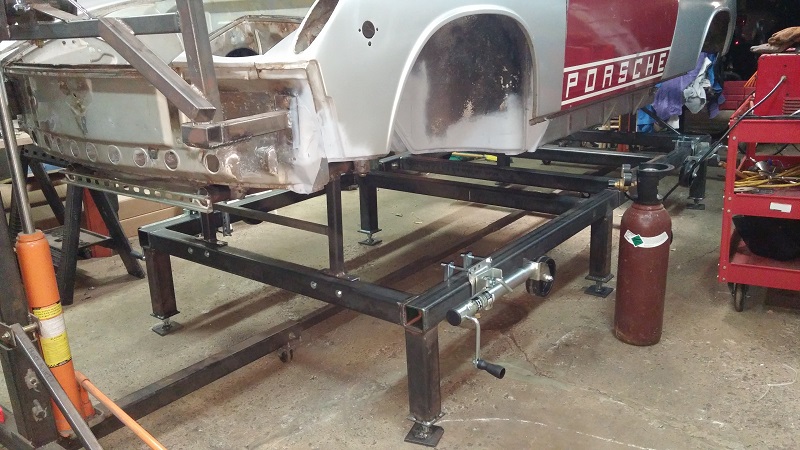 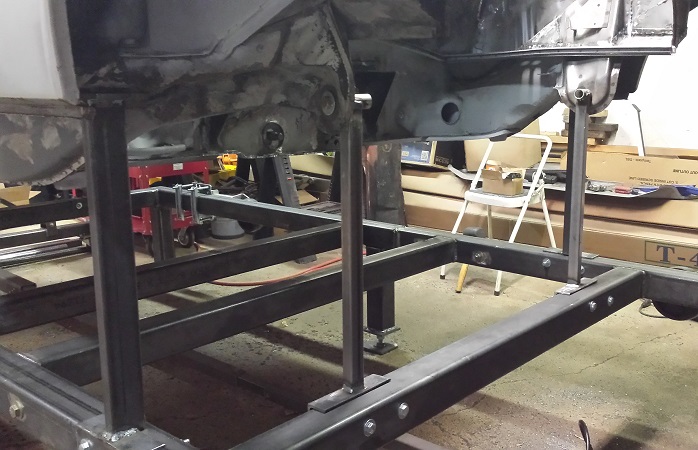 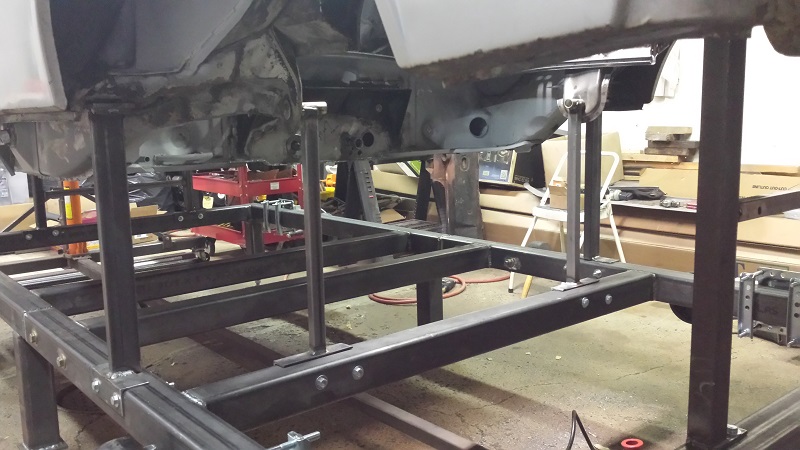 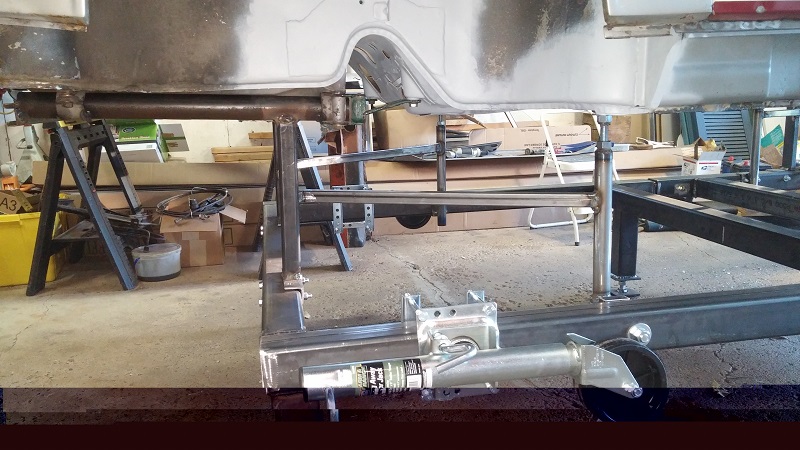 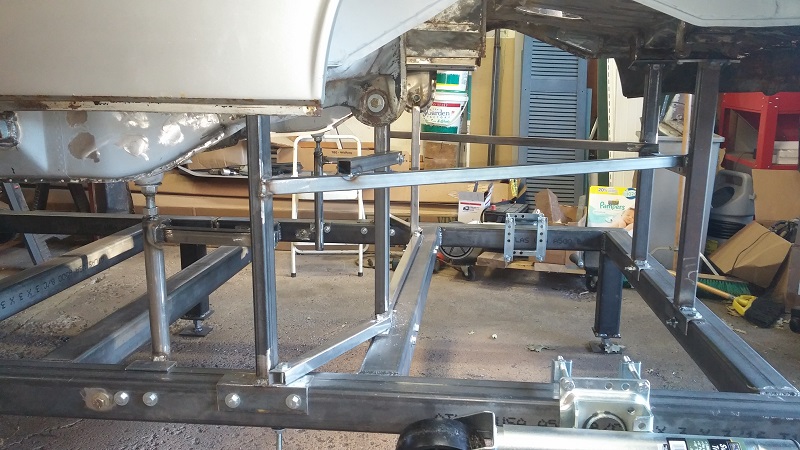
|
|
|
|
| jmitro |
Oct 10 2015, 09:10 AM
Post
#56
|
|
Senior Member Group: Members Posts: 713 Joined: 23-July 15 From: Oklahoma Member No.: 18,986 Region Association: None |
fantastic work; very thorough.
Just curious why you're building a chassis jig? With the structural welding done, i wouldn't imagine any significant chassis flex when it comes off the rotisserie. (IMG:style_emoticons/default/confused24.gif) |
|
|
|
| Luke M |
Oct 10 2015, 09:30 AM
Post
#57
|
|
Senior Member Group: Members Posts: 1,563 Joined: 8-February 05 From: WNY Member No.: 3,574 Region Association: North East States |
QUOTE(jmitro @ Oct 10 2015, 08:10 AM) fantastic work; very thorough. Just curious why you're building a chassis jig? With the structural welding done, i wouldn't imagine any significant chassis flex when it comes off the rotisserie. (IMG:style_emoticons/default/confused24.gif) I have another 914 that will need the chassis jig later on. I'll have to cut a good portion of the r/r & hell hole off the car. My brothers 914 chassis is solid now and measurements are within factory specs. I built the jig off his car as it was already on the rotisserie which made a few things easier to fabricate. I'll still use the jig to do more work on his 914 as the rotisserie work is just about done. The next patient: Attached image(s) 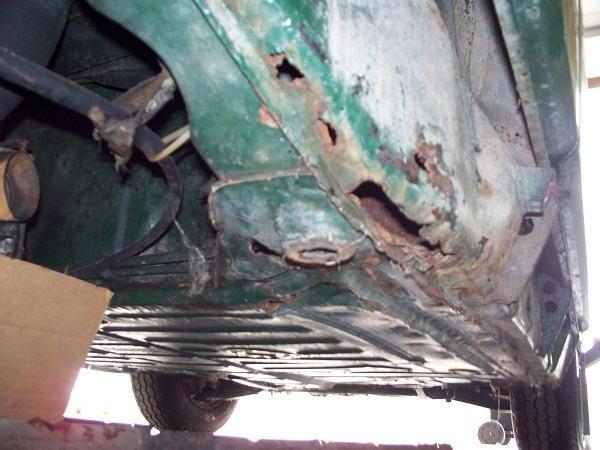 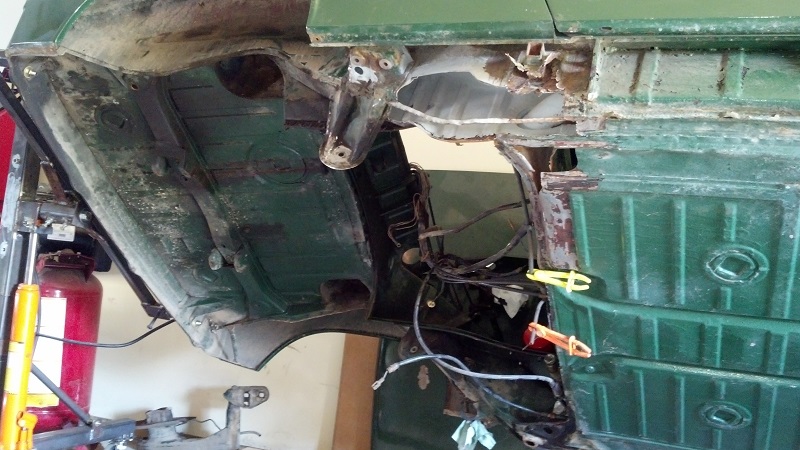 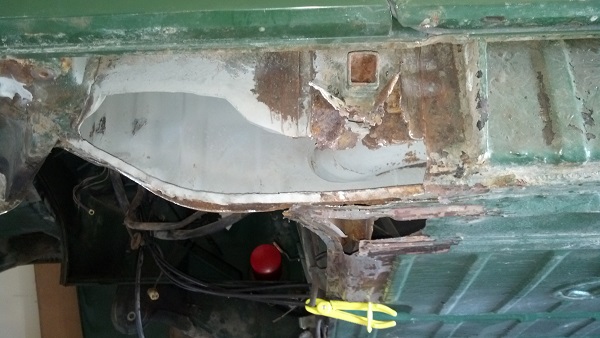
|
|
|
|
| trojanhorsepower |
Oct 10 2015, 11:01 AM
Post
#58
|
|
Senior Member Group: Members Posts: 1,053 Joined: 21-September 03 From: Marion, NC Member No.: 1,179 Region Association: None |
Great work guys!
|
|
|
|
| Luke M |
Mar 15 2016, 11:26 AM
Post
#59
|
|
Senior Member Group: Members Posts: 1,563 Joined: 8-February 05 From: WNY Member No.: 3,574 Region Association: North East States |
Slow winter here but we got two transmissions rebuilt.
All new bearings, synchros, gear teeth, gaskets, and swapped gears. It's pretty easy once you have all the tools to do it right. Made up a custom 6 throttle linkage bracket too. Gear Ratio is now : A, GA, O, X, flipped H. It's going to be run with the 3.0 6 . Attached image(s) 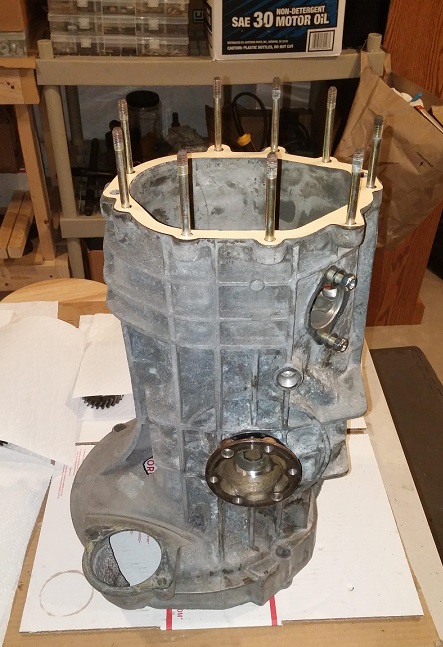 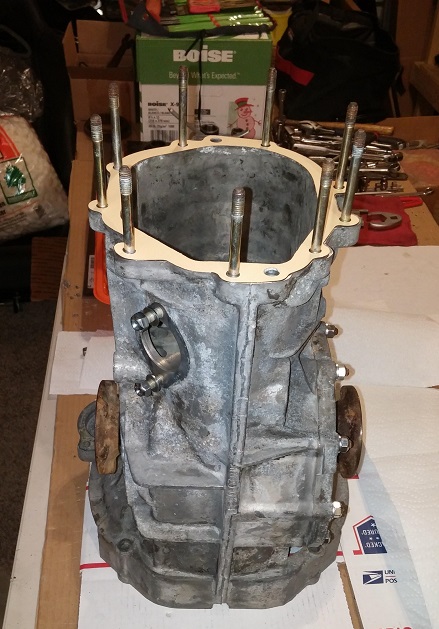 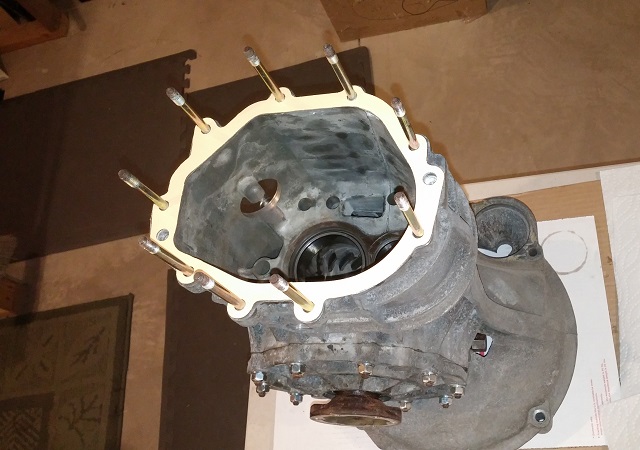 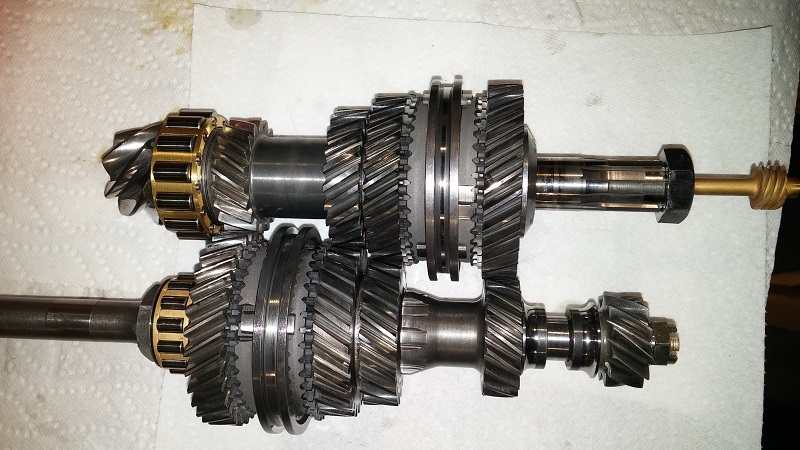 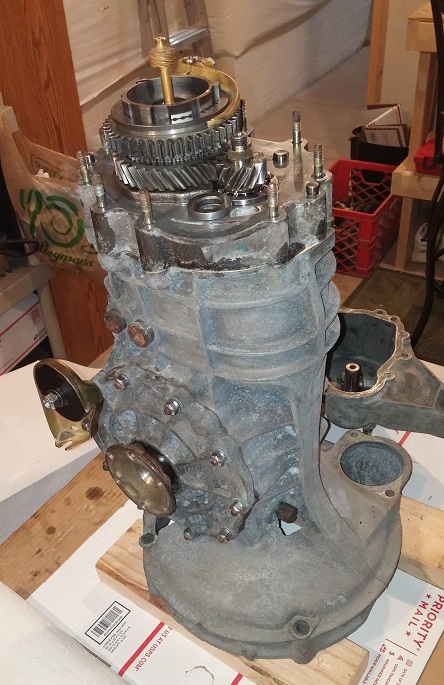 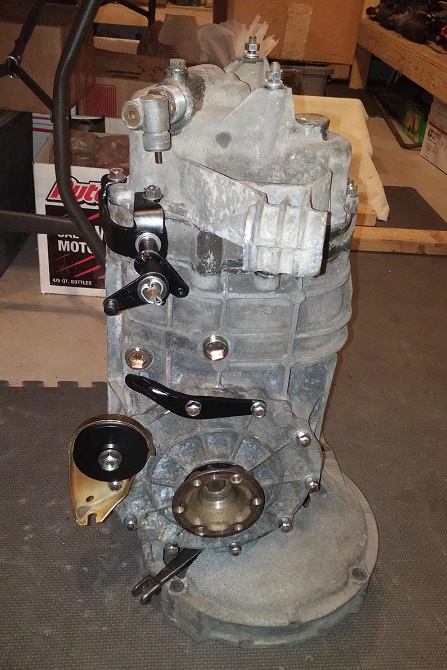 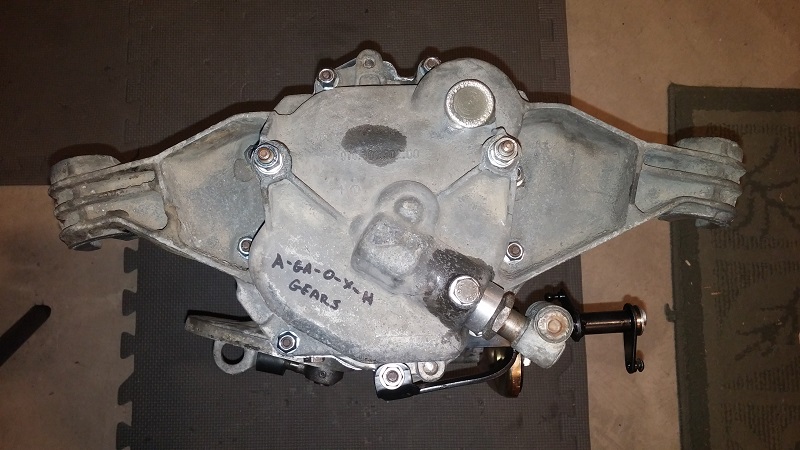
|
|
|
|
| Luke M |
May 19 2018, 10:25 AM
Post
#60
|
|
Senior Member Group: Members Posts: 1,563 Joined: 8-February 05 From: WNY Member No.: 3,574 Region Association: North East States |
3.0 is almost done. Waiting on cams, rockers then set the timing.
(IMG:style_emoticons/default/beer3.gif) Attached image(s) 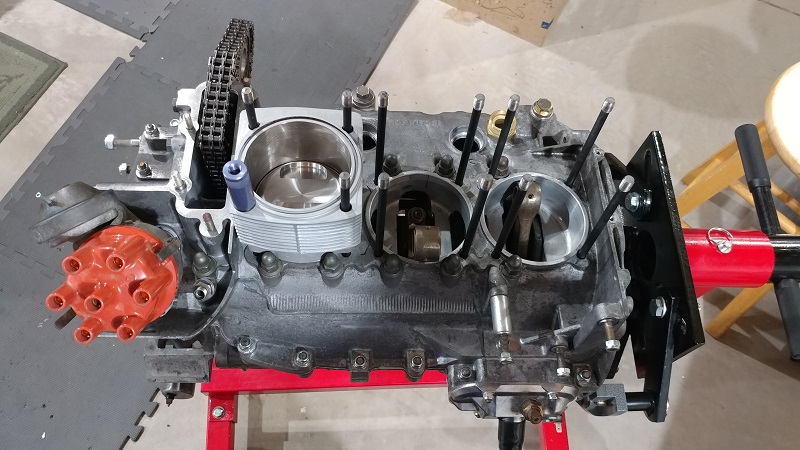 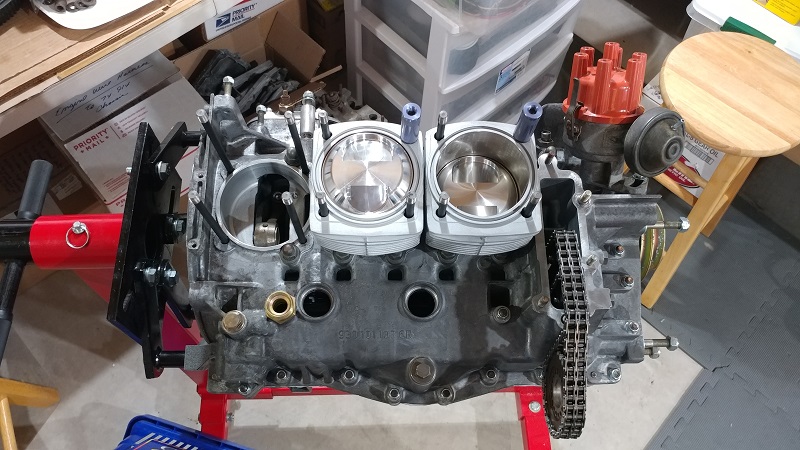 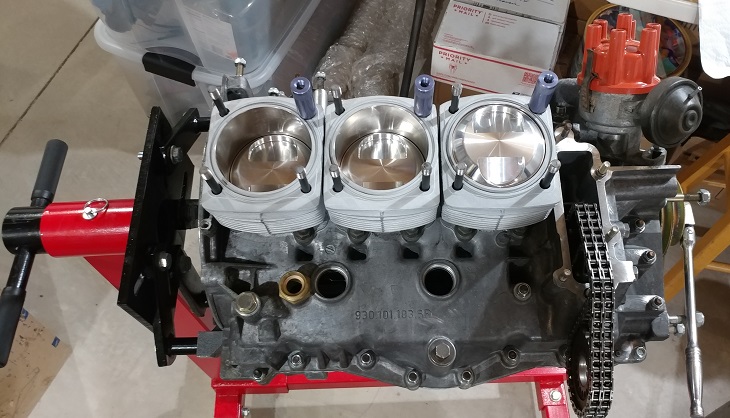 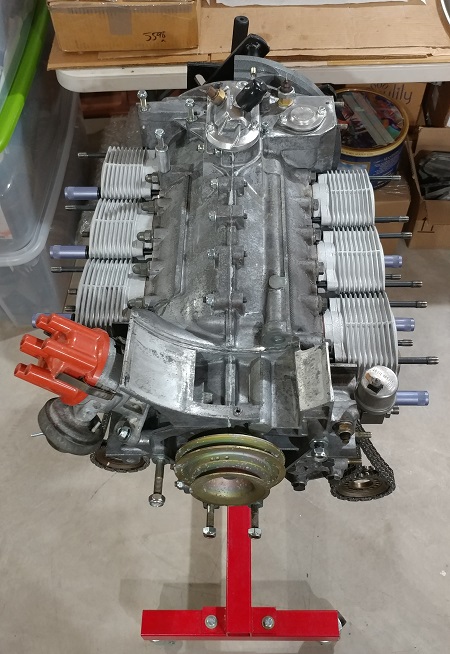 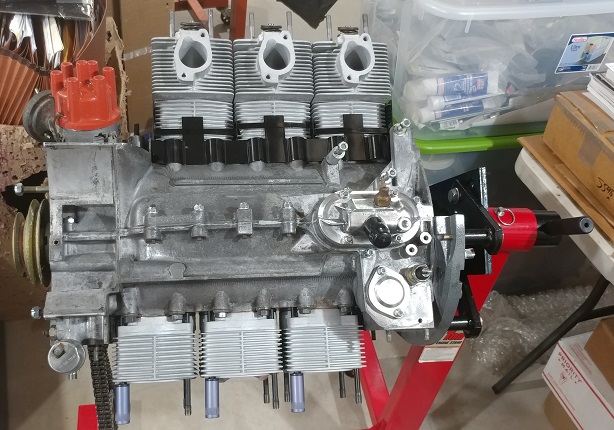 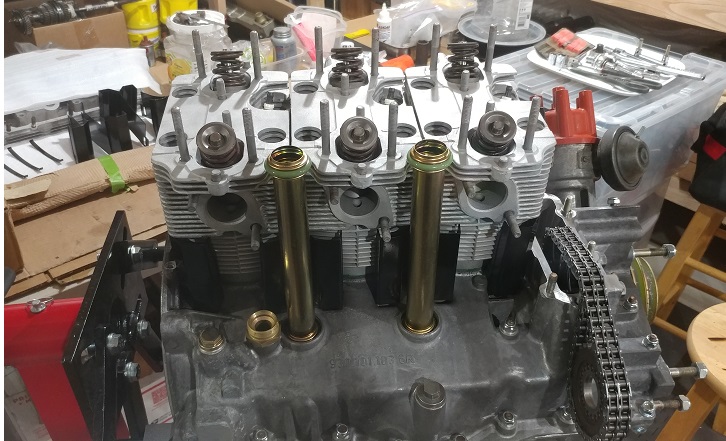 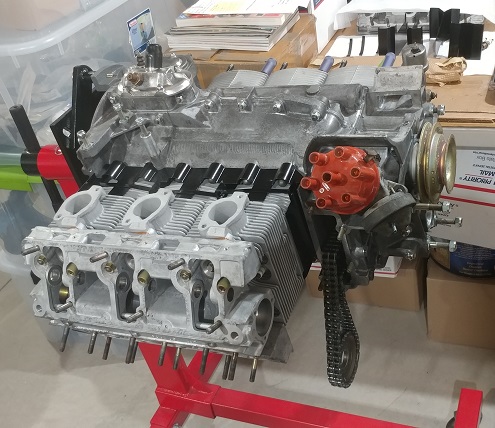 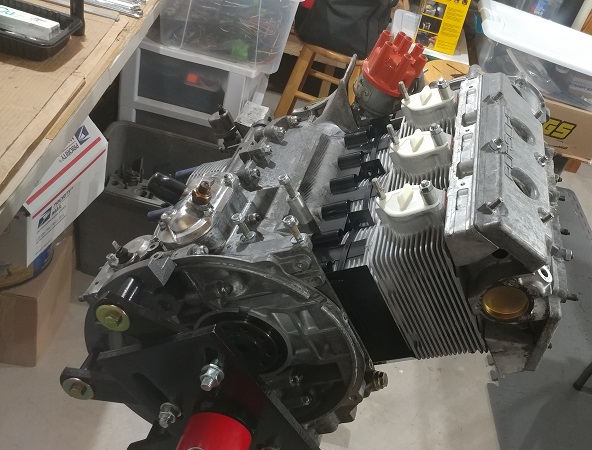 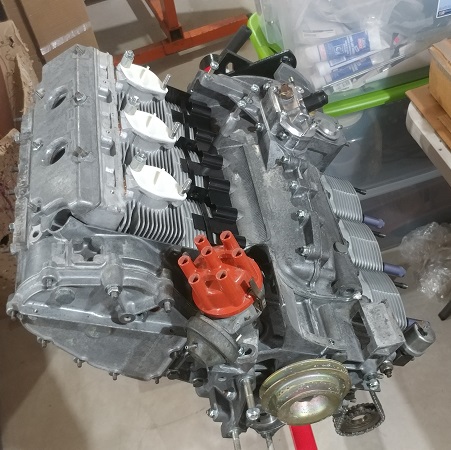 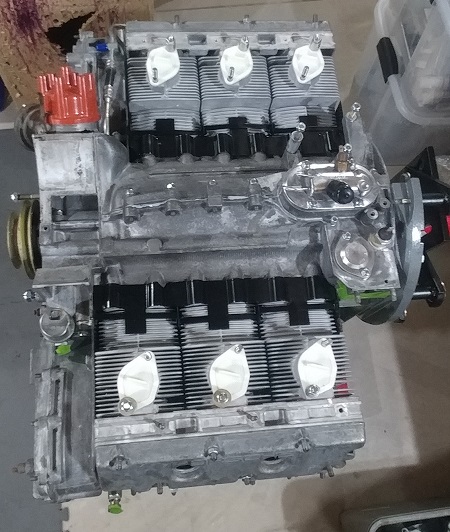 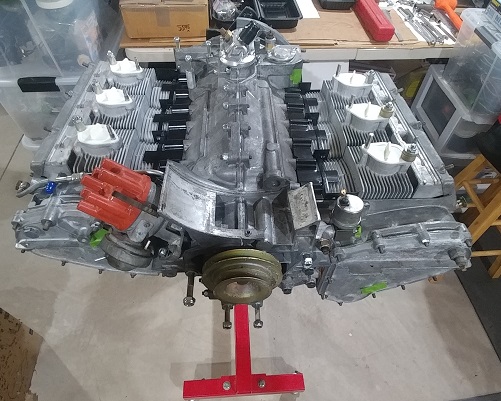
|
|
|
|
|
1 User(s) are reading this topic (1 Guests and 0 Anonymous Users)
0 Members:

|
Lo-Fi Version | Time is now: 28th July 2026 - 08:47 AM |
Invision Power Board
v9.1.4 © 2026 IPS, Inc.