|
|
|
Porsche, and the Porsche crest are registered trademarks of Dr. Ing. h.c. F. Porsche AG.
This site is not affiliated with Porsche in any way. Its only purpose is to provide an online forum for car enthusiasts. All other trademarks are property of their respective owners. |
|
|

  |

| jd74914 |
 Oct 30 2017, 07:33 AM Oct 30 2017, 07:33 AM
Post
#1021
|
|
Its alive  Group: Members Posts: 4,860 Joined: 16-February 04 From: CT Member No.: 1,659 Region Association: North East States |
QUOTE(Amenson @ Oct 20 2017, 10:12 AM)  Purpose of the shroud is to increasing radiator utilization while stationary or at low speeds by allowing the fan to draw air through the entire radiator instead of just the area covered by the fan. Certainly, at speeds higher than what the fan can create, the shroud will limit the flow to what is capable of passing through the fan. That said, I have yet to experience a shrouded radiator that cools while stationary, not cooling at high speeds. I have experienced an un-shrouded radiator not cooling. I've actually had they very problem before with a shroud that sealed too well and excessive pressure drop through the fan limited air flow. It was pretty neat, we put yarn on the inlet duct and actually saw reversion as vehicle speeds increased (didn't happen at the magical 25 mph number though (IMG:style_emoticons/default/blink.gif) (IMG:style_emoticons/default/laugh.gif) ). Like you said, not well enough shrouded it usually the issue and flaps are easy. Just though I'd put this anecdote here since it actually does happen. OTOH, that was on a racecar, street cars just don't have the high-speed, high engine load duty cycles so they're likely a bit more forgiving. In any case, it looks great! The mustang cap looks nice too-definitely going to steal that one! (IMG:style_emoticons/default/smile.gif) |
   |

 
|
| Amenson |
Oct 30 2017, 08:48 AM
Post
#1022
|
|
That's opposite lock!! Group: Members Posts: 645 Joined: 27-May 05 From: Dublin, OH Member No.: 4,154 Region Association: None |
QUOTE(jd74914 @ Oct 30 2017, 09:33 AM) In any case, it looks great! The mustang cap looks nice too-definitely going to steal that one! (IMG:style_emoticons/default/smile.gif) The cap idea was inspired by Bob when I found a picture of his conversion using a Volvo The weld fitting for a non P/N: CR-SM-CPF-001A Price: $20 Cheers, Scott |
|
|
|
| jd74914 |
Oct 30 2017, 11:43 AM
Post
#1023
|
|
Its alive Group: Members Posts: 4,860 Joined: 16-February 04 From: CT Member No.: 1,659 Region Association: North East States |
Thanks! That's really not a bad price either all considering.
|
|
|
|
| Amenson |
Nov 5 2017, 09:43 PM
Post
#1024
|
|
That's opposite lock!! Group: Members Posts: 645 Joined: 27-May 05 From: Dublin, OH Member No.: 4,154 Region Association: None |
Mounted the fuel pressure regulator and Boost controller and as always, it got a bit out of hand finding an ideal location.
I really wanted to put it behind the the intake manifold so that I could connect directly to the "T" between the fuel rails. Problem is there is not a while lot of room between the intake manifold and the charge pipe to the turbo. After a whole lot of measuring and pondering I decided that might just work...step 1, modify the fuel pressure regulator mounting bracket. Can't get 0.5mm shorter without a whole bunch of stuff interfering with each other. 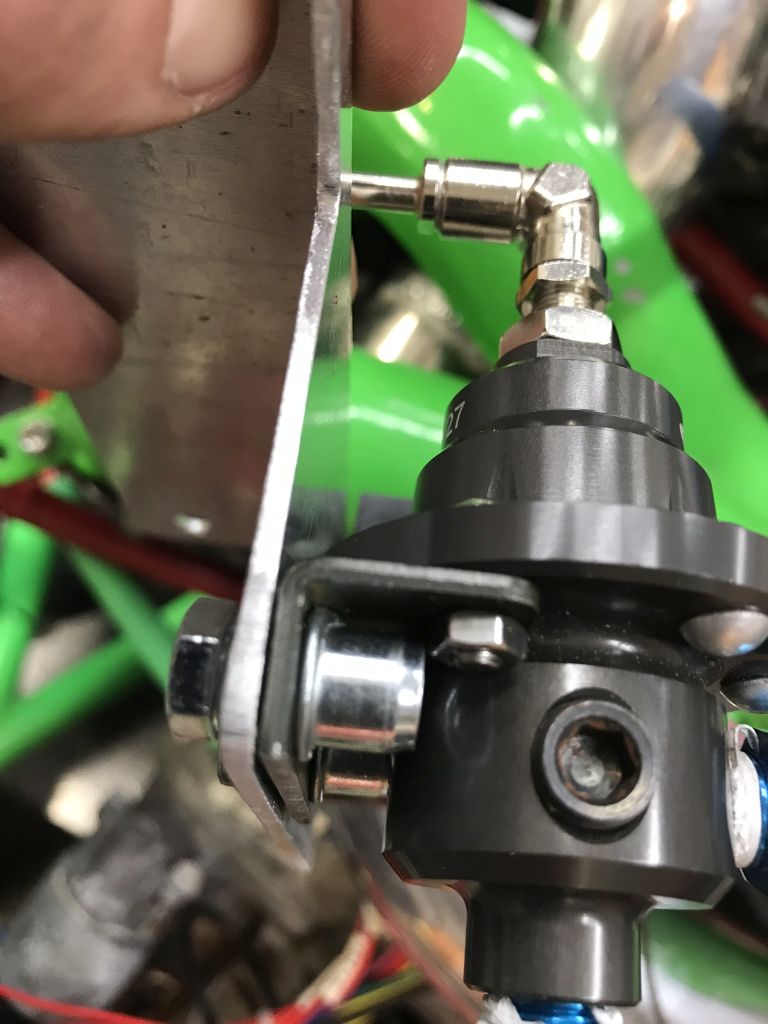 I always wanted to use press in threaded inserts so I tried to reuse the ones from the boost controller. Worked perfectly. Now I just need to figure out how to buy a bunch. Who knows what they are called? 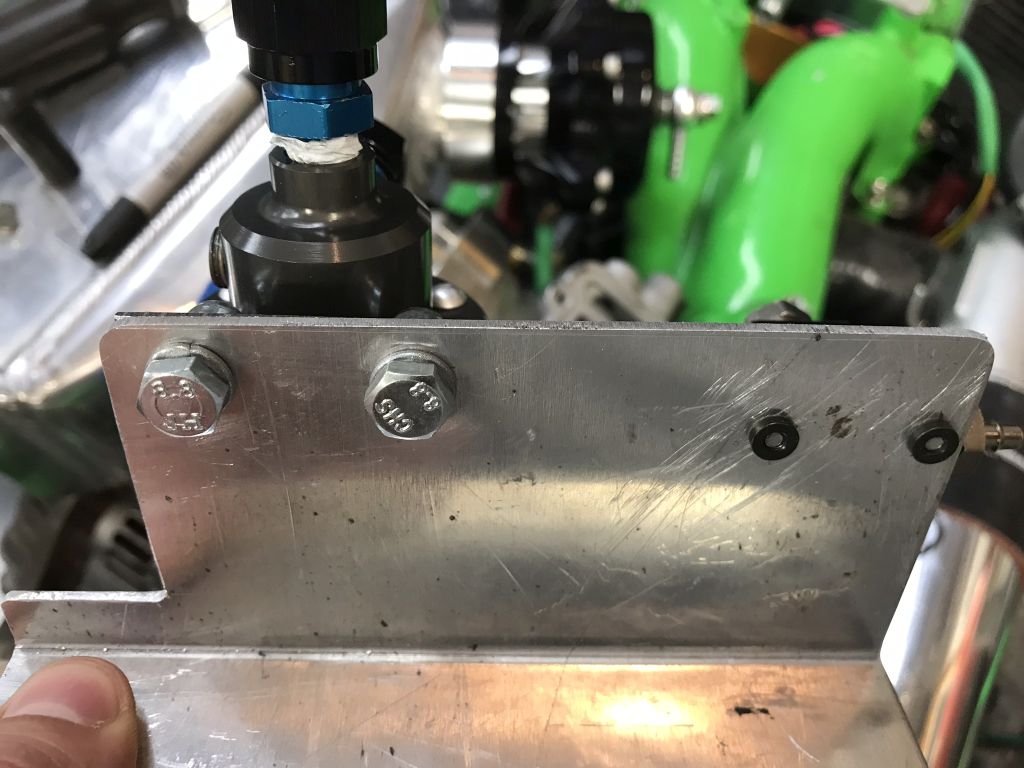 Clearance everywhere!  Packaging. 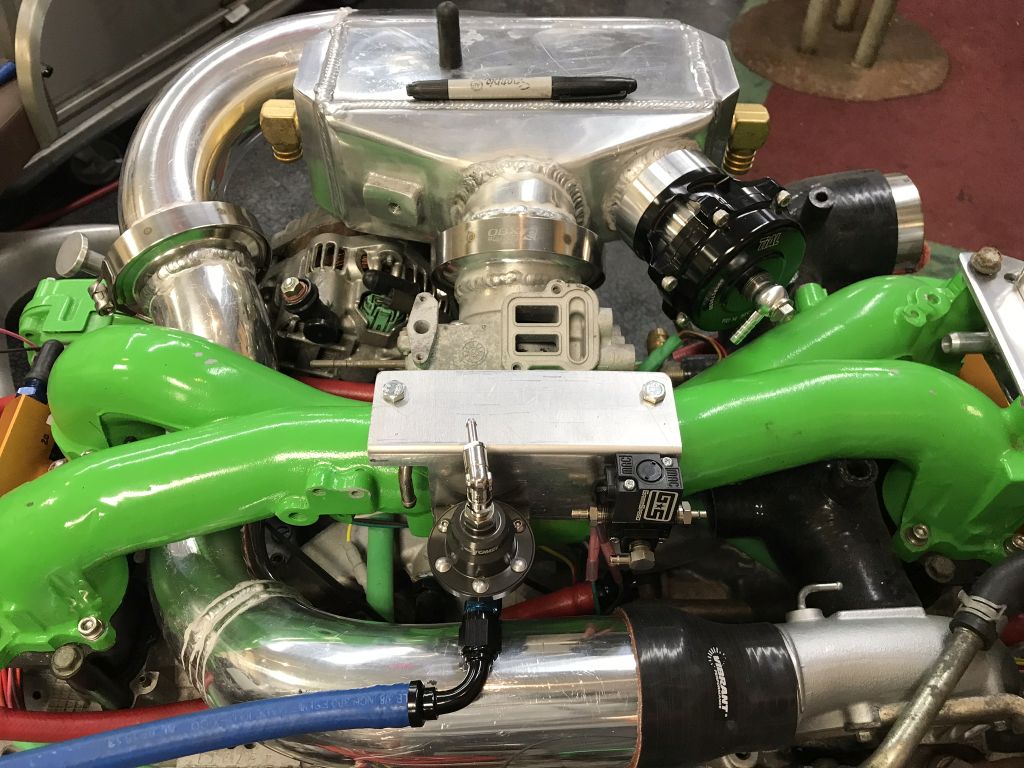 One issue is that the top of the manifold was ground down so there is not a flat surface to bolt to. 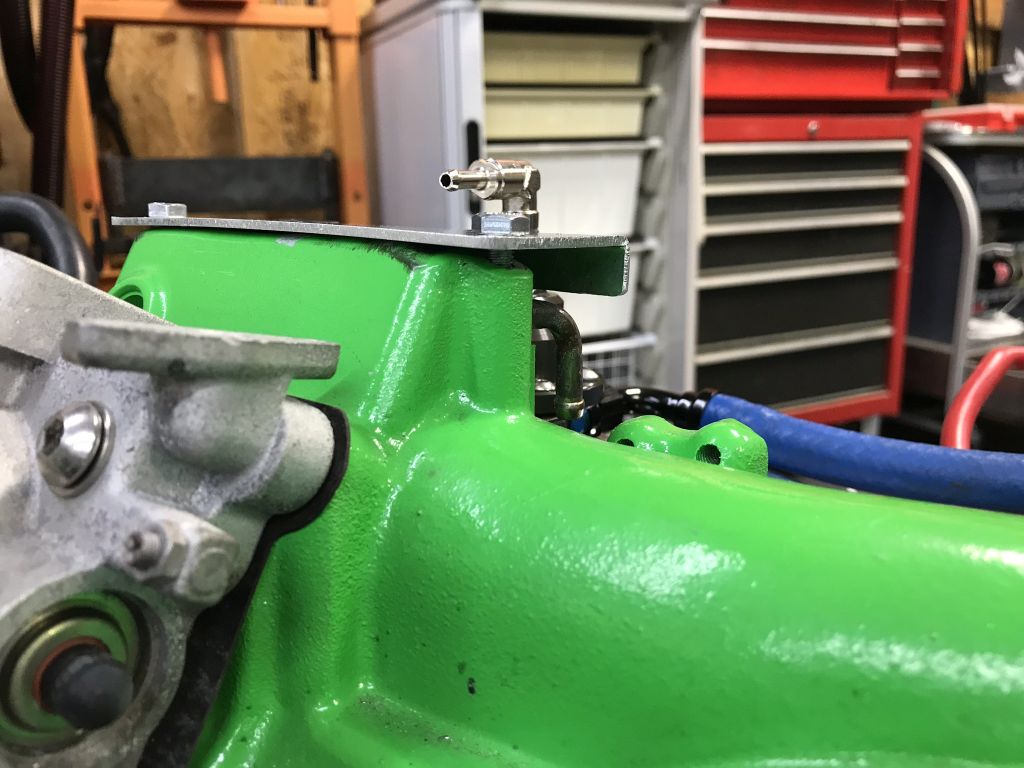 This was really bothering me so $40 on ebay later and a new manifold is on the way. The one I found even has the throttle body and throttle cable bracket! The throttle cable brake alone made it worth it so that I don't have to design/make one! Cheers, Scott |
|
|
|
| mepstein |
Nov 6 2017, 05:29 AM
Post
#1025
|
|
914-6 GT in waiting Group: Members Posts: 20,214 Joined: 19-September 09 From: Landenberg, PA/Wilmington, DE Member No.: 10,825 Region Association: MidAtlantic Region |
"I always wanted to use press in threaded inserts so I tried to reuse the ones from the boost controller. Worked perfectly. Now I just need to figure out how to buy a bunch. Who knows what they are called?"
Riv nuts? |
 |
|
| GS Guy |
Nov 6 2017, 05:49 AM
Post
#1026
|
|
Member Group: Members Posts: 243 Joined: 8-July 04 From: Columbia, MD Member No.: 2,325 Region Association: North East States |
QUOTE(mepstein @ Nov 6 2017, 06:29 AM) "I always wanted to use press in threaded inserts so I tried to reuse the ones from the boost controller. Worked perfectly. Now I just need to figure out how to buy a bunch. Who knows what they are called?" Riv nuts? Pem nuts. Nice looking work! |
|
|
|
| Amenson |
Nov 6 2017, 06:27 AM
Post
#1027
|
|
That's opposite lock!! Group: Members Posts: 645 Joined: 27-May 05 From: Dublin, OH Member No.: 4,154 Region Association: None |
QUOTE(GS Guy @ Nov 6 2017, 07:49 AM) QUOTE(mepstein @ Nov 6 2017, 06:29 AM) "I always wanted to use press in threaded inserts so I tried to reuse the ones from the boost controller. Worked perfectly. Now I just need to figure out how to buy a bunch. Who knows what they are called?" Riv nuts? Pem nuts. Nice looking work! Oh yes!! Thanks. What is up with your suby build...lost track of the build thread? |
|
|
|
| Amenson |
Nov 6 2017, 01:59 PM
Post
#1028
|
|
That's opposite lock!! Group: Members Posts: 645 Joined: 27-May 05 From: Dublin, OH Member No.: 4,154 Region Association: None |
Ever since plumbing the 3 port boost controller for the first time on the PorSTI it has always bothered me why a connection was necessary back to the intake between the air filter (MAF) and turbo. Having to now add the connection for Grey I decided to find out. It is not, definitely not for a setup w/o MAF. The port is just a vent to release the pressure from the waste-gate actuator.
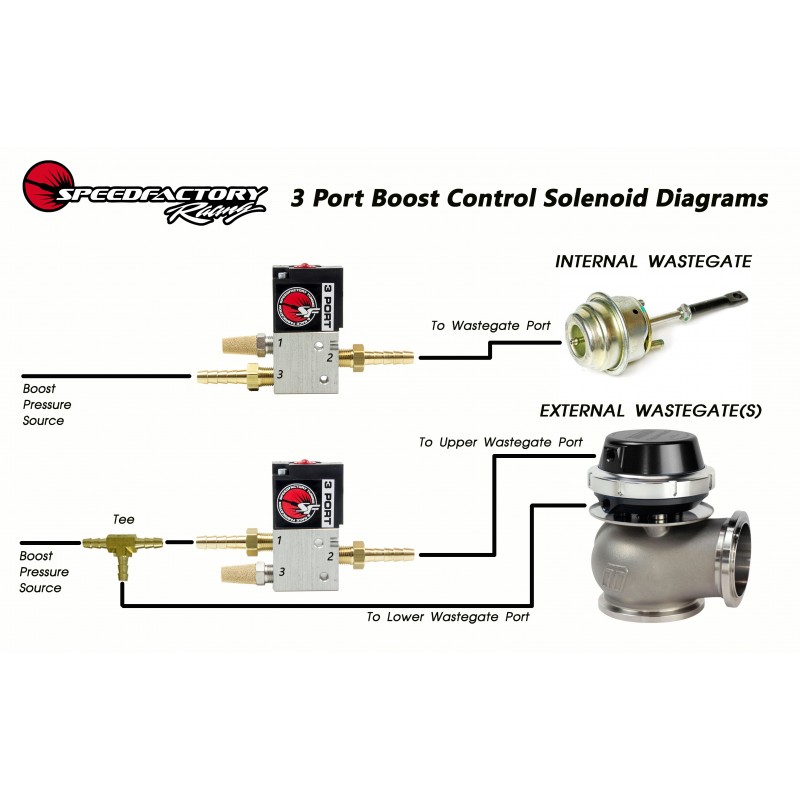  I guess theoretically in a MAF system venting the volume of air already accounted for by the MAF back into the system post MAF increases accuracy but it seems like a remarkably insignificant volume of air. The best type of plumbing is the type that is not necessary. Sintered bronze mufflers on order! Speaking of MAF-less...I am confirming that we need to add a temp sensor into the Intake manifold. IAT Cheers, Scott |
|
|
|
| jd74914 |
Nov 6 2017, 02:09 PM
Post
#1029
|
|
Its alive Group: Members Posts: 4,860 Joined: 16-February 04 From: CT Member No.: 1,659 Region Association: North East States |
You do need an IAT for speed density. Maybe need is a little strong since technical the IAT is most strongly governed by your IC efficiency curve and compressor map, so you could kind of build the correction into the load table, but it's certainly nice to have for tuning simplicity since you can just make an ideal gas correction.
Why not use the combined Bosch MAP/MAT sensor?It's a pretty slick package and requires only 1 hole in the manifold? https://www.bmotorsports.com/shop/product_i...roducts_id/1721 |
|
|
|
| jd74914 |
Nov 6 2017, 02:11 PM
Post
#1030
|
|
Its alive Group: Members Posts: 4,860 Joined: 16-February 04 From: CT Member No.: 1,659 Region Association: North East States |
QUOTE(Amenson @ Nov 6 2017, 02:59 PM) I guess theoretically in a MAF system venting the volume of air already accounted for by the MAF back into the system post MAF increases accuracy but it seems like a remarkably insignificant volume of air. It may not be so insignificant for improving IMEP COV and emissions characteristics. (IMG:style_emoticons/default/idea.gif) |
|
|
|
| Amenson |
Nov 6 2017, 02:18 PM
Post
#1031
|
|
That's opposite lock!! Group: Members Posts: 645 Joined: 27-May 05 From: Dublin, OH Member No.: 4,154 Region Association: None |
QUOTE(jd74914 @ Nov 6 2017, 04:09 PM) You do need an IAT for speed density. Maybe need is a little strong since technical the IAT is most strongly governed by your IC efficiency curve and compressor map, so you could kind of build the correction into the load table, but it's certainly nice to have for tuning simplicity since you can just make an ideal gas correction. Why not use the combined Bosch MAP/MAT sensor?It's a pretty slick package and requires only 1 hole in the manifold? https://www.bmotorsports.com/shop/product_i...roducts_id/1721 Bosch...who would use their crap (IMG:style_emoticons/default/huh.gif) (I realized after writing this, probably not everyone knows that I work for Bosch) I would but Grey's ecu has an onboard MAP sensor. Cheers, Scott |
|
|
|
| 914forme |
Nov 7 2017, 06:46 AM
Post
#1032
|
|
Times a wastin', get wrenchin'! Group: Members Posts: 3,896 Joined: 24-July 04 From: Dayton, Ohio Member No.: 2,388 Region Association: None |
QUOTE(Amenson @ Nov 6 2017, 03:18 PM) Bosch...who would use their crap (IMG:style_emoticons/default/huh.gif) (I realized after writing this, probably not everyone knows that I work for Bosch) I would but Grey's ecu has an onboard MAP sensor. Cheers, Scott (IMG:style_emoticons/default/av-943.gif) Nice to see progress. I can bring up my PEM setting tool on Friday, if you need one. Street Term for Mark is Riv Nuts, or Rivet Nuts, or Blind Rivet Nuts as that is what they are most akin to in most peoples knowledge of fasteners and tools. The good old Pop Rivet, or blind Rivet. Both use a mandrel to draw the pieces together and lock them in place. One advantage to the PEMs is you can also use a bolt, and backer to place them. On larger units that is exactly how you get them in there. Very handy for places you can no weld a nut or threaded sleeve in place. I figured you would have made a threaded sleeve and then welded it onto the bracket you made just to get a bit more TIG time in. Some times it is nice just to get stuff done. Though your places seems to be the place where my cool tools go and stay. I think your hoping I forget about my Parker's (IMG:style_emoticons/default/lol-2.gif) |
|
|
|
| Amenson |
Nov 7 2017, 09:47 PM
Post
#1033
|
|
That's opposite lock!! Group: Members Posts: 645 Joined: 27-May 05 From: Dublin, OH Member No.: 4,154 Region Association: None |
QUOTE(914forme @ Nov 7 2017, 08:46 AM) (IMG:style_emoticons/default/av-943.gif) Nice to see progress. I can bring up my PEM setting tool on Friday, if you need one. Street Term for Mark is Riv Nuts, or Rivet Nuts, or Blind Rivet Nuts as that is what they are most akin to in most peoples knowledge of fasteners and tools. The good old Pop Rivet, or blind Rivet. Both use a mandrel to draw the pieces together and lock them in place. One advantage to the PEMs is you can also use a bolt, and backer to place them. On larger units that is exactly how you get them in there. Very handy for places you can no weld a nut or threaded sleeve in place. I figured you would have made a threaded sleeve and then welded it onto the bracket you made just to get a bit more TIG time in. Some times it is nice just to get stuff done. Though your places seems to be the place where my cool tools go and stay. I think your hoping I forget about my Parker's (IMG:style_emoticons/default/lol-2.gif) I like the PEM in this application because I didn't have room for a riv nut. No need to bring yet another tool over. I can buy my own PEM set. The Parker beaders on the other hand....those are worth their weigh in gold and is about what a new set costs. Don't worry, I will bring them back the moment that you need them. Which is hopefully soon, you really need to get back to your suby build one of these days. Speaking of tools...new tool day! DSO Nano next to the trusty Fluke Scopemeter. 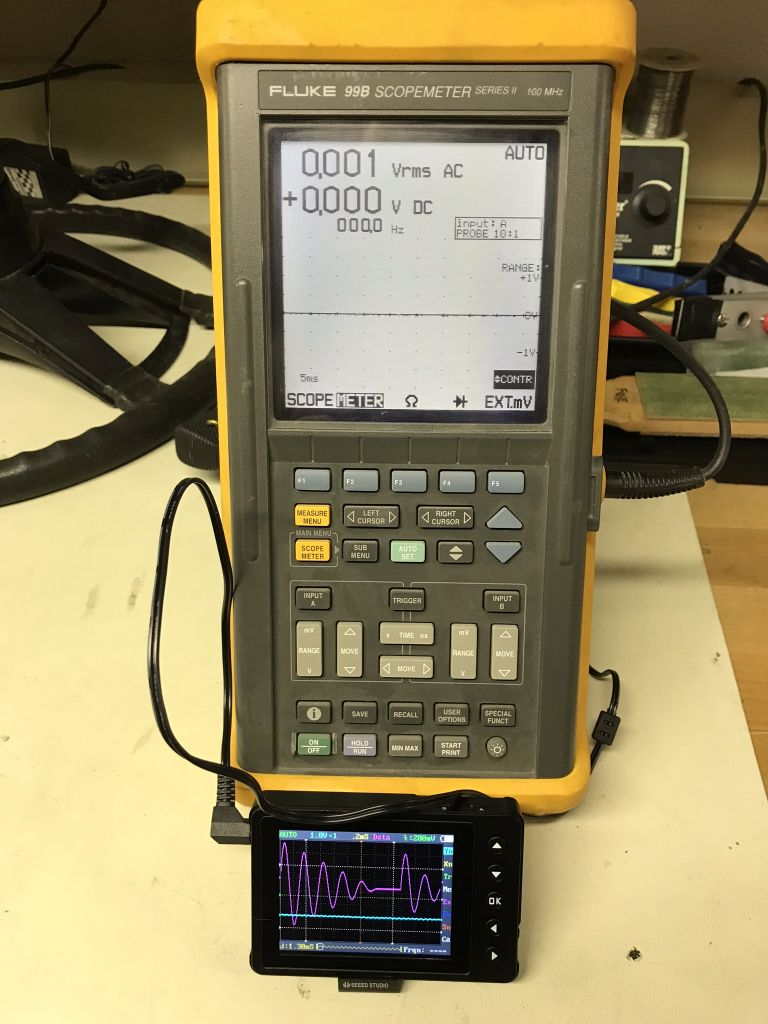 Not an instrument grade oscilloscope but a compact way to confirm sensor behavior. Cheers, Scott |
|
|
|
| Amenson |
Nov 12 2017, 10:33 PM
Post
#1034
|
|
That's opposite lock!! Group: Members Posts: 645 Joined: 27-May 05 From: Dublin, OH Member No.: 4,154 Region Association: None |
Stephen stopped by on Friday and delivered the new dash pieces so I pulled the existing one, installed the stock one and fit the 911 style dash top.
I fit them together off the car to check for issues. Good thing that I did because the center mounting hole is shifted to use another hole that needed to be enlarged. 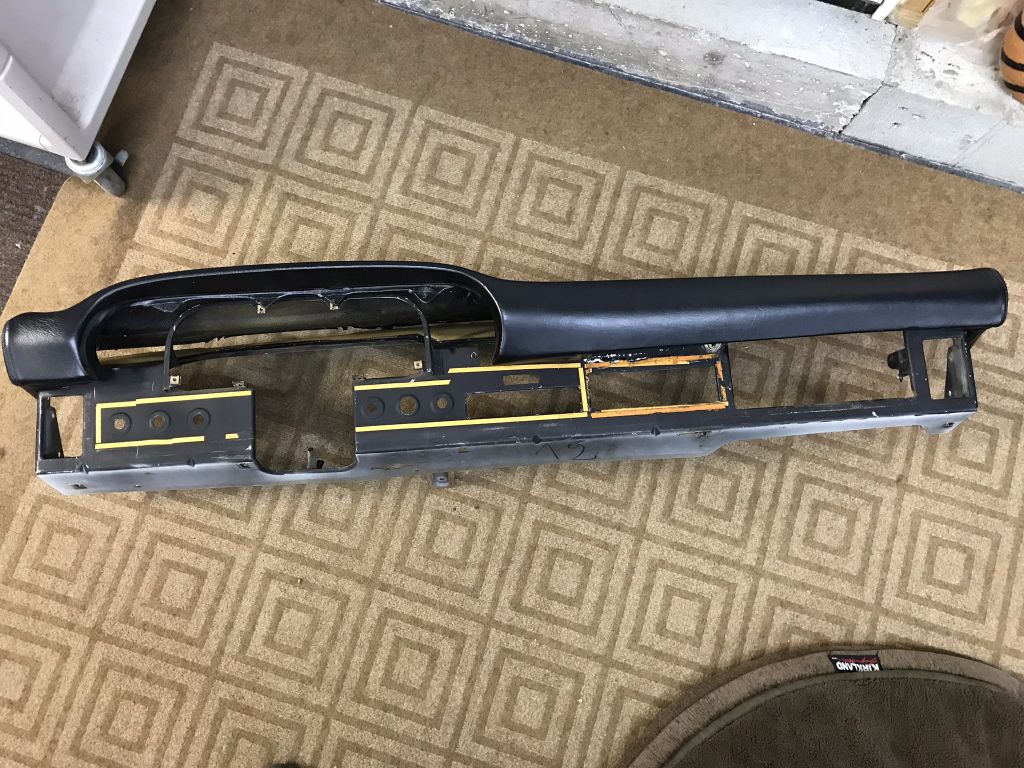 Back to stock.  OK not really.  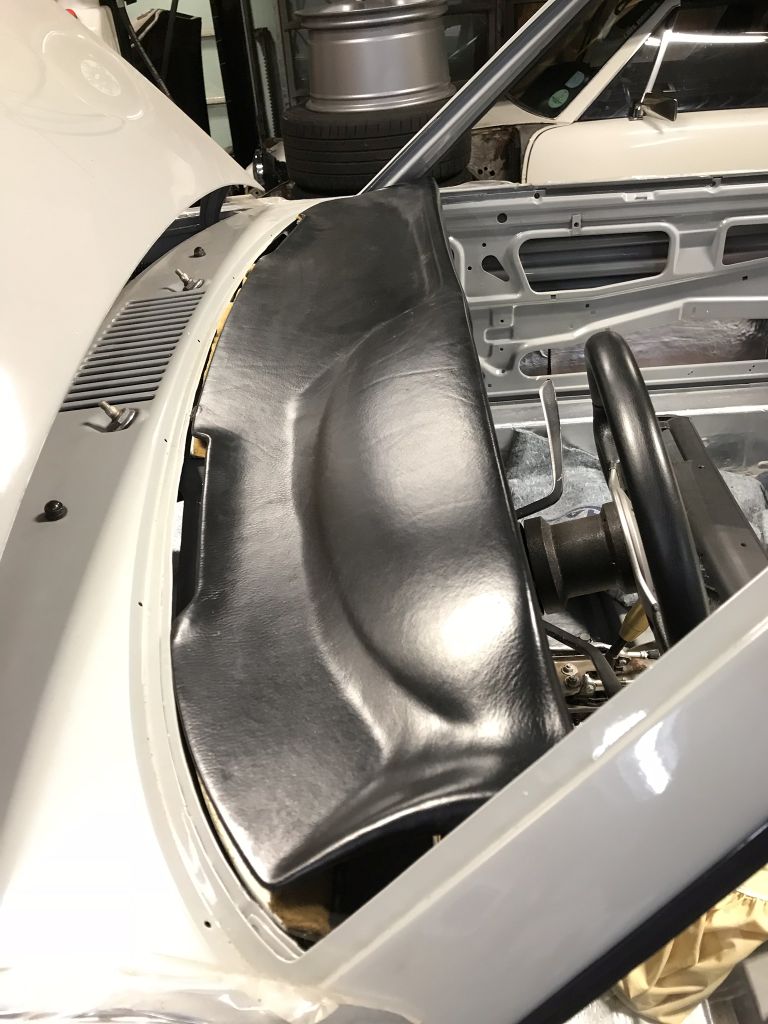 Then I did this....check the PorSTI build for the background. 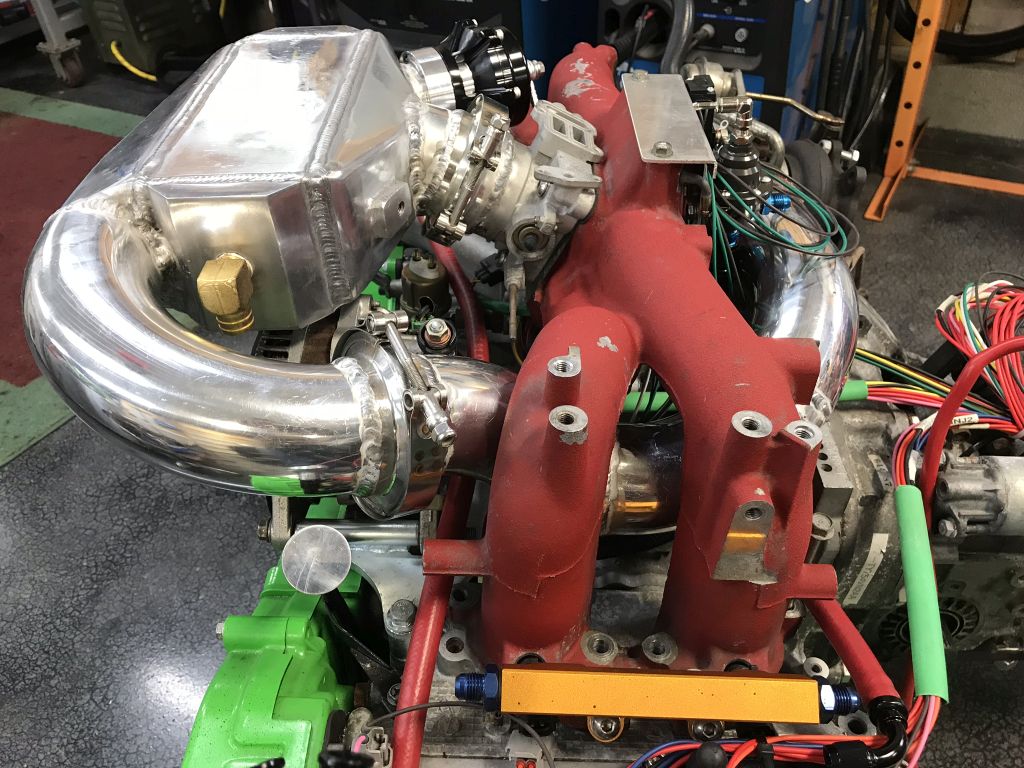 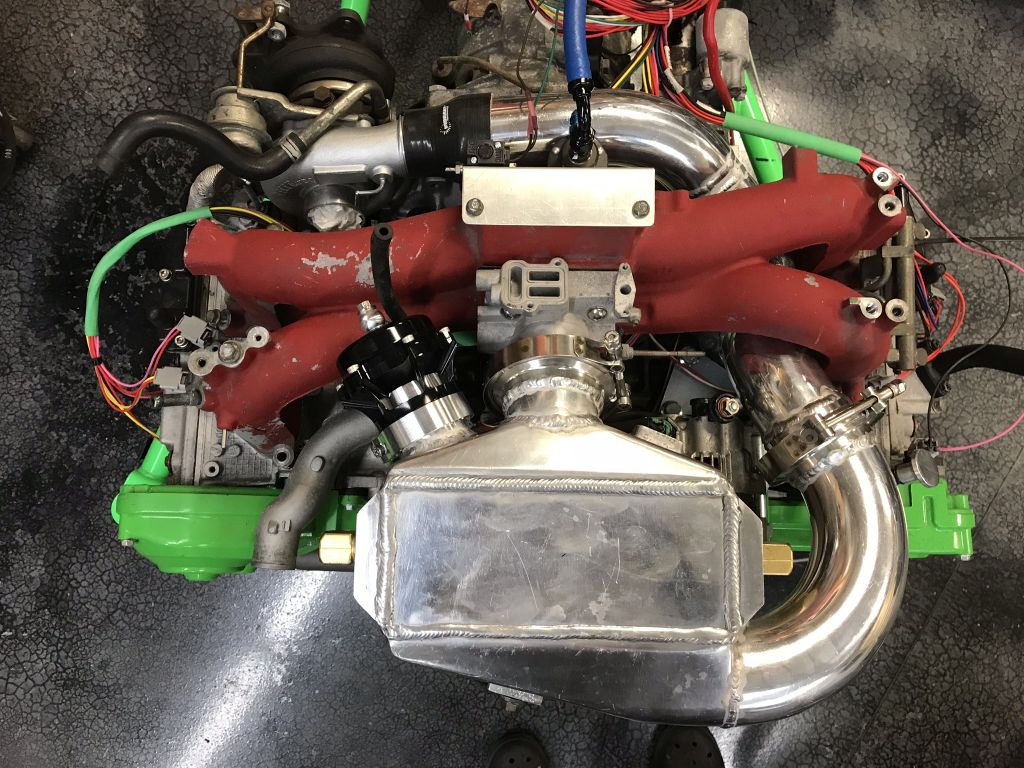 Not only does it look better, it eliminates the need to slot the middle mounting holes when rotating the upper part of the intake.  Tom, I am thinking about a proposal. I'll send an email... Cheers, Scott |
|
|
|
| theer |
Nov 12 2017, 11:00 PM
Post
#1035
|
|
Senior Member Group: Members Posts: 692 Joined: 31-July 15 From: Dover, MA Member No.: 19,014 Region Association: North East States |
Whatcha got in mind, Scott?
|
|
|
|
| 914forme |
Nov 13 2017, 12:04 PM
Post
#1036
|
|
Times a wastin', get wrenchin'! Group: Members Posts: 3,896 Joined: 24-July 04 From: Dayton, Ohio Member No.: 2,388 Region Association: None |
Nice progress I like it.
|
|
|
|
| Amenson |
Nov 30 2017, 09:18 PM
Post
#1037
|
|
That's opposite lock!! Group: Members Posts: 645 Joined: 27-May 05 From: Dublin, OH Member No.: 4,154 Region Association: None |
Time for a much overdue update. Have been getting a ton of time in the garage but quite busy ouside as well so have not made time to organze pictures.
Here we go.... I talked Tom into going with the JDM manifold and man am I happy I did. The hours to smooth and intigrate it were not planned but well worth it. First off was to add a second lug for the coolant tank. 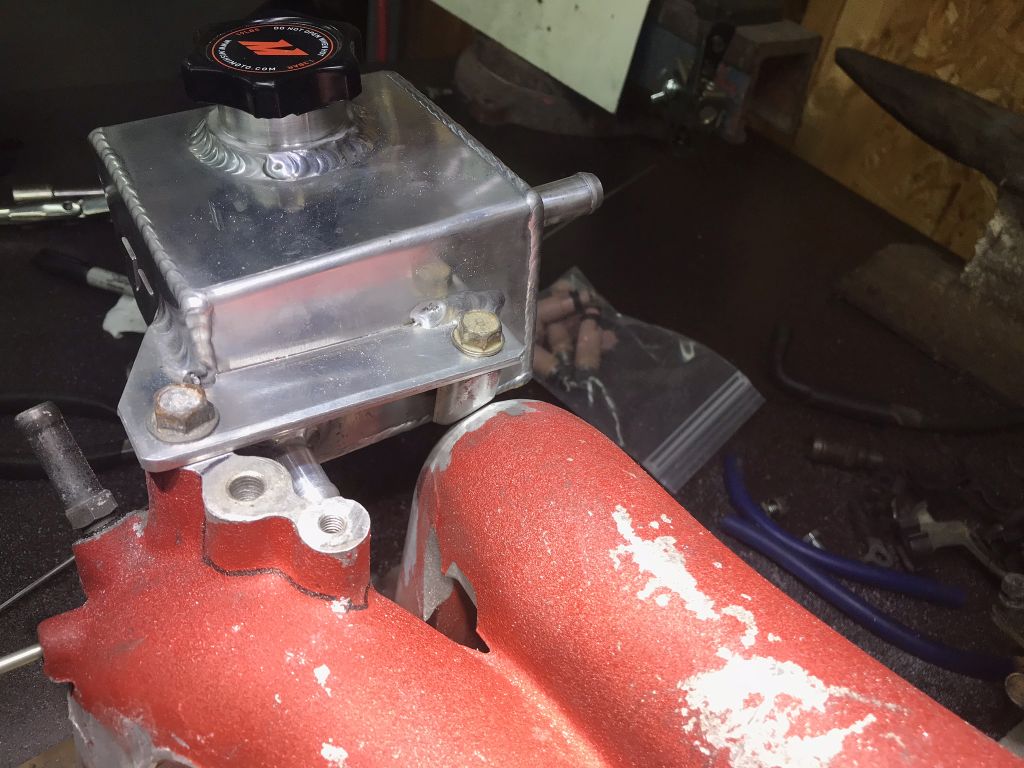 After many hours of cutting/grinding/welding... 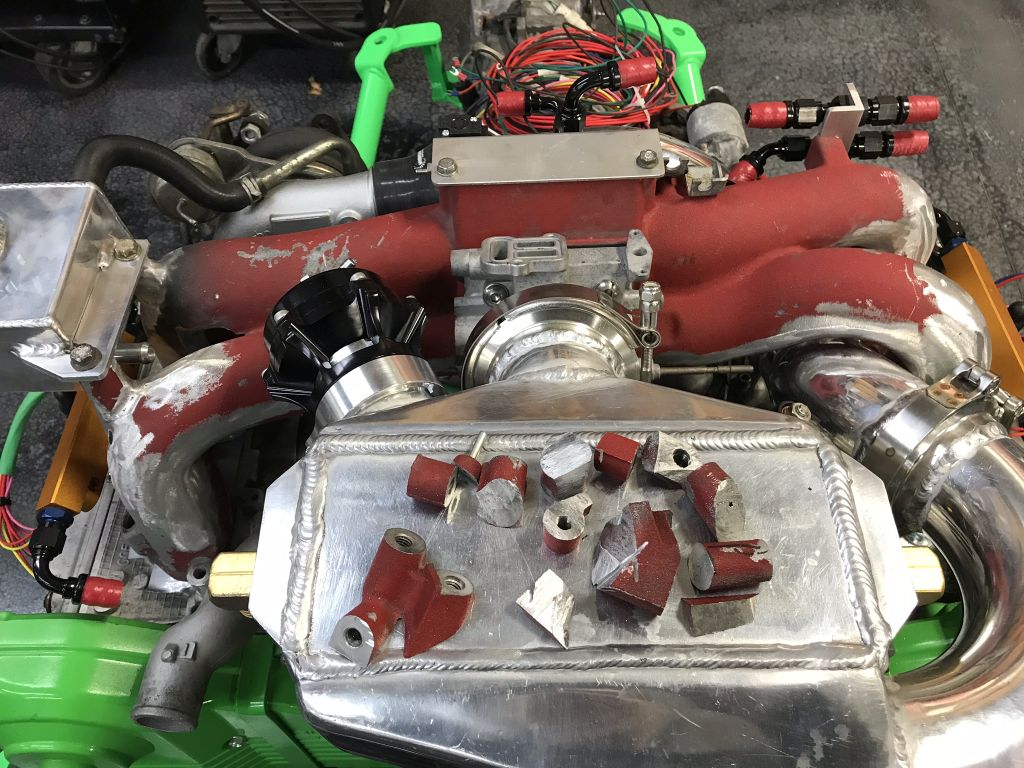 This lug stayed and made a perfect place to mount for the fuel line connections to the chassis lines. 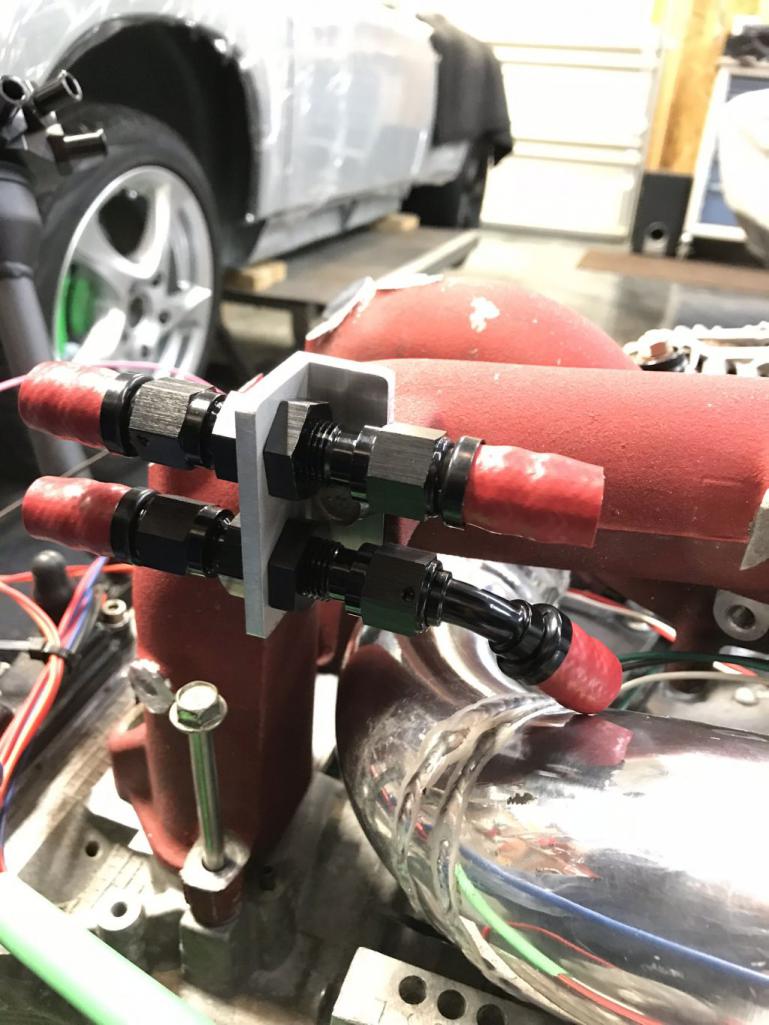 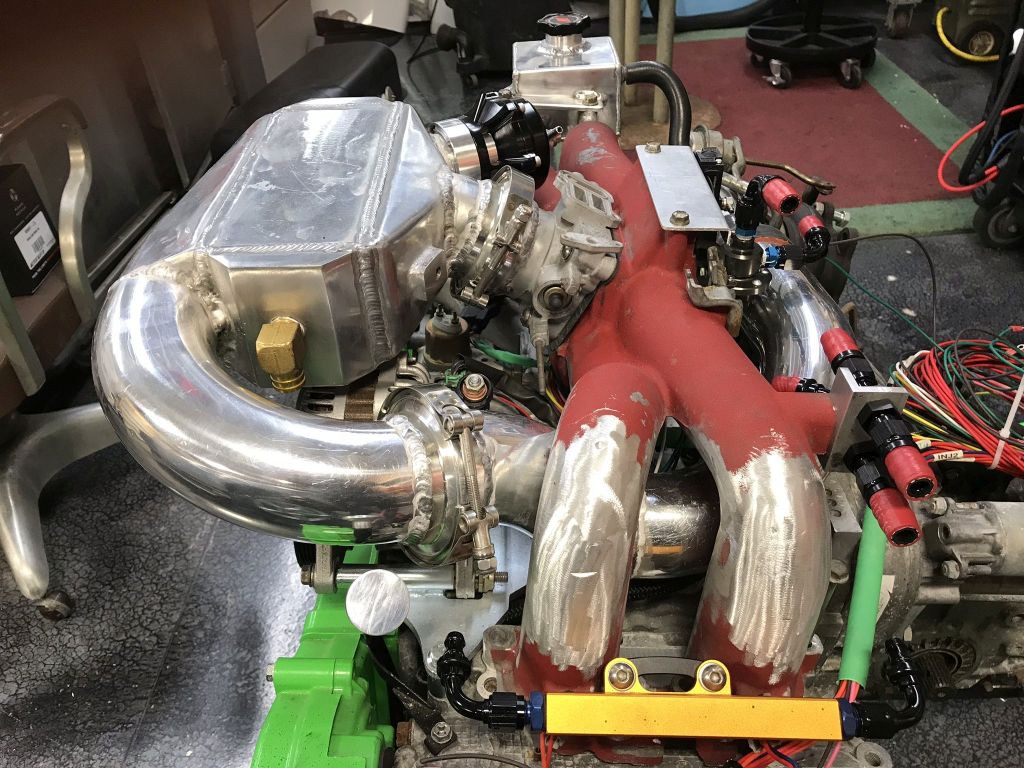 The aftermarket silicon turbo intake had way too many extra connections so I decided to make my own. Unfortunately it was not quite a straight shot to the turbo. 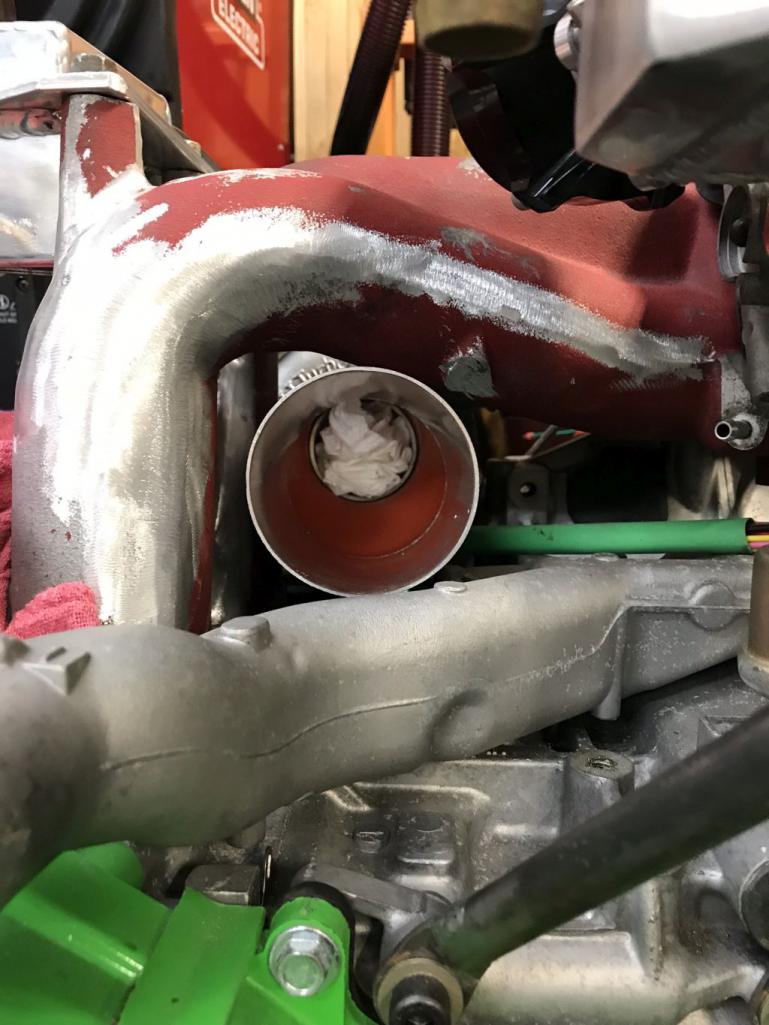 No problem. 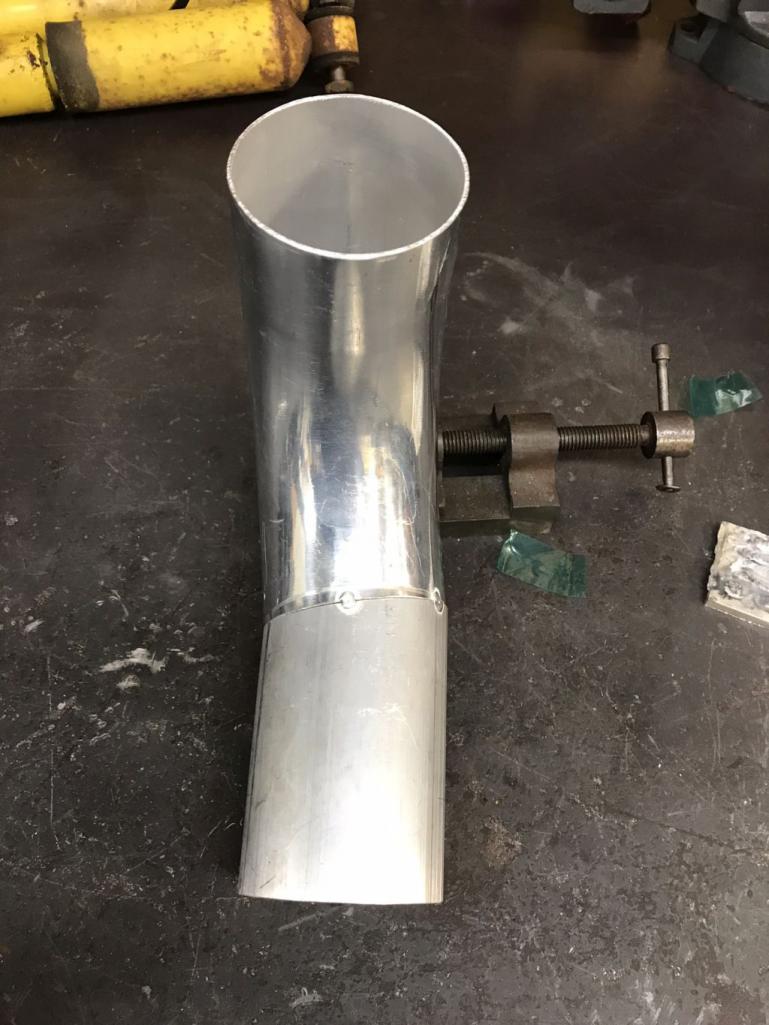 Much better. 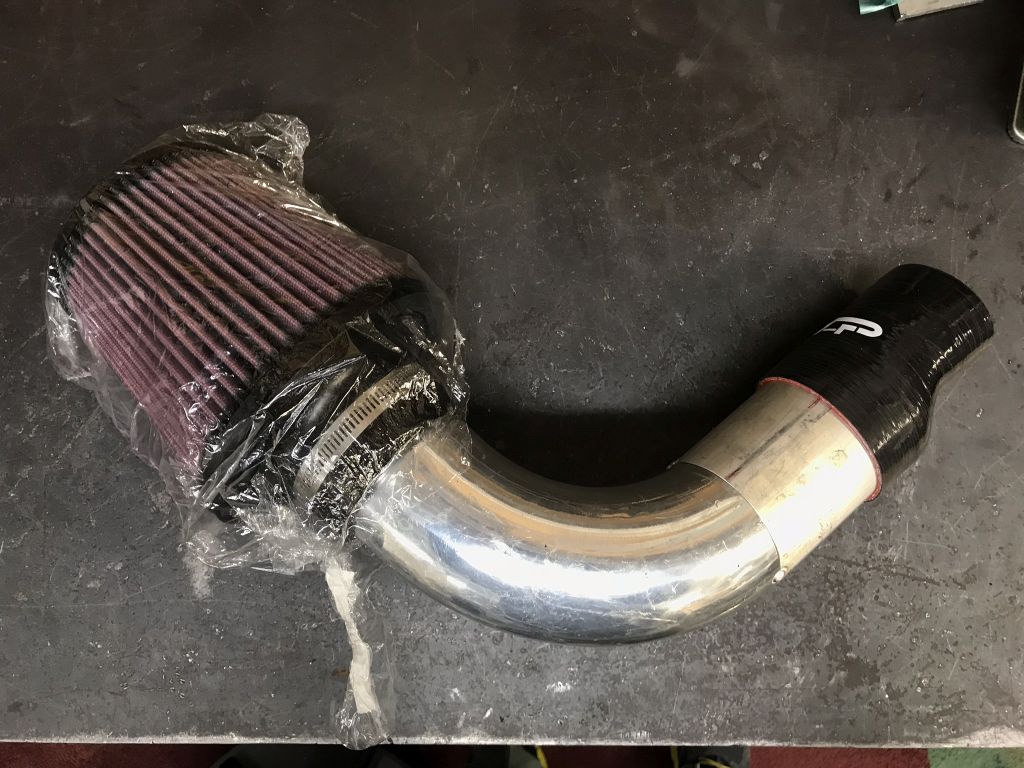 Ooooh 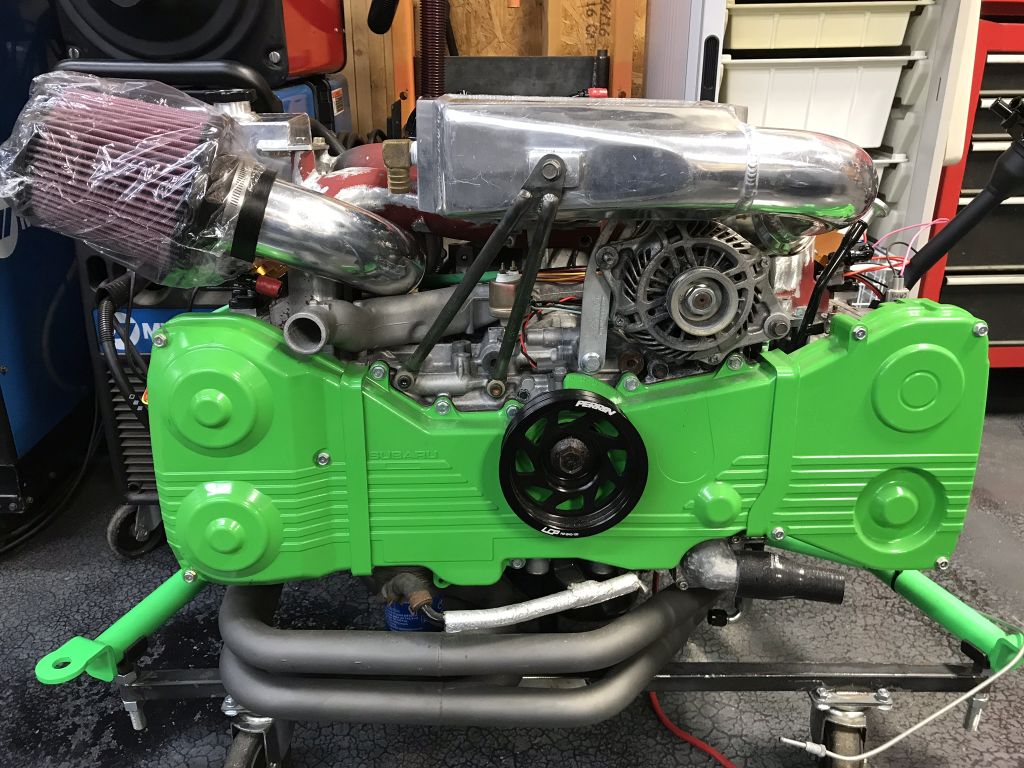 Aaaah 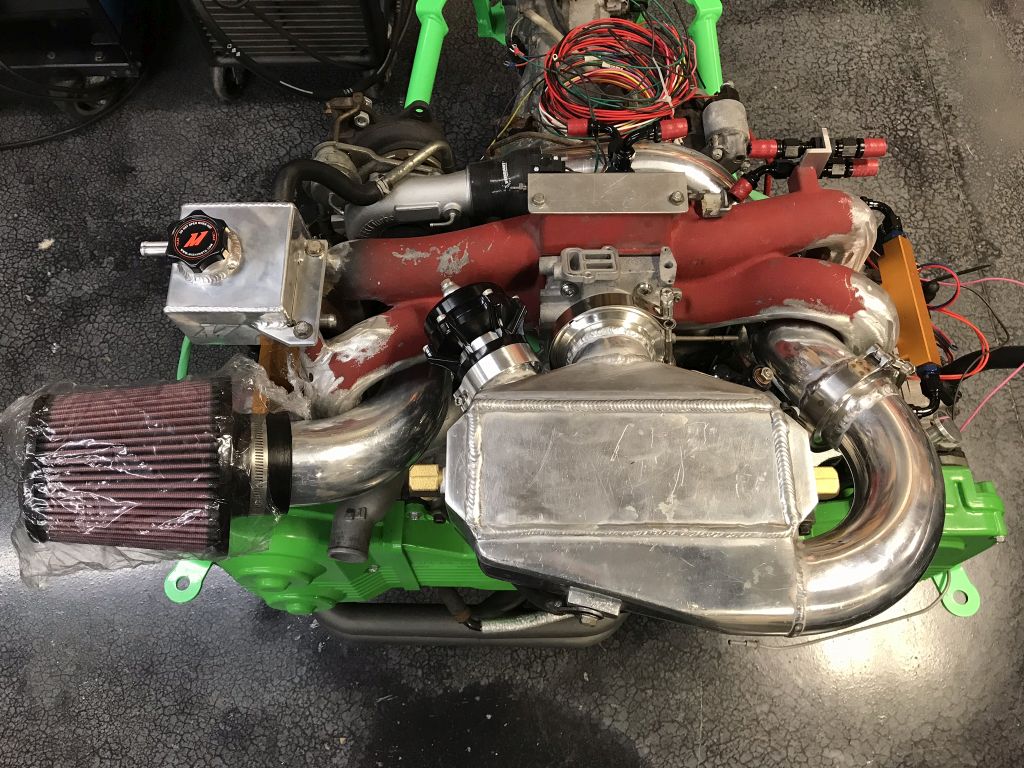 Still need to make a tab and add a lug to the intake to support it. Cheers, Scott |
|
|
|
| Amenson |
Nov 30 2017, 09:30 PM
Post
#1038
|
|
That's opposite lock!! Group: Members Posts: 645 Joined: 27-May 05 From: Dublin, OH Member No.: 4,154 Region Association: None |
Also worked on the chassis.
Swapped out the oversized spings for the springs I pulled from Porsti when I installed the coil overs. Also threw on the tie downs. 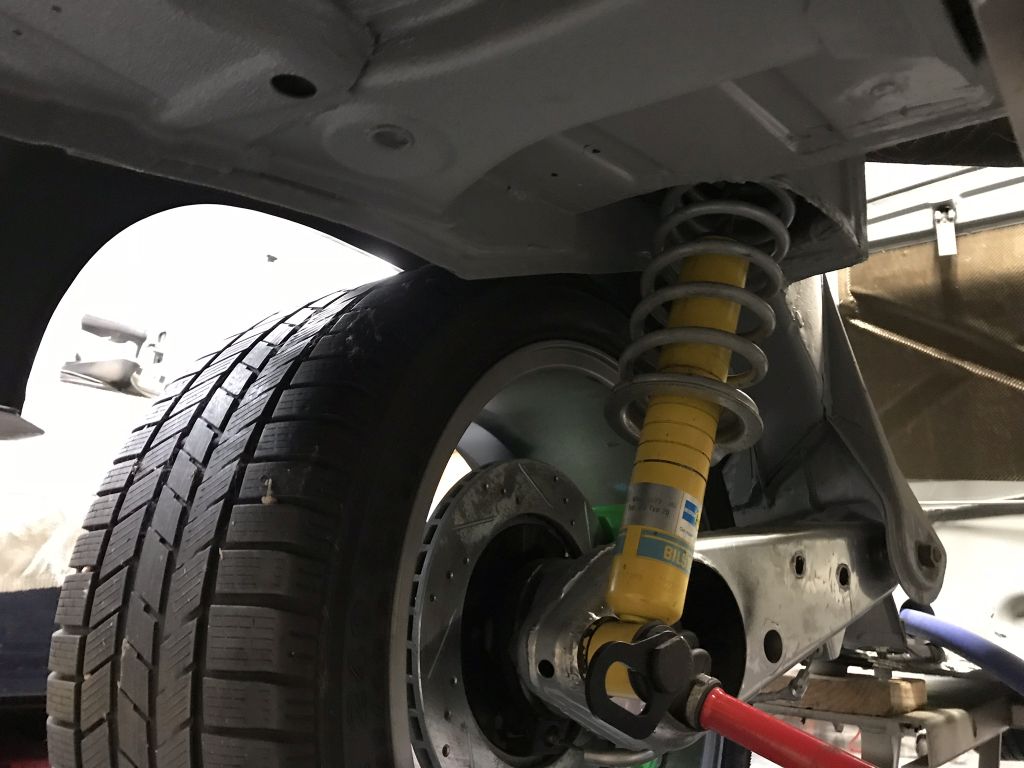 Was going to install the windshield while I had extra hands around the garage but managed to break 2 of the trim clips. Those things are a bugger to install. 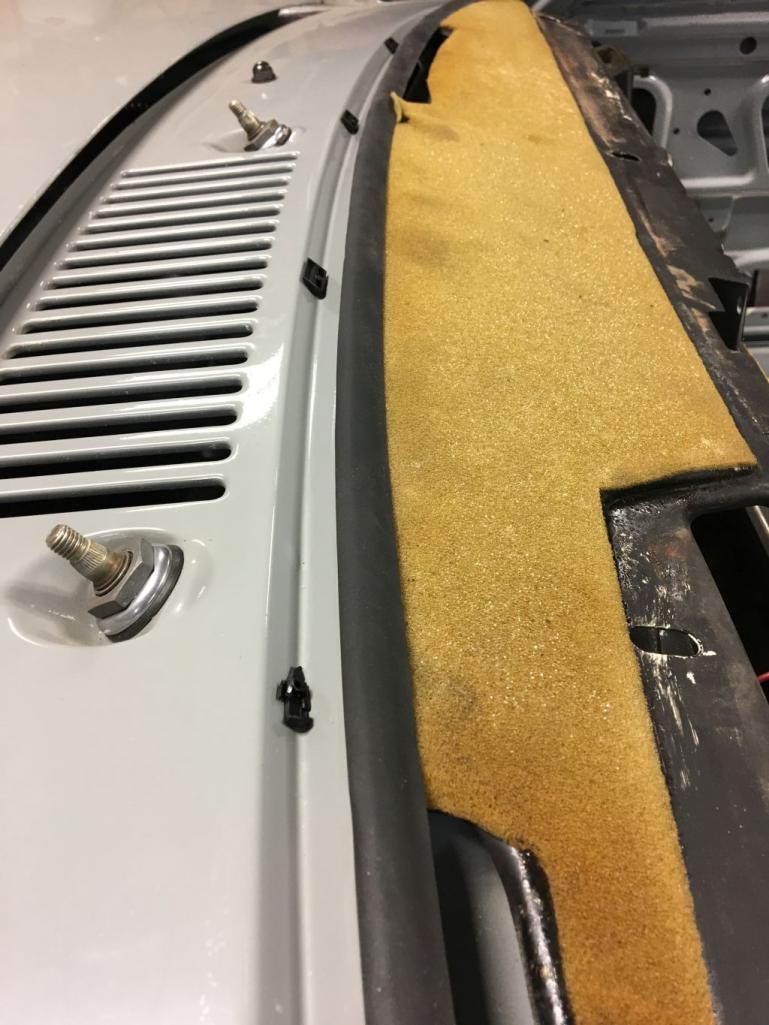 Removed the extra stuff coming trough the firewall. Will cut out the shift rod support also. Then everything will be filled and properly placed holes added. Removed the wiley brake and clutch lines. New brake line made. 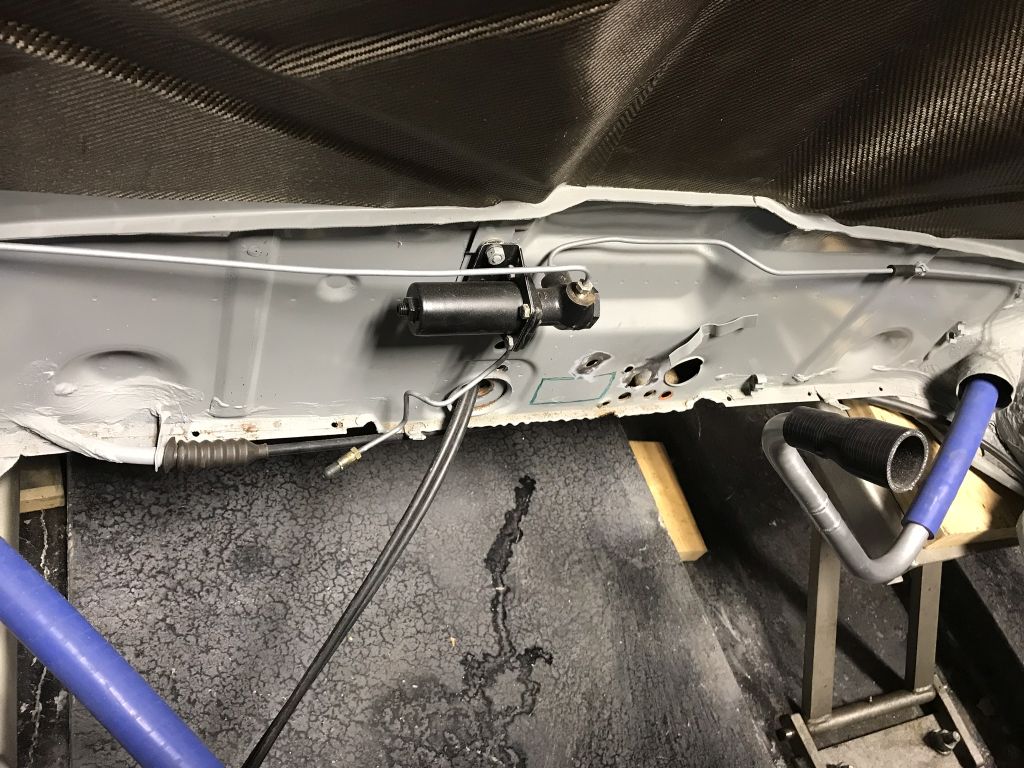 Started mounting the coolant tanks. Battery tray removed and tiny battery mounted in the trunk. 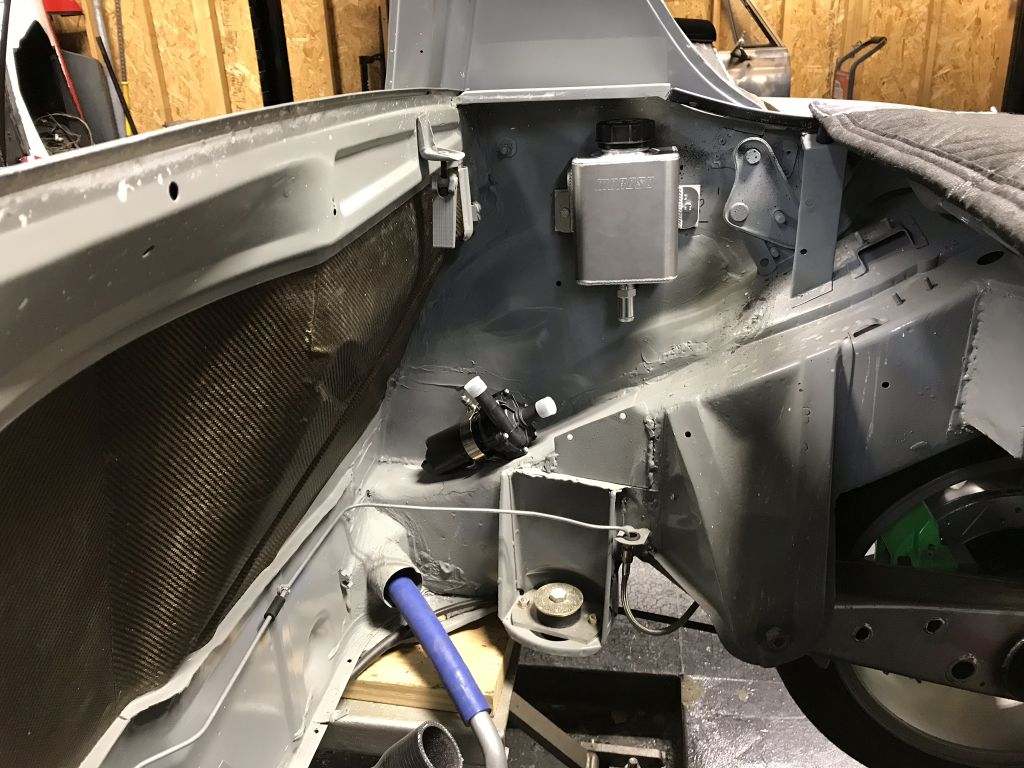 My parents were in down last week and my Father knocked out a ton of work on my much neglected C10. Starting to look like a truck again. 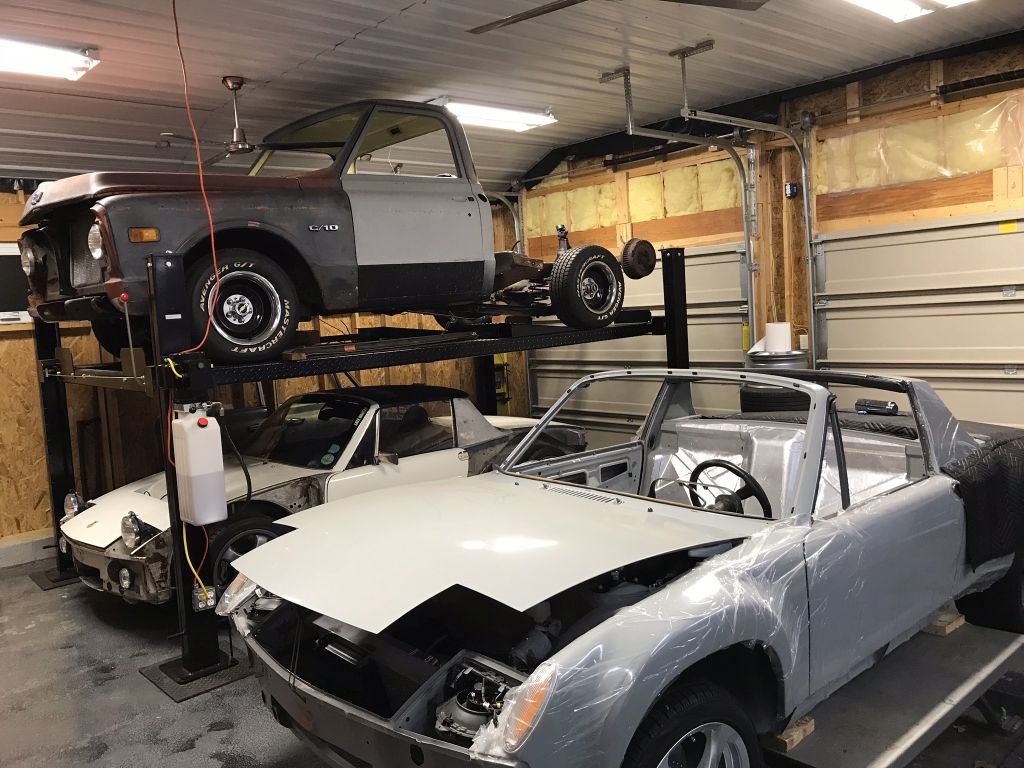 Cheers, Scott |
|
|
|
| effutuo101 |
Dec 1 2017, 09:16 AM
Post
#1039
|
|
Advanced Member Group: Members Posts: 2,737 Joined: 10-April 05 From: Lemon Grove Member No.: 3,914 Region Association: Southern California |
Sweet! Looking good!
|
|
|
|
| theer |
Dec 1 2017, 09:26 AM
Post
#1040
|
|
Senior Member Group: Members Posts: 692 Joined: 31-July 15 From: Dover, MA Member No.: 19,014 Region Association: North East States |
Scott, you are a true artist when it comes to getting all that plumbing to fit. Looks awesome.
Tom |
|
|
|
|
1 User(s) are reading this topic (1 Guests and 0 Anonymous Users)
0 Members:

|
Lo-Fi Version | Time is now: 7th November 2025 - 10:50 AM |
Invision Power Board
v9.1.4 © 2025 IPS, Inc.