|
|
|
Porsche, and the Porsche crest are registered trademarks of Dr. Ing. h.c. F. Porsche AG.
This site is not affiliated with Porsche in any way. Its only purpose is to provide an online forum for car enthusiasts. All other trademarks are property of their respective owners. |
|
|

  |

| effutuo101 |
 Oct 15 2018, 01:27 PM Oct 15 2018, 01:27 PM
Post
#1121
|
|
Advanced Member  Group: Members Posts: 2,738 Joined: 10-April 05 From: Lemon Grove Member No.: 3,914 Region Association: Southern California |
|
   |

 
|
| Amenson |
Oct 21 2018, 07:38 PM
Post
#1122
|
|
That's opposite lock!! Group: Members Posts: 645 Joined: 27-May 05 From: Dublin, OH Member No.: 4,154 Region Association: None |
More plumbing installed.
I had to modify the fuel lines. I set the dimensions for CRF to match what I had on my car which does not use the factory brake proportioning valve. My lines rung right through that area so I had to shorten them and weld on new fittings. Fortunately I had some left over from my lines. A little time on the lathe and welding table and they are correct. 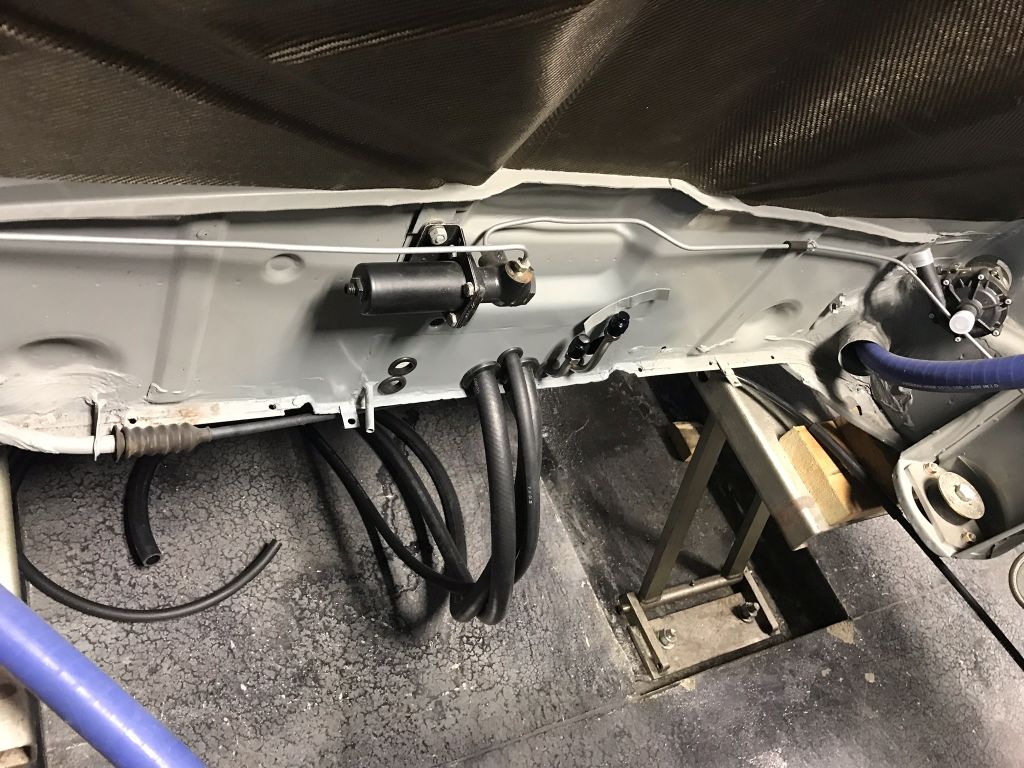 Crappy thing about using the proper sized grommets is that the tube is tight to pull through. So nice though... 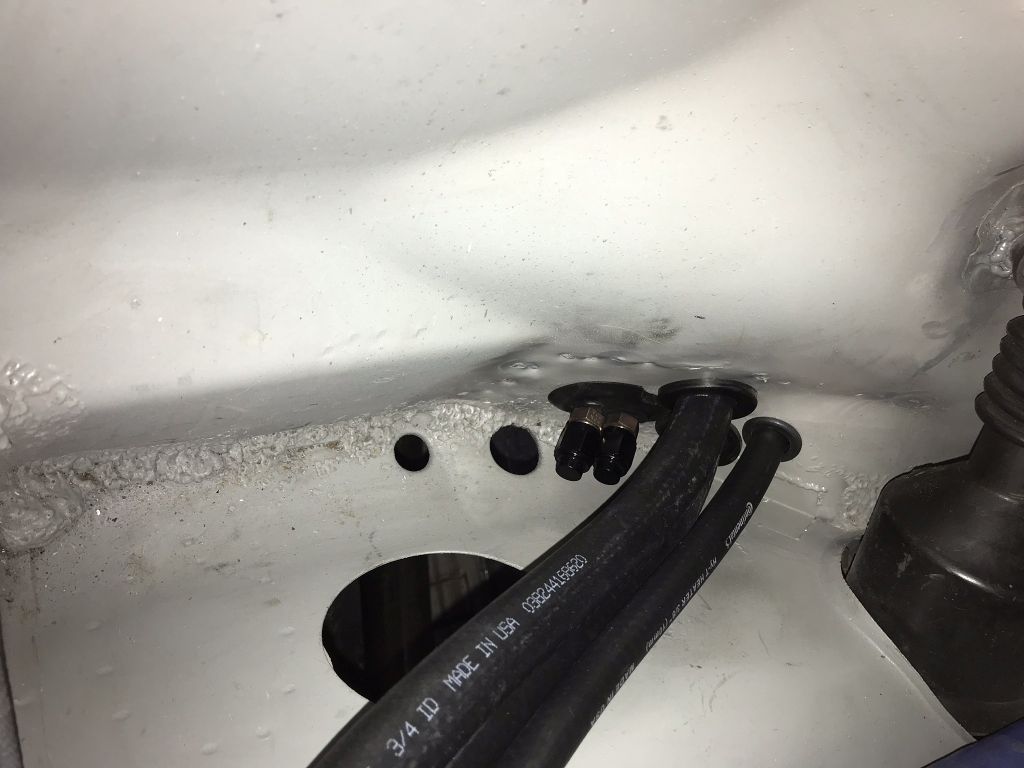 I also cleaned up the rear of the floor pan where the edge was goop welded. It was a bit too close to my work and could have been thought to have been something that I did...now it is and is done properly. |
|
|
|
| CptTripps |
Oct 22 2018, 11:36 AM
Post
#1123
|
|
:: Punch and Pie :: Group: Members Posts: 3,586 Joined: 26-December 04 From: Tuscaloosa, AL and Akron, OH Member No.: 3,342 Region Association: Upper MidWest |
I'm absolutely loving the progress. You're crushing it, Scott. So many little things that were bothering me, are bothering you too...except you have the ability to actually fix them.
Can't wait to see this thing on the road. |
|
|
|
| Amenson |
Jan 1 2019, 10:09 PM
Post
#1124
|
|
That's opposite lock!! Group: Members Posts: 645 Joined: 27-May 05 From: Dublin, OH Member No.: 4,154 Region Association: None |
Been a while since an update...havn't fallen off the earth, just not very active online.
I did take a couple of weeks of garage time to make the wife happy and insulate the shop and put up wall covering. I posted a picture on the Porsti build thread. As for progress on Grey, knocking stuff off the list toward road worthyness. A few photogenic updates: Finally got the auxilary fuse/relay box to fit properly. Required quite a bit of reshaping, probably would have been quicker to cut the area out and weld in a flat section pre-cutout for the box. Still needs to be painted. 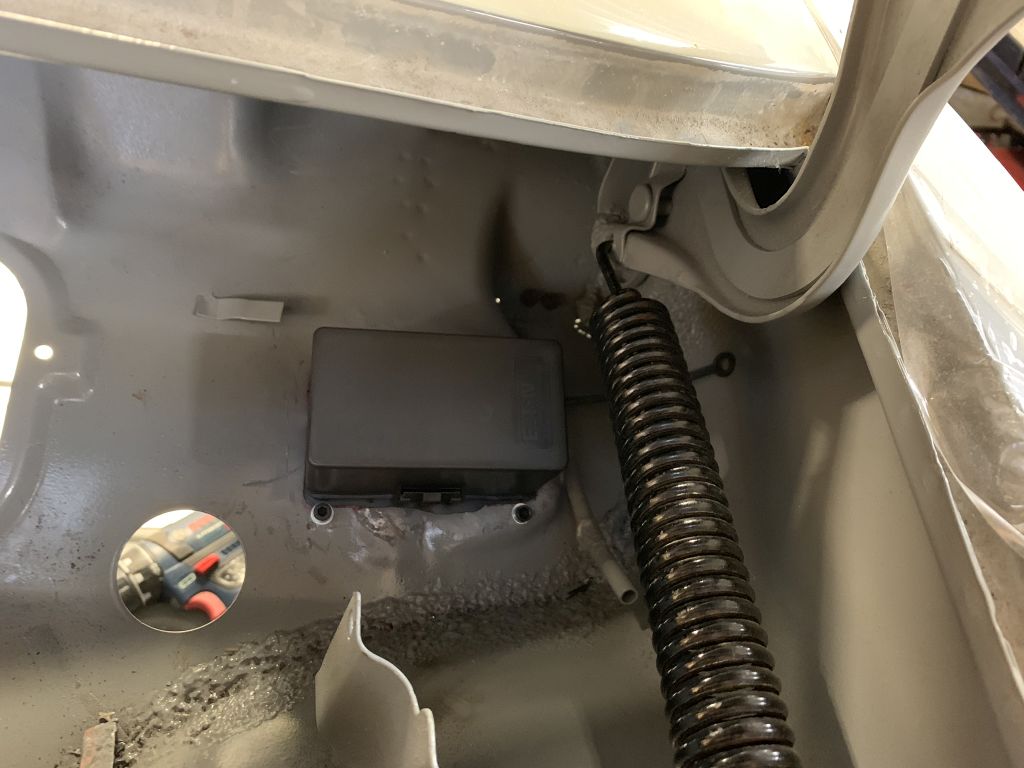 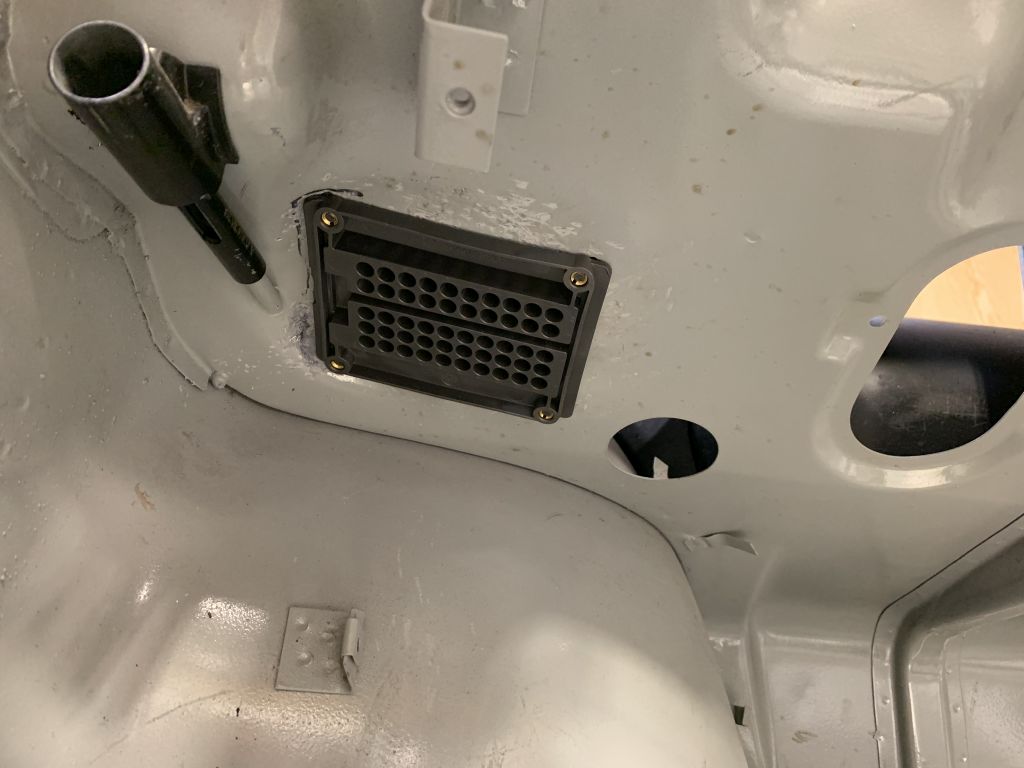 Also got the IC pump mounted and the overflow and IC reservoir modified/mounted. The pump sort of interfered with the bottom battery tray mount that was unnecessary and quite ugly...so I removed it. This opened a huge can of worms due to the less than stellar hell hole repair. For a couple of hours I was seriously contemplating redoing the entire hell hole repair. More than a little cutting/welding/grinding later and the area is presentable. I decided to attach the expansion tank to the IC reservoir which made it impossible to use the inlet I cut it out and plugged the opening (pic pre welding). I also added spacers to the back of the reservoir because during one of Tom's visits he pointed out that it is a bit tight to get to the cap. Still not super convenient but better. 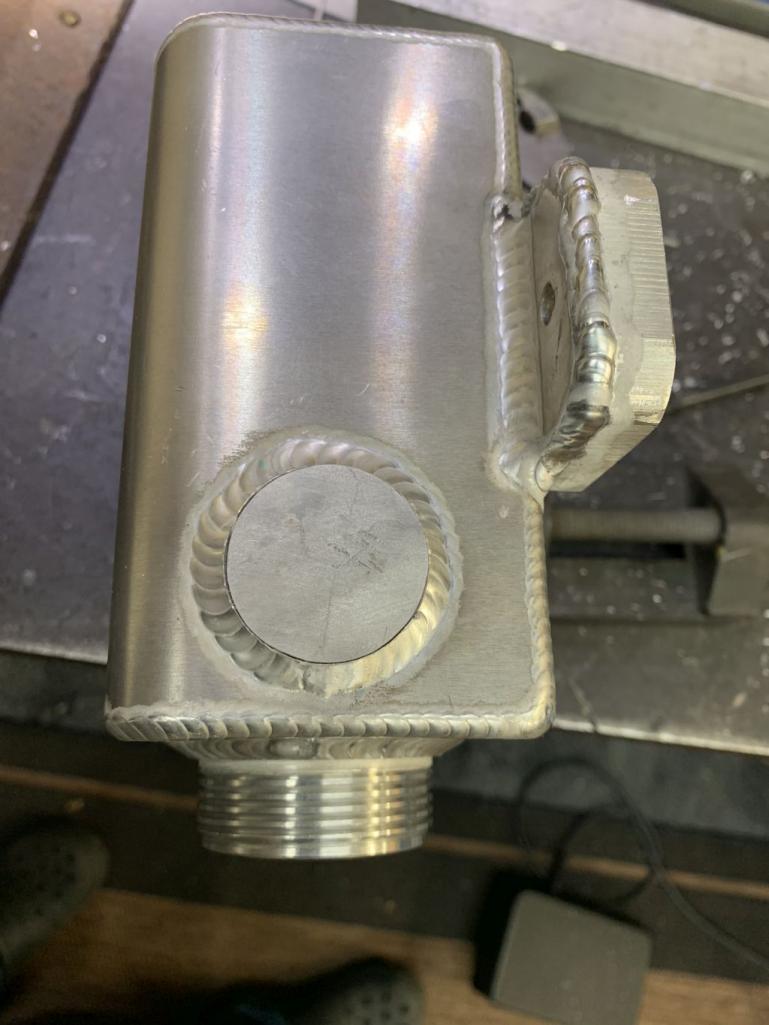 Made some plates to attach the two reservoirs. The expansion tank was chromed so I sandblasted it to remove the bulk of it. Turned up the cleaning a bit on the TIG and it welded pretty well. 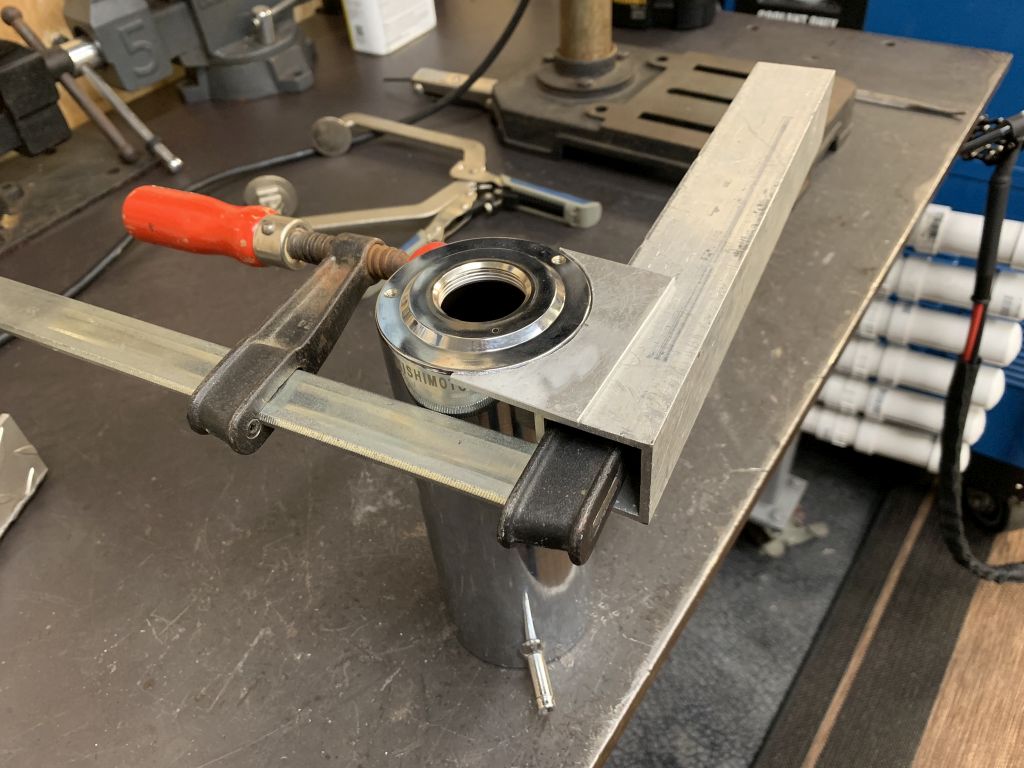 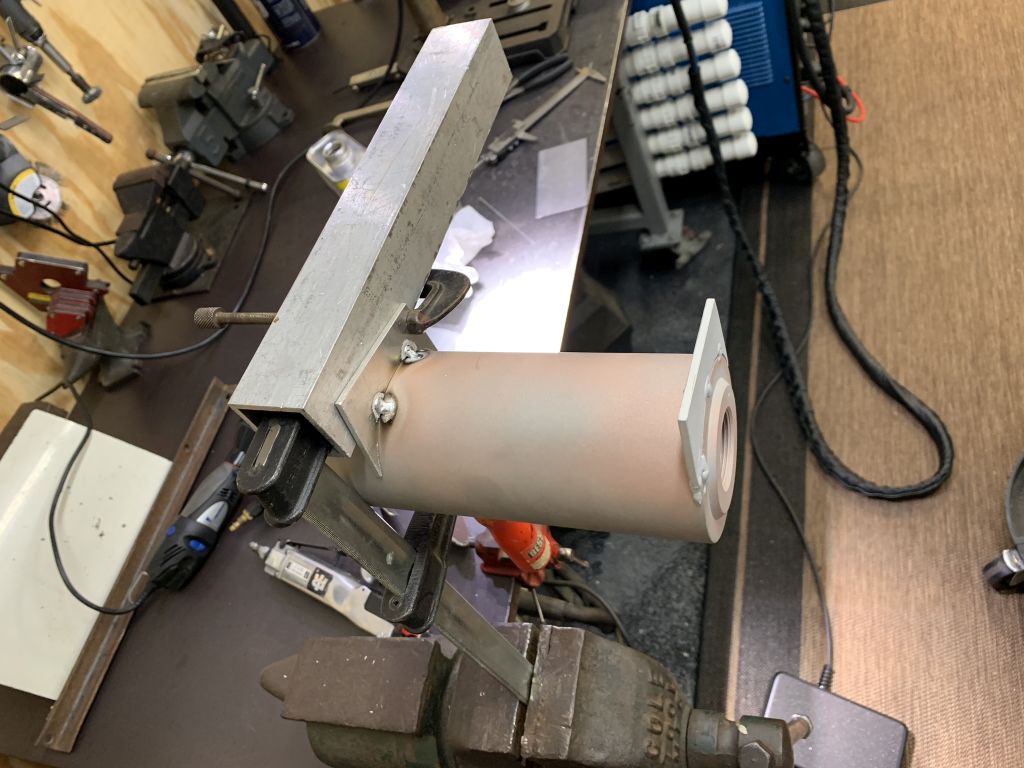 I still need to add the inlet bung and will probably put a braket at the bottom of the expansion tank. 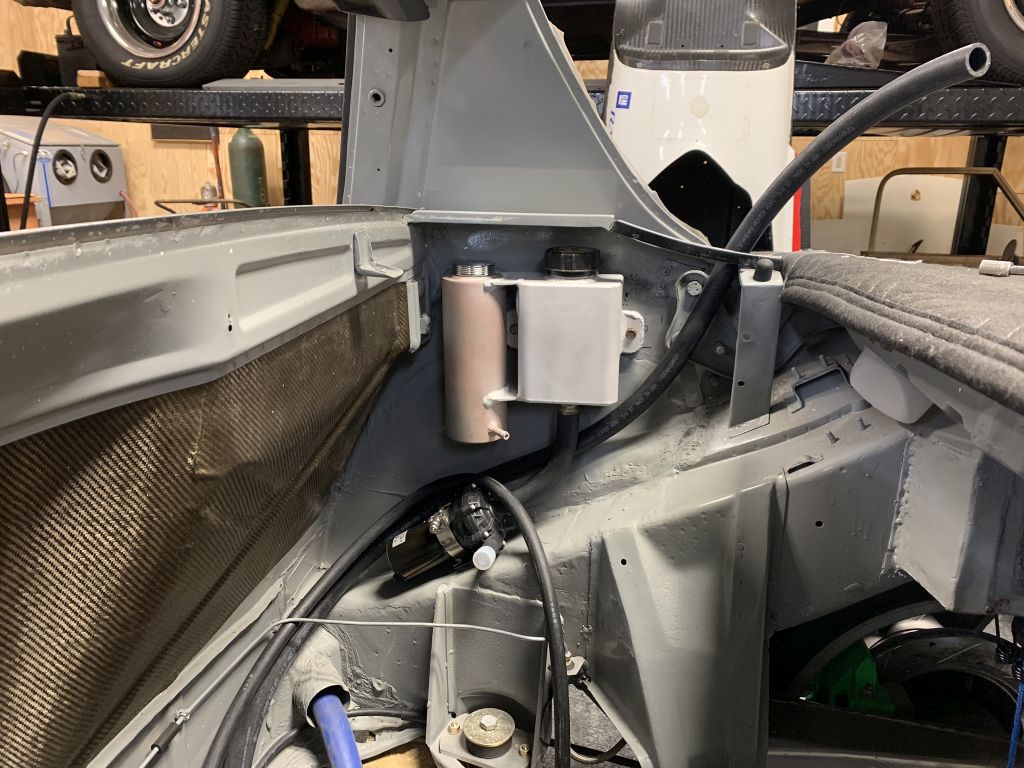 Happy New Year (IMG:style_emoticons/default/beer.gif) Scott |
|
|
|
| theer |
Jan 2 2019, 10:28 AM
Post
#1125
|
|
Senior Member Group: Members Posts: 692 Joined: 31-July 15 From: Dover, MA Member No.: 19,014 Region Association: North East States |
Happy New Year, Scott!
Garage looks great.. Grey is coming together nicely... looks as if 2019 is going to be an excellent year. Tom (IMG:style_emoticons/default/beerchug.gif) |
|
|
|
| Amenson |
Jan 13 2019, 10:06 PM
Post
#1126
|
|
That's opposite lock!! Group: Members Posts: 645 Joined: 27-May 05 From: Dublin, OH Member No.: 4,154 Region Association: None |
Another big task check off the thist and one that I was avoiding.
Filled all of the unnecessary holes in the trunk (and one that I buggered up installing the batter box). 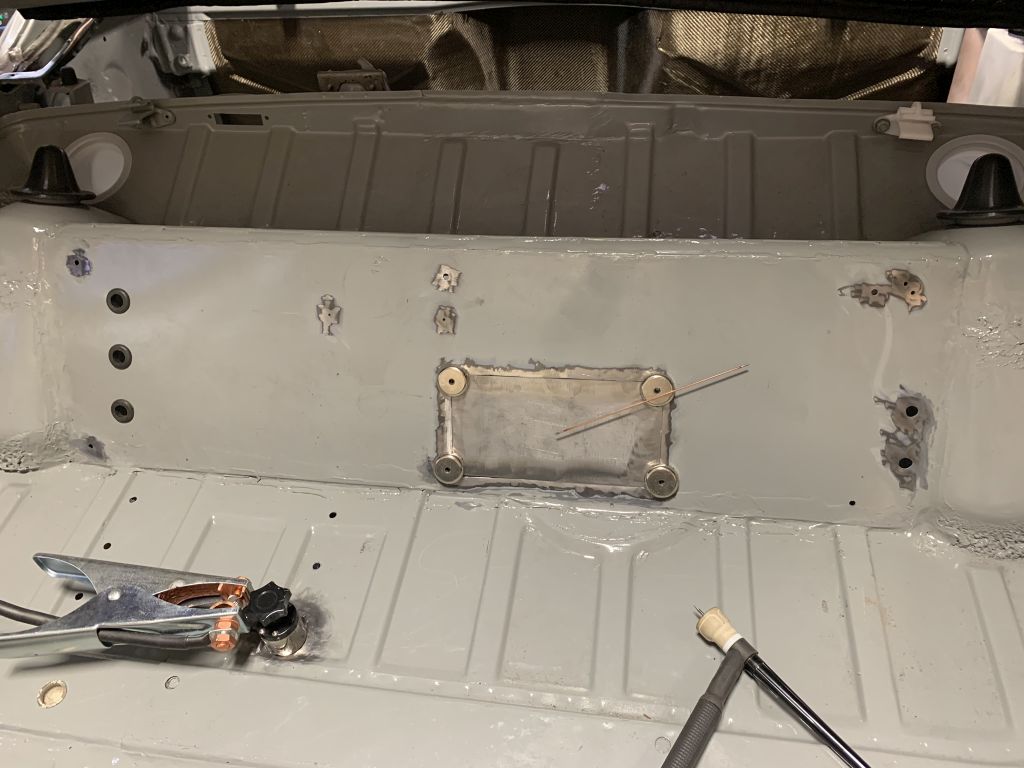 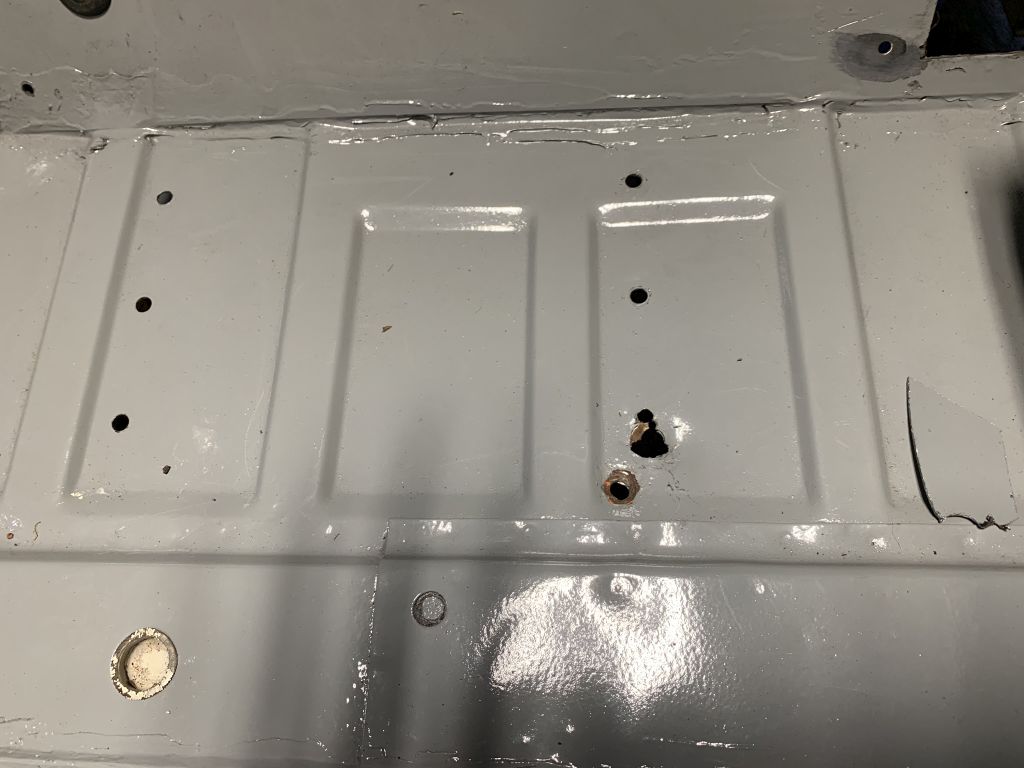 So much better, and got the the bulkhead connectors installed. 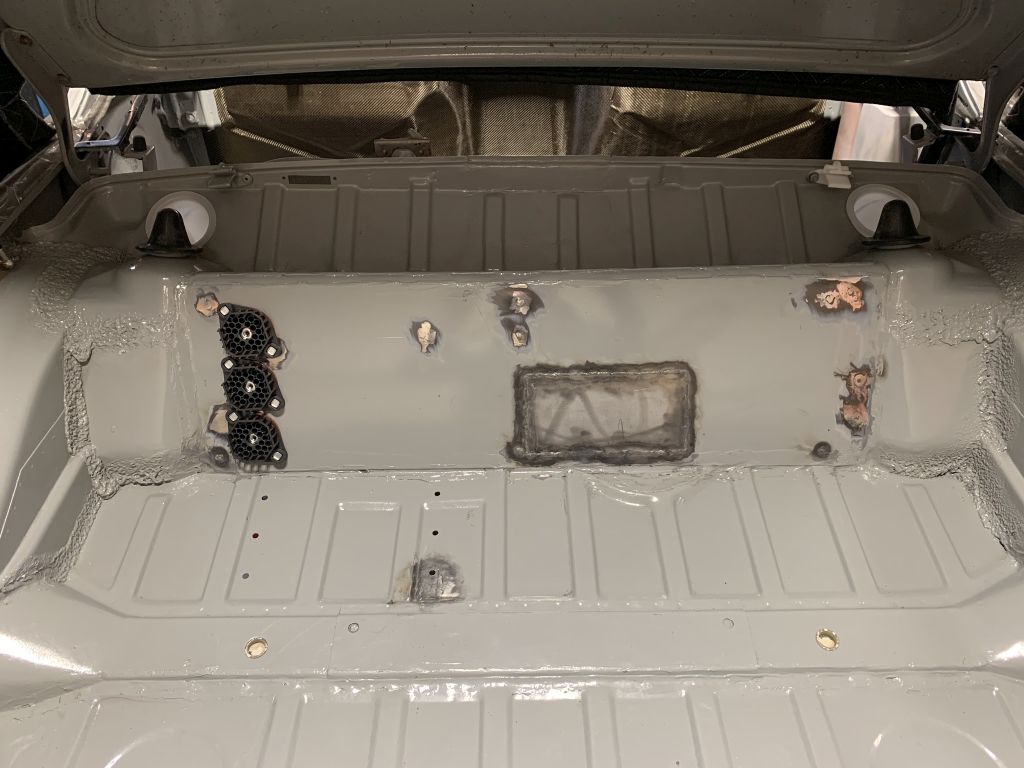 I knew it was going to be close fitting three but it was really close. 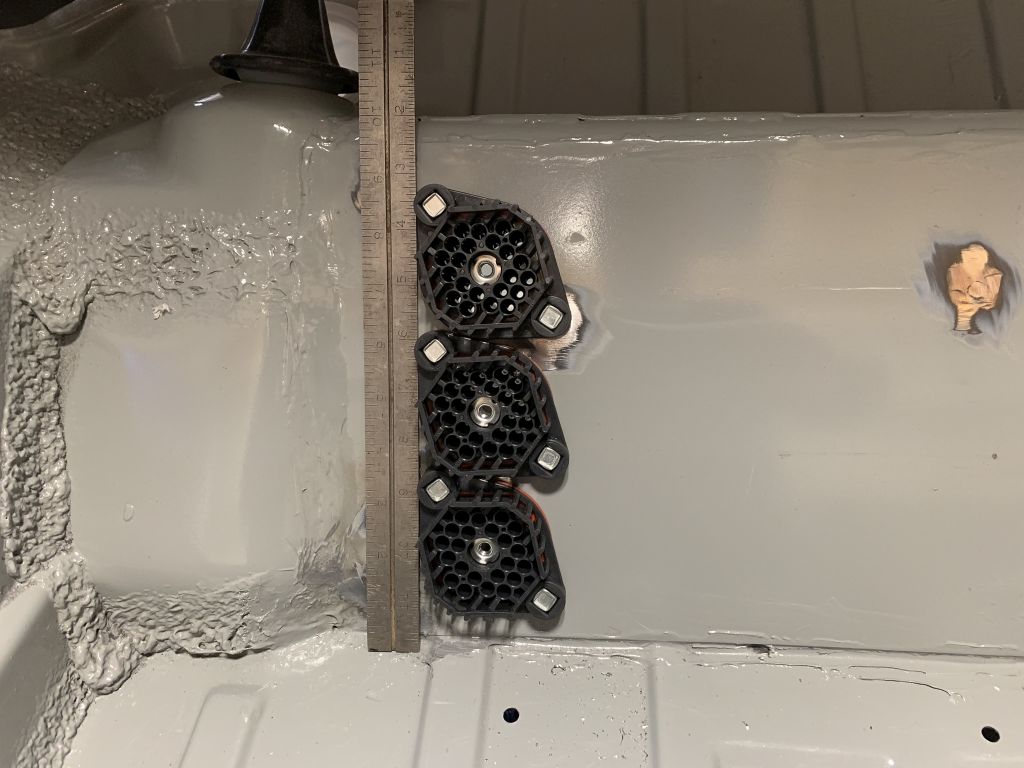 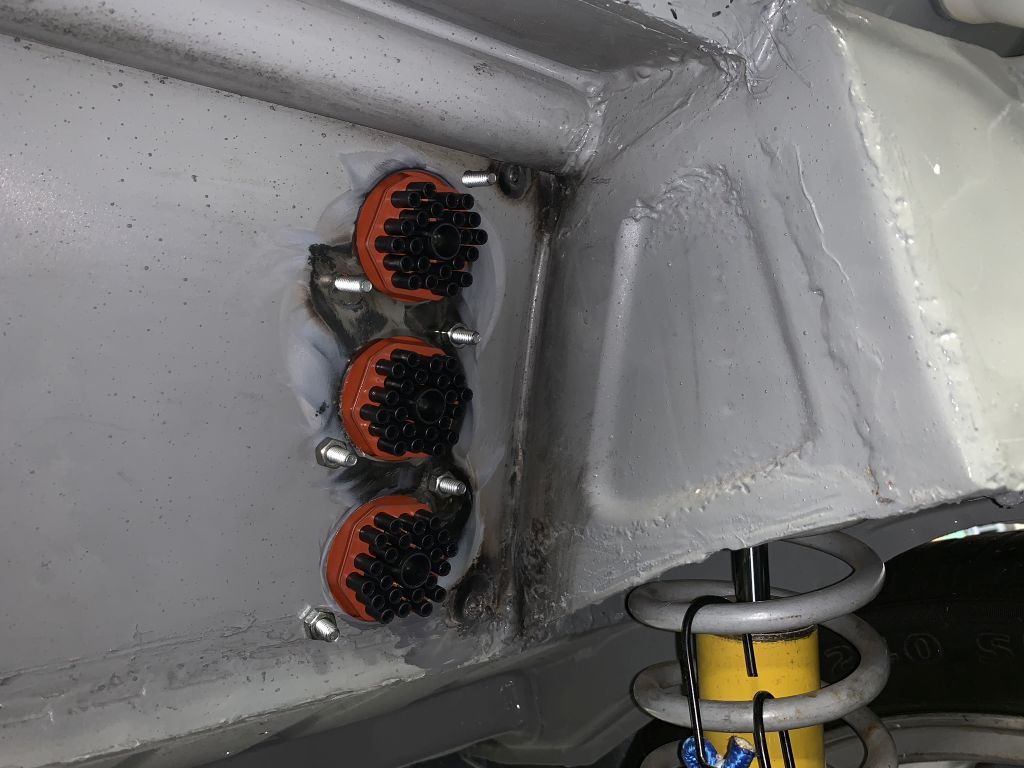 I bit more smoothing and then paint. |
|
|
|
| CptTripps |
Jan 15 2019, 09:07 AM
Post
#1127
|
|
:: Punch and Pie :: Group: Members Posts: 3,586 Joined: 26-December 04 From: Tuscaloosa, AL and Akron, OH Member No.: 3,342 Region Association: Upper MidWest |
I'm assuming that you're still putting the computer back there. Those connectors will be brilliant for that.
Sorry about the big hole. I later had the idea to put the ATW intercooler back there for some dumb reason. That one is on me! |
|
|
|
| Amenson |
Jan 17 2019, 09:56 AM
Post
#1128
|
|
That's opposite lock!! Group: Members Posts: 645 Joined: 27-May 05 From: Dublin, OH Member No.: 4,154 Region Association: None |
QUOTE(CptTripps @ Jan 15 2019, 10:07 AM)  I'm assuming that you're still putting the computer back there. Those connectors will be brilliant for that. Sorry about the big hole. I later had the idea to put the ATW intercooler back there for some dumb reason. That one is on me! ECU will go pretty much where you had it. As for the big hole...decisions like that are forced when trying to do complex plumbing using only silicon elbows and chunks of tube. It is like it never happened now! |
|
|
|
| Amenson |
Jan 20 2019, 09:50 PM
Post
#1129
|
|
That's opposite lock!! Group: Members Posts: 645 Joined: 27-May 05 From: Dublin, OH Member No.: 4,154 Region Association: None |
Bit of a mixed bag of success this weekend. Was planning to do final assembly of the cooling lines but the step clamps that I ordered arrived as 31.6mm instead of 36.1mm.
Jumped to install the clutch reservoir line. Went in pretty well but tube was a bit loose on the MC fitting so I installed a step clamp for good measure. While I was at it I decided the brake reservoir hose needed them also. Got the clamps slid over from the reservoir side but could not get the tool in to make the crimp. Out comes the MC... 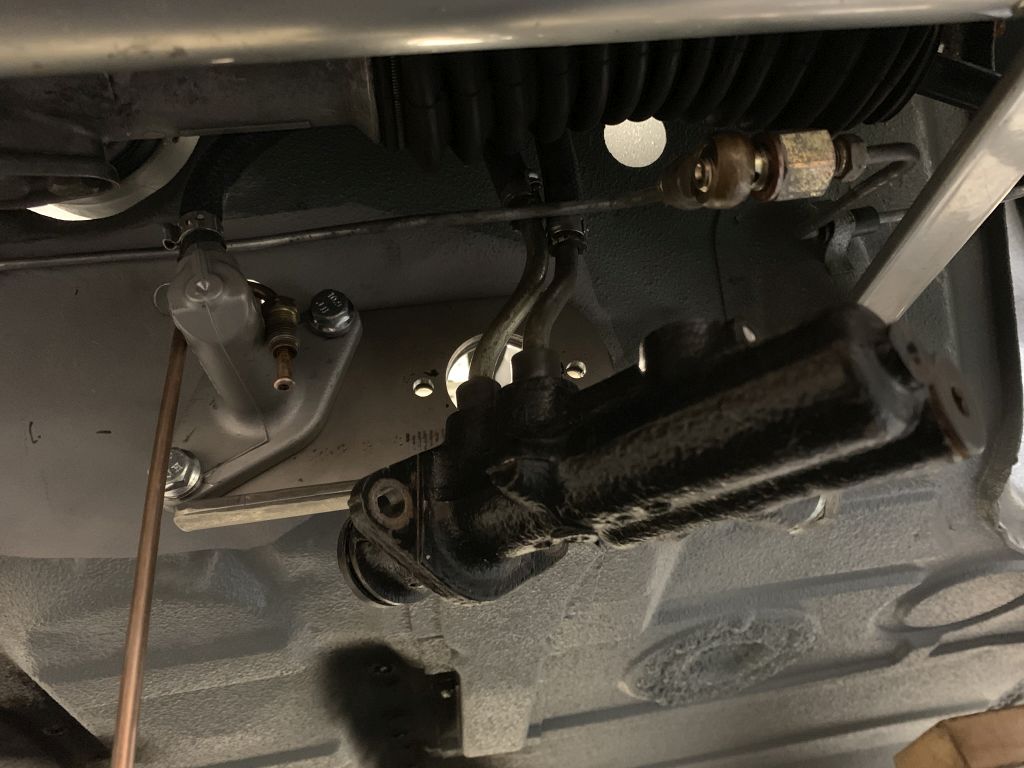 No chance of them leaking or blowing off during pressure bleeding now! 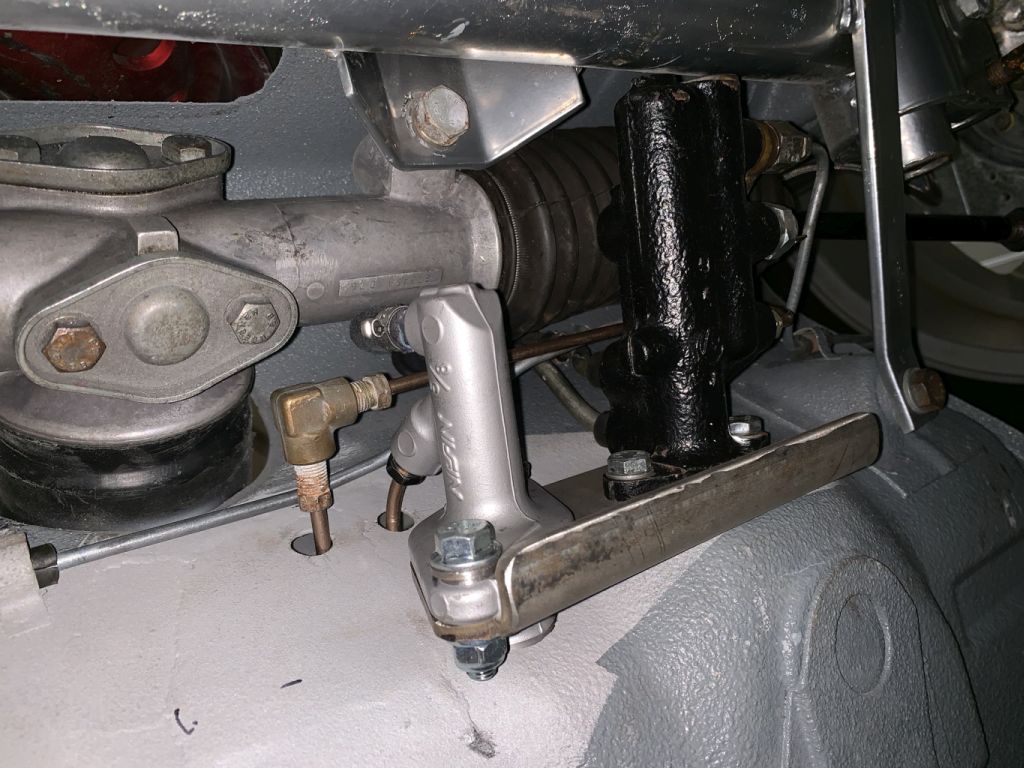 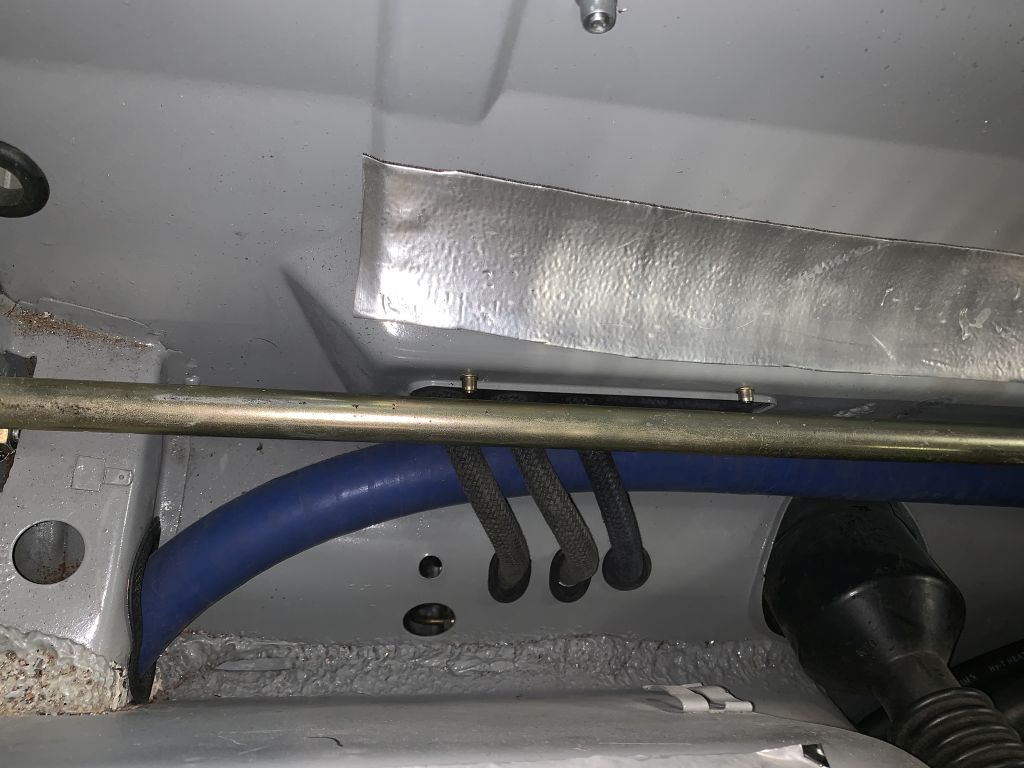 While fussing with the rear springs a while ago I managed to lose one of the big washers. Finally found a replacement and pulled the rear apart to install it. |
|
|
|
| CptTripps |
Jan 22 2019, 12:02 PM
Post
#1130
|
|
:: Punch and Pie :: Group: Members Posts: 3,586 Joined: 26-December 04 From: Tuscaloosa, AL and Akron, OH Member No.: 3,342 Region Association: Upper MidWest |
It's funny, I'm looking at that second picture, and remembering the weekend that my son and I spent cleaning re-building that steering rack. That was the first time I used my soda blaster.
|
|
|
|
| Amenson |
Feb 7 2019, 09:56 PM
Post
#1131
|
|
That's opposite lock!! Group: Members Posts: 645 Joined: 27-May 05 From: Dublin, OH Member No.: 4,154 Region Association: None |
Update from the last two weeks. Two weekends ago I was in Vail so no progress but had a great time. This past weekend was quite productive.
I finished up the trunk. Good amount of grinding and hammering to get it reasonably flat. I am not a huge fan of cut trunks but this doesn't look so bad. 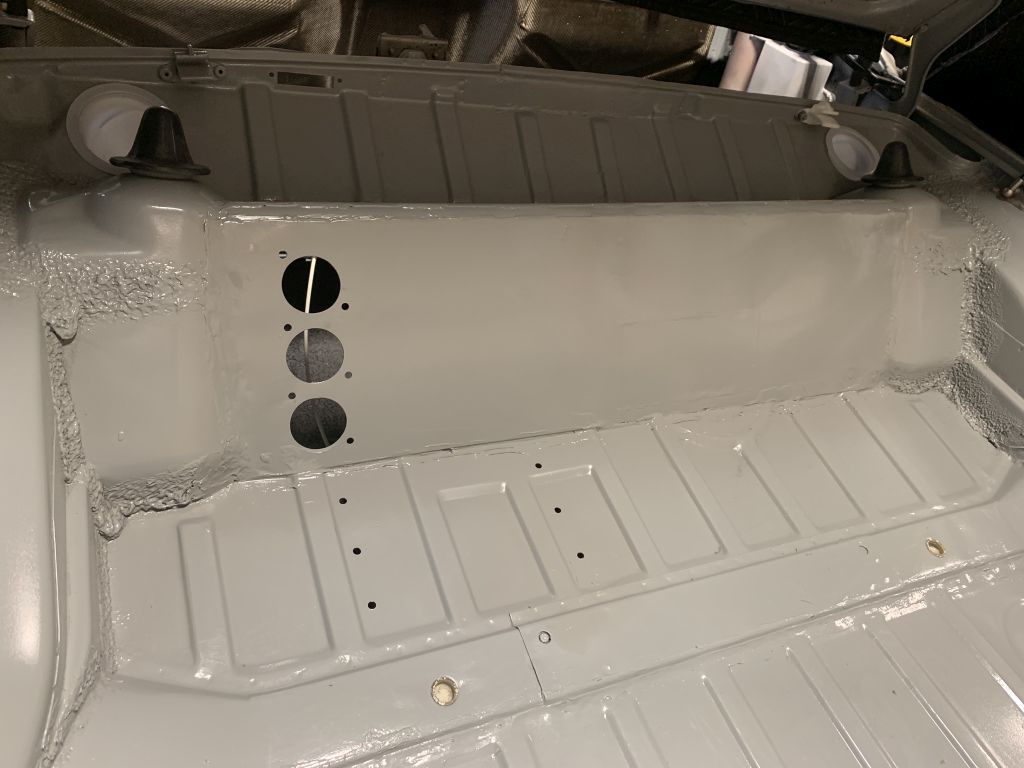 Didn't take a picture but I got sick of dropping nuts and washers when installing/removing the battery box so I put in nutserts. Back to the front. Pulled all of the ducting and installed the nutserts. Reinstalled the hard lines for the coolant with the Oetiker stepless ear clamps in place. I ordered the smaller of the two sizes that would work just to make sure that I got a good clamping force but it made it a huge pain to install. Still not crimped close just in case I need to make some adjustments. 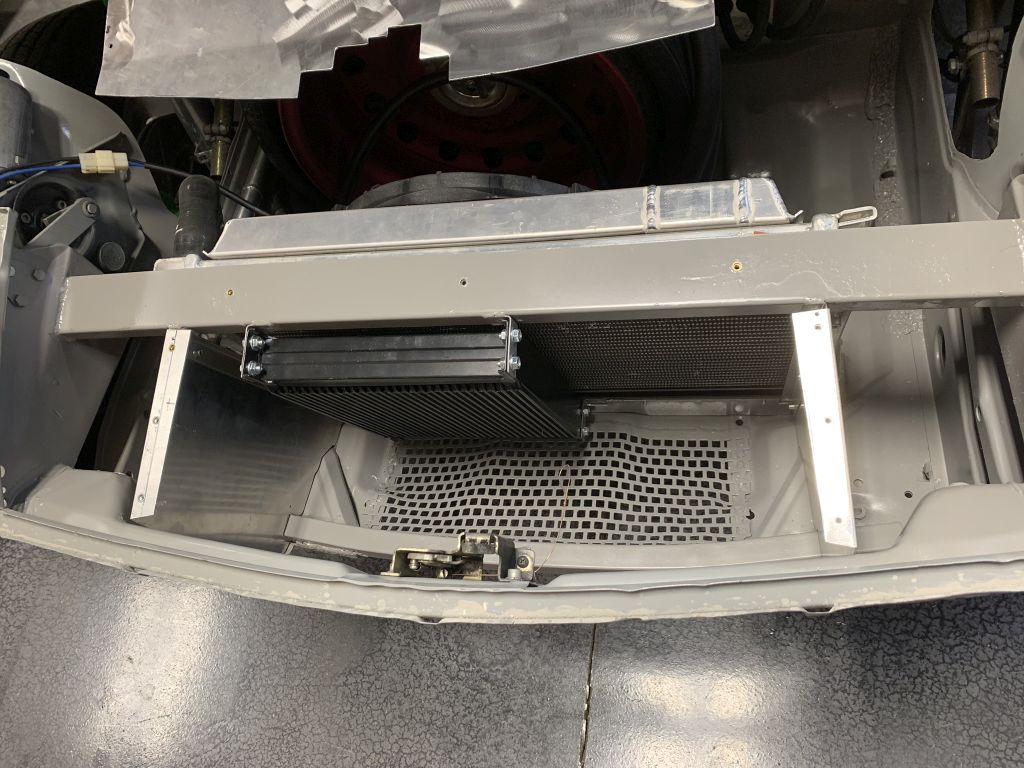 I'll refinish the top piece so that the texture is uniform. Hard to see in the picture but the fasters are stainless steel flanged button head socket cap screws, super clean. 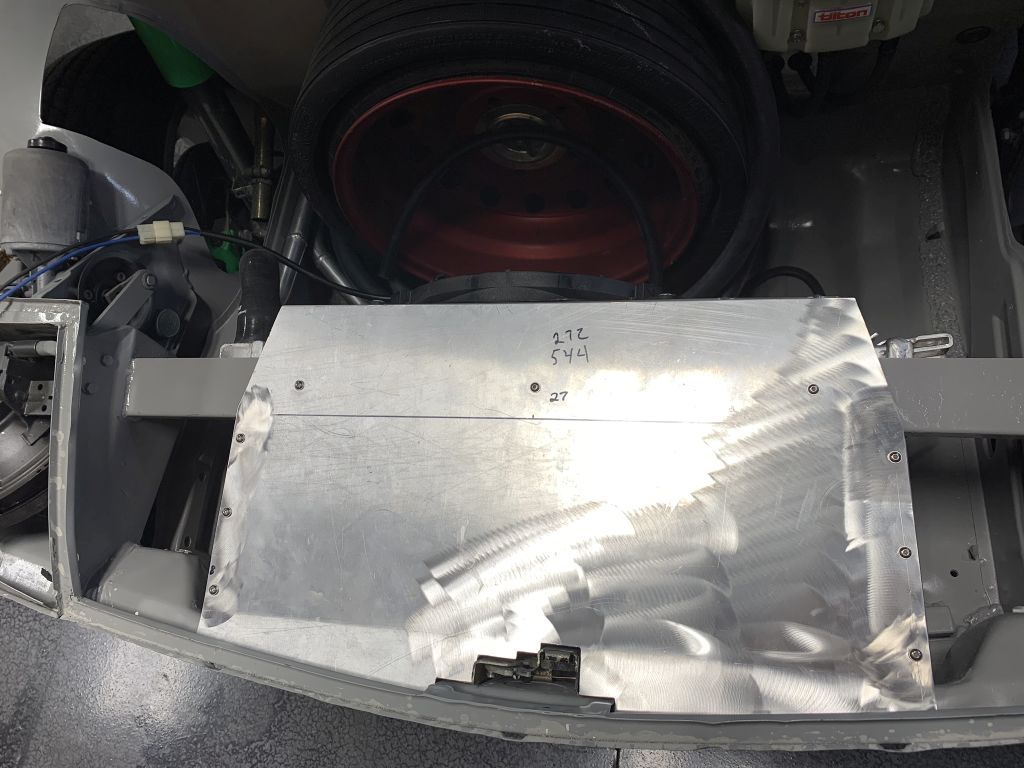 Tom, here are some pictures of the 944 phone dials to confirm fitment of your Fuchs. Looks like there is pleanty of room. ID of these wheels is ~14.5" 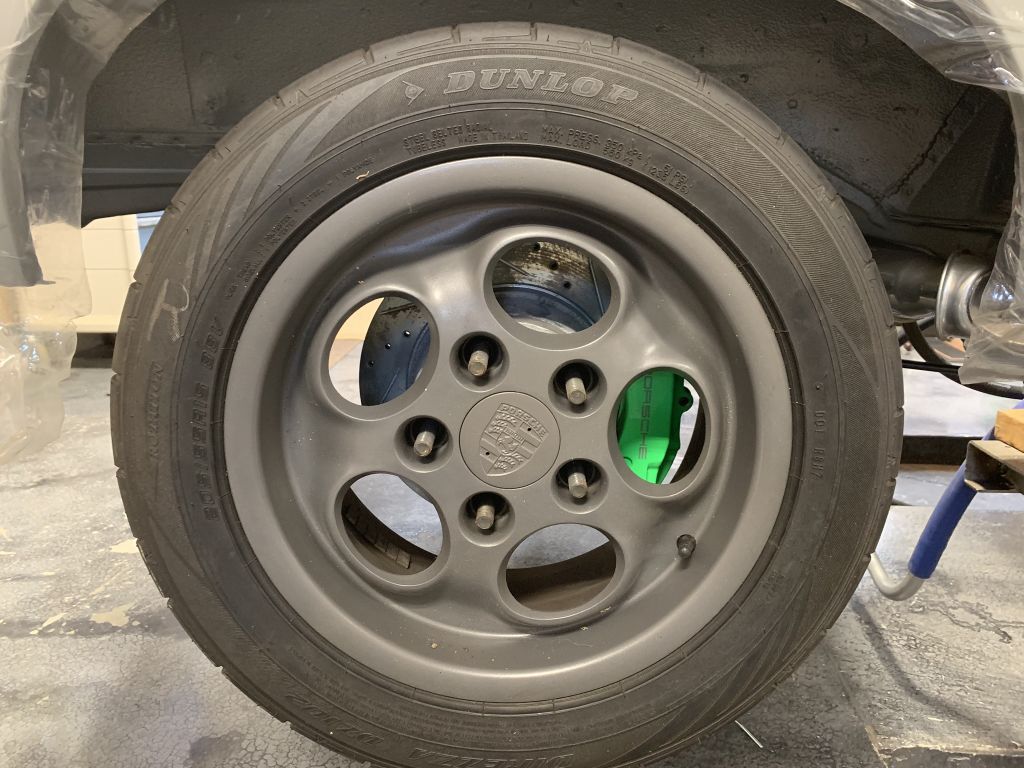 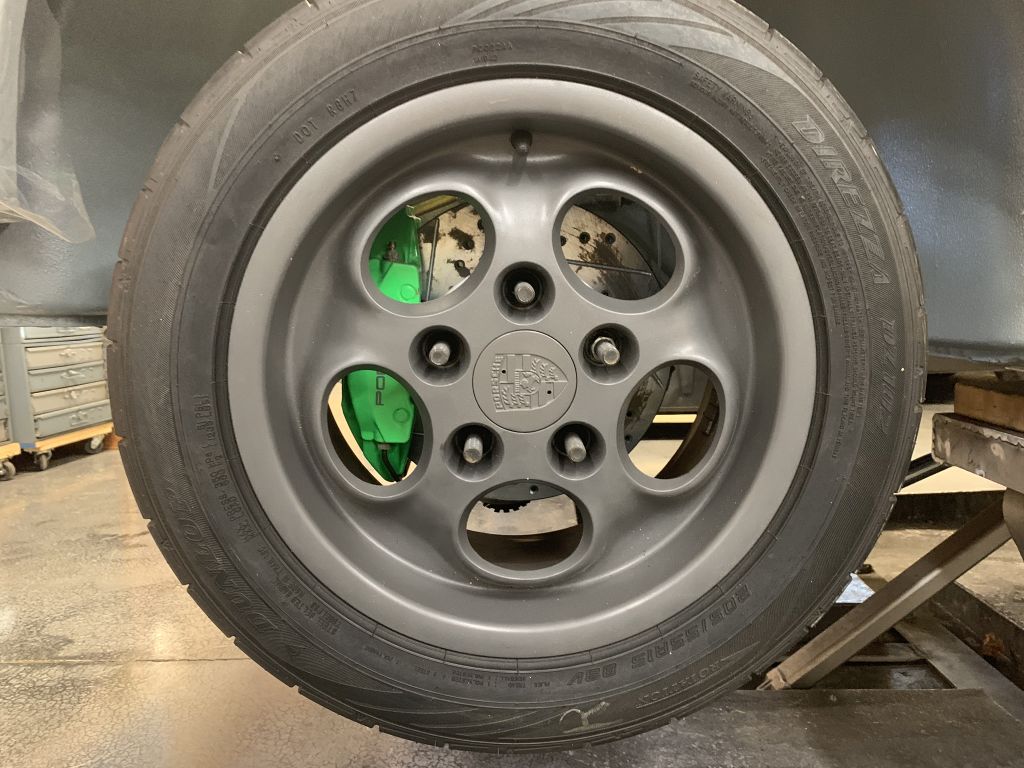 If anyone is looking for a set of phone dials...I am looking to get these out of the garage. The throttle cable also arrived. Quite a bit shorter than ideal but Looks like I can make it work. I did get a bit panicked when I installed it in the pedal linkage. I had forgotten how close that linkage is to the ex-clutch cable pivot. I was convinced that pressing the clutch pedal would pull the throttle cable. Clearance should be the same as stock...at least that is what I keep telling myself. (IMG:style_emoticons/default/blink.gif) |
|
|
|
| theer |
Feb 8 2019, 09:05 AM
Post
#1132
|
|
Senior Member Group: Members Posts: 692 Joined: 31-July 15 From: Dover, MA Member No.: 19,014 Region Association: North East States |
(IMG:style_emoticons/default/smilie_wirdgut.gif)
Oooohhhhmmmm ...... everything will work out..... ooohhhhhhhmmmmmmm... throttle cable will be fine.... ooohhhmmmmmm. |
|
|
|
| CptTripps |
Feb 8 2019, 10:04 AM
Post
#1133
|
|
:: Punch and Pie :: Group: Members Posts: 3,586 Joined: 26-December 04 From: Tuscaloosa, AL and Akron, OH Member No.: 3,342 Region Association: Upper MidWest |
The happiest day of my life will be the day I Text Tom to ask how much it'll cost me to buy Grey back.
Keep rocking guys! Looking great. |
|
|
|
| theer |
Feb 8 2019, 10:16 AM
Post
#1134
|
|
Senior Member Group: Members Posts: 692 Joined: 31-July 15 From: Dover, MA Member No.: 19,014 Region Association: North East States |
|
|
|
|
| CptTripps |
Feb 8 2019, 10:32 AM
Post
#1135
|
|
:: Punch and Pie :: Group: Members Posts: 3,586 Joined: 26-December 04 From: Tuscaloosa, AL and Akron, OH Member No.: 3,342 Region Association: Upper MidWest |
|
|
|
|
| Amenson |
Mar 17 2019, 08:54 PM
Post
#1136
|
|
That's opposite lock!! Group: Members Posts: 645 Joined: 27-May 05 From: Dublin, OH Member No.: 4,154 Region Association: None |
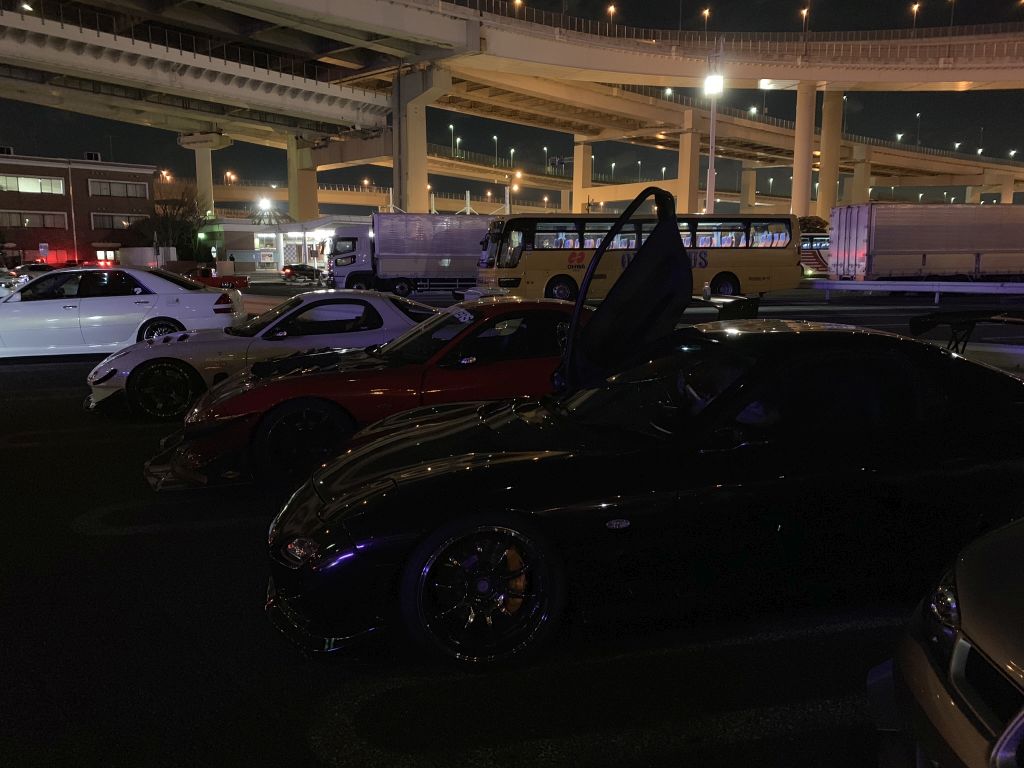
Not really project related other than killing 10 days of progress...I had another business trip to Japan. While there I took the time to finally visit Diakoku Futo PA. Think of Cars and Coffee at a truck stop on a small island in Tokyo Bay. If you don't know what it is, check out some videos. Weather was not great on the Saturday night I visited but a good crown considering. One of my colleagues had just returned to Japan after an assignment in the US and brought back is Grand Sport so he picked me up and we tore around Tokyo after checking out the car scene.
    On with the build progress... Next step to beinging done is to take it all back apart (IMG:style_emoticons/default/blink.gif) 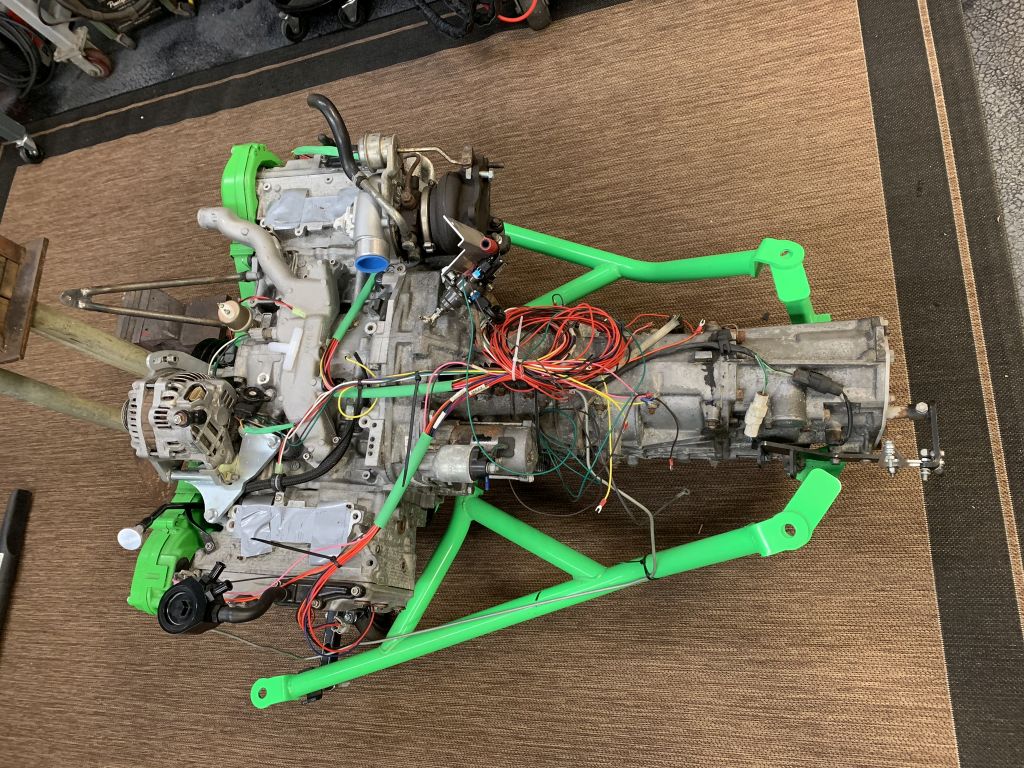 Finished welding unnecessary holes in the manifold and smoothing a few more casting lines.  Also added the IAT sensor bung to the bottom of the IC. And cut off and welded shut an unused mounting lug. 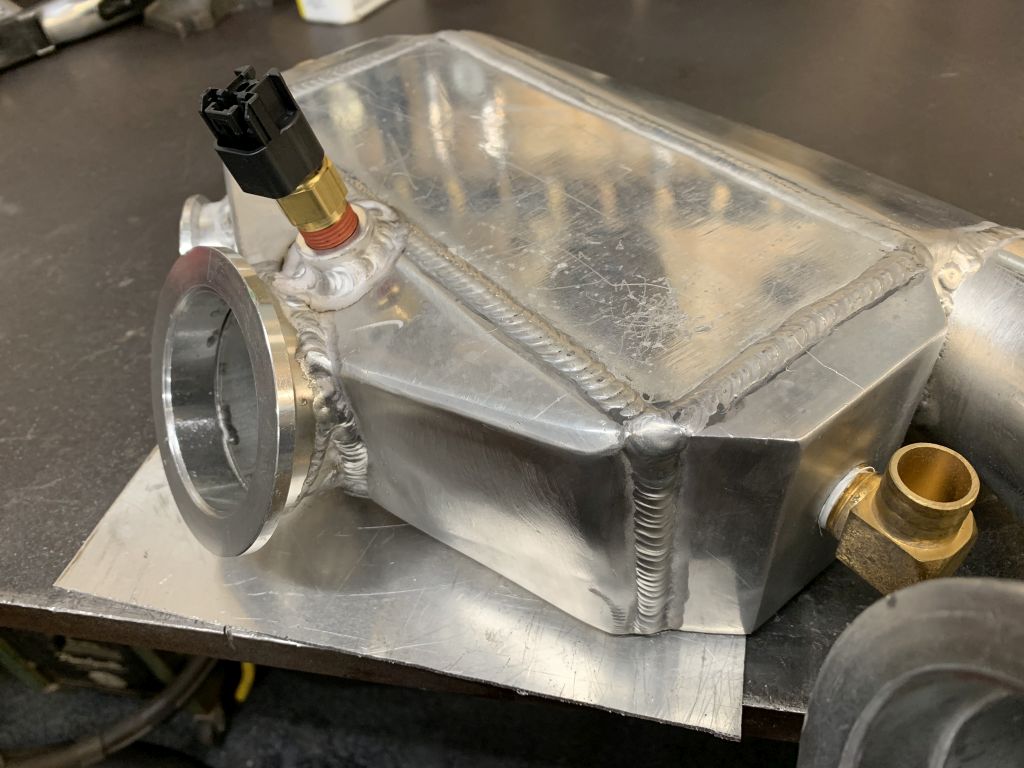 Now I know why powder coating costs so much. Sand blasting and masking take forever. 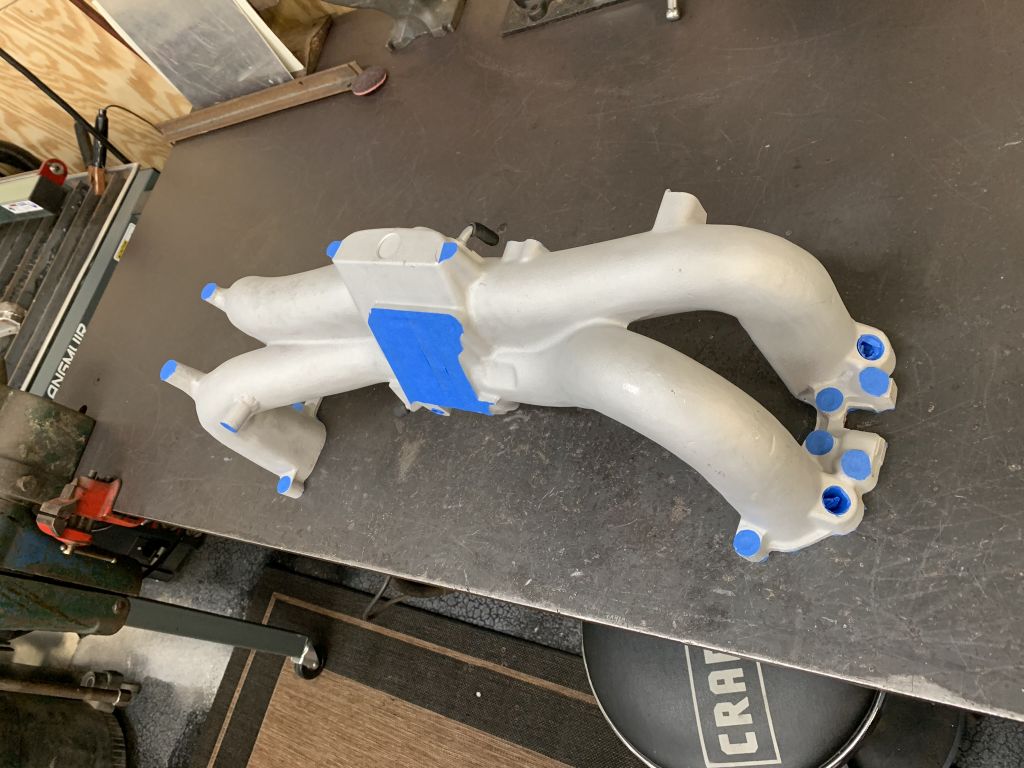 I wanted to match the factory Subaru crinkle paint and found a product that is high temp and somehow crinkles as it dries. Instructions called for 3 "heavy" coats. What a terrible product to spray. It comes out in huge drops and is either not covering completely or on the verge of running. The drops are so big that half do not make it to the target and make a huge mess on the floor. 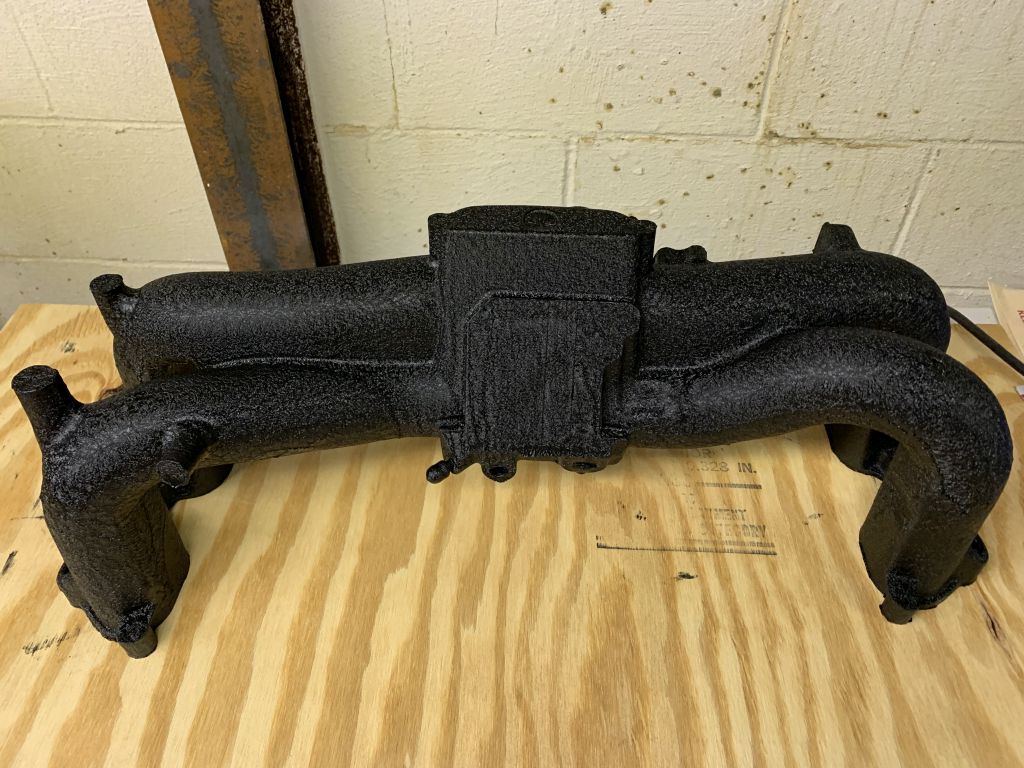 Even after being gone for two days it was still curing (in the basement) when I returned so I had to accelerate it. Instructions called for 200 deg oven but the wife would not have been down with that, so... 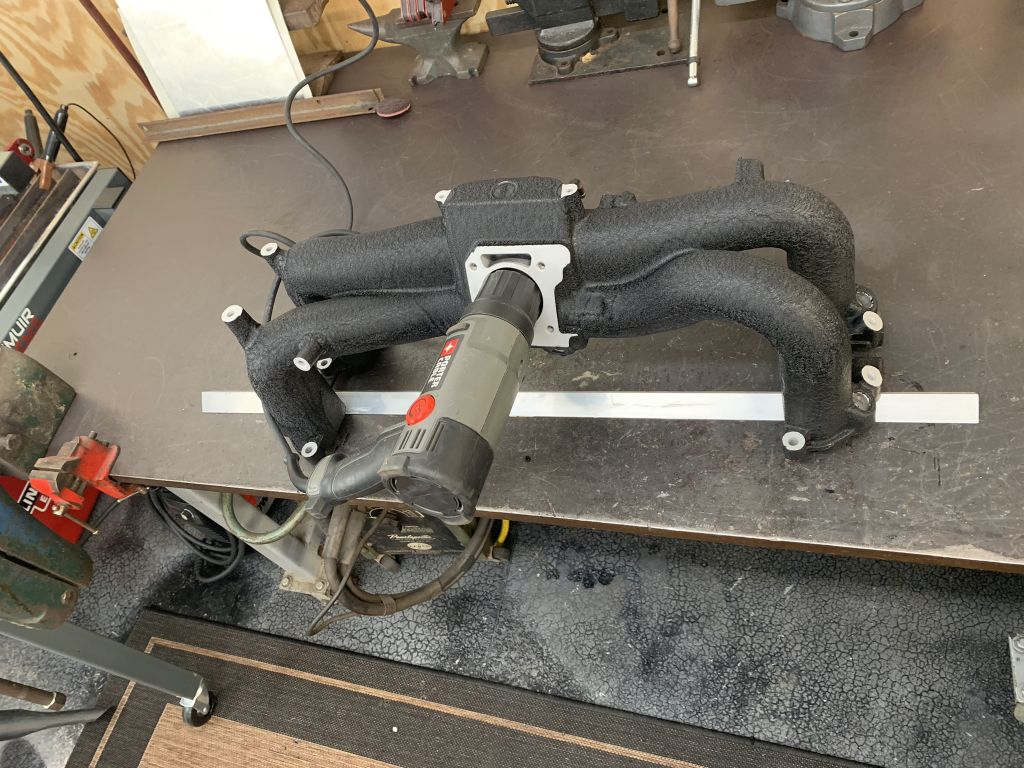 Final assembly!!! Can't just throw it together though, everything needs to be cleaned. 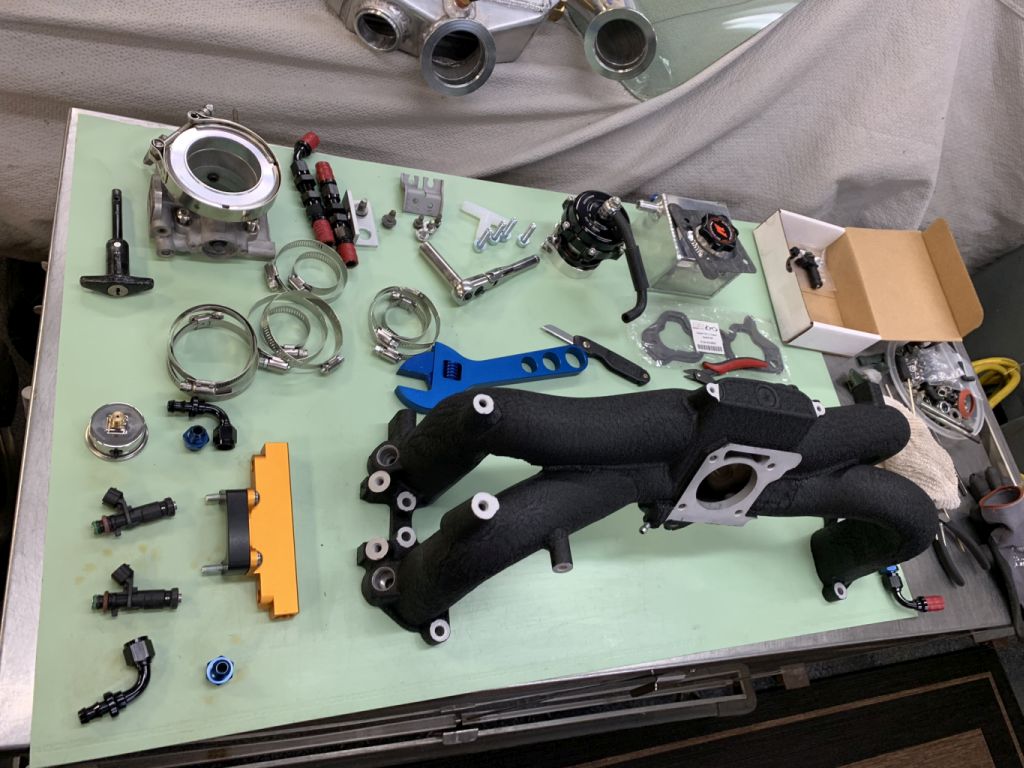 I was a little worried that something might have found its way into the intake ports so I checked all of them...perfectly clean. Will pull the plugs and use a bore scope to check out the combustion chamber prior to firing. 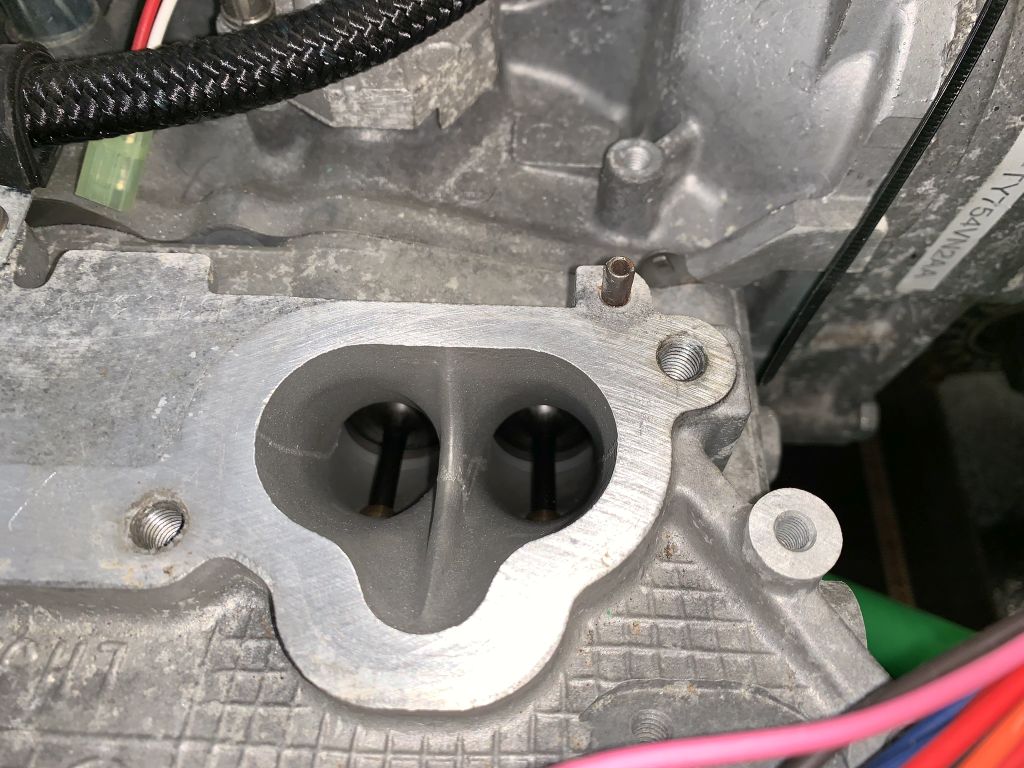 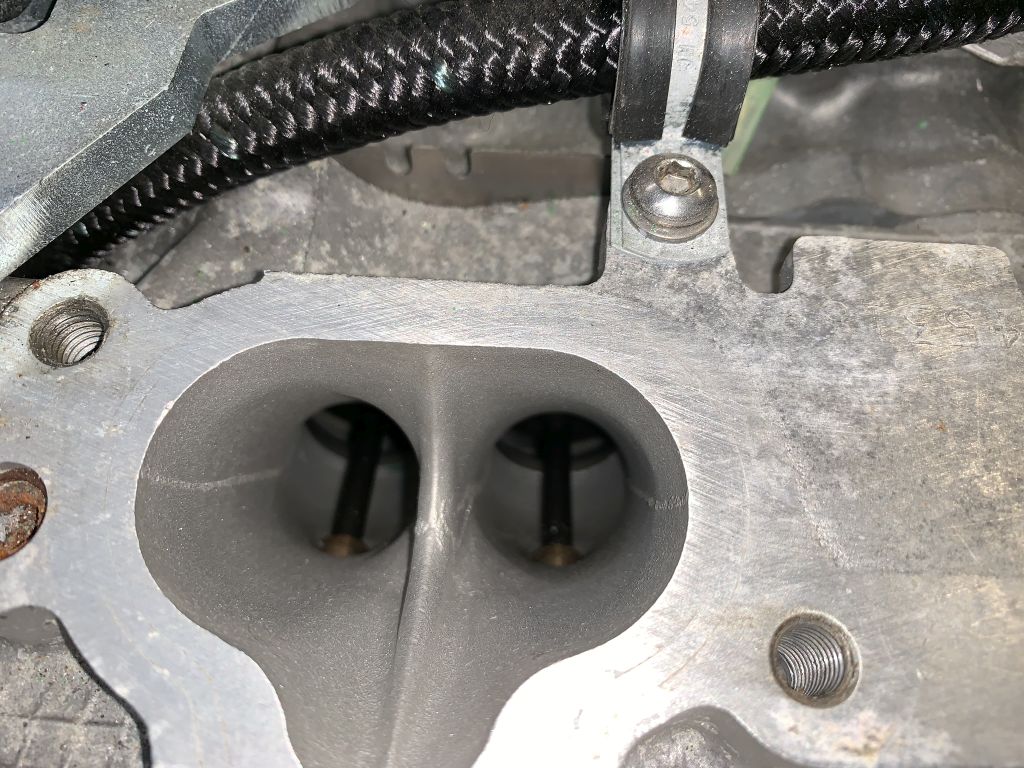 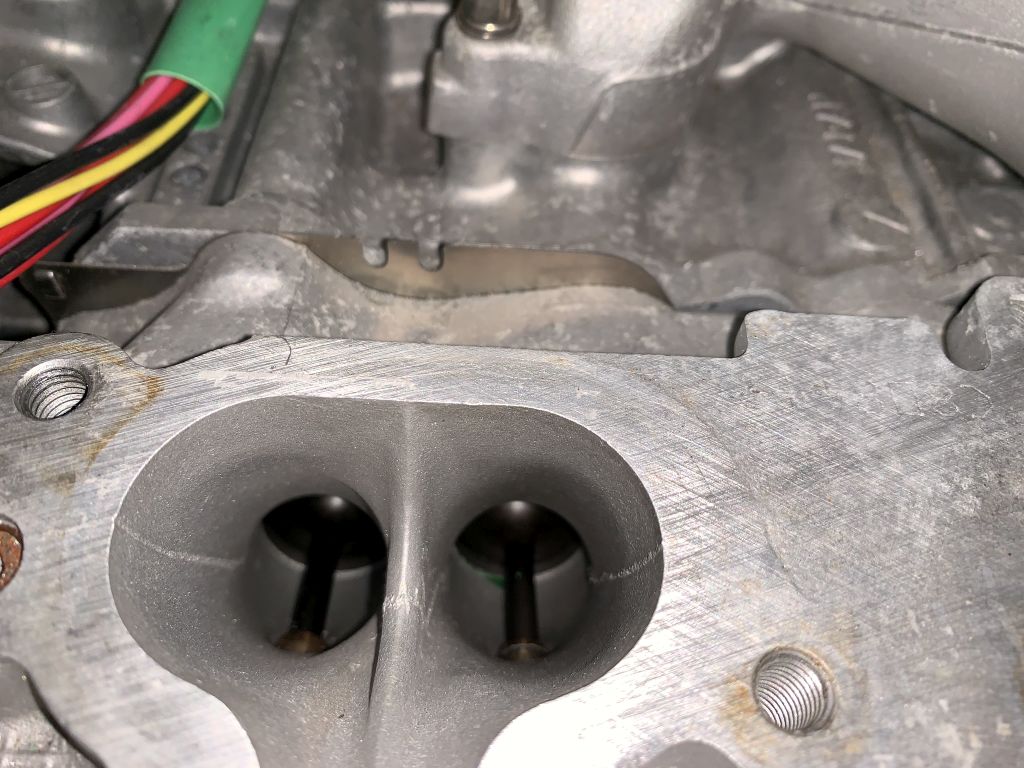 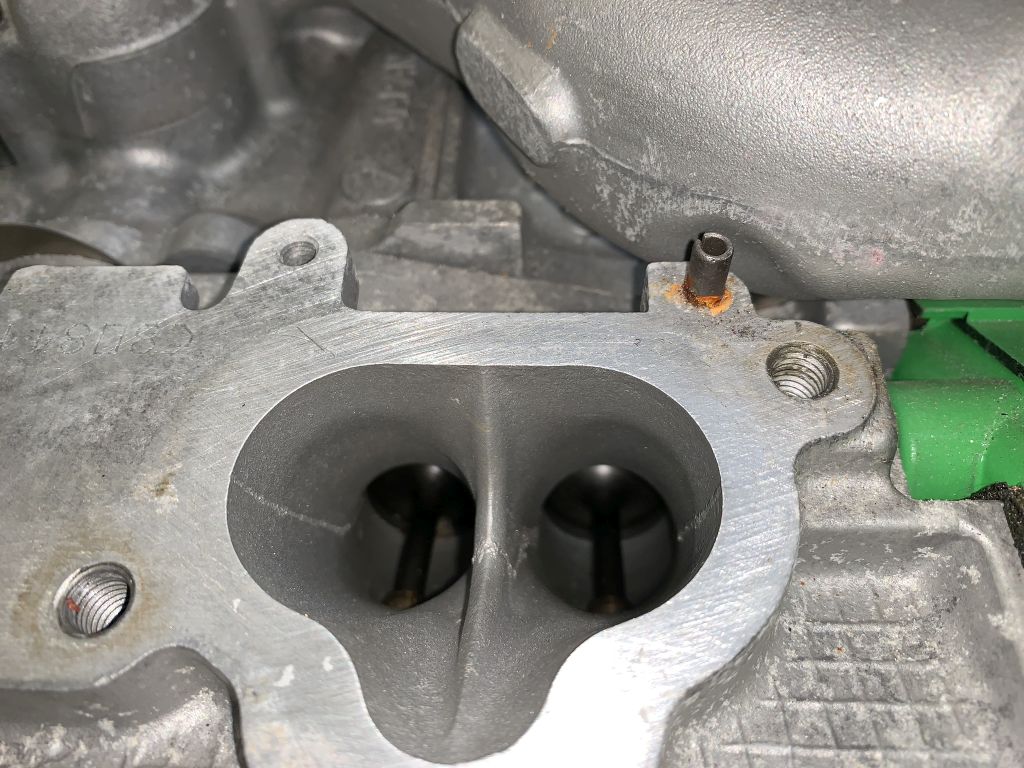 Finally coming together for the final time. All of the raw aluminum is getting a rub down with green and then white scotch bright pads to even out the finish a bit. Fussy but makes a huge difference. Oh, also drilled and tapped the fuel rail for the pressure gauge. 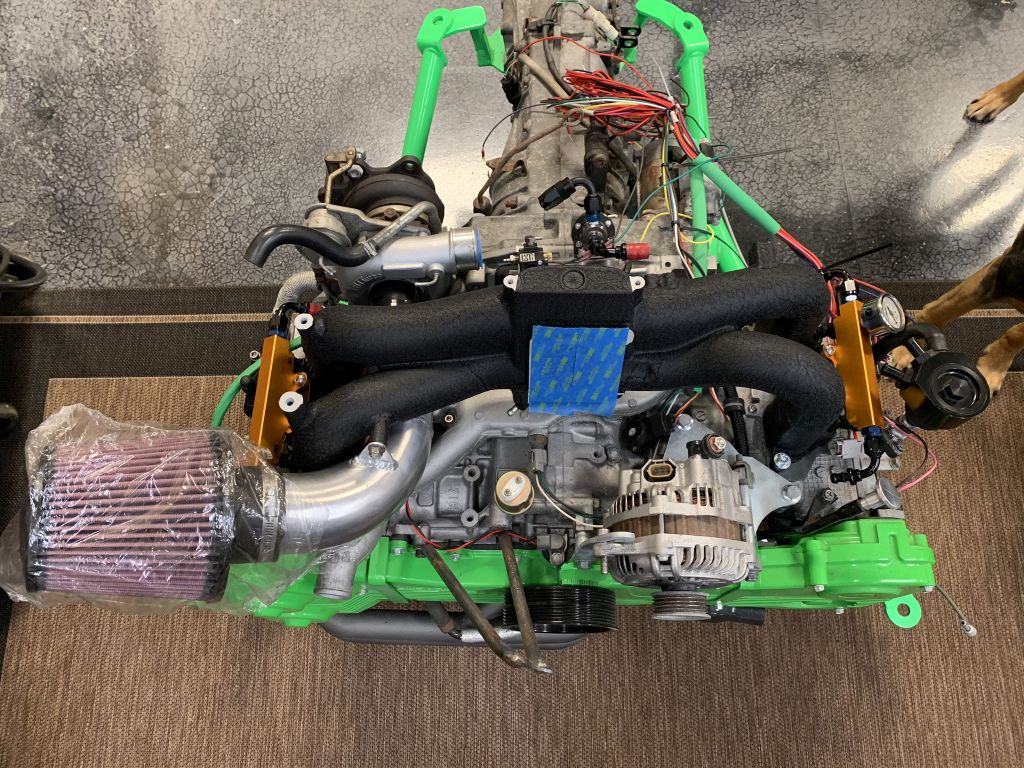 |
|
|
|
| CptTripps |
Mar 18 2019, 07:54 AM
Post
#1137
|
|
:: Punch and Pie :: Group: Members Posts: 3,586 Joined: 26-December 04 From: Tuscaloosa, AL and Akron, OH Member No.: 3,342 Region Association: Upper MidWest |
Looks absolutely amazing. Can't wait to see her on the road!
|
|
|
|
| mepstein |
Mar 18 2019, 08:18 AM
Post
#1138
|
|
914-6 GT in waiting Group: Members Posts: 20,662 Joined: 19-September 09 From: Landenberg, PA/Wilmington, DE Member No.: 10,825 Region Association: MidAtlantic Region |
“Now I know why powder coating costs so much. Sand blasting and masking take forever”
It’s always the prep that takes 95% of the time. Removing old powder coat takes forever. Neat work. |
 |
|
| 914forme |
Mar 18 2019, 08:49 AM
Post
#1139
|
|
Times a wastin', get wrenchin'! Group: Members Posts: 3,899 Joined: 24-July 04 From: Dayton, Ohio Member No.: 2,388 Region Association: None |
Easy way to remove Powdercoat is higher heat, it becomes ash once you get it hot enough, and let it cool back down in a controlled fashion. Bring it up slow, bring it back down slowly. Like diving you don't want to get the bends.
(IMG:style_emoticons/default/drooley.gif) Did not look like that the last time I was there. |
|
|
|
| mepstein |
Mar 18 2019, 09:47 AM
Post
#1140
|
|
914-6 GT in waiting Group: Members Posts: 20,662 Joined: 19-September 09 From: Landenberg, PA/Wilmington, DE Member No.: 10,825 Region Association: MidAtlantic Region |
QUOTE(914forme @ Mar 18 2019, 10:49 AM) Easy way to remove Powdercoat is higher heat, it becomes ash once you get it hot enough, and let it cool back down in a controlled fashion. Bring it up slow, bring it back down slowly. Like diving you don't want to get the bends. (IMG:style_emoticons/default/drooley.gif) Did not look like that the last time I was there. That is true. We just have a powdercoat oven so max heat is 420. The real powdercoat shops have ovens to burn off the oil and old coatings but if I did it in my kitchen oven, my wife would kill me if the fumes didn't. |
|
|
|
|
2 User(s) are reading this topic (2 Guests and 0 Anonymous Users)
0 Members:

|
Lo-Fi Version | Time is now: 30th April 2026 - 11:09 AM |
Invision Power Board
v9.1.4 © 2026 IPS, Inc.