|
|
|
Porsche, and the Porsche crest are registered trademarks of Dr. Ing. h.c. F. Porsche AG.
This site is not affiliated with Porsche in any way. Its only purpose is to provide an online forum for car enthusiasts. All other trademarks are property of their respective owners. |
|
|

  |

| Amenson |
 Nov 26 2016, 07:41 PM Nov 26 2016, 07:41 PM
Post
#941
|
|
That's opposite lock!!  Group: Members Posts: 645 Joined: 27-May 05 From: Dublin, OH Member No.: 4,154 Region Association: None |
QUOTE(CptTripps @ Nov 23 2016, 10:33 AM)  Quick question/comment for Scott: Are you going to move where the radiator hose goes through the longs, or at least how they get routed there? I'm certain I had about 10' too much hose in that operation, and what I'd originally set up would have been a bitch to get bubbles out of the line. Just curious if you found a better way. Hose routing will definitely be different. Similar to mine with some tweaks. Should have it routed this week now that I am back from holiday travel. Stay tuned. Cheers, Scott |
   |

 
|
| Amenson |
Dec 4 2016, 07:33 PM
Post
#942
|
|
That's opposite lock!! Group: Members Posts: 645 Joined: 27-May 05 From: Dublin, OH Member No.: 4,154 Region Association: None |
Hose routing through the passenger compartment proof of concept. Still need to clean up the holes and install edge treatment...and weld the access hole closed.
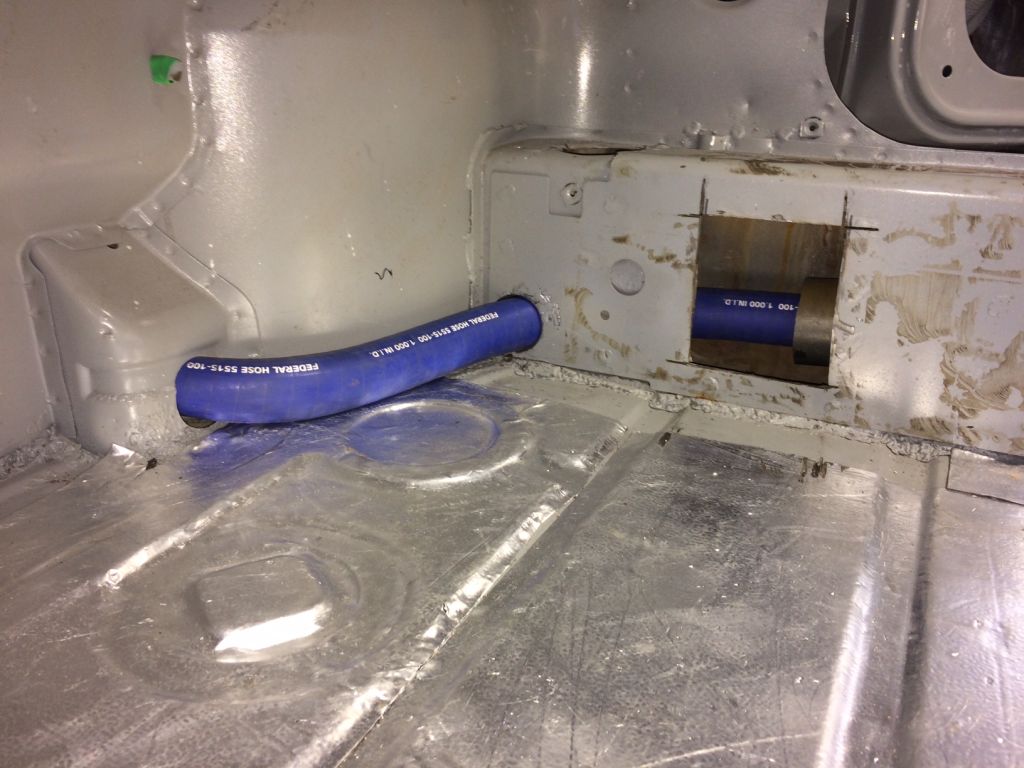 No hint of kinking like I had initially with my setup. The silicone hose is really nice to work with. Cheers, Scott |
|
|
|
| IronHillRestorations |
Dec 4 2016, 08:27 PM
Post
#943
|
|
I. I. R. C. Group: Members Posts: 6,887 Joined: 18-March 03 From: West TN Member No.: 439 Region Association: None |
Wouldn't it be better to make a bolt on cover? How would you replace that line?
|
|
|
|
| Spoke |
Dec 4 2016, 08:28 PM
Post
#944
|
|
Jerry Group: Members Posts: 7,268 Joined: 29-October 04 From: Allentown, PA Member No.: 3,031 Region Association: None |
QUOTE(Perry Kiehl @ Dec 4 2016, 10:27 PM) Wouldn't it be better to make a bolt on cover? How would you replace that line? I was thinking the same thing. Does the hole need welded up to add rigidity to the long? |
|
|
|
| Amenson |
Dec 4 2016, 08:41 PM
Post
#945
|
|
That's opposite lock!! Group: Members Posts: 645 Joined: 27-May 05 From: Dublin, OH Member No.: 4,154 Region Association: None |
QUOTE(Perry Kiehl @ Dec 4 2016, 09:27 PM) Wouldn't it be better to make a bolt on cover? How would you replace that line? The hose is installed from the engine compartment and can be manipulated out of the long through the existing heater hole in the top of the long. I will leave that open for just this purpose. Cheers, Scott |
|
|
|
| Amenson |
Dec 4 2016, 08:51 PM
Post
#946
|
|
That's opposite lock!! Group: Members Posts: 645 Joined: 27-May 05 From: Dublin, OH Member No.: 4,154 Region Association: None |
QUOTE(Amenson @ Dec 4 2016, 09:41 PM) QUOTE(Perry Kiehl @ Dec 4 2016, 09:27 PM) Wouldn't it be better to make a bolt on cover? How would you replace that line? The hose is installed from the engine compartment and can be manipulated out of the long through the existing heater hole in the top of the long. I will leave that open for just this purpose. Cheers, Scott This is the other side. I cut the hole in the long so that I could remove the elbow in the heater duct. 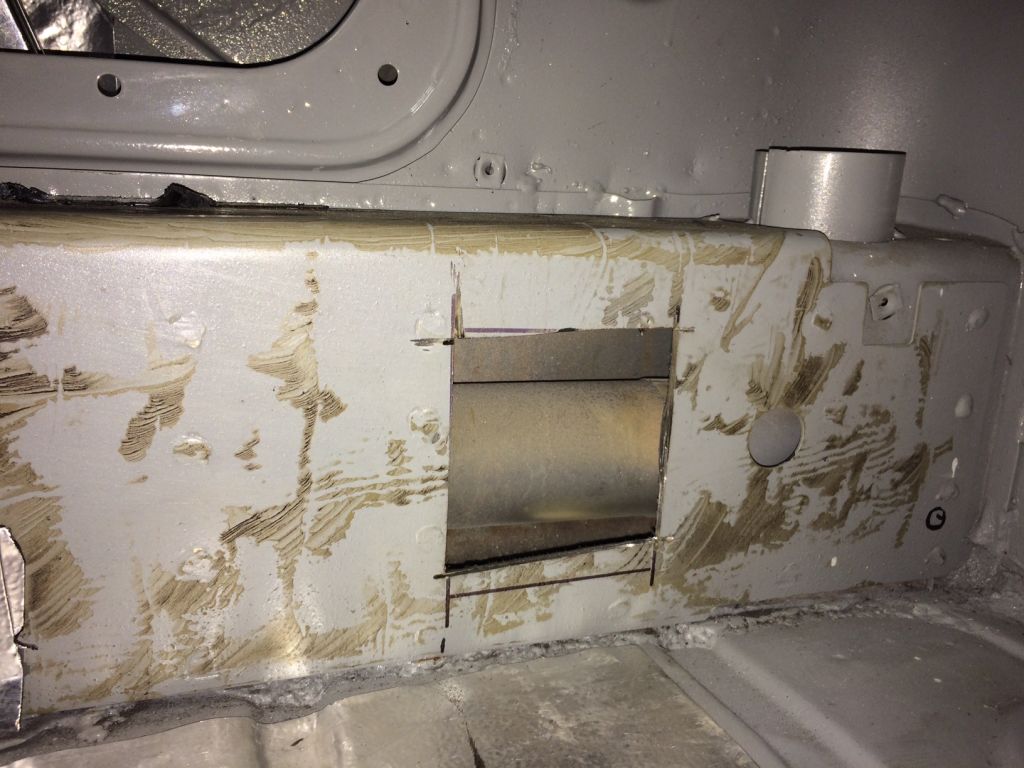 It was much more challenging than anticipated because the tube is almost touching the reinforcing plate in the center of the long. 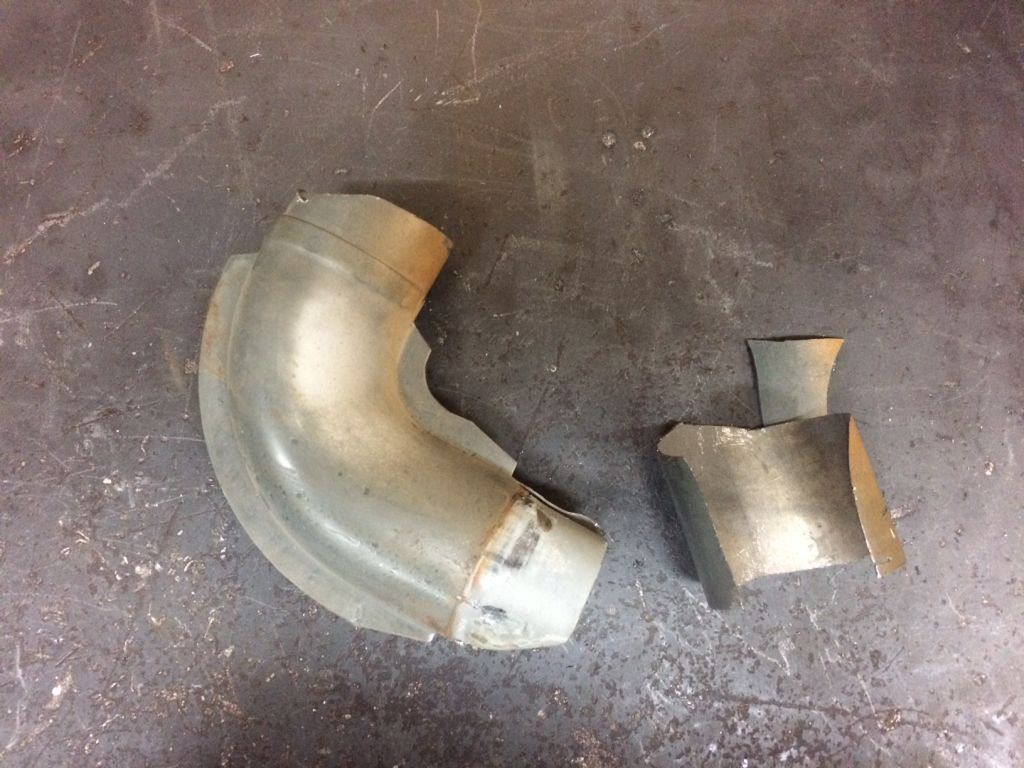 Cheers, Scott |
|
|
|
| CptTripps |
Dec 5 2016, 04:01 PM
Post
#947
|
|
:: Punch and Pie :: Group: Members Posts: 3,585 Joined: 26-December 04 From: Tuscaloosa, AL and Akron, OH Member No.: 3,342 Region Association: Upper MidWest |
Feel free to pull any/all of the Dynamat out of there. I'm actually thinking of taking it all out and just spraying the interior with Rhinoliner.
Looking good Scott. I'll reply to your email tonight when I have some time to sit down and go through everything. |
|
|
|
| CptTripps |
Dec 6 2016, 10:16 AM
Post
#948
|
|
:: Punch and Pie :: Group: Members Posts: 3,585 Joined: 26-December 04 From: Tuscaloosa, AL and Akron, OH Member No.: 3,342 Region Association: Upper MidWest |
QUOTE(Spoke @ Dec 4 2016, 09:28 PM) I was thinking the same thing. Does the hole need welded up to add rigidity to the long? Longs have the chassis stiffening kit installed already, so they're already much beefier than stock. |
|
|
|
| Amenson |
Dec 8 2016, 08:28 PM
Post
#949
|
|
That's opposite lock!! Group: Members Posts: 645 Joined: 27-May 05 From: Dublin, OH Member No.: 4,154 Region Association: None |
I had a chance to pop into the garage tonight. I reshaped the holes a bit and installed the edge treatment. I ran the full length hose from the rear to make sure I can fish it through without using the access hole.
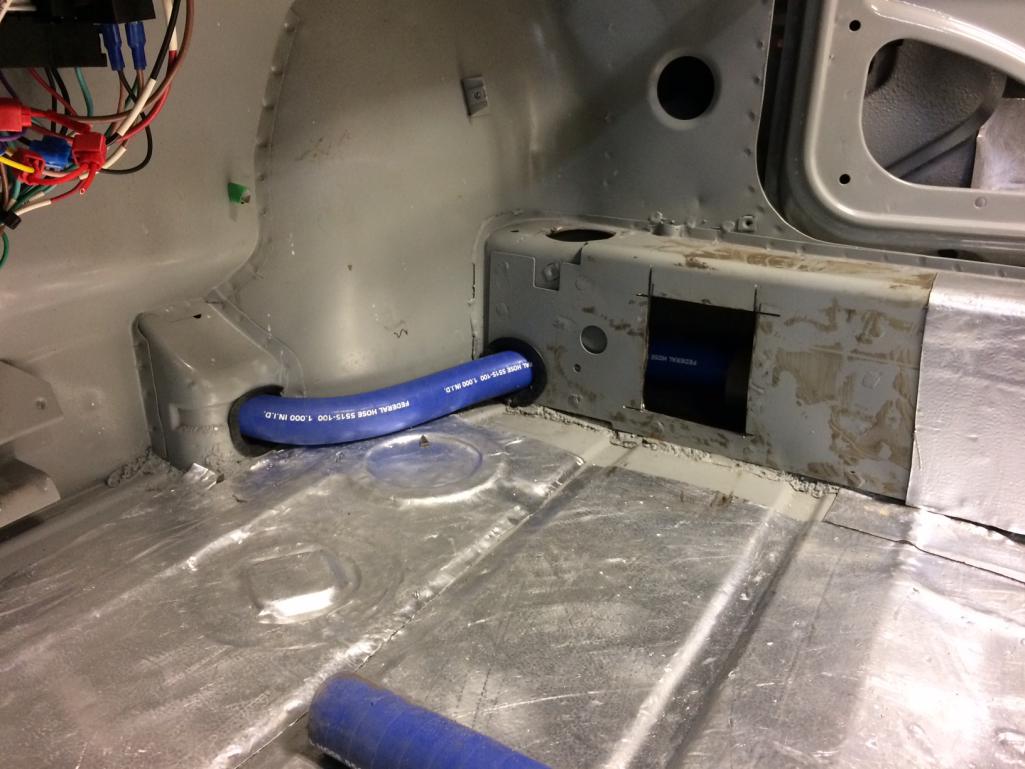 Couldn't stop there so I ran it to the radiator. 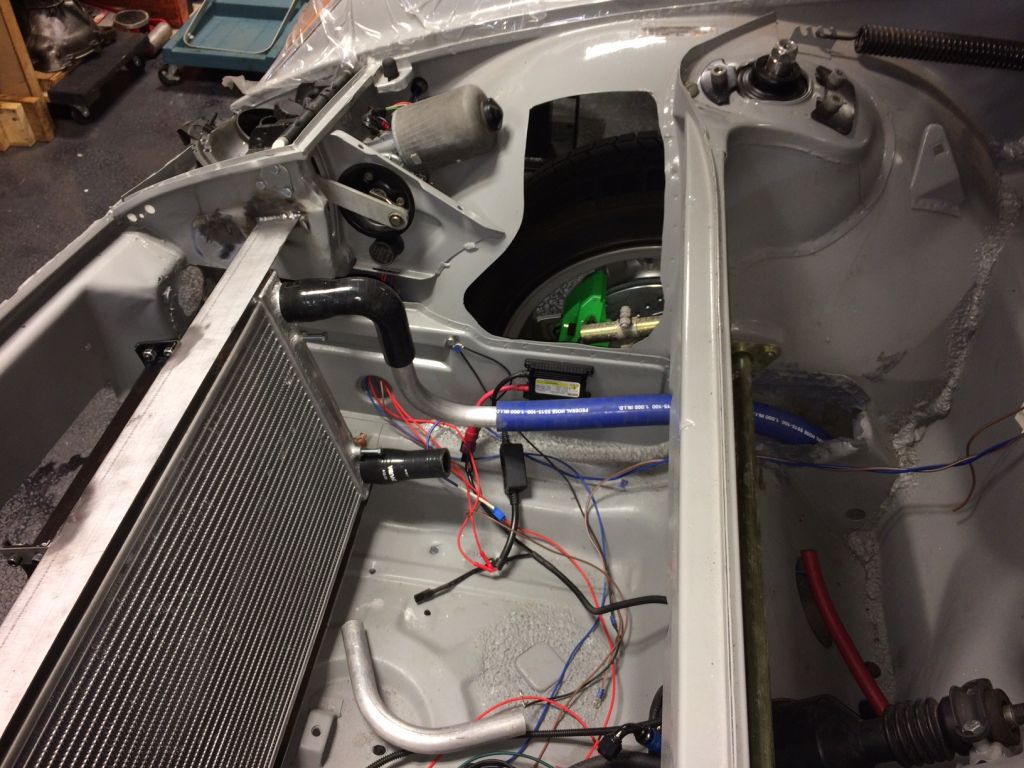 Just to be clear, I had nothing do do with the angry beaver removal of the channel over the steering rack hump and have not decided what to do with it yet (IMG:style_emoticons/default/dry.gif) Cheers, Scott |
|
|
|
| 914forme |
Dec 8 2016, 09:01 PM
Post
#950
|
|
Times a wastin', get wrenchin'! Group: Members Posts: 3,896 Joined: 24-July 04 From: Dayton, Ohio Member No.: 2,388 Region Association: None |
Someone needs to use a nice set of beading tools that someone else left behind (IMG:style_emoticons/default/poke.gif)
|
|
|
|
| jd74914 |
Dec 9 2016, 10:53 AM
Post
#951
|
|
Its alive Group: Members Posts: 4,860 Joined: 16-February 04 From: CT Member No.: 1,659 Region Association: North East States |
Awesome progress!
Please don't take offense at this, but I have used silicon coolant hoses on a car with a racecar with a sealed and pressurized coolant system and noticed that the water level decreased over time (no evidence of head gasket failure when running or after disassembly). I looked it up then and found that silicon hoses allow some diffusion of water so you might want to be careful of exactly where you put them in case they need to be removed. I just worry that over time you'll leak water into the cabin, etc. Probably not much and I'm just a little over-conservative, but I just wanted to say something. |
|
|
|
| Amenson |
Dec 9 2016, 02:41 PM
Post
#952
|
|
That's opposite lock!! Group: Members Posts: 645 Joined: 27-May 05 From: Dublin, OH Member No.: 4,154 Region Association: None |
QUOTE(jd74914 @ Dec 9 2016, 11:53 AM) Awesome progress! Please don't take offense at this, but I have used silicon coolant hoses on a car with a racecar with a sealed and pressurized coolant system and noticed that the water level decreased over time (no evidence of head gasket failure when running or after disassembly). I looked it up then and found that silicon hoses allow some diffusion of water so you might want to be careful of exactly where you put them in case they need to be removed. I just worry that over time you'll leak water into the cabin, etc. Probably not much and I'm just a little over-conservative, but I just wanted to say something. Jim, feedback based on direct personal experience with the topic at hand is always appreciated. There are many questions about the size and material of the cooling lines. If it does not work out we can easily pull them and install lines similar to my car. And yes Stephen...I will be beading all of the AL tubes. Have to keep the beaders fresh for you! Cheers, Scott |
|
|
|
| Amenson |
Dec 11 2016, 02:52 PM
Post
#953
|
|
That's opposite lock!! Group: Members Posts: 645 Joined: 27-May 05 From: Dublin, OH Member No.: 4,154 Region Association: None |
Duplicated the cabin routing to the driver's side and then added the twist for the passenger side. To clean up the front trunk area I am running the cooling line across the car under the fuel tank. Have plans tonight so no time to pull the test hose and add install edge treatments. Will hold it in place with a couple p-clamps
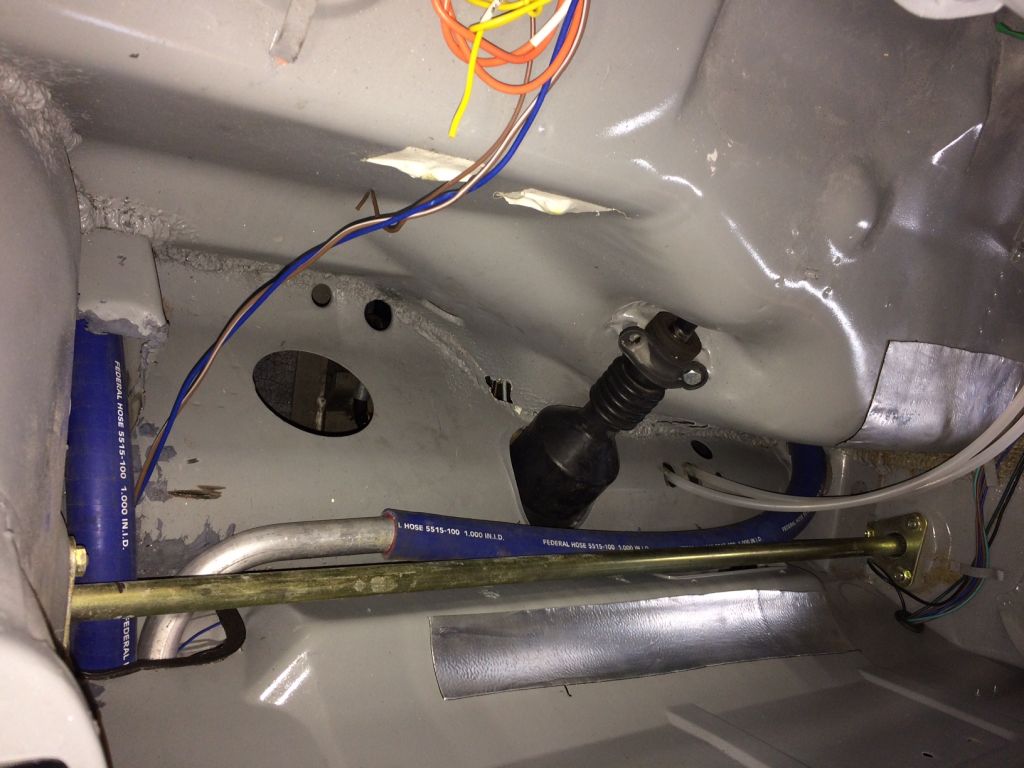 One thing I noticed while I was sitting in the fuel tank area, one of the posts for the steering rack clamp is missing!? Doug, do you have the piece that broke off so that I can weld it back in? Cheers, Scott |
|
|
|
| CptTripps |
Dec 12 2016, 08:02 AM
Post
#954
|
|
:: Punch and Pie :: Group: Members Posts: 3,585 Joined: 26-December 04 From: Tuscaloosa, AL and Akron, OH Member No.: 3,342 Region Association: Upper MidWest |
QUOTE(Amenson @ Dec 8 2016, 09:28 PM) Just to be clear, I had nothing do do with the angry beaver removal of the channel over the steering rack hump and have not decided what to do with it yet (IMG:style_emoticons/default/dry.gif) You can thank Renegade for that one. They did the V8 install I took out. There were a lot of things that had me scratching me head like that. QUOTE(Amenson @ Dec 11 2016, 03:52 PM) Doug, do you have the piece that broke off so that I can weld it back in? I believe it was like that when I stripped everything off of the tub. No clue how I'd even be able to come across one of those. Would welding a nut in place work? |
|
|
|
| 914forme |
Dec 12 2016, 08:33 AM
Post
#955
|
|
Times a wastin', get wrenchin'! Group: Members Posts: 3,896 Joined: 24-July 04 From: Dayton, Ohio Member No.: 2,388 Region Association: None |
QUOTE(CptTripps @ Dec 12 2016, 09:02 AM) QUOTE(Amenson @ Dec 11 2016, 03:52 PM) Doug, do you have the piece that broke off so that I can weld it back in? I believe it was like that when I stripped everything off of the tub. No clue how I'd even be able to come across one of those. Would welding a nut in place work? Pretty simple operation , just machining the part out of some stock and get to welding it in there. Or place a WTB add in the classifieds and see if someone comes to your rescue, with the real part. |
|
|
|
| Amenson |
Dec 30 2016, 07:08 PM
Post
#956
|
|
That's opposite lock!! Group: Members Posts: 645 Joined: 27-May 05 From: Dublin, OH Member No.: 4,154 Region Association: None |
I have quite a bit of time off during this time of year so I managed to get the cooling system pretty much finished. Still need to make the mount for the fans and ducting for the radiator but the plumbing is solid.
I hate MIG welding for many reasons but the fumes are the primary one so I picked up a Lincoln fume extractor. It turns on automatically and does a great job controlling the weld fumes. 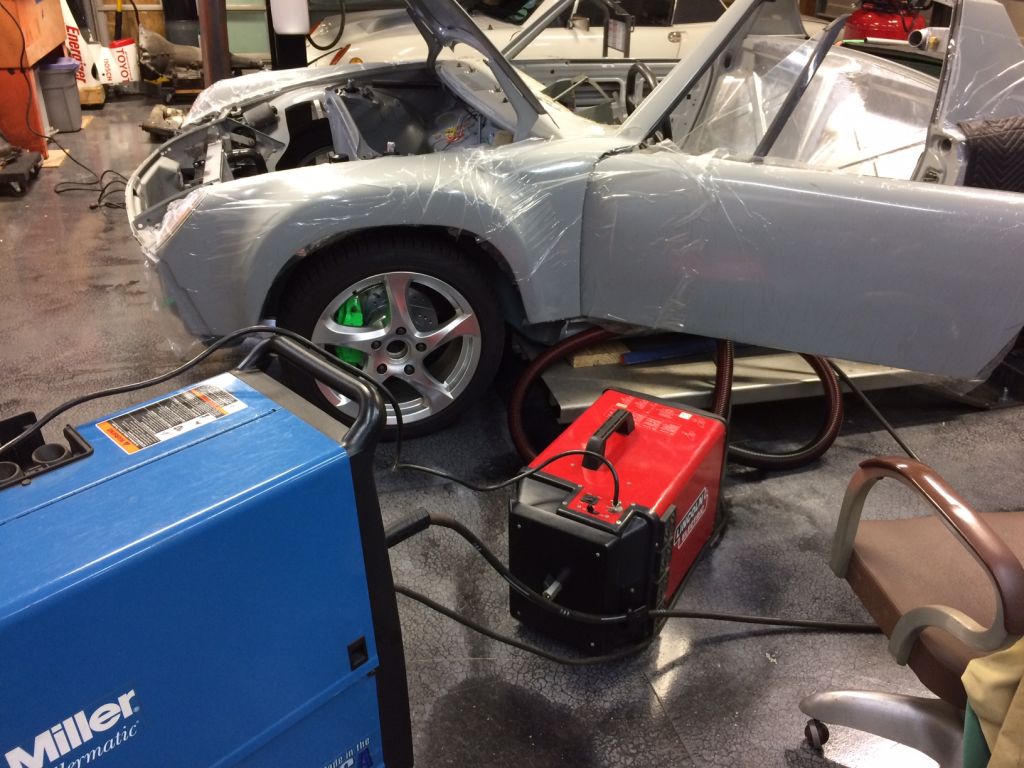 After removing the elbow from the heater system the remaining tube was not supported very well so I welded it to the inner long and applied edge treatment. 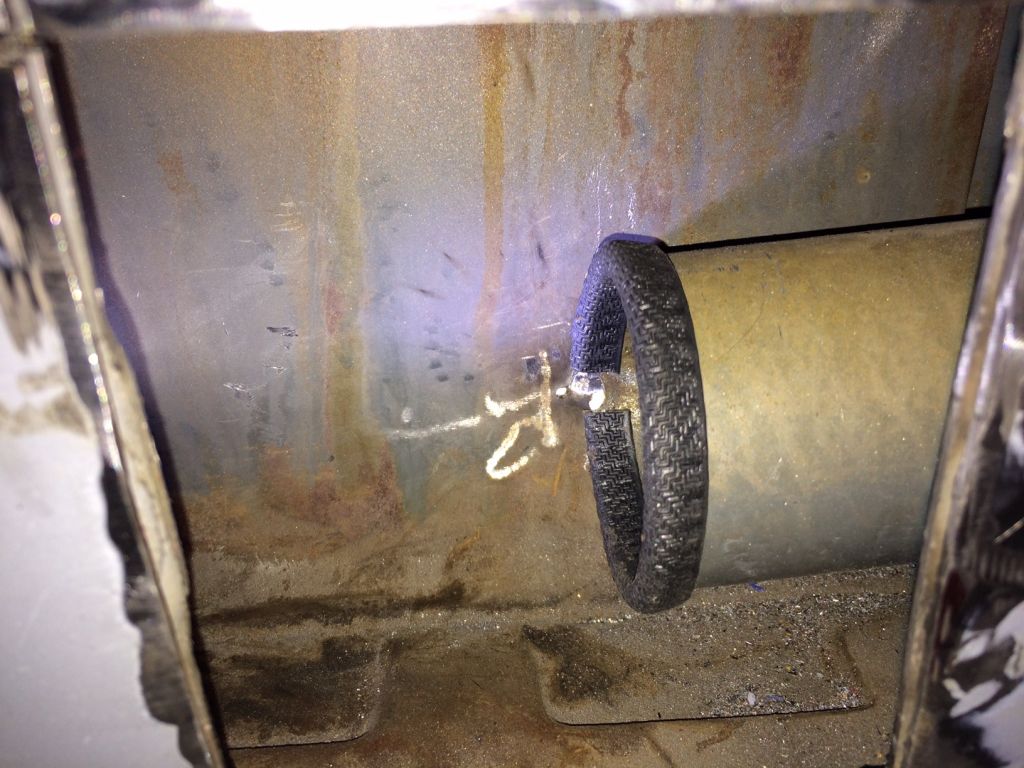 I have a moving blanket in the car to lay on while I am working and the dogs decided that it would be a great place to hang out on while I was at the welding bench. 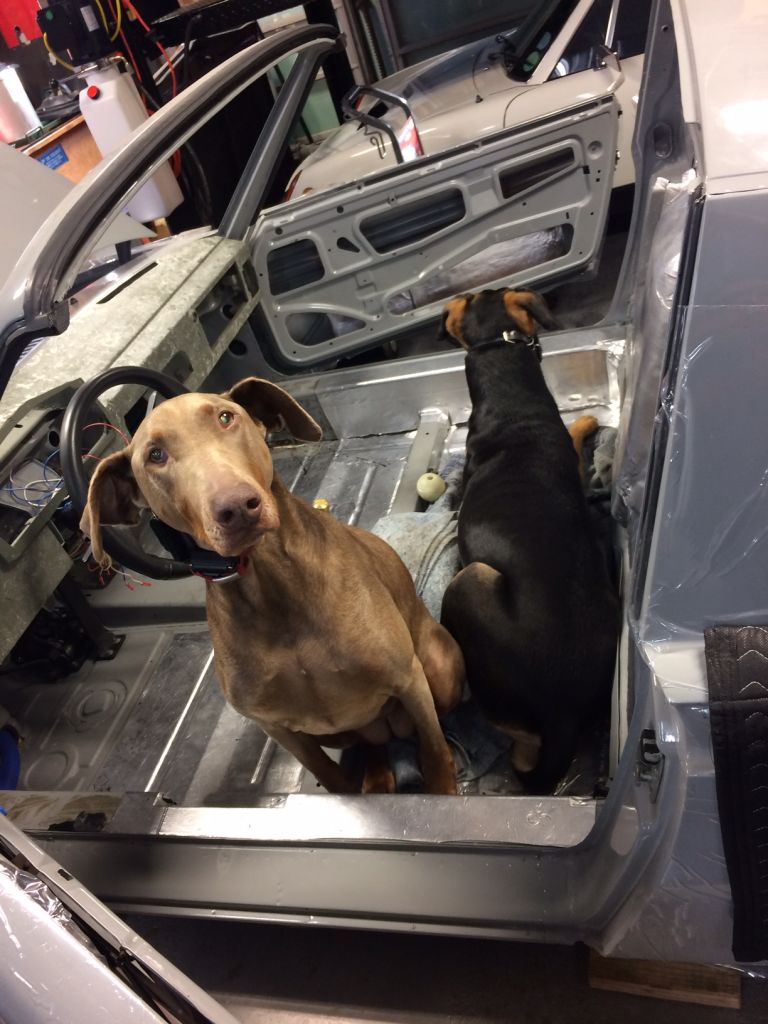 These two pieces take the place of a dozen random connectors that Doug had in the car when it arrived. Stephen's tube beader applied the finishing touches. 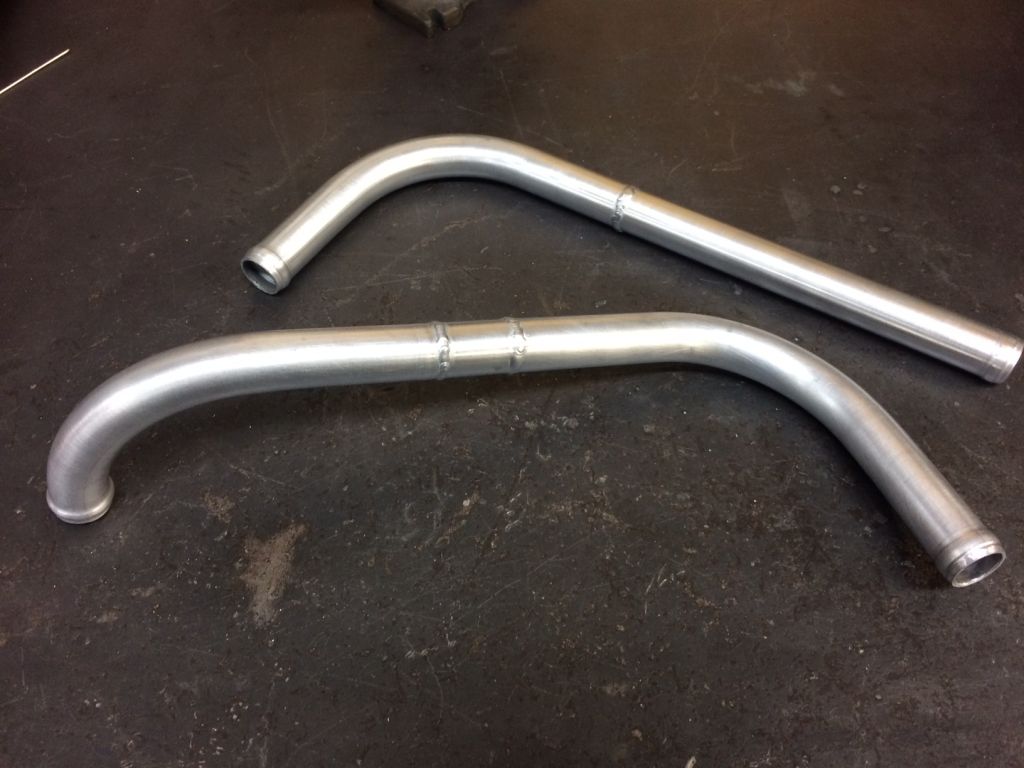 Simple but elegant solution. 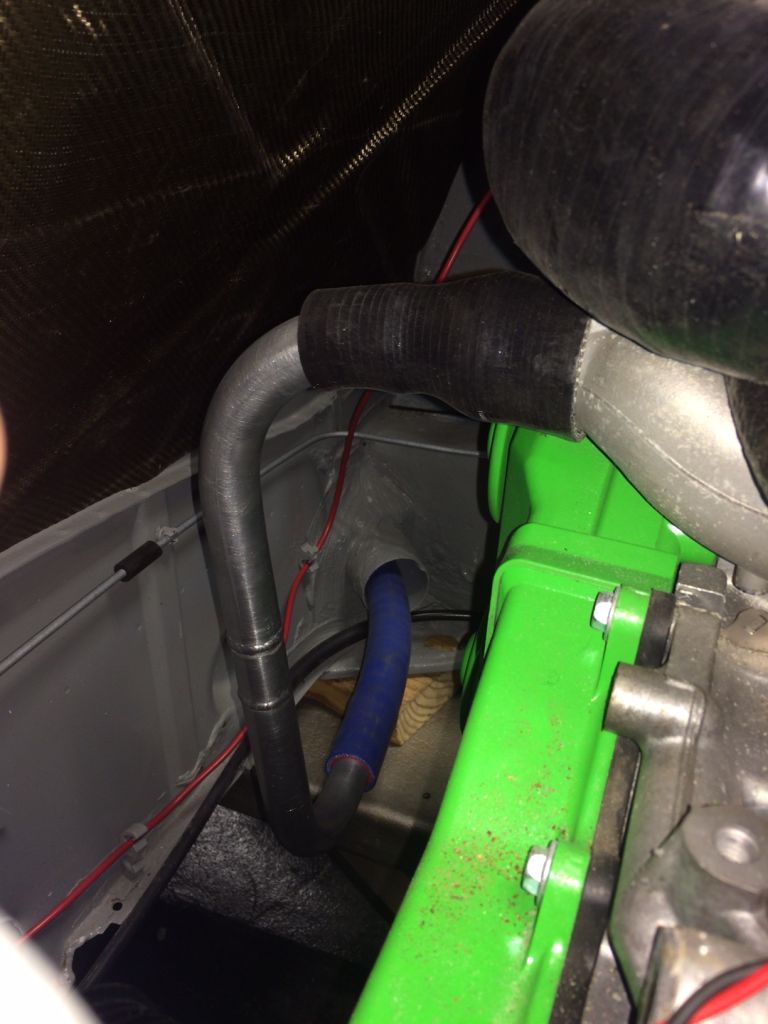 I really enjoy making parts that will only work in one place on any car. 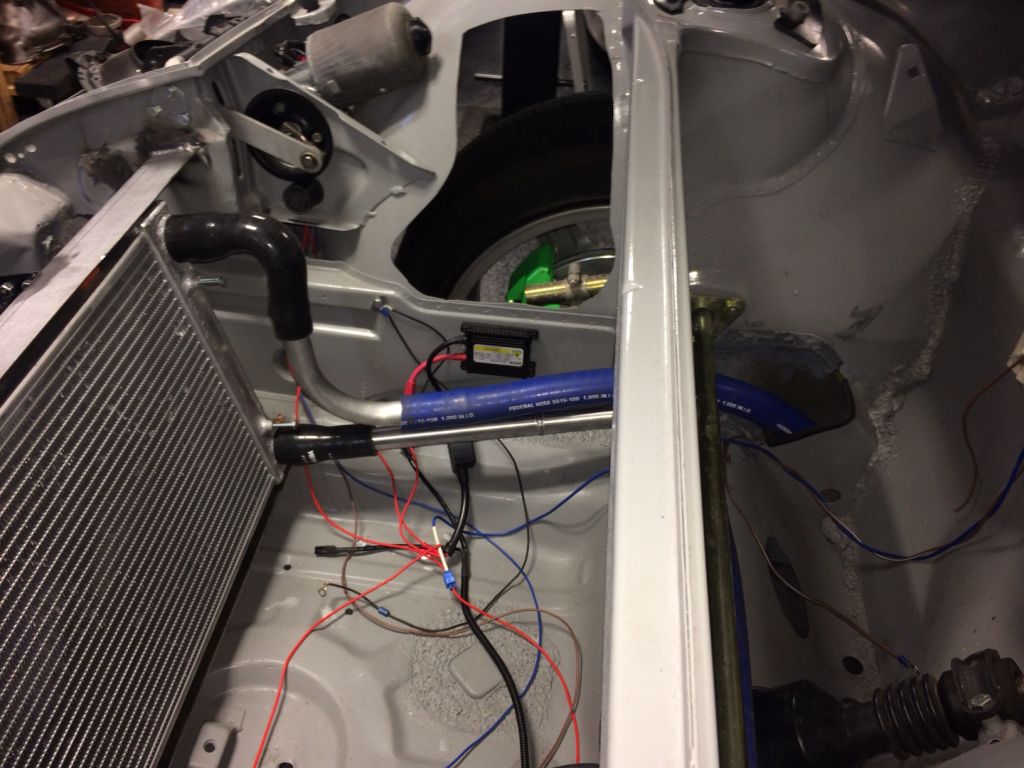 I welded up the access ports in the longs. 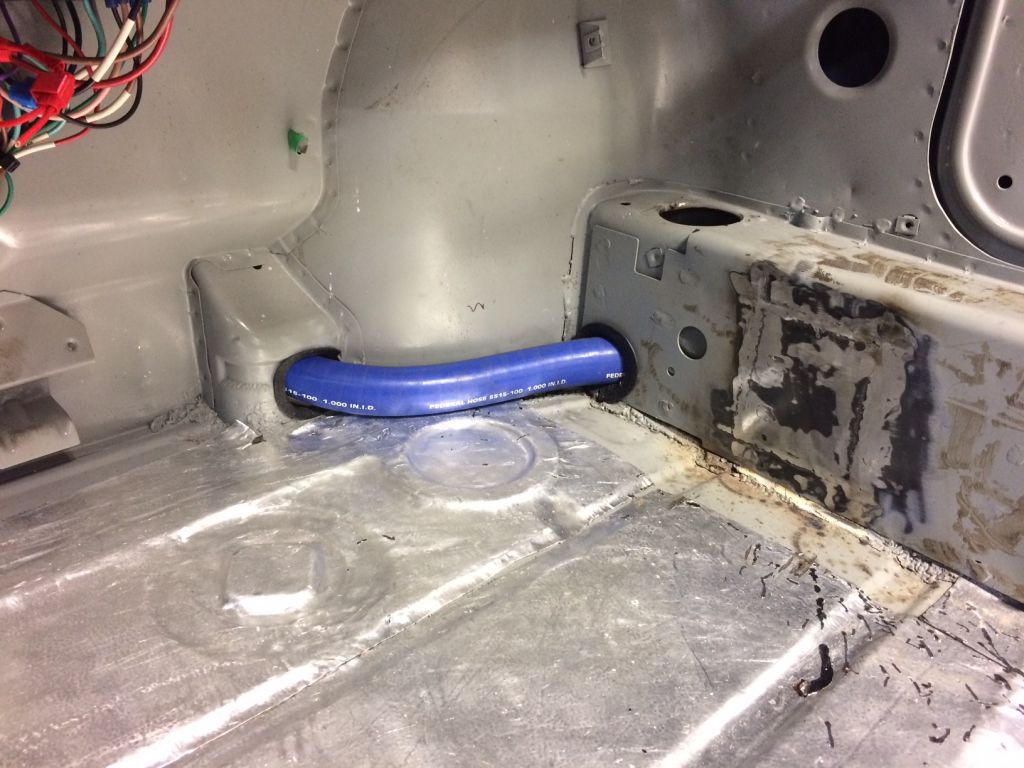 Unfortunately I welded this one twice. I got a bit ahead of myself and welded it the first time before securing the inner tube and applying the edge treatment so I had to cut it back open and then weld back closed. 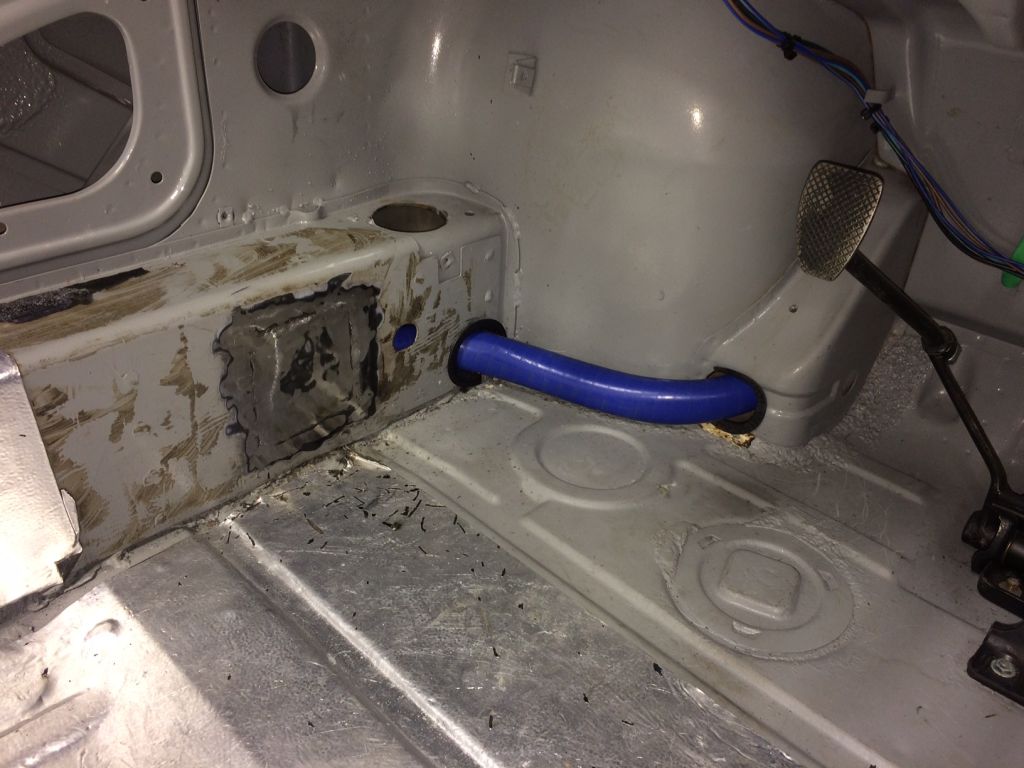 I am off until Tuesday so i should get to make some good progress on the IC install. Cheers, Scott |
|
|
|
| Amenson |
Dec 31 2016, 08:03 PM
Post
#957
|
|
That's opposite lock!! Group: Members Posts: 645 Joined: 27-May 05 From: Dublin, OH Member No.: 4,154 Region Association: None |
I had a super productive day today. The plan was rock solid in my head, I had all of the material and I didn't mess up any parts!
Step one of using an off the shelf part...cut it up. 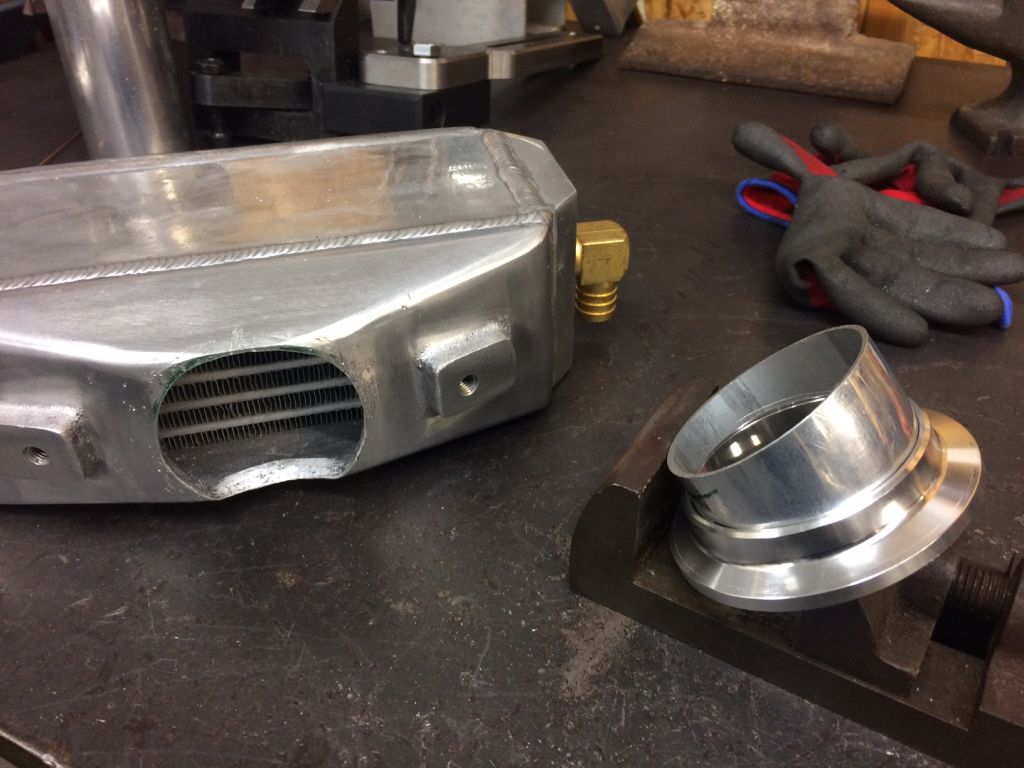 I didn't take any pictures but I disassembled and sandblasted the throttle body. I then modified it so that the v-band half would fit on the inlet and TIG welded it on. Hours of fussing to get everything straight and level and...vuala. 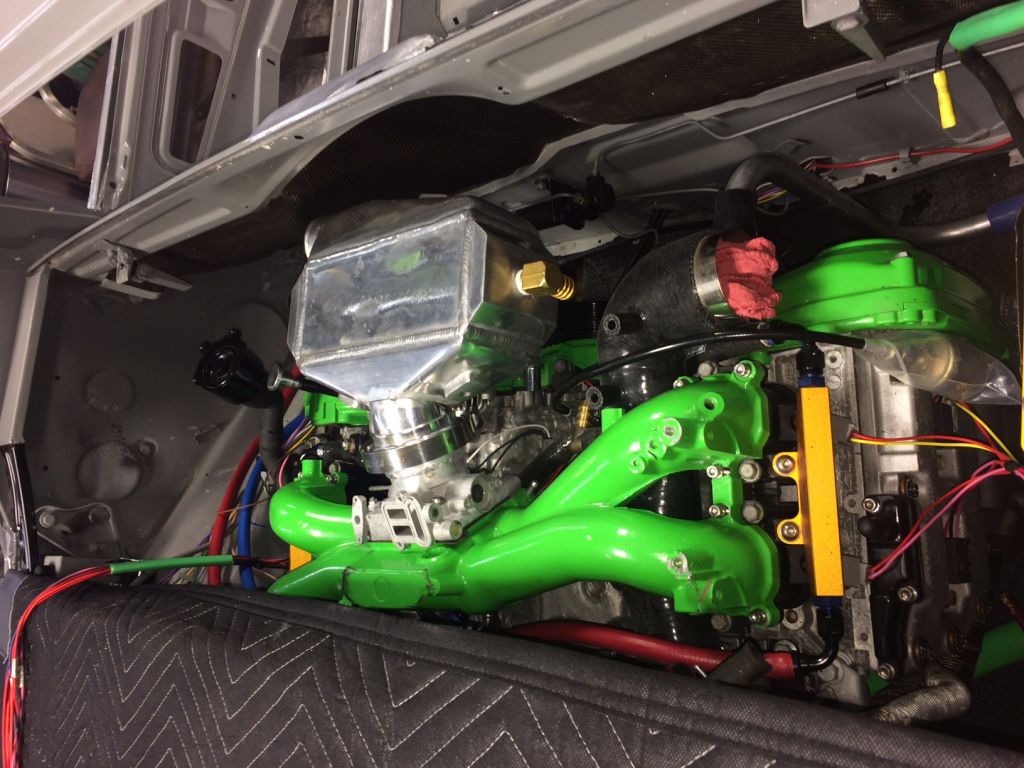 Perfect. 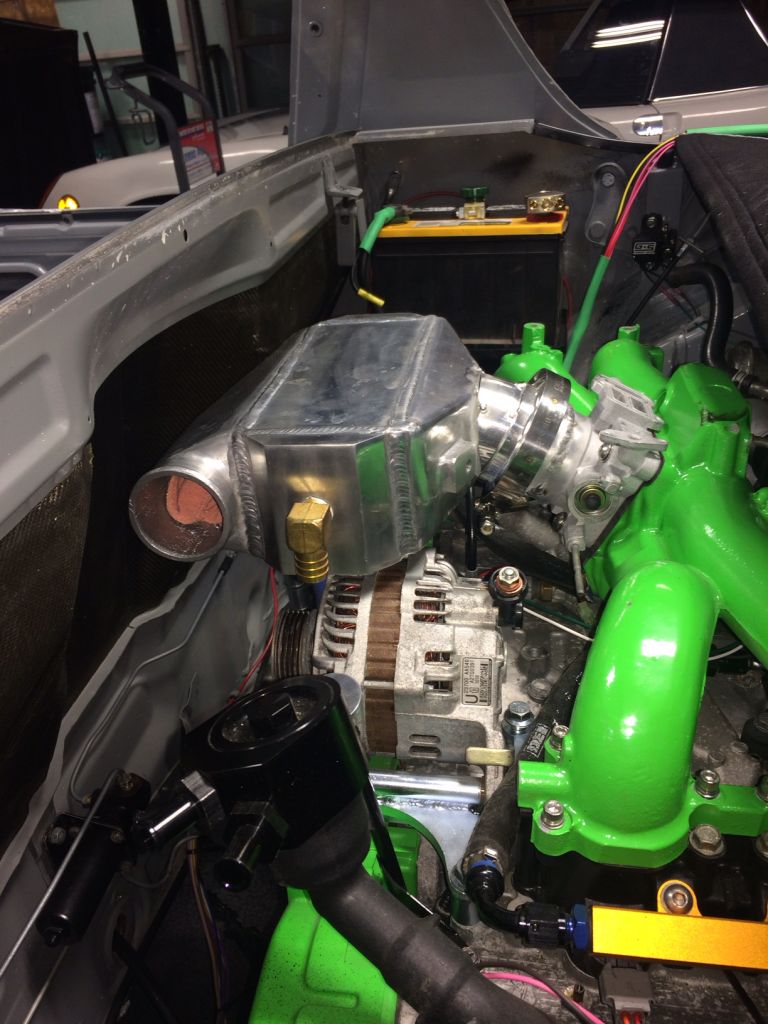 Had some extra time before dinner so I started on the IC to turbo plumbing. Tubes are exactly where I want them to be. Unfortunately it is resting on the dipstick tube, alternator and intake manifold. 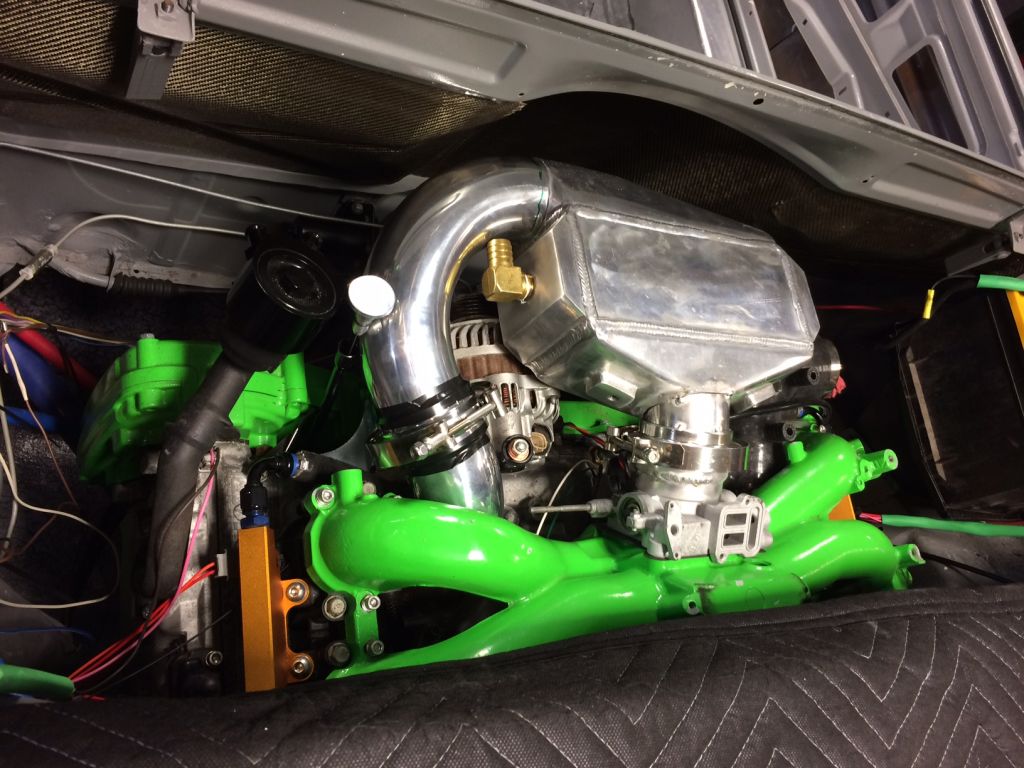 The engine is going to need to come out to get this sorted. It will also make the IC mount easier to mock up. I am going to take some time to make a roller kart that I can mount on the engine cradle because I may have another project lined up that I can use it on. Happy New Year, Scott |
|
|
|
| CptTripps |
Jan 3 2017, 04:14 PM
Post
#958
|
|
:: Punch and Pie :: Group: Members Posts: 3,585 Joined: 26-December 04 From: Tuscaloosa, AL and Akron, OH Member No.: 3,342 Region Association: Upper MidWest |
Holy. Shit.
That's looking bad-ass Scott. You're a true master. |
|
|
|
| 76-914 |
Jan 3 2017, 06:38 PM
Post
#959
|
|
Repeat Offender & Resident Subaru Antagonist Group: Members Posts: 13,815 Joined: 23-January 09 From: Temecula, CA Member No.: 9,964 Region Association: Southern California |
Maybe a rubber isolation coupling between the IC & TB (IMG:style_emoticons/default/confused24.gif)
|
|
|
|
| Amenson |
Jan 3 2017, 07:33 PM
Post
#960
|
|
That's opposite lock!! Group: Members Posts: 645 Joined: 27-May 05 From: Dublin, OH Member No.: 4,154 Region Association: None |
QUOTE(76-914 @ Jan 3 2017, 07:38 PM) Ya, sure...why not. I would only take about 7 minutes to run the intercooler and throttle body through the the bandsaw to hack off the v-band clamp that I spent all day installing and replace it with leak prone rubber/silicone coupling. (IMG:style_emoticons/default/av-943.gif) (IMG:style_emoticons/default/laugh.gif) (IMG:style_emoticons/default/lol-2.gif) (IMG:style_emoticons/default/barf.gif) (IMG:style_emoticons/default/barf.gif) (IMG:style_emoticons/default/barf.gif) (IMG:style_emoticons/default/barf.gif) (IMG:style_emoticons/default/barf.gif) (IMG:style_emoticons/default/barf.gif) (IMG:style_emoticons/default/barf.gif) Sarcasm aside, this is an upgrade that I added to the project on my own time because I did not want Doug to have to deal with the frustration of blowing IC piping apart in the middle of an awesome high boost maneuver. Nobody should have to ever experience that. (IMG:style_emoticons/default/hissyfit.gif) Cheers, Scott |
|
|
|
|
1 User(s) are reading this topic (1 Guests and 0 Anonymous Users)
0 Members:

|
Lo-Fi Version | Time is now: 7th November 2025 - 08:22 PM |
Invision Power Board
v9.1.4 © 2025 IPS, Inc.