|
|
|
Porsche, and the Porsche crest are registered trademarks of Dr. Ing. h.c. F. Porsche AG.
This site is not affiliated with Porsche in any way. Its only purpose is to provide an online forum for car enthusiasts. All other trademarks are property of their respective owners. |
|
|

  |

| rhodyguy |
 May 16 2014, 02:24 PM May 16 2014, 02:24 PM
Post
#121
|
|
Chimp Sanctuary NW. Check it out.  Group: Members Posts: 22,252 Joined: 2-March 03 From: Orion's Bell. The BELL! Member No.: 378 Region Association: Galt's Gulch |
Nice work!
|
   |

 
|
| Bulldog9 |
Jun 1 2014, 06:59 PM
Post
#122
|
|
Senior Member Group: Members Posts: 706 Joined: 21-August 13 From: United States Member No.: 16,283 Region Association: MidAtlantic Region |
Finally some Progress, bolted on the front suspension! Most went very well, a few snafu's but the Rebel Racing Bushings went in well. I need to redo one of the Ball Joint pin/bolts, as it wouldnt seat all the way and I discovered that the 912E front sway bar is skinnier than the 911, but all is looking great. Regret the gold disk brake dust shield (looks dumb IMO). Had a great day of father son bonding, and progress on the car.
Attached thumbnail(s) 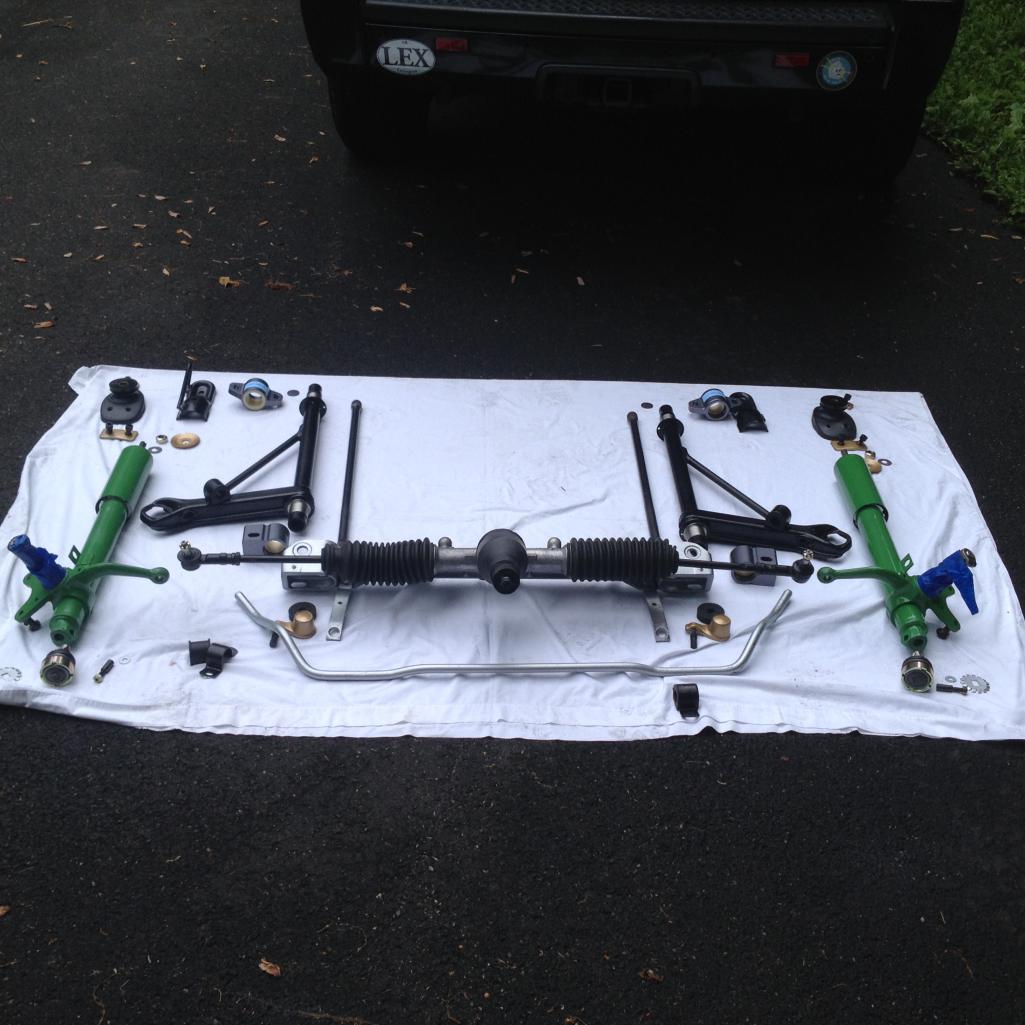 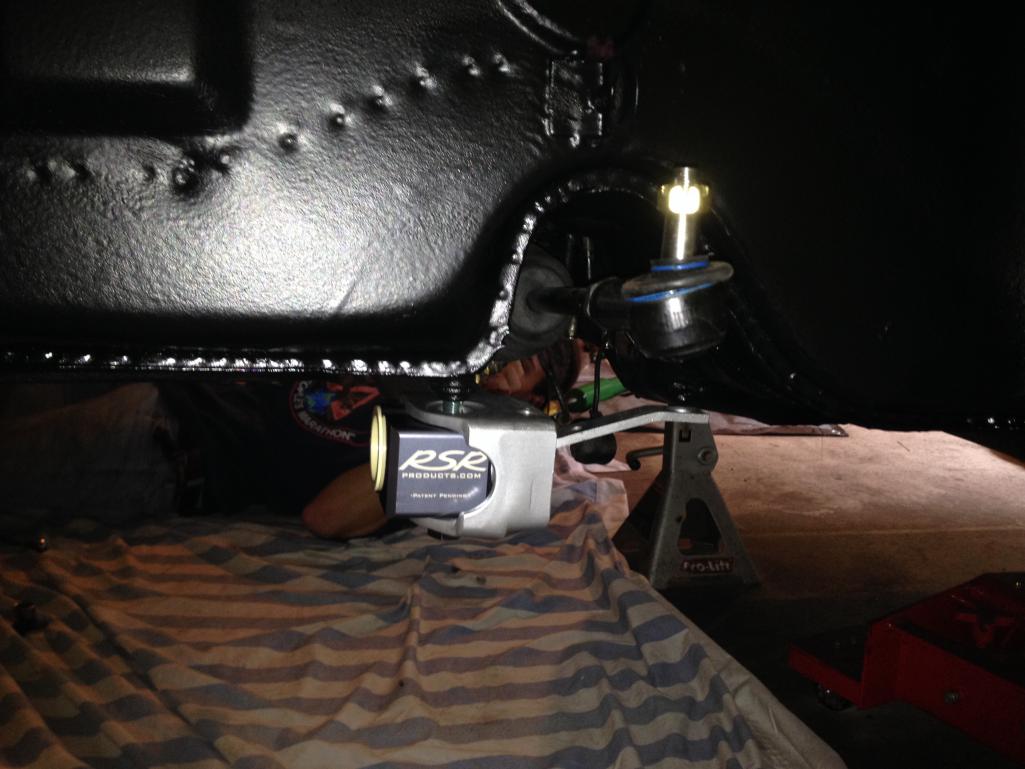
|
|
|
|
| Bulldog9 |
Jun 1 2014, 07:02 PM
Post
#123
|
|
Senior Member Group: Members Posts: 706 Joined: 21-August 13 From: United States Member No.: 16,283 Region Association: MidAtlantic Region |
Views of the Rebel Racing Bushings. Install was straightforward, very smooth range of motion, just barely enough to hold the position it is left in. Haven't tightened to final torque, will do when back on ground.
Attached thumbnail(s)  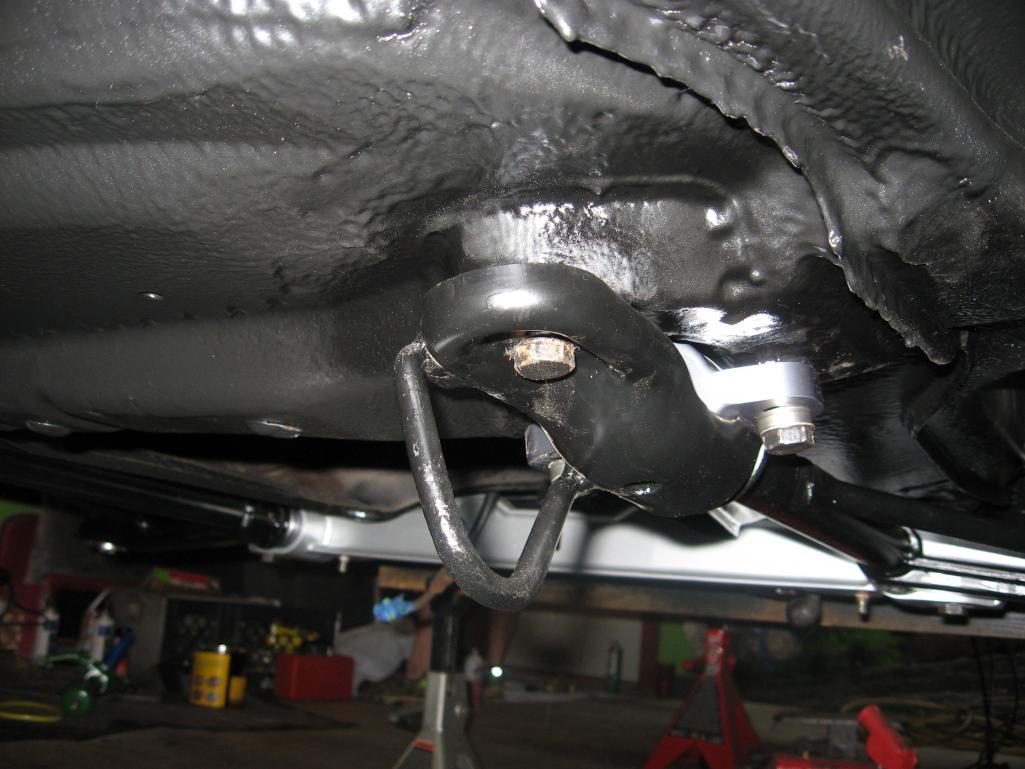
|
|
|
|
| Bulldog9 |
Jun 1 2014, 07:04 PM
Post
#124
|
|
Senior Member Group: Members Posts: 706 Joined: 21-August 13 From: United States Member No.: 16,283 Region Association: MidAtlantic Region |
More views
Attached thumbnail(s)  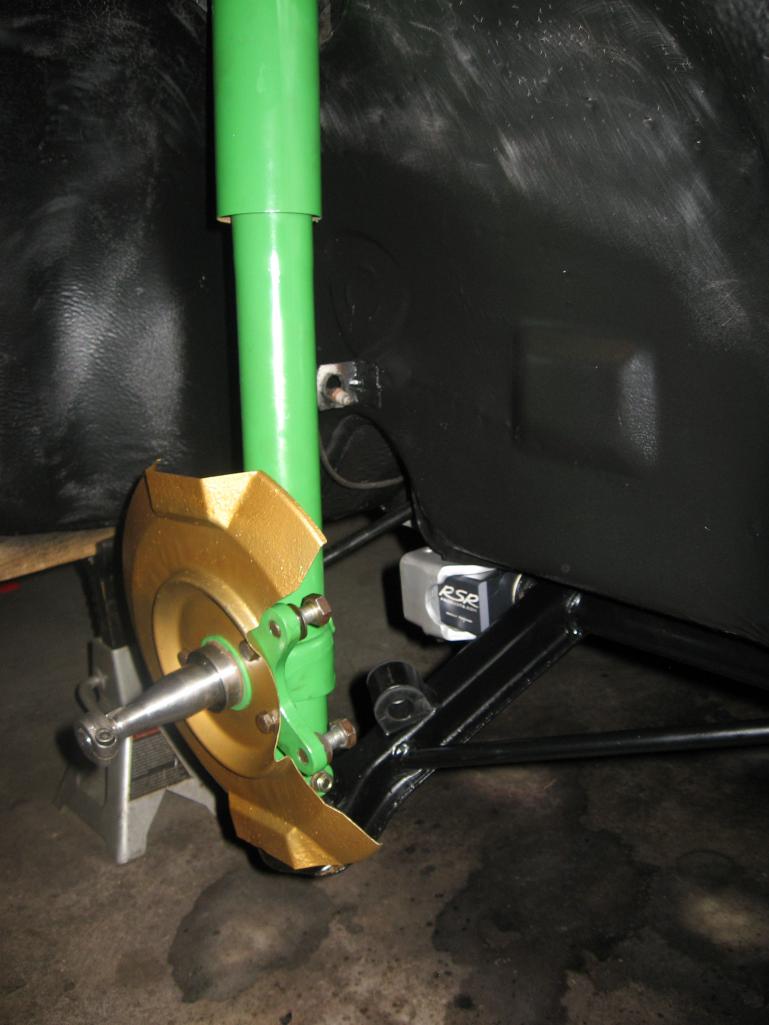
|
|
|
|
| Bulldog9 |
Jun 1 2014, 07:11 PM
Post
#125
|
|
Senior Member Group: Members Posts: 706 Joined: 21-August 13 From: United States Member No.: 16,283 Region Association: MidAtlantic Region |
My son is home from college for the summer, was great to work together on this. He did a great job cleaning up the rear trailing arms, and prepping rear wheel wells and lower chassis. Solid worker and skills! Was great. He never really liked changing oil/plugs, etc, but this he is really into and we had a blast.
Attached thumbnail(s) 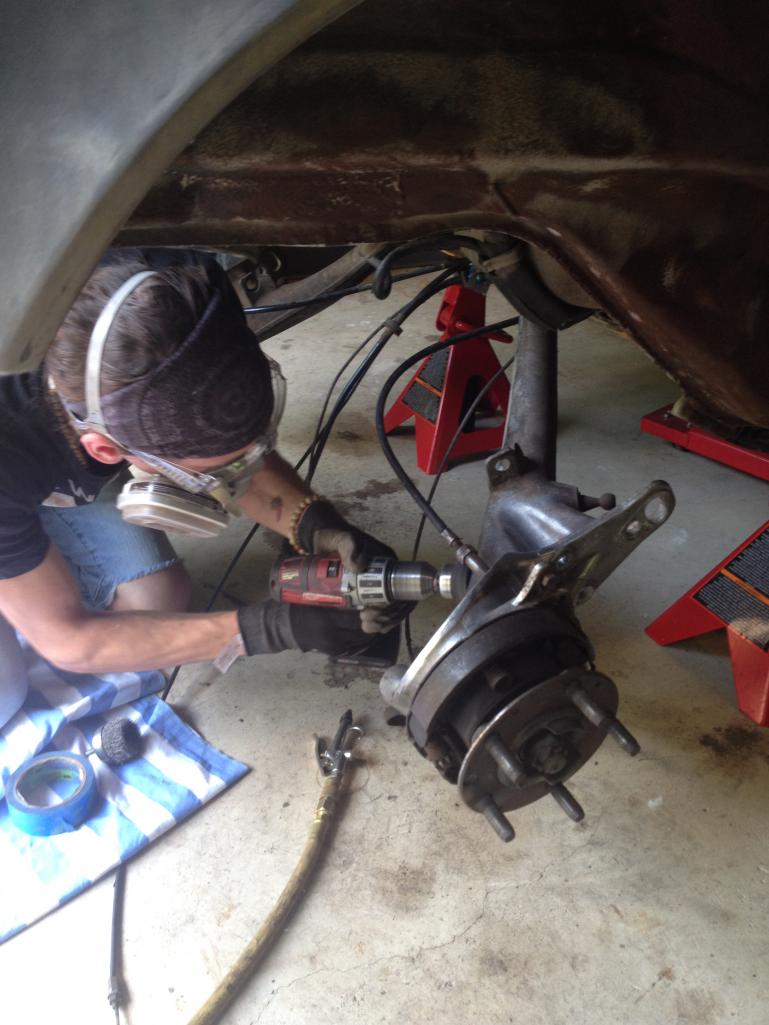 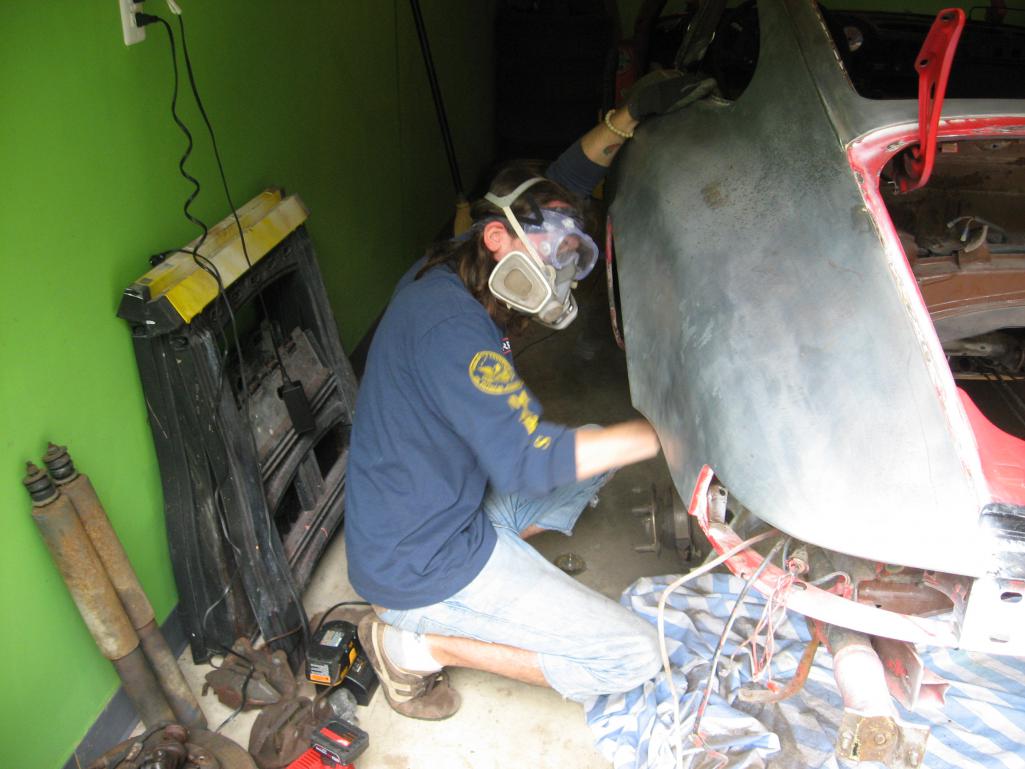
|
|
|
|
| Bulldog9 |
Jun 1 2014, 07:23 PM
Post
#126
|
|
Senior Member Group: Members Posts: 706 Joined: 21-August 13 From: United States Member No.: 16,283 Region Association: MidAtlantic Region |
A few more random shots. Next up is prepping the openings for the rear radius arm/spring plate Bushing. The holes had some significant rust and piting, will likely need to grind a bit. Surprisingly the torsion bars came out fairly easy. After a minute or two of hard wiggling and circular movements, a very slight wiggle and pressure and POP they came right out. I was ready for an all day fight, but we were very fortunate. Bars looked great.
Attached thumbnail(s) 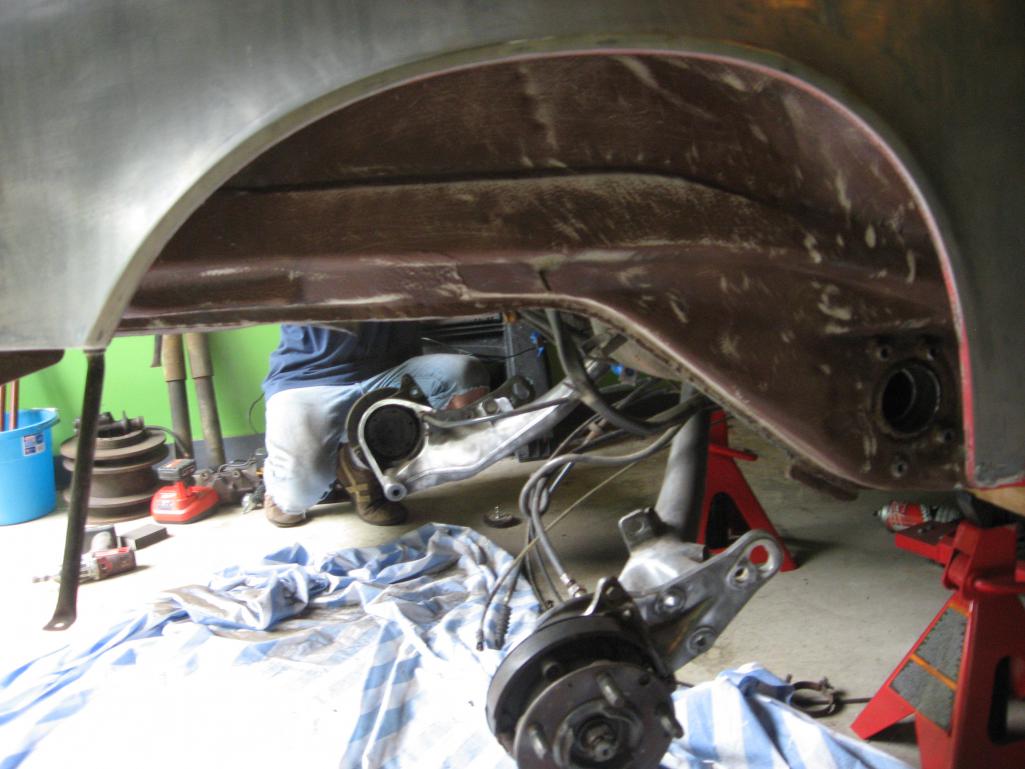 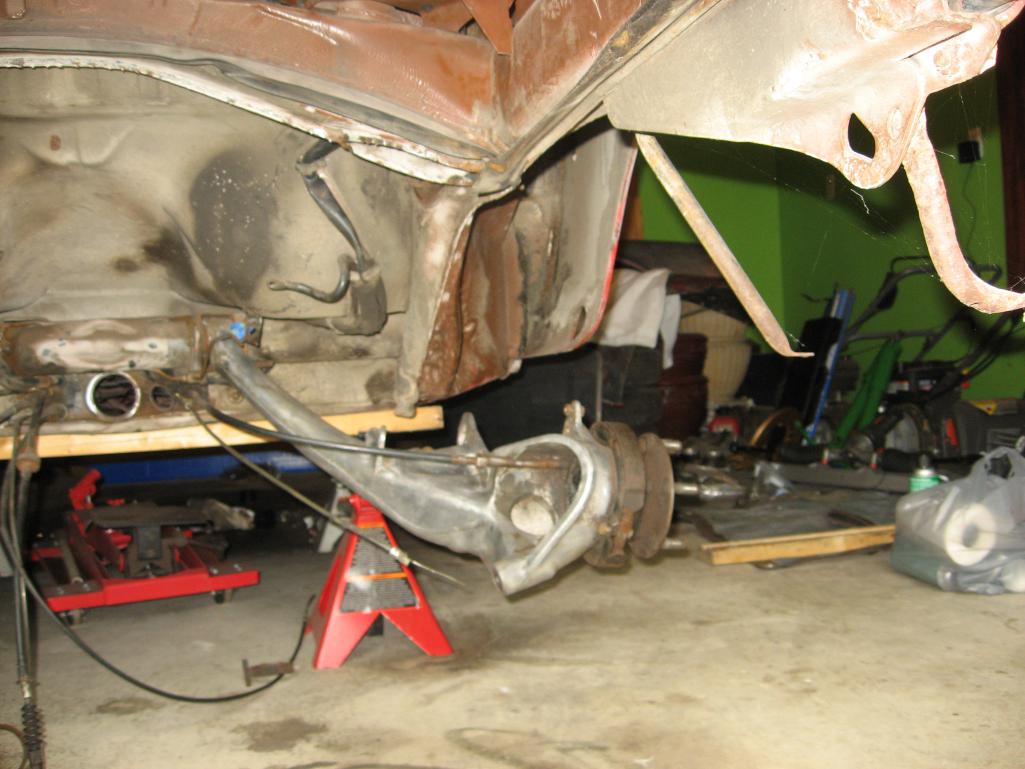
|
|
|
|
| euro911 |
Jun 1 2014, 08:28 PM
Post
#127
|
|
Retired & living the dream. God help me if I wake up! Group: Members Posts: 8,937 Joined: 2-December 06 From: So.Cal. & No.AZ (USA) Member No.: 7,300 Region Association: Southern California |
QUOTE(Steve Pratel @ Jun 1 2014, 05:23 PM)  A few more random shots. Next up is prepping the openings for the rear radius arm/spring plate Bushing. The holes had some significant rust and piting, will likely need to grind a bit. Surprisingly the torsion bars came out fairly easy. After a minute or two of hard wiggling and circular movements, a very slight wiggle and pressure and POP they came right out. I was ready for an all day fight, but we were very fortunate. Bars looked great. Sometimes I wished we had some kids. Only sometimes though (IMG:style_emoticons/default/laugh.gif) |
|
|
|
| Bulldog9 |
Jul 2 2014, 12:53 PM
Post
#128
|
|
Senior Member Group: Members Posts: 706 Joined: 21-August 13 From: United States Member No.: 16,283 Region Association: MidAtlantic Region |
Making progress, was able to finish the rear suspension over the weekend. The rebel racing Bushings are well made and perfectly machined and line up with the mounts. They are a little pricey, but the benefit of smooth suspension movement, ease of install, dis-assembly for setting ride height and the fact they are flat out awesome looking make it worth while. Installation was straight forward, but a little nerve racking. Key is proper prep of torsion bar tube, and I'd recommend to fully test install the bushings and swing-arm with spacers and tightened down before installing the torsion bars. This part is time consuming. Looking forward to seeing how the car rides with the smooth virtually free moving suspension front and rear (as opposed to the tight twisting rubber setup that the car had stock) I'm hoping for a smooth responsive suspension. Also installed the new vented rear rotors, amazing difference in size. Pics follow.
Attached thumbnail(s) 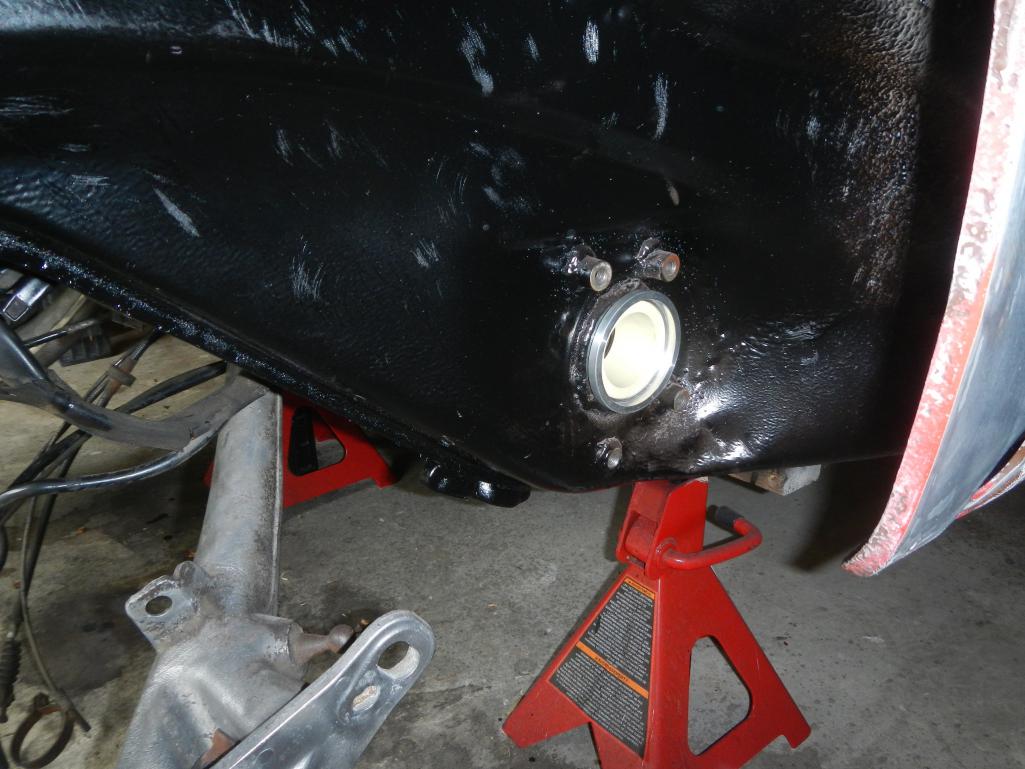 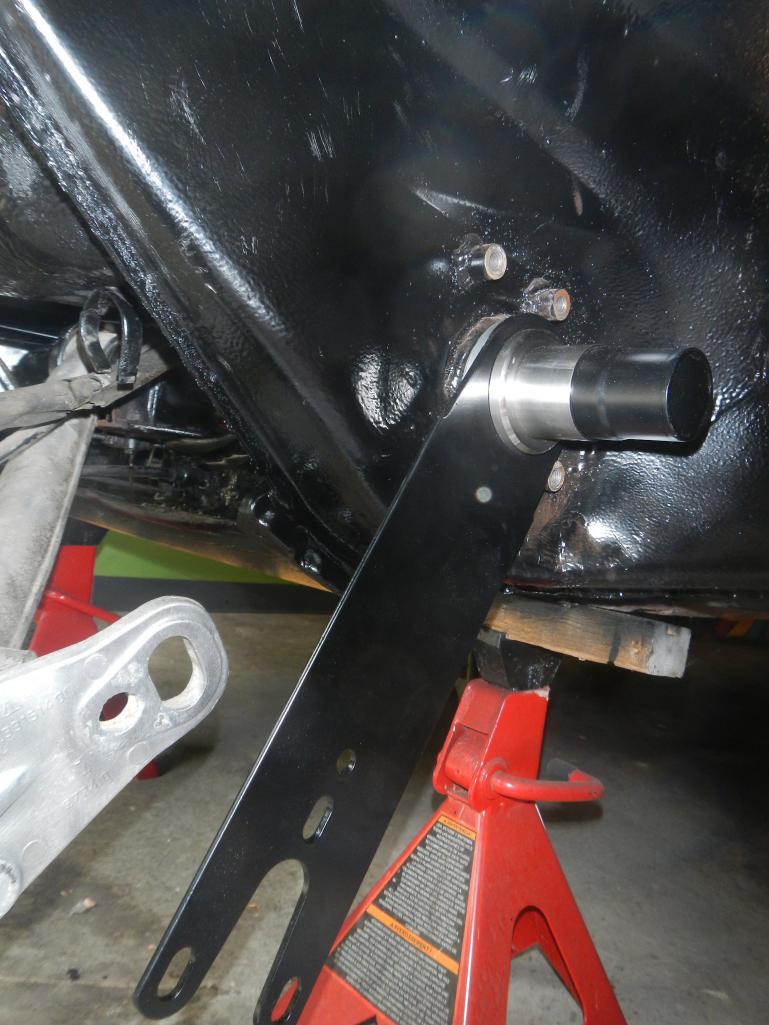 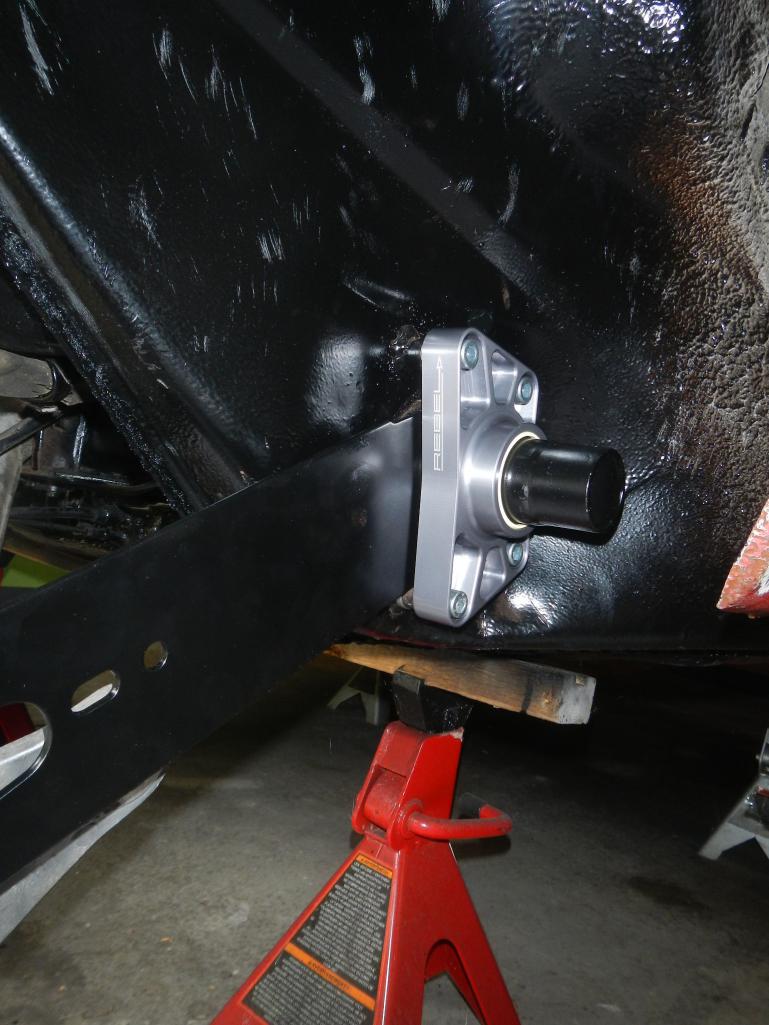 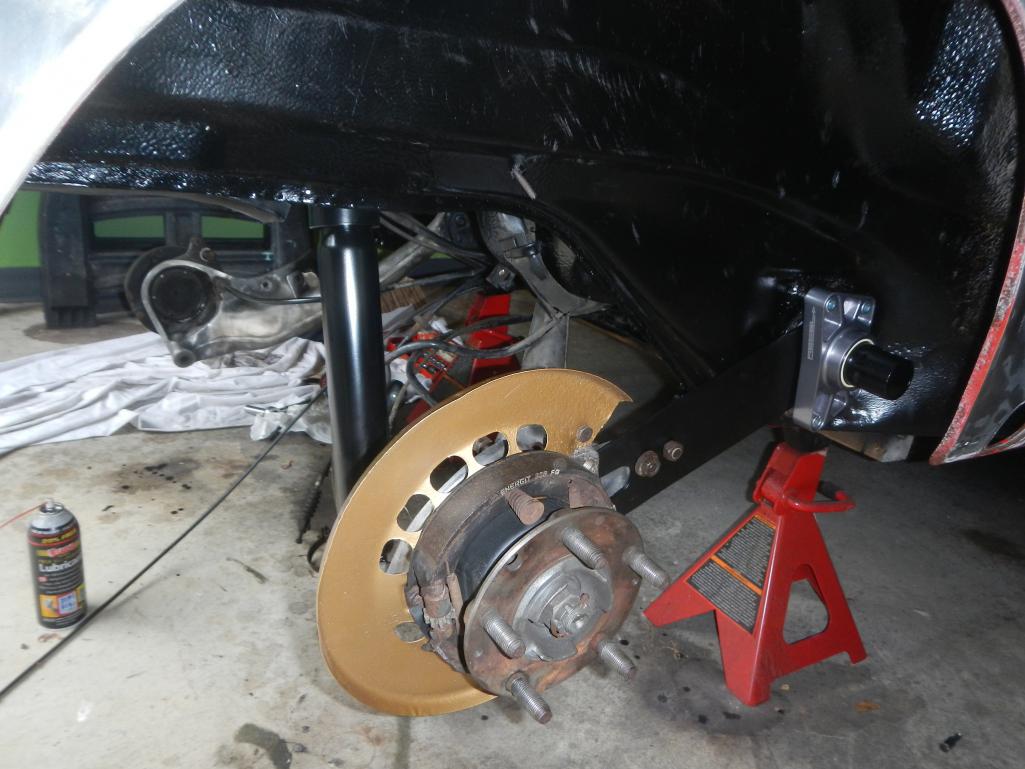 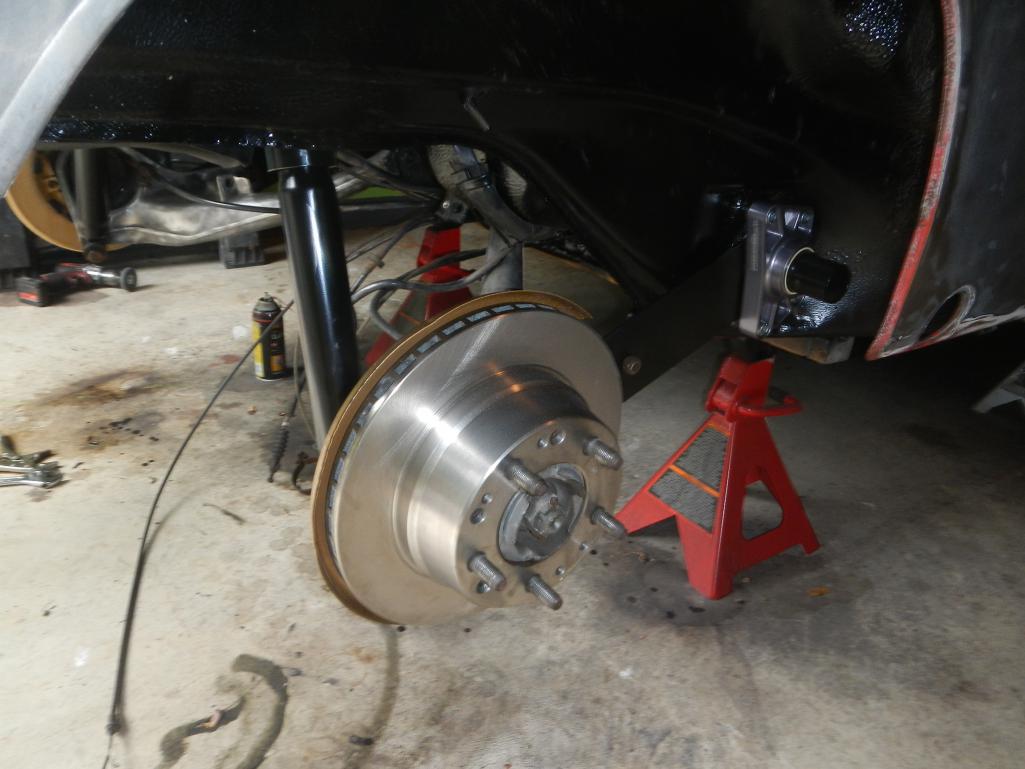
|
|
|
|
| Bulldog9 |
Sep 2 2014, 05:48 PM
Post
#129
|
|
Senior Member Group: Members Posts: 706 Joined: 21-August 13 From: United States Member No.: 16,283 Region Association: MidAtlantic Region |
Things are progressing, I was able to source the correct Calipers, sourced a set of 'A' calipers for an 83, and they bolted right up to the strut and proper spacing and fitment to the rotor, so GOOD NEWS on that regard. Bolted them up put on the tires and I have a rolling chassis again!
This means I can get back to bodywork. Last summer over ab out 6 days of straight work, I was able to get the body stripped down to bare metal, then the two step PPG 579/520 metal conditioning outlined in pelican under bodywork. MUCH has been said about how long you can leave bare metal left untreated, and my experience is that these panels showed NO evidence of rust for the first 9 months and only began showing some flash or surface rust mid June or July. I ran out of steam, and time and one thing led to the next, and winter came, so I decided to put the car on stands, strip the suspension parts and restore them over the winter. Now that it is all back together it was time to revisit the body work, getting it ready for the body shop. Last year I just focused on the exterior panels not the back or crevices, etc. so in addition to going over the whole body again with 80 grit with a DA sander, I also had to do all the joints and back of the panels. Not to many trouble spots, and will trust Scotty B (autobody shop doing my paint) to sort them out. After I re-conditioned all the parts (man I REALLY don't like spraying water on bare metal) it was time to address all the remaining paint and areas that would be covered with primer, as well as the back side of some of the panels. Talk about a NEVER ending job! I've done small projects before but never something at this level. It took another 3-4 days of sanding, grinding cleaning prepping, sanding cleaning and I was finally done. I was super stressed about actually spraying, and though I have pretty good rattle can skills, I had never sprayed paint with an air gun, never mind 2 part epoxy. Would I set the gun right? what ratio paint/hardener/reducer to use, would it stick? LOL The kit I bought came with two guns a 1.4 and 1.8 (not that I know what the heck the difference is) so I hooked up the 1.8 filled it with water and sprayed away teaching myself how the gun worked. Once I was more confident I hooked up the 1.4 gun, cleaned it with some reducer by spraying it, and setting the gun to where I felt it would spray well. Then I set up my makeshift panel stands hung the fenders hood and door, mixed the paint and wiped the panels down with pre paint cleaner AND IT STARTED TO RAIN...... lol Of course all goes inside. Wait an hour no go, wait till the next day deal with a few flash rust spots from rain, repeat wipe down and tac cloth, start pouring out paint AND RAIN..... At this point I was ready to quit. It was Sunday, and Monday was Labor day. But I got up Monday morning, the sun was out and I figured one last time. Third time was a charm. I set everything up, mixed and sprayed the individual panes first, then as they dried I rolled the chassis out of the Garage, masked and prepped the body and shot the paint. VERY happy with the results, the primer sprayed beautifully, only one area of runs which was the first piece I painted (fender), and only one area with orange peel which was my second piece (engine lid), The rest went very well, and now I am anxious about prep. Will the primer stick? did the pre-cleaner leave a residue, did I mix correctly, etc etc. Whatever, the body is sealed and I leave it to the Scotty B and his expertise at the paint shop to go from here. Materials/supplies PPG 579/520 metal conditioning TCP Global 2 Part Epoxy Primer PPG medium reducer Mercedes source Miracle Paint El cheapo harbor freight 1.4 nozzle air gun 100 lbs at wall, 45 lbs at gun with two water separators, one before and one after the regulator. Makita 5600 Air Compressor Eastwood DA sander & 8million discs... lol Pics follow Attached thumbnail(s) 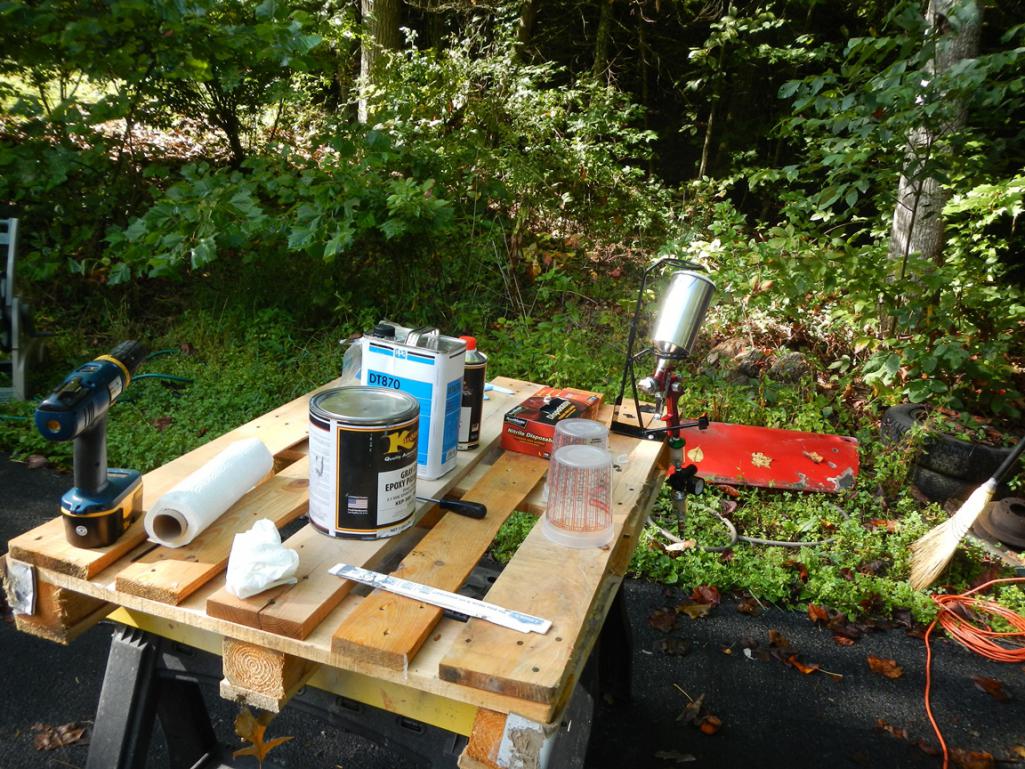 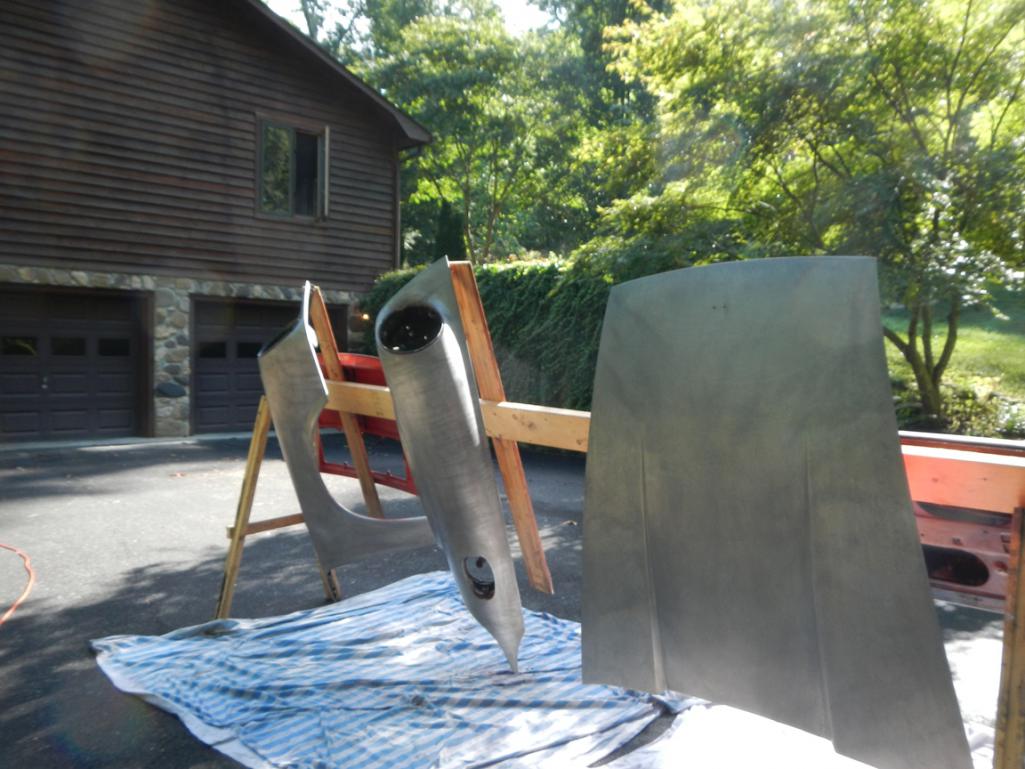 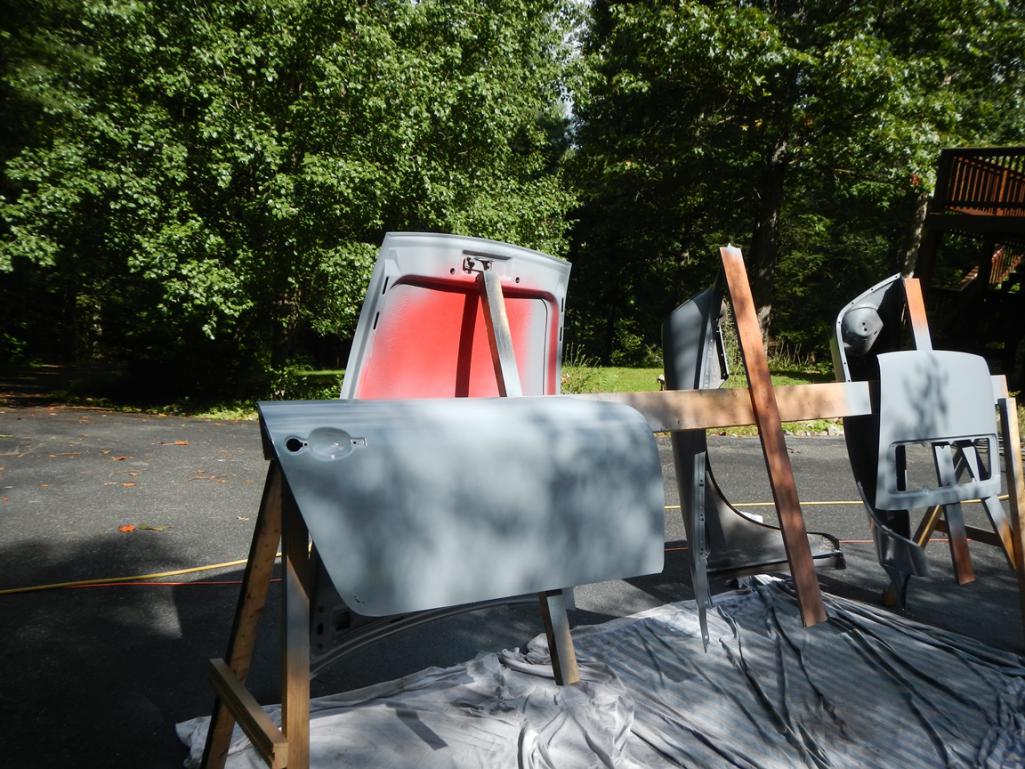  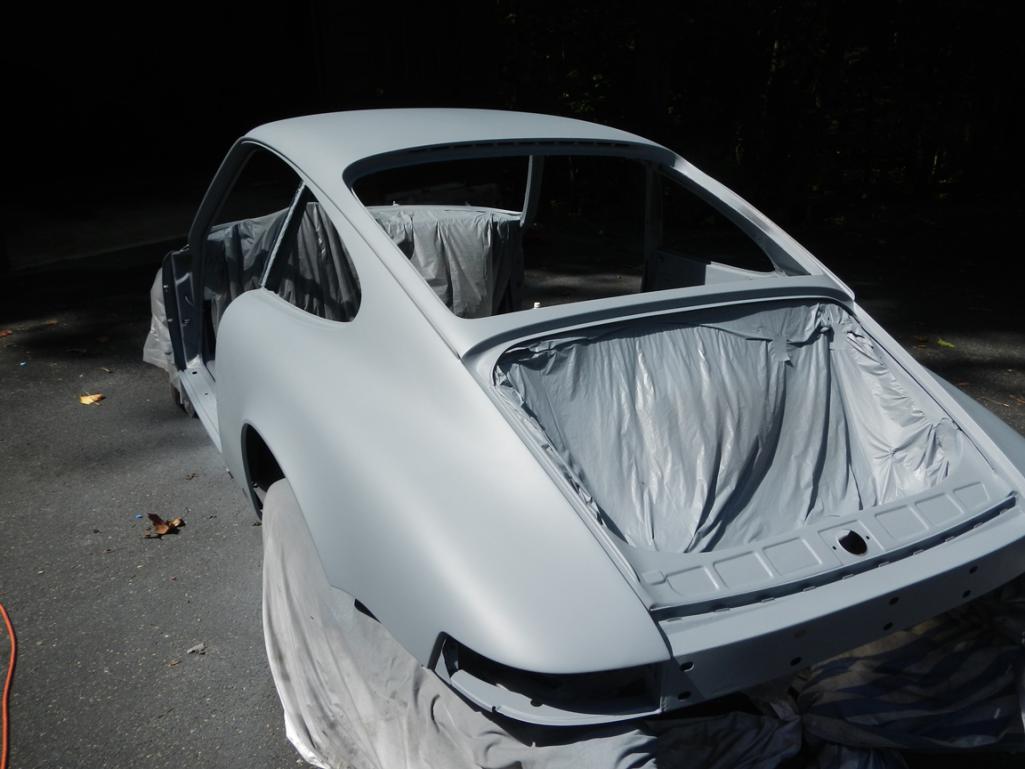 Attached image(s) 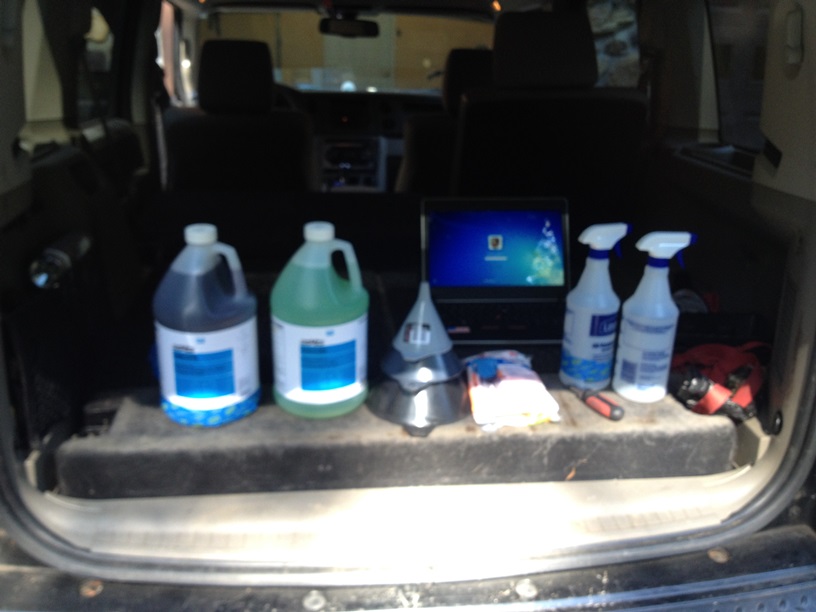
|
|
|
|
| Bulldog9 |
Sep 2 2014, 05:52 PM
Post
#130
|
|
Senior Member Group: Members Posts: 706 Joined: 21-August 13 From: United States Member No.: 16,283 Region Association: MidAtlantic Region |
A few more pics. and the starting point. NEXT for the chassis is Paint and time to start building the motor.
Attached thumbnail(s) 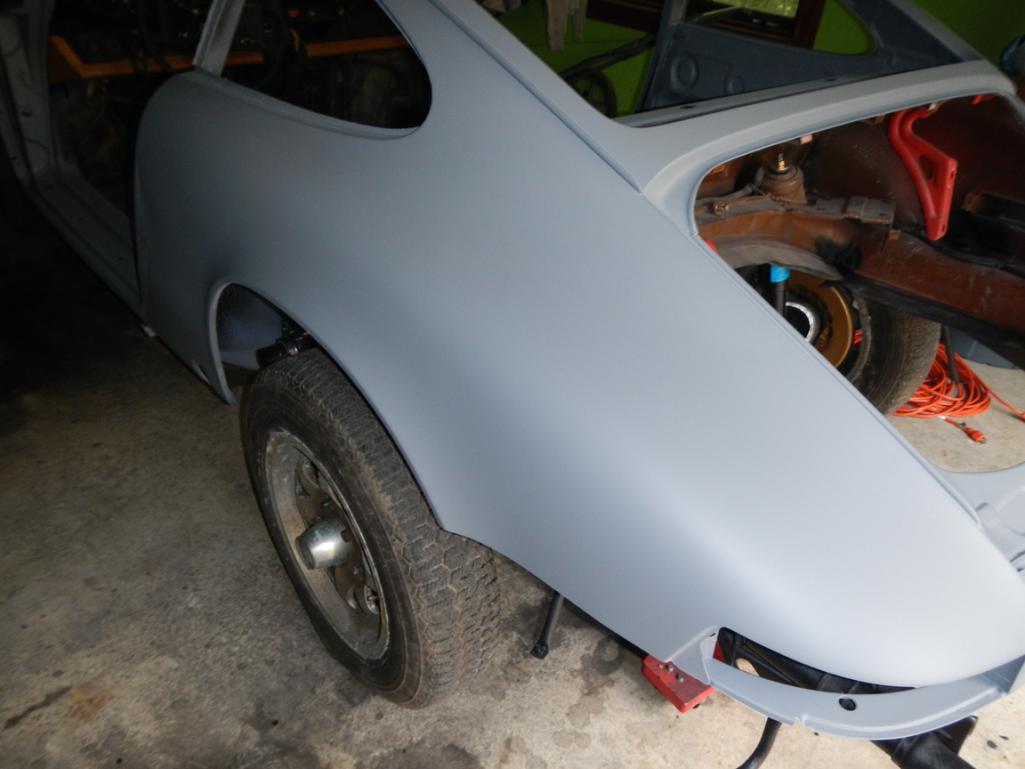 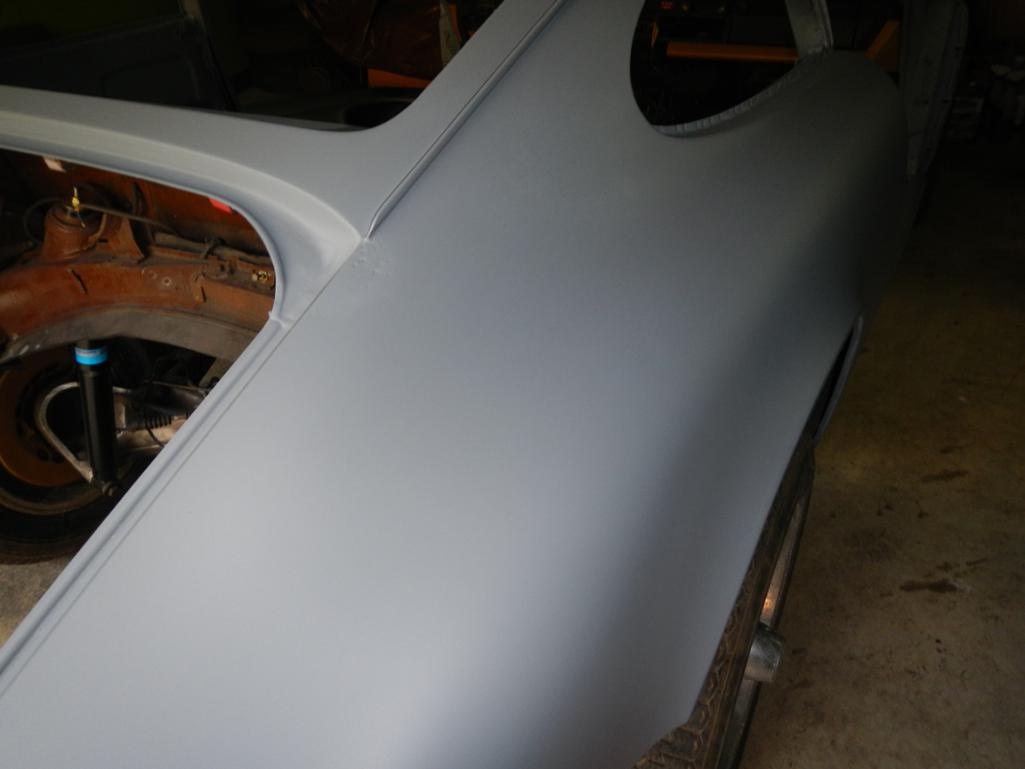 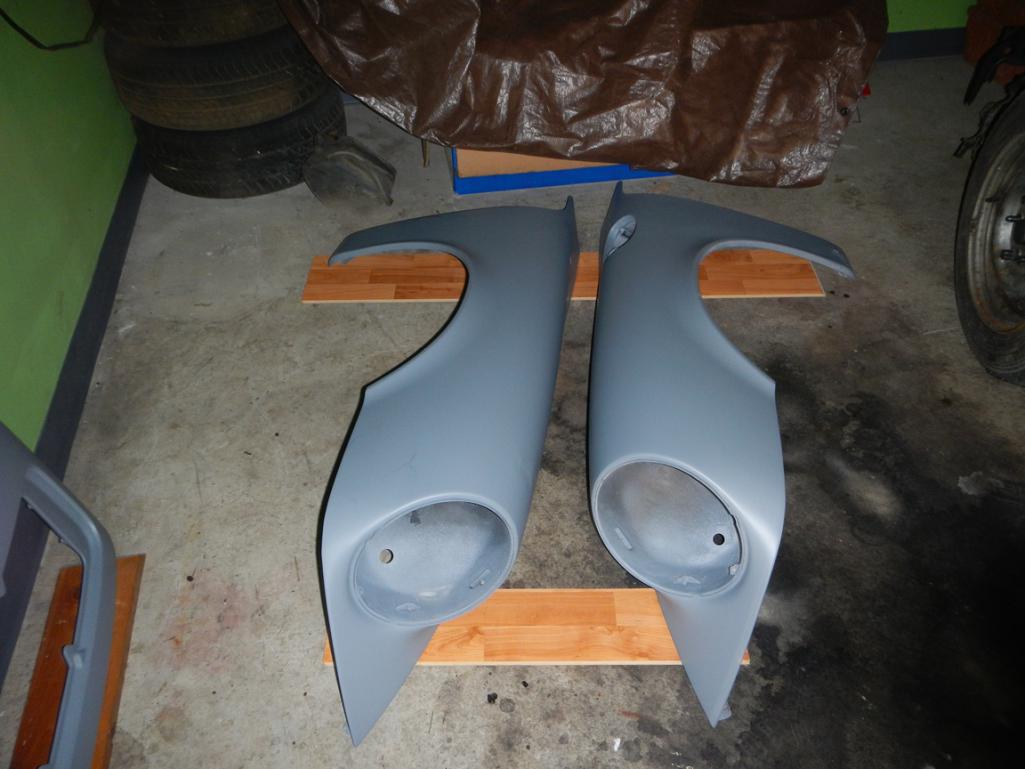 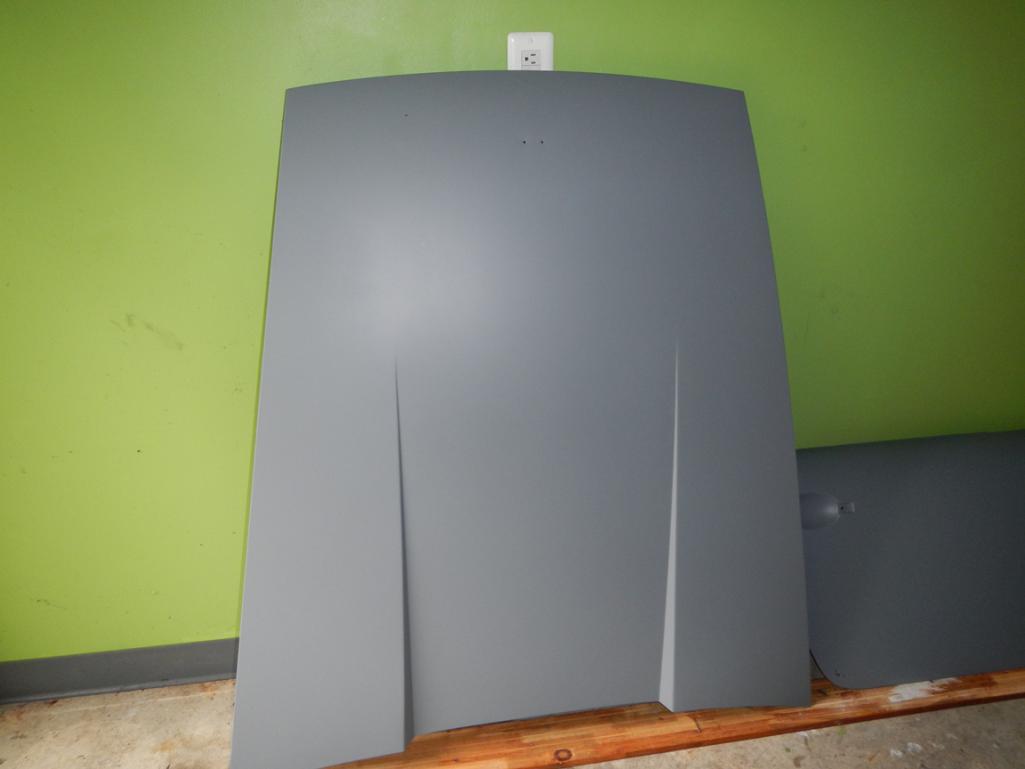 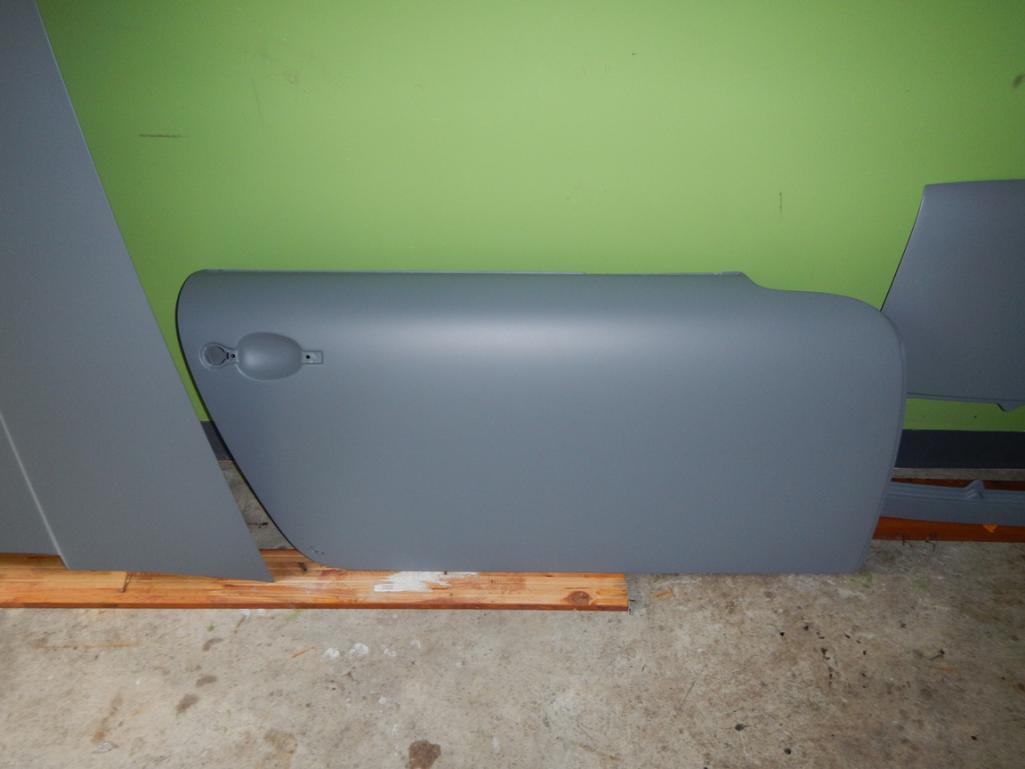 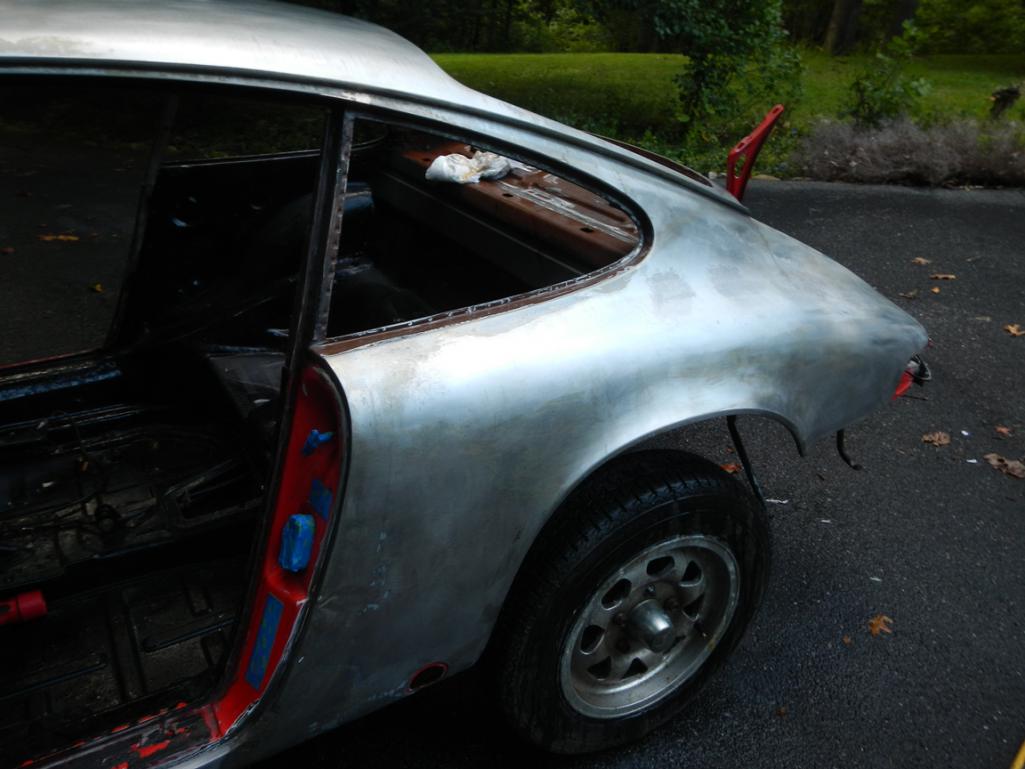 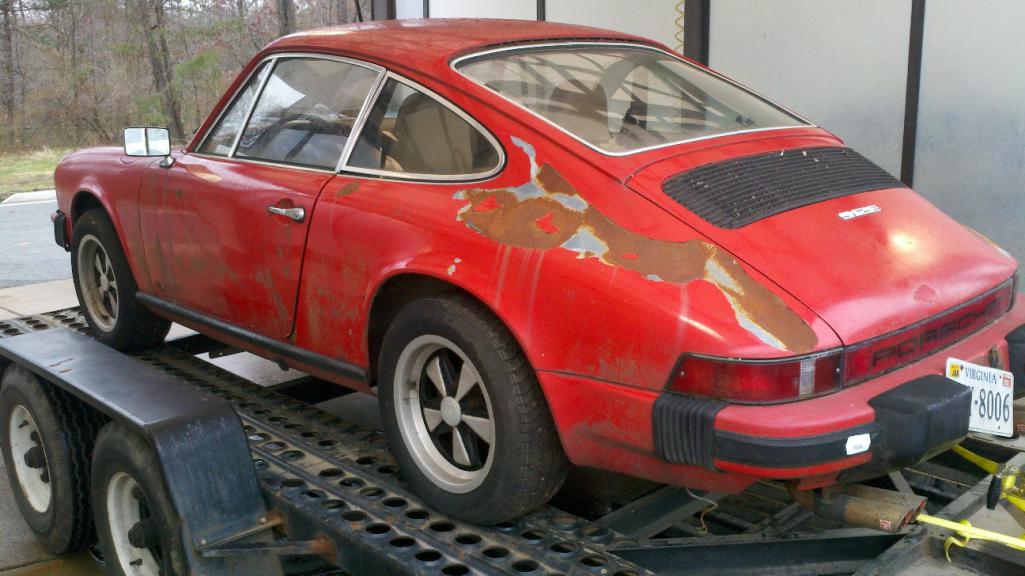 
|
|
|
|
| scotty b |
Sep 2 2014, 06:15 PM
Post
#131
|
|
rust free you say ? Group: Members Posts: 16,375 Joined: 7-January 05 From: richmond, Va. Member No.: 3,419 Region Association: None |
Looking good Steve. Once you get that 6 built she'll be pretty sweet (IMG:style_emoticons/default/poke.gif)
|
|
|
|
| Bulldog9 |
Sep 3 2014, 05:42 AM
Post
#132
|
|
Senior Member Group: Members Posts: 706 Joined: 21-August 13 From: United States Member No.: 16,283 Region Association: MidAtlantic Region |
(IMG:style_emoticons/default/sawzall-smiley.gif) Yeah, about that, I seem to have lost two of the pistons and cyls, looks like I'll just have to do it with 4. But on the bright side, it will have closer to a 50/50 weight balance now! (IMG:style_emoticons/default/piratenanner.gif) QUOTE(scotty b @ Sep 2 2014, 08:15 PM) Looking good Steve. Once you get that 6 built she'll be pretty sweet (IMG:style_emoticons/default/poke.gif) |
|
|
|
| Harpo |
Sep 20 2014, 01:39 PM
Post
#133
|
|
Senior Member Group: Members Posts: 1,304 Joined: 21-August 11 From: Motor City aka Detroit Member No.: 13,469 Region Association: None |
Very nice. I would be interested to hear about the RSR bushings after your first ride. I'm concerned about the stiffness. I would really like to get a 912 before they become too expensive
Thanks David |
|
|
|
| Bulldog9 |
Sep 23 2014, 05:51 PM
Post
#134
|
|
Senior Member Group: Members Posts: 706 Joined: 21-August 13 From: United States Member No.: 16,283 Region Association: MidAtlantic Region |
Time to buy the AFM, Anyone using this? I like that it has a voltmeter built in and can expand to other modules (pricey) http://www.plxdevices.com/product_info.php...WDBDSMAFR_DM6G3
|
|
|
|
| Bulldog9 |
Sep 24 2014, 10:45 PM
Post
#135
|
|
Senior Member Group: Members Posts: 706 Joined: 21-August 13 From: United States Member No.: 16,283 Region Association: MidAtlantic Region |
I pulled the switch on the PLX, is a Gen 3, looks to be a good deal from the manufacturers now that their Gen 4 is out. It comes with a 10 foot cable but also a 1 foot pigtail. This is 11 feet to the Module, then there is a 4 foot cable that goes from the module to the gauge so I think I should be OK as far as cable length.
I plan to mount the AFM/Voltmeter in between a fuel gauge and clock (52MM VDO) in a 3 gauge bracket where the ash tray was, will likely need to widen the opening a bit. The nice thing about the PLX is that is it super low profile, and could be mounted elsewhere very easily. I added the dual pressure/temp gauge from a 911 and also plan to delete the fuel gauge and clock, and replace them with dash vents from a Ford F150 connected to a fan with a heater element and filter. I'll be using one of the heater boxes I made when I was trying to create a heat exchanger option. I picked up a 52mm VDO clock and fuel gauge (VW beetle type). I attached a pic of my proposed layouts, as well as a pic of the ford vent. Not sure if I will keep or sell the stock clock and fuel gauge. Believe it or not the original clock still works. Attached thumbnail(s) 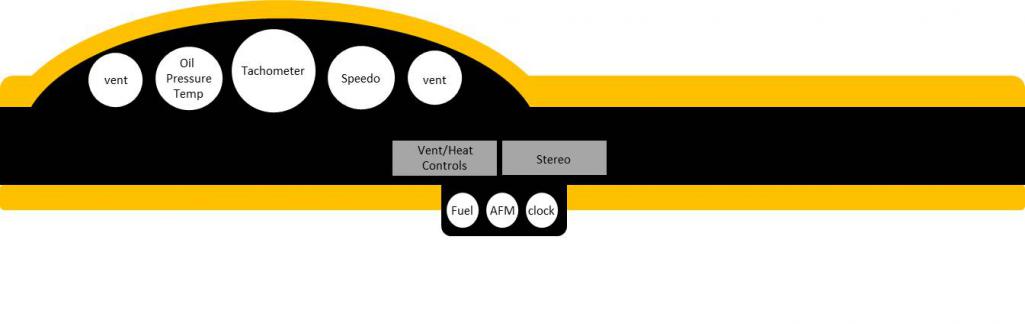  Attached image(s) 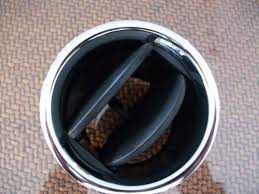
|
|
|
|
| Bulldog9 |
Oct 21 2014, 02:52 PM
Post
#136
|
|
Senior Member Group: Members Posts: 706 Joined: 21-August 13 From: United States Member No.: 16,283 Region Association: MidAtlantic Region |
Woohoo, dropped of #770 at Scotty B's shop for some TLC & Paint! cant wait to see it back in its original color! I almost cant believe it.... Time to get serious on building the motor! In addition to repairing some of the weak/rusted panels, (spot on door, fender, rear window) he is going to prep, block & paint, as well as set the headliner and front/rear windscreens...
Of course when backing on the trailer the throttle cable got pulled down and pushed forward and under the car so I couldn't see it and is now toast as a result of being dragged for 150 miles, oy (IMG:style_emoticons/default/blink.gif) I have a bit of cleanup to do in the garage and paint the tins/fan case, then it is assembly time. Now I'm getting nervous. Two areas I will need the most help with is valve geometry and setting up the carbs. First is to get a magnifying glass so I can actually read what is stamped on the jets etc, 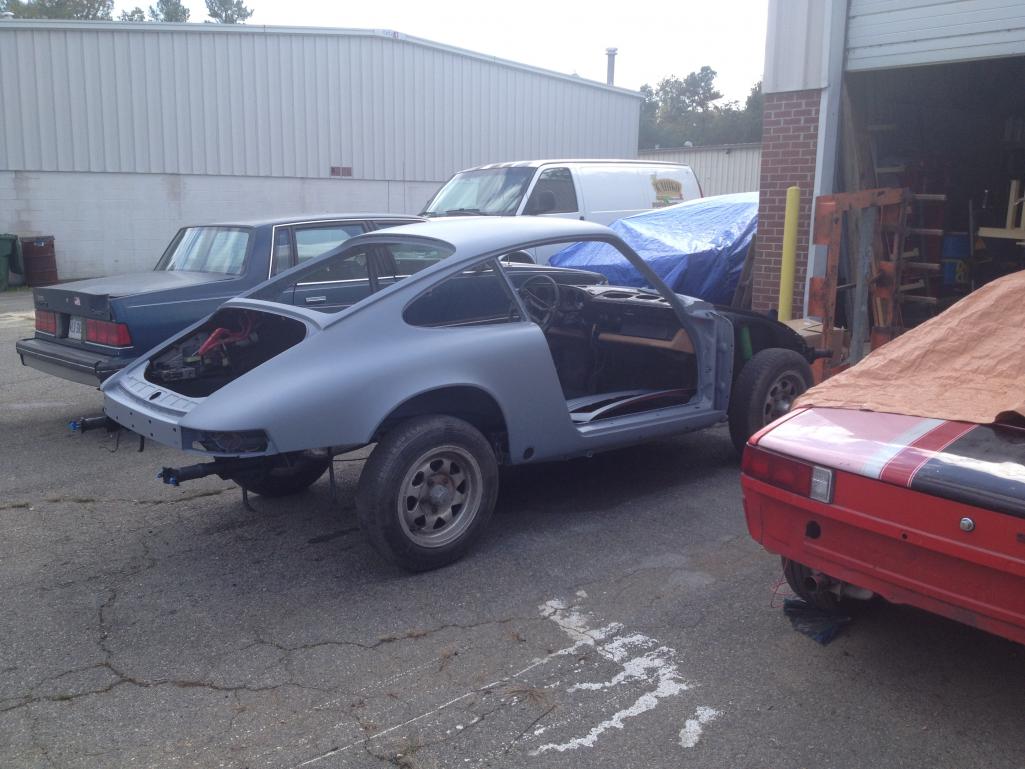 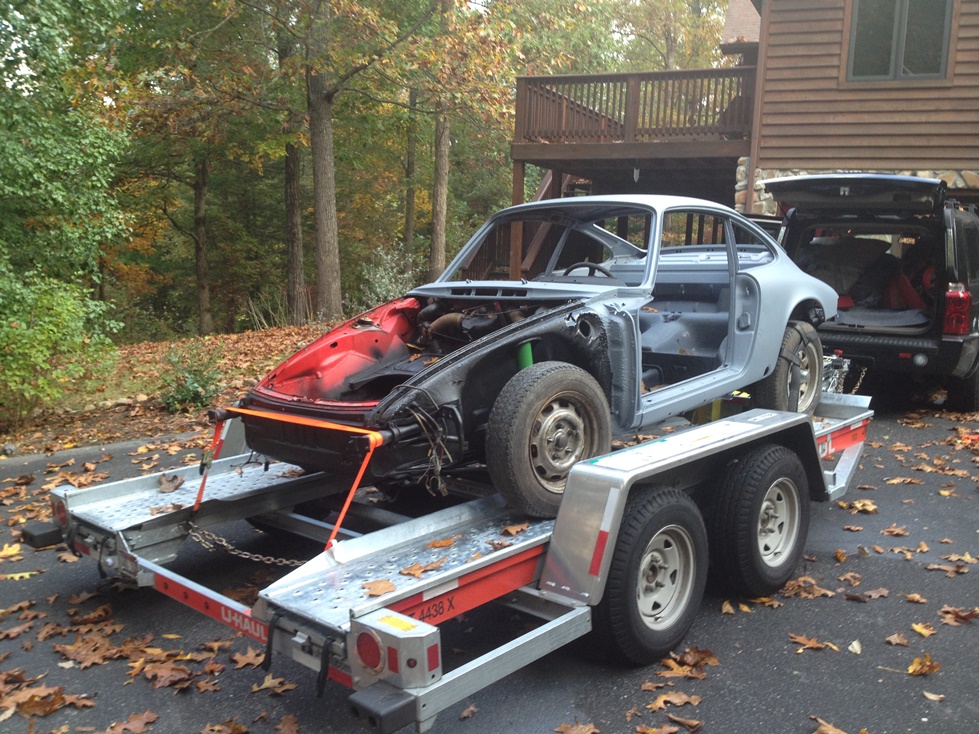 |
|
|
|
| scotty b |
Oct 21 2014, 06:41 PM
Post
#137
|
|
rust free you say ? Group: Members Posts: 16,375 Joined: 7-January 05 From: richmond, Va. Member No.: 3,419 Region Association: None |
I put Ben on it today. Will have some pics this weekend in it's first coat of high build. this one should go quickly since the car is in such good shape and Steve did so much of the prep work (IMG:style_emoticons/default/smile.gif) Doo doo brown here we come (IMG:style_emoticons/default/huh.gif)
|
|
|
|
| Bulldog9 |
Oct 22 2014, 08:36 PM
Post
#138
|
|
Senior Member Group: Members Posts: 706 Joined: 21-August 13 From: United States Member No.: 16,283 Region Association: MidAtlantic Region |
Look forward to the pics! I dropped a package in the mail with the fender/door bolts, hood & trunk latches, as well as some other misc hardware including the small body panel that goes behind the front fender bellows. I will bring the headliner and windshield/seals/molding when it is time.
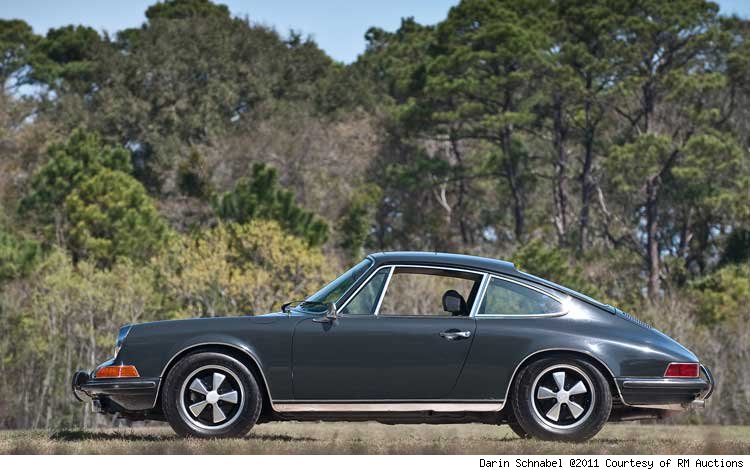
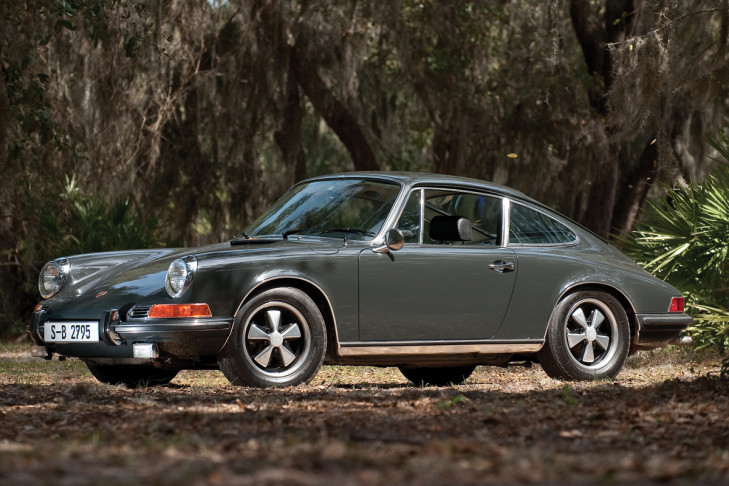
What.......... you dont like "bitta chocolate?" (IMG:style_emoticons/default/beer.gif) Its not the 'nicest' color on the planet and I almost went for BRG or Ivory, but this was what it rolled from the factory in. Pic of BC below is my visual 'target' but I do like the Ivory and BRG as well. QUOTE(scotty b @ Oct 21 2014, 08:41 PM) I put Ben on it today. Will have some pics this weekend in it's first coat of high build. this one should go quickly since the car is in such good shape and Steve did so much of the prep work (IMG:style_emoticons/default/smile.gif) Doo doo brown here we come (IMG:style_emoticons/default/huh.gif) |
|
|
|
| Bulldog9 |
Oct 22 2014, 08:41 PM
Post
#139
|
|
Senior Member Group: Members Posts: 706 Joined: 21-August 13 From: United States Member No.: 16,283 Region Association: MidAtlantic Region |
One day, I would love to have a color schemed car that in 1973 caused me to obsess over the 911...... I am psyched over the car I have and looking forward to putting bitter chocolate back on it though.
  |
|
|
|
| scotty b |
Oct 24 2014, 05:01 PM
Post
#140
|
|
rust free you say ? Group: Members Posts: 16,375 Joined: 7-January 05 From: richmond, Va. Member No.: 3,419 Region Association: None |
I need to talk to my helper about his picture taking (IMG:style_emoticons/default/dry.gif) There was a crunched spot of the front of the drivers quarter. The ONE pic he took was after he pulled it out. As of yesterday the main body has been blocked down and skim coated where needed, as are the passenger door and both fenders. I'll probably be putting a couple coats of high build on Monday night (IMG:style_emoticons/default/smile.gif)
Attached image(s) 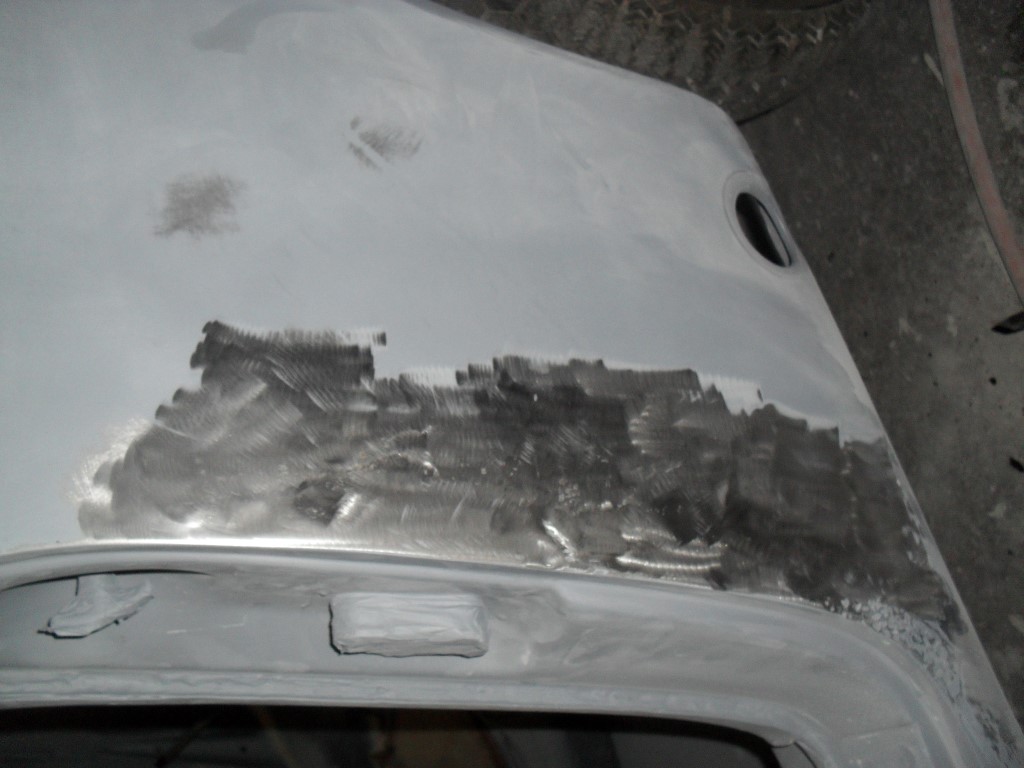 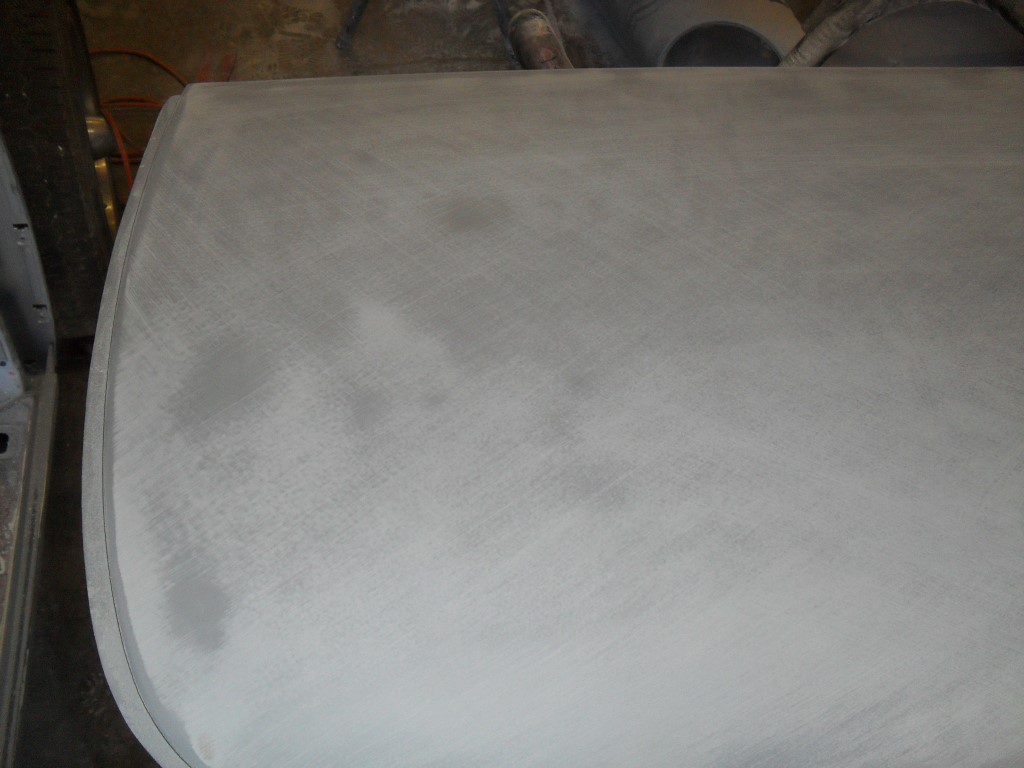 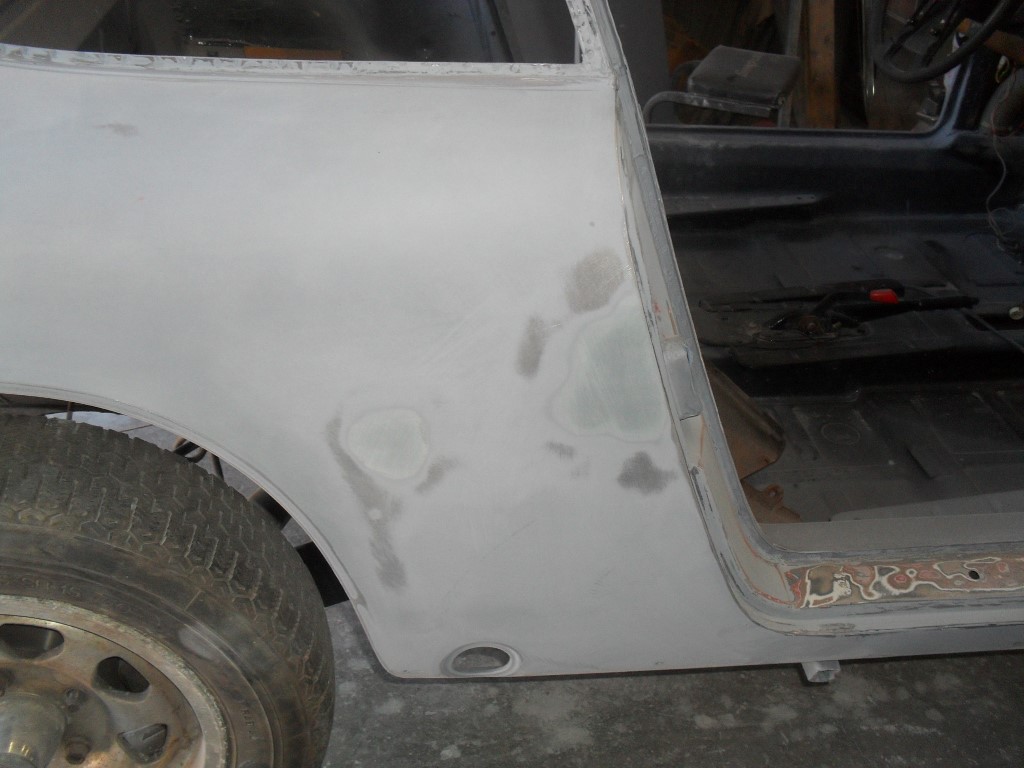 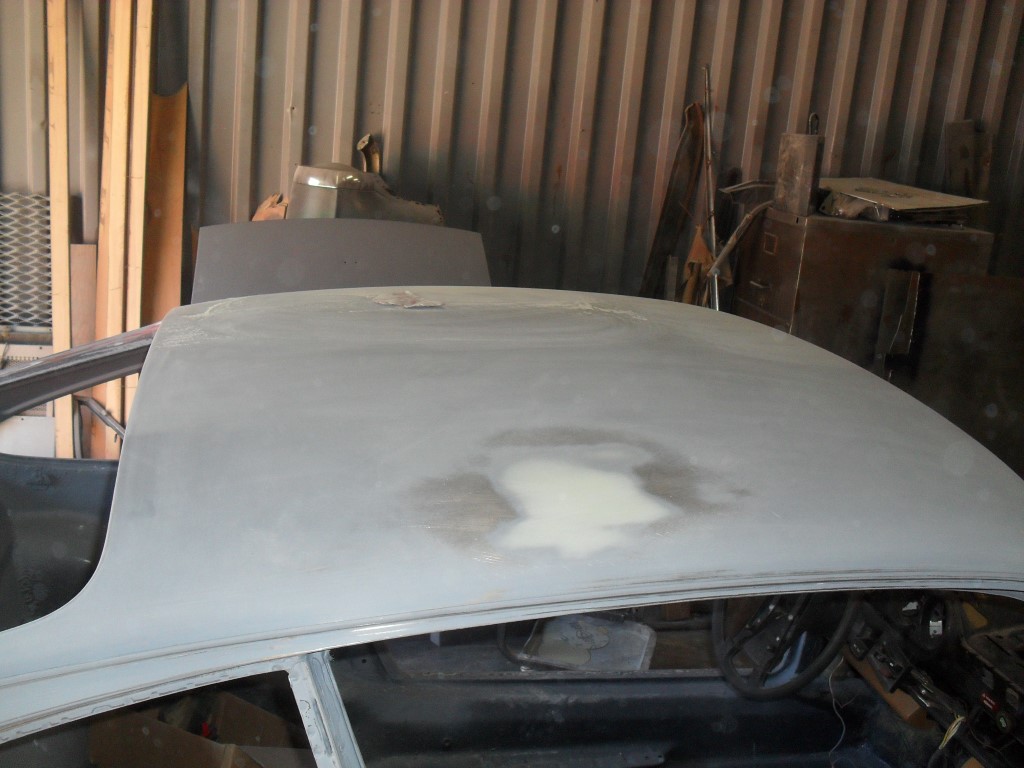 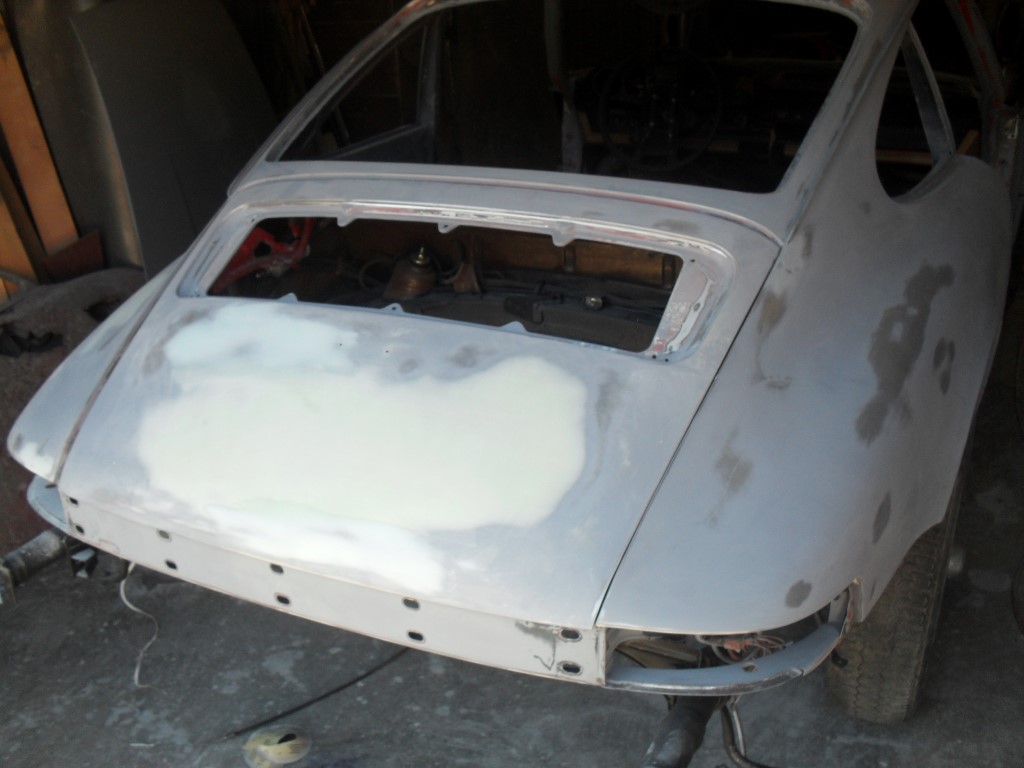 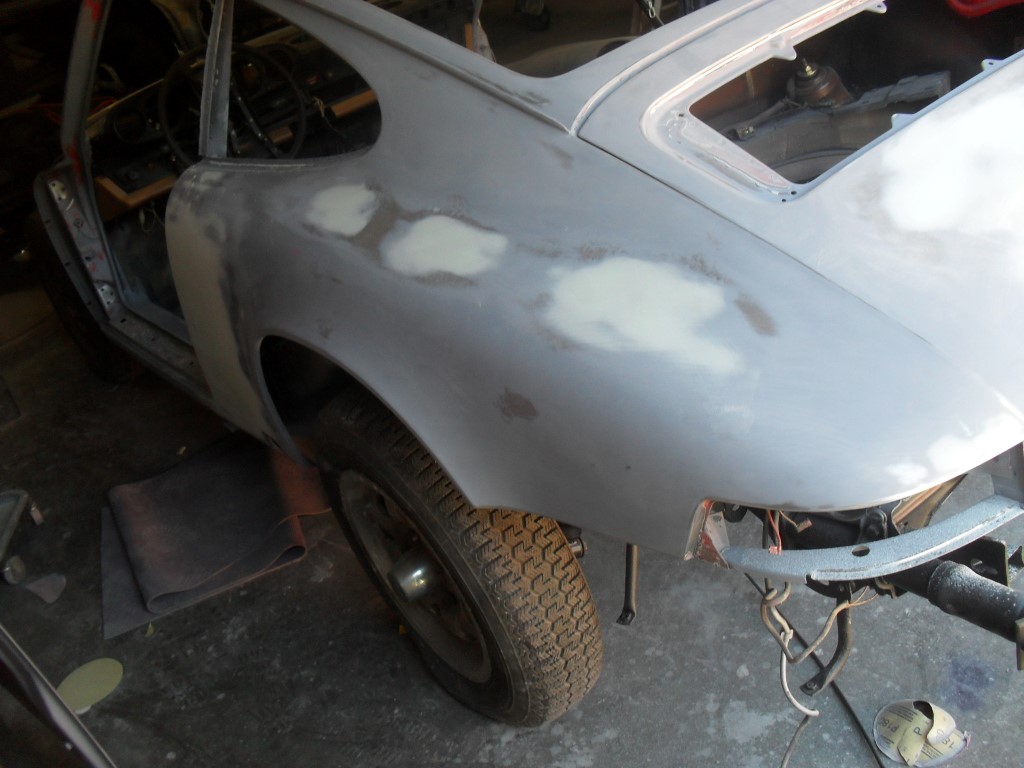 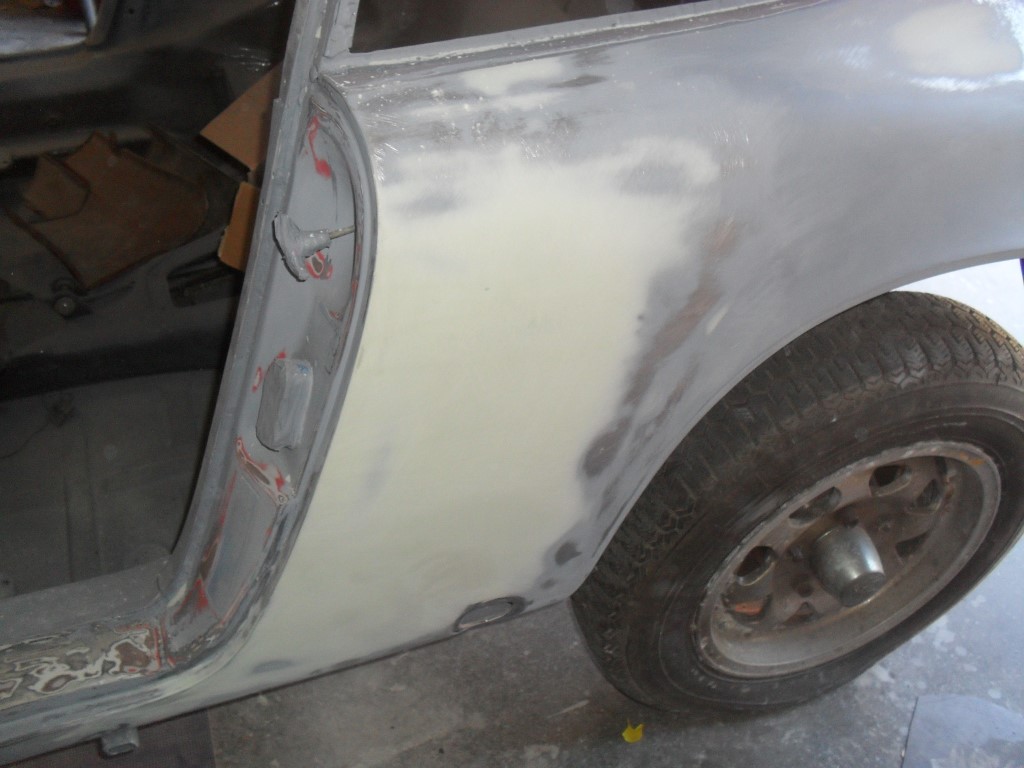 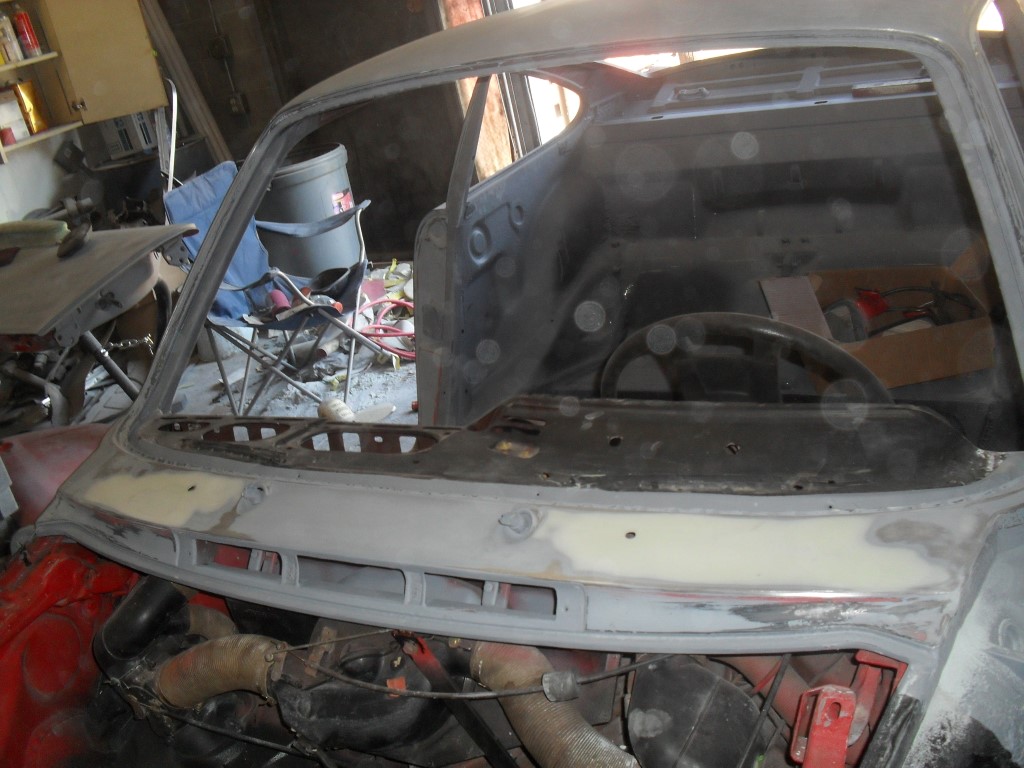 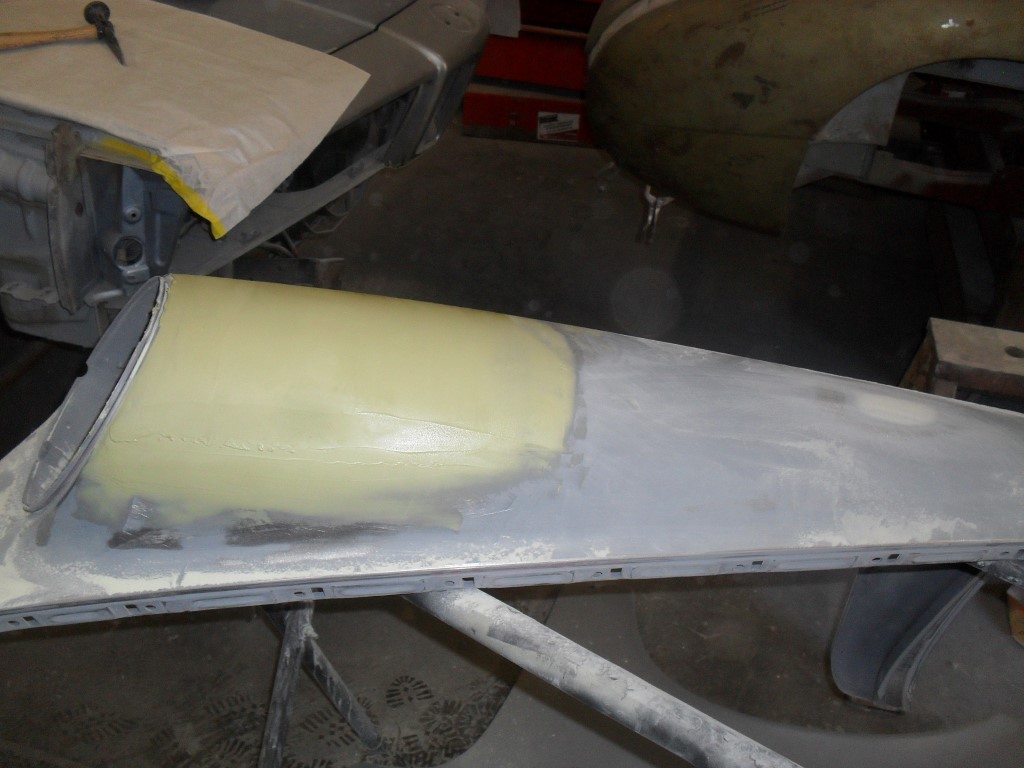 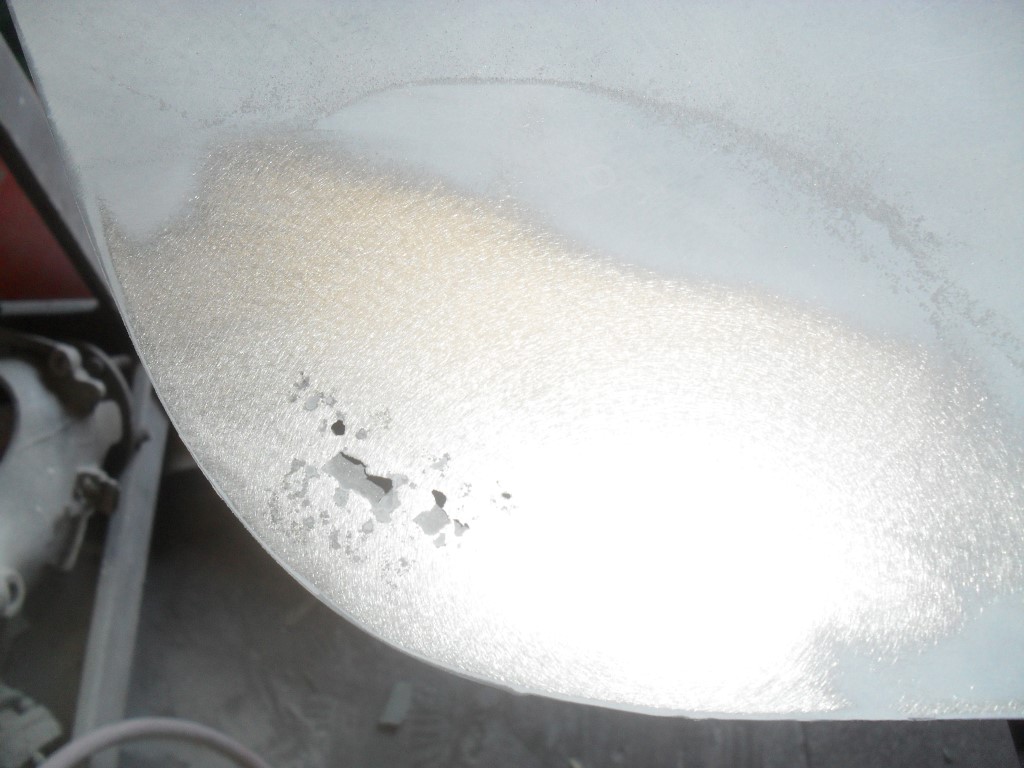 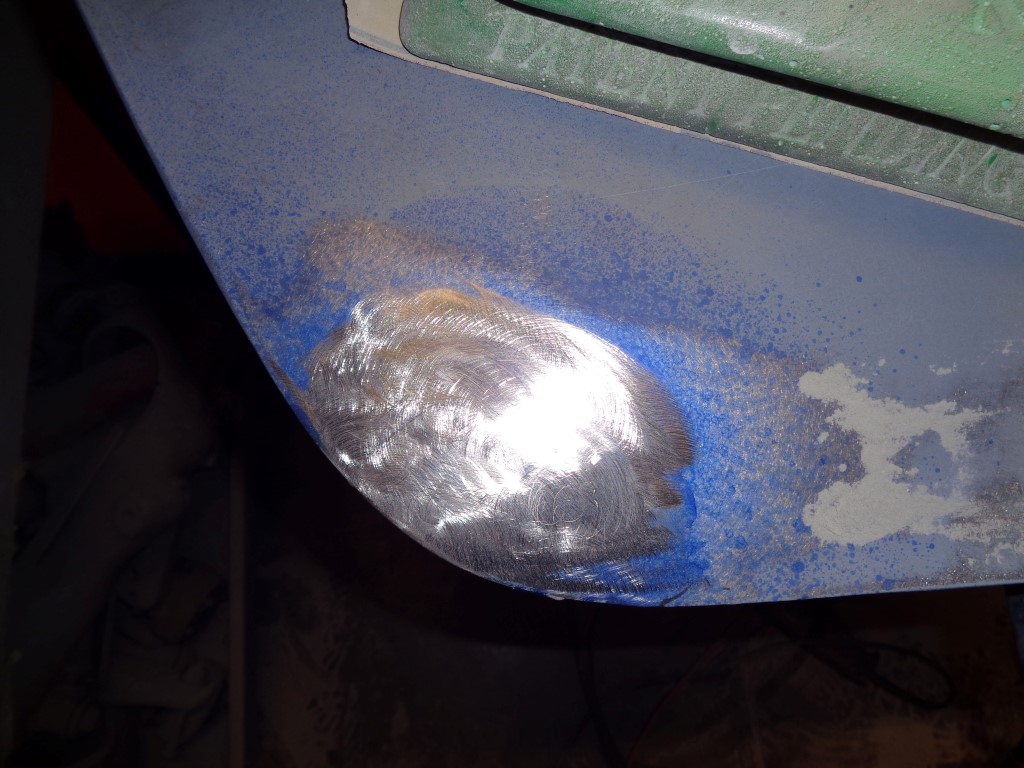
|
|
|
|
|
2 User(s) are reading this topic (2 Guests and 0 Anonymous Users)
0 Members:

|
Lo-Fi Version | Time is now: 23rd May 2026 - 12:22 PM |
Invision Power Board
v9.1.4 © 2026 IPS, Inc.